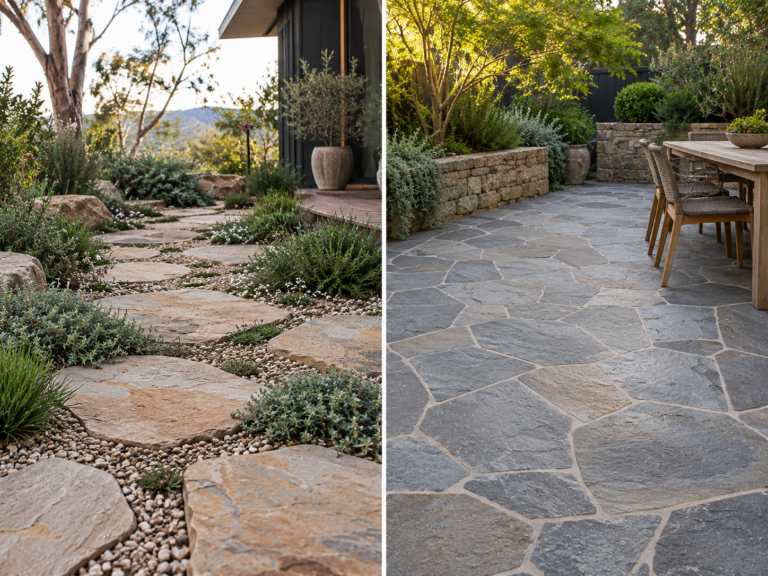


Planning a DIY natural stone project? Natural stone adds real value to a property, but it is unforgiving of shortcuts, and most DIY natural stone mistakes are locked in before the first piece is laid. The wrong stone, a weak base or the wrong adhesive can cost more to fix than the original job did to build.
This guide covers the ten most common mistakes when working with natural stone, what each one does to the finished result, and how to avoid it. It also covers the part most guides skip: when a job is genuinely DIY-friendly and when it pays to hire a professional.
Mistake 1: Choosing the wrong stone for the job
The fix: match the stone to the application, not just the look.
Softer, porous stones such as marble, limestone and travertine are beautiful but vulnerable to scratching, staining and etching, which makes them a poor fit for kitchens, bathrooms and high-traffic areas unless you commit to careful sealing and maintenance. Harder stones such as granite and quartzite resist damage but are more difficult to cut and handle.
Before you choose, ask what the surface will face: moisture, foot traffic, acidic substances, frost. Then check each stone’s durability, porosity and sealing needs against those demands. Our natural stone guide for Australia compares the main stone types and where each one performs.
Mistake 2: Skipping proper surface preparation

The fix: build on a base that is stable, level, clean and dry.
A weak or uneven base is behind most cracking, shifting and lifting in stone installations. For interior work like tiles or benchtops, the subfloor must be clean, dry, flat and structurally able to carry the weight of the stone, which is considerable. Any dips or high spots have to be corrected first.
For outdoor work like patios and walkways, the base needs the same discipline: compacted, levelled and reinforced where required so it does not settle or move under load. Skipping this stage compromises the whole installation, and the repair almost always costs more than doing the prep properly would have.
Mistake 3: Using the wrong adhesive or mortar
The fix: use a stone-specific thin-set, and white thin-set under light-coloured stone.
Generic, all-purpose mortars are a common trap. Some do not bond reliably to stone, leaving loose tiles or slabs, and some react with minerals in the stone to cause staining or discolouration. Use a high-quality thin-set or adhesive made specifically for natural stone.
For light-coloured stones like marble and travertine, white thin-set is essential, since a grey mortar can darken or shadow through the stone. If you are unsure, confirm the product with the supplier or manufacturer for your stone type. The same logic applies to cladding, covered in our stone cladding adhesive guide.
Mistake 4: Sealing incorrectly, or not at all

The fix: use a penetrating sealer on porous stone, and reseal on a water-test schedule.
Porous stones absorb liquids, which leads to staining, discolouration and, in wet areas, mould. Two errors are common: using a topical sealer that sits on the surface and wears off porous stone quickly, and failing to seal at all, which leaves outdoor stone exposed to rain, UV and dirt. A penetrating sealer is the right choice for porous stone because it protects from within.
Seal in stages: once before grouting, so grout residue cannot soak into the pores, and again after installation. As a general guide, reseal high-traffic, kitchen and outdoor surfaces roughly every six to twelve months, and less-exposed surfaces every two to three years. The reliable trigger is a water-drop test: if water beads, the seal holds; if it soaks in and darkens the stone, it is time to reseal. See how to check your stone’s porosity for the method.
Mistake 5: Cutting and handling the stone unsafely
The fix: wet-cut with a diamond blade, protect your lungs, and carry slabs upright.
Precision matters when cutting stone. Standard masonry blades leave rough, chipped edges, while a wet saw with a diamond-tipped blade cuts cleanly and limits the heat and micro-cracks that weaken stone over time.
Cutting natural stone also releases fine crystalline silica dust, which is a known respiratory hazard. Always wet-cut to suppress the dust, wear a properly fitted P2 respirator, and work in a ventilated area. This is not optional, especially with high-silica stones.
Handling is the other half of the risk. Slabs and tiles are heavy and brittle. Carry slabs on edge rather than flat to avoid stress fractures, pad them during transport, and stack tiles vertically with spacers so pressure points do not crack them. Our guide to handling and installing stone safely goes further on this.
Mistake 6: Grouting and cleaning the wrong way
The fix: match the grout to the stone, and go easy on the water.
Grout choice trips up a lot of DIY jobs. Sanded grout can scratch the polished surface of delicate stones like marble and granite, so unsanded grout is usually the better choice for smooth, polished stone. Grout colour should complement the stone rather than fight it.
Application matters as much as selection. Flooding the joints with water during clean-up weakens the grout and causes efflorescence (a white powdery deposit), discolouration and cracking, and lets water into the stone. Follow the manufacturer’s mixing ratios and curing times, clean with a pH-neutral stone cleaner, and avoid harsh chemicals or abrasive pads. Our grout guide for stone and porcelain tiles covers colour, sealers and joint size in detail.
Mistake 7: Leaving out expansion joints
The fix: build in movement joints, sized for the stone, the area and the climate.
Stone expands and contracts with temperature, and without somewhere to move, it cracks, lifts or warps. Expansion (movement) joints are deliberate gaps between sections of stone that absorb this movement without stressing the stone itself.
They matter most in large installations like floors, patios and walls, and anywhere with big temperature swings. The right size and spacing depend on the stone type, the size of the area and the local climate, which is one of the points worth confirming with a professional installer before you start.
Mistake 8: Ignoring drainage and water runoff
The fix: build in a fall and a free-draining base for any outdoor stone.
Outdoor stone has to shed water. Without a fall to carry runoff away, and without a base that drains, you get erosion, staining, weakened support and, in cold areas, frost damage. Laying stone straight onto soil almost guarantees premature wear.
Patios and walkways need a slight slope so water runs away from the structure, set over a well-draining base material rather than a moisture-trapping one. Where runoff is a real concern, a permeable paving approach manages it at the source.
Mistake 9: Not laying out a test sample first
The fix: dry-lay a section before you fix anything.
Natural stone varies in colour, veining and texture, even within the same batch. Fixing it straight down without checking the layout risks a patchy, jarring result, particularly with veined or patterned stone.
Dry-laying a section in the intended pattern lets you preview the look, blend the natural variation across the area, and adjust before anything is permanent. It is a five-minute step that prevents expensive rework.
Mistake 10: Assuming stone is maintenance-free
The fix: clean with pH-neutral products and reseal on schedule.
The idea that natural stone looks after itself is how good stone ends up dull and stained. Acidic household cleaners, including vinegar and lemon juice, etch marble and limestone, leaving dull spots or stripping the polish entirely.
Use pH-neutral cleaners made for natural stone, and reseal as recommended for your stone and its exposure. Consistent, gentle care keeps the surface protected far better than occasional heavy cleaning. Our stone maintenance and care guide sets out a simple routine.
The 10 mistakes at a glance
| Mistake | The fix |
| Wrong stone for the job | Match stone to traffic, moisture and use |
| Poor surface preparation | Stable, level, clean, dry base |
| Wrong adhesive or mortar | Stone-specific thin-set; white under light stone |
| Sealing wrong, or not at all | Penetrating sealer; reseal on a water test |
| Unsafe cutting and handling | Wet-cut, P2 respirator, carry slabs upright |
| Wrong grout and overwatering | Unsanded grout on polished stone; minimal water |
| No expansion joints | Movement joints sized to stone and climate |
| Ignoring drainage | Build in a fall and a free-draining base |
| No test sample | Dry-lay before fixing |
| Assuming no maintenance | pH-neutral cleaning; reseal on schedule |
When to DIY natural stone and when to hire a professional
DIY is realistic for smaller, forgiving jobs: sand-set pavers on a well-prepared base, tumbled stone, a modest garden feature or a small low-traffic area. These tolerate minor errors and are straightforward to lift and redo if needed.
Hand the job over when the stakes are higher: structural work, large or patterned floors, benchtops, expensive or hard stone like granite and quartzite that needs specialist cutting, and anything that depends on correctly designed expansion joints or drainage. The honest test is simple. If a mistake would be expensive or dangerous to undo, get a quote first. For a fuller breakdown, see our guide on whether to tackle a stone project yourself or hire a pro.
Final word
Most DIY natural stone failures trace back to the same handful of decisions: the stone, the base, the adhesive, the seal and the prep. Get those right, respect the cutting and handling safety, and be honest about which jobs are worth handing over, and the result lasts.
Start your project the right way. Contact Splendour In Stone for expert advice tailored to your stone and your specific project.
Frequently asked questions
1. What is the easiest natural stone to work with for a DIY project?
For DIY paving, tumbled or sawn pavers laid on a compacted base are the most forgiving. For cutting, softer stones like travertine and limestone are easier to work than granite or quartzite, though all of them still need a wet diamond saw. Match the stone to the job rather than choosing on ease of cutting alone.
2. What blade do you use to cut natural stone?
A diamond-tipped blade on a wet saw. Wet cutting produces a clean edge, limits heat and micro-cracks, and suppresses the crystalline silica dust that dry cutting throws off. Avoid standard masonry blades, which chip and crack the stone.
3. How soon should you seal natural stone after laying it?
Seal porous stone before grouting to stop grout staining the surface, then again after the grout has cured. After that, reseal on a water-test schedule rather than a fixed calendar date, since exposure and traffic decide how fast the seal wears.