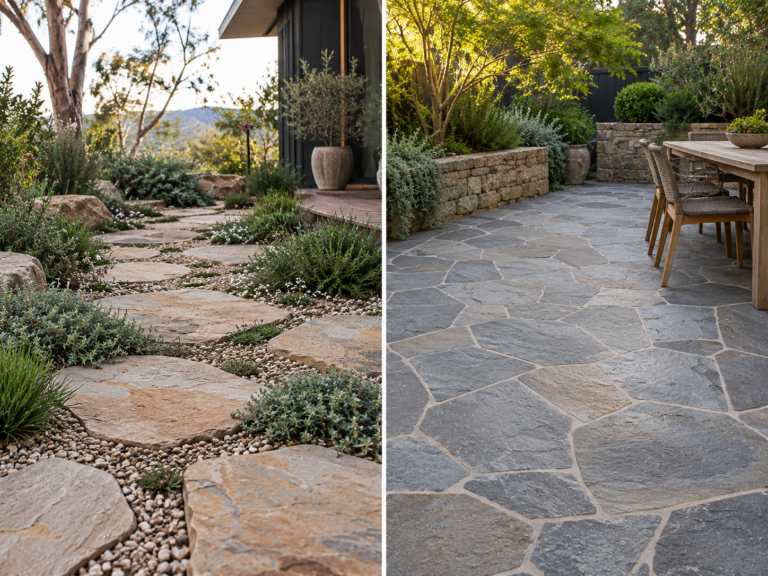


A stone patio can completely change how an outdoor area feels, but the best results come from more than choosing attractive pavers. The base, drainage, installation method and maintenance plan all affect how long the surface lasts.
For Australian homes, stone patios are popular because they offer natural texture, strong durability and flexible design options. They can suit relaxed garden spaces, alfresco areas, courtyards, pool surrounds and outdoor entertaining zones.
This guide covers the key decisions, from base preparation and installation to repairs, maintenance and design ideas.
What Is a Stone Patio?
A stone patio is an outdoor paved area built using natural stone pavers, slabs, cobbles or tiles laid over a prepared base. It creates a solid, usable surface for relaxing, dining, entertaining or connecting different parts of the garden.
Stone patios are commonly used in alfresco areas, courtyards, pool surrounds, outdoor kitchens, garden seating zones and pathway-linked entertaining spaces. They can be designed as small private retreats or larger outdoor living areas, depending on the available space and how the area will be used.
Popular stone options include bluestone, limestone, granite, travertine, marble and porphyry. Each material has its own colour, texture, finish and maintenance requirements, which is why choosing the right natural stone should match both the home’s style and the patio’s purpose.
A good stone patio is not just about the surface you see. The base, drainage, bedding layer, joints, edging and sealing all play a role in how stable, safe and long-lasting the finished area becomes.
Why Choose Stone for a Patio?

Stone is one of the strongest choices for patios because it gives outdoor areas a natural, permanent and high-quality finish. Unlike materials that can date quickly or wear unevenly, stone has a timeless look that suits a wide range of Australian homes.
Durability is one of the biggest reasons homeowners choose stone. A properly installed stone patio can handle regular foot traffic, outdoor furniture, weather exposure and everyday entertaining without losing its structure or character. This makes it suitable for both quiet garden corners and busy alfresco areas.
Stone also offers strong design flexibility. Bluestone, limestone, granite, travertine and other natural stones each bring different colours, textures and finishes, allowing the patio to feel rustic, coastal, modern or architectural. The right stone can soften a garden, define an entertaining area or create a more refined indoor-outdoor transition that feels connected rather than separate.
Maintenance is usually manageable when the patio is installed correctly. Regular sweeping, occasional washing, prompt stain cleaning and sealing where needed can keep the surface looking good for years.
A well-designed stone patio can also improve how the outdoor area is used. It creates a stable surface for dining, seating, fire pits, outdoor kitchens and garden furniture. For homeowners thinking long term, stone can add visual appeal, practical value and a stronger sense of permanence to the landscape.
Best Stone Patio Materials to Consider
The best stone patio material depends on the look you want, how the area will be used and how much maintenance you are comfortable with. Some stones are better for heavy traffic, while others are chosen for softer colour, texture or a more refined design finish.
Bluestone
Bluestone is a strong choice for patios that need durability and a premium blue-grey appearance. Its dense structure makes it suitable for alfresco areas, pathways, courtyards and outdoor entertaining zones where the surface needs to handle regular use. A finish such as Bluestone Sawn can suit patios that need a clean, architectural look without losing the natural character of stone.
Limestone
Limestone offers softer natural tones, often in cream, beige, grey or warm neutral shades. It works well in relaxed, elegant outdoor spaces, especially where the goal is a lighter and more understated patio finish. Limestone Brooklyn Paving Stone can suit patio designs that need a refined natural surface, although sealing is still recommended to help protect it from stains.
Granite
Granite is one of the hardest natural stone options for patios. It suits high-traffic areas, exposed outdoor spaces and homes needing a tough, long-lasting surface. Its strength makes it practical, although its appearance can feel more formal depending on the colour and finish.
Travertine
Travertine brings warmth and texture to outdoor spaces. Its beige, cream and soft brown tones suit Mediterranean-style patios, pool surrounds and relaxed alfresco areas. A surface such as Travertine Classic can help create that softer outdoor feel, but because travertine is porous, it should be sealed properly in wet or heavily used spaces.
Marble
Marble is best suited to feature patios where appearance is the main priority. Its veining and polished character can look luxurious, but it usually needs more careful maintenance than tougher outdoor stones.
Concrete, Brick and Porphyry Pavers
Concrete, brick and porphyry pavers can also be used for patios. Concrete is budget-friendly and flexible, brick offers a traditional feel, while porphyry provides a hard-wearing surface with strong colour variation.
How to Design a Stone Patio That Works

A good stone patio should look beautiful, but it also needs to suit how the outdoor area will be used. Before choosing the stone or laying pattern, think about whether the space is for dining, relaxing, entertaining, cooking or connecting different parts of the garden.
Choose the Right Patio Layout
The layout should match the size and shape of the area. A compact square or rectangular patio works well for smaller courtyards and dining zones, while curved or free-flowing layouts can soften larger gardens. In bigger outdoor areas, garden pavers and pathways can connect the patio to lawns, pool zones or garden features without making the landscape feel broken up.
Plan Functional Zones
A patio becomes more useful when each zone has a clear purpose. You might include a dining area near the kitchen, a lounge setting under shade, or a quiet seating corner facing the garden. Keeping these zones organised helps the space feel comfortable rather than crowded.
Use Levels and Sunken Patio Features
Sunken patios can create a more private and sheltered outdoor retreat. By lowering the seating area slightly, the design can feel more intimate while also helping reduce wind exposure and surrounding noise. Raised garden beds, stone walls or steps can make the level change feel intentional.
Add Practical Design Features
Fire pits, built-in seating, outdoor kitchens, vertical gardens and lighting can make a stone patio more inviting. These features should be planned early so the layout, stone choice and access points all work together.
Match the Patio to the Home
The stone colour, finish, pattern and edging should suit the home’s architecture. A modern build may suit clean lines and large-format pavers, while a cottage-style garden may look better with textured stone and softer edges.
What Base Should You Use for a Stone Patio?
The base is one of the most important parts of any stone patio. Even premium stone pavers can shift, sink or become uneven if the foundation underneath is weak. A well-built base supports the paving, manages water movement and helps the finished patio stay stable for years.
Crushed Stone Base
Crushed stone is often the best base for a long-lasting stone patio. Its angular pieces compact tightly, creating a firm foundation that still allows water to drain through. This makes it suitable for patios, courtyards, paths and outdoor areas that receive regular foot traffic.
Gravel Base
Gravel can also be used for patio bases, especially in lighter-use areas with good natural drainage. It is usually more affordable, but it needs careful compaction to prevent movement. Without proper installation, gravel can shift and cause the pavers above to settle unevenly.
Sand Bedding Layer
Sand should not be treated as the main base. Instead, it works as a thin bedding layer above the compacted base. This layer helps level the surface and allows small adjustments when placing each stone paver.
Crusher Run or Limestone Dust
Crusher run or limestone dust can create a tightly compacted layer for stronger support. It may suit high-use patios or areas needing a firmer base, but drainage should still be considered carefully so water does not sit beneath the stone.
Concrete or Mortar Base
A concrete or mortar base may be used when extra strength is needed, such as over an existing slab, in high-traffic areas or for a more permanent installation. However, drainage, movement and surface preparation must be handled properly.
For most stone patios, the best system includes a compacted sub-base, a stable base layer, a thin bedding layer and well-secured edges. That full structure gives the patio its strength, not the stone alone.
How to Install a Stone Patio Step by Step

Installing a stone patio properly comes down to preparation, drainage and careful placement. The process should create a stable surface that can handle foot traffic, furniture and changing outdoor conditions without shifting too quickly. The same principles apply to any stone paver installation, where the base, bedding layer, joints and edging all need to work together.
Step 1: Mark and Prepare the Area
Start by marking the patio shape with string lines, stakes or spray paint. Clear grass, weeds, old paving, roots and loose debris so the site is clean and ready for excavation.
Step 2: Excavate to the Correct Depth
Dig the area deep enough to allow for the sub-base, bedding layer and stone thickness. The required depth depends on the stone type, expected use and ground conditions. High-traffic patios usually need a stronger foundation than light garden seating areas.
Step 3: Create a Drainage Fall
The patio should slope slightly away from the home or nearby structures. This helps water move off the surface instead of pooling around the paving, joints or building edge.
Step 4: Add and Compact the Base
Spread crushed stone or gravel across the excavated area, then compact it firmly in layers. Proper compaction is essential because weak or loose base material is one of the main reasons patio pavers sink later.
Step 5: Add the Bedding Layer
Add a thin, even layer of sharp sand or mortar, depending on the installation method. This layer helps level the stone pavers and supports small adjustments during laying.
Step 6: Lay the Stone Pavers
Place the pavers according to the chosen pattern, checking levels and spacing as you go. Use a rubber mallet to tap each piece into position without damaging the surface.
Step 7: Fill the Joints
Once the pavers are in place, fill the joints with polymeric sand, jointing compound or mortar. Well-filled joints help reduce movement, weed growth and water-related issues.
Step 8: Seal and Finish
After installation, sealing may be recommended depending on the stone type, finish and exposure. A quality sealer can help protect against stains, moisture and weathering while keeping the patio easier to maintain.
Can You Install Patio Pavers Over Existing Concrete?
Yes, patio pavers can be installed over an existing concrete slab, but only when the slab is stable, reasonably level and able to drain properly. This approach can save time and reduce demolition costs, especially when the concrete is tired-looking but still structurally sound. The same checks matter when laying bluestone over concrete, as the slab underneath still controls drainage, movement and long-term stability.
Start by checking the slab for major cracks, movement, loose sections or areas that have lifted. Small surface cracks can often be repaired, but large structural cracks may continue to move beneath the new pavers. If the slab is unstable, laying pavers over it may only hide the problem for a short time.
Drainage is just as important. Water should not sit on the concrete after rain. If the slab holds water, the new paver surface may become unstable, stained or uneven over time. In some cases, weep holes or other drainage solutions may be needed to help water escape.
Before laying pavers, the concrete should be cleaned thoroughly. Dirt, grease, moss and loose material need to be removed so the bedding layer, mortar or adhesive can sit properly. Uneven areas may need levelling before work continues.
Edge restraints should also be installed to stop pavers from spreading or shifting. Once the pavers are placed, the joints can be filled with polymeric sand or a suitable jointing material. Sealing may also be recommended, depending on the stone and how exposed the patio is.
How to Repair Sinking Patio Pavers
Sinking patio pavers usually mean there is a problem beneath the surface. Poor compaction, weak base material, drainage issues or erosion can cause sections of the patio to drop, creating uneven areas, trip hazards and water pooling. This is why proper paverjoint filling and sealing matters after repairs, especially where open joints allow water to move into the base.
Step 1: Identify the Affected Area
Start by checking where the pavers have moved. Look for dips, loose joints, uneven edges, pooling water or gaps between the stones. Mark the affected section so you can repair the problem without disturbing more of the patio than needed.
Step 2: Lift the Sunken Pavers
Carefully lift the sunken pavers using a flat tool or paver lifter. Work slowly to avoid chipping the edges, especially with natural stone. Set the pavers aside in the same order if you plan to reuse them.
Step 3: Rebuild the Base
Remove loose, soft or washed-out material from the area. Add fresh crushed stone or gravel, then compact it firmly so the base sits stable and level with the surrounding patio structure.
Step 4: Add a Fresh Bedding Layer
Spread a thin layer of sharp sand over the repaired base. Level it carefully so the pavers can sit evenly without rocking or dipping once they are placed back.
Step 5: Relay and Level the Pavers
Place the pavers back into position and check the height against the surrounding surface. Use a rubber mallet to adjust each piece until the repaired section sits flat, stable and aligned.
Step 6: Refill Joints and Seal
Fill the joints with polymeric sand, jointing compound or mortar, depending on the patio system. If suitable for the stone, sealing can help protect the repaired area from stains, moisture and future wear.
Common Stone Patio Problems and How to Avoid Them
Most stone patio problems start below the surface. The stone itself may be strong, but poor drainage, weak jointing or an unstable base can lead to movement, staining and uneven areas over time.
| Problem | Likely Cause | Best Fix |
| Sinking pavers | Weak base, poor compaction or water pooling | Lift the affected pavers, rebuild the base and compact it properly |
| Weed growth | Open joints or washed-out jointing material | Refill joints with polymeric sand or suitable jointing compound |
| Drainage issues | Incorrect slope or blocked water flow | Regrade the area or add drainage solutions where needed |
| Staining | Leaves, food, oils or organic debris left on the surface | Clean spills quickly and seal the stone where suitable |
| Loose stones | Eroded joints, poor bedding or movement beneath the surface | Reset the stones and refill the joints securely |
| Surface scratches | Dragged furniture, sharp objects or heavy items | Use furniture pads and lift items instead of dragging them |
The best way to avoid these issues is to treat the patio as a complete system. A strong base, proper fall, secure edging, suitable jointing and regular maintenance all work together to keep the surface stable.
Small problems should also be handled early. A loose joint, shallow dip or drainage issue may seem minor at first, but it can quickly spread across a larger section of the patio if ignored.
Stone Patio Maintenance: How to Keep It Looking Good
A stone patio does not need complicated upkeep, but it does need consistent care. Regular maintenance helps protect the surface, keep the joints stable and prevent small issues from turning into costly repairs.
- Sweep regularly: Remove leaves, soil, grit and garden debris before they settle into the joints or leave marks on the stone surface.
- Wash with a mild cleaner: Use clean water and a stone-safe cleaner when the patio needs a deeper clean. Gentle paver cleaning and maintenance is especially important with natural stone, as strong products may damage the finish.
- Avoid harsh chemicals: Acidic or abrasive cleaners can mark natural stone, especially softer materials like limestone, travertine and marble.
- Top up joint material: Refill lost sand, mortar or jointing compound when gaps appear. Open joints can allow weeds, movement and water damage.
- Seal when needed: Some stones benefit from sealing every few years, especially in exposed areas, dining spaces or patios near trees and gardens.
- Check drainage after rain: Watch for pooling, erosion or shifting after heavy weather. Water sitting beneath pavers can weaken the base over time.
- Protect from furniture marks: Use pads under outdoor tables, chairs and lounges. Lift heavy furniture instead of dragging it across the patio.
- Repair small problems early: Fix loose stones, sunken sections, cracks or failing joints before they spread across a larger area.
Stone Patio Design Ideas to Upgrade Your Outdoor Space

A stone patio can be more than a paved area. With the right features, it can become a comfortable outdoor room that feels connected to the garden, home and everyday lifestyle.
Add a Fire Pit
A fire pit creates a natural gathering point for cooler evenings, relaxed conversations and outdoor entertaining. Stone works especially well around fire features because it feels grounded, durable and visually suited to the warmth of the setting.
Build Comfortable Seating Zones
Plan seating around how the patio will be used. A dining setting suits family meals and entertaining, while outdoor lounges create a slower, more relaxed space. Built-in stone seating can also help save space and make the patio feel more permanent.
Use Outdoor Lighting
Lighting can completely change the way a patio feels at night. Path lights, step lighting, wall lights and soft feature lighting can improve safety while adding warmth and depth to the stone surface.
Add Vertical Gardens or Planting Borders
Plants help soften the hard edges of stone paving. Vertical gardens, raised beds and planted borders can add colour, shade and privacy while making the patio feel more inviting and less exposed.
Consider an Outdoor Kitchen
An outdoor kitchen works well for homeowners who entertain often. When planned properly, it can include a barbecue, preparation bench, storage and dining space without making the patio feel overcrowded.
Create a Sunken Patio
A sunken patio can add privacy, shelter and a stronger design statement. Lowering the seating area slightly helps create a more intimate outdoor retreat, especially when paired with stone walls, steps, planting or built-in seating.
Use Stone Borders, Steps and Pathways
Stone borders, steps and pathways can connect the patio to the rest of the landscape. These details help the space feel planned rather than isolated, giving the whole outdoor area better flow.
Is a Stone Patio Worth It for Australian Homes?
Yes, a stone patio is worth considering for Australian homes when you want an outdoor area that feels durable, natural and built for long-term use. It may cost more upfront than some alternatives, but the value comes from its strength, design flexibility and ability to age with character.
Stone is especially worthwhile in spaces that are used often. A patio that supports outdoor dining, lounge furniture, family gatherings, fire pits or garden access needs a surface that can handle regular movement without looking tired too quickly.
It also suits homes where outdoor presentation matters. Natural stone can lift the look of a garden, courtyard or alfresco area in a way that feels more permanent than many standard paving options. The colours, textures and laying patterns can be matched to the architecture, whether the home is modern, traditional, coastal or more rustic.
The key is to invest in the full system, not just the stone. A strong base, proper drainage, secure joints, suitable sealing and regular maintenance all affect the final result. When those details are handled well, a stone patio can be a practical and visually strong addition to an Australian home.
Build a Stone Patio That Lasts
A long-lasting stone patio depends on more than the pavers you choose. The base, drainage, bedding layer, jointing, edging, sealing and maintenance all work together to keep the surface stable and attractive over time.
With the right planning, stone can be used for simple garden patios, sunken retreats, outdoor kitchens, poolside areas, courtyards and premium alfresco spaces. The key is matching the stone and installation method to the way the area will actually be used.
If you are planning a stone patio, Splendour in Stone can help you choose the right material, finish and format for your outdoor project.
FAQs
1. What is the best base for a stone patio?
A compacted crushed stone or gravel base is usually the best option for a stone patio because it provides strength, drainage and long-term stability. Sand should only be used as a thin bedding layer above the compacted base, not as the main foundation.
2. Can you lay stone pavers over concrete?
Yes, stone pavers can be laid over existing concrete if the slab is stable, level and drains properly. If the concrete is badly cracked, moving or holding water, those issues should be fixed before installing pavers over the top.
3. Why do patio pavers sink?
Patio pavers usually sink because the base underneath was not compacted properly, the wrong base material was used, or water has washed material away. Poor drainage can also weaken the foundation and cause sections of the patio to drop over time.
4. What is the best stone for a patio?
Bluestone, limestone, granite and travertine are all strong options for patios. The best choice depends on the look you want, how often the area will be used, your budget and how much maintenance you are comfortable with.
5. How do you maintain a stone patio?
Maintain a stone patio by sweeping regularly, cleaning spills quickly, washing with a mild stone-safe cleaner and checking joints after heavy rain. Some stone patios also need sealing every few years, depending on the material, finish and exposure.
6. Is a stone patio better than concrete?
Stone is often better if you want a natural, premium and long-lasting outdoor surface with more character. Concrete is usually cheaper and faster to install, but it does not offer the same natural variation or high-end finish as stone.
7. How long does a stone patio last?
A properly installed stone patio can last for decades. Its lifespan depends on the stone quality, base preparation, drainage, jointing, sealing and routine maintenance. A weak base or poor drainage can shorten its life, even when premium stone is used.