
Stone paver installation often gets treated as a weekend job that goes wrong by Sunday afternoon. The pavers themselves rarely fail. The base does. The bedding does. Drainage gets ignored, edges get skipped, and a year later the whole surface starts shifting.
This guide pulls together everything needed to install stone pavers properly, whether you’re a homeowner, landscaper, or builder working on a residential or commercial site. It covers ground preparation, base materials, bedding choices, laying methods, cutting, common mistakes, and how to handle repairs when something does need fixing.
Tools and Materials Needed for Stone Paver Installation
The right tools and materials make stone paver installation easier, safer, and more accurate. They also help you prepare a stronger base, keep the surface level, and avoid common problems such as shifting pavers, weak joints, poor drainage, or uneven edges.
Before starting, gather everything you need so the project can move smoothly from excavation through to final joint filling and sealing.
| Tool or Material | Purpose | Why It Matters |
| Rake | Spreads and levels soil, crushed rock, gravel, or sand | Helps create an even foundation before compaction |
| Plate compactor or hand tamper | Compresses the ground and base layers | Prevents sinking, movement, and uneven settlement |
| Spirit level | Checks levels and drainage fall | Helps the surface stay safe, even, and properly sloped |
| Rubber mallet | Taps pavers into position | Adjusts placement without damaging the stone surface |
| Wet saw or diamond blade | Cuts stone pavers to fit edges or obstacles | Produces cleaner cuts and a more professional finish |
| Crushed rock or gravel | Forms the structural base layer | Adds strength, support, and drainage beneath the pavers |
| Bedding sand, mortar, or adhesive | Supports and holds the pavers in place | Must match the stone type, surface use, and base system |
| Jointing sand, polymeric sand, or grout | Fills gaps between pavers | Locks the surface together and reduces movement |
| Stone-safe sealer | Protects the finished surface | Helps reduce staining, moisture absorption, and weather damage |
For small garden paths or light patio areas, basic tools may be enough. Larger patios, driveways, pool surrounds, or premium natural stone installations often need stronger equipment, more precise cutting tools, and professional-grade bedding or bonding materials.
How to Prepare the Ground for Stone Pavers

Proper ground preparation is the foundation of every successful stone paver installation. Even the best natural stone can shift, sink, or crack if the area underneath is weak, uneven, or poorly drained. Taking time at this stage helps create a paved surface that stays stable, safe, and visually consistent for years.
1. Clear the Area
Start by removing grass, weeds, roots, old paving, loose soil, and any debris from the installation area. Organic material should never be left beneath pavers because it can break down over time and create gaps under the base.
Clear the site slightly beyond the finished paving edge so you have enough space for edge restraints, compacted base material, and accurate alignment. A clean work area also makes it easier to mark levels, inspect the soil, and prepare the surface properly.
2. Measure and Mark the Installation Area
Use a tape measure, stakes, and string lines to mark the exact shape of the paved area. This helps you confirm the size, check the layout, and avoid ordering too much or too little material.
Straight edges should be marked carefully, while curved paths can be shaped with a flexible hose or string. At this stage, it is also worth checking where cuts may be needed around steps, walls, garden beds, drains, or outdoor structures.
3. Excavate to the Correct Depth
Excavation depth depends on the purpose of the paved area. A garden path or light patio usually needs less depth than a driveway or high-traffic outdoor space. The excavation must allow room for the compacted base, bedding layer, and paver thickness.
If the area is not excavated deeply enough, the finished surface may sit too high or lack the base support needed for long-term stability. Remove soil evenly and keep checking the depth across the site as you work.
4. Check the Soil and Improve Weak Areas
Soil condition affects how the pavers perform. Clay-heavy soil can hold moisture and expand, while loose or sandy soil may need extra stabilisation. Soft spots should be dug out and replaced with suitable compactable material.
In areas with weak or shifting soil, geotextile fabric can help separate the soil from the base layer. This reduces contamination, improves stability, and helps the base perform more consistently over time.
5. Create the Correct Fall for Drainage
Drainage should be built into the preparation stage, not fixed later. The paved surface should slope gently away from buildings, walls, pool edges, and outdoor structures so water does not sit on the surface or soak into the base.
A poor fall can lead to water pooling, erosion, staining, slippery patches, and paver movement. Planning the drainage direction early helps protect both the stone and the structure beneath it.
6. Compact the Ground Before Adding Base Material
Once the site is excavated and shaped, compact the exposed ground using a hand tamper or plate compactor. This creates a firmer starting point before the base material is added.
Compaction should be even across the whole area, especially along edges and corners. A stable subgrade helps the base layer lock together properly and reduces the chance of future sinking or uneven settlement.
Best Base Materials for Stone Pavers
The base material is what gives stone pavers their long-term strength. It supports the weight of the surface, helps water move away, and reduces the risk of sinking or shifting. Choosing the wrong base can lead to uneven pavers, cracked joints, loose edges, and drainage problems that become harder to fix later.
The best base depends on the project type, expected load, soil condition, and whether the pavers are being installed over compacted ground or an existing concrete slab.
Crushed Rock or Crushed Stone
Crushed rock is one of the best base materials for stone paver installation because it compacts tightly and creates a strong foundation. Its angular pieces lock together under pressure, giving the paved surface better support than loose or rounded materials.
This option works well for patios, pathways, driveways, and outdoor entertaining areas. It also supports drainage when installed at the right depth and compacted in layers. For heavier-use spaces, crushed rock should be spread evenly, compacted properly, and checked for the correct fall before the bedding layer is added.
Gravel
Gravel can also be used as a paver base, especially where drainage and flexibility are important. It allows water to move through the base more easily, which makes it useful in permeable paving projects where reducing pooling and moisture buildup beneath the pavers is a priority.
However, gravel must be selected carefully. Poorly graded or overly rounded gravel may not compact firmly enough, which can lead to movement over time. For best results, use compactable gravel designed for base preparation rather than decorative gravel.
Concrete Sand
Concrete sand is commonly used as a bedding layer rather than the main structural base. It sits above the compacted crushed rock or gravel and helps create a smooth, level surface for the pavers.
A consistent bedding layer makes it easier to adjust each paver during installation. It should not be too thick, as excess sand can create instability. The goal is to provide a level, supportive layer without allowing the pavers to float or shift under pressure.
Polymeric Sand
Polymeric sand is mainly used for filling joints between pavers, not for building the base. Once swept into the joints and activated with water, it hardens to help lock the pavers in place, which is why paver joint filling and sealing needs to be handled carefully after the stones are laid.
This makes it useful for reducing weed growth, joint erosion, and surface movement. It is especially helpful in patios, pathways, and driveways where stable joints are important. Correct installation matters, as overwatering or leaving residue on the stone can affect the finish.
When a Concrete Base Is Better
A concrete base is often the better choice for premium stone installations, driveways, pool surrounds, steps, and high-load areas. It provides strong, rigid support and helps maintain a precise, level surface.
Concrete is especially useful when installing thin pavers over an existing surface or when the stone needs mortar or adhesive bedding. The slab must be stable, clean, properly cured, and designed with the right fall for drainage before any stone is installed.
| Base Material | Best For | Main Benefit | Watch Out For |
| Crushed rock | Patios, paths, driveways, outdoor areas | Strong compaction and drainage | Must be compacted in layers |
| Gravel | Flexible outdoor areas and drainage-focused projects | Affordable and drains well | Needs the right grading for stability |
| Concrete sand | Bedding layer above a compacted base | Helps create a level laying surface | Too much depth can cause movement |
| Polymeric sand | Filling joints between pavers | Locks joints and reduces weed growth | Must be applied and watered correctly |
| Concrete base | Premium stone, driveways, pool areas, heavy-use zones | Maximum strength and stability | Needs correct curing, slope, and bonding preparation |
Bedding Materials Explained: Sand, Mortar and Adhesive

The bedding material sits between the base and the stone pavers, helping each piece stay supported, level, and secure. The right choice depends on the stone thickness, surface use, load requirements, moisture exposure, and whether the installation needs flexibility or a rigid bond.
Sand, mortar, and adhesive all have a place in stone paver installation, but they are not interchangeable. A light garden path may perform well on a flexible sand bedding system, while a driveway, pool surround, or premium natural stone area may need mortar or a concrete-based installation for better strength.
| Bedding Material | Best Use | Strength | Drainage | Skill Level |
| Sand bedding | Garden paths, stepping stones, light patios | Flexible and moderate | Good drainage when installed over a compacted base | Beginner-friendly |
| Mortar bedding | Patios, steps, pool surrounds, driveways, high-use outdoor areas | Strong and rigid | Depends on correct falls and base preparation | More skilled |
| Adhesive bedding | Wall cladding, indoor floors, thin stone, precise installations | Strong bond when used on the right substrate | Limited drainage | Skilled |
| Mortar over concrete | Premium outdoor paving, pool coping, heavy-use zones | Very strong and stable | Requires planned slope and drainage | Professional |
Sand Bedding
Sand bedding works well for flexible paving systems where slight movement is acceptable. It is commonly used over a compacted crushed rock or gravel base to create a smooth laying surface for the pavers.
This method is useful for garden paths, stepping stones, light patios, and some low-traffic outdoor areas. It also makes repairs easier because individual pavers can be lifted, relevelled, and placed back without major disruption.
However, sand bedding is not suitable for every project. Heavy loads, driveways, thin stone, or unstable ground usually need a stronger system.
Mortar Bedding
Mortar bedding creates a stronger and more rigid installation. It is often used for natural stone paving where movement must be reduced, especially in patios, pool surrounds, stairs, driveways, and high-traffic areas.
A mortar bed supports the stone evenly and helps reduce rocking, shifting, and uneven settlement. It also gives installers more control when working with stone that needs a precise finish.
The main challenge is that mortar requires correct mixing, application, curing, and drainage planning. If installed poorly, it can lead to weak bonding, cracking, or moisture-related issues.
Adhesive Bedding
Adhesive bedding is used where stone needs a firm bond to a stable surface. It is common for wall cladding, indoor floors, thin stone tiles, and some concrete-based installations.
This method works best on clean, level, dry, and structurally sound substrates. It is not usually the right option for uneven outdoor bases or areas that need open drainage beneath the pavers.
Step-by-Step Stone Paver Installation Guide

Once the ground is prepared and the right base and bedding materials are selected, the installation process becomes much easier to manage. The goal is to work carefully, check levels often, and avoid rushing any stage that affects stability, drainage, or alignment.
1. Plan and Dry-Lay the Pattern
Before fixing anything in place, dry-lay a small section of your chosen pattern. This helps you see how the pavers will sit, where cuts may be needed, and whether the design suits the shape of the area.
Running bond works well for pathways, patios, and larger outdoor spaces because it is simple to align and helps disguise minor layout changes. Stack bond creates a clean, modern look with straight vertical and horizontal lines. French pattern and modular layouts suit natural stone areas where you want more movement and visual interest.
Dry-laying also helps reduce waste. You can adjust the starting point, avoid narrow edge cuts, and make sure the finished layout feels balanced before installation begins.
2. Build and Compact the Base
Spread your chosen base material, usually crushed rock or compactable gravel, across the excavated area. Add it in layers rather than dumping everything in at once. Each layer should be levelled and compacted before the next one is added.
This layered approach creates a stronger foundation and reduces the risk of sinking later. Use a plate compactor for larger areas and a hand tamper for smaller sections, corners, or tight spaces.
Keep checking the fall as you work. The base should follow the planned drainage slope so water moves away from structures rather than sitting beneath the pavers.
3. Add and Level the Bedding Layer
The bedding layer creates the final surface that the pavers sit on. For flexible installations, spread a consistent layer of bedding sand over the compacted base and level it with a screed board.
For mortar installations, apply a suitable mortar bed at the correct thickness for the stone and project type. For adhesive installations, make sure the concrete or substrate is clean, dry, stable, and prepared according to the adhesive requirements.
This layer must be even. Any dips, ridges, or inconsistent depth can show through in the finished surface, creating lippage, rocking pavers, or uneven joint lines.
4. Lay the Pavers from a Straight Edge
Start laying pavers from a fixed straight edge, such as a wall, step, boundary line, or installed edge restraint. Place each paver gently onto the bedding layer rather than dragging it across the surface.
Dragging pavers can disturb the bedding and create uneven sections. Instead, lower each stone into position, check the spacing, then tap it gently with a rubber mallet if adjustment is needed.
Keep joint gaps consistent as you work. Regular spacing helps the surface look professional and gives the jointing material enough room to lock the pavers together.
5. Cut Pavers Where Needed
Most stone paver installations require some cutting around edges, drains, steps, posts, or garden borders. Use the right cutting method for the stone thickness and level of precision needed.
A wet saw or masonry saw is usually best for clean, accurate cuts. A circular saw with a diamond blade can work for straight DIY cuts, while an angle grinder is useful for smaller adjustments or tight areas.
Always mark cuts clearly before cutting. Wear eye protection, gloves, hearing protection, and dust protection, especially when cutting dry. Clean, accurate cuts improve the final look and reduce weak edges that may chip later.
6. Fill the Joints
Once the pavers are laid, sweep jointing sand, polymeric sand, or suitable grout into the gaps. The right jointing material depends on the installation method, joint width, and stone type.
For sand-set paving, jointing sand helps lock the pavers together and reduce movement. Polymeric sand can offer stronger joint stability and better resistance to weeds and erosion when installed correctly.
Make sure the joints are fully filled. If the material settles after compaction or watering, top it up before finishing the area.
7. Compact, Clean and Seal the Surface
After joint filling, compact the surface if the installation method allows it. Use a protective mat over natural stone to reduce the risk of marks, chips, or surface damage.
Sweep away excess sand, grout, or residue before it hardens. If polymeric sand is used, follow the watering instructions carefully, as too much water can wash the material out and too little may prevent it from bonding properly.
Can You Install Stone Pavers Over Existing Concrete?

Yes, stone pavers can be installed over existing concrete if the concrete slab is stable, clean, level, and properly drained. This method is often used when homeowners want to upgrade a plain or tired concrete surface without removing the entire slab.
However, the existing concrete must be assessed carefully before installation. If the slab is cracked, lifting, badly stained, poorly sloped, or holding water, laying pavers over it can trap existing problems underneath. In those cases, repairs or professional preparation may be needed before any new stone is installed.
Thin stone pavers are often the best choice for overlay projects because they add a premium finish without raising the surface too much. They can improve the look of patios, pathways, courtyards, pool surrounds, and outdoor entertaining areas while using the existing concrete as a strong base.
Before installing stone pavers over concrete, check that the slab has the correct fall for drainage. Water should move away from buildings, walls, and pool edges. The surface must also be cleaned properly so mortar or adhesive can bond securely.
Avoid installing over concrete that is unstable, severely cracked, hollow, or affected by drainage issues. A poor slab will still move beneath the stone, which can lead to cracking, lifting, loose pavers, or moisture problems over time.
How to Repair Broken, Sunken or Loose Pavers
Even with careful installation, stone pavers can sometimes crack, sink, loosen, or shift over time. This usually happens because of base movement, water erosion, heavy loads, poor joint filling, or natural wear. The good news is that many paver repair issues can be fixed without relaying the entire area.
The key is to repair the cause, not just replace the visible damaged stone. If the base is still weak underneath, the same problem will return.
1. Assess the Damage First
Start by checking whether the paver is cracked, loose, sunken, raised, or rocking underfoot. Look closely at the surrounding pavers as well, because one damaged piece may be a sign of a wider base or drainage issue.
If water is pooling nearby, the fall may be wrong or the base may have eroded. If several pavers are sinking together, the issue is likely below the surface rather than with the individual stones. Understanding the cause helps you decide whether a simple replacement is enough or whether the base needs rebuilding.
2. Remove the Damaged Paver Carefully
Use a pry bar, screwdriver, chisel, or paver removal tool to lift the damaged paver without disturbing the surrounding stones. Work slowly around the joints instead of forcing the stone out from one side.
If the paver is broken, remove it in pieces while protecting the edges of nearby pavers. A rubber mallet can help loosen tight areas, but avoid using heavy force that could chip the surrounding stone or disrupt the pattern.
Once removed, clear out loose jointing sand, broken fragments, dirt, roots, and any unstable bedding material.
3. Clean and Rebuild the Base
The base beneath the damaged paver must be stable before the replacement goes in. If the area is low, soft, or uneven, add fresh bedding sand, crushed rock, or gravel as needed. Compact the material firmly so it does not settle again after the repair.
Use a straightedge or spirit level to check the height against the surrounding pavers. The repaired base should allow the replacement paver to sit flush with the existing surface, not higher or lower.
If the issue was caused by drainage, correct the fall or clear nearby drainage channels before reinstalling the paver.
4. Install the Replacement Paver
Choose a replacement paver that matches the size, thickness, material, colour, and finish of the surrounding area. Place it gently onto the prepared base and check its alignment with the existing pattern.
Tap it into position with a rubber mallet until it sits firm and level. If it sits too high, remove some bedding material. If it sits too low, add more and compact it again before replacing the stone.
5. Fill Joints and Finish the Repair
Sweep jointing sand, polymeric sand, or the correct grout into the gaps around the repaired paver. Make sure the joints are fully filled, as loose joints allow movement and can cause the paver to shift again.
Compact the area if suitable for the stone and installation method, then sweep away excess material. Lightly mist polymeric sand if required, following the product instructions carefully.
A clean, level, well-filled repair should blend into the existing surface and restore both safety and appearance.
Cutting and Edge Finishing for Stone Pavers

Cutting is often needed when stone pavers meet walls, steps, drains, garden borders, posts, or curved edges. Clean cuts help the finished surface look professional and reduce weak points that may chip, crack, or sit unevenly over time.
The best cutting method depends on the stone type, thickness, project size, and level of precision required. Natural stone can be tough, so always use the correct blade, stable work surface, and proper safety gear.
| Cutting Method | Best For | Notes |
| Wet saw | Clean straight cuts and detailed paving work | Provides precision and helps control dust during cutting |
| Masonry saw | Thick stone pavers and heavy-duty cuts | Suitable for larger projects where accuracy and power are needed |
| Circular saw with diamond blade | Straight DIY cuts | Works well when used slowly with steady pressure |
| Angle grinder | Small adjustments, edges, and tight areas | Useful for trimming around corners, drains, and obstacles |
| Chisel and hammer | Minor shaping or rough manual cuts | Best for small adjustments, not highly precise finish work |
| Guillotine cutter or splitter | Straight cuts on larger paving projects | Fast and efficient, but not suited to curves or intricate shapes |
Use the Right Blade for Natural Stone
A diamond blade is usually the best choice for cutting natural stone pavers. It can handle dense materials more effectively and reduces the chance of rough, chipped edges.
The blade should match the stone type and cutting tool. A poor-quality or incorrect blade can overheat, bind, chip the surface, or produce uneven cuts that affect the final layout.
Mark and Support the Paver Before Cutting
Measure carefully and mark the cutting line with chalk or a pencil before starting. Double-check the measurement against the space where the paver will be placed, especially near walls, steps, or drains.
Support the paver on a stable surface so it does not move while being cut. Movement during cutting can cause uneven edges, cracking, or safety risks.
Finish Edges for a Cleaner Result
After cutting, check the edge for chips, sharp points, or rough sections. A masonry file, rubbing stone, or suitable abrasive pad can help smooth minor imperfections.
Clean edge finishing matters most in visible areas such as steps, pool surrounds, patios, and entry paths. Neat edges improve the overall appearance and help each paver sit more consistently within the pattern.
Follow Safe Cutting Practices
Always wear safety goggles, gloves, hearing protection, sturdy boots, and dust protection when cutting stone. Wet cutting is often preferred because it reduces dust and helps keep the blade cooler.
Avoid rushing the cut or forcing the tool through the stone. Let the blade work steadily, make multiple passes if needed, and keep your hands clear of the cutting path at all times.
Finishing, Sealing and Post-Installation Care
Finishing is the stage that turns a laid paver surface into a clean, protected, and long-lasting outdoor feature. Once the pavers are in place, the joints must be filled properly, the surface cleaned carefully, and the stone given enough time to settle before sealing. Rushing this stage can leave residue, trap moisture, or weaken the final result.
Clean the Surface Before Sealing
Before any sealer is applied, the stone surface must be completely clean. Gentle paver cleaning and maintenance should remove loose sand, grout haze, adhesive residue, dust, and dirt using a broom, soft brush, or stone-safe cleaner.
Avoid harsh acidic cleaners, especially on natural stone such as limestone, travertine, bluestone, or marble. These products can damage the surface, dull the finish, or create uneven marks. If grout or jointing residue is left too long, it can become harder to remove and may affect the final appearance.
A clean surface allows the sealer to bond evenly and helps preserve the stone’s natural colour, texture, and finish.
Seal at the Right Time
Sealing helps protect stone pavers from stains, moisture absorption, weather exposure, and everyday wear. However, timing is important. If pavers are sealed too soon, moisture from the bedding layer, mortar, grout, or substrate can become trapped beneath the surface.
Allow the installation to cure and dry properly before sealing. The exact timing depends on the stone type, bedding system, weather conditions, and sealer instructions.
Choose a stone-safe sealer that suits the material and the area. Pool surrounds, driveways, patios, and outdoor dining spaces may need different levels of protection depending on water exposure, traffic, and staining risk.
Maintain Joints and Edges
Strong joints and stable edges keep the entire paved area locked together. Over time, weather, cleaning, movement, and foot traffic can wear down jointing material or loosen edge sections.
- Top up jointing sand: Refill gaps when sand washes out or settles, as empty joints can lead to paver movement.
- Inspect edge restraints: Check borders regularly to make sure the pavers are not spreading or losing shape.
- Clear drainage paths: Remove leaves, soil, and debris from drains or channels so water can move away freely.
- Treat stains quickly: Clean spills early before they soak into the stone or become harder to remove.
- Reseal when needed: Reapply sealer based on stone type, exposure, and product guidance to maintain protection.
With the right finishing and care, stone pavers stay cleaner, safer, and more stable through changing weather and everyday outdoor use.
Build a Stone Paver Surface That Lasts
A stone paver surface that holds up for decades isn’t built on shortcuts. It’s built on the basics done well: planning the site, prepping the ground, choosing the right base and bedding, laying the stone with care, finishing the joints, and stepping in early when small repairs are needed.
The pavers themselves are a long-term asset. The installation is what unlocks their value. Get the layered system right and the surface will keep performing through every season the climate throws at it.
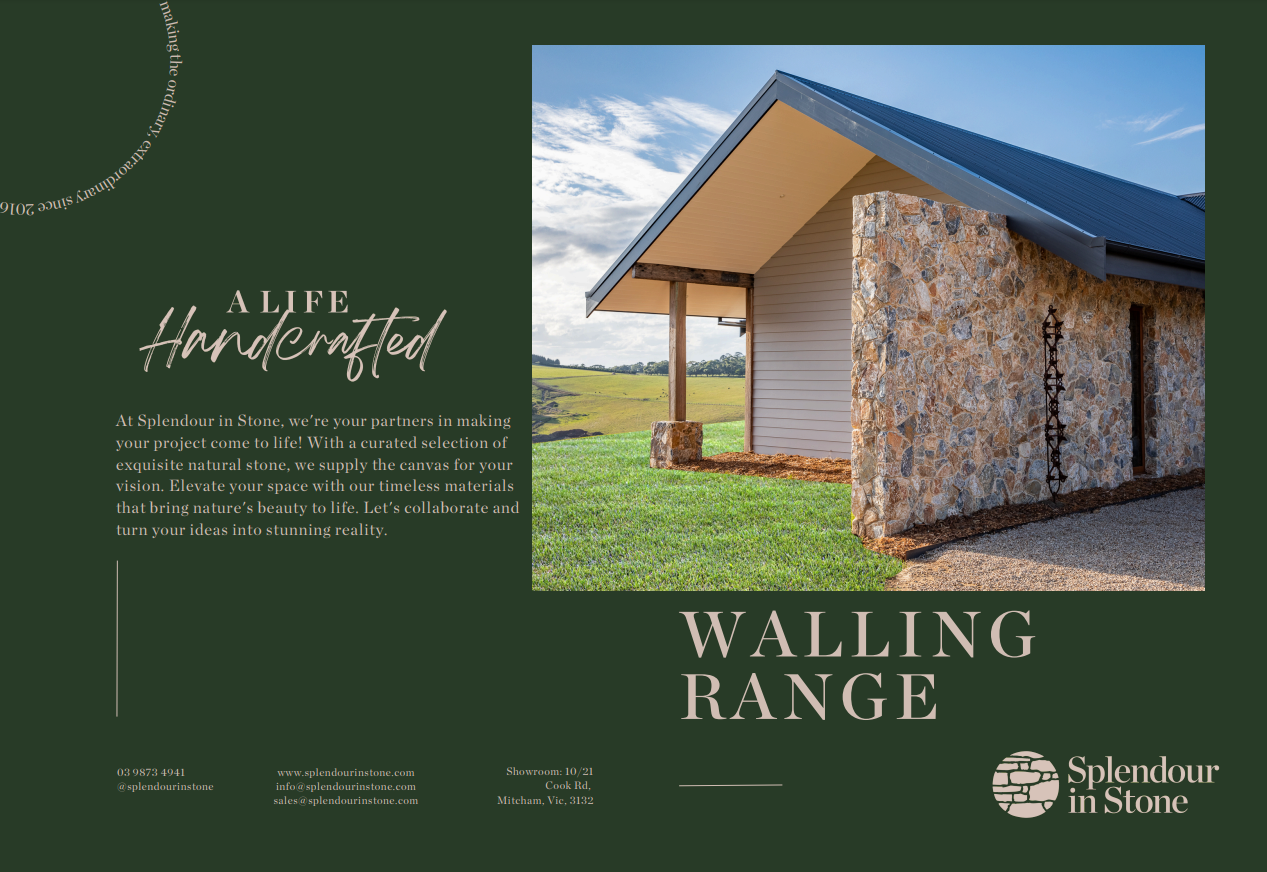
For natural stone pavers, project guidance, and expert support across Melbourne and Australia, the team at Splendour in Stone is a good place to start.
FAQs About Stone Paver Installation
1. What is the best base for stone pavers?
The best base for stone pavers is usually compacted crushed rock or crushed stone because it provides strong support and good drainage. For heavier areas such as driveways, pool surrounds, or premium stone installations, a concrete base may be more suitable. The right choice depends on load, soil condition, drainage, and stone thickness.
2. How deep should I excavate for stone pavers?
Excavation depth depends on how the area will be used. Light garden paths and patios usually need enough depth for the base, bedding layer, and paver thickness. Driveways and heavy-use areas need deeper excavation to support extra weight. The finished level should also allow for proper drainage away from structures.
3. Can stone pavers be laid on sand?
Stone pavers can be laid on sand in some light-use areas, such as garden paths, stepping stone areas, and simple patios. However, sand should usually sit over a compacted crushed rock or gravel base. For driveways, pool surrounds, and high-traffic areas, mortar, adhesive, or concrete-based systems may be more suitable.
4. Why do stone pavers sink or become uneven?
Stone pavers usually sink or become uneven because of poor base preparation, weak compaction, drainage problems, unstable soil, or missing edge restraints. If water washes out the base or bedding layer, the pavers can lose support. Fixing the visible paver is not enough unless the underlying cause is corrected.
5. Can I replace one broken paver without relaying the whole area?
Yes, one broken paver can often be replaced without relaying the entire surface. The damaged paver should be removed carefully, the base underneath cleaned and relevelled, and a matching replacement installed. Once the new paver is level, the joints should be refilled and compacted to restore stability.
6. Should stone pavers be sealed after installation?
Stone pavers often benefit from sealing because it helps protect against stains, moisture, weathering, and everyday wear. The timing matters, though. The pavers, bedding, grout, or jointing material should be fully cured and dry before sealing. Always choose a sealer suited to the specific stone type and exposure conditions.