Register your Information for Free Stone Samples Sent Express to You!

Search
Search
Close this search box.
Search
Close this search box.

Marble Cleaning Mistakes: Avoid These Disasters

Marble is a beautiful and luxurious material, but it’s also delicate and prone to damage from improper cleaning methods. 

Using the wrong products or techniques can leave your marble surfaces etched, stained, or dull, ruining their elegant appearance and potentially costing you a fortune in repairs or replacements. 

Fortunately, avoiding these common marble cleaning mistakes allows you to keep your marble looking pristine for years.

Common Marble Cleaning Mistakes

1. Using Harsh Chemical Cleaners
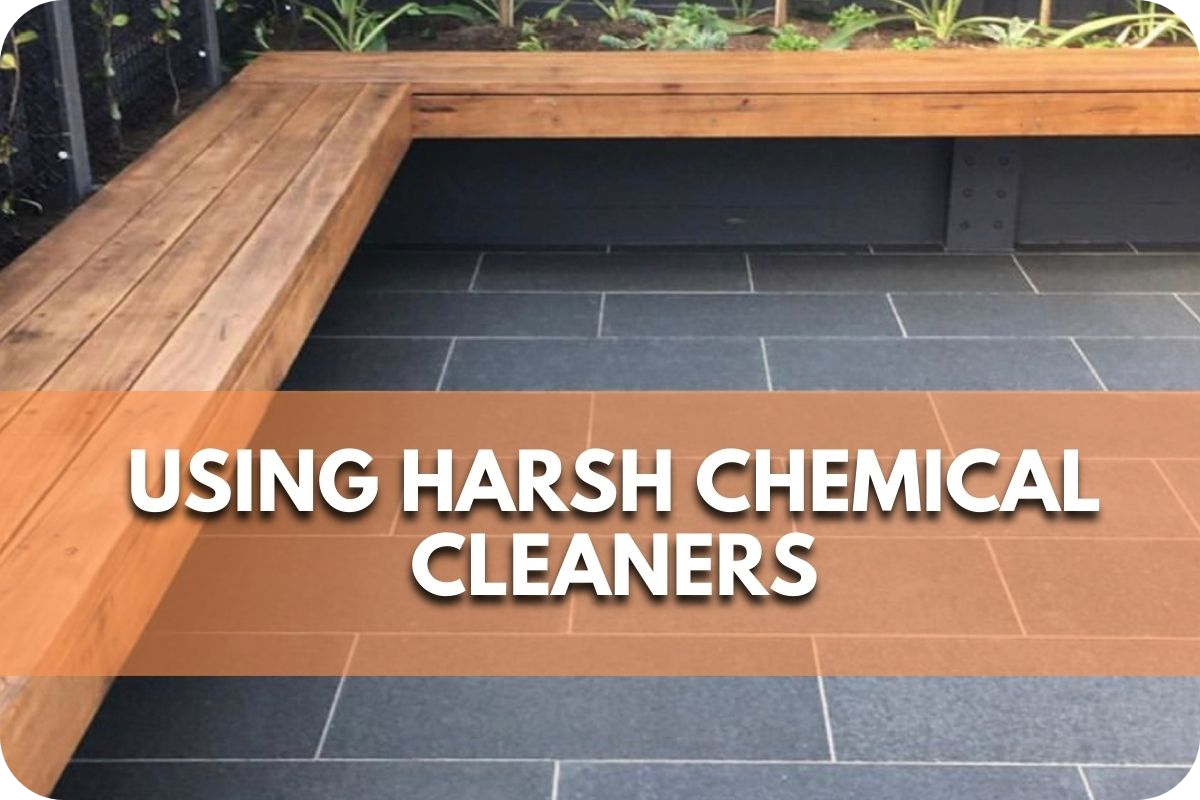
One of the most damaging mistakes you can make with marble is using harsh chemical cleaners. Here’s why:

  • Acidic Cleaners: Products like vinegar, lemon juice, and many all-purpose cleaners contain acids that etch marble. This etching dissolves the surface, creating dull spots, loss of shine, and increased proneness to staining and scratches.
  • Abrasive Cleaners: Even seemingly mild cleaners with scrubbing particles can scratch marble’s delicate surface. These scratches dull the finish, making the stone susceptible to further damage.

Gentle Alternatives for Marble Cleaning

Instead of harsh chemicals, opt for these safe and effective cleaning solutions:

  • Dish Soap and Warm Water: A few drops of mild dish soap in warm water create a gentle cleaner that is ideal for cleaning marble surfaces daily.
  • Stone-Specific Cleaners: Formulated with a neutral pH, these cleaners are designed to safely lift dirt and grime from marble.
  • Baking Soda Paste: For tougher stains, make a paste of baking soda and water. Apply it to the stain, let it sit briefly, and gently wipe away.

2. Ignoring Spills and Stains

The importance of promptly addressing spills and stains on marble surfaces.

  • Marble’s porous nature allows liquids to penetrate quickly, making stains more challenging to remove when left unattended.
  • Immediate action is crucial to prevent deep-set stains that can be difficult or impossible to eliminate.

Tips for removing common stains from marble, such as wine, coffee, and oil.

  • Blot, Don’t Wipe: Blotting spills with an absorbent cloth prevents them from spreading.
  • Wine, Coffee, and Tea: A mixture of ammonia and hydrogen peroxide can often remove these stains. Apply the mix, let it sit for a few minutes, and wipe clean.
  • Oil: Baking soda and water paste effectively draws out oil stains. Apply, cover with plastic wrap, and leave for several hours.
  • Poultices: For deep-set stains, a poultice (thick paste of cleaning powder and water) may be necessary. Apply, cover with plastic, and let sit for 12-24 hours.
  • Professional Assistance: For severe or unidentified stains, consult a stone care professional to avoid causing further damage to your marble.

3. Incorrect Cleaning Techniques

Even with the best intentions, using the wrong cleaning methods can damage your marble. Here’s what to avoid:

  • Abrasive Tools: Rough sponges, scrub brushes, or scouring pads will scratch the marble’s delicate surface. These scratches dull the shine, making the stone vulnerable to stains and other damage.
  • Excessive Force: Scrubbing too vigorously, even with a soft cloth, can abrade the marble’s surface over time.
  • Incorrect Cleaners: As mentioned earlier, harsh chemicals like acidic cleaners or bleach will etch and damage marble. Stick to specially formulated cleaners.

Proper Cleaning Techniques for Marble

  • Gentle Touch: Always use soft cloths or microfiber sponges when cleaning marble. Wipe in a gentle, circular motion to avoid scratching.
  • pH-Neutral Cleaners: Opt for neutral pH (7) cleaning solutions specifically designed for natural stone like marble. Alternatively, a few drops of mild dish soap in warm water works well.
  • Damp, Not Soaking: Use a damp cloth that is well-wrung out. Excessive water can seep into the marble and cause damage.
  • Dry Thoroughly: After cleaning, dry the marble surface with a clean, soft cloth to prevent water spots or streaks.

4. Overlooking Sealing Maintenance

Regular sealing of marble surfaces is necessary to protect against stains and etching.

  • The Role of Sealant: The sealer acts as a barrier, slowing the absorption of liquids and minimizing the impact of acidic substances that cause etching and staining.
  • Maintaining Protection: Sealants naturally wear down over time, requiring regular reapplication to ensure continued protection for your marble.

Guidelines for determining when to reseal marble and recommended sealing products.

  • The Water Test: Sprinkle water on your marble surface. If it beads up, the seal is working. If it soaks in and darkens the stone, a new coat of sealant is needed.
  • Resealing Frequency: Most experts recommend resealing every 6-12 months, though high-traffic areas may need more frequent attention.
  • Type of Sealer: Choose high-quality impregnating sealers designed for marble. These penetrate the stone for better protection than topical sealers. Always follow the product’s instructions carefully.

5. Neglecting Regular Maintenance

Marble isn’t a “set it and forget it” surface. Consistent care is vital to protect its beauty and avoid costly restoration down the line. Here’s why regular maintenance matters:

  • Preventing Buildup: Dirt, dust, and even everyday spills can detract from marble’s shine if left too long. Regular cleaning prevents buildup and keeps your surfaces looking polished.
  • Minimizing Damage: Small scratches or etches addressed quickly are less likely to worsen. Regular maintenance lets you spot and address potential problem areas.

Simple Maintenance Routine

  • Daily: Wipe up spills immediately. Use coasters under glasses, especially those containing acidic liquids, to prevent rings.
  • Weekly: Clean surfaces with a damp microfiber cloth and a pH-neutral, marble-safe cleaner. Dry thoroughly afterwards. Consider a quick polish with a dry microfiber cloth for extra shine.

6. Not Using Protective Measures

Prevention is key to maintaining marble. Simple protective measures can make a huge difference in minimizing damage and keeping surfaces looking pristine.

The Power of Prevention:

  • Coasters protect against water rings and etching from acidic drinks.
  • Mats and trivets shield your marble from scratches and heat damage caused by dishes or pots.

High-Traffic Areas:

  • Floors: Place area rugs or runners in busy areas to protect from scratches and wear. Use felt pads under furniture legs to prevent scuffing.

Common Mistakes Made When Cleaning Marble Surfaces

  • Using acidic cleaners: Common household cleaners like vinegar, lemon juice, or other acids-containing products.
  • Employing abrasive scrubs: Utilizing harsh scrubbers, scouring pads, or overly aggressive cleaning tools.
  • Not addressing spills promptly: Leaving spilt liquids, especially acidic substances like coffee, wine, or citrus juices, to sit on the marble surface for a long time.
  • Disregarding sealing: Failing to initially seal marble surfaces or neglecting to reapply sealant as needed.
  • Overusing water: Cleaning with excessive amounts of water.

How these Mistakes Can Damage or dull the marble

  • Acidic cleaners: Acids react with the calcium carbonate in marble, etching the surface and causing permanent dull spots or discolouration.
  • Abrasive scrubs: These create scratches on the polished surface of the marble, diminishing its shine.
  • Neglecting spills: These liquids, especially acidic ones, penetrate the porous marble, leading to deep-set stains that are difficult to remove.
  • Ignoring sealing: Sealing creates a protective barrier. Without it, marble is vulnerable to etching, staining, and general wear.
  • Excessive water: Water can seep into marble, causing discolouration or warping over time.

Conclusion

Preserving your marble’s elegance requires avoiding etching, staining, and dullness caused by acidic cleaners, abrasives, and improper techniques. Implement gentle, pH-neutral cleaning solutions and methods to keep your marble surfaces looking pristine.

For expert guidance on marble care, contact Splendour In Stone Melbourne for professional advice and services.

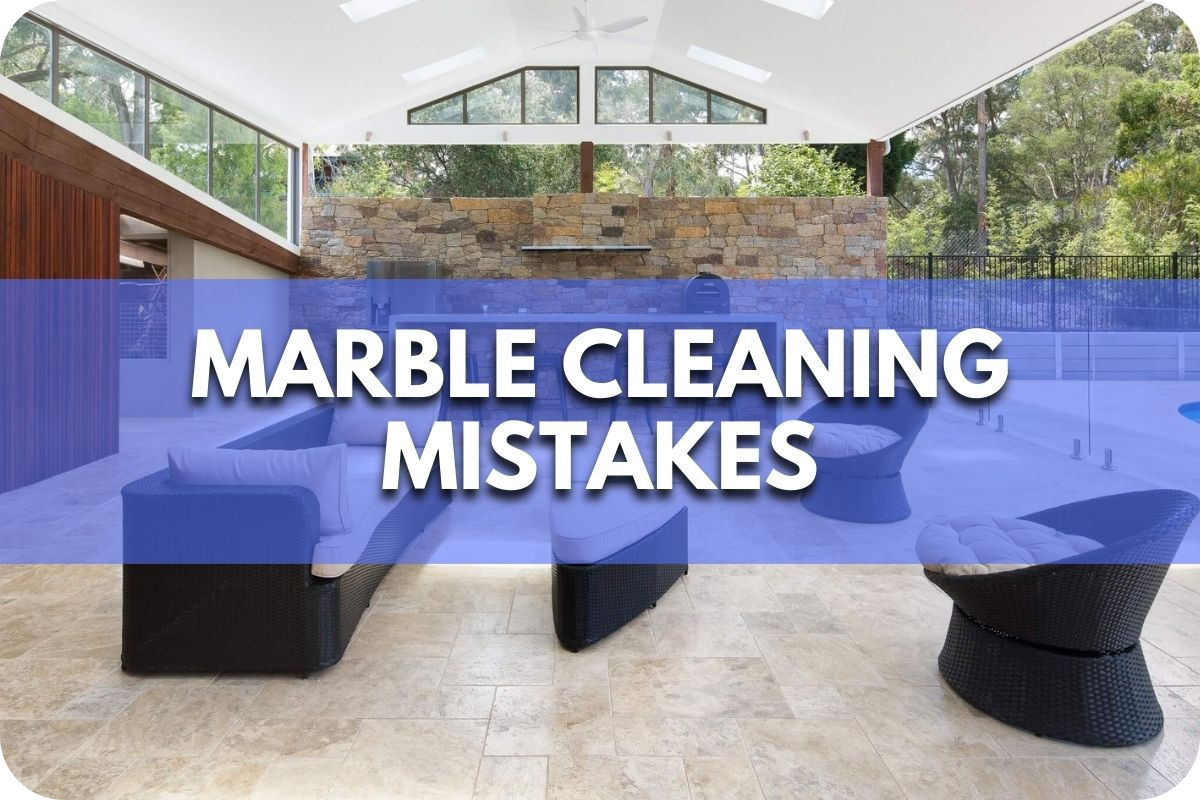
The Psychology of Stone: How Colors & Textures Affect Your Mood

Have you ever wondered why certain stone colours and textures evoke different emotions?

The wrong choice could leave you feeling uneasy or uninspired in your space.

Dive into “The Psychology of Stone” as we unravel how colours and textures can profoundly impact your mood, guiding you towards creating environments that uplift and inspire.

Understanding Colour Psychology in Stone

Colour psychology significantly influences how stone materials influence our emotions and moods

Each stone colour has unique properties that can evoke specific feelings and reactions. 

  • Warm tones like red and yellow evoke energy, passion, and warmth, creating vibrant and inviting spaces.
  • Cool tones such as blue and green promote relaxation and tranquillity with their calming effects.
  • Neutral colours like beige and grey offer balance and stability, as versatile backdrops for various design styles.

By understanding the principles of colour psychology, homeowners can effectively use stone materials to create environments that evoke desired emotions and enhance overall well-being. 

Whether selecting a bold granite countertop to energize a kitchen or opting for a serene marble bathroom, the choice of stone colour can profoundly impact the mood and ambience of any space.

Warm vs. Cool Stone Colors

Warm-toned and cool-toned stone colours evoke distinct emotional responses, impacting mood and ambience. 

Warm colours like red, yellow, and orange radiate energy, passion, and warmth, creating vibrant and inviting spaces. They stimulate activity and conversation, making them ideal for social areas like living rooms and kitchens. 

In contrast, cool colours such as blue, green, and grey exude calmness, serenity, and relaxation, promoting a sense of tranquillity and peace. They are well-suited for spaces intended for rest and rejuvenation, such as bedrooms and bathrooms. 

Understanding the emotional effects of warm and cool stone colours allows homeowners to select hues that align with their desired atmosphere and enhance the overall mood of their living spaces.

Whether warmth and vitality or cool-toned marble flooring fosters serenity and tranquillity, the choice of stone colours profoundly influences the emotional experience within a home.

The Impact of Stone Textures on Mood

Texture plays a significant role in shaping the emotional response to stone surfaces, influencing mood and ambience within a space. 

The tactile qualities of stone textures evoke specific sensations and emotions. For instance, rough textures can impart a sense of ruggedness and authenticity, evoking feelings of strength and resilience. 

On the other hand, smooth textures convey a sense of elegance and sophistication, promoting feelings of calmness and serenity

Additionally, textured surfaces offer visual interest and depth, enriching the sensory experience and creating a dynamic environment. By carefully selecting stone textures, homeowners can evoke desired emotions and enhance the overall mood of their living spaces. 

Whether one embraces the rough-hewn charm of natural stone walls or revels in the sleek refinement of polished stone surfaces, the texture of stone surfaces plays a vital role in shaping the emotional atmosphere of interior spaces.

Smooth vs. Rough Stone Textures

Smooth and Polished Stone TexturesRough and Natural Stone Textures
Convey refinement and sophisticationExude ruggedness and authenticity
Promote feelings of calmness and serenityEvoke warmth and comfort
Offer a sleek and elegant aestheticAdd depth and character to a space
Ideal for modern and luxurious spacesInfuse coziness and natural charm
Infuse cosiness and natural charmExamples: Natural stone accent walls

Using Stone Colors and Textures in Interior Design

Incorporating stone colours and textures into interior design can dramatically enhance the mood and ambience of a space. 

Here are some practical tips:

  • Choose stone colours and textures that complement the room’s existing colour palette and design style.
  • Use warm-toned stones like red or yellow for spaces intended for socializing, such as living rooms or dining areas, to create a vibrant and inviting atmosphere.
  • Choose cool-toned stones like blue or grey in bedrooms or relaxation areas to promote a sense of calm and tranquillity.
  • Mix and match different stone textures to add visual interest and depth to a room—for example, pair rough-textured stone accent walls with smooth stone surfaces for a balanced look.
  • When selecting stone colours and textures, consider the overall mood and function of the space. For instance, choose sleek and polished textures for modern and luxurious spaces while opting for rough and natural textures for cosy and rustic environments.

Homeowners can create visually stunning interiors and evoke specific emotions by carefully selecting stone colours and textures that enhance the overall well-being of occupants.

Creating Mood-Enhancing Environments with Stone

Crafting mood-enhancing environments with stone involves thoughtfully using colours, textures, and design elements to evoke specific atmospheres. Here are some strategies:

  • Utilize warm-toned stones like red or yellow in social areas to foster vibrancy, while cool-toned stones like blue or grey are perfect for promoting relaxation in bedrooms or quiet spaces.
  • Pair rough and natural stone textures with cosy furnishings and soft lighting to create a warm and inviting ambience, ideal for cosy living rooms or reading nooks.
  • Combine sleek and polished stone surfaces with modern furniture and minimalist dĂ©cor for a sophisticated atmosphere, ideal for contemporary living spaces or home offices.
  • Experiment with contrasting textures and colours to add visual interest and depth to a room. For example, juxtapose rough stone accent walls with smooth stone surfaces for a dynamic and balanced aesthetic.
  • Incorporate natural elements like wood and plants to amplify the organic feel of stone and create a harmonious and tranquil environment, reminiscent of a spa or retreat.

Homeowners can create spaces that look aesthetically pleasing, evoke specific emotions, and enhance the overall mood and well-being of occupants by thoughtfully considering the interplay of stone colours, textures, and design elements.

Case Studies: Real-Life Examples

In real-life interior design projects, stone colours and textures influence mood and enhance occupants’ experiences.

  • Cosy Living Room: Warm-toned sandstone accent walls provide a cosy and inviting atmosphere, evoking feelings of warmth and comfort. The natural texture of sandstone adds depth and character to the space, creating a visually appealing focal point. The earthy sandstone hues complement the furnishings and decor, enhancing the room’s overall aesthetic.
  • Sophisticated Kitchen: Polished granite surfaces exude elegance and luxury, elevating the kitchen’s aesthetic. The smooth surface of granite adds a sleek and modern touch to the space, making it feel refined and sophisticated. Granite’s durability ensures long-lasting beauty, making it a practical and stylish choice for a high-traffic area like the kitchen.
  • Spa-like Bathroom: Smooth marble surfaces in the bathroom create a serene and luxurious ambience reminiscent of a spa retreat. The cool, neutral tones of marble promote a sense of calmness and relaxation, ideal for unwinding after a long day. The natural veining and marble patterns add visual interest and elegance to the space, enhancing its overall appeal and tranquillity.
  • Serene Bedroom Retreat: The soft, muted tones of limestone flooring create a serene and calming atmosphere in the bedroom. The natural variation in limestone’s texture adds depth and interest to the floor, enhancing the room’s visual appeal. Limestone’s cool and soothing properties contribute to a peaceful sleep environment, promoting relaxation and tranquillity throughout the night.

Conclusion

Stone colours and textures wield significant influence over mood. Consider these nuances in your design or renovation journey. 

For expert guidance on selecting mood-enhancing stone materials, contact Splendour In Stone Melbourne. 

Your space awaits its transformative touch.

Stone Safety: Handling and Installing to Prevent Injury

Working with heavy stone materials can pose significant risks of injury if not handled and installed properly. 

Improper lifting techniques, inadequate protective equipment, and lack of safety precautions can lead to severe back injuries, crushed limbs, or even fatal accidents

This article provides essential guidelines for safe stone handling and installation. It covers proper lifting methods, personal protective equipment (PPE), and crucial safety measures to prevent injuries and ensure a secure working environment.

Assessing Risks in Stone Handling and Installation

Stoneworking, while beautiful and functional, comes with inherent risks. To ensure a safe work environment, understanding these risks is vital.

1. Heavy Lifting Hazards

  • Injuries: Lifting heavy stone pieces can lead to strains, sprains, back injuries, or crushed limbs if proper protocols aren’t followed. 
  • Prevention: Utilize mechanical lifting equipment (dollies, vacuum lifters), ensure enough workers share the load, and follow ergonomic lifting techniques (bend knees, not back).

2. Sharp Edges and Corners

  • Injuries: Cuts, lacerations, and punctures can easily occur from handling stones with sharp edges and corners. 
  • Prevention: Wear thick, cut-resistant gloves. Use padding on stone edges during transport, and be mindful when installing pieces with sharp angles.

3. Dust Inhalation

  • Injuries: Silica dust, generated while cutting or shaping stone, can cause serious lung diseases like silicosis. 
  • Prevention: Use wet-cutting methods to suppress dust, wear proper respiratory protection (masks or respirators), and ensure good ventilation.

4. Noise Exposure

Injuries: Stone cutting and grinding generate loud noise, which can potentially cause hearing loss. Prevention: Wear mandatory hearing protection (earplugs or earmuffs) and limit exposure to noisy machinery.

Safety Precautions for Stone Handling

Prevention is key to avoiding injuries when handling stones. Follow these crucial precautions:

1. Proper Lifting Techniques

  • Bend with your knees: Squat down with your knees bent, not your back. Keep your back straight and core engaged.
  • Lift with your legs: Power the lift from your leg muscles, not your back.
  • Teamwork: For heavier loads, coordinate with team members for a synchronized lift and safe distribution of weight.
  • Mechanical aids: To minimize manual strain, use dollies, vacuum lifters, or forklifts (with proper attachments) whenever possible.

2. Personal Protective Equipment (PPE)

  • Gloves: Choose cut-resistant gloves to protect hands from sharp edges and corners.
  • Safety glasses/goggles: Shield your eyes from dust, chips, and flying debris.
  • Steel-toed boots: Protect feet from dropped materials or crushing injuries.
  • Optional: Consider knee pads for extended periods of kneeling.

3. Secure Storage and Transportation

  • Stable surfaces: Use A-frame racks specifically designed for stone slabs.
  • Strap down: Secure materials with strong straps/ratchets during transport, preventing shifting.
  • Utilize proper equipment: Use forklifts with suitable attachments, vacuum lifters designed for stone, or specifically designed dollies for moving slabs.

4. Dust Control

  • Wet cutting: Use wet saws to reduce airborne silica dust significantly.
  • Respiratory protection: Wear appropriate respirators or dust masks designed for silica protection.

5. Work Area Awareness

  • Clear walkways: Keep work areas clean and free of debris to minimize trip hazards.
  • Fall protection: When working at heights, utilize fall harnesses and secure anchor points.

Safety Measures for Stone Installation

A safe worksite is crucial during the installation phase. Implement these measures for accident prevention:

1. Proper Tool Use and Maintenance

  • Training: Ensure workers are well-trained in correctly using power saws, grinders, mixers, and any specialized stone installation tools.
  • Maintenance: Keep tools sharp and in good repair. Dull or damaged tools are more likely to cause accidents.
  • Follow guidelines: Always adhere to the manufacturer’s instructions and safety protocols when operating tools.

2. Workspace Organization

  • Clear pathways: Maintain clean, uncluttered walkways to prevent trips and falls.
  • Store materials properly: Stack materials securely, away from high-traffic areas.
  • Tool management: Designate areas for tools when not in use, preventing them from becoming hazards.

3. Risk Assessment and Planning

  • Identify potential hazards: Analyze the workspace for uneven surfaces, electrical hazards, potential overhead risks, or nearby traffic.
  • Develop a plan: Create a safety plan outlining specific precautions for each identified hazard. Communicate this plan to all workers.
  • Contingency preparation: Plan for unexpected events (broken slabs, tool malfunctions) to minimize delays and safety risks.

4. Secure Installation Area

  • Barricades: If necessary, use barriers or highly visible tape to cordon off the installation area, preventing unauthorized access.
  • Ground stability: Verify the ground or scaffolding is stable and can support the weight of stone and workers.

5. Noise and Dust Protection:

  • Hearing protection: Require earplugs or earmuffs in areas with loud machinery.
  • Dust control: Continue wet-cutting methods and/or use dust collection systems where possible. Utilize proper respirators.

Conclusion

Stone’s beauty and versatility are undeniable, but working with it requires careful attention to safety. By understanding the risks, using proper lifting techniques, wearing PPE, and maintaining a safe workspace, you significantly reduce the potential for injuries.

Don’t compromise on safety – make it a cornerstone of your stonework.

Contact Splendour In Stone Melbourne for tailored advice and expert assistance in creating the safest stone handling and installation practices.

The Pros and Cons of Underfloor Heating with Natural Stone

Cold tile floors are a bane during chilly seasons. No one wants to step out of a warm shower onto icy stone.

Underfloor heating is the perfect solution, but it can be costly. On average, underfloor heating installation can range from $5000 to $15000. This raises concerns about whether natural stone is suitable for this type of heating.

Discover the pros and cons of underfloor heating with natural stone to decide if this luxurious upgrade suits your home.

Pros of Underfloor Heating with Natural Stone

Here’s a detailed section on the pros of underfloor heating with natural stone:

  • Efficient Heating: Natural stone’s excellent thermal conductivity means it heats quickly and efficiently when paired with underfloor heating. Its heat retention properties keep the floor warm for an extended period, even after the system is turned off. This translates to cosy, consistent warmth throughout your space.
  • Luxurious Aesthetic Natural stone offers a timeless elegance that complements any dĂ©cor style. Popular choices for underfloor heating include marble, limestone, and travertine, all of which provide a beautiful, luxurious element to the room while warmed from underneath. For instance, the natural variations in the colour and pattern of these stones can add depth and visual interest to a space.
  • Durability and Longevity: Natural stone is incredibly durable and stands the test of time. When paired with underfloor heating, a well-maintained stone floor will look beautiful for decades, withstanding the heat and pressure without warping or sustaining damage.
  • Allergy-Friendly: Underfloor heating eliminates drafts caused by radiators, reducing the circulation of dust, pollen, and other allergens. This, coupled with the easy-to-clean surface of natural stone, contributes to a healthier indoor environment, especially for sensitivities. For instance, the lack of radiators means there are fewer surfaces for the dust to settle on, and even heat distribution can help prevent the growth of mould and mildew.
  • Energy Efficiency: Underfloor heating and natural stone can contribute to energy savings. Because the stone distributes the heat evenly and retains it well, the system can operate at lower temperatures than conventional radiators, reducing energy consumption and heating costs.
  • Space Saving: Underfloor heating eliminates the need for bulky radiators or heating units, freeing up valuable wall and floor space. This can be particularly beneficial in rooms with limited square footage or areas with a desired minimalist aesthetic.
  • Compatibility with Various Flooring Types: While natural stone is a popular choice for underfloor heating due to its thermal properties, the system is compatible with a wide range of flooring materials. Popular choices include marble, limestone, and travertine. This versatility allows homeowners to achieve their desired aesthetic without sacrificing the comfort and efficiency of underfloor heating.
  • Enhanced Property Value: Installing underfloor heating with natural stone flooring can increase your property’s value. Potential buyers often perceive this combination as a premium feature, adding to the overall appeal and marketability of the home.
  • Low Maintenance: Natural stone flooring is known for its low maintenance requirements, and underfloor heating further simplifies upkeep by eliminating the need for frequent dusting or cleaning around radiators. This makes the combination of underfloor heating and natural stone an attractive option for busy households or individuals seeking a hassle-free flooring solution.

Underfloor heating with natural stone is a versatile solution suitable for various rooms in your home. Whether you’re looking for cosy warmth in your living room or a spa-like ambience in your bathroom, this combination offers comfort and adaptability for any space.

Cons of Underfloor Heating with Natural Stone

Here’s an informative section about the cons of underfloor heating with natural stone:

  • Installation Costs: Underfloor heating is inherently more expensive than traditional heating solutions. Combining it with natural stone further increases costs due to material prices and specialized labour requirements. Consider the size of the space and any potential need for modifying existing subfloors. This process typically involves [removing the existing flooring, installing the heating system, and then replacing the flooring with natural stone], which can add to the overall cost and time required for the project.
  • Heat Retention: The heat retention properties of natural stone can be a double-edged sword. While excellent for staying warm, your floors will take longer to heat initially and may cool down more slowly when the system is adjusted.
  • Compatibility Issues: Only some types of natural stone are ideal for underfloor heating. Some stones may be susceptible to cracking or discolouration due to prolonged exposure to heat. Selecting a suitable stone type and engaging professionals knowledgeable about this combination is crucial.
  • Maintenance Requirements: Natural stone requires regular care, especially with underfloor heating. Cleaning and sealing routines have become even more critical in protecting the stone from heat-related stress and potential moisture concerns within the subfloor.
  • Potential for Overheating: Underfloor heating, if not adequately controlled, can lead to overly warm floors. This can be uncomfortable and potentially damaging to specific wood furniture placed directly on the heated stone. To prevent this, it’s essential to [install a thermostat with temperature control and limit the maximum temperature to a comfortable level].
  • Slow Response Time: Natural stone’s heat retention properties, while advantageous in terms of maintaining warmth, can also result in a slower response time when adjusting the temperature. This means that changes to the thermostat may take longer to feel in the room than with more responsive heating systems.
  • Risk of Damage during Installation: Installing underfloor heating with natural stone can pose a risk of damage to the flooring material. Improper handling or accidental impacts during installation can lead to cracks, chips, or other forms of damage, requiring costly repairs or replacements.
  • Limited Compatibility with Floor Coverings: While natural stone is compatible with underfloor heating, certain floor coverings, such as thick carpets or rugs, may hinder the heating system’s effectiveness. These materials can act as insulators, preventing heat from adequately transferring to the room above.
  • Long-Term Maintenance Challenges: While natural stone is durable, it may require periodic maintenance and repair over time, especially in conjunction with underfloor heating. Issues such as grout deterioration, tile movement, or subfloor moisture problems can arise, necessitating ongoing attention and upkeep to ensure the longevity of the flooring system.

Conclusion

Underfloor heating with natural stone offers luxurious warmth, efficiency, and timeless beauty but comes with costs and considerations.

Weigh your needs, budget, and lifestyle to decide if this upgrade suits you.

For the best selection of natural stone and expert guidance, contact Splendour In Stone Melbourne and elevate your home’s comfort.

Stone Restoration: When to Call a Professional vs. DIY Fixes

Stone surfaces, whether in your home or outdoor areas, can become worn, stained, or damaged over time. 

Attempting to restore them yourself can be tempting, but improper techniques or products can cause further damage, leading to costly repairs. On the other hand, hiring professionals may seem expensive. 

This article guides when DIY fixes are appropriate and when it’s best to call in experts for stone restoration, helping you make an informed decision while protecting your investment.

Signs That Professional Restoration is Needed

It’s time to consider calling in the experts when DIY methods can’t solve the following problems:

1. Deep Stains and Etching

  • If stains have penetrated beyond the surface layer of your stone or acidic substances have caused etching (dull spots), DIY cleaners won’t be able to fix the problem effectively.
  • Professionals utilize specialized techniques, such as honing (grinding down the surface) and polishing, to remove these deep-set imperfections and restore the stone’s natural shine and smooth finish.

2. Structural Damage

  • Cracks, chips, or loose tiles in stone surfaces are not just cosmetic issues – they compromise the stone’s structural integrity.
  • Professional stone restoration experts have the necessary expertise and specialized tools to adequately address these structural problems, ensuring sound repairs and preventing further worsening of the damage over time.

3. Severe Wear and Tear

  • In high-traffic areas, stone floors can experience significant wear and tear, becoming dull, uneven, and losing their original lustre.
  • Professional stone restoration services can completely revitalize worn stone surfaces, restoring them to their original beauty and evenness through techniques like grinding, honing, and polishing.

DIY Fixes for Minor Issues

With the right approach, you can tackle some common minor stone problems yourself:

1. Surface Cleaning and Maintenance

  • Regular cleaning with a pH-neutral, stone-safe cleaner and soft cloths or mops is essential for removing surface dirt, grime, and spills, helping keep your stone surfaces looking their best.
  • Avoid harsh chemical cleaners or abrasive scrubbing pads, as these can etch, scratch, or damage delicate stone surfaces.

2. Minor Scratch and Chip Repair

  • Small, shallow scratches and chips in stone can often be repaired using DIY stone repair kits containing coloured epoxy or putty compounds matched to your stone.
  • Follow the product instructions carefully, and practice your technique in an inconspicuous area first to ensure you achieve the desired results.

3. Enhancing Shine and Luster

  • When stone surfaces start to look dull, you can help restore their natural shine and lustre by using stone polishing powders or creams specifically designed for your type of stone.  
  • For more intensive shine restoration on floors, you may be able to rent or purchase diamond polishing pads. Use them cautiously and according to the instructions on your stone surfaces.

When to Consult a Professional for Advice

Here are guidelines for determining when it’s best to consult a professional for advice, even if DIY fixes seem feasible.

Identifying the Problem: If you’re unsure about the specific type of stain, the root cause of damage, or even what kind of stone you’re dealing with, it’s advisable to seek professional guidance. Misidentifying these factors could lead to using ineffective or harmful DIY methods.

Unsure of Your Approach: If the DIY solutions seem overly complex, involve the use of harsh chemicals that require precise handling, or you lack confidence in choosing and executing the right method, consulting an expert is the safer route to avoid costly mistakes.

High-Value Surfaces: When dealing with expensive, rare, antique, or sentimental stone surfaces with significant monetary or personal value, taking a DIY approach poses greater risks. Professionals have the specialized knowledge to properly care for and restore these high-value stones without compromising their integrity or beauty.

Example of a situation where professional assessment and recommendations are warranted to avoid causing further damage to stone surfaces.

Potential for Further Damage: If you suspect that visible surface problems on your stone, such as cracks or chips, could indicate underlying structural issues or more extensive damage, it’s crucial to seek professional assessment before attempting any DIY fixes.

Addressing only the surface problem without understanding the root cause could worsen the damage or prevent the crucial repairs needed.

For instance, if you notice cracks forming in your stone countertop or floor tiles, this could signify more serious issues like subfloor settling, excessive weight loads, or improper installation that a DIYer may not diagnose or address properly.

Attempting DIY crack repairs without assessing and fixing the core problem first could result in a surface-level fix that fails to prevent the cracks from worsening or new ones from forming.

In such cases, having a professional stone restoration expert evaluate the situation can help identify any hidden structural problems and recommend the appropriate solutions, repairs, or preventative measures needed to avoid causing further, more costly damage down the line.

Conclusion

Understanding when to tackle stone restoration yourself and when to call in professionals is crucial for maintaining the longevity and beauty of your stone surfaces.

Don’t compromise your investment by guessing – prioritize expert guidance when needed.

Contact Splendour In Stone Melbourne for professional stone restoration services and expert advice on DIY maintenance and repairs that will keep your stone looking its best for years to come.

In SQM?

Please fill your details to download.


      Request Callback


        Enquiry Form


        Please fill your details to download.