Register your Information for Free Stone Samples Sent Express to You!

Search
Search
Close this search box.
Search
Close this search box.

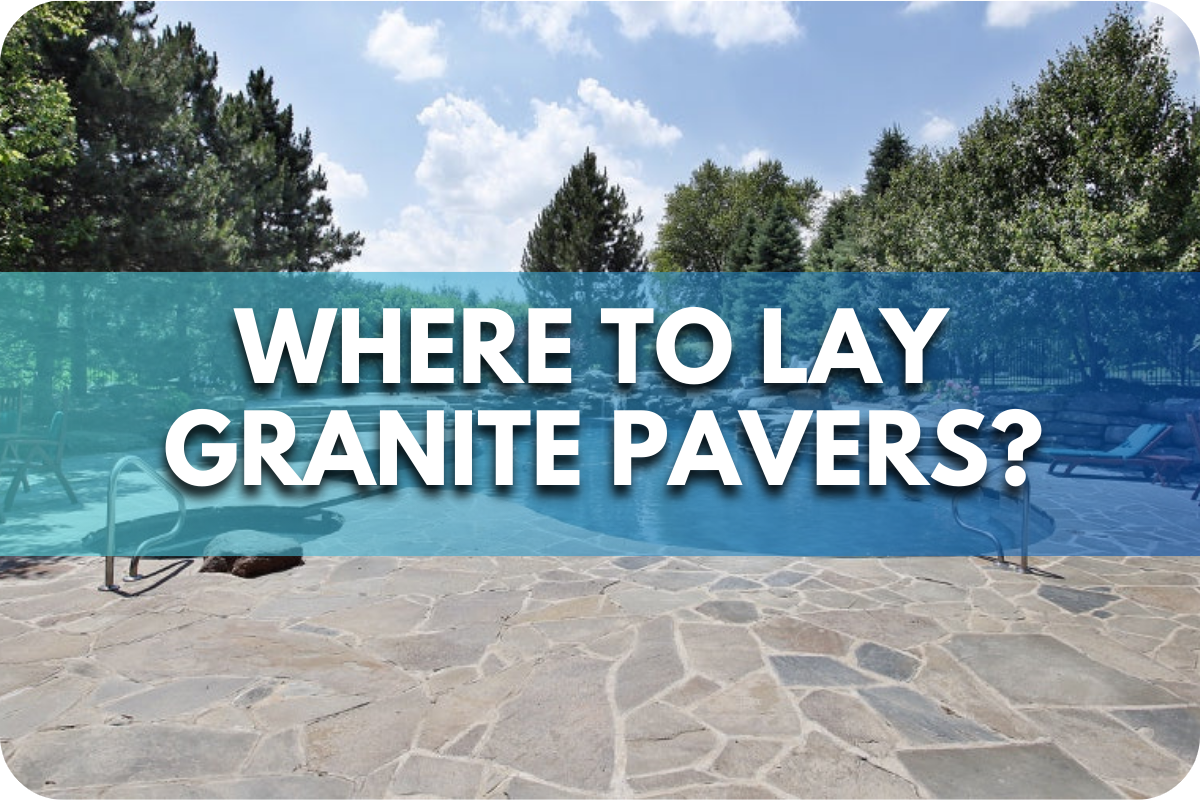
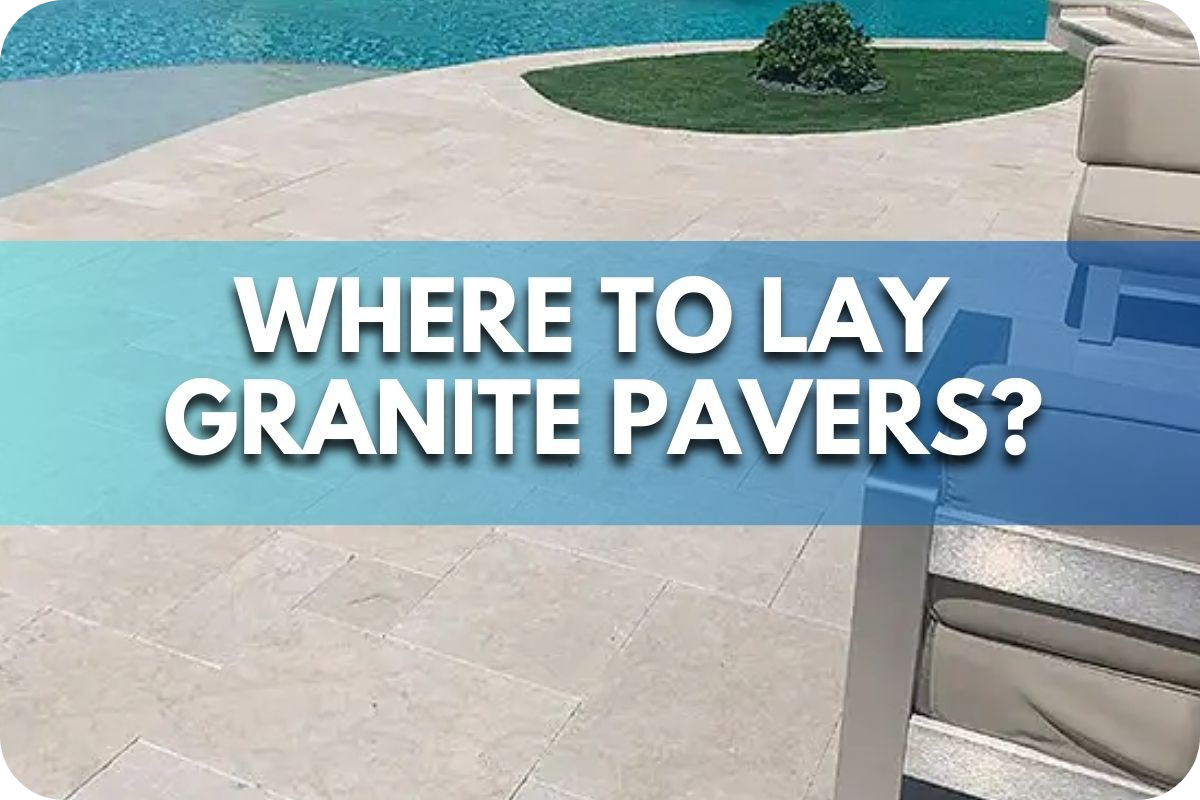
Where to Lay Granite Pavers?

Choosing the right location to lay granite pavers can be challenging due to the many options available.

Without proper guidance, you might install them in less suitable areas, leading to issues like reduced durability or aesthetic mismatch.

This article will guide you through the best places to lay granite pavers, ensuring you make informed decisions that enhance your outdoor spaces’ functionality and beauty. 

Discover the ideal locations to maximise the benefits of your granite pavers.

Key Areas to Use Granite Pavers

1. Driveways

Granite pavers are an excellent choice for driveways due to their exceptional durability and ability to withstand heavy loads. They resist cracking and can handle the weight of vehicles without damage. 

When choosing granite pavers for driveways, opt for a thickness of at least 3 cm to ensure strength. 

A flamed or bush-hammered finish enhances slip resistance, making it safer for pedestrians and vehicles.

2. Patios and Entertainment Areas

Granite pavers enhance the beauty and functionality of patios and entertainment areas, providing a luxurious and durable surface that can withstand outdoor elements. 

Integrate granite pavers with other landscape elements, such as stone fire pits, seating walls, and garden beds, to create a cohesive and inviting outdoor space. 

The variety of colours and finishes allows customisation to match your design preferences.

3. Walkways and Garden Paths

Granite pavers create inviting and aesthetically pleasing walkways and garden paths. Their natural beauty and range of textures and colours charm any landscape. 

Choose pavers with a flamed or bush-hammered finish for safety and aesthetic harmony to prevent slipping. 

Design considerations include using smaller pavers for intricate pathways and larger ones for broader, more formal walkways.

4. Pool Surrounds

Granite pavers are ideal for pool surrounds due to their slip- and water-resistant properties. The flamed finish provides a textured surface that reduces the risk of slipping when wet. 

Granite’s ability to withstand water and chlorine ensures longevity and easy maintenance. 

Examples of pool designs featuring granite pavers include sleek, modern pool decks with light-coloured pavers to reflect heat and create a cool, comfortable surface.

5. Public Spaces and Commercial Use

Due to their durability and low maintenance, granite pavers are frequently used in public spaces and commercial applications such as parks, plazas, and business exteriors. 

They can withstand heavy foot traffic and harsh weather conditions, making them a cost-effective choice for large-scale projects. 

The variety of finishes and colours available allows for creative and visually appealing designs that enhance the functionality and aesthetics of public and commercial spaces.

Design Tips for Laying Granite Pavers

Designing with granite pavers can transform any outdoor space into a sophisticated haven. Consider these expert tips to achieve the best results. 

Firstly, plan your layout meticulously. Granite pavers come in various sizes and patterns, so choose a design that complements your space. A staggered or herringbone pattern adds visual interest and enhances durability.

Next, pay attention to the spacing. Uniform gaps ensure stability and allow for natural expansion and contraction. Use spacers, typically between 3 and 5 millimetres, to maintain consistent joints.

Level the base properly. A well-prepared base with compacted gravel and sand prevents uneven settling and water pooling. Ensure a slight slope for drainage, guiding water away from structures.

Consider the edges. Secure the perimeter with edge restraints to keep pavers in place and maintain the design’s integrity. This step is crucial for preventing movement over time.

Finally, seal the pavers. Sealing granite enhances its natural beauty and protects it from stains and weather damage. Choose a sealant appropriate for granite to ensure long-lasting results.

Learn how to lay pavers properly from our article. How do you lay granite pavers?

Installation Advice

Installing granite pavers requires precision and attention to detail for a flawless finish. Begin by preparing the site thoroughly. Excavate the area to a depth of 15-20 centimetres, ensuring it is clear of any debris or vegetation. Compact the soil to create a stable foundation.

Next, lay a base layer. Spread and compact a 10-15 centimetre crushed stone or gravel layer. This base provides drainage and prevents the pavers from shifting. Follow with a 2-3 centimetre coarse sand, smoothing it out to create a level surface.

Position the pavers carefully. Start at one corner, laying the pavers in your chosen pattern. Use spacers to maintain uniform gaps, typically 3-5 millimetres. Frequently check for levelness using a spirit level and adjust as needed by adding or removing sand.

Edge restraints are crucial. Install these along the perimeter to keep the pavers in place and maintain the integrity of the design. Secure them firmly to prevent any movement over time.

Finally, fill the joints. Sweep fine sand into the gaps between the pavers, ensuring they are completely filled. This locks the pavers in place and prevents weed growth. Compact the entire area once more to ensure stability.

Maintenance and Care

Maintaining granite pavers is essential for preserving their beauty and longevity. Regular cleaning is crucial. Sweep the surface frequently to remove dirt and debris. 

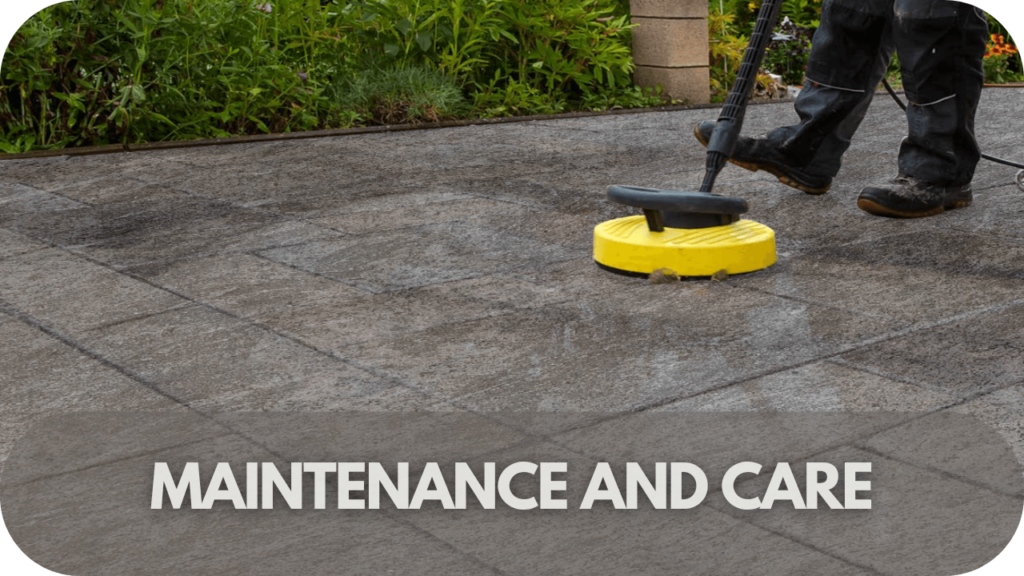
Use a mild detergent mixed with water and a stiff brush for deeper cleaning. Avoid harsh chemicals or high-pressure washers, as these can damage the stone.

Sealing the pavers is highly recommended. Apply a high-quality stone sealant every 1-2 years to protect against stains, moisture, and weather damage. Ensure the pavers are clean and dry before applying the sealant, following the manufacturer’s instructions for the best results.

Address stains promptly. Spills should be cleaned up immediately to prevent staining. For oil stains, use a poultice or a specialised stone cleaner. Avoid using acidic cleaners, which can etch the surface of the granite.

Weed control is also important. Regularly inspect the joints and remove any weeds that may sprout. Applying a weed inhibitor can help prevent growth.

Monitor for shifting or settling. Check the pavers periodically to ensure they remain level. If any pavers become loose or uneven, they should be lifted, the base material adjusted, and the pavers reinstalled.

For more information on how to maintain and care for a paver read this: The Complete Guide to Caring for Your Granite Pavers.

Conclusion

Granite pavers are a versatile and durable choice for any outdoor area. From driveways to garden paths, their elegance and resilience make them ideal. Contact Splendour In Stone for professional advice and top-quality granite pavers tailored to your project needs. Transform your outdoors with timeless beauty.

What is Granite?

Many homeowners and builders are unsure about the properties and benefits of using granite in their projects.

This lack of knowledge can lead to missed opportunities for using a durable and aesthetically pleasing material, resulting in potential regrets and added costs from choosing inferior alternatives.

This article will explore granite, its unique characteristics, and why it should be considered for your next project. 

Find out why granite is a top choice for countertops, flooring, and other applications, ensuring you make informed decisions.

What is Granite?

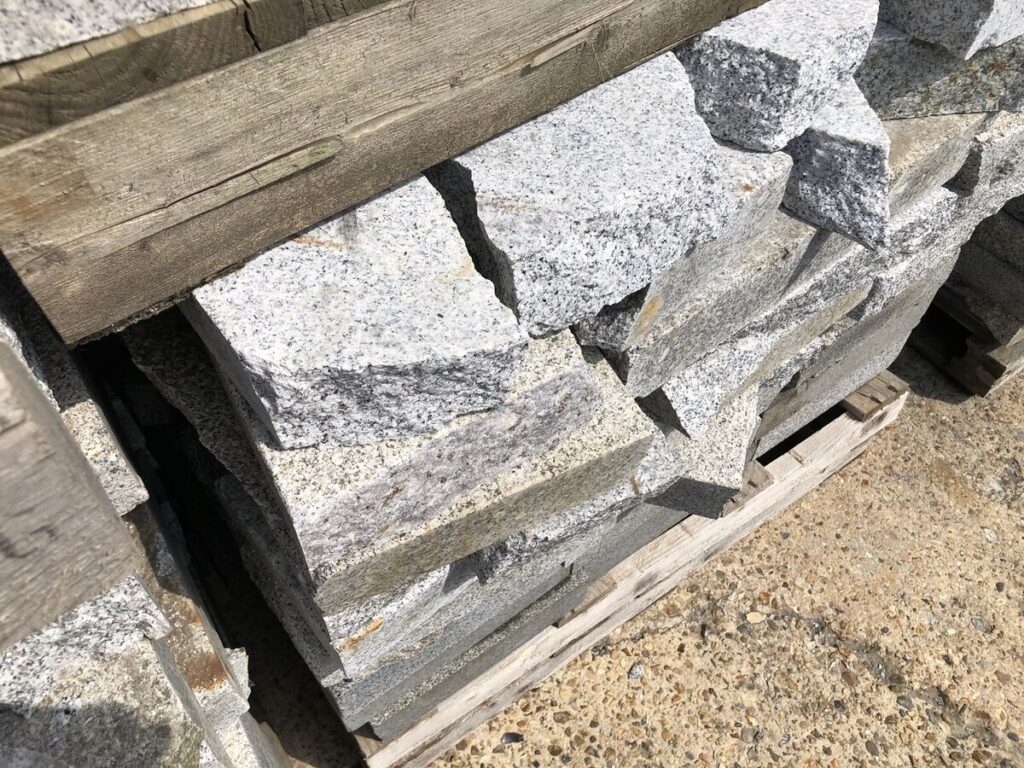
Granite is a coarse-grained, intrusive igneous rock primarily composed of quartz, feldspar, and mica. It forms from the slow crystallisation of magma beneath the Earth’s surface. Known for its durability and strength, granite is widely used in construction and architectural design, particularly for countertops, flooring, and monuments​​.

The Composition of Granite

Granite is a coarse-grained, intrusive igneous rock predominantly composed of quartz, feldspar, and mica. It forms from the slow crystallisation of magma beneath the Earth’s surface, which results in the large, visible mineral grains characteristic of granite.

Key Minerals Found in Granite:

  • Quartz: Constitutes 20-60% of granite, contributing to its hardness and durability.
  • Feldspar: The most abundant mineral in granite, feldspar comes in orthoclase and plagioclase.
  • Mica: Includes biotite and muscovite, which add to granite’s sparkle and colour variations.

Granite’s geological formation involves the slow cooling of magma deep within the Earth’s crust, allowing large crystals to form. This makes granite extremely durable and resistant to weathering and chemical interactions, making it ideal for construction and decorative uses.

Physical and Chemical Properties

Granite is renowned for its exceptional hardness, rated 6-7 on the Mohs scale, making it highly resistant to scratches and wear

This durability is due to its interlocking crystal structure, formed during the slow cooling of magma beneath the Earth’s surface​. This property makes granite ideal for surfaces that endure regular use, such as flooring.

Granite’s colour spectrum includes shades of white, black, grey, pink, and red. These variations are influenced by its mineral composition: quartz typically gives a grey or white hue, feldspar can add pink, orange, or blue tones, and mica may introduce black or green shades​. 

Each piece of granite is unique, displaying distinct patterns and colours that enhance its aesthetic appeal in various applications.

Granite is chemically inert and highly resistant to weathering and acidic environments, thanks to its high silica content (65-75%) and the presence of stable minerals like quartz and feldspar

This resistance makes it a durable choice for indoor and outdoor applications, ensuring longevity even in harsh conditions. Its low porosity further contributes to its resilience, preventing water absorption and reducing the risk of damage from freeze-thaw cycles.

For high-quality granite products, Splendour in Stone offers a diverse selection, ensuring you find the perfect match for your design and durability needs.

Types of Granite

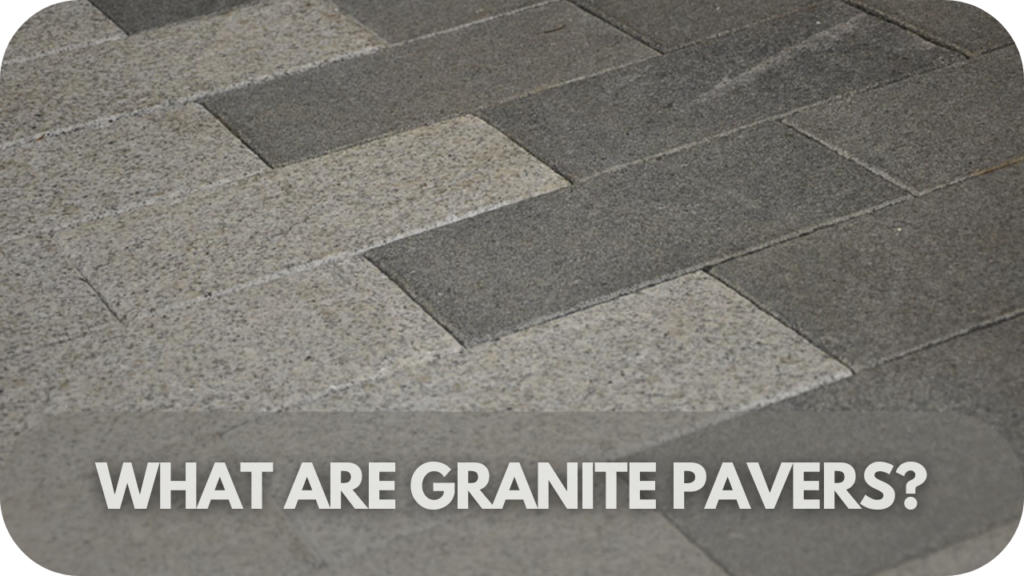
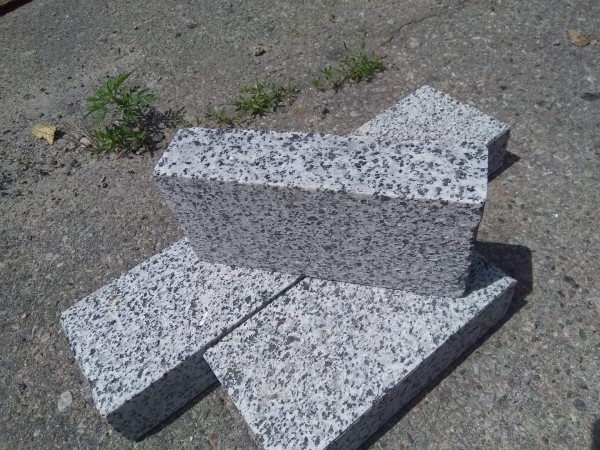
At Splendour in Stone, we offer a diverse range of high-quality granite pavers that are perfect for paving and walling applications. Our granite pavers are renowned for their durability, aesthetic appeal, and versatility. Here are the types of granite pavers we provide:

1. Hotham Granite

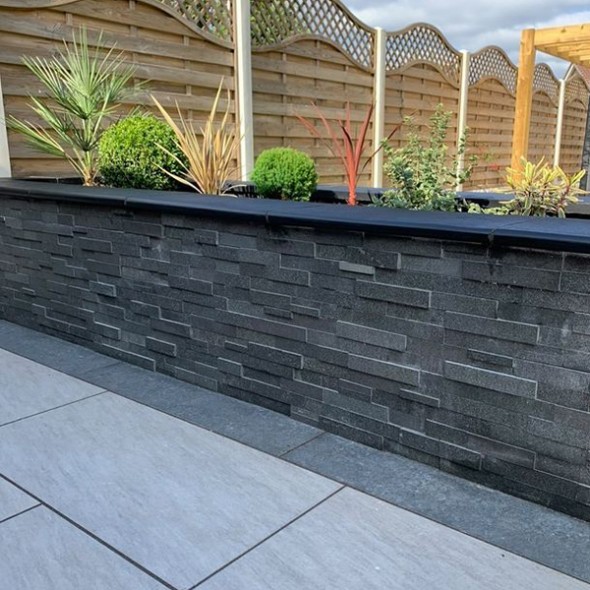
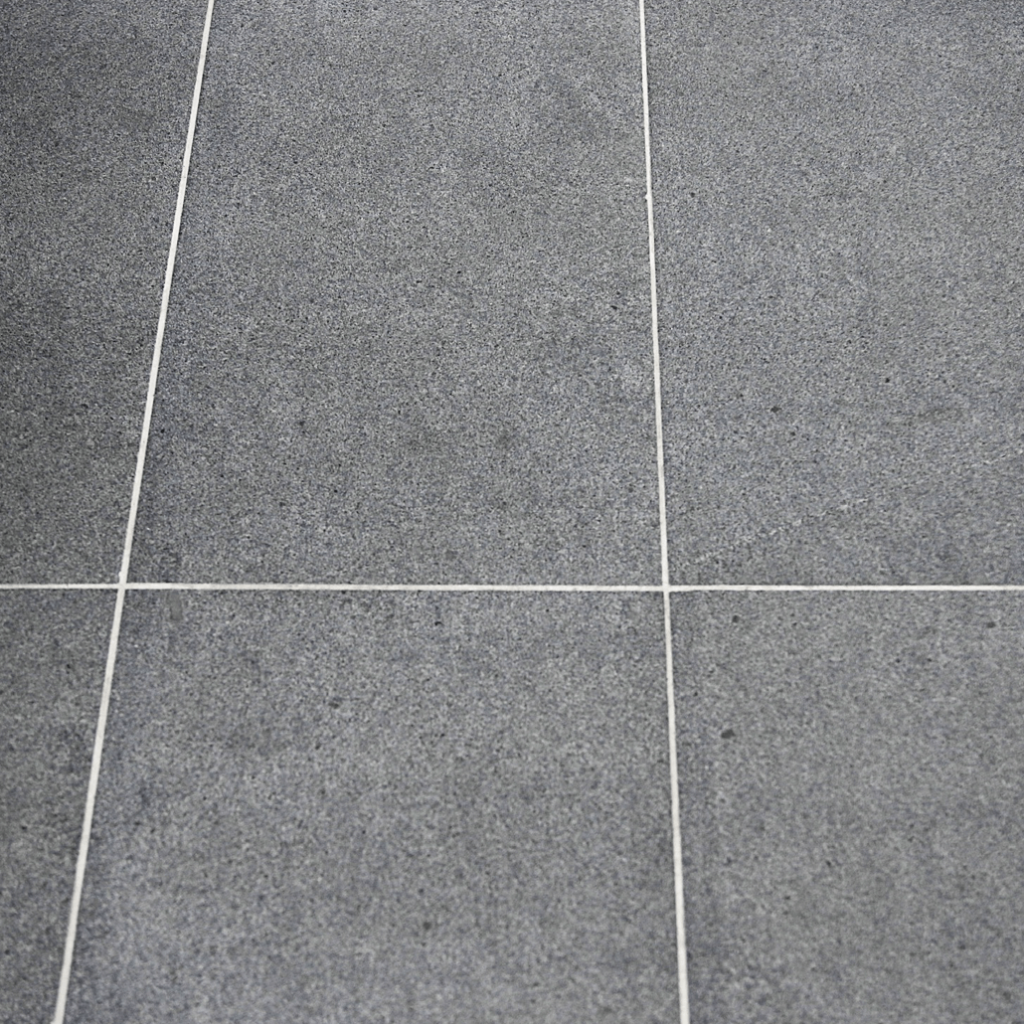
Hotham Granite is a stunning choice for those seeking a blend of elegance and durability. This granite features a unique texture and a rich, dark hue that adds a touch of sophistication to any outdoor or indoor space. Ideal for pathways, patios, and wall cladding, Hotham Granite is resistant to weathering and maintains its beauty over time.

2. Buffalo Granite

Our Buffalo Granite is perfect for creating a bold and striking look. With its deep, rich colour and subtle pattern variations, this granite adds a dramatic flair to any landscape. It’s an excellent choice for driveways, garden paths, and accent walls, offering both durability and a high-end aesthetic.

3. Charcoal Granite

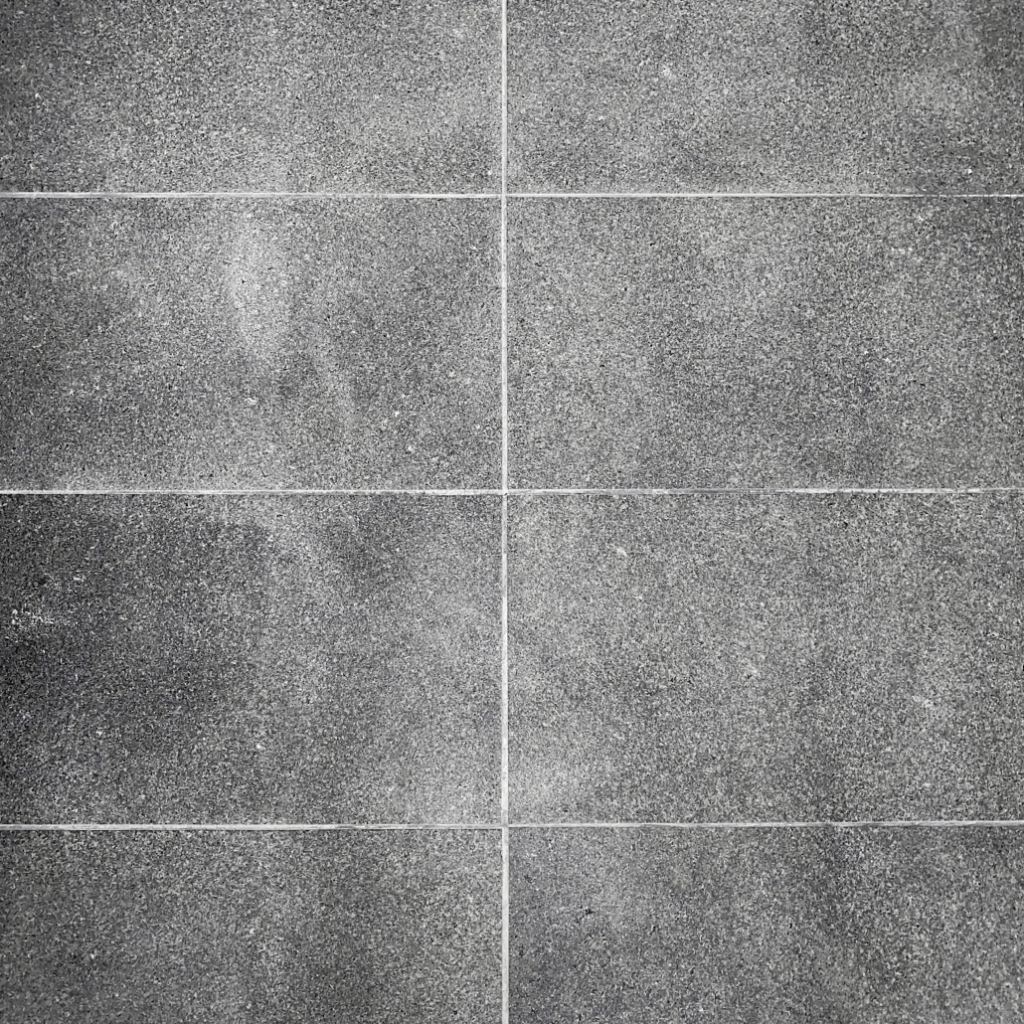
Charcoal Granite is a versatile option that complements various design styles. Its deep charcoal tones provide a contemporary and sleek look, making it ideal for modern landscapes and architectural projects. This visually appealing granite is highly resistant to stains and scratches, ensuring long-lasting beauty.

4. Grey Granite

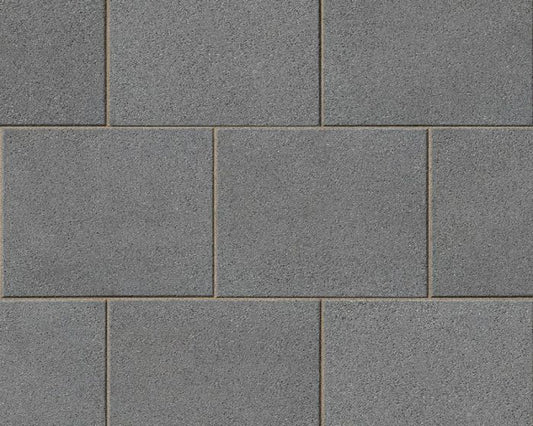
Our Grey Granite is an excellent choice for a timeless and classic appearance. The subtle grey tones and natural texture make it suitable for various applications, including patios, walkways, and feature walls. 

Grey Granite is known for its resilience and low maintenance, making it a practical and stylish option for residential and commercial projects.

Each type of granite paver offered by Splendour in Stone is selected for its unique characteristics and superior quality. Whether you’re enhancing a garden path, a patio, or a feature wall, our granite pavers provide the perfect blend of aesthetics and functionality.

Uses of Granite

Granite is a cornerstone of architectural excellence, offering enduring durability and aesthetic versatility. From luxurious flooring solutions to timeless monuments and resilient building facades, granite’s strength and adaptability elevate every design concept with timeless elegance and structural integrity. Here are more of the uses:

1. Flooring

Granite is a popular choice for flooring due to its durability and resistance to wear. Its natural hardness makes it ideal for high-traffic areas such as lobbies, hallways, and outdoor patios. Granite floors add a touch of luxury and provide a long-lasting solution. The wide range of colours and finishes allows for customisation to suit any design concept, ensuring a cohesive and visually appealing space.

2. Monuments and Sculptures

Granite’s strength and beauty make it a preferred material for monuments and sculptures. Its ability to withstand weathering and its aesthetic appeal makes it a timeless choice for commemorative structures and artistic installations. Granite’s unique patterns and colours create striking and enduring works of art that capture attention and imagination.

3. Building Facades

In modern architecture, granite is frequently used for building facades. Its durability and resistance to environmental factors make it excellent for exterior cladding. Granite facades enhance the building’s aesthetic appeal and provide structural benefits by protecting against weathering and erosion. The versatility of granite in finishes and colours allows architects to achieve various looks, from sleek and modern to classic and traditional.

Granite’s applications in architecture and design demonstrate its unmatched combination of durability, beauty, and versatility

Benefits of Using Granite

Granite offers numerous advantages that make it an excellent choice for various applications.

1. Durability

Granite is renowned for its exceptional durability. It is highly resistant to scratches, heat, and stains, making it ideal for high-traffic areas like kitchen countertops and flooring. Its hard surface ensures it withstands daily wear and tear, lasting for decades with minimal maintenance​​.

2. Aesthetic Appeal

Each granite slab features unique patterns and colours, providing a unique look that enhances any space’s beauty. The natural veining and speckles can add a touch of elegance and luxury to traditional and modern interiors​​.

3. Easy Maintenance

Granite is easy to clean and maintain. Its non-porous nature, especially when sealed, makes it resistant to bacteria and dirt, ensuring a hygienic surface for food preparation. Simple cleaning with mild soap and water keeps it looking pristine​.

4. Value Addition

Installing granite can increase the value of your home. It is a highly desirable feature for potential buyers, contributing to a higher resale value due to its long-lasting beauty and functionality​​.

5. Versatility

Granite suits various applications beyond countertops, including flooring, monuments, sculptures, and building facades. Its ability to withstand harsh weather conditions makes it an excellent choice for indoor and outdoor use​. 

Conclusion

With its remarkable durability and aesthetic appeal, granite remains a top choice for construction and design. Whether planning a home renovation or a large-scale project, consider granite for its unique blend of beauty and strength. 

Explore our granite collection today and transform your spaces with this timeless material.

How to Lay Granite Pavers?

Installing granite pavers can seem daunting due to the precise steps and tools required.

Without proper guidance, you risk an uneven surface, poor drainage, or even pavers shifting over time, leading to frustration and additional costs.

This article provides a step-by-step guide for laying granite pavers, ensuring a durable and aesthetically pleasing result. 

Follow these instructions to transform your outdoor space with confidence and ease.

Tools and Materials Needed

You’ll need a comprehensive set of tools and materials to lay granite pavers successfully. Here’s a detailed list to ensure you have everything required for the job:

Tools

  • Measuring Tape: This is used for accurate measurements of the installation area.
  • Shovel: To excavate the area where the pavers will be laid.
  • Wheelbarrow: For transporting gravel, sand, and pavers.
  • Compactor: Compact the gravel base and sand bed, ensuring stability.
  • Rubber Mallet: This is for gently tapping pavers into place without damaging them.
  • Level: To ensure the pavers are laid evenly.
  • String Line and Stakes: To mark the installation area and maintain straight lines.
  • Brick Cutter or Wet Saw: This is for cutting pavers to fit edges and corners precisely.
  • Soft Bristle Brush: To sweep polymeric sand into joints and clean the surface.

Materials

  • Granite Pavers: For durability and aesthetic appeal, choose high-quality granite pavers from reputable suppliers like Splendour in Stone, which is known for its premium selection.
  • Crushed Gravel: For the base layer, ensuring proper drainage and stability.
  • Coarse Sand: To create a smooth, level bedding layer for the pavers.
  • Polymeric Sand: To fill the joints between the pavers, lock them in place, and prevent weed growth.
  • Sealant: Optional but recommended for protecting the granite from stains and weathering.

Sourcing High-Quality Granite

When sourcing granite pavers, look for suppliers with a reputation for quality and reliability. 

Splendour in Stone is an excellent choice, offering a wide range of high-quality granite pavers.

Visit their showroom or website to explore different options and ensure you select the best granite for your project.

Preparation Steps

Site Planning and Design

Proper planning and design are crucial for a successful granite paver installation. Begin by measuring the area where you intend to lay the pavers. 

Mark the boundaries using stakes and string lines to outline the exact layout. Consider the traffic flow, drainage, and overall aesthetics when planning the design. 

Sketching a design plan, including patterns and special features like curves or borders, can help visualise the final result and ensure accuracy during installation.

Preparing the Base

A solid and stable foundation is essential for the longevity and stability of your granite pavers. Here’s a step-by-step guide to preparing the ground:

  • Excavation: Dig out the installation area to a depth of about 6-8 inches, depending on the thickness of your pavers and the type of soil. Ensure the excavation is even and follows the desired slope for drainage.
  • Compact the Subgrade: Use a compactor to compact the soil at the bottom of the excavation. This step is crucial to prevent settling and shifting over time.
  • Add the Gravel Base: Spread a layer of crushed gravel or stone, about 4-6 inches thick, over the compacted subgrade. This base layer provides drainage and supports the pavers. Compact the gravel layer thoroughly using a compactor.
  • Lay the Sand Bedding: Spread 1-2 inches of coarse sand over the compacted gravel. Use a rake to level the sand evenly. The sand bed creates a smooth surface for the pavers to rest on and helps distribute the load evenly.
  • Level and Compact the Sand: Use a level to ensure the sand bed is even. Compact the sand lightly to settle it without compressing it too much.

Importance of Proper Foundation

A well-prepared foundation is critical for the success of your granite paver installation. Proper excavation and compaction prevent the pavers from shifting or sinking over time. The gravel base provides necessary drainage, preventing water from pooling under the pavers, which can cause instability. 

The sand bedding ensures that the pavers are evenly supported and can be adjusted to achieve a level surface. 

Investing time and effort in preparing the base ensures the longevity and stability of your granite pavers, maintaining their beauty and functionality for years to come.

Laying Granite Pavers

Setting the Base Layer

Start by laying and compacting the base material to ensure a stable foundation. Spread a 4-6 inch layer of crushed gravel or stone evenly over the prepared site. 

Use a plate compactor to compact the gravel thoroughly, ensuring it is level and firmly in place. This step is crucial for providing drainage and preventing the pavers from shifting over time.

Laying the Pavers

  • Place the Pavers: Begin laying the granite pavers from one corner, following the planned design. Lay the pavers on the sand bedding, ensuring they are levelled.
  • Alignment and Spacing: Use spacers to maintain consistent gaps between the pavers, typically 1/8 to 1/4 inch. This allows for joint filling and expansion. Regularly check the alignment with a string line or level to ensure straight lines and even surfaces.
  • Tapping into Place: Use a rubber mallet to gently tap each paver into the sand, ensuring they are firmly set and level.

Cutting Pavers

  • Tools and Techniques: To cut granite pavers accurately, use a wet or masonry saw with a diamond blade. Mark the cut lines with a pencil or chalk before cutting.
  • Cutting Process: Align the paver with the saw blade and make the cut slowly and steadily to prevent chipping. Always wear safety goggles and gloves for protection.

Finishing Touches

Filling the Joints

Once the granite pavers are laid, the next step is to fill the joints. Proper joint filling helps stabilise the pavers and prevents weeds from growing between them. 

Here are some options for filling materials and application methods:

1. Polymeric Sand

Polymeric sand is popular because it can harden and lock the pavers in place. It also helps prevent weed growth and insect infestations.

Spread the polymeric sand over the pavers using a broom, sweeping it into the joints until they are filled. After filling the joints, use a plate compactor to vibrate the sand down into the joints. Sweep away any excess sand from the surface. Finally, mist the pavers with water to activate the polymeric sand, allowing it to harden.

2. Masonry Sand

Masonry sand is another option, providing a more traditional look. However, it may require more frequent maintenance as it doesn’t harden like polymeric sand.

Like polymeric sand, spread the masonry sand over the pavers and sweep it into the joints. Compact the sand using a plate compactor, then add more sand if needed to fill any gaps. Brush off the excess sand from the surface.

Sealing the Pavers

Sealing granite pavers offers several benefits, including protecting the stone from stains, enhancing its natural colour, and increasing lifespan. Sealing also makes cleaning easier and prevents water penetration, which can cause damage over time.

Benefits of Sealing

  • Protection: Sealing protects the granite from spills, stains, and weathering, keeping it looking pristine.
  • Colour Enhancement: Sealants can enhance the natural colour and texture of the granite, giving it a more vibrant appearance.
  • Ease of Maintenance: Sealed pavers are easier to clean and maintain, as the sealant creates a barrier against dirt and grime.

Recommended Sealants

  • Penetrating Sealants: These sealants penetrate the granite’s surface, providing deep protection without altering its appearance. They are ideal for preserving the stone’s natural look.
  • Enhancing Sealants: These sealants protect and improve the colour and texture of the granite, perfect for highlighting the stone’s natural beauty.

Application Method

  • Clean the surface thoroughly before sealing. Ensure the pavers are dry and free of dirt and debris.
  • Apply the sealant evenly using a brush, roller, or sprayer. Follow the manufacturer’s instructions for coverage and drying times.
  • Allow the sealant to dry completely before using the area. Depending on the product and weather conditions, this usually takes 24-48 hours.

Maintenance and Care

Proper maintenance and care are essential to ensure your granite pavers remain durable and retain their aesthetic appeal over time. 

Here are some tips to help you maintain your granite pavers effectively:

  • Regular Cleaning: Sweep your granite pavers regularly to remove dirt, leaves, and debris that can accumulate on the surface. This prevents scratches and keeps the pavers looking pristine.
  • Washing: Occasionally wash the pavers with a mild detergent and water. Use a soft brush to scrub away any stains or grime gently. Avoid using acidic or abrasive cleaners, which can damage the granite and degrade the sealant.
  • Resealing: To protect your pavers from stains and weathering, reapply a high-quality granite sealant every 1-2 years. This helps maintain the stone’s natural colour and texture while providing a protective barrier against moisture and spills.
  • Weed Control: Use polymeric sand to fill the joints between pavers. This hardens and prevents weed growth. If weeds do appear, remove them promptly to avoid damaging the pavers and joints.
  • Address Spills Quickly: To prevent staining, clean up spills immediately. Blot the spill with a clean cloth and wash the area with mild detergent and water.
  • Inspect Regularly: Inspect the pavers for any signs of damage, such as chips or cracks. Addressing these issues promptly can prevent further damage and maintain the integrity of the installation.

Troubleshooting Common Issues

Laying granite pavers can sometimes present challenges. Here are common problems encountered and how to solve them:

Uneven Pavers

Unleveled pavers can create an uneven surface, posing tripping hazards and affecting overall appearance.

Ensure the base is compacted correctly and level before laying the pavers. Use a rubber mallet and a level to adjust pavers as you lay them, ensuring they sit evenly on the sand bed. If a paver is still uneven, lift it, change the sand bed, and replace it.

Shifting or Sinking Pavers

Pavers may shift or sink over time due to an improperly prepared base or poor drainage.

Ensure the base layer is well-compacted and graded for proper drainage. Adding a layer of geotextile fabric between the soil and the gravel base can help stabilise the ground. If pavers have already shifted or sunk, lift them, recompact the base, and re-lay the pavers.

Weed Growth Between Pavers

Weeds growing in the joints between pavers can detract from the appearance and stability of the installation.

Use polymeric sand to fill the joints, which hardens and prevents weed growth. Regularly inspect and remove any weeds that do appear. Applying a sealant can also help inhibit weed growth.

Staining

Stains from spills, dirt, or organic materials can mar the appearance of granite pavers.

Clean spills immediately with a mild detergent and water. For stubborn stains, use a poultice made from baking soda and water. Regularly resealing the pavers can also protect against staining.

Conclusion

Formulating granite pavers involves careful planning, proper base preparation, precise laying, and regular maintenance. By following these steps, you can create a durable and attractive paving solution for your outdoor space. 

Undertake this project to enhance your home’s beauty and functionality. 

Start your granite paver project today and transform your landscape!

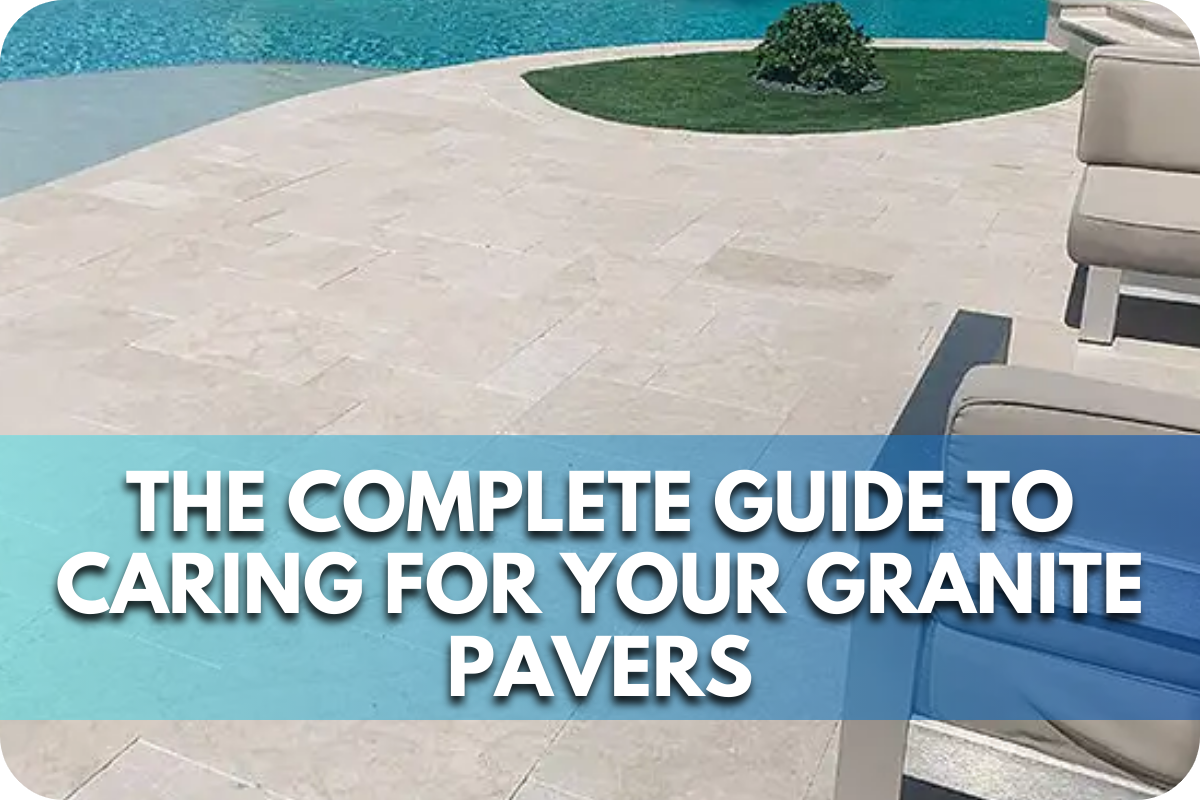
The Complete Guide to Caring for Your Granite Pavers

Granite pavers are a stunning addition to any outdoor space but can deteriorate over time without proper care.

Dirt, weathering, and neglect can dull the natural beauty of granite, leading to costly repairs or replacements that disrupt the elegance of your property.

This guide provides comprehensive tips and strategies for maintaining granite pavers.

From routine cleaning to preventative measures, learn how to keep your granite looking pristine year after year, ensuring your investment continues to enhance your home’s curb appeal and functionality.

1. Initial Installation and Treatment

Proper initial installation and treatment are crucial for ensuring the longevity and durability of your granite pavers. Prepare a stable and level base, typically compacted gravel and sand, to provide adequate support and drainage.

Ensuring the ground is even and well-compacted will prevent shifting and uneven settling over time.

When laying the granite pavers, maintain consistent spacing using spacers, and regularly check for levelness with a spirit level.

Use a rubber mallet to tap the pavers gently into place, ensuring a secure fit. After laying the pavers, fill the joints with fine or polymeric sand, which hardens upon contact with water, providing additional stability and resistance to weed growth.

To protect your investment, apply a high-quality sealer after installation. This treatment enhances the granite’s natural beauty and provides a protective barrier against stains, moisture, and the effects of weathering.

Choose a penetrating sealer for natural stone to ensure deep absorption and long-lasting protection.

Proper initial installation and treatment are essential steps that set the stage for your granite pavers’ enduring beauty and performance. These measures will help prevent common issues and ensure your outdoor space remains stunning for years.

For more information about proper installation, read this Installation Tips.

2. Routine Cleaning Practices

Routine cleaning is essential to maintain the pristine appearance of your granite pavers. Begin by sweeping the surface regularly with a stiff-bristled broom to remove loose dirt, leaves, and debris. This simple step prevents the accumulation of grime that can lead to staining and discolouration.

Use a mild detergent mixed with warm water for a more thorough clean. Avoid harsh chemicals and acidic cleaners, which can damage the stone’s surface. 

Gently scrub the pavers with a soft brush or mop, particularly in stained or heavily soiled areas. After cleaning, rinse thoroughly with clean water to remove any soap residue, which can attract dirt and cause a slippery surface.

To tackle tougher stains, create a paste using baking soda and water. Apply the paste to the stained area and let it sit for a few minutes before scrubbing with a soft brush and rinsing with water. 

For oil-based stains, use a specially formulated stone cleaner to break down and remove the residue without harming the granite.

Regular cleaning keeps your granite pavers looking their best and helps preserve their natural beauty and extend their lifespan. 

3. Deep Cleaning Techniques

Over time, your granite pavers may require deep cleaning to remove ingrained dirt and stubborn stains. To start, sweep the area thoroughly to eliminate loose debris. Prepare a solution of pH-neutral cleaner and warm water, ensuring it is suitable for natural stone.

Apply the solution to the pavers and scrub with a soft-bristled brush. Avoid using wire brushes or abrasive pads that can scratch the surface. For tough stains, let the cleaner sit for a few minutes before scrubbing to allow it to penetrate and break down the grime.

For oil stains, use a poultice made of baking soda and water. Spread the paste over the stain, cover it with plastic wrap, and leave it for 24 hours. The baking soda will absorb the oil, making it easier to remove. Afterwards, rinse the area with clean water and scrub gently.

In cases of heavy soiling, consider using a pressure washer with a wide nozzle to avoid damage. Maintain a safe distance and use a low-pressure setting. Always follow up with a thorough rinse to remove any cleaning residues.

Deep cleaning not only restores the appearance of your granite pavers but also helps maintain their durability. Regular deep cleaning ensures your outdoor space remains attractive and well-maintained.

4. Stain Removal Tips

Stains on granite pavers can be challenging, but they can be effectively removed with the right techniques. Identify the type of stain before treatment to choose the appropriate method.

A solution of hydrogen peroxide and a few drops of ammonia can be effective for organic stains such as leaves, food, or bird droppings. Apply the solution to the stain, let it sit for a few minutes, then scrub gently with a soft brush and rinse with clean water.

Oil-based stains, like those from grease or cooking oil, require a different approach. Create a poultice using baking soda and water.

Apply the paste to the stain, cover it with plastic wrap, and leave it for 24 hours. The baking soda will draw out the oil, making it easier to remove. After 24 hours, rinse thoroughly and scrub gently.

Use a commercial rust remover specifically designed for natural stone for rust stains. Follow the manufacturer’s instructions carefully to avoid damaging the granite.

Ink or paint stains can be tackled with a mild solvent like acetone. Apply a small amount to a cloth and gently dab the stain until it lifts. Always rinse the area well after treatment to remove any residual solvent.

5. Preventative Measures

Preventative measures are essential to protect your granite pavers and extend their lifespan. Start by applying a high-quality sealer designed for natural stone. Sealing your pavers creates a protective barrier against stains, moisture, and the effects of weathering.

Reapply the sealer every 1-2 years, or as the manufacturer recommends, to maintain its effectiveness.

Regular maintenance is crucial. Sweep your pavers frequently to remove dirt and debris that can cause scratches or become embedded in the stone. In autumn, promptly clear fallen leaves and organic matter to prevent staining.

Fill the joints between pavers with polymeric sand to prevent weed growth and ant infestations. This sand hardens upon contact with water, providing a durable, weed-resistant barrier.

To protect your granite pavers from heavy impacts, avoid metal shovels or sharp snow and ice removal tools. Opt for plastic or rubber-edged tools instead. For added protection, consider placing mats or rugs in high-traffic areas to minimise wear and tear.

Lastly, drainage issues should be monitored and addressed to prevent water pooling, which can lead to erosion and damage over time. Ensure your installation has proper slope and drainage to direct water away from the pavers.

6. Repairing Damaged Pavers

Repairing damaged granite pavers promptly is essential to maintaining your outdoor space’s overall appearance and safety. Begin by inspecting the affected area to assess the extent of the damage. Common issues include cracks, chips, or loose pavers.

For minor cracks and chips, use a stone adhesive or epoxy filler specifically designed for granite. Clean the damaged area thoroughly to remove any dirt or debris. Apply the adhesive or filler according to the manufacturer’s instructions, smoothing it with a putty knife. Allow it to cure completely before using the area again.

In cases of severely damaged or loose pavers, replacement may be necessary. Carefully remove the damaged paver using a chisel and mallet, not disturbing the surrounding pavers. Prepare the base by ensuring it is level and compacted. Place the new paver in position, check for levelness, and adjust as needed. Fill the joints with sand or polymeric sand to secure the paver.

For larger repair projects, consider consulting a professional to ensure the work is done correctly and maintain the integrity of your paver installation.

7. Sealing Granite Pavers

Sealing your granite pavers is crucial in enhancing their durability and preserving their natural beauty. Begin by selecting a high-quality penetrating sealer specifically designed for natural stone. This type of sealer penetrates the stone’s pores, providing deep protection against stains, moisture, and the effects of weathering.

Before sealing, clean the pavers thoroughly to remove any dirt, debris, or stains. Allow the surface to dry completely to ensure optimal sealer absorption.

Use a brush, roller, or sprayer to apply the sealer evenly across the paver surface. Follow the manufacturer’s instructions for application techniques and drying times.

Apply a second coat if recommended, allowing adequate drying time between coats. This ensures maximum protection and enhances the pavers’ resistance to water and oil-based stains.

Regular reapplication of the sealer is essential to maintain its effectiveness. Typically, resealing should be done every 1-2 years or as the sealer manufacturer specifies. Regular sealing extends the lifespan of your granite pavers and keeps them looking vibrant and new.

8. Seasonal Care and Maintenance

Seasonal care and maintenance are vital for keeping your granite pavers in top condition throughout the year. Each season brings unique challenges, requiring specific care practices to maintain the integrity and appearance of your pavers.

In spring, thoroughly clean your pavers to remove winter debris, dirt, and moss. Use a mild detergent and a soft brush, followed by a thorough rinse. Inspect for any damage caused by winter weather and repair promptly.

During summer, the primary focus is protecting your pavers from heat and UV exposure. Apply a high-quality penetrating sealer to guard against fading and enhance stain resistance. Regularly sweep the pavers to remove dirt and organic matter that can lead to staining.

Autumn requires frequent removal of fallen leaves and debris to prevent organic stains. Clean the pavers with a mild detergent solution and inspect for any damage from summer use. If needed, consider applying another coat of sealer.

Winter care involves protecting your pavers from freeze-thaw cycles and de-icing chemicals. Use plastic shovels or snow blowers to remove snow and ice, avoiding metal tools that can scratch the surface. Opt for non-corrosive, stone-safe de-icing products to prevent damage.

Conclusion

Caring for granite pavers is essential to preserving their beauty and functionality. Regular maintenance, including proper cleaning, sealing, and timely repairs, ensures their longevity. 

Use products designed for granite and consider professional assessments to keep pavers in optimal condition.

These practices can help you maintain your granite pavers’ enduring appeal and durability for years.

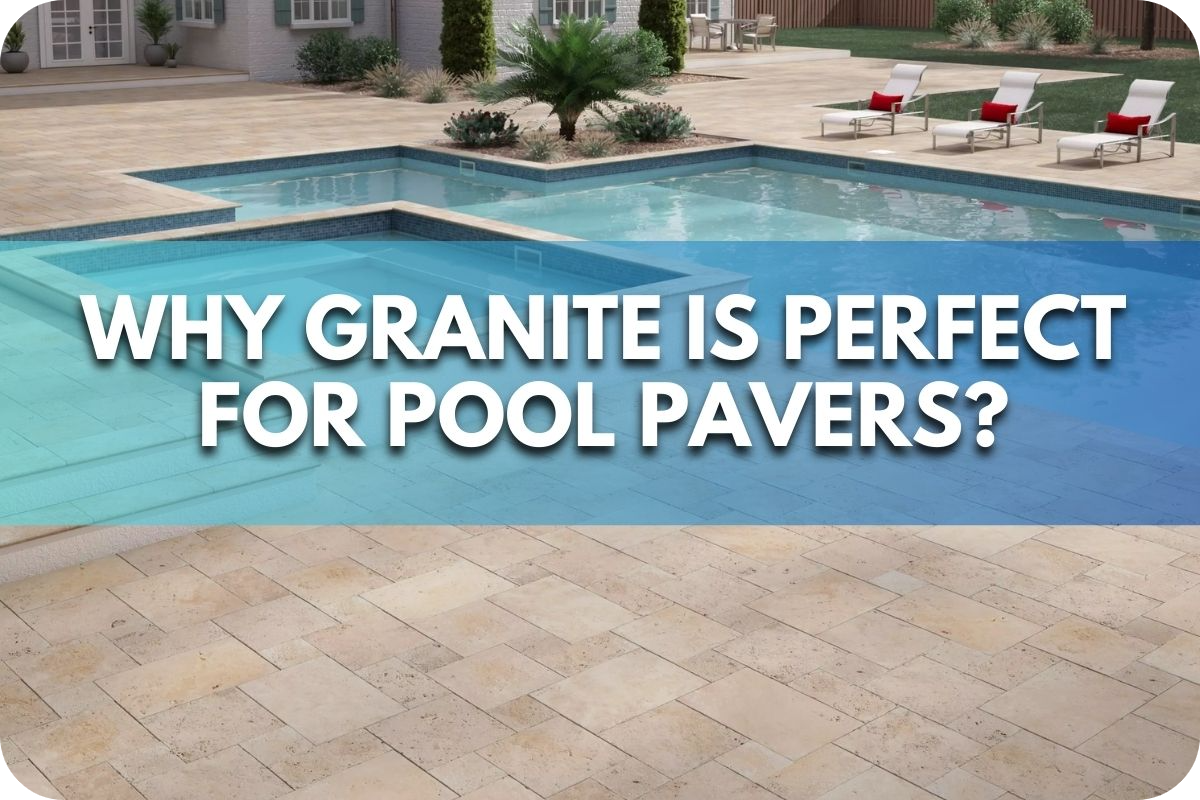
Why Granite Is Perfect for Pool Pavers?

Choosing the right material for pool pavers can be challenging, given the need for durability, safety, and aesthetics.

Many materials fail to meet all these criteria, leading to slippery surfaces, quick wear and tear, and a lacklustre appearance that detracts from the pool area’s appeal.

Granite is the perfect solution for pool pavers, offering exceptional durability, slip resistance, and timeless beauty. This article explores why granite is the ideal choice for ensuring a safe and stunning poolside environment.

What is Granite?

Granite is a natural igneous rock formed from the slow cooling of molten magma deep within the Earth’s crust. 

Renowned for its strength and durability, it comprises quartz, feldspar, and mica, which give it a unique speckled appearance and a wide range of colours, from soft greys to vibrant blacks. 

This natural composition makes granite incredibly tough and resistant to wear, making it an ideal choice for outdoor applications like pool pavers.

For poolside areas, granite stands out due to its slip-resistant texture, ensuring safety in wet conditions. Its non-porous surface resists water absorption, reducing the risk of damage and ensuring long-term durability in high-moisture environments. 

Granite’s natural resistance to heat means it stays cool underfoot, even in direct sunlight, providing comfort around the pool. Additionally, its timeless beauty and variety of colours and finishes allow it to blend seamlessly with any pool design, adding elegance and functionality to outdoor spaces.

Key Benefits of Using Granite for Pool Pavers

Granite is a premium choice for pool pavers, offering a combination of durability, functionality, and aesthetic appeal. Here are the key benefits:

1. Durability

Granite is one of the toughest natural stones, built to last even in high-traffic areas like pool decks. It resists cracking, chipping, and wear, ensuring a long lifespan. 

Its strength makes it ideal for handling the pressures of outdoor environments, providing a reliable surface that won’t degrade easily. This durability translates to fewer repairs and long-term cost savings for homeowners.

2. Safety

Safety is a paramount concern around pool areas, and granite excels. Its naturally rough surface provides excellent slip resistance, reducing the risk of falls and injuries in wet conditions. 

This non-slip property is particularly beneficial for poolside applications where water is constantly present. Granite’s safety benefits make it an excellent choice for families with children or public pool areas where safety is a top priority.

3. Low Maintenance

Granite pool pavers are incredibly low-maintenance, a significant advantage for busy homeowners. The stone’s dense composition makes it resistant to staining and fading, even with constant exposure to water and sunlight

Cleaning granite is straightforward; regular sweeping and occasional rinsing with water is usually sufficient to keep the pavers looking pristine. 

A mild detergent and a soft brush can be used for tougher stains without damaging the surface. The low upkeep requirements make granite a practical and cost-effective choice for pool areas.

4. Aesthetic Appeal

Granite offers a wide range of colours and finishes, allowing for customisation to suit any design preference. From subtle greys and whites to striking blacks and blues, granite can complement various landscaping themes and architectural styles. 

The stone’s natural beauty enhances the visual appeal of pool areas, creating a luxurious and inviting atmosphere. 

Polished, honed, or flamed finishes add different textures and appearances, further enhancing granite’s aesthetic versatility.

5. Design Flexibility with Granite

Granite offers remarkable design flexibility, making it ideal for customising pool pavers to suit any aesthetic preference. With various patterns and installation styles, granite pavers can be arranged in numerous ways to create visually appealing designs. 

Traditional patterns such as herringbone, basket weave, or running bond provide classic looks, while random or irregular patterns can add a more organic and natural feel to your pool area.

6. Aesthetic Versatility

Available in a stunning variety of colours, patterns, and finishes, granite allows for customisation to match any design preference. Whether you’re aiming for a modern aesthetic or a natural, rustic look, granite seamlessly blends into your outdoor decor. Its timeless elegance adds sophistication and enhances the overall value of your property.

7. Eco-Friendly Choice

Granite is an environmentally sustainable material, sourced directly from nature. Its longevity reduces the need for frequent replacements, and it can be recycled or repurposed when no longer needed. Choosing granite for pool pavers combines luxury with environmental responsibility, making it a smart choice for eco-conscious homeowners.

Installation Considerations

Installing granite pool pavers requires thoughtful planning and precise execution to maximise their durability, safety, and aesthetic appeal. Here are the key considerations:

1. Base Preparation

A strong foundation is critical for ensuring the longevity of granite pavers. The installation site must be levelled and compacted to prevent uneven settling over time. A base layer of crushed stone or gravel is often added to enhance drainage and stability, providing a solid foundation for the pavers.

2. Proper Spacing

Granite pavers should be spaced evenly to accommodate joint material like sand or polymeric sand. Proper spacing not only enhances the visual appeal but also prevents pavers from shifting. Joints should be sealed or filled with material that resists weeds and erosion while allowing for minor natural movement.

3. Drainage Planning

Good drainage is essential to prevent water from pooling around the pool area. Slightly sloping the pavers away from the pool ensures water flows into designated drainage areas. Poor drainage can lead to water damage and compromise the structural integrity of the pavers over time.

4. Choosing the Right Finish

Select a finish that enhances safety and matches your aesthetic goals. Flamed or honed granite provides a slip-resistant surface, ideal for wet poolside conditions. Polished granite, while visually stunning, may not offer the same level of grip and is better suited for decorative areas.

5. Sealing the Pavers

Although granite is naturally durable, sealing the pavers adds an extra layer of protection against stains, chemicals, and weathering. Use a high-quality penetrating sealant to maintain the stone’s natural beauty while enhancing its resistance to moisture and UV rays. Resealing every 1–3 years is recommended for optimal performance.

6. Edge Restraints

Installing proper edge restraints prevents the pavers from shifting or spreading over time. Strong edge supports keep the pavers locked in place, maintaining the structure’s integrity, especially in high-traffic areas.

7. Professional Installation

Granite is a heavy and dense material that requires specialised tools and expertise for precise cutting and placement. Hiring a professional installer ensures the project is completed efficiently and to the highest standards, avoiding costly mistakes.

Maintenance Tips for Granite Pool Pavers

Maintaining granite pool pavers is straightforward, ensuring they retain their beauty and functionality for years. Here are essential tips for routine maintenance:

  • Regular Cleaning: Sweep the pavers regularly to remove dirt, leaves, and debris that can accumulate on the surface. This prevents scratches and keeps the pavers looking pristine.
  • Washing: Use a garden hose or pressure washer set to a low setting to rinse off dirt and grime. Mix a mild detergent with water and scrub the pavers with a soft brush for deeper cleaning. Rinse thoroughly to remove any soap residue.
  • Stain Removal: Address spills immediately to prevent staining. A mixture of baking soda and water can be effective for organic stains like food or drink. Apply the paste to the stain, let it sit for a few minutes, then scrub and rinse.
  • Sealing: Although granite is highly durable, applying a sealant once every 1-2 years can provide extra protection against stains and moisture absorption. This is particularly important in pool areas where the pavers are constantly exposed to water.

Conclusion

Granite pool pavers offer unmatched durability, slip resistance, and timeless beauty, making them a standout choice for any poolside. Elevate your outdoor oasis with this versatile natural stone. 

Ready to transform your pool area? Contact Splendour in Stone today for premium granite pavers and expert advice to bring your vision to life!

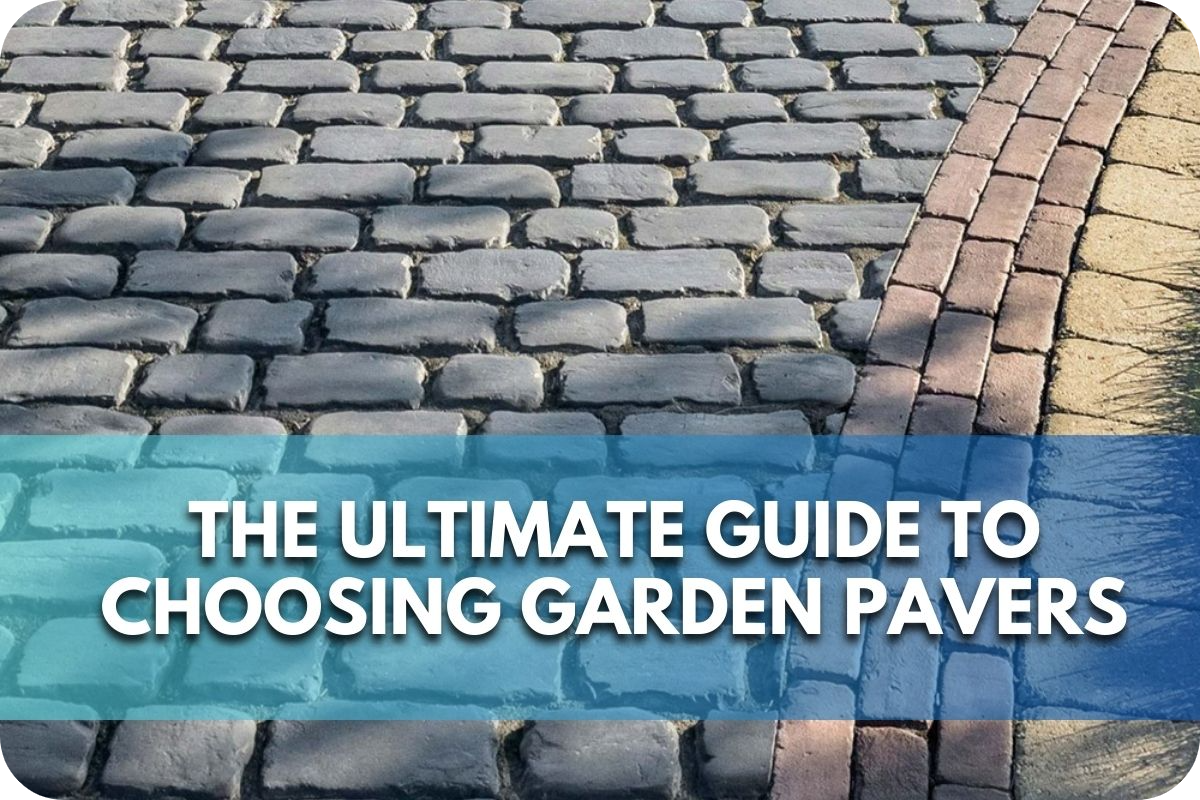
The Ultimate Guide to Choosing Garden Pavers: Everything You Need to Know

Creating a beautiful and functional outdoor space can be daunting, especially when choosing the right garden pavers.

With countless options available in the market, it’s easy to feel overwhelmed and unsure where to start. Picking the wrong pavers can lead to costly mistakes and disappointing results.

This guide will cover everything you need to know about choosing garden pavers, from materials and sizes to costs and installation techniques, ensuring your outdoor oasis is stunning and long-lasting.

Types of Garden Pavers

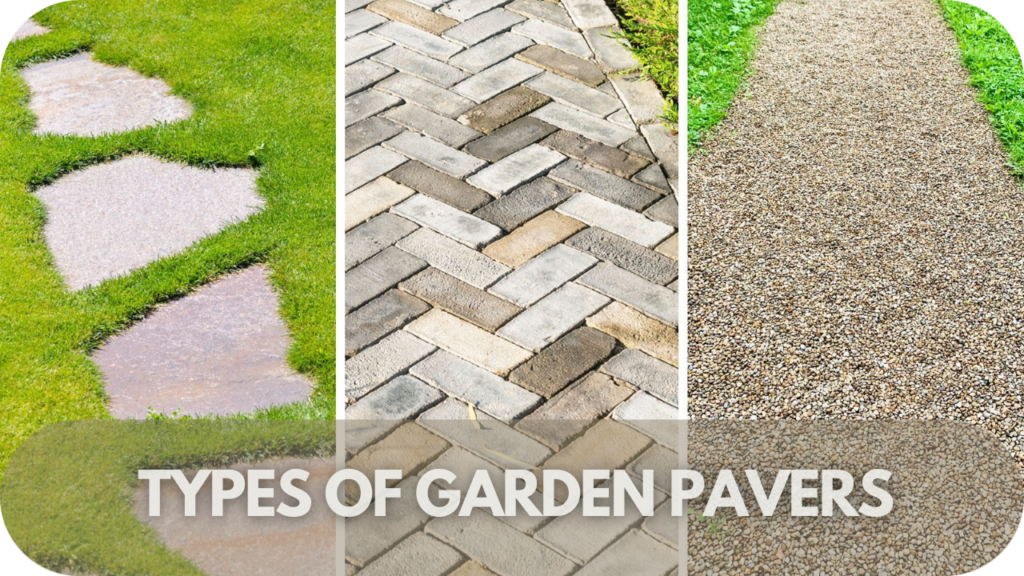
Different types of garden pavers including concrete, clay, natural stone, rubber, and porcelain for various outdoor designs

Choosing the right garden pavers can transform your outdoor space. Learn the different types of pavers to find the perfect fit for your garden’s style and function.

1. Concrete Pavers

When choosing pavers for your garden, concrete offers an ideal balance of durability, versatility, and affordability. Available in a wide range of shapes, sizes, and colours, it can complement various garden designs.

Concrete pavers are known for their resilience, handling both high traffic and extreme weather with ease. They require minimal maintenance, with occasional cleaning and sealing to retain their aesthetic appeal.

2. Clay Pavers

With their natural, earthy tones, clay pavers bring timeless beauty to any garden, making them a versatile choice for both traditional and modern landscapes.

Durable and resistant to fading, cracking, and weathering, clay pavers maintain their appearance and integrity even in harsh climates. Their low maintenance requirements make them a practical option, needing only occasional cleaning.

As a sustainable choice, clay pavers are made from natural materials, adding an eco-friendly touch to your outdoor space.

3. Natural Stone Pavers

These pavers bring unparalleled elegance and unique character to any garden. Each stone is distinct, offering a one-of-a-kind appearance with beautiful textures and natural colours.

Stones like granite, slate, and sandstone are celebrated for their durability, making them perfect for high-traffic areas and extreme weather conditions. 

Low maintenance and highly resistant to wear, these pavers retain their charm for years with minimal upkeep.

4. Rubber Pavers

They offer a sustainable and versatile option for garden paving. Made from recycled tyres, they provide an eco-friendly solution while helping to reduce waste.

These pavers are softer than traditional materials, making them ideal for areas where safety is a priority, such as playgrounds or paths. 

Highly durable and weather-resistant, rubber pavers are not prone to cracking or fading, ensuring long-lasting performance. Their non-slip surface also makes them a safer option in wet conditions. 

5. Porcelain Pavers

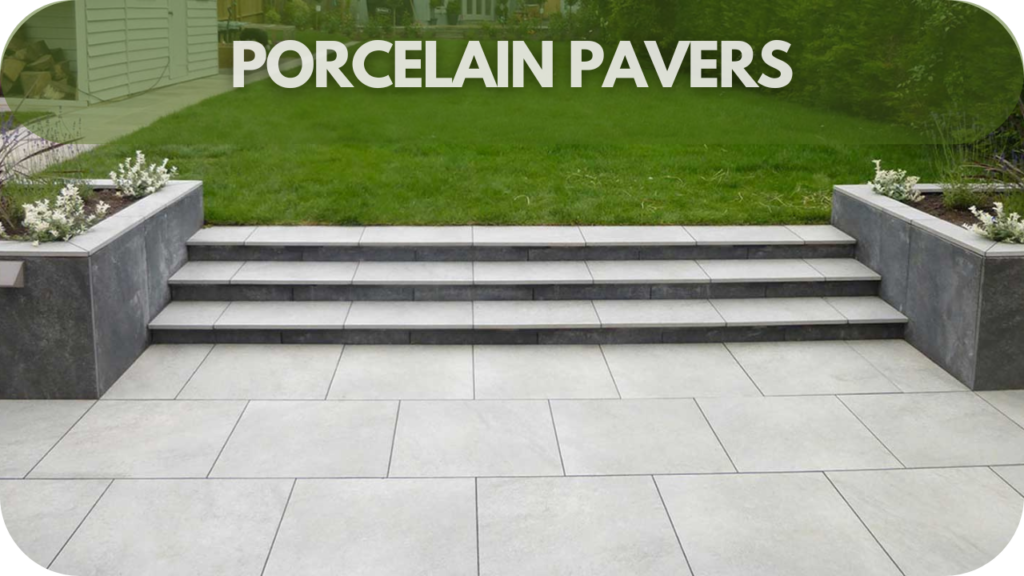
Durable and stylish porcelain pavers for modern garden and patio designs, offering long-lasting performance and low maintenance.

Are a sleek and modern choice for garden paving, known for their sophisticated appearance and durability. Available in a wide variety of finishes and colours, they can complement any outdoor style, from contemporary to minimalist.

Porcelain is highly resistant to staining, fading, and scratching, ensuring long-term performance with minimal upkeep. These pavers are low-maintenance, requiring only occasional cleaning to retain their pristine look.

With exceptional strength and slip resistance, porcelain pavers are ideal for high-traffic areas and outdoor environments exposed to varying weather conditions.

6. Gravel Pavers

They provide an affordable and practical solution for garden pathways and driveways. Their permeable nature allows water to drain naturally, reducing runoff and supporting sustainable drainage systems.

Gravel pavers are easy to install and require minimal maintenance, often needing only occasional replenishment to maintain their integrity. They offer a rustic, natural aesthetic that complements various garden styles. Durable and able to withstand heavy traffic, gravel pavers maintain their structure over time.

Factors to Consider When Choosing Garden Pavers

When selecting garden pavers, it’s essential to consider several key factors to ensure that the final installation meets both aesthetic and functional requirements.

1. Durability and Maintenance

When selecting garden pavers, choose materials like granite or porcelain that can withstand harsh weather and heavy foot traffic. Durable pavers with minimal maintenance needs will ensure long-lasting performance. 

Regular cleaning and occasional sealing can further extend their lifespan, making them ideal for both residential and commercial outdoor spaces.

2. Aesthetic Compatibility

When exploring garden pavers ideas, it’s important to ensure they seamlessly blend with your home and garden’s style and colour scheme. Consider matching the texture, colour, and shape of the pavers to the surrounding landscape and architecture.

A cohesive design ensures a visually appealing outdoor area, elevating the overall aesthetic of your garden or driveway.

3. Safety

Opt for pavers with slip-resistant surfaces to prevent accidents, especially in wet or high-traffic areas. Using pavers to make your garden pet-friendly ensures a safe, non-slip environment for both pets and people.

Textured finishes or flamed stones provide additional grip, making them perfect for paths, driveways, and patios. Safety features like these are crucial for maintaining a secure and functional outdoor environment.

4. Budget

Set a realistic budget that includes both the initial cost and long-term maintenance expenses. 

While natural stone and porcelain pavers may have higher upfront costs, their durability and minimal upkeep can save money in the long run. Consider all factors, including installation costs, when finalising your choice.

5. Environmental Impact

For eco-friendly gardens, choose sustainable pavers made from recycled materials or those sourced responsibly. Recycled pavers can help reduce your carbon footprint while providing unique design features. 

Opting for green paving solutions supports both environmental conservation and the creation of a more sustainable outdoor space.

6. Installation Requirements

Before purchasing, consider whether the pavers require professional installation or can be handled as a DIY project. 

Paving materials like concrete and gravel are often easier to install, whereas natural stone or porcelain pavers may need professional expertise for proper placement. Installation complexity affects both cost and effort.

7. Climate Considerations

Take into account your region’s climate when selecting pavers. Weather-resistant pavers such as granite or porcelain are suitable for harsh climates, as they endure extreme heat, cold, or rain. 

Some materials, like porous stones, may not be ideal for freezing conditions due to water absorption, which could lead to cracking.

8. Colour Fading

Consider how the pavers will hold up over time, especially in areas exposed to strong sunlight.

UV-resistant pavers, like porcelain and natural stone, retain their colour longer than other materials, ensuring your garden looks vibrant for years. Colour stability is an important factor for maintaining your garden’s aesthetic appeal.

9. Load-bearing Capacity

For areas exposed to heavy traffic or vehicles, ensure your pavers can handle the load. High-strength pavers made from materials like concrete or granite are ideal for driveways and parking spaces. 

Be sure to choose pavers with the necessary load-bearing capacity to prevent cracking or shifting under pressure.

Design Considerations

Design considerations are crucial when selecting garden pavers, as they significantly impact outdoor spaces’ aesthetic appeal and functionality. Here are essential aspects to evaluate:

  • Pattern and Scale: The layout and size of pavers should complement the scale of the garden and its surrounding features. Larger pavers can make a small space appear bigger, while smaller, more intricate patterns are ideal for large areas to add detail and interest.
  • Colour Coordination: Choose colours that harmonise with the environment. Neutral tones blend seamlessly with most landscapes, while bold or contrasting colours can highlight specific areas or features. Consider the colour of your home’s exterior and existing landscaping elements to create a cohesive look.
  • Integration with Landscape Features: Pavers should harmonise with the garden’s natural and built elements. Softer, more natural tones and textures work well for paths winding through greenery. For modern, structured gardens, geometric shapes and more refined textures might be preferable.
  • Transition Spaces: Consider how paver designs can create smooth transitions between different garden areas. Consistent paver styles and colours can unify spaces while varying patterns and textures define separate areas or features.

Installation Tips

Installing garden pavers can transform your outdoor space but requires careful planning and execution. Select the right paver type for your garden’s style and function. Measure the area accurately and purchase 10% extra pavers for cuts and potential breakage.

  • Prepare the Ground: Excavate the area to a depth of 150-200mm, ensuring it’s level. Remove any roots, rocks, or debris, and compact the soil using a plate compactor to prevent settling.
  • Create a Stable Base: Lay a geotextile fabric to prevent weed growth. Add a 100-150mm layer of crushed stone or gravel, compacting it in 50mm increments to achieve a solid foundation.
  • Add a Sand Layer: Spread a 30-50mm layer of coarse sand over the gravel. Use a screed board to ensure an even surface, maintaining a slight slope for water drainage.
  • Lay the Pavers: Begin at a corner, placing pavers in your desired pattern. Use spacers to maintain consistent gaps. Periodically check for levelness and adjust as necessary.
  • Secure the Pavers: Fill the joints with fine or polymeric sand, sweeping it into the gaps. Compact the pavers again to set them firmly.
  • Final Touches: Water the area lightly to settle the sand. Edge the pavers with concrete or plastic edging to prevent shifting. Avoid common paver installation mistakes to ensure a long-lasting, stable finish.

Maintenance and Upkeep

Proper maintenance and upkeep are essential to ensure your garden pavers remain in top condition for years. 

Regular care not only enhances the appearance of your outdoor space but also prolongs the lifespan of your paving.

Regular cleaning is key; sweeping frequently removes dirt and debris that can cause staining or encourage moss and weed growth. For a deeper clean, use a garden hose or pressure washer, taking care not to dislodge the joint sand.

Weed control is important for keeping your pavers neat and intact. Apply a weed killer annually and replenish joint sand to fill gaps, reducing the risk of weed penetration.

Stain removal should be handled promptly. For organic stains like food or leaves, a mild detergent solution works well, while oil stains require a paver-specific degreaser.

Sealing is highly recommended to protect pavers from stains, UV damage, and water penetration. Apply a high-quality sealant every 2-3 years for optimal results.

Replacing damaged pavers ensures a safe, functional surface. Inspect regularly and replace cracked or broken pavers immediately.

Conclusion

Choosing the right garden pavers is key to creating a functional, aesthetically pleasing outdoor space. Consider durability, style, safety, and environmental impact to make an informed decision. 

Ready to transform your garden? Trust Splendour In Stone as your reliable service provider for premium pavers. Contact us today for expert advice and top-quality products to bring your vision to life.

In SQM?

Please fill your details to download.


      Request Callback


        Enquiry Form


        Please fill your details to download.