Register your Information for Free Stone Samples Sent Express to You! |
Search
Search
Close this search box.
Search
Close this search box.

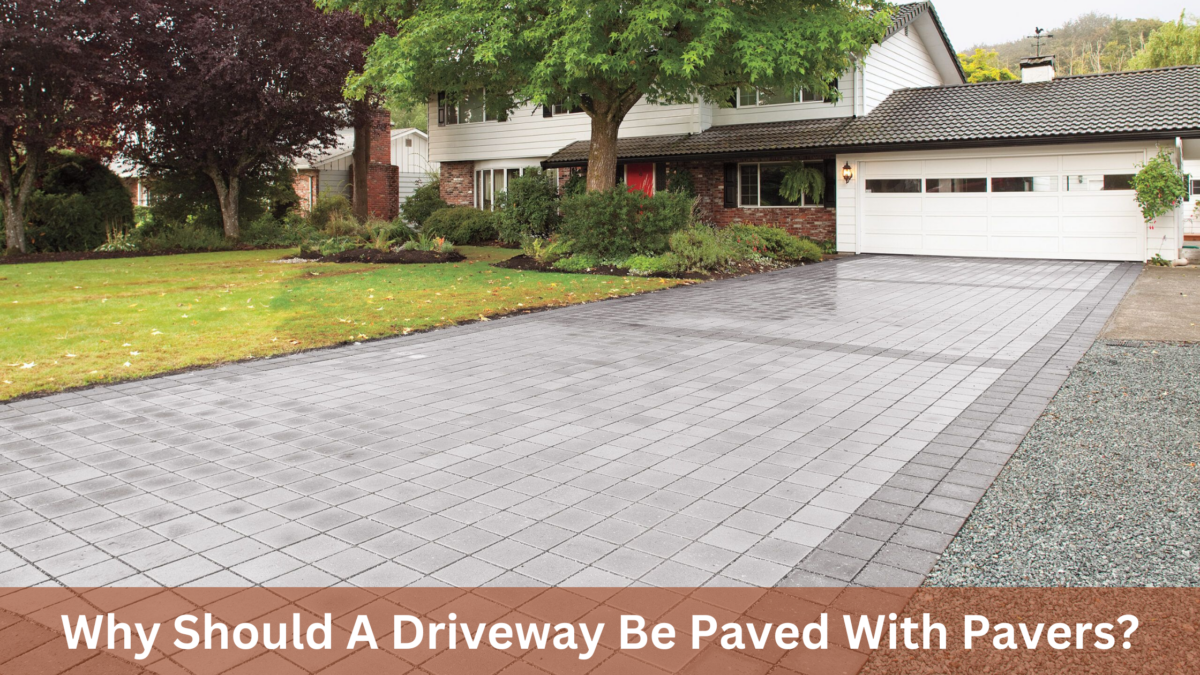
Why Should A Driveway Be Paved With Pavers?

Driveways face constant wear and tear from vehicles and weather, often resulting in cracks and potholes.

These issues diminish your home’s aesthetics and lead to costly repairs and safety hazards.

Paving your driveway with pavers offers a durable, visually appealing, cost-effective solution to these common problems.

Why should a driveway be paved with pavers?

Driveways should be paved with pavers for several reasons. Pavers offer unmatched durability, aesthetic appeal, and low maintenance compared to traditional materials like concrete or asphalt. Their interlocking design ensures longevity, while a wide range of styles allows for customisation to suit any home.

Top benefits of paving driveway

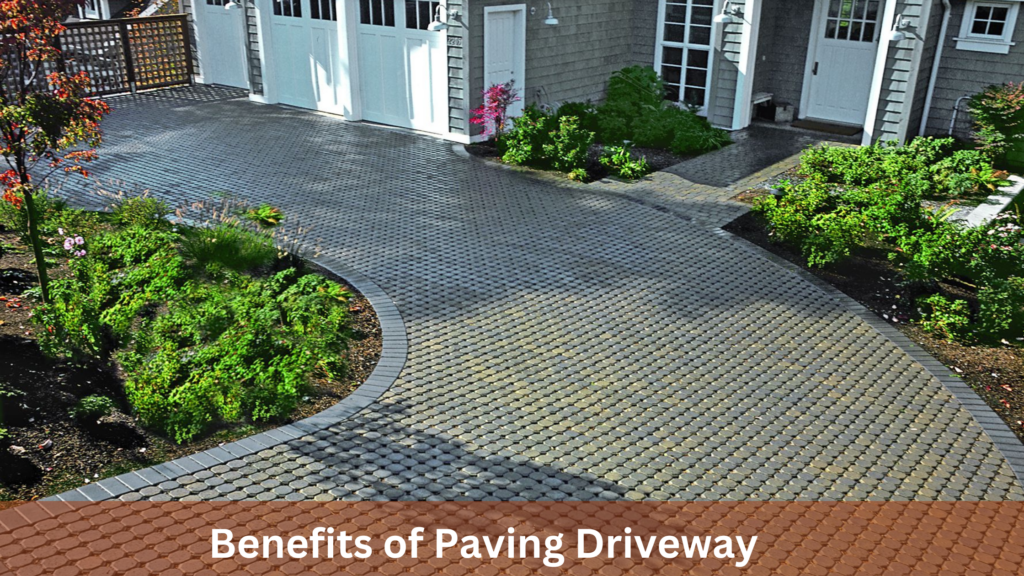
Imagine transforming your home’s exterior with a driveway that enhances curb appeal and stands the test of time. Paving driveways offer a blend of durability, visual appeal, and cost-effectiveness that surpasses traditional options. Ready to discover why homeowners are making the switch? 

Dive into the top benefits of a paving driveway and see how this investment can elevate your property’s value and aesthetic charm.

1. Durability and longevity

Regarding durability and longevity, pavers stand head and shoulders above other driveway materials. 

Made from robust materials like concrete, brick, or natural stone, pavers are engineered to withstand the harshest weather conditions, including heavy rain, snow, and UV exposure.

Unlike concrete or asphalt, which can crack and deteriorate over time, pavers resist cracking and fading, ensuring that your driveway maintains its pristine appearance for years.

One key factor contributing to pavers’ durability is their interlocking design. This design allows them to distribute weight evenly across the surface, reducing the risk of cracking under pressure. Individual pavers can be easily replaced if damaged, making repairs quick and cost-effective.

Studies have shown that adequately installed paver driveways can last over 30 years, significantly longer than traditional concrete or asphalt driveways. This longevity saves homeowners money in the long run and minimises the need for frequent maintenance and repairs.

2. Visual appeal

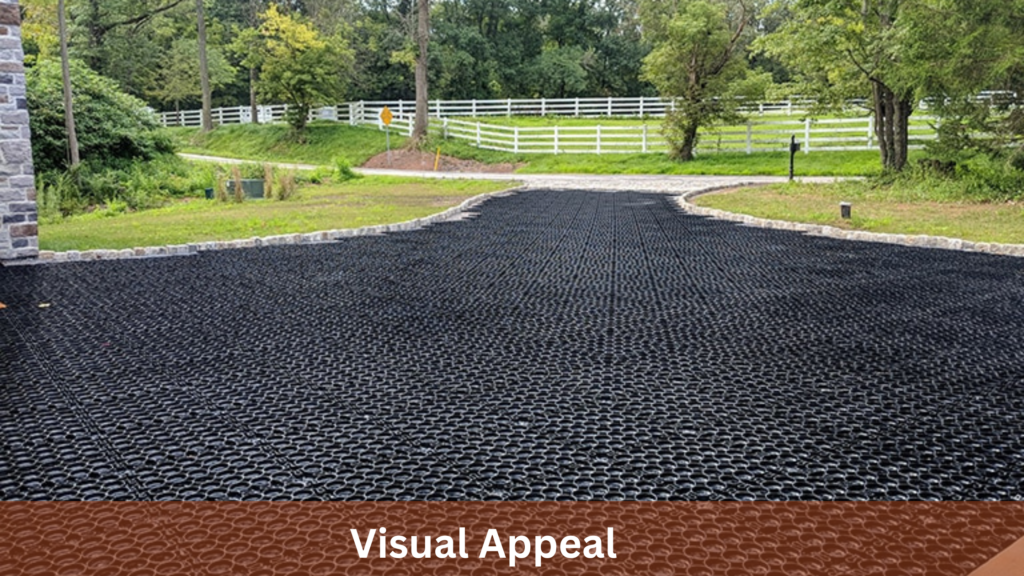
Paver driveways are renowned for their unparalleled visual appeal, offering homeowners endless possibilities for creating stunning outdoor spaces. Available in various colours, shapes, and patterns, pavers can be customised to suit any architectural style or personal preference.

Whether you prefer the classic elegance of brick pavers, the rustic charm of natural stone, or the sleek modernity of concrete pavers, there’s a style to match every taste and aesthetic.

Furthermore, pavers can be laid in intricate patterns such as herringbone, basket weave, or circular designs, adding visual interest and dimension to your driveway.

Pavers’ versatility extends beyond traditional driveway applications. They can also create borders, accents, or even entire outdoor living spaces, seamlessly blending the driveway with the surrounding landscape.

This cohesive integration enhances the overall curb appeal of your property and creates a lasting impression on visitors.

In addition to their aesthetic appeal, paver driveways offer practical benefits. The textured surface of pavers provides excellent traction, reducing the risk of slips and falls, especially during inclement weather.

Furthermore, their permeable design allows for natural drainage, preventing water from pooling and creating unsightly puddles on your driveway.

3. Versatility

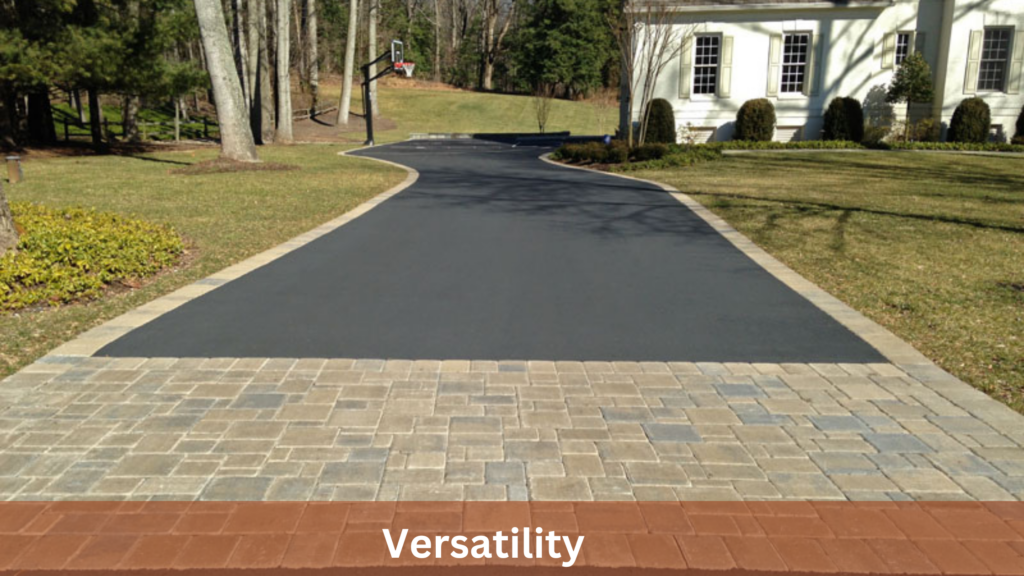
One of the standout features of pavers is their versatility, which allows homeowners to unleash their creativity and design a driveway that perfectly reflects their unique style and preferences.

Whether you have a traditional, contemporary, or eclectic home, pavers offer endless possibilities for customization and personalization. 

Pavers can be laid in various patterns and configurations, allowing you to create a one-of-a-kind driveway that complements your home’s architecture and landscaping. From simple running bond patterns to intricate herringbone designs, the design options are limited only by your imagination. 

Unlike concrete or asphalt driveways, which are complex and costly to modify once installed, pavers can be easily removed and replaced to accommodate changes in design preferences or landscaping features. 

This flexibility allows you to adapt your driveway to suit evolving needs and tastes. Whether your driveway is flat, sloped, or irregularly shaped, pavers can be installed to accommodate the terrain and create a smooth, level surface. 

Their modular design allows for seamless integration with the natural contours of your property, ensuring a visually pleasing and functional driveway.

4. Low maintenance

One of the most appealing aspects of paver driveways is their low maintenance requirements. Pavers are remarkably easy to maintain, unlike other driveway materials such as concrete or asphalt, which may require regular sealing, patching, or resurfacing. 

The interlocking design of pavers creates a durable and stable surface that is resistant to cracking and shifting. Once installed correctly, paver driveways typically require minimal upkeep. 

Routine maintenance tasks may include periodic sweeping or hosing down to remove dirt, leaves, and debris, helping prevent stains and keep the surface fresh.

While pavers resist weeds, occasional weed growth between the joints may occur, but this can be quickly addressed by applying a weed killer or manually pulling out the weeds. 

The joint sand between the pavers may become dislodged or eroded over time, so replacing it every few years will help maintain the driveway’s stability and integrity. If spills or stains occur, prompt cleaning with a mild detergent and water can prevent permanent discolouration.

Compared to concrete or asphalt driveways, which may require frequent repairs and resurfacing, paver driveways require minimal maintenance, saving homeowners time, effort, and money in the long run. 

Furthermore, because pavers are individual units, any damaged or stained pavers can be easily replaced without affecting the overall integrity of the driveway, this means minor repairs can be addressed quickly and affordably, prolonging the driveway’s lifespan and maintaining its pristine appearance.

5. Eco-friendly option

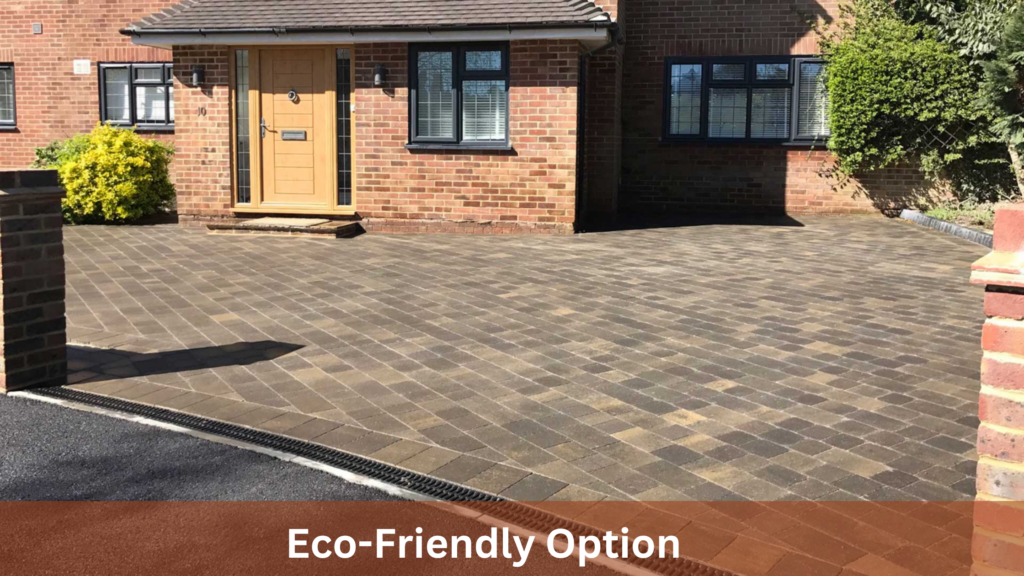
In today’s environmentally conscious world, more and more homeowners are seeking sustainable alternatives for their outdoor spaces, and paver driveways offer a compelling eco-friendly option.

One of the primary environmental benefits of paver driveways lies in their permeable design. Unlike traditional concrete or asphalt driveways, which create impermeable surfaces that contribute to stormwater runoff and flooding, pavers allow rainwater to infiltrate the ground naturally, replenishing groundwater supplies and reducing the strain on municipal stormwater systems.

Additionally, paver driveways’ permeable nature helps filter pollutants and contaminants from rainwater as they percolate through the soil, improving water quality and reducing the risk of pollution in nearby water bodies.

Furthermore, because pavers are typically made from natural materials such as concrete, brick, or stone, they have a lower environmental impact than synthetic materials. Many paver manufacturers also offer products made from recycled materials, further reducing the ecological footprint of the driveway.

Another eco-friendly aspect of paver driveways is their longevity. As mentioned, adequately installed paver driveways can last 30 years or more with minimal maintenance.

This longevity means fewer resources are required for repairs and replacements over the lifetime of the driveway, reducing waste and conserving materials.

6. Cost-effectiveness

While the initial cost of installing a paver driveway may be higher than that of traditional concrete or asphalt driveways, the long-term cost-effectiveness of pavers must be considered.

One of the primary factors contributing to the cost-effectiveness of paver driveways is their durability and longevity. As mentioned, paver driveways can last over 30 years or more with minimal maintenance.

This longevity means that homeowners will spend less on repairs, resurfacing, and replacements over the lifetime of the driveway, ultimately saving money in the long run.

Additionally, because pavers are modular units, any damaged or stained pavers can be easily replaced without redoing the entire driveway; this means that minor repairs can be addressed quickly and affordably, further reducing long-term maintenance costs.

Furthermore, pavers offer excellent value for money in terms of curb appeal and resale value. A well-designed and properly maintained paver driveway can significantly enhance a property’s aesthetic, increasing its marketability and resale value.

Studies have shown that homes with paver driveways sell for higher prices and spend less time on the market than homes with traditional concrete or asphalt driveways.

Moreover, paver driveways offer flexibility in design and customisation, allowing homeowners to create unique and personalised outdoor spaces that reflect their style and preferences.

This versatility adds to pavers’ value proposition, making them a worthwhile investment for homeowners who want to enhance the beauty and functionality of their properties.

7. Increased property value

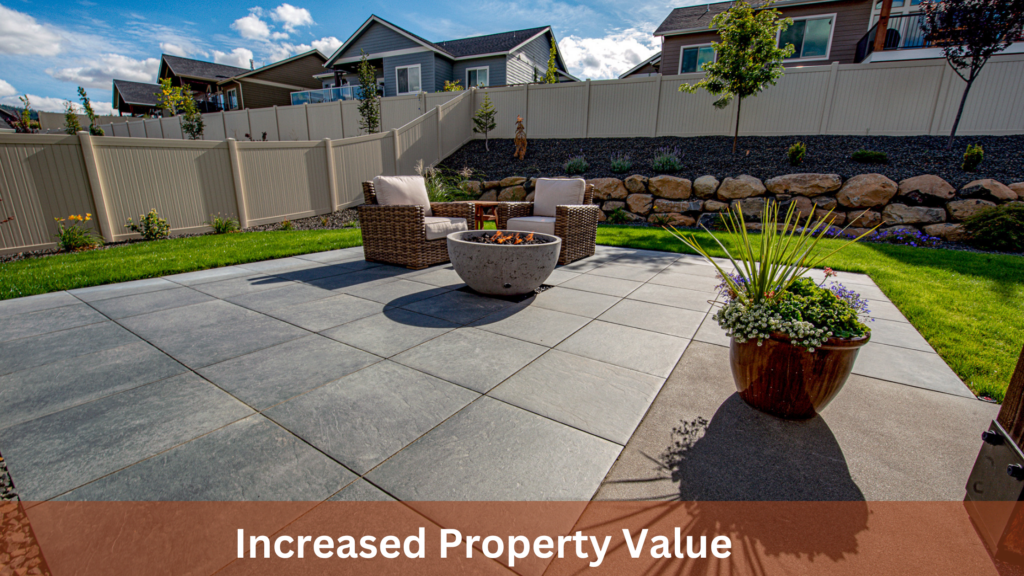
Investing in a paver driveway enhances your property’s aesthetic appeal and functionality and adds tangible value to your home. A well-maintained paver driveway significantly enhances curb appeal, creating a welcoming entrance with timeless elegance and sophistication.

Paver driveways integrate with landscaping features like gardens, pathways, and outdoor living spaces, creating a cohesive and visually appealing outdoor environment. This coherent integration enhances the property’s overall aesthetic and leaves a lasting impression on potential buyers.

The durability and longevity of paver driveways are attractive selling points for homebuyers. Knowing they won’t have to worry about costly repairs or replacements shortly can make your property more appealing and valuable. 

Paver driveways offer endless customisation options, allowing homeowners to create unique and personalised outdoor spaces that reflect their style and preferences. Whether choosing the perfect colour, pattern, or texture, the ability to customise the driveway adds value to the property and makes it more desirable to potential buyers.

Additionally, paver driveways’ low maintenance requirements are another selling point for homebuyers. Knowing they won’t have to spend much time and money on upkeep can make your property more attractive and valuable.

Conclusion

Paver driveways offer an unbeatable combination of durability, versatility, and aesthetic appeal. They can withstand the test of time, enhance curb appeal, and minimise environmental impact, so investing in one will pay dividends for years. 

Experience the timeless elegance and practical benefits of paver driveways with Splendour In Stone Melbourne today!

10 Common Paver Installation Mistakes

Installing pavers might seem straightforward, but many fall into common traps that compromise the project. 

Poor preparation, incorrect paver selection, and improper spacing can lead to an uneven, unattractive surface. This not only wastes time and resources but also requires costly repairs. 

Our 10 Common Paver Installation Mistakes guide will help you identify and avoid these errors, ensuring a smooth and durable paver installation.

1. Poor Planning and Design

A successful paver installation starts with meticulous planning and design. One of the most common mistakes is not paying attention to this crucial step. You can avoid uneven surfaces, poor drainage, and an unappealing look with a well-thought-out plan.

Firstly, accurately measure your space to ensure you purchase the suitable materials. Miscalculations can lead to shortages or excess, both of which are costly. Consider the layout and pattern of the pavers; a lack of a coherent design can make the installation look haphazard.

Proper drainage is another critical aspect often overlooked. Without considering water runoff, you may face pooling water, leading to erosion and damage. Ensure the area slopes away from buildings to direct water flow appropriately.

Investing time in planning and design can save you from future headaches and expenses. 

2. Ignoring the Soil Condition

Understanding your soil condition is a crucial step that is often ignored in paver installation. The type and stability of the soil beneath your pavers significantly impact their longevity and performance.

Poor soil conditions can lead to shifting and settling, causing uneven surfaces and potential trip hazards. Conduct a soil test before beginning your project. Clay soil, for instance, tends to expand and contract with moisture changes, making it unsuitable without proper preparation. Sandy soil, while better for drainage, may require additional stabilisation.

Proper excavation is key. Remove any organic material, such as grass and roots, as they can decompose and create voids under your pavers. Aim to dig at least 6 to 8 inches deep to accommodate a solid base layer.

Using geotextile fabric can provide an extra layer of stability by preventing soil from mixing with the base material. This step is crucial for areas with poor or shifting soil conditions.

3. Inadequate Base Preparation

Inadequate base preparation is one of the most common and critical mistakes in paver installation. The base is the foundation of your project; if it’s not prepared correctly, your pavers will suffer from instability and unevenness.

Start with proper excavation. Dig down to a depth of at least 6 to 8 inches, depending on the soil type and expected load. This depth allows for a robust base layer that can support the pavers. Remove all organic material, as it can decompose and cause the base to shift.

Next, choose the suitable base material. Crushed stone or gravel is recommended for its stability and drainage properties. Spread the base material in layers, compacting each layer thoroughly. Compaction is crucial; use a plate compactor to ensure the base is firm and level.

Look at the edge restraints. These are essential for preventing pavers from spreading and shifting over time. Properly installed edge restraints help maintain the integrity of your design.

Level the base carefully. An uneven base leads to uneven pavers, which can cause water pooling and trip hazards. Use a spirit level to check the evenness of the surface frequently.

4. Using the Wrong Materials

Choosing suitable materials is essential for a successful paver installation. Using the wrong materials can lead to poor performance, frequent repairs, and a shorter lifespan for your project.

Selecting inappropriate pavers is a common mistake. Ensure that the pavers you choose are suitable for the intended use. For example, lightweight pavers may not withstand the weight of vehicles, making them unsuitable for driveways. Always opt for high-quality, durable pavers designed for your specific application.

The base material is equally crucial. Avoid using dirt or loose soil as a base, as these materials do not provide stability and drainage. Instead, use crushed stone or gravel to create a solid, well-draining foundation.

Joint sand is another critical component. Polymeric sand is recommended for its binding properties, which help lock the pavers in place and prevent weed growth. Using regular sand can result in shifting pavers and unwanted vegetation.

Edge restraints are often overlooked but are vital for maintaining the structure of your paver installation. Use sturdy materials such as metal or heavy-duty plastic to keep the pavers from spreading and shifting over time.

5. Insufficient Compaction

Insufficient compaction is a critical error that can compromise the entire paver installation. Proper compaction ensures a stable surface, preventing pavers from shifting, settling, and creating uneven surfaces.

Compaction begins with the base. After excavation, the base material, typically crushed stone or gravel, should be laid in layers no thicker than 2 to 3 inches. Each layer must be thoroughly compacted using a plate compactor to eliminate air gaps and ensure maximum stability.

Neglecting to compact the sub-base can lead to future issues. Without a solid foundation, the pavers can shift and settle unevenly over time, causing trip hazards and drainage problems. The sub-base should be compacted until it is firm and does not shift underfoot.

The compaction of the pavers themselves is also crucial. After placing the pavers, run a plate compactor over the surface to bed them into the sand layer and achieve a level finish. This step helps lock the pavers in place and prevents future movement.

Repeat compaction after joint sand application. Spread polymeric sand over the pavers and compact again to ensure the sand fills the joints, adding further stability to the installation.

6. Poor Edge Restraint Installation

Poor edge restraint installation is a common mistake that can lead to significant problems in your paver project. Edge restraints are crucial for maintaining your paver installation’s structural integrity and aesthetic.

Edge restraints prevent pavers from shifting. Pavers can move over time without proper restraints due to traffic, weather conditions, and natural settling. This can result in gaps, uneven surfaces, and a compromised installation.

Choosing the right materials for edge restraints is essential. Metal and heavy-duty plastic are durable options that provide the necessary support. Avoid flimsy materials like wood, which can deteriorate and fail over time.

Proper installation techniques are key. The edge restraints should be installed flush against the pavers and secured with regular spikes driven into the ground. Spikes should be placed every 12 to 18 inches to ensure the restraints remain firmly in place.

Backfilling and compacting around the edge restraints adds extra stability. This step helps lock the restraints and prevents them from moving or shifting.

7. Incorrect Sand Bedding

Incorrect sand bedding is a common mistake that can undermine the stability and appearance of your paver installation. Proper sand bedding provides a smooth, even surface for the pavers and ensures they remain level over time.

Choosing the right type of sand is essential. Concrete sand is recommended for its coarse texture, providing better interlocking and stability than fine sand. Avoid using play sand, as it lacks the necessary structure.

The thickness of the sand layer is also critical. The sand bedding should be approximately 1 inch thick. A too-thick or too-thin layer can cause pavers to shift and settle unevenly.

Proper sand levelling is crucial. Use screed boards to spread and level the sand uniformly. This ensures a consistent surface for the pavers and prevents low spots that can lead to water pooling and uneven settling.

Avoid compacting the sand bedding before laying the pavers. Compacted sand can lose its ability to provide a flexible base, leading to instability. Instead, let the pavers naturally compact the sand as they are laid and during the final compaction step.

8. Improper Paver Laying Techniques

Improper paver laying techniques can significantly affect the durability and appearance of your installation. Ensuring the correct methods are used is essential for a professional and lasting result.

Starting with a straight reference line is crucial. Use a string line or a straight edge to maintain straight and even rows. This helps prevent the pavers from drifting off course and ensures a uniform layout.

Laying pavers too tightly or too loosely can cause problems. Pavers need consistent joint spacing, typically 2-3mm, to allow sand to fill the gaps and provide stability. Too tight, they can crack or chip; too loose, and they may shift or settle unevenly.

Avoid dragging pavers across the sand. This can disturb the level of the bedding layer and cause uneven surfaces. Instead, carefully place each paver down without sliding it.

It is also essential to maintain a consistent pattern. Follow the chosen design pattern meticulously to ensure a cohesive appearance. Misaligned pavers can disrupt the visual flow and weaken the structure.

Check the level of each paver as you go. Use a spirit level to ensure each paver is level with its neighbours, adjusting as necessary to maintain a smooth surface.

9. Skipping Joint Sanding

Skipping joint sanding is a common yet significant mistake that can compromise the stability and longevity of your paver installation. Joint sanding is crucial in locking the pavers in place and preventing movement.

Polymeric sand is typically used for joint sanding. This unique sand contains additives that bind together when moistened, creating a firm and stable joint. Without this step, the pavers can shift, leading to uneven surfaces and potential tripping hazards.

It is essential to fill the joints thoroughly. After laying the pavers, spread the polymeric sand over the surface and sweep it into the joints using a broom. Ensure all gaps are filled to maximise the installation’s stability.

Compact the sand into the joints. Use a plate compactor to help the sand settle deeply and fill any voids. This step helps ensure the sand is evenly distributed and firmly in place.

The final step is moistening the sand. Lightly mist the surface with water to activate the binding agents in the polymeric sand. Be careful not to overwater, which can wash away the sand and reduce its effectiveness.

10. Neglecting Proper Drainage

Neglecting proper drainage is a critical mistake that can lead to severe issues in your paver installation. Adequate drainage is essential to prevent water accumulation, which can damage the pavers and the underlying base.

Poor drainage can cause water to pool on the surface, leading to paver displacement, erosion of the base material, and potential structural failure. Over time, this can result in uneven surfaces and increased maintenance costs.

Plan for adequate drainage during the design phase. Ensure that the paver surface slopes away from buildings and other structures. A 1-2% slope is generally recommended to facilitate water runoff.

Installing drainage systems can significantly enhance water management. French drains, perforated pipes, and catch basins are practical solutions to direct water away from the paver area. These systems help maintain the integrity of the installation by preventing water from undermining the base.

Regular maintenance is also essential. Keep the drainage systems clear of debris to ensure they function correctly. Check for any signs of water pooling and address them promptly to avoid long-term damage.

Conclusion

Avoiding these common paver installation mistakes—poor planning, ignoring soil conditions, inadequate base preparation, using the wrong materials, and more—ensures a durable and attractive surface.

Pay attention to detail, use the right materials, and follow best practices for a flawless paver installation. Contact us for expert advice and professional installation services.

8 Ways to Cut a Paving Stone

Cutting paving stones can be daunting for DIY enthusiasts and professional landscapers.
Without the right techniques and tools, you risk uneven cuts, wasted materials, and frustration.

Our guide on 8 Ways to Cut a Paving Stone will provide easy-to-follow methods and practical tips to achieve clean, precise cuts every time, ensuring your paving project looks professional and seamless.

1. Using a Circular Saw

Using a circular saw is one of the most efficient methods for cutting paving stones, ensuring precise and clean cuts. 

You’ll need a circular saw with a diamond blade designed for masonry work. This type of blade can handle the hardness of paving stones without dulling quickly.

Begin by measuring and marking your cutting line on the paving stone with chalk or a pencil. Secure the stone on a stable work surface using clamps to prevent movement during cutting. Safety is paramount, so wear protective gear, including safety goggles, gloves, and a dust mask.

Position the circular saw at the edge of the stone, aligning the blade with your marked line. Start the saw and allow the blade to reach full speed before making contact with the stone. 

Apply steady, even pressure as you guide the saw along the marked line. Avoid forcing the saw, as this can cause the blade to bind or the stone to crack.

For thicker stones, you may need to make multiple passes, gradually increasing the depth of the cut with each pass. This method reduces the risk of damaging the stone and ensures a cleaner finish. You can smooth rough edges once the cut is complete with a masonry file or sandpaper.

2. Cutting with a Masonry Saw

A masonry saw is ideal for cutting paving stones with precision and efficiency. This specialised tool is designed for heavy-duty masonry work and provides clean and accurate cuts. Before you begin, ensure a masonry saw has a diamond blade.

Start by measuring and marking the cut line on the paving stone with chalk or a pencil. Secure the stone firmly on the saw’s cutting table to prevent movement during the operation. Wear protective gear such as safety goggles, gloves, and a dust mask to safeguard against debris and dust.

Align the marked line with the blade and turn on the saw, allowing it to reach full speed. Guide the stone slowly and steadily into the blade, applying consistent pressure. The masonry saw’s water cooling system will keep the blade cool and reduce dust, ensuring a smoother cut and prolonging the blade’s life.

You might need to adjust the blade’s depth and make multiple passes for thicker paving stones. This method ensures a clean, precise cut without overloading the blade or damaging the stone. After cutting, you can smooth rough edges with a masonry file or sandpaper.

3. Utilising an Angle Grinder

An angle grinder, a side grinder or a disc grinder is a powerful and versatile tool that can make light work of cutting paving stones. An angle grinder can easily slice through even the most challenging paving slabs with a diamond-tipped blade designed for masonry work.

Safety should be your top priority when using an angle grinder. Always wear protective gear, including safety glasses, gloves, and a dust mask or respirator. Ensure the paving stone is securely clamped or anchored to prevent it from shifting during cutting.

Mark your cut line clearly, and position the angle grinder’s blade along the marked line. Apply gentle pressure and let the tool’s weight work, avoiding excessive force that could cause the blade to bind or kick back. Guide the grinder smoothly along the cut line, allowing the blade to penetrate the stone gradually.

You may need to make multiple passes for thicker paving slabs, gradually deepening the cut with each pass. Be patient and let the tool work at its own pace, as forcing it could damage the blade or the stone. Once the cut is complete, carefully break or pry apart the two halves along the cut line.

4. Employing a Chisel and Hammer

A chisel and hammer can be an effective solution if you’re looking for a low-tech and affordable method to cut paving stones. While this technique requires more elbow grease, it can be handy for smaller projects or when working with thinner paving slabs.

Marking the desired cut line on the paving stone using a permanent marker or chalk. Position the chisel along the marked line, angling it slightly towards the waste side of the cut. Ensure the chisel’s edge is sharp and in good condition for a clean cut.

With a firm grip on the chisel’s handle, strike the chisel’s head with a masonry hammer or club hammer. Apply consistent, controlled strikes along the cut line, gradually working across the stone. The force of the hammer blows will cause the stone to fracture along the scored line.

You may need to score both sides of the stone for thicker paving slabs, alternating between striking the chisel on each side. This technique helps to create a cleaner break and prevents excessive chipping or cracking.

Patience and a steady hand are essential when using this method. Rushing the process or striking too forcefully can cause the chisel to veer off course or the stone to break irregularly. Take your time and maintain a consistent rhythm for the best results.

5. Using a Wet Saw

A wet saw is invaluable for precise and clean cuts on paving stones. Also known as masonry or tile saw, this specialised equipment uses a diamond-tipped blade and a continuous water supply to cool the blade and minimise dust during the cutting process.

Before operating a wet saw, ensure it is set up on a stable, level surface and adequately connected to a water source. 

Adjust the blade guard and fence to accommodate your paving stone’s thickness and desired cut. It’s crucial to wear appropriate protective equipment, including safety glasses, gloves, and ear protection, as wet saws can generate significant noise and water spray.

Mark your cut line on the paving stone, and securely clamp or hold it against the saw’s fence. Turn on the water supply and allow it to flow over the blade before starting the saw. Slowly and steadily guide the stone through the blade, applying gentle pressure and letting the blade do the work.

Wet saws are particularly effective for making straight, precise cuts and intricate shapes or patterns. However, they may struggle with curved or freehand cuts. Regularly check and adjust the water flow to ensure proper blade cooling and dust suppression throughout the cutting process.

After completing the cut, turn off the saw and allow the blade to come to a complete stop before removing the paving stone. Proper maintenance, including cleaning and blade replacement when necessary, will ensure optimal performance and longevity of your wet saw.

6. Cutting with a Tile Saw

While primarily designed for cutting ceramic tiles, a tile saw can also be an effective tool for slicing through paving stones, particularly those made of softer materials like sandstone or concrete pavers.

A tile saw typically features a diamond-coated blade mounted on a rail system, allowing for straight, precision cuts. Before using a tile saw on paving stones, ensure the blade is in good condition and suitable for cutting masonry materials.

Proper setup is crucial. Position the paving stone securely on the saw’s work surface, aligning the cut line with the blade’s path. Adjust the rail fence and cutting guide to your cut’s desired angle and depth.

When operating the tile saw, apply gentle, consistent pressure to the stone, guiding it smoothly along the rail. Avoid forcing the stone through the blade, which can cause chipping, binding, or kickback. 

For thicker paving slabs, you may need to make multiple passes, gradually increasing the depth of the cut.

Tile saws are particularly well-suited for making straight cuts and cutting smaller paving stones to size. However, they may struggle with curved or freehand cuts, and more significantly, thicker slabs can be challenging to manoeuvre on the saw’s work surface.

Remember to wear appropriate safety gear, including eye protection and a dust mask or respirator, as tile saws can generate significant dust and debris during operation. 

Proper maintenance, such as regularly changing the water reservoir and cleaning the saw, will help ensure optimal performance and extend the life of your tool.

7. Leveraging a Guillotine Cutter

A guillotine cutter can be an invaluable tool for cutting paving stones with precision and efficiency. This specialised equipment uses a heavy-duty blade with immense force, cleanly slicing through even the toughest paving materials.

Proper setup is essential when using a guillotine cutter. Ensure that the cutter is installed on a stable, level surface and that the blade is sharp and in good condition. Adjust the cutting guide and fence to accommodate your paving stone’s size and desired cut.

Mark your cut line on the paving stone and position it securely against the cutting fence. Double-check the alignment to ensure a straight, accurate cut. Engage the safety mechanisms and operate the lever or hydraulic system to bring the blade down with controlled force.

Guillotine cutters are particularly effective for making straight, clean cuts on large paving stones or slabs. They can handle various materials, including concrete, natural stone, and even thicker pavers or bricks.

However, it’s important to note that guillotine cutters are typically limited to straight cuts and may not be suitable for curved or intricate shapes. They also require a significant amount of workspace and may not be practical for smaller projects or tight spaces.

Proper safety precautions are paramount when using a guillotine cutter. Wear appropriate protective equipment, such as safety glasses, gloves, and steel-toed boots, and keep hands and body parts clear of the blade path during operation.

Regular maintenance and blade replacement will ensure optimal performance and longevity of your cutter.

8. Employing a Splitter

For those tackling larger paving stone projects, a splitter can be an efficient tool for cleanly splitting and cutting through thick slabs.

This heavy-duty equipment uses immense hydraulic force to drive a sturdy blade or chisel through the stone, effectively splitting it into two or more pieces along a predetermined line.

Proper setup is crucial when using a splitter. Ensure that the splitter is securely positioned on a stable, level surface and that the blade or chisel is sharp and in good condition. Mark your desired cut line on the paving stone and align it precisely with the splitter’s blade or chisel.

Engage the safety mechanisms and operate the hydraulic system to gradually drive the blade or chisel into the stone. The immense force generated by the splitter will cause the paving slab to fracture along the cut line, splitting it into separate pieces.

Splitters are particularly effective for cutting through thick, dense paving materials, such as concrete or natural stone slabs. They can handle large, heavy stones that would be challenging to cut with other methods, making them ideal for landscaping projects or patio installations.

However, it’s important to note that splitters are typically limited to straight cuts and may not be suitable for curved or intricate shapes. They also require a significant amount of workspace and may not be practical for smaller projects or tight spaces.

Proper safety precautions are paramount when using a splitter. Wear appropriate protective equipment, such as safety glasses, gloves, and steel-toed boots, and keep hands and body parts clear of the blade or chisel path during operation.

Regular maintenance and blade or chisel replacement will ensure optimal performance and longevity of your splitter.

Conclusion

Cutting paving stones requires the right technique and tool. Whether you use an angle grinder, chisel, wet saw, tile saw, guillotine cutter, or splitter, prioritise safety with protective gear and careful operation. Choose the method best suited to your project’s size, material, and desired cut precision.

In SQM?

Please fill your details to download.


      Request Callback


        Enquiry Form