Register your Information for Free Stone Samples Sent Express to You!

Search
Search
Close this search box.
Search
Close this search box.

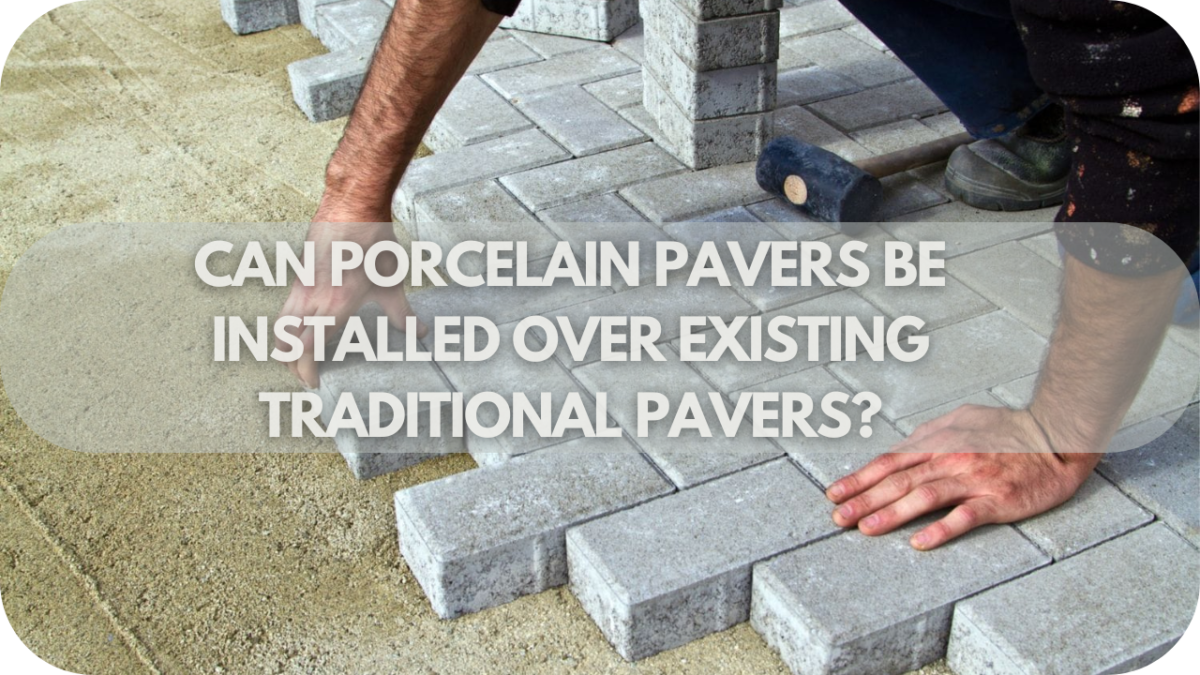
Can Porcelain Pavers Be Installed Over Existing Traditional Pavers?

Over time, traditional pavers can become outdated, cracked, or uneven, diminishing the beauty and functionality of your outdoor space.

Replacing them entirely involves significant expense, effort, and disruption, leaving homeowners frustrated and seeking a better alternative.

Luckily, installing porcelain pavers over existing traditional pavers is a cost-effective, efficient, and aesthetically pleasing solution that transforms your outdoor area with minimal hassle.

Can Porcelain Pavers Be Installed Over Existing Traditional Pavers?

Yes, porcelain pavers can be installed over existing traditional pavers. This method is cost-effective, time-saving, and minimises disruption. Ensure the existing pavers are stable, clean, and properly levelled. With proper preparation and installation, porcelain pavers offer a durable and aesthetically pleasing upgrade to your outdoor space.

Why Choose Porcelain Pavers for Overlaying Traditional Pavers?

Porcelain pavers are an excellent choice for overlaying traditional pavers due to their durability, low maintenance, and aesthetic appeal. Porcelain is highly resistant to cracking, fading, and weather damage, ideal for outdoor spaces where resilience is vital.

Its non-porous nature prevents moisture absorption, making it resistant to stains, frost, and mould—qualities that minimise upkeep compared to natural stone or concrete pavers.

In addition to practicality, porcelain offers a range of styles, colours, and textures, allowing you to achieve a sophisticated look that mimics natural stone or wood without the maintenance demands. 

UV-resistant properties ensure that colours stay vibrant even under prolonged sunlight. Overall, porcelain pavers provide a stylish, durable, and low-maintenance overlay solution, transforming any outdoor space with ease and longevity.

Assessing the Condition of Existing Pavers

Before installing porcelain pavers over traditional pavers, evaluating the base’s current condition is essential. The existing pavers must be stable and level to support the new porcelain layer effectively. Any instability or unevenness can cause cracks or shifting, leading to future issues.

Begin by checking for any damaged, cracked, or loose pavers. These must be repaired or replaced before installation to ensure a solid foundation. Additionally, any uneven sections should be levelled to prevent water pooling, which can impact the lifespan of the porcelain pavers.

Don’t forget to inspect the drainage system. Proper drainage is critical to avoid moisture getting trapped under the new pavers, which could lead to structural damage over time. If drainage issues are present, they must be addressed before installing the porcelain pavers.

Benefits of Installing Porcelain Pavers Over Traditional Pavers

Can Porcelain Pavers Be Installed Over Existing Traditional Pavers (Benefits of Installing Porcelain Pavers Over Traditional Pavers)

Are you thinking of upgrading your outdoor space? Installing porcelain pavers over your existing traditional pavers is a smart choice.

  • Cost-effective: One of the most significant advantages is the cost savings. By laying porcelain pavers over your existing surface, you avoid the need for expensive demolition and disposal. This can significantly reduce your project’s overall cost.
  • Superior durability: Porcelain pavers are known for their incredible strength. They resist cracking, fading, and scratching, perfect for high-traffic areas and harsh outdoor environments.
  • Low maintenance: Unlike traditional pavers, porcelain pavers require very little upkeep. A simple wash now and then is all that’s needed to keep them looking pristine.
  • Modern aesthetic: With a wide variety of styles, finishes, and colours, porcelain pavers can mimic the look of natural stone, wood, or concrete, offering a modern and stylish upgrade for your space.
  • Quick installation: When the current pavers are in good condition, the installation process is faster and simpler, minimising disruption to your space.
  • Weather-resistant: Withstands moisture, frost, and temperature changes without degrading.
  • Slip-resistant: Textured surfaces enhance safety in wet areas.
  • Colourfast: Resists fading even in direct sunlight.
  • Eco-friendly: Reduces waste by eliminating demolition; made from recyclable materials.
  • Boosts property value: Adds modern appeal, increasing overall property value.
  • Stain-resistant: Resists stains from grease, oil, and other common outdoor messes.

Step-by-Step Guide: Installing Porcelain Pavers Over Old Pavers

Step-by-Step Guide: Installing Porcelain Pavers Over Old Pavers

With the right preparation and techniques, traditional pavers can be transformed into porcelain. Here’s a detailed, step-by-step guide to ensure a successful installation that combines durability and style.

Step 1: Assess the Existing Surface

Start by carefully inspecting the old pavers for stability and level. A strong base is essential for porcelain. Check for cracks, loose pavers, or any areas where movement might occur—these issues must be fixed before beginning. 

If any loose or uneven sections exist, resecure them or apply a levelling compound to create a solid, flat surface. A stable foundation will help prevent shifting or cracking in the porcelain layer.

Step 2: Clean the Area

A thorough cleaning ensures that the bonding layer will adhere effectively to the old pavers. Begin by sweeping the area to remove dust and debris, then use a power washer to clear away any stubborn dirt, moss, or residues. 

The old surface must be dry before moving to the next step, as moisture can interfere with adhesion. This clean base will securely help the new layer bond for a long-lasting finish.

Step 3: Apply a Bonding Layer

Apply a high-quality bonding agent or a thin layer of mortar to secure the bond between the old pavers and the new porcelain layer. 

Spread the bonding material evenly across the surface, ensuring it covers all areas to avoid gaps in adhesion. This bonding layer will create a durable attachment, helping the porcelain pavers withstand weather and heavy foot traffic. 

Step 4: Lay the Porcelain Pavers

Position the porcelain pavers carefully, beginning from one edge and working systematically across the surface. Use spacers to maintain consistent gaps between each paver, ensuring an even and professional look

As you lay each paver, check for levelness with a spirit level to prevent uneven spots, making adjustments as necessary. 

Step 5: Grout and Seal

Once all the pavers are in place and adjustments have been made, grout will be applied between each one. Use a grout suitable for outdoor porcelain pavers to resist weather and wear.

Consider sealing the surface if you’re in a high-traffic area or want extra protection. Although porcelain is non-porous and generally doesn’t need sealing, adding a sealant can provide additional durability in certain conditions

Advantages and Disadvantages of Installing Porcelain Pavers

Installing porcelain pavers over existing pavers offers an easy upgrade with noticeable benefits, but there are also a few factors to consider before making the decision.

Advantages:

Advantages of Installing Porcelain Pavers Over Traditional Paving: Explore why overlaying porcelain on existing pavers can elevate durability, style, and efficiency.

  • Efficient and Cost-Effective: By skipping the need for demolition, you save time, labour costs, and waste disposal, making this a budget-friendly option for a stylish refresh.
  • Low Maintenance and High Durability: Porcelain is non-porous, naturally resisting moisture, stains, and frost. This quality makes it ideal for patios and garden paths, as it withstands fluctuating weather without fading or staining.
  • Long-Lasting Aesthetic Appeal: Thanks to UV resistance, porcelain pavers maintain their colour and texture for years, ensuring a modern look that requires little upkeep.
  • Easy Cleaning: Porcelain surfaces are smooth and resistant to grime buildup, making them exceptionally easy to clean compared to traditional stone or brick.
  • Versatile Design Options: Porcelain pavers come in various styles, finishes, and textures, easily mimicking stone, wood, or concrete. This allows for a custom look that complements any aesthetic.
  • Slip Resistance Options: Many porcelain pavers have anti-slip surfaces, making them safe for wet areas like pool decks or garden pathways.
  • Eco-Friendly Choice: Installing porcelain over existing pavers minimizes waste and reduces the environmental impact of disposal and demolition.
  • Heat Resistance: Porcelain surfaces remain cool even under direct sunlight, making them ideal for outdoor areas where barefoot comfort is desired.
  • Fast Installation: If the current pavers are level and stable, porcelain can be installed quickly with minimal disruption, making it an efficient choice for time-sensitive projects.

Disadvantages:

Disadvantages of Installing Porcelain Pavers Over Traditional Paving: Before I commit, here’s what I need to know about potential height, stability, and traffic concerns.

  • Raised Surface Level: Adding porcelain over existing pavers increases the height, which may require adjustments to door thresholds, steps, and drainage. If these features are not considered, installation can be complicated.
  • Thickness Limitations: Porcelain pavers are often thinner than traditional stone options, which may limit their suitability for heavy-traffic areas unless the underlying surface is well-supported.
  • Dependent on Existing Foundation Stability: Any imperfections or movement in the underlying pavers can cause cracking or shifting in the porcelain layer, so the base must be in excellent condition.
  • Possible Additional Costs: Although demolition isn’t required, the added preparation for ensuring a stable base may add to installation costs if repairs to the original surface are needed.

Porcelain Pavers Maintenance and Longevity Guide

Porcelain Pavers Maintenance and Longevity Guide

Porcelain pavers are known for their durability and low-maintenance qualities, making them an attractive choice for overlaying existing pavers. With minimal upkeep, these pavers retain their appearance and functionality over time, but understanding maintenance basics can further enhance their longevity.

Maintenance

Porcelain pavers require only periodic cleaning to keep them looking new. A simple wash with water and mild detergent removes dirt, while a soft brush helps eliminate tougher grime.

Unlike natural stone, porcelain is non-porous, meaning it doesn’t absorb stains or moisture, eliminating the need for sealing. However, periodically inspecting for any shifts or gaps, especially if installed over uneven traditional pavers, is essential to address early signs of movement.

Longevity

Porcelain’s high resistance to wear, UV exposure, and frost ensures it withstands weather conditions without fading, cracking, or warping. 

When properly installed over a stable base, porcelain pavers can last decades, offering a durable and stylish solution for outdoor spaces. With regular attention, they can provide long-lasting beauty and functionality over traditional surfaces.

Frequently Asked Questions (FAQs)

1. Can Porcelain Pavers Be Installed Over Any Type of Existing Pavers?

Yes, porcelain pavers, including concrete, brick, and natural stone, can be installed over existing pavers. However, it is essential to ensure the existing pavers are stable, level, and free from significant damage.

2. Do I Need to Remove Weeds Before Installation?

Yes, removing weeds and any organic growth is crucial before installation. Thorough cleaning and applying a weed inhibitor or geotextile fabric will help prevent future weed growth between the new porcelain pavers.

3. How Long Does the Installation Process Take?

The installation duration depends on the area size and complexity. Generally, preparing the surface and installing porcelain pavers over existing ones is quicker than a complete removal and replacement, often completed within a few days.

4. Are There Special Adhesives Required for Porcelain Pavers?

Yes, it is recommended that you use a high-quality adhesive designed explicitly for porcelain pavers. These adhesives ensure proper bonding and durability, particularly in outdoor conditions.

5. Can I Install Porcelain Pavers, or Should I Hire a Professional?

While DIY installation is possible for those with experience and the right tools, hiring a professional ensures proper preparation, installation, and long-term performance. Professionals can handle challenges like cutting pavers and ensuring adequate drainage.

6. What Should I Do If My Existing Pavers Are Uneven?

If your existing pavers are uneven, you must level the surface before installing porcelain pavers. This may involve filling low spots with sand or a levelling compound and ensuring the surface is stable and smooth.

7. Are Porcelain Pavers Suitable for All Climates?

Yes, porcelain pavers are highly durable and suitable for various climates. They are resistant to frost, heat, and moisture, making them ideal for hot and cold weather conditions.

8. How Do Porcelain Pavers Compare to Natural Stone in Durability?

Porcelain pavers are incredibly durable, often more so than natural stone. They are resistant to staining, fading, and cracking and require less maintenance. Additionally, they are designed to withstand heavy foot traffic and harsh weather conditions.

Conclusion

Installing porcelain pavers over existing traditional pavers is a practical and aesthetic upgrade. Ensure proper preparation and follow best practices for a durable result.

Ready to transform your outdoor space? Contact Splendour In Stone for expert advice and high-quality porcelain pavers. Elevate your landscape effortlessly and beautifully!

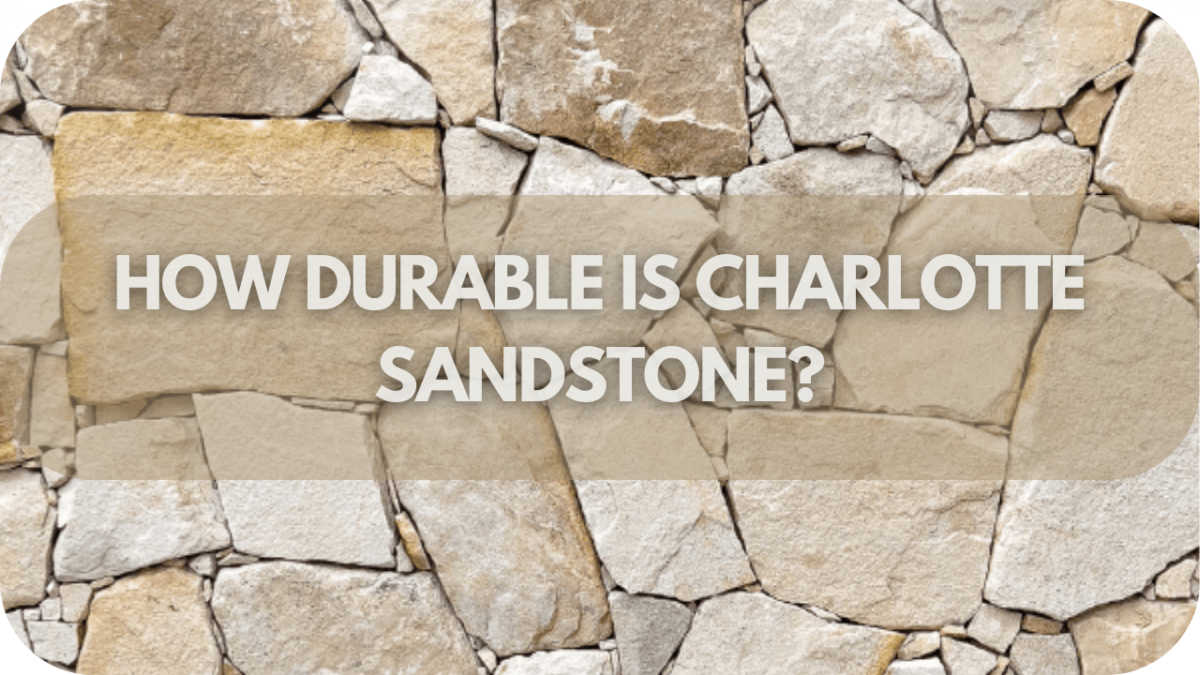
How Durable is Charlotte Sandstone? What You Need to Know Before Buying

Choosing the right stone for outdoor use is challenging. Durability and long-term performance often top the list of concerns, especially when harsh weather can quickly wear out lesser materials, resulting in costly repairs. 

Imagine a stone that not only withstands nature’s toughest tests but maintains its beauty year after year. Charlotte Sandstone, known for its remarkable strength and resilience, is that stone.

This versatile stone remains pristine through the most challenging conditions, making it a top choice for lasting outdoor projects. Are you curious about how it holds up over time? Let’s dive into the details.

How Durable is Charlotte Sandstone?

Charlotte Sandstone is highly durable and known for its excellent resistance to weathering and erosion. Its robust nature makes it suitable for outdoor applications, ensuring long-lasting performance. With proper maintenance, Charlotte Sandstone can withstand time, providing aesthetic appeal and structural integrity for years.

Factors Affecting Charlotte Sandstone’s Durability

How Durable is Charlotte Sandstone: Factors Affecting Charlotte Sandstone's Durability

Several factors affect the durability of Charlotte Sandstone, ensuring its long-lasting performance in various applications.

  • Composition: Charlotte Sandstone’s mineral composition plays a crucial role. A higher quartz content generally indicates better durability, as quartz is a complex and weather-resistant mineral.
  • Density and Porosity: The stone’s density and porosity significantly impact its resilience. Lower porosity means less water absorption, reducing the risk of freeze-thaw cycles and weathering. Denser stones are typically more robust and less prone to erosion.
  • Weather Conditions: Charlotte Sandstone’s exposure to weather conditions such as rain, wind, and temperature fluctuations can influence its durability. Regions with severe weather patterns may require additional maintenance to preserve the stone’s integrity.
  • Installation Quality: Proper installation techniques are vital. Poor installation can lead to structural weaknesses, reducing the stone’s lifespan. Ensuring correct sealing and jointing methods will enhance its durability.
  • Maintenance: Regular maintenance, including cleaning and sealing, is essential to protect Charlotte Sandstone from environmental damage. Proper care can significantly extend the stone’s life and maintain its appearance.

Performance in Different Environments

How Durable is Charlotte Sandstone: Performance in Different Environments

Charlotte Sandstone performs exceptionally well in various environments, making it a versatile choice for indoor and outdoor applications:

1. Outdoor Use

In exterior settings, Charlotte Sandstone demonstrates excellent resistance to weathering. Its low porosity minimises water absorption, significantly reducing the risk of freeze-thaw damage in colder climates. 

This feature ensures the stone remains structurally sound, even after years of exposure to moisture and freezing temperatures. Charlotte Sandstone’s robust nature makes it ideal for patios, pathways, and garden features, where it can withstand heavy foot traffic and varying weather conditions.

Its hard-wearing qualities also make it an excellent option for driveways and outdoor seating areas, providing durability without compromising natural beauty.

2. Coastal Areas

Charlotte Sandstone’s resilience to saltwater and wind erosion is particularly notable in seaside environments. Despite exposure to harsh coastal elements, its ability to maintain structural integrity and aesthetic appeal makes it a preferred choice for seaside constructions such as retaining walls, pier facades, and outdoor terraces. 

The stone’s low porosity means it absorbs less saltwater, reducing the risk of salt crystallisation, which can otherwise cause surface damage over time. 

This durability ensures that Charlotte Sandstone maintains its natural finish and texture, even in locations prone to constant sea spray and high winds.

3. Urban Settings

Charlotte Sandstone stands out in urban areas for its durability against pollution and acid rain, which can deteriorate other natural stones over time. Its resistance to chemical weathering ensures it remains in good condition even in heavily industrialised areas.

 As a result, it is often chosen for building facades, public monuments, and city squares where aesthetic longevity and low maintenance are essential.

Charlotte Sandstone’s natural appearance complements modern and historical architecture, making it a versatile option for urban landscaping, including benches, fountains, and walkways.

4. Indoor Applications

Indoors, Charlotte Sandstone retains its durability even when environmental factors are less of a concern. Its resistance to wear and tear makes it a suitable choice for flooring, wall cladding, and decorative features like fireplace surrounds and feature walls. 

The stone’s fine grain and elegant finish add a touch of sophistication to interior spaces, while its robust structure ensures it can handle the demands of high-traffic areas like hallways and living rooms.

Charlotte Sandstone requires minimal maintenance to maintain its natural beauty, making it a long-lasting and attractive choice for residential and commercial interiors.

Common Uses of Charlotte Sandstone

Common Uses of Charlotte Sandstone

Charlotte Sandstone is widely valued for its durability and versatility, making it an excellent choice for various applications in construction and design, particularly in wall cladding and paving.

  • Wall Cladding: Charlotte Sandstone has many wall cladding benefits thanks to its aesthetic appeal and resilience. It enhances the buildings’ exterior and interior walls, providing a natural and timeless look while offering excellent protection against weather elements.
  • Paving: Charlotte Sandstone’s robustness and resistance to wear and tear make it ideal for paving applications. It is commonly used for pathways, patios, and driveways, where it can withstand heavy foot traffic and vehicular loads, maintaining its integrity and appearance over time.
  • Landscaping: Charlotte Sandstone is used for various landscaping features beyond paving, including garden walls, steps, and edging. Its natural texture and durability make it suitable for visually appealing and long-lasting outdoor spaces.
  • Retaining Walls: Charlotte Sandstone’s strength and stability are advantageous for retaining walls. These walls serve a functional purpose in managing soil, preventing erosion, and adding an element of natural beauty to the landscape.
  • Interior Design: Indoors, Charlotte Sandstone is used for flooring, feature walls, and decorative accents. Its ability to withstand daily wear and tear while maintaining its beauty makes it a preferred material for high-traffic areas such as hallways, living rooms, and kitchens.
  • Monuments and Sculptures: Charlotte Sandstone’s workability and aesthetic qualities make it a preferred material for monuments and sculptures. Artists and architects value its ability to hold intricate details and its enduring charm.

Comparison with Other Sandstones

How Durable is Charlotte Sandstone: Comparison with Other Sandstones

When comparing Charlotte Sandstone to other sandstones, several factors highlight its superior durability and performance in various applications.

FeatureCharlotte SandstoneRoman, Stirling, Australiana, and Kimberley Sandstones
Composition and DensityHigher quartz content, lower porosity, enhanced strength, and resistance to weathering. Ideal for outdoor use.Higher porosity is more prone to water absorption, leading to quicker degradation through freeze-thaw cycles.
Weather ResistanceResilient against harsh weather, including rain, wind, and temperature fluctuations. Suitable for severe climates.It may require more frequent maintenance or replacement in harsh climates.
Aesthetic LongevityMaintains aesthetic appeal over time, resists staining and erosion, and is suitable for high-traffic or exposed areas.More prone to discolouration and erosion, which can detract from initial appearance over time.
VersatilitySuitable for various applications, including wall cladding, paving, sculptures, and monuments.Often limited to specific uses due to lower durability.
MaintenanceLower maintenance requirements due to environmental resistance reduce long-term upkeep costs.Requires more frequent cleaning and sealing, leading to higher maintenance efforts.

Maintenance and Care

How Durable is Charlotte Sandstone: Maintenance and Care

Proper maintenance and care are essential to maximise the durability and longevity of Charlotte Sandstone. Here are the key steps to ensure its optimal condition:

  • Regular Cleaning: Regular cleaning prevents dirt, moss, and algae build-up. Use a soft brush and mild detergent to clean the surface, avoiding harsh chemicals that can damage the stone. A pressure washer can be used for outdoor applications, but with caution to prevent surface erosion.
  • Sealing: A high-quality sealant can significantly enhance Charlotte Sandstone’s resistance to moisture and staining. Sealing the stone helps reduce porosity, prevent water absorption, and protect against freeze-thaw cycles. Re-seal the stone every few years or as recommended by the manufacturer.
  • Inspecting for Damage: Regularly inspect the stone for any signs of damage, such as cracks or chips. Early detection allows for timely repairs, preventing further deterioration. Use appropriate fillers or patching compounds to repair minor damages and maintain the stone’s integrity.
  • Preventing Stains: To prevent staining, promptly clean any spills, especially from acidic substances like vinegar or citrus juices, which can etch the stone. Mats or coasters can also help protect the stone from stains and scratches.
  • Avoiding Harsh Chemicals: Avoid using harsh chemicals, acidic cleaners, or abrasive tools on Charlotte Sandstone. These can cause surface damage and reduce the stone’s lifespan. Opt for pH-neutral cleaners specifically designed for natural stone.

Conclusion

Charlotte Sandstone stands out for its exceptional durability, low porosity, and resistance to weathering. Its versatility makes it ideal for various applications, from wall cladding to paving. 

Choose Charlotte Sandstone for your next project to enjoy long-lasting beauty and resilience. Contact us today to learn more about its benefits and to get started on your project.

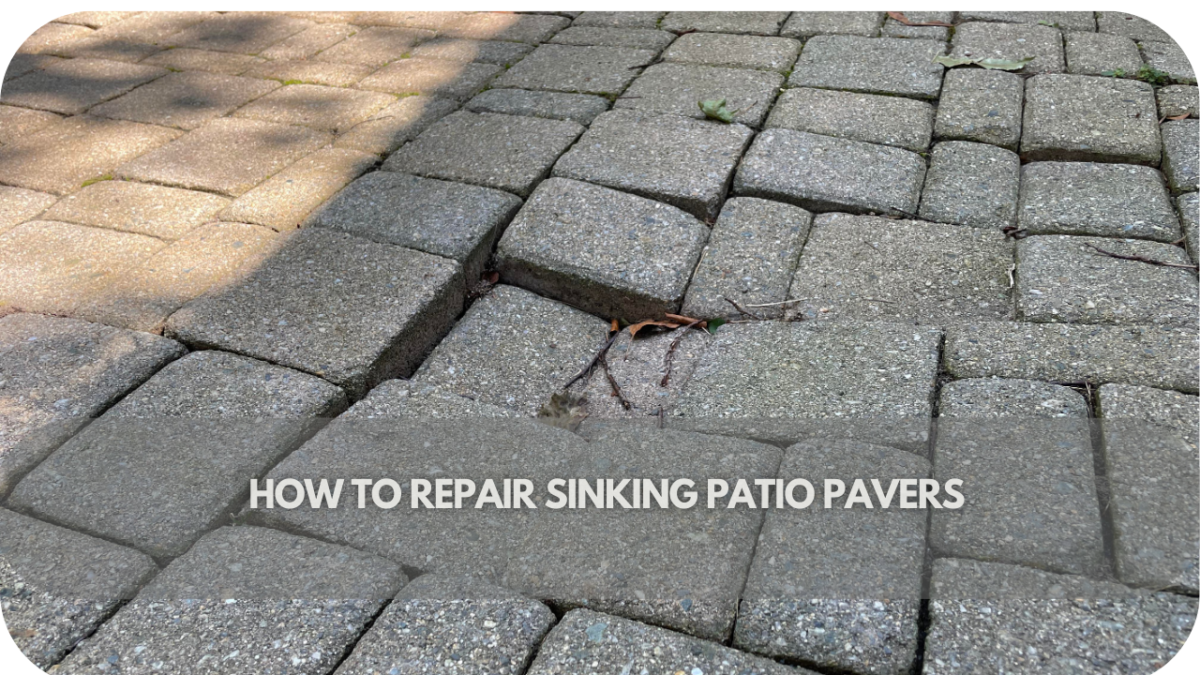
How to Repair Sinking Patio Pavers

Are your patio pavers sinking, creating an uneven and unsightly surface?

This common issue can lead to tripping hazards, water pooling, and further damage to your outdoor space, making it less enjoyable and potentially costly to fix if left unattended.

Fortunately, repairing sinking patio pavers is a manageable task. 

In this guide, we’ll walk you through the steps to restore your patio, ensuring a safe and beautiful area for your family and friends to enjoy.

Tools and Materials Needed

How to Repair Sinking Patio Pavers: Tools and Materials Needed

The right tools and materials are essential for successfully repairing sinking patio pavers. 

Here’s what you’ll need:

Tools:

  • Shovel: To remove the affected pavers and excavate the base material.
  • Rubber Mallet: To tap the pavers back into place without damaging them.
  • Level: Ensures the pavers are set evenly and correctly aligned.
  • Plate Compactor: Compacts the base material for a stable foundation (manual tamper can be used for smaller areas).
  • Wheelbarrow: Useful for transporting materials like sand and gravel.
  • Broom: For sweeping joint sand into the paver gaps after the repair.

Materials:

  • Paver Base Material: Typically a mix of crushed stone or gravel, providing a sturdy foundation.
  • Sand: Used to create a smooth, level bedding layer for the pavers.
  • Polymeric Sand: Fills the joints between pavers, hardening to prevent weed growth and insect infestation.
  • Geotextile Fabric: Optional but recommended to prevent the base material from mixing with the soil below

Step 1: Preparation

How to Repair Sinking Patio Pavers: Preparation

Before you begin repairing sinking patio pavers, proper preparation is crucial to ensure a successful outcome.

Start by clearing the area and removing furniture, plants, or other items around the affected area. This will give you ample space to work and prevent any obstructions.

Next, carefully lift and set aside the sinking pavers using a shovel or paver lifter. Be sure to keep them intact so you can reuse them later.

Also, clean the pavers and surrounding surfaces. Once the pavers are removed, thoroughly clean them with a stiff brush and water to remove any dirt, moss, or debris. This ensures that they will fit back together neatly when reinstalled. 

Similarly, clean the surrounding surface to remove any loose sand, gravel, or organic material that may have accumulated. This step is essential for maintaining a smooth, even surface and preventing further issues.

Step 2: Repair the Sinking Pavers

Start by carefully lifting the affected pavers using a flat pry bar or a specialised paver lifter. Take care not to damage the edges. Once removed, inspect the underlying base material. If it’s uneven or degraded, address this before resetting the pavers.

Next, add base material. A stable base is crucial for preventing future sinking. Remove any loose or poor-quality base material. Add a layer of paver base material, such as crushed stone or gravel, to the excavated area. Spread it evenly and use a plate compactor or a manual tamper to compact the material firmly. The base should be about 4 to 6 inches thick, depending on the expected load and soil conditions.

Begin by leveling and compacting the base material to ensure a stable foundation. Once compacted, spread a layer of sand evenly across the surface, creating a smooth, level base for the pavers.

Use a screed board to level the sand evenly. Place the pavers back into position, ensuring they align with the surrounding area. Use a rubber mallet to tap them gently into place.

Step 3: Sealing and Finishing Touches

How to Repair Sinking Patio Pavers: Sealing and Finishing Touches

Once the pavers are securely reset, it’s time to apply jointing sand or polymeric sand between them. 

Sweep the sand over the surface, ensuring it fills all the joints. Polymeric sand is especially effective as it hardens when moistened, creating a strong bond that helps prevent weed growth and insect intrusion. 

Use a broom to thoroughly work the sand into the joints, then lightly mist the area with water to activate the polymeric sand.

Consider sealing the pavers to enhance the durability and longevity of your repair. A quality paver sealer protects against staining, weathering, and wear. Apply the sealer evenly over the entire surface using a roller or sprayer, following the manufacturer’s instructions. Allow the sealer to dry completely before using the area.

Sealing not only extends the lifespan of your patio but also enhances its appearance by adding a slight sheen and bringing out the natural colours of the pavers. With these finishing touches, your patio will be stable, level, pristine and inviting for years.

Preventive Maintenance Tips

Regularly inspecting your patio is essential to catch potential issues early, before they escalate into major problems. 

Aim to check for signs like uneven pavers, gaps, and cracks at least twice a year, paying particular attention after heavy rain or during seasonal changes when the ground is more prone to shifting. 

By detecting these issues early, you can address minor repairs promptly, saving you from more extensive and costly fixes down the line.

Maintaining proper drainage is essential for preventing future sinking and ensuring the long-term stability of your patio. Water accumulation beneath the surface is one of the main causes of paver sinking, so regularly cleaning gutters and downspouts to direct water away from the area is crucial. 

Additionally, check the slope of your patio to confirm it guides water away from the foundation. If needed, consider installing drainage solutions, like French drains or perforated pipes, to efficiently manage water runoff and prevent pooling that could destabilize the pavers.

Conclusion

This guide assessed damage, gathered the right tools, repaired sinking pavers, and implemented preventive maintenance. Don’t let your patio deteriorate further—take action now and restore its beauty and safety. 

Start your repair today and enjoy a level, stable patio for years to come.

In SQM?

Please fill your details to download.


      Request Callback


        Enquiry Form


        Please fill your details to download.