Register your Information for Free Stone Samples Sent Express to You!

Search
Search
Close this search box.
Search
Close this search box.

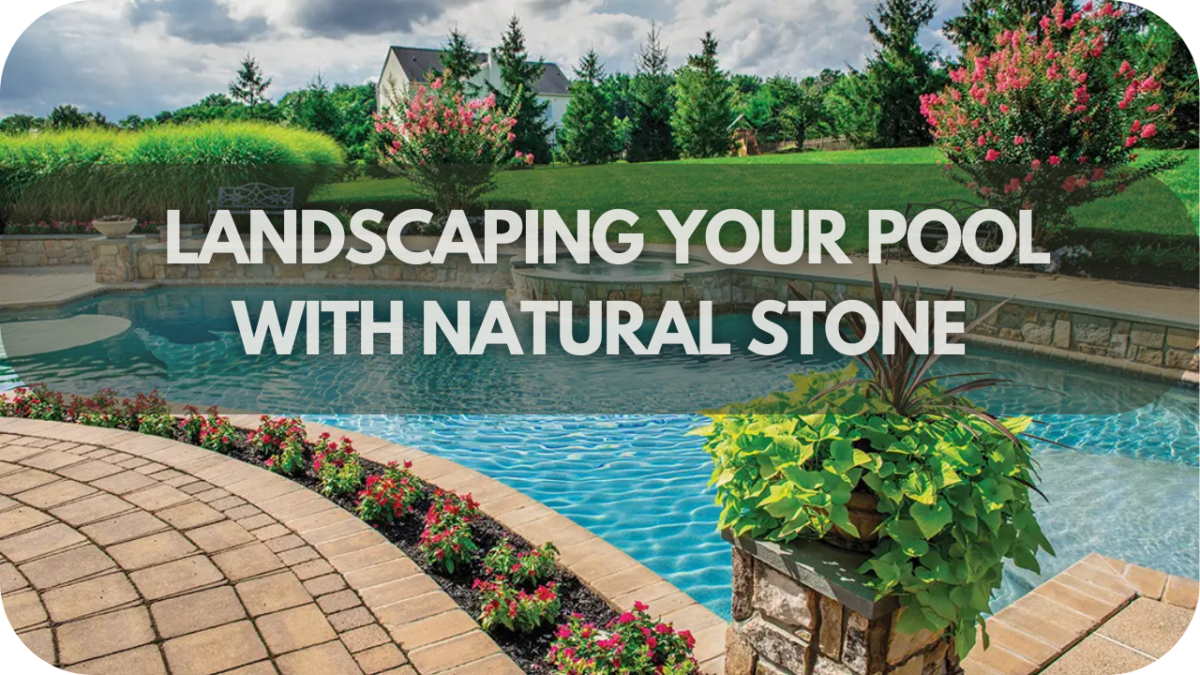
5 Natural Stones to Use When Landscaping Around Your Pool

Landscaping around your pool can be tricky, especially when choosing materials that balance style with durability.

The wrong choice can lead to slippery surfaces, unbearable underfoot heat, and a landscape that doesn’t match your vision. This can make your pool area unsafe and less than inviting.

Fortunately, natural stones offer a stunning, practical solution. Here are four ideal options that enhance your pool’s aesthetic, provide heat control, and are long-lasting—perfect for creating a safe, stylish oasis right at home.

1. Travertine

Natural Stones to Use When Landscaping Around Your Pool: Travertine

Travertine is an ideal solution for pool landscaping, offering a perfect balance of elegance, functionality, and safety. Its naturally porous surface delivers a secure footing around the pool, enhancing safety in wet conditions. This quality sets it apart from alternatives like sandstone or bluestone.

One of the most attractive qualities of travertine is its ability to remain cool underfoot, even in scorching temperatures. This heat-resistant property makes it a comfortable option for poolside areas, unlike other stones that can become uncomfortably hot.

Travertine’s aesthetic appeal is undeniable. Available in various colours, from soft ivories to rich walnuts, it can seamlessly integrate with multiple design themes, adding a touch of luxury to any pool setting

Additionally, travertine is versatile in its applications. It can be used for pool decking, pathways, steps, and coping, making it a comprehensive solution for your landscaping needs. When considering stones like limestone, which also offers elegance and coolness, travertine’s unique texture and colour options often give it the edge. 

2. Limestone

Natural Stones to Use When Landscaping Around Your Pool: Limestone

Limestone is an exceptional choice for poolside landscaping, combining timeless elegance with practical benefits. Its smooth texture and consistent colouring create a sophisticated look, making it popular alongside stones like travertine, sandstone, and bluestone.

One of limestone’s standout features is its ability to stay cool underfoot, even on the hottest days. This property ensures comfort around your pool, similar to the benefits offered by travertine. 

Available in various hues, including cream, white, and grey, limestone can complement a wide range of design aesthetics. Whether aiming for a classic or contemporary look, this stone provides versatility in colour and application. Its durability ensures that your poolside area will withstand the test of time and weather, maintaining its beauty and functionality.

Limestone is ideal for various poolside applications, such as coping, borders, terraces, and patios. Its elegant appearance and practical qualities make it a top contender over other natural stones. Limestone is an excellent choice for pool landscaping for those seeking a blend of beauty, comfort, and durability.

3. Granite

Natural Stones to Use When Landscaping Around Your Pool: Granite

Granite is a top-tier choice for pool landscaping. One of its key features is its resistance to heat, scratches, and stains. This resilience ensures that your poolside area remains pristine and functional despite constant exposure to water, sunlight, and outdoor elements.

Aesthetically, granite offers a diverse palette of colours and patterns, ranging from subtle greys to vibrant reds and blues. This variety allows for creative and personalised poolside designs that complement other natural stones like sandstone and bluestone, creating a harmonious outdoor space.

Granite’s versatility extends to various applications, including pool decks, coping, and pathways. Its ability to withstand harsh weather conditions and heavy use without losing appeal makes it a preferred choice for those seeking both beauty and durability in their pool landscaping. Granite is an exceptional option for a pool area that balances strength with style.

4. Sandstone

Natural Stones to Use When Landscaping Around Your Pool: Sandstone

Sandstone is a fantastic poolside landscaping option, offering natural beauty and strength. 

Its warm, earthy look brings a rustic charm that stands out from more polished stones like travertine or limestone, creating a welcoming atmosphere around your pool. Sandstone’s versatility in texture and colour, with shades like beige, brown, red, and grey, ensures it can easily harmonise with any outdoor design.

Highly durable, sandstone withstands the demands of poolside conditions, from water and chemicals to fluctuating temperatures, making it ideal for high-traffic areas. Its robust nature provides long-lasting performance, ensuring your poolside remains attractive and functional. 

Sandstone is also used for various purposes, including pool decking, pathways, retaining walls, and garden edging. It offers a cohesive and stylish look. For a blend of natural aesthetics and durability, sandstone is an exceptional choice for enhancing your pool landscape.

Durability and Beauty: Why Natural Stone is Ideal for Pools

Durability and Beauty: Why Natural Stone is Ideal for Pools

Natural stone combines resilience with timeless beauty, making it the perfect choice for poolside landscaping. Designed to withstand the elements, stones like granite, travertine, and limestone can endure heavy foot traffic, fluctuating temperatures, and constant exposure to water and pool chemicals.

This durability means less frequent replacements and lower maintenance costs, providing exceptional long-term value. Aesthetically, natural stone offers unmatched elegance. Each piece has unique colour variations and textures, bringing organic warmth and character to the pool area.

Stones like travertine remain cool underfoot even on hot days, ensuring comfort around the pool in all seasons. Natural stones are available in various shapes and finishes for a cohesive look, allowing for seamless integration with surrounding outdoor features.

In addition to its practical and aesthetic benefits, natural stone also enhances property value. This premium material adds an upscale, luxurious touch to any home, appealing to future buyers. 

Choosing the Right Stone for Your Pool

Choosing the Right Stone for Your Pool

Choosing the perfect stone for your pool area can transform its look and feel, balancing aesthetics with functionality. Here are factors to consider when selecting poolside stone:

  • Consider Climate: Stones like travertine or limestone are ideal for hotter climates as they stay cool underfoot, even in direct sunlight.
  • Focus on Finish and Texture: A smooth finish with a slight texture adds traction without sacrificing aesthetics.
  • Evaluate Maintenance Needs: For low maintenance, granite’s hardness and stain resistance make it durable in high-traffic areas. Stones like sandstone are beautiful but may require periodic sealing to resist moisture and pool chemicals.
  • Think About Colour: Lighter tones like ivory or beige enhance the pool’s reflective qualities. Darker shades of granite offer a bold, dramatic contrast.
  • Complement Your Home’s Style: Choose a stone that seamlessly complements your home’s design, creating a cohesive look from the indoors to the poolside.
  • Plan Thoughtfully: With the right choice, your pool area can become a luxurious retreat, balancing beauty and function.

Installation Tips and Tricks

The difference between a lasting, beautiful stone installation and one that quickly shifts or cracks lies in the details. From laying the foundation to locking in those final stones, these essential tips and tricks ensure your poolside stonework is as durable as stunning. 

  • Prepare a Stable Base: Excavate the area to around 4-6 inches deep, and lay a compacted gravel foundation to ensure proper drainage and stability for the stones.
  • Add Sand or Mortar Layer: Spread sand or mortar over the gravel to create a smooth, level surface that securely holds the stones in place.
  • Lay Stones Strategically: Begin placing stones from one corner, moving outward with slight spacing between each stone to allow for natural expansion and avoid cracks.
  • Tap Stones into Place: Gently tap each stone with a rubber mallet, ensuring it is level and securely set.
  • Fill Joints with Polymeric Sand: Sweep polymeric sand into the joints; it hardens upon setting, locking the stones in place and helping to prevent weed growth.
  • Seal for Protection: Apply a sealant to protect against pool chemicals and weather exposure, which enhances the colour and extends the life of the stones

Maintenance and Care

Stone Maintenance and Care Tips

Keeping your poolside stonework in pristine condition requires regular care and mindful maintenance. With a few simple steps, you can protect your stones and keep them looking stunning season after season.

  • Regular Cleaning: Sweep frequently to prevent dirt and debris from settling. For spot cleaning, use mild soap with water. For a deeper clean, use a gentle pressure wash—just avoid harsh chemicals that could damage the stone.
  • Sealing for Protection: Apply a stone sealant every one to two years, especially for porous stones like sandstone and travertine. Sealing guards against moisture, pool chemicals, and UV exposure, helping to prevent stains and reduce water absorption.
  • Prevent Weed Growth: Sweep polymeric sand between stones after sealing. This locks in the rocks and helps block weeds from sprouting up in the joints.
  • Repair Cracks Promptly: Look for shifting or cracks in the stone. Addressing repairs quickly prevents further damage and maintains the structural integrity of your poolside area.

Poolside Designs with Paving

Poolside Designs with Paving

Poolside paving can transform an essential pool area into a refined retreat, balancing beauty with functionality. Begin by selecting durable paving stones like travertine, sandstone, or limestone.

These stones stay cool underfoot and handle moisture well, making them ideal for wet areas. Travertine’s soft, neutral tones provide a classic look that pairs well with various poolside styles, while limestone offers a sleek, modern aesthetic.

Consider the layout and design of your paving to enhance the pool’s visual appeal. Straight, linear patterns create a clean, minimalist look, while random arrangements with various stone sizes add texture and interest. 

Framing the pool with a border of darker stones, like bluestone, can create a striking contrast that draws the eye to the water. For added luxury, incorporate inlaid lighting between pavers or around the pool edge, which brings a warm glow and enhances safety after sunset.

Finally, soft landscaping—such as low-profile plants or decorative gravel—surrounds the paving and adds natural beauty while framing the stonework. Thoughtful poolside paving creates a stylish, practical, inviting space for relaxation and outdoor entertaining.

Safety Considerations

Creating a safe poolside area goes beyond aesthetics—choosing suitable stones and installation methods can make all the difference. Here are essential safety tips to ensure your poolside stonework is as secure as it is beautiful:

  • Ensure a Solid, Level Base: Install stones on a stable, compacted base to prevent uneven surfaces. This reduces tripping hazards and keeps the stonework secure over time.
  • Secure Edging Along the Pool: Properly fixed edging keeps stones in place and prevents shifting, especially in high-traffic areas around the pool.
  • Inspect for Cracks: Check stones periodically for any cracks or loosened areas, repairing them promptly to maintain a safe surface.
  • Choose Heat-Reflective Stones for Comfort: Use lighter-coloured stones like travertine, which stay cooler under the sun, avoiding burns on bare feet during summer.
  • Incorporate Lighting for Evening Safety: Add lighting along paths and edges to improve visibility around the pool after dark.

Long-term Benefits

1. Exceptional Durability. Stones like granite and limestone endure heavy use, harsh weather, and exposure to pool chemicals without fading or wearing down.

2. Cost-effective Longevity. Natural stone requires fewer repairs or replacements over time, making it an intelligent investment for outdoor spaces.

3. Low Maintenance. When adequately sealed, natural stones require minimal upkeep, reducing the need for intensive cleaning or frequent maintenance.

4. Comfortable Underfoot. Stones like travertine remain cool in direct sunlight, providing comfort around the pool and resisting cracking from temperature changes.

5. Enhanced Property Value. Natural stone’s timeless appearance and lasting quality add appeal for potential buyers, making it a valuable asset for resale.

6. Style and Function. Choosing natural stone elevates your pool area with an enduring, low-maintenance feature that continues to provide beauty, resilience, and value.

Conclusion

Choosing a suitable natural stone for your pool area enhances its beauty and functionality. Whether you prioritise cool surfaces or durability, each stone offers unique benefits tailored to outdoor living. 

Ready to transform your poolside with elegance and durability? Explore your options and create a lasting, stylish retreat with the perfect stone selection.

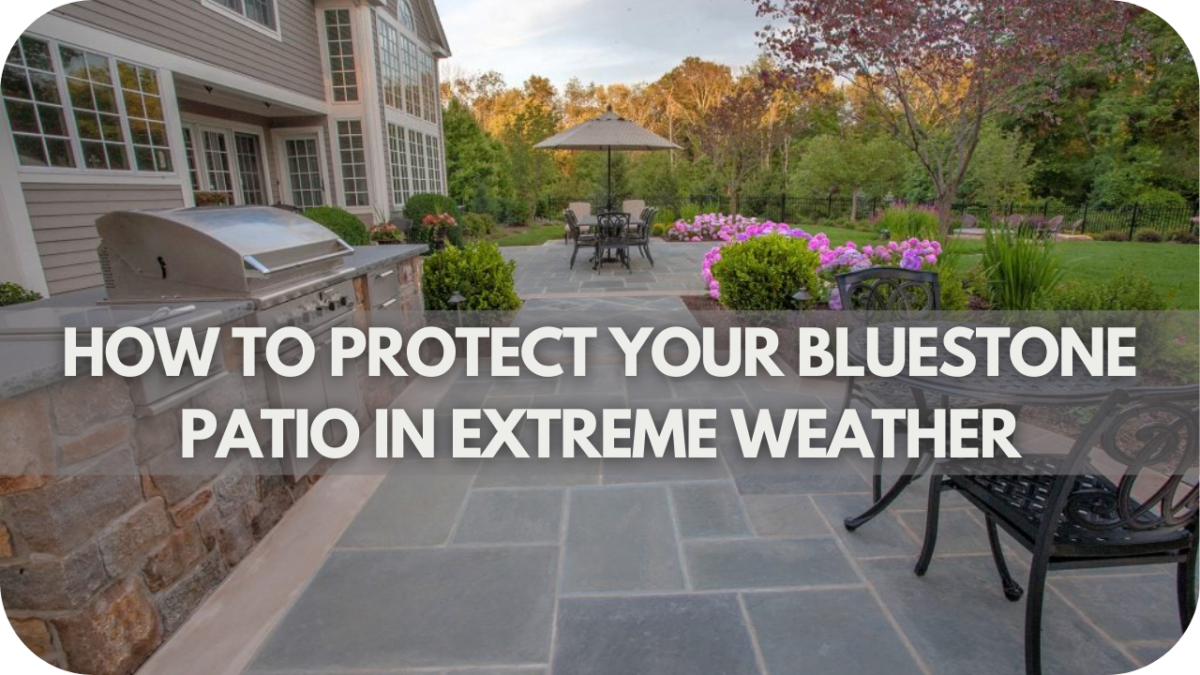
How to Protect Your Bluestone Patio in Extreme Weather

Bluestone patios are beautiful but can be vulnerable in extreme weather, with harsh elements threatening their durability and appearance.

Without proper protection, your bluestone can crack, discolour, or erode, leading to costly repairs and diminished appeal. Freezing temperatures, intense sun, and heavy rain all contribute to its wear, making it essential to take action.

Fortunately, with the proper maintenance and protective measures, you can keep your bluestone patio looking pristine year-round. 

Here’s how to safeguard your patio from the elements and ensure its lasting beauty.

1. Use Weather-Resistant Sealants

How to Protect Your Bluestone Patio in Extreme Weather: Use Weather-Resistant Sealants

Protecting your bluestone patio begins with applying a high-quality, weather-resistant sealant. A well-chosen sealant acts as a protective layer, safeguarding against water infiltration and preventing freeze-thaw damage. 

Regular application every 1 to 2 years ensures your bluestone remains resilient. Weather-resistant sealants are specifically designed to handle the challenges of extreme climates—whether it’s torrential rain or freezing temperatures. Sealing should be done during dry weather for optimal adhesion. 

Choose a penetrating sealer for best results. These offer deep, lasting protection without altering the stone’s natural appearance. Remember, the key is consistency—keeping your bluestone sealed will reduce water absorption and prevent cracking.

Applying sealant is relatively simple but transformative in maintaining your patio’s longevity. Prioritise this step, and your patio will thank you for years to come!

2. Avoid Heavy Items During Extreme Cold

How to Protect Your Bluestone Patio in Extreme Weather: Avoid Heavy Items During Extreme Cold

Keeping heavy furniture and decorations off your bluestone patio during extreme cold can significantly reduce the risk of damage. Bluestone can become brittle when temperatures drop; additional pressure from heavy items could lead to cracks or chips

When winter approaches, use lightweight or removable outdoor furniture. If heavy items are a must, consider placing protective mats underneath to distribute the weight evenly and reduce pressure points. Bluestone is naturally durable, but like any stone, it has limits. 

Be mindful of those limits, especially during the freezing season. Relocating heavy objects during winter is often a simple task, yet it significantly affects the overall durability of your patio. A few adjustments now can save you expensive repairs down the road!

3. Regular Inspections

How to Protect Your Bluestone Patio in Extreme Weather: Regular Inspections

Checking your bluestone patio regularly is essential for catching potential issues early. Small cracks, loose stones, or signs of erosion can worsen if left unattended, especially during extreme weather. 

Walk around your patio monthly, paying close attention to grout lines and edges, where issues typically begin. Addressing problems when they’re still minor can prevent costly repairs later. A professional inspection once a year can also be valuable for spotting underlying concerns you might miss. 

Proper repairs ensure your patio stays intact and appealing. Treating minor imperfections today means avoiding major overhauls tomorrow. Regular inspection is one of the simplest yet most effective ways to maintain your patio’s durability.

5. Ensure Proper Drainage

How to Protect Your Bluestone Patio in Extreme Weather: Ensure Proper Drainage

Ensuring proper drainage around your bluestone patio can significantly affect its lifespan. Water pooling is the enemy of any stone patio, leading to unwanted erosion, cracking, and even shifting of the bluestone pavers. Grade the area surrounding your patio to direct water away naturally. 

Installing a French drain or gravel border can effectively manage excessive water. Always monitor areas that tend to pool after rain and address them immediately. Remember, stagnant water weakens the structure of your bluestone over time. 

Adding drainage solutions might take some initial effort, but it’s a small price to pay for maintaining a beautiful, long-lasting patio. Proper drainage is key to enjoying your bluestone patio year after year without worrying about water damage.

5. Shade Protection

How to Protect Your Bluestone Patio in Extreme Weather: Shade Protection

Providing shade for your bluestone patio can significantly reduce the impact of extreme weather. Direct sunlight can cause bluestone to heat up excessively, leading to thermal stress and potential cracking over time. 

Installing a shade sail pergola or using large umbrellas can protect the patio surface from harsh UV rays. Trees and well-placed shrubs can also offer natural shade while enhancing the overall aesthetic of your outdoor space. 

Minimising direct exposure to sunlight helps maintain the colour and integrity of the bluestone. In winter, shaded areas can also reduce the severity of freeze-thaw cycles by preventing rapid temperature fluctuations. 

A simple investment in shade solutions can help preserve your patio’s beauty and durability for the long term.

Regular Maintenance Tips

Bluestone Patio Maintenance Tips

Consistent maintenance is crucial for keeping your Bluestone patio in top condition, especially when exposed to extreme weather. Here’s how to ensure your patio remains durable and visually appealing year-round.

  • Regular Cleaning: Bluestone can accumulate dirt, debris, and organic matter, which can cause staining and surface damage over time. Sweep your patio regularly to remove loose dirt and clean it with water and mild detergent to prevent build-up. Do not acid wash, as it could erode the stone or damage the sealant.
  • Reapply Sealant as Needed: The protective sealant on your Bluestone patio needs periodic reapplication to maintain its effectiveness. Inspect your patio every 2-3 years and reapply sealant as necessary, especially after severe weather conditions or signs of wear.
  • Promptly Address Damage: Minor cracks or chips can quickly escalate. Inspect your Bluestone regularly for any signs of damage and repair them immediately to prevent further deterioration.
  • Seasonal Care: Depending on your climate, specific seasonal maintenance is essential. For example, clear snow promptly in winter to avoid freeze-thaw damage, and use non-corrosive de-icing methods to protect the stone.
  • Prevent Moisture Build-up: Bluestone can absorb moisture, leading to potential damage over time. Ensure your patio has adequate drainage and address areas where water pools. Regularly check for and remove any standing water to prevent long-term damage.
  • Protect Against Abrasive Materials: Dirt, sand, and other abrasive materials can scratch the surface of your Bluestone. Place mats or rugs at entry points to reduce the abrasive particles that come into contact with the stone. Regularly sweep or rinse the patio to remove any potentially harmful debris.

Conclusion

Protecting your Bluestone patio from extreme weather is essential for preserving its beauty and longevity. Following the fitting, sealing, cleaning, and maintenance practices, you can ensure your patio remains a stunning outdoor space feature for years. 

Ready to safeguard your Bluestone? Contact Splendour in Stone Melbourne today for expert advice and top-quality solutions tailored to your needs.

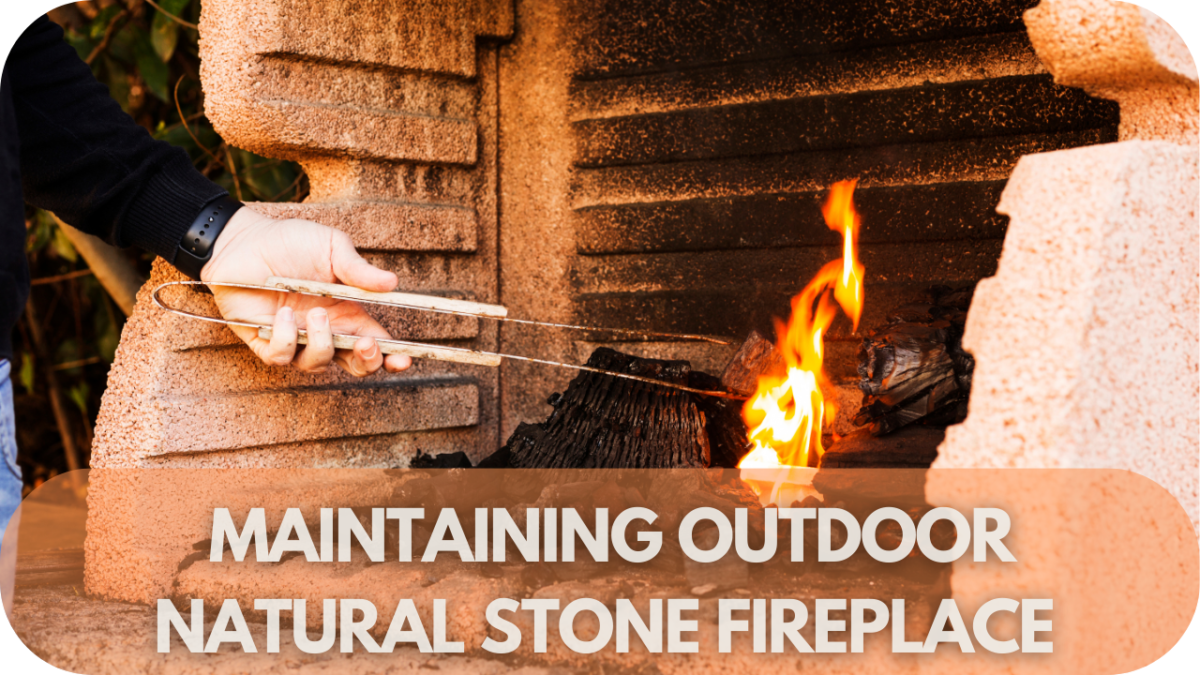
How Do You Maintain an Outdoor Natural Stone Fireplace?

Maintaining an outdoor natural stone fireplace is more than just a task—it’s a way to preserve a focal point that transforms your outdoor space into a warm, inviting haven. 

As someone who’s seen how proper care can extend the life and beauty of these stone masterpieces, I can tell you that a little effort goes a long way. 

From regular cleaning to protecting against the elements, these maintenance steps will ensure your fireplace stays stunning and functional for years, providing countless cosy nights under the stars.

Importance of Maintaining Outdoor Natural Stone Fireplaces

Your outdoor natural stone fireplace is more than just a feature—it’s a focal point that enhances the beauty and value of your outdoor space. Moisture, temperature fluctuations, and UV rays are stone’s natural enemies, leading to discolouration, erosion, and cracks.

Regular maintenance is crucial to preserving the integrity and appearance of your fireplace. Keeping the stone clean and sealed prevents dirt, mould, and pollutants from penetrating the surface, which can cause permanent stains and structural damage.

Moreover, a well-maintained fireplace looks better and functions more safely, reducing the risk of fire hazards caused by accumulated debris or weakened stone. In short, consistent upkeep is essential to ensuring your outdoor fireplace remains a stunning and durable centrepiece in your garden for years to come.

Below are the ways of maintaining your outdoor stone fireplace.

1. Regular Cleaning Routine

How Do You Maintain an Outdoor Natural Stone Fireplace: Regular Cleaning Routine

Maintaining an outdoor natural stone fireplace starts with a regular cleaning routine, ensuring it stays functional and visually appealing. 

Begin by removing ash and burnt debris after each use. Using a soft brush or an outdoor wet-dry vacuum, sweep out soot, ash, and any leaves that may have settled in the firebox. This step is crucial as leftover ash can attract moisture, which may seep into the stone, causing potential damage over time.

For a deeper clean, mix warm water with a gentle, pH-neutral soap—specifically formulated for natural stone surfaces—to avoid stripping the stone of its natural oils. Apply this solution using a soft-bristled brush to scrub the stone surface, focusing on areas with soot or smoke residue. 

Work in small sections, rinsing thoroughly with clean water to prevent soap residue from leaving streaks or discolouration. Avoid pressure washers, as the high pressure can damage the stone’s surface or mortar joints.

After washing, allow the fireplace to air dry completely before using it again, as moisture trapped in the stone can weaken its structure over time. A routine like this helps to prevent stubborn stains, preserves the stone’s natural finish.

2. Deep Cleaning: Annual Maintenance

How Do You Maintain an Outdoor Natural Stone Fireplace: Deep Cleaning: Annual Maintenance

While regular cleaning keeps your outdoor natural stone fireplace looking great, a deep clean once a year is essential for maintaining its longevity and appearance. Start by thoroughly sweeping out any ash, soot, and debris. 

Next, inspect the fireplace for stubborn soot stains or discolouration, especially around the firebox and chimney. To avoid damaging the surface, use a specialised stone cleaner that is pH-neutral and designed for natural stone. Apply the cleaner with a soft-bristled brush, scrubbing gently in circular motions to lift embedded dirt and stains.

Use a smaller brush or a toothbrush for precision for hard-to-reach areas, such as gaps between stones or mortar lines. Rinse the stone thoroughly with clean water, ensuring no cleaning residue is left behind, as this can dull the stone’s finish. Avoid using pressure washers, which can erode the stone or damage mortar joints. 

Allow the fireplace to air dry completely, which helps prevent moisture from being trapped within the stone, leading to potential cracking or structural issues. 

3. Sealing the Stone for Protection

Sealing the Stone for Protection

Applying a sealant to your outdoor natural stone fireplace is crucial for protecting it from the elements and preserving its appearance. 

Sealing creates a protective barrier that prevents water, dirt, and stains from penetrating the stone. This is especially important in outdoor settings exposed to rain and fluctuating temperatures. 

Choose a high-quality, breathable stone sealant specifically formulated for natural stone. This ensures the stone can release any trapped moisture, preventing mould or freeze-thaw damage. Here’s an article I did on Common Mistakes to Avoid When Sealing a Stacked Stone Fireplace that might be handy.

Before applying the sealant, ensure the stone is clean and completely dry—moisture trapped beneath the sealant can lead to discolouration or damage. Use a paintbrush, roller, or sprayer to apply the sealant evenly, working in manageable sections. 

Follow the manufacturer’s instructions regarding the number of coats and drying times. Depending on the climate and level of use, it’s recommended to reapply the sealant every 1-2 years. 

4. Addressing Weather Damage

How Do You Maintain an Outdoor Natural Stone Fireplace: Addressing Weather Damage

Outdoor natural stone fireplaces are constantly exposed to the elements, making them vulnerable to weather-related damage over time. 

Regularly inspecting your fireplace for signs of weathering is crucial in preventing more serious issues. Look for cracks, chips, or spalling (flaking) caused by the freeze-thaw cycle, where water seeps into small gaps, freezes, and then expands, widening the cracks. If you spot any damage, address it promptly using appropriate stone repair products like epoxy or mortar.

To minimise water damage, ensure that the fireplace is properly sealed. Sealants help repel moisture and prevent absorption into the stone. Additionally, directing water away from the fireplace using proper drainage solutions, such as grading the ground or adding a small roof overhang, can reduce moisture buildup. 

For areas with heavy rainfall or snow, consider covering the fireplace during off-seasons with a breathable cover, which protects the stone while allowing it to release moisture. Addressing weather damage quickly and proactively ensures that your fireplace remains a beautiful, long-lasting feature of your outdoor space.

5. Managing Surrounding Foliage

Managing Surrounding Foliage

Managing the plants and trees around your outdoor natural stone fireplace is essential for maintaining both its safety and longevity. 

Overgrown foliage can trap moisture against the stone, leading to staining, mildew, and even structural damage as roots or vines penetrate small cracks. To prevent this, regularly trim trees, bushes, and creeping vines that grow close to the fireplace. 

Maintaining a clear area of at least three feet around the fireplace ensures better airflow, reduces moisture buildup, and helps the stone dry more quickly after rain.

It’s also essential to prevent leaves, twigs, and other debris from accumulating near the base or on top of the fireplace. These can trap moisture and contribute to the growth of moss or mould, which can stain the stone and cause further damage over time. 

Use a rake or leaf blower to clear debris away regularly, especially in autumn. 

6. Safety Checks and Firebox Maintenance

Safety Checks and Firebox Maintenance

Regular safety checks and proper firebox maintenance are essential for keeping your outdoor natural stone fireplace safe and efficient. 

Start by inspecting the firebox where the fire burns for any signs of damage, such as cracks, worn areas, or loose mortar joints. Over time, the intense heat can cause these materials to degrade, potentially leading to safety hazards if not addressed promptly. Use a flashlight to examine hard-to-reach corners and ensure all components remain intact.

Clean the firebox regularly, removing leftover ash, unburned logs, and soot build-up. Excess ash can block airflow, reducing the fire’s efficiency and increasing the risk of sparks escaping. For wood-burning fireplaces, inspect the chimney or flue for creosote build-up—a highly flammable by-product of burning wood. Creosote should be professionally cleaned at least once a year to prevent chimney fires.

Additionally, ensure a fire extinguisher is kept nearby and the fireplace has proper clearance from flammable materials. 

Troubleshooting Common Problems

How Do You Maintain an Outdoor Natural Stone Fireplace: Troubleshooting Common Problems

Even with regular maintenance, outdoor natural stone fireplaces can encounter common problems. Identifying and addressing these issues early can save you time and prevent costly repairs. 

One common issue is the appearance of hairline cracks in the stone or mortar due to the freeze-thaw cycle. These can often be repaired using a high-quality masonry filler or sealant to prevent further moisture infiltration.

Another frequent problem is poor drainage around the fireplace, which can lead to water pooling at the base. This moisture can seep into the stone, causing staining or structural damage over time. Installing proper drainage or grading the ground away from the fireplace can resolve this issue.

Soot and smoke stains are also common, especially for wood-burning fireplaces. These stains can be removed using a stone-safe cleaner and a soft brush. If you notice excessive smoke, it may indicate a blockage in the chimney or a drafting issue—make sure to inspect the chimney for obstructions like leaves or nests.

Consulting a professional is recommended for persistent issues such as deep cracks or significant smoke leakage. Addressing these problems promptly ensures that your fireplace remains safe and visually appealing for years to come.

Conclusion

Your outdoor natural stone fireplace is more than just a feature—it’s a gathering place. By taking the time to care for it, you ensure it remains a warm, inviting spot for friends and family to enjoy. Need more advice or professional help? We’re here to make your fireplace maintenance a breeze.

Reach out for personalised maintenance tips or to book a professional consultation.

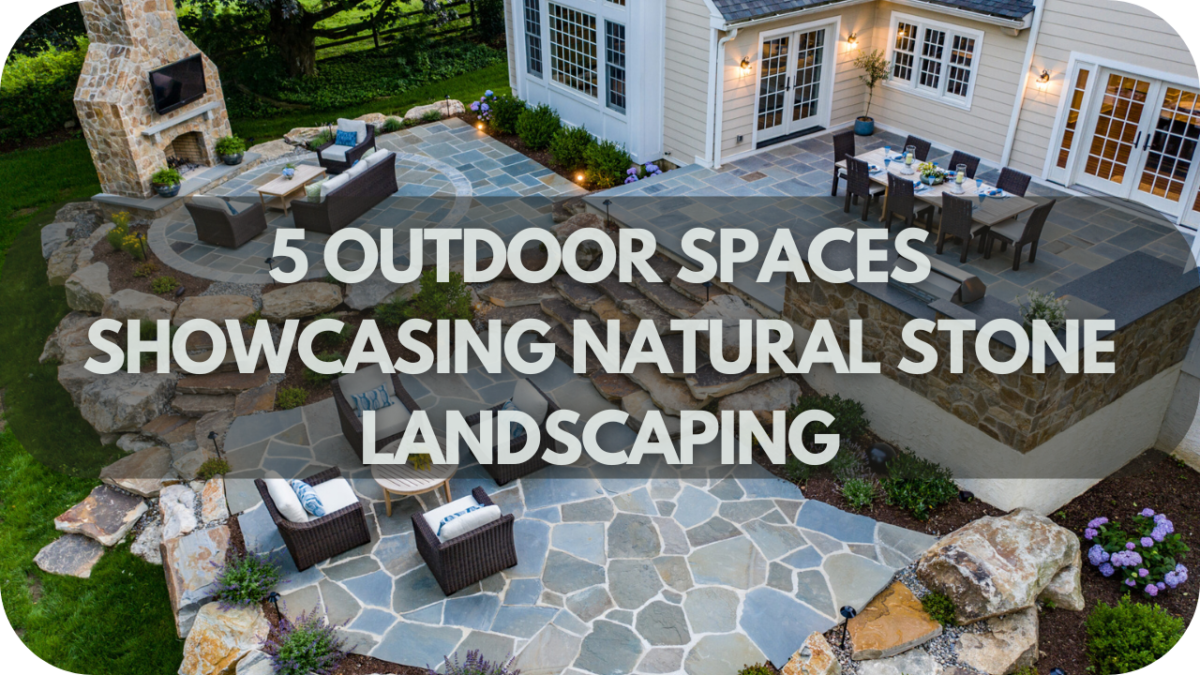
5 Outdoor Spaces Showcasing Natural Stone Landscaping

Looking to give your outdoor space a makeover? Natural stone landscaping is a fantastic way to add both beauty and value to your home. 

From patios and walkways to retaining walls and water features, the options are endless. 

Get inspired by these five real-world examples of how natural stone can transform your backyard into an oasis.

Let’s get started!

1. Natural Stone Fire Pits

Outdoor Spaces Showcasing Natural Stone Landscaping: Natural Stone Fire Pits

Natural stone fire pits are inviting and timeless outdoor features with many benefits. They create a focal point for gatherings and add warmth to any garden space. Constructed with stones like granite, sandstone, or river rock, these fire pits blend beautifully with the surrounding landscape, lending an organic, rustic appeal.

Stones like granite are particularly well-suited for fire pits due to their durability and ability to retain heat, making fireside evenings cosy and enjoyable

Start by choosing a safe location, ideally 10 feet away from structures. Preparing a solid base is essential, as a well-compacted gravel base helps stabilise the stone and allows for proper drainage.

The stones should be stacked securely, either in a circular or square arrangement, depending on the aesthetic you’re after. To enhance safety, use heat-resistant mortar between the stones, ensuring they stay in place under high temperatures.

For finishing touches, consider surrounding the fire pit with additional seating made from stone or wood to create a complete, inviting space for friends and family. Natural stone fire pits are low-maintenance and, with proper care, can last for years, adding functionality and beauty to your outdoor area.

2. Rustic Retaining Walls

Outdoor Spaces Showcasing Natural Stone Landscaping: Rustic Retaining Walls

Rustic stone retaining walls offer structure and charm, perfect for outdoor spaces that embrace natural beauty. Built from rocks like fieldstone, bluestone, or granite, these walls bring an organic, time-worn look to landscapes while serving practical purposes, such as preventing soil erosion and creating levelled areas on sloped grounds.

These stones’ irregular shapes and textures enhance the rustic feel, blending seamlessly into gardens and adding character to any design. When constructing a retaining wall, start digging a trench slightly wider than the stones and deep enough to support the wall’s height.

A gravel or crushed stone base helps anchor the structure and improve drainage. Stones should be stacked carefully, each layer offset from the one below, to ensure stability and prevent shifting.

Additionally, a slight backward lean in the wall provides added support against soil pressure. To complete the look, consider incorporating pockets for plants between stones or cascading vines along the wall’s edges. Rustic retaining walls are low-maintenance and durable, creating a beautiful, functional boundary that enhances the natural appeal of any outdoor space.

3. Garden Pathways

Outdoor Spaces Showcasing Natural Stone Landscaping: Garden Pathways

An inviting garden pathway can transform outdoor spaces, guiding visitors through lush landscapes while adding beauty and functionality. Natural stone pathways (landscaping stones) crafted from flagstone, slate, or cobblestone materials create a rustic charm that feels timeless and welcoming.

Using larger stones for a solid path or smaller ones with gaps for moss or grass to grow in between adds texture and a natural look to your garden. Start with a well-prepared foundation for a durable pathway.

Dig a shallow trench along your path’s planned route and fill it with gravel to provide stability and drainage. When arranging stones, keep them close together for a smooth surface or space them out slightly for a more relaxed, meandering look.

For enhanced stability, consider using sand or soil to level and secure each stone, pressing them firmly into place. Lighting along the pathway’s edges creates a warm ambience and improves visibility at night.

Whether winding through flower beds or leading to a seating area, a thoughtfully crafted stone pathway draws the eye and invites exploration, adding an enchanting touch to any garden landscape.

4. Elegant Patios and Terraces

Outdoor Spaces Showcasing Natural Stone Landscaping: Elegant Patios and Terraces

Elegant stone patios and terraces elevate outdoor spaces with a touch of sophistication and timeless appeal. Large stone slabs like limestone, travertine, or bluestone are excellent choices for creating a smooth, refined surface that looks luxurious and is easy to maintain.

Arranging these stones in clean, uniform lines or creating subtle patterns can add visual interest while retaining a minimalist aesthetic. For a durable foundation, begin by laying a compacted gravel base before placing the stone slabs, ensuring stability and longevity. 

Spacing is critical: small gaps filled with sand or gravel will help prevent stones from shifting and improve drainage. Adding comfortable seating, such as stone benches or weather-resistant furniture, transforms the terrace into a welcoming space for relaxation or entertaining. Consider framing the patio with lush greenery or low-profile landscaping to enhance its elegance.

For evening ambience, integrate subtle lighting like embedded floor lights or lanterns to accentuate the stone’s natural tones. An elegant patio or terrace, crafted with quality stone, creates an inviting area that blends style with functionality, perfect for enjoying the outdoors in luxury

5. Stunning Water Features with Stone Paving

Outdoor Spaces Showcasing Natural Stone Landscaping: Stunning Water Features with Stone Paving

Incorporating stone paving around water features brings a natural, sophisticated look to any outdoor space. Large rocks like granite, slate, or basalt are ideal for framing ponds, fountains, or small waterfalls, creating a smooth transition between water and surrounding landscaping.

Each type of stone brings unique tones and textures, enhancing the water feature’s appeal and helping it blend seamlessly with the environment. Before laying the stone paving, ensure the ground around the water feature is level and stable.

A solid foundation of compacted gravel will support the stones and improve drainage, preventing any shifting over time. When arranging the paving stones, leave small, even gaps to allow for natural expansion and drainage, mainly if using irregular shapes to create a more organic look.

Lighting around the paved edges can bring a dramatic effect, especially at night, as light dances on the stone and reflects in the water. Additionally, consider using greenery, such as moss or low-profile plants, to soften the edges. Stone paving around water features not only adds visual interest but also provides a serene, tranquil atmosphere that enhances the entire landscape.

Tips on Styling Your Space

Bring out the best in your outdoor space! Thoughtful stone styling can add depth, warmth, and personality. Here are simple tips to make your space feel cohesive, welcoming, and stylish year-round.

  • Choose a Cohesive Colour Palette
    Create harmony by selecting neutral tones that enhance the natural hues of the stone. Subtle accent colours bring out sandstone’s warmth or slate’s relaxed elegance, making the space feel balanced.
  • Add Texture with Furnishings
    Layer outdoor-friendly cushions, throws, and rugs to introduce warmth and comfort. Soft textures transform the space into an inviting oasis that complements the stone’s natural strength.
  • Incorporate Ambient Lighting
    Bring the space to life at night with solar lanterns, LED string lights, or pathway lighting. Emphasise focal points like water features or seating areas, adding charm and a welcoming glow.
  • Mix in Complementary Materials
    Blend in rustic wood or metal accents that naturally pair with stone. These materials add depth and personality, making the space feel stylish and unique.
  • Add Greenery for Contrast
    Soften the stone’s edges with climate-suited plants, whether lush potted greenery or trailing vines. Green plants provide a fresh, natural contrast that enhances the overall design.

Conclusion

Natural stone can transform any outdoor space, adding timeless beauty and function to gardens, patios, pathways, and more. Each design showcases how stonework elevates the landscape, blending naturally with its surroundings.

Ready to create your stunning outdoor area? Explore these ideas and bring your vision to life with the unique elegance of natural stone.

In SQM?

Please fill your details to download.


      Request Callback


        Enquiry Form


        Please fill your details to download.