Register your Information for Free Stone Samples Sent Express to You!

Search
Search
Close this search box.
Search
Close this search box.

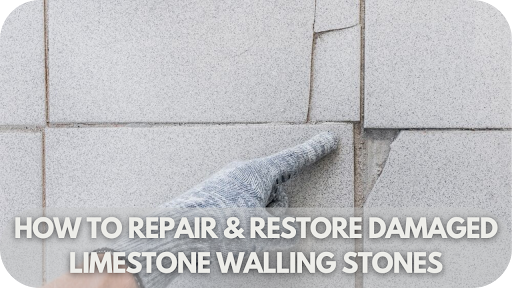
How to Repair & Restore Damaged Limestone Walling Stones

Limestone walling stones bring timeless elegance to any space, but even the most durable surfaces can suffer damage over time. 

Whether it’s from harsh weather, accidental impact, or natural wear, restoring your limestone can seem daunting. But fear not – with the right tools and techniques, you can bring your stones back to life. 

In this guide, we’ll walk you through the essential steps to repair and restore damaged limestone walling stones, ensuring they look as beautiful and sturdy as the day they were installed. Let’s get started!

Common Causes of Damaged Limestone Walling Stones

Understanding common causes of limestone wall damage for effective repair.

Limestone walling stones are renowned for their durability, but even the most resilient stone can succumb to damage over time. Understanding the most common causes of wear and tear can help you protect your investment. Here are the most common causes:

1. Weathering and Erosion

Exposure to the elements—wind, rain, and frost—can slowly erode limestone over time. This constant wear makes the surface rougher, more porous, and vulnerable to further damage. 

The freeze-thaw cycle, where water penetrates the stone, freezes, and expands, causes cracks, worsening the deterioration.

2. Staining and Discolouration

Limestone can easily become stained or discoloured due to organic growths such as moss, algae, and lichen or by external pollutants like rust, mineral deposits, and environmental pollution. 

If left untreated, these stains can be permanent, affecting the stone’s appearance and long-term durability.

3. Cracks and Chips

Limestone is vulnerable to physical impact, whether from heavy objects, settling foundations, or shifting ground. 

Natural expansion and contraction of the stone due to temperature fluctuations can also cause cracks and chips. Over time, these minor damages can worsen, leading to significant structural issues if not addressed promptly.

4. Algae, Moss, and Lichen Growth

Algae, moss, and lichen can thrive on limestone, particularly in damp, shaded areas. 

These biological growths damage the stone’s surface by infiltrating it with their root systems. Over time, they contribute to stone erosion and accelerate the breakdown of the material.

Tools and Materials Required for Repairing Limestone Walling Stones

Essential tools and materials for limestone wall restoration.

When repairing and restoring damaged limestone walling stones, having the right tools and materials is essential for achieving a professional and durable result. Here’s what you’ll need:

  • Chisels and Hammers: For minor chips and cracks, stone chisels and a masonry hammer are essential to carefully remove damaged areas and create a clean surface for repair.
  • Angle Grinder or Handsaw: If you need to shape or cut the stone, an angle grinder with a diamond blade is often the best choice, but if you’re looking for a more accessible option, a manual handsaw or wet stone cutter can also work for small repairs.
  • Stone Repair Filler: A high-quality stone filler or epoxy resin is critical for filling cracks and chips. Choose a filler that matches the limestone’s colour and texture for seamless restoration.
  • Brushes: A soft bristle brush is useful for cleaning the stone’s surface before repairs. A wire brush may also be needed to remove stubborn dirt or old sealant.
  • Protective Gear: To ensure safety, always wear gloves, safety glasses, and a dust mask when handling tools and working with stone.
  • Stone Sealer: After repairs, a stone sealer is essential to protect the stone from future damage and stains. Opt for a high-quality, breathable sealer for optimal results.

Step-by-Step Guide to Repairing Damaged Limestone Walling Stones

Easy step-by-step guide to restore damaged limestone walls.

Restoring damaged limestone walling stones may seem daunting, but with the right approach, you can achieve stunning, long-lasting results. Follow these easy steps to bring your limestone back to life!

Step 1: Clean the Damaged Area

Start by removing dirt, debris, and any biological growth from the damaged area using a soft brush. Then, wash the surface with a mild detergent or stone-safe cleaner. Rinse thoroughly with clean water to ensure no residue remains, leaving a clean, smooth surface for repairs.

Step 2: Treat Stains and Discolouration

Identify the type of stain affecting the limestone—organic, rust, or mineral. Apply a suitable cleaner or poultice to the stained area and allow it to sit for the recommended time. Scrape off the poultice and rinse thoroughly with water. Repeat if necessary to remove stubborn stains.

Step 3: Fill Cracks and Chips

Mix a stone repair compound according to the manufacturer’s instructions. Use a putty knife or spatula to fill the cracks or chips with the compound, smoothing it out so it blends with the surrounding stone. Allow the compound to cure fully, then gently sand the repaired area to match the texture.

Step 4: Restore the Texture and Colour

Assess whether the stone needs texture restoration or colour correction. Use a grinder or sandpaper to restore the texture if necessary. For colour issues, apply a tinted stone repair compound and blend it seamlessly into the surrounding stone for a uniform look. Finish by buffing the area for a smooth, even surface.

Step 5: Seal the Limestone

Select an appropriate stone sealer (either penetrating or surface sealer) and apply it with a clean cloth or brush. Allow the sealer to absorb as per the manufacturer’s instructions. Wipe away any excess to prevent streaking or glossiness. Reapply periodically to maintain long-lasting protection and prevent further damage.

Pro Tips for Preventing Further Damage to Limestone Walling Stones

Expert tips to protect limestone walls from future damage.

Preventing further damage is key to preserving the integrity of your limestone walling. Follow these essential tips to keep your stone looking its best and lasting for years to come:

  • Regular Cleaning: Use a soft brush and a stone-safe cleaner to remove dirt, moss, and debris, preventing moisture buildup that can lead to erosion or staining. Avoid harsh chemicals that can weaken the stone.
  • Apply a High-Quality Stone Sealer: Protect your limestone by applying a breathable stone sealer. Sealing will protect the stone from moisture, stains, and pollutants while allowing trapped moisture to escape. Reapply periodically for lasting protection.
  • Ensure Good Drainage: Make sure water flows away from the limestone wall by maintaining gutter systems and downpipes. Poor drainage can cause water to pool at the base, leading to cracks and stone erosion.
  • Inspect Regularly: Conduct regular checks for minor cracks or chips. Address any issues early before they develop into more significant damage, saving time and money on repairs.
  • Avoid Direct Contact with Harsh Materials: Keep acidic substances such as vinegar, citrus, and cleaning agents away from the limestone, as these can cause etching and discolouration. Use stone-safe cleaning products instead.
  • Limit Exposure to Extreme Weather: If possible, protect your limestone walling from prolonged exposure to extreme temperature fluctuations or harsh winds, which can cause expansion and contraction, leading to cracks. Use appropriate covers or shielding for vulnerable areas.

When to Call a Professional for Limestone Restoration

Know when to seek professional help for limestone restoration.

While many limestone repairs can be tackled DIY, some issues are best left to the experts. If the damage is extensive or beyond your skills, professional restoration ensures the job is done right. Here are the key situations when calling a professional is the smartest choice.

1. Extensive Cracks or Structural Damage

Large cracks or structural damage in limestone walls require professional expertise. Experts can assess the underlying issues and use specialised tools to stabilise and repair the stone, ensuring a durable, long-lasting restoration that prevents further deterioration.

2. Severe Biological Growth

When moss, mould, or lichen has deeply penetrated the stone, professionals can safely remove it without damaging the surface. Their specialised cleaning methods eradicate root systems effectively, preventing future growth and preserving the integrity of the limestone.

3. Persistent Staining or Discolouration

Stains from rust, minerals, or organic growth that don’t respond to DIY cleaning should be treated by a professional. Experts use poultices and specialised cleaners to remove deep-set stains without compromising the stone’s natural colour or structure.

4. Complex Texture or Colour Restoration

For significant texture or colour restoration, professionals have the skills and materials to match the stone’s original appearance. This ensures repairs are seamless, maintaining the uniformity and aesthetic value of your limestone wall.

5. Large-Scale Repairs

For extensive damage, professionals bring the right tools and expertise to handle large-scale repairs efficiently, ensuring both aesthetic and structural integrity.

Conclusion

Restoring damaged limestone walling stones requires the right techniques, tools, and care. Whether you’re tackling small repairs or needing professional help for large-scale restoration, addressing damage early ensures your limestone remains strong and beautiful. 

For expert advice or high-quality limestone materials, contact Splendour in Stone today. Our team is ready to help you restore your stone’s natural beauty and durability for years to come.

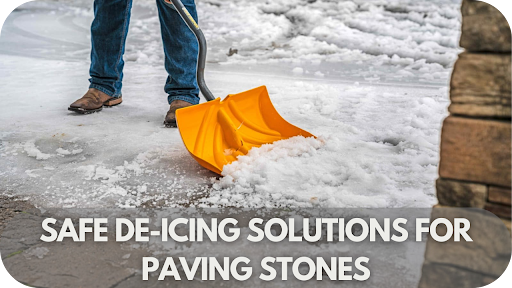
Safe De-icing Solutions for Paving Stones

Winter can be tough on outdoor spaces, especially when it comes to keeping your paving stones safe from ice and snow. 

While traditional de-icers might seem like a quick fix, they often cause lasting damage—staining, erosion, and cracks. But what if there’s a way to keep your surfaces pristine without the risk? 

In this guide, we’ll explore safe and effective de-icing solutions that protect your paving stones through the harshest months. Ready to learn the secrets to winter-proofing your outdoor areas? Let’s dive in!

Why De-icing Is Necessary for Paving Stones

Snow-covered paving stones in winter highlighting the importance of de-icing for safety and longevity.

From preventing dangerous slips to maintaining the long-term integrity of your surfaces, de-icing is an essential part of winter maintenance. Here’s why it matters.

1. Enhances Safety

De-icing is essential for creating safe, slip-free surfaces during winter. It prevents ice build-up on paving stones, reducing the risk of accidents and falls. Safe de-icing solutions ensure safer walkways and driveways for family members, visitors, and vehicles.

2. Prevents Damage from Freeze-Thaw Cycles

Water that seeps into paving stones can freeze and expand during cold weather, causing cracks and surface erosion. De-icing helps prevent this freeze-thaw cycle by keeping moisture from freezing on the stone, ultimately preserving the integrity and lifespan of your paving stones.

3. Reduces Maintenance and Repair Costs

By preventing ice accumulation and minimising damage, de-icing helps extend the life of your paving stones. This reduces the need for frequent repairs or replacement, saving you money in the long run. Regular de-icing maintenance keeps your outdoor surfaces in top condition.

4. Maintains Aesthetics

Ice and snow can leave behind unsightly stains, especially when melted by traditional salts. Safe de-icing solutions are designed to protect your paving stones, preserve their appearance, and prevent long-term discolouration or damage so your outdoor spaces stay attractive all winter long.

5. Improves Functionality

De-icing ensures that paving stones remain functional throughout the winter season. It prevents dangerous ice build-up, ensuring driveways, walkways, and patios remain accessible for vehicles and pedestrians. It also maintains your outdoor areas’ usability despite harsh weather conditions.

Safe De-Icing Solutions for Paving Stones

A close-up of paving stones treated with safe de-icing solutions, ensuring a clear and protected walkway.

Winter can be tough on your paving stones, but with the right approach, you can keep them safe and pristine. Here are safe, effective de-icing solutions to protect your paving stones this winter.

1. Calcium Magnesium Acetate

Calcium Magnesium Acetate (CMA) is an environmentally friendly alternative to traditional de-icers. It is less corrosive to both concrete and vegetation, making it safe for paving stones. 

CMA works by preventing ice from bonding to surfaces, making it easier to remove. Its mild nature makes it ideal for areas sensitive to harsh chemicals.

2. Potassium Acetate

Potassium Acetate is another eco-friendly de-icing option that works well in low temperatures. It is less corrosive than rock salt and is non-toxic to plants and animals. 

This solution is often used in commercial settings, such as airports, for its fast-acting properties and minimal impact on paving stones and surrounding environments.

3. Sand

Sand doesn’t melt ice but provides traction, reducing the risk of slipping on icy surfaces. It’s safe for paving stones and doesn’t cause damage or corrosion. 

Sand is best used in areas where traction is needed immediately, but it doesn’t solve the problem of ice buildup long-term, so it’s often used in combination with other de-icers.

4. Gravel

Like sand, gravel provides additional traction on icy surfaces. It’s a natural and non-corrosive material that doesn’t damage paving stones or harm plant life. 

Gravel is ideal for areas with heavy foot traffic or where immediate traction is needed, though it may require frequent replenishment and clean up after it settles.

5. Baking Soda

Baking soda sprinkled on icy paving stones as a natural de-icing alternative.

Baking soda is a gentle yet effective de-icer. It works by lowering the freezing point of water, preventing ice from bonding to surfaces. 

It’s non-corrosive and safe for paving stones, plants, and pets. However, it is best suited for smaller areas or light snow and ice conditions, as it can be less effective in extreme cold.

6. Vinegar and Water Solution

A mixture of vinegar and water can be used as a mild de-icer for light snow or ice. Vinegar’s acidity helps break the bond between ice and surfaces, allowing for easier removal. 

This solution is eco-friendly and safe for paving stones but may require reapplication in extreme conditions or prolonged cold weather.

7. Urea

Urea is commonly used as a fertiliser but can also be an effective de-icer. Compared to traditional salts, it’s safer for plants and animals and less harmful to paving stones. 

Urea works by accelerating the melting of snow and ice, but excessive amounts can lead to soil contamination over time.

8. Beet Juice-Based Solutions

Beet juice-based de-icers are gaining popularity for their eco-friendly properties. These solutions combine beet juice with salt or other substances to enhance melting efficiency at lower temperatures. 

The natural sugars in beet juice help keep the ice from refreezing. It’s safe for paving stones, reduces corrosive effects, and is biodegradable, making it a green alternative.

Best Practices for De-icing Paving Stones

A person applying de-icing material on paving stones with care, following best practices for safety and durability.

Maintaining your paving stones during winter doesn’t have to be complicated. Follow these best practices for safe, effective de-icing, and protect your outdoor surfaces while ensuring optimal performance all season long.

1. Choose Stone-Safe De-Icers

Select non-corrosive, eco-friendly de-icers like Calcium Magnesium Acetate (CMA) or Potassium Acetate to protect your paving stones from damage while effectively melting ice and snow.

2. Apply Evenly and Sparingly

When applying de-icer, spread it evenly across the surface to avoid overuse. A thin, uniform layer is sufficient to prevent staining and erosion, ensuring optimal results without harming your paving stones.

3. Use the Right Tools

Avoid metal shovels or tools that can scratch and damage your paving stones. Opt for plastic shovels, snow blowers, or brooms to gently remove snow and ice, preserving your pavers’ surface.

4. Time Your Application

Apply a de-icer before snow accumulates too heavily, allowing it to work effectively before ice bonds to the stones. This makes removal more manageable and reduces the chances of long-term damage to the stone surface.

5. Remove Residual Product

After de-icing, always clear any leftover product from your paving stones. This helps prevent the build-up of harmful chemicals and ensures your paving stones remain in good condition throughout the winter.

How to Clean and Maintain Paving Stones After De-Icing

Cleaning off residue after de-icing to maintain their appearance and integrity.

Once winter is over, it’s time to give your paving stones some TLC. Follow these simple steps to clean and maintain them, ensuring they stay in excellent condition and last for many seasons.

  • Remove Excess De-Icer: Use a broom or plastic shovel to clear any leftover de-icer from the surface. This prevents the residue from soaking into the stone and causing long-term damage.
  • Clean with Mild Detergent: Use a gentle solution of warm water and mild detergent to clean your paving stones. Avoid harsh chemicals, as they can damage the stone’s finish over time and affect its appearance.
  • Rinse Thoroughly: After cleaning, rinse the paving stones thoroughly with clean water to remove any remaining cleaning solution or residue. This helps prevent any build-up that could stain or damage the surface.
  • Inspect and Reapply Sealant: Check the condition of the sealant on your paving stones. Apply a fresh coat if the sealant shows signs of wear or damage. Sealing creates a protective barrier that shields the stone from moisture and future de-icing chemicals.
  • Check for Cracks and Damage: After cleaning and re-sealing, inspect your paving stones for any signs of cracks or damage caused by the winter freeze-thaw cycle. If needed, repair the damaged stones promptly to prevent further deterioration and ensure long-lasting durability.

Preventing Future Damage: Proactive Care Tips

Well-maintained paving stones with no cracks, showcasing the results of proactive care to prevent future damage.

Protecting your paving stones starts long before winter arrives. Following these simple yet effective care tips, you can safeguard your stones against harsh weather and ensure they stay in top condition for years.

  • Resand the Joints Between Pavers: Reapply sand to joints to prevent weed growth and maintain stability. Use polymeric sand for added durability and to reduce erosion over time.
  • Apply Joint Stabilizers: Joint stabilisers lock sand in place, preventing erosion and enhancing the longevity of paving stones, especially in areas with heavy rainfall or freeze-thaw cycles.
  • Ensure Proper Drainage: Paving stones should be laid with a slight slope to direct water away. Proper drainage prevents water from pooling on the surface, reducing the risk of freeze-thaw damage and maintaining the structural integrity of your stones.
  • Protect with Edge Restraints: Install edge restraints around your paving stones to prevent shifting during freeze-thaw cycles. This ensures the integrity of the stone layout and keeps them securely in place.
  • Maintain Vegetation Around Pavers: Trim plants and trees near pavers to prevent root damage and reduce debris that could stain or degrade the stone over time, ensuring long-lasting, pristine surfaces.

Conclusion

At Splendour in Stone, we believe in keeping your outdoor spaces beautiful and durable through every season. You can protect your paving stones from long-term damage by choosing safe, eco-friendly de-icing solutions and following proper maintenance practices. 

Don’t wait for the damage to appear – invest in the right products today and ensure your paving stones remain pristine for years.

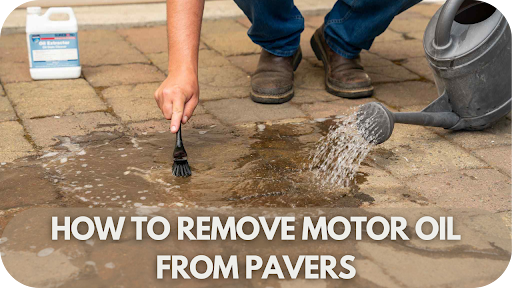
How to Remove Motor Oil from Pavers

Motor oil stains on pavers can be a real headache, whether it’s from an accident while changing the oil or a slip-up in the garage. 

But all is not lost—there are simple, effective methods to restore your pavers to their original beauty. Picture those stubborn stains disappearing, leaving your driveway or patio looking as good as new. 

In this guide, we’ll walk you through the best techniques to remove motor oil from pavers so your outdoor space stays clean and welcoming. Read on.

Why Motor Oil Stains on Pavers Are Problematic

Close-up of motor oil stains on pavers highlighting the damage and unsightly appearance.

Motor oil stains on pavers are not just unsightly—they can cause long-term damage. The oil seeps into porous surfaces, making them harder to clean and weakening the pavers over time. 

This can lead to slippery areas, increasing the risk of accidents. Additionally, untreated oil stains can wash into drainage systems, harming the environment by contaminating water supplies. 

Prompt removal is essential to maintain the beauty and safety of your outdoor spaces while preserving the integrity of your pavers. Act quickly to keep your surfaces looking pristine and protect the surrounding environment.

Tools and Materials Needed

Essential tools and materials neatly arranged for removing motor oil from pavers.

To effectively remove motor oil stains from pavers, having the right tools and materials on hand is essential. Gathering everything before you start will make the process smoother and more efficient. Here’s what you’ll need:

  • Absorbent Material (e.g., cat litter, baking soda or sand): This will help soak up excess oil from the surface, preventing it from spreading further.
  • Dish Soap or Degreaser: A powerful degreaser will break down the oil, making it easier to lift from the pavers. Dish soap, with its grease-cutting properties, can also be effective.
  • Broom or Scrub Brush: A stiff-bristled broom or scrub brush is essential for scrubbing away the oil and detergent solution.
  • Hot Water: Hot water helps activate cleaning agents and will make scrubbing more effective.
  • Bucket: A sturdy bucket is necessary to mix your cleaning solution and water.
  • Protective Gloves: Motor oil can irritate the skin, so gloves protect your hands during cleaning.
  • Pressure Washer (optional): A pressure washer can provide extra cleaning power, especially for large areas with tougher stains.

Step-by-Step Guide for Removing Motor Oil Stains

Hands demonstrating step-by-step techniques to remove motor oil stains from pavers.

Motor oil stains can be a nuisance, but they’re easy to remove with the proper steps. Follow this guide to learn how to effectively clean motor oil stains and restore your pavers, keeping your outdoor surfaces looking pristine.

Step 1: Blot the Stain Immediately

Act quickly to blot up the excess oil with absorbent materials like paper towels or a cloth. The faster you remove the spill, the less time the oil has to penetrate the paver surface. 

Be sure to avoid rubbing, as this can spread the stain further. The goal is to soak up as much oil as possible before it sets.

Step 2: Apply Absorbent Powder (Baking Soda or Cat Litter)

Once the excess oil is blotted, cover the stain with an absorbent material such as baking soda or cat litter. These materials help draw out any remaining oil from the paver. 

Leave it to sit for 15-30 minutes, allowing it to fully absorb the oil. Afterwards, sweep or vacuum the powder off the surface, revealing a cleaner paver.

Step 3: Scrub the Area

Prepare a mixture of warm water and a degreasing cleaner or dish soap. Use a stiff brush to scrub the oil stain, applying pressure to lift the oil from the pavers. 

Scrubbing the surface thoroughly will work the solution into the paver’s porous material, effectively breaking down and lifting the oil. Focus on areas with the most staining.

Step 4: Rinse and Repeat

Once you’ve scrubbed the stain, rinse the area with clean water to remove any leftover cleaner or residue. Assess if the stain has completely gone. 

If the oil stain remains, repeat the process. Some stains may require multiple rounds of scrubbing or additional absorbent material to remove the oil entirely.

Step 5: Use a Pressure Washer (Optional)

A pressure washer can help remove deep-set oil stains on larger or more stubborn pavers. The high-pressure water forces oil out of the paver’s surface, cleaning stubborn stains

Use the washer on a low setting to avoid damaging the pavers. Sweep the nozzle across the area for an even, thorough clean.

Additional Tips for Stubborn Stains

Expert tips and tricks for tackling stubborn motor oil stains on pavers.

For stubborn motor oil stains that won’t budge after the initial cleaning, try these additional tips to get your pavers back to their original condition.

  • Try a Commercial Degreaser: If soap and water aren’t enough, a commercial degreaser can break down tough grease and oil stains. Apply the degreaser, let it sit, and scrub with a stiff-bristled brush for deeper cleaning.
  • Use a Poultice for Deep Stains: For oil that has soaked into porous pavers, a poultice made from baking soda and water can draw out the oil. Apply a thick paste, cover with plastic, and leave it for 24-48 hours. The poultice absorbs the oil, making it easier to clean off.
  • Try an Oxygen Bleach Solution: Oxygen bleach (like sodium percarbonate) is an eco-friendly alternative for tough stains. Mix with warm water, apply to the stain, and let it sit for 15-30 minutes before scrubbing. It’s gentle on pavers but effective on deep stains.
  • Use a Scraper for Residue: If sticky residue remains, gently scrape it off with a plastic scraper. Be careful not to scratch the surface, working in small sections for the best results.
  • Apply a Commercial Concrete Cleaner: For persistent stains, use a commercial concrete cleaner designed for heavy-duty cleaning. Follow the manufacturer’s instructions, scrub, or pressure wash for a thorough clean.

When to Call a Professional

Professional assessing motor oil stains on pavers for advanced cleaning solutions.

While many motor oil stains can be tackled with DIY methods, there are situations where it’s best to call in a professional to ensure the job is done right.

1. Persistent Stains

If the oil stain remains after several cleaning attempts, it may have soaked deeply into the pavers. A professional can use industrial-grade cleaning agents and specialised equipment to tackle even the most stubborn stains without damaging the surface.

2. Large Areas or Heavy Spills

For extensive spills covering large areas or hard-to-reach spots, DIY cleaning can be overwhelming. Professionals can handle large-scale clean-ups efficiently, ensuring consistent results across the entire surface.

3. Damage to Pavers

If your cleaning attempts have caused any discolouration or surface damage, it’s time to call in an expert. Professionals can assess and restore the pavers, using the correct methods to repair damaged stones and preserve their integrity.

4. Safety Concerns

Motor oil can create a slippery surface, and using powerful cleaning equipment like pressure washers can only be safe with proper training. Professionals are equipped to handle these tasks safely, avoiding injury and damage to your property.

Conclusion

Removing motor oil from pavers doesn’t have to be a hassle. With the right techniques and tools, you can restore your outdoor surfaces to their former glory. Whether you’re dealing with a small stain or a larger spill, following the correct steps will make all the difference. 

For those stubborn stains or larger areas, professional cleaning ensures a deep, lasting clean without damaging your pavers. Ready to make your pavers look brand new again? Contact Splendour in Stone for expert advice and high-quality solutions today!

In SQM?

Please fill your details to download.


      Request Callback


        Enquiry Form


        Please fill your details to download.