Register your Information for Free Stone Samples Sent Express to You!

Search
Search
Close this search box.
Search
Close this search box.

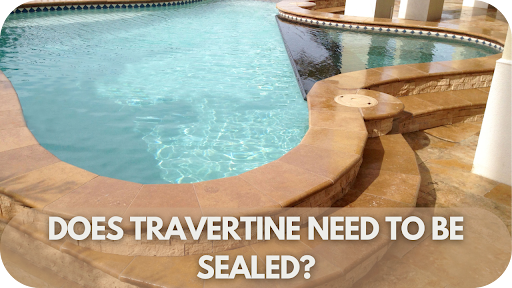
Does Travertine Need to Be Sealed?

Travertine’s natural beauty makes it a standout choice for floors, patios, and wall cladding. However, its porous surface can quickly turn from elegant to problematic when exposed to moisture, stains, or wear.

The solution lies in sealing. A proper seal protects the stone, enhances its durability, and preserves its stunning appearance. Without it, your travertine may lose its charm sooner than expected. 

Ready to safeguard your investment? Let’s explore why sealing travertine is essential and how it ensures your surfaces stay beautiful for years to come.

Does Travertine Need to Be Sealed?

Yes, travertine needs to be sealed to protect its porous surface from stains, water damage, and erosion. Sealing creates a protective barrier that prevents moisture and debris from penetrating the stone, ensuring its durability and appearance. Regular resealing, especially in high-moisture areas, preserves travertine’s natural beauty and extends its lifespan.

Why Sealing Travertine is Essential

Learn why sealing travertine is essential for protecting its beauty and durability.

Travertine is a natural stone celebrated for its timeless beauty. Sealing travertine is crucial for maintaining its durability and functionality. Below are the key reasons why sealing your travertine surfaces is a must.

1. Prevents Stains

Travertine’s porous surface absorbs liquids like water, oil, and wine, which can cause unsightly stains. Sealing creates a protective barrier that repels spills, ensuring they don’t penetrate the stone and leave permanent marks, keeping your surfaces looking clean and pristine.

2. Protects Against Water Damage

In moisture-prone areas like bathrooms, kitchens, or outdoor patios, water can seep into travertine, leading to erosion, mould, and structural weakening. Sealing prevents water absorption, protecting the stone from long-term damage and ensuring its durability in high-moisture environments.

3. Enhances Durability

Sealing strengthens the stone’s resistance to wear and tear caused by heavy foot traffic, weather exposure, or daily use. It prevents pitting, cracking, and surface erosion, ensuring the stone remains structurally sound and visually appealing for years.

4. Maintains Aesthetic Appeal

A quality sealant enhances the natural colours and textures of travertine, giving it a richer, more vibrant appearance. Sealing also prevents dullness caused by dirt or moisture, keeping the stone’s rustic charm intact.

5. Simplifies Maintenance

Sealed travertine is easier to clean and maintain, as dirt and debris remain on the surface instead of settling into the pores. This reduces cleaning time and prolongs the stone’s polished appearance.

Signs That Travertine Needs Resealing

Discover the signs that your travertine needs resealing to maintain its condition.

Travertine’s protective seal wears down over time, leaving it exposed to moisture and stains. Here are the key signs that indicate it’s time to reseal your travertine surfaces:

  • Water Absorption: If water no longer beads on the surface and instead soaks into the stone, the sealant has deteriorated. Resealing prevents moisture from causing stains or long-term damage.
  • Dark Spots or Stains: Stains that appear after spills show liquids are penetrating the surface. Resealing strengthens the barrier, protecting the stone from permanent discolouration and unsightly marks.
  • Dullness or Fading: Travertine that appears faded or lacks its natural shine, especially in high-traffic areas, signals that the sealant has worn away. Resealing restores the stone’s rich, vibrant tones.
  • Easier Dirt Build-Up: If dirt, dust, or grime settles into the stone and cleaning becomes difficult, the sealant is compromised. Resealing creates a smooth, protective layer for easier maintenance.
  • Surface Feels Rough or Uneven: A rough or textured feel may indicate erosion from water exposure. Resealing strengthens the surface, preventing further deterioration and preserving the stone’s integrity.
  • Increased Susceptibility to Etching: Acidic substances like wine or citrus can cause etching on unsealed travertine, leaving dull spots or marks. Resealing provides a barrier that protects against chemical damage.

Types of Sealers for Travertine

Explore the different types of sealers for travertine and find the best option.

Choosing the right sealer is key to protecting travertine’s natural beauty and ensuring its long-term durability. Below are the main types of sealers to consider for your travertine surfaces:

1. Penetrating Sealers

Penetrating sealers absorb deep into the stone, creating an invisible barrier that repels water, stains, and dirt. They do not alter the stone’s appearance, making them ideal for those who prefer a natural, matte finish. Perfect for both indoor and outdoor spaces, they allow the stone to breathe naturally.

2. Topical Sealers

Topical sealers form a protective layer on the stone’s surface, offering excellent resistance to stains and abrasions. They enhance the stone’s appearance with a glossy or satin finish, deepening its natural colour. However, they require more frequent reapplication, especially in high-traffic areas.

3. Enhancing Sealers

Enhancing sealers not only protect travertine from moisture and spills but also enrich and deepens its natural tones. They highlight the stone’s colour variations and textures, adding vibrancy to both indoor and outdoor installations.

4. Water-Repellent Sealers

Water-repellent sealers are ideal for areas exposed to moisture, such as bathrooms, kitchens, or pool surrounds. They provide strong water resistance, preventing absorption that can lead to stains, erosion, or mould growth.

When Should You Seal Travertine?

Find out when to seal your travertine for optimal protection and longevity.

Sealing travertine at the right time is essential to protect its natural beauty and ensure its longevity. Below are the key scenarios when sealing is necessary:

1. Immediately After Installation

The most critical time to seal travertine is right after installation. During this process, grout, moisture, and construction debris can penetrate the stone’s porous surface. Sealing immediately creates a protective barrier, preventing stains, discolouration, and long-term damage before it has a chance to occur.

2. In High-Traffic Areas

Floors, hallways, and outdoor patios are subject to constant foot traffic, which can wear down the sealant over time. Resealing travertine in high-traffic areas every 1–2 years helps maintain protection against dirt, scuff marks, and stains, ensuring the stone’s durability and polished appearance remains intact.

3. In Moisture-Prone Spaces

Bathrooms, kitchens, and pool surrounds are exposed to regular moisture and humidity. Without sealing, water can seep into the stone, causing erosion, mould growth, and structural weakening. Regular resealing in these areas prevents water damage and keeps the travertine strong and clean.

4. When the Sealant Wears Off

If you’re unsure whether the seal is intact, perform a water bead test. Place a few drops of water on the stone; if the water soaks in instead of beading up, it’s time to reseal to restore protection and prevent damage.

How to Seal Travertine: A Step-by-Step Guide

Follow this easy step-by-step guide to seal your travertine like a pro.

Sealing travertine doesn’t have to be complicated. Follow these simple steps to protect your stone, enhance its beauty, and ensure it stays durable for years to come.

Step 1: Clean the Surface

Before sealing, thoroughly clean the surface using a pH-neutral, stone-safe cleaner. Remove all dust, dirt, and stains to ensure the sealant adheres evenly. Allow the surface to dry completely for optimal results and long-lasting protection.

Step 2: Choose the Right Sealer

Select a sealer suited to your needs. For high-moisture areas like bathrooms or outdoor spaces, a penetrating or water-repellent sealer works best. If you prefer enhancing the stone’s colour, opt for an enhancing or topical sealer.

Step 3: Apply the Sealer

Using a clean brush, roller, or sprayer, apply a thin, even coat of sealant across the surface. Work in sections to ensure full coverage. Avoid over-application, as excess sealer can create streaks or a cloudy finish.

Step 4: Allow to Dry

Let the sealant penetrate and dry completely according to the manufacturer’s instructions. This typically takes a few hours. Avoid walking on or using the surface until the sealant has fully cured to maximise its effectiveness.

Step 5: Test the Seal

Once dry, check the seal’s effectiveness by dropping water onto the surface. If the water beads up, the seal is intact. If it soaks in, apply another thin coat to restore full protection against moisture and stains.

Common Mistakes to Avoid When Sealing Travertine

Avoid these common mistakes when sealing travertine for perfect results.

Sealing travertine is essential to protect its beauty, but common mistakes can undermine the process. Avoid these errors to ensure long-lasting protection and a flawless finish:

  • Skipping Surface Preparation: Failing to clean the travertine thoroughly before sealing traps dirt, dust, and stains beneath the sealant, leading to an uneven or discoloured surface. Always clean with a pH-neutral cleaner and allow it to dry completely.
  • Using the Wrong Sealer: Applying an inappropriate sealer can ruin the stone’s appearance or fail to offer protection. Choose penetrating sealers for a natural look, enhancing sealers for richer colour, or water-repellent options for moisture-prone areas.
  • Over-Application of Sealer: Too much sealant creates a cloudy, streaky finish. Apply a thin, even coat and remove excess to maintain the travertine’s natural elegance.
  • Ignoring Resealing Schedules: Delaying resealing leaves the stone vulnerable to water damage, stains, and erosion. Reseal every 1–2 years, especially in high-traffic or moisture-rich areas.
  • Using Harsh Cleaners: Acidic or abrasive cleaners can strip the sealant and damage the stone. Always use gentle, stone-safe products to maintain the protective barrier.

Conclusion

Sealing travertine is essential to protect its natural beauty, prevent stains, and ensure long-term durability. With the right sealer and regular maintenance, your travertine surfaces will remain stunning and resilient for years to come.

Ready to preserve and enhance your travertine? At Splendour in Stone, we offer premium travertine solutions and expert advice to help you keep your surfaces in perfect condition. Explore our range today and give your travertine the care it deserves!

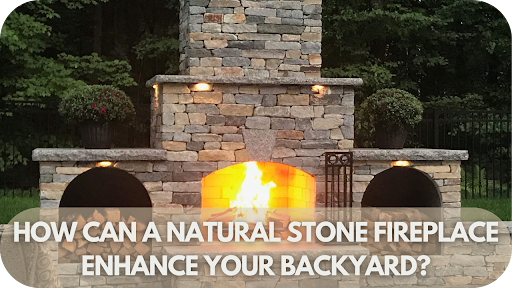
How Can a Natural Stone Fireplace Enhance Your Backyard?

There’s something magical about gathering around a fire in your backyard, especially when it’s surrounded by the timeless elegance of natural stone. 

A natural stone fireplace does more than just provide warmth – it adds a stunning focal point to your outdoor space. Imagine hosting friends or unwinding after a long day, all while enjoying the rustic charm and durability that only stone can offer. 

Let’s take a closer look at how a natural stone fireplace can completely transform your backyard into a year-round haven.

Benefits of a Natural Stone Fireplace in Your Backyard

Discover how a natural stone fireplace can elevate your backyard with warmth, style, and timeless appeal.

A natural stone fireplace offers unique benefits that elevate your backyard in ways few other features can, enhancing outdoor gatherings and adding value to your home. Here’s how it can transform your space:

1. Adds Timeless Beauty

A natural stone fireplace enhances your backyard with its rich textures and colours, providing an elegant focal point that blends seamlessly with any garden design. Whether modern or rustic, it creates a sophisticated atmosphere that stands the test of time.

2. Increases Property Value

Investing in a stone fireplace boosts your home’s value. Its durability and aesthetic appeal attract buyers, making it a desirable feature. Whether you’re selling or upgrading, a natural stone fireplace is a smart investment that elevates your property’s marketability.

3. Provides Year-Round Use

A stone fireplace extends the usability of your outdoor space, keeping it warm and inviting during colder months. It turns your garden into a year-round retreat, perfect for outdoor gatherings, cosy evenings, or winter relaxation.

4. Low Maintenance and Durability

Stone is one of the most durable materials for an outdoor fireplace. Resistant to harsh weather conditions, it requires minimal maintenance and withstands rain, wind, and freezing temperatures, providing long-lasting value with little upkeep.

5. Enhances Outdoor Entertainment

A natural stone fireplace becomes the heart of outdoor entertaining. Whether hosting a party or enjoying a quiet evening, its warmth and ambience make it the perfect space for relaxation, conversation, and cooking.

6. Eco-Friendly Option

Natural stone is a sustainable material, free from harmful chemicals. Its natural insulation properties help maintain temperature, making it an energy-efficient, eco-friendly choice that seamlessly blends with nature.

Best Natural Stone for Outdoor Fireplace

Explore the top natural stones for building a durable and stylish outdoor fireplace that blends with your backyard.

Choosing the right natural stone for your outdoor fireplace is essential to achieving both style and functionality. Here are the best stones to elevate your outdoor space.

1. Granite

Granite is a top choice for outdoor fireplaces due to its exceptional durability and resistance to high heat. Available in a range of colours and textures, granite offers a sophisticated, modern aesthetic while effortlessly withstanding harsh outdoor conditions.

2. Limestone

Limestone brings rustic charm and earthy warmth to outdoor fireplace designs. Its versatility suits various styles, and its neutral tones create an inviting atmosphere. However, it requires proper sealing to prevent moisture damage and maintain its timeless appearance over time.

3. Travertine

Travertine combines natural beauty with resilience, making it ideal for outdoor conditions. Its porous surface adds texture and warmth, while its earthy colours create a cosy, inviting space. Sealing ensures longevity, keeping it stunning in any outdoor setting.

4. Sandstone

Sandstone is perfect for rustic and natural outdoor fireplace designs. Its earthy tones and natural texture blend seamlessly with gardens and landscapes, creating a harmonious aesthetic. Its durability makes it a reliable choice for enhancing outdoor living spaces.

Natural Stone Fireplace Design Ideas for Outdoor Spaces

Inspire your outdoor space with creative natural stone fireplace designs that add charm and functionality to your backyard.

A natural stone fireplace can completely transform your outdoor space, adding both style and warmth. Here are some design ideas to inspire your backyard transformation and create a stunning focal point.

1. Minimalist Modern Fireplace Design

For a sleek, contemporary look, opt for a minimalist stone fireplace made from smooth granite or limestone. Clean lines and neutral tones create a stylish focal point, perfect for modern outdoor furniture and simple landscaping.

2. Rustic Stone Fireplace with Natural Textures

Embrace nature with a rustic stone fireplace using travertine or sandstone. Their earthy tones and textured surfaces seamlessly blend with garden settings, creating a cosy atmosphere perfect for gatherings or quiet outdoor moments. Complete the look with a stone hearth or rustic seating.

3. Traditional Stone Fireplace with Classic Charm

For timeless appeal, choose a traditional stone fireplace with a brick surround or detailed stonework. This design evokes warmth and nostalgia, ideal for family gatherings. Enhance it with rustic wooden furniture or wrought-iron details for a vintage feel.

4. Statement Feature Wall Fireplace

Make a bold statement with a stone fireplace as the focal point of a feature wall. Large-format stones like slate or granite create a dramatic backdrop, perfect for expansive backyards or open-plan patio areas. It adds both style and function to your outdoor space.

5. Corner Fireplace for Smaller Spaces

For limited spaces, a corner fireplace crafted from limestone or travertine optimises the area while providing warmth. Surround it with comfortable seating to create an intimate, relaxing outdoor retreat.

Functionality Considerations for Your Natural Stone Fireplace

Learn key functionality tips for your natural stone fireplace, ensuring it’s both practical and beautiful in your backyard.

When designing your natural stone fireplace, it’s essential to consider functionality alongside aesthetics. Here are key factors to ensure your fireplace not only looks stunning but performs efficiently and lasts for years.

  • Stone Selection: Choose durable materials like granite or bluestone for heat resistance. Softer stones like limestone or travertine may require more maintenance to avoid damage over time.
  • Size and Placement: Ensure the fireplace is appropriately sized for your space and positioned to distribute warmth effectively, especially for year-round use in cooler months. A corner design works well in smaller backyards.
  • Ventilation: Proper airflow is essential for safe and efficient burning. Ensure adequate ventilation to prevent smoke buildup, especially in wood or gas-burning fireplaces.
  • Layout Integration: Consider the surrounding design. Built-in seating or stone surrounds can enhance functionality and comfort, creating an inviting gathering space.
  • Weather Resistance: Select stones that can withstand moisture and freezing temperatures to ensure the fireplace’s longevity and reduce maintenance needs during harsh weather.
  • Fuel Type: When designing your fireplace, consider the fuel source (wood, gas, propane, etc.). Gas fireplaces require a different setup for venting and installation while wood-burning models need proper chimney clearance.
  • Accessibility: Position your fireplace so it’s easy to light and maintain while remaining at a safe distance from seating areas. Opt for features like easy-to-reach firewood storage or gas model controls to ensure convenience.

Maintenance Tips for a Natural Stone Fireplace

Keep your natural stone fireplace looking great with these easy maintenance tips for long-lasting beauty and performance.

A natural stone fireplace is a beautiful and durable addition to your outdoor space. Like any feature, it requires some care to maintain its beauty and functionality. Proper maintenance ensures it remains a safe and striking focal point for years to come.

  • Regular Cleaning: Clean your fireplace regularly to remove soot, ash, and debris. Use a soft brush or cloth and avoid harsh chemicals that can damage the stone. A mixture of warm water and mild soap works wonders for stubborn stains.
  • Seal the Stone: Many natural stones, such as limestone or travertine, are porous and can absorb moisture, which may cause damage over time. Applying a high-quality stone sealer helps protect the surface from stains and moisture penetration, especially during wet or cold months.
  • Inspect for Cracks or Damage: Over time, the stone may develop cracks or chips. Regularly inspect your fireplace for any signs of damage. If you notice any issues, it’s best to address them promptly to avoid further deterioration.
  • Clean the Chimney: If your fireplace is wood-burning, be sure to have the chimney cleaned regularly to prevent a dangerous creosote buildup. This ensures proper ventilation and reduces the risk of fire hazards.

Conclusion

A natural stone fireplace is the perfect way to elevate your backyard, combining functionality with timeless beauty. 

Whether you’re looking to create a cosy retreat, increase your home’s value, or enjoy year-round outdoor gatherings, stone offers unmatched durability and elegance. 

Ready to transform your outdoor space? Explore our wide selection of high-quality natural stone options at Splendour in Stone and turn your backyard dreams into reality today.

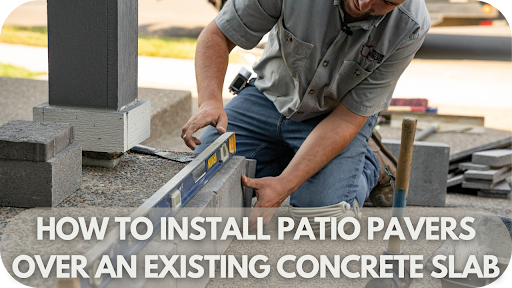
How to Install Patio Pavers Over an Existing Concrete Slab

An old, cracked concrete slab can make any outdoor space feel tired and uninspired. Instead of tearing it out, imagine transforming it into a beautiful, functional patio with minimal effort. 

By installing pavers over the existing concrete, you can give your backyard a fresh new look without the mess or expense of starting from scratch.

Curious how it works? Keep reading – you’re just a few steps away from creating the patio of your dreams!

Tools and Materials You’ll Need

Essential tools and materials for installing patio pavers.

Having the right tools and materials before starting the installation is crucial for a smooth and successful project.

  • Tape Measure: This is used to ensure accurate measurements for paver placement.
  • Spirit Level: This is to check that the surface is perfectly even and level.
  • Broom: This is used to sweep away debris and spread sand into joints.
  • Rubber Mallet: This is used to adjust pavers into position without causing damage.
  • Plate Compactor: This is for compacting pavers and sand to create a stable base.
  • Masonry Saw or Angle Grinder: This is used for cutting pavers to fit corners and edges precisely.
  • High-Quality Pavers: These are used to create a durable and visually appealing patio surface.
  • Coarse Sand or Polymeric Sand: To build a stable base and secure paver joints.
  • Edge Restraints: These are used to prevent pavers from shifting or spreading over time.
  • Self-Levelling Compound: For smoothing out dips or uneven areas on the slab.
  • Adhesive or Bonding Agent: For securing pavers in high-traffic or sloped areas.

Step-by-Step Installation Process

Easy-to-follow steps for installing patio pavers over concrete.

Transforming your dull concrete slab into a stunning patio is easier than you think. Follow these simple steps to achieve a professional, durable finish that enhances your outdoor space.

Step 1: Assess the Existing Concrete Slab

Start by checking the slab’s structural integrity. Look for cracks, uneven surfaces, or instability, and repair any minor issues to ensure a solid base. Confirm the slab has a slight slope for proper water runoff. If drainage is poor, consider using drainage solutions like installing weep holes.

Step 2: Prepare the Concrete Surface

Using a power washer, clean the slab thoroughly to remove dirt, grease, and debris. If there are any dips or uneven spots, apply a self-levelling compound to smooth out imperfections. For added paver stability, spread a thin layer of mortar or adhesive as a bonding layer.

Step 3: Lay the Paver Base

Spread a thin, even layer of coarse sand or bonding adhesive over the cleaned concrete surface. This layer creates a stable and level foundation for the pavers. Ensure the sand or adhesive is evenly distributed to avoid future shifting or unevenness when placing the pavers.

Step 4: Place the Pavers

Start placing the pavers in your chosen pattern, such as herringbone or basket weave. Use a level to maintain even alignment and a rubber mallet to adjust each paver gently into place. Pay attention to spacing for a uniform and professional finish.

Step 5: Install Edge Restraints

How to install edge restraints for secure paver placement.

Edge restraints are essential for keeping the pavers in position over time. Place them around the perimeter of the patio to prevent shifting or spreading. Secure the restraints using adhesive or ground anchors to ensure they remain firm, especially in high-traffic areas.

Step 6: Fill the Joints

Seal the paver joint for longevity. Spread polymeric sand evenly across the paver surface, sweeping it into the joints with a broom. Remove any excess sand from the surface, then lightly mist it with water to activate the binding agent. Allow the sand to settle and harden for a strong, long-lasting bond.

Step 7: Compact the Surface

Use a plate compactor to press the pavers firmly into place, ensuring they settle evenly into the base. This step enhances stability and reduces gaps. After compacting, check for alignment and fill any remaining gaps with additional sand for a smooth, polished finish.

Step 8: Seal the Pavers

Apply a high-quality paver sealant. Sealing protects the surface from stains, weather damage, and wear. Use a roller or sprayer for even coverage, and allow the sealant to dry completely. Paver sealing ensures longevity, enhances the pavers’ colour, and keeps your patio pristine for years.

Benefits of Installing Patio Pavers Over Concrete

Key benefits of installing pavers over an existing concrete slab.

Transforming your existing concrete slab with patio pavers is a smart, cost-effective way to enhance your outdoor space. Below are the key benefits of installing patio pavers over concrete, each offering practical and aesthetic advantages for your home.

1. Ease of Installation

Installing pavers over concrete eliminates the need for slab removal, saving time, money, and labour. The process is straightforward and far less disruptive, allowing you to achieve a brand-new patio with minimal hassle while avoiding the mess of a full demolition.

2. Design Versatility

Pavers come in a wide range of materials, patterns, and colours, making it easy to match your style preferences. Whether you love the timeless appeal of natural stone or the clean finish of interlocking concrete pavers, the design options are virtually endless.

3. Durability and Longevity

High-quality pavers are designed to withstand heavy foot traffic, changing weather conditions, and wear over time. Their robust nature ensures a long-lasting, sturdy patio surface that remains beautiful and functional for years with proper care.

4. Low Maintenance

Maintaining pavers is simple and cost-effective. Regular sweeping, occasional washing, and reapplying joint sand or sealant keep the surface looking fresh and clean, without the cracks or major repairs often associated with concrete slabs.

5. Increased Property Value

A well-designed patio adds significant value to your home. Pavers not only improve curb appeal but also enhance the overall functionality of your outdoor space, making your property more attractive to potential buyers.

6. Improved Aesthetics

Pavers instantly upgrade the look of an old, worn concrete slab. Their elegant finish creates a warm, inviting outdoor area perfect for relaxing, entertaining, or showcasing a professionally designed landscape.

Common Problems and Fixes For Installing Pavers Over Concrete

Solutions to common issues when installing pavers over concrete.

While installing pavers over concrete is straightforward, a few challenges can arise if not addressed correctly. Understanding these common issues—and their fixes—will ensure your patio remains durable and visually appealing for years to come.

Poor Drainage

If water pools on the concrete, it weakens the paver base over time and causes instability. To fix this, ensure the concrete has a proper slope for runoff. For stubborn water retention, drill small weep holes into the slab to allow water to escape effectively.

Paver Movement

Pavers can shift or spread if edge restraints are overlooked during installation. Installing sturdy edge restraints and securing them with strong adhesive or ground anchors prevents unwanted movement. This step is crucial for maintaining stability in high-traffic areas.

Uneven Surface

Dips and bumps in the concrete can make the pavers unstable and uneven. Apply a self-levelling compound to fill low spots and smooth imperfections. Once levelled, add a thin layer of sand or adhesive to create a strong, even foundation for the pavers.

Joint Sand Loss

Regular sand between paver joints can wash out over time, leading to loose pavers and weed growth. Replace it with polymeric sand, which hardens when wet, locking pavers into place. This creates a solid bond while resisting erosion, weeds, and heavy rains.

Maintenance Tips for Patio Pavers

Easy maintenance tips to keep your patio pavers looking great.

With proper care, a beautifully laid patio can stay stunning for years. The good news is that maintaining patio pavers is simple and doesn’t require expensive tools or excessive effort. Follow these tips to keep your outdoor space looking polished and functional season after season.

  • Regular Cleaning: Sweep weekly to remove dirt, leaves, and debris. Use water and mild detergent to lift stains for a deeper clean, ensuring you rinse thoroughly.
  • Reapply Joint Sand: Over time, sand between the pavers can erode. Use polymeric sand to refill joints—it hardens when wet and resists weeds, insects, and washout.
  • Seal the Surface: Apply a quality paver sealant every 2–3 years to protect against stains, fading, and weather damage while enhancing the paver colour.
  • Address Weeds and Moss: Remove weeds or moss promptly and treat the joints with an appropriate weed or moss killer to prevent regrowth.
  • Check for Movement: Inspect the pavers for shifting or uneven areas. Reset the affected pavers and reapply joint sand to maintain a stable surface.
  • Prevent Staining: Avoid spills from oil, food, or chemicals. Clean stubborn stains immediately to prevent long-term discolouration or surface damage.
  • Protect Against Harsh Weather: Avoid using metal shovels or de-icing salts in colder climates, as they can scratch or degrade the paver surface. Instead, use plastic tools and gentle ice-melting alternatives.

Conclusion

Transforming your old concrete slab with patio pavers is a cost-effective and rewarding way to elevate your outdoor space. With the right tools, materials, and steps, you can create a stunning, durable patio that enhances both functionality and style.

Ready to bring your vision to life? At Splendour in Stone, we offer premium pavers and expert advice to help you achieve the perfect finish. Explore our range today and start your patio transformation with confidence!

In SQM?

Please fill your details to download.


      Request Callback


        Enquiry Form


        Please fill your details to download.