Register your Information for Free Stone Samples Sent Express to You!

Search
Search
Close this search box.
Search
Close this search box.

Does Water Damage Travertine?

Travertine’s natural beauty adds elegance to any space, but its porous nature leaves it vulnerable to water damage. Over time, moisture can cause stains, cracks, and erosion.

The good news? With the proper care, you can protect your travertine surfaces and keep them looking pristine. 

Are you curious about how water affects this stunning stone and how you can prevent damage? Let’s dig into everything you need to know to preserve the timeless appeal of your travertine.

Does Water Damage Travertine?

Yes, water can damage travertine due to its porous nature. Prolonged exposure to moisture can cause staining, mould growth, and surface erosion. Proper sealing prevents water absorption, protecting the stone’s durability and appearance. Regular maintenance, including sealing every 1–2 years, ensures travertine remains resistant to water damage in bathrooms, kitchens, and outdoor spaces.

Travertine’s Properties and Its Relationship with Water

Illustration of travertine’s properties and its interaction with water, highlighting durability and susceptibility to water damage.

Travertine is a natural stone renowned for its timeless beauty and rustic charm. It is formed through mineral deposits from natural springs and boasts unique patterns, warm earthy tones, and a distinctive porous structure. These small holes and cavities contribute to its character but also impact its functionality.

The stone’s porous nature makes it highly absorbent, allowing water to seep into the surface if left untreated. Prolonged water exposure can lead to staining, discolouration, and mould growth in moisture-rich environments such as bathrooms, patios, or pool surrounds. 

These issues compromise the stone’s aesthetic appeal and weaken its structure over time, potentially causing erosion or surface damage.

To maintain its longevity, proper sealing and regular maintenance are essential. When adequately protected, travertine can withstand wet environments while preserving its natural elegance and durability. With the right care, its beauty and strength can last for generations.

How Water Affects Travertine

Visual representation of how water affects travertine, showcasing potential damage and its impact on the stone's durability.

Travertine’s porous nature makes it vulnerable to water exposure, which can lead to several issues over time. Below are the key ways water affects travertine and what it means for its durability and appearance.

1. Surface Stains and Discolouration

Water can seep into the travertine’s natural pores, causing stains and surface discolouration. In bathrooms, kitchens, or outdoor areas, prolonged moisture can darken the stone, leaving unsightly patches that diminish its aesthetic appeal if not cleaned or treated promptly.

2. Mould and Mildew Growth

Water trapped in travertine pores in high-moisture environments, like showers or patios, encourages mould and mildew growth. These create dark, unpleasant spots and pose potential health concerns, requiring specialised cleaning to restore the stone’s appearance.

3. Erosion and Pitting

Continuous water exposure erodes the travertine surface, leading to pitting or small cavities. Outdoor surfaces, like pool decks, are particularly susceptible, as standing water accelerates wear and weakens the stone’s structure.

4. Cracking from Freeze-Thaw Cycles

In colder climates, water absorbed into travertine can freeze and expand, causing cracks. The freeze-thaw cycle gradually damages the stone, leading to splits and weakening its durability, especially on outdoor installations.

5. Loss of Structural Integrity

Excessive moisture weakens travertine’s natural strength, making it more susceptible to cracks and breakage. The stone’s durability can be compromised without proper sealing, reducing its lifespan and requiring costly repairs.

Common Causes of Water Damage on Travertine

Image illustrating common causes of water damage on travertine, including moisture exposure, spills, and improper sealing.

Travertine is a popular choice known for its natural beauty and durability, but its porous nature leaves it susceptible to water damage. Here are the primary causes:

1. Excessive Moisture Exposure

Areas with constant water exposure, like bathrooms, showers, or pool surrounds, can cause moisture to seep into the stone. The water penetrates the surface without proper sealing, leading to discolouration, erosion, or weakening over time.

2. Improper Sealing or Lack of Sealing

Travertine must be sealed regularly to protect against water absorption. Unsealed or poorly sealed surfaces allow water to soak in, increasing the risk of stains, mould, and eventual surface deterioration.

3. Standing Water

Pooled or stagnant water can erode the stone’s surface, especially on outdoor travertine patios. Over time, this results in pitting, cracks, or loosening of the stone if not addressed promptly.

4. Harsh Cleaning Products

Acidic or abrasive cleaners strip the sealant and damage the stone’s structure. Once the protective layer is gone, water can easily penetrate, causing significant harm.

5. High Humidity and Poor Ventilation

Indoor spaces with high humidity and limited airflow, such as basements or bathrooms, encourage moisture buildup. This creates the perfect environment for mould and mildew to thrive within the travertine’s pores.

6. Poor Installation and Drainage

Incorrect installation or inadequate drainage causes water to collect beneath the travertine, weakening its foundation. Over time, this leads to cracks, instability, and surface damage.

How to Prevent Water Damage on Travertine

Tips on how to prevent water damage on travertine, featuring proper sealing, cleaning, and maintenance practices.

Travertine’s timeless appeal lies in its natural charm, but its porous nature makes it prone to water damage. The good news? With proper care and maintenance, you can protect its beauty and durability.

  • Seal the Surface: Apply a high-quality, penetrating sealant to block water absorption. Reseal every 1–2 years, especially in bathrooms, kitchens, or outdoor areas exposed to heavy moisture.
  • Clean Spills Immediately: Wipe up spills promptly to prevent staining and water penetration. Use soft cloths and pH-neutral cleaners to protect natural stone from unnecessary wear.
  • Ensure Proper Drainage: For outdoor areas like patios and pool surrounds, incorporate slight slopes or drainage systems to prevent standing water, accelerating erosion and weakening the stone’s structure.
  • Avoid Harsh Cleaners: Acidic or abrasive cleaning products strip away sealant and damage the travertine’s surface. Opt for gentle, stone-safe solutions to maintain the stone and its protective barrier.
  • Improve Ventilation: Maintain good airflow in moisture-prone spaces like bathrooms or kitchens. Proper ventilation helps keep surfaces dry and reduces the risk of mould or mildew growth.
  • Regular Maintenance: Inspect travertine surfaces regularly for early signs of water damage, like dark spots or erosion. Proactive cleaning and resealing will ensure long-lasting protection and durability.

How to Fix Water Damage on Travertine

Steps on how to fix water damage on travertine, including cleaning, repairing, and resealing to restore its natural beauty.

Water damage on travertine can be concerning, but it’s not irreversible. With the correct methods, you can restore the stone’s beauty and prevent further issues.

  • Clean Surface Stains: Use a pH-neutral stone cleaner and a soft cloth to remove surface stains gently. Apply a specialised poultice for stubborn stains to draw out moisture and discolouration.
  • Remove Mould and Mildew: Treat affected areas with a stone-safe mould remover. Clean carefully, ensuring the surface dries completely. Proper ventilation prevents further moisture buildup and future mould growth.
  • Repair Pitting and Erosion: Fill small pits and cavities with a travertine filler. Once it dries, buff the surface to create a smooth, even finish and restore the stone’s integrity.
  • Polish the Surface: For dull or worn areas, lightly polish the stone to restore its natural sheen. Professional polishing may be necessary for significant water damage.
  • Replace Severely Damaged Tiles: In cases of irreparable damage, replace individual tiles to maintain the overall look and integrity of the installation. Professional help ensures seamless results.
  • Regrout Travertine Joints: Water can weaken grout over time, leading to gaps that trap moisture. Remove damaged grout and replace it with a suitable stone-safe grout to prevent further water seepage.
  • Resurface the Travertine: For extensive damage, resurfacing the stone can remove eroded layers, revealing a fresh, smooth surface. Professionals best handle this process for an even finish.

Conclusion

Water can damage travertine, but its natural beauty and durability can be preserved for years with the right care. From sealing to regular maintenance, simple steps can prevent costly repairs and keep your travertine surfaces looking flawless.

Ready to protect and enhance your stone? At Splendour in Stone, we offer premium travertine solutions and expert advice tailored to your needs. Explore our range today and ensure your travertine stands the test of time.

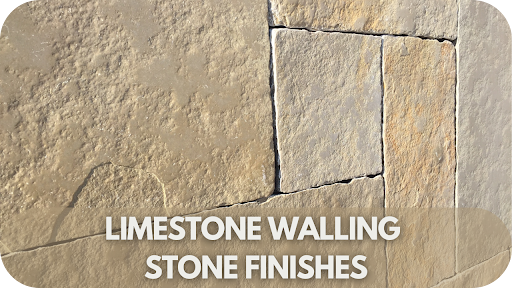
Limestone Walling Stone Finishes: A Comprehensive Guide to Texture & Colour

Limestone walling stones are an unbeatable choice when transforming your space with timeless elegance. 

Whether you’re creating a rustic feature wall or a sleek modern facade, the finish of your limestone can make all the difference. But with so many textures and colours, how do you know which is right for your project? 

This comprehensive guide will unravel the secrets behind limestone finishes, helping you choose the perfect style to elevate your design and bring your vision to life.

Why Choose Limestone for Walling

Limestone is a timeless choice for walling, offering natural durability and unmatched aesthetic appeal. Its range of textures and colours—from soft greys to warm creams—adds depth and character, making it suitable for contemporary and traditional designs.

Durable and weather-resistant, limestone excels in outdoor spaces while requiring minimal maintenance. Indoors, it brings warmth and elegance to feature walls, blending effortlessly with any dĂ©cor. 

As a naturally occurring material, it’s also an eco-friendly option with a lower environmental impact than synthetic alternatives.

Whether enhancing a garden, boundary, or interior space, limestone delivers enduring beauty and resilience. Its classic charm ensures your walls remain striking for years to come.

Top Limestone Walling Stone Finishes

Top limestone walling stone finishes showcasing diverse textures and colors, highlighting premium options for construction and design.

Choosing the right finish for your limestone walling can dramatically impact your project’s final look and performance. Below are the top finishes to consider, each suited to different styles, applications, and environments.

1. Honed Finish

A honed finish creates a smooth, matte surface with a subtle sheen. It works well for interior walls and modern facades and is ideal for contemporary designs. While easy to maintain, it is less durable outdoors, as weathering can affect the surface over time, making it better suited for indoor applications.

2. Polished Finish

A polished finish gives limestone a high-gloss, reflective surface that enhances its natural beauty. Perfect for luxury designs and indoor feature walls, it requires more maintenance due to its susceptibility to scratches. 

While it creates a striking visual effect, the glossy surface needs regular care, especially in high-traffic areas.

3. Rough-cut (Rustic) Finish

The rough-cut finish mimics the appearance of unrefined quarry stone with a coarse, uneven surface. Ideal for rustic and outdoor applications, it adds character to traditional walling. While it provides authenticity, the irregular texture makes cleaning more complex, making it best suited for low-maintenance environments.

4. Tumbled Finish

A tumbled finish gives limestone a weathered, rounded appearance, ideal for vintage designs and garden walls. It is non-slip and perfect for outdoor settings, offering old-world charm. The soft, rounded edges may not suit modern designs, but they provide a rustic look that complements natural environments.

5. Flamed Finish

Flamed Finish

The flamed finish involves applying heat to the stone, creating a rough, uneven surface. Its durability and slip resistance are ideal for paving, outdoor walls, and high-traffic areas. The rugged texture makes it perfect for exterior use, though it’s unsuitable for those seeking a polished look.

6. Split-Faced Finish

A split-faced finish splits the limestone along natural seams, creating a jagged, rugged texture. It highlights the stone’s organic feel, which is perfect for features and garden walls. 

While it offers a distinctive look, the uneven surface can be harder to clean, making it better suited for outdoor environments.

7. Sandblasted Finish

The sandblasted finish creates an even, textured surface by blasting the stone with sand. It is commonly used for commercial and public buildings, providing a uniform appearance. 

While it highlights natural colours, the process can flatten finer details, making it less ideal for designs requiring intricate patterns.

8. Sawn Finish

A sawn finish leaves the limestone smooth with visible saw marks. It is popular in modern and industrial settings and offers a clean, minimalist look. The smooth surface is easy to maintain, though it lacks the natural character of more textured finishes, giving it a more uniform and polished appearance.

Limestone Walling Stone Colour Options

Limestone walling stone color options displaying a variety of natural shades, enhancing design versatility and aesthetic appeal.

Limestone comes in various beautiful colours, offering distinct appeal and versatility for different design styles. Here are some popular options:

  • Beige: A timeless, neutral colour that complements modern and traditional designs, providing warmth and elegance while blending seamlessly with most other materials.
  • Cream: Light and airy, cream limestone brightens spaces, adding subtle sophistication to interior walls and exterior facades. It is ideal for enhancing natural light.
  • Grey: Sleek and contemporary grey limestone suits modern urban settings. Its cool tones add a minimalist, sophisticated look, perfect for stylish and clean designs.
  • Buff: A warm, earthy colour with a soft, golden hue. Buff limestone brings a rustic charm to garden walls and exterior applications, offering a natural, welcoming look.
  • Yellow: Vibrant and cheerful, yellow limestone adds character and a touch of sunshine to traditional and rustic settings. It is often used for feature walls and outdoor spaces.
  • Brown: Rich, deep brown tones provide an organic, earthy feel, ideal for outdoor projects such as garden walls, driveways, or rustic architectural designs.
  • White: Crisp and clean, white limestone gives a fresh, modern look. It is often used in contemporary settings for facades, flooring, and interior accent walls.
  • Blue: Rare but striking, blue limestone offers a cool, sophisticated colour, making it an excellent choice for bold, contemporary designs with a unique touch.

How to Select the Right Limestone Walling Stone Finish

Guide on how to select the right limestone walling stone finish, focusing on texture and color options for optimal design choice.

Selecting the right limestone walling stone finish depends on a range of factors that influence both the look and longevity of your stonework. Consider the following key elements when making your choice:

1. Project Style and Aesthetic

The finish should complement the overall style of your project. A honed finish suits modern interiors and sleek exteriors, while a rough-cut or tumbled finish works best for rustic, traditional designs. The finish will determine how your limestone interacts with light, texture, and surrounding materials.

2. Functionality and Durability

Consider where your limestone will be used. For high-traffic areas or outdoor applications, finishes like flamed or split-faced offer better durability and a non-slip surface. These finishes are ideal for paving, garden walls, and exterior facades, where the stone needs to withstand the elements.

3. Maintenance and Cleaning

Some finishes require more maintenance than others. A polished finish looks stunning but may require frequent cleaning to maintain its high-gloss appearance, especially in exterior settings. Textured finishes, such as rough-cut or sandblasted, may require more effort to clean due to their irregular surfaces.

4. Environmental Conditions

The location of your project plays a significant role in the finish selection. Polished finishes are better suited for indoor applications, while finishes like tumbled or flamed are ideal for outdoor use, offering resilience against weathering, moisture, and staining.

5. Budget and Cost

Some finishes, like polished or sawn, may cost more due to the additional work required during the finishing process. If you’re working with a limited budget, consider finishes like rough-cut or sandblasted, which offer a natural look at a more affordable price point.

Maintenance and Care of Limestone Walling Stones

Proper maintenance ensures your limestone walling remains beautiful and durable for years. Here are some essential tips to keep your stone in top condition:

  • Clean Regularly: Use a soft brush or mild detergent mixed with water to clean the surface gently. Avoid harsh chemicals or abrasives that could damage the stone.
  • Wash with Low Pressure: Use low-pressure washing to remove dirt and debris from outdoor walls. High pressure can erode the stone, so always keep the pressure setting low.
  • Seal the Stone: Apply a high-quality stone sealer. Sealing protects the stone against stains, moisture, and oils. Reapply the sealer every few years based on exposure to the weather.
  • Inspect for Damage: Regularly inspect for any cracks, chips, or signs of wear. Catching damage early prevents it from worsening and maintains the integrity of the stone.
  • Avoid Abrasive Tools: Avoid using abrasive tools or scrubbing pads, as they can scratch or wear down the surface, particularly on smooth or polished finishes.
  • Dry Gently: After cleaning, pat dry with a soft cloth to avoid water marks, especially on polished or smooth finishes where moisture can leave stains.

Conclusion

Selecting the right limestone walling stone finish can elevate your project, adding both aesthetic appeal and lasting durability. Whether you prefer the sleekness of a polished finish or the rustic charm of a rough-cut texture, there’s a perfect option for every design. 

At Splendour in Stone, we offer a wide range of limestone finishes to suit your needs. Contact us today to find the ideal stone for your project and transform your space with timeless elegance.

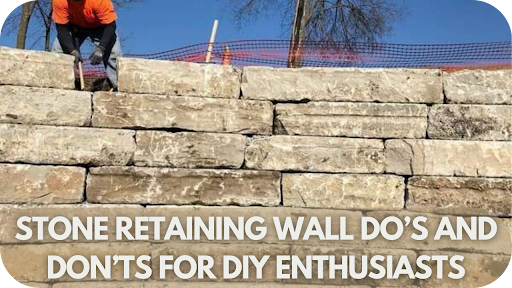
Stone Retaining Wall Do’s and Don’ts for DIY Enthusiasts

Building a stone retaining wall can be the perfect DIY project to enhance your garden’s aesthetic and functionality. 

However, a few missteps could turn your dream wall into a costly nightmare. From choosing the right materials to ensuring proper drainage, every decision counts. Whether you’re a seasoned DIY enthusiast or a first-timer, getting the dos and don’ts right is crucial. 

Stick with us to uncover expert tips for making your stone retaining wall sturdy and a stunning feature in your outdoor space.

Do’s for Building a Stone Retaining Wall

Do’s for Building a Stone Retaining Wall

A stone retaining enhances both functionality and aesthetics; follow these essential steps to ensure your project is structurally sound and visually stunning, creating a lasting feature in your garden.

1. Plan Your Project Thoroughly

A solid plan is crucial to a successful stone retaining wall. Take the time to carefully consider factors like location, wall height, materials, and the intended function of the wall. Don’t forget to check local building codes and zoning regulations to avoid any compliance issues during construction.

2. Choose the Right Stone for the Job

Select durable stones such as granite, limestone, sandstone, or fieldstone, which are well-known for their strength and aesthetic value. The right stone will complement your garden’s look while ensuring the wall’s structural integrity. Matching the stone to your landscape’s style is an excellent idea for a cohesive outdoor design.

3. Dig a Proper Foundation Trench

Digging a trench at least 6-12 inches deep is essential for stability and durability. A properly dug foundation will prevent the wall from shifting over time. Use gravel or crushed stone to enhance drainage behind the wall, and ensure the trench is level for a straight and even structure.

4. Use Proper Drainage Techniques

Use Proper Drainage Techniques

Effective drainage is essential to avoid water buildup behind the wall, which could lead to shifting or collapse. Install weep holes, perforated pipes, and drainage fabric to promote water flow and reduce hydrostatic pressure. Incorporating gravel behind the wall helps maintain its structural integrity and longevity.

5. Stack Stones Correctly

Start with the largest stones at the base, working upwards and tapering the layers. Each stone should be level and securely interlocked to prevent shifting. Gently tap each stone into place with a rubber mallet to ensure a snug fit without cracking or damaging the stones.

6. Secure Stones with Mortar or Adhesive 

Consider using mortar or stone adhesive to hold the stones in place for taller retaining walls under significant pressure. While dry-stacking can be effective, using mortar or adhesive adds extra security and can be especially important for added strength in high-stress areas.

7. Consider Reinforcement for Taller Walls

Reinforcement is often necessary for walls exceeding 3 feet in height to prevent instability or shifting. Reinforcements such as geogrids, rebar, or metal ties can distribute the wall’s weight and provide additional structural support, ensuring your wall stays solid and secure.

8. Maintain and Inspect Regularly

Once the retaining wall is built, it’s essential to perform regular maintenance checks. Look for signs of settling, cracking, or shifting. Periodic inspections and minor repairs can help prevent bigger issues down the line, ensuring your stone wall remains strong, functional, and visually appealing for years.

Don’ts for Building a Stone Retaining Wall

Don’ts for Building a Stone Retaining Wall

Building a stone retaining wall can transform your garden, but avoiding common mistakes is crucial. Follow these essential don’ts to ensure your DIY project is sturdy, long-lasting, and safe.

1. Skip the Site Preparation

Proper site preparation is essential for stability. Remove weeds and debris, and ensure the ground is level to avoid uneven walls or drainage problems. Skipping this step can lead to shifting, cracking, or water-related damage, compromising the wall’s integrity.

2. Use Stones That Are Too Small or Weak

Avoid using small or fragile stones that can’t bear the pressure. Stones like granite or sandstone are sturdy and load-bearing, ensuring your wall stays intact. Weak stones will break down under pressure, causing the wall to fail prematurely.

3. Build Too High Without Support

Walls over 3 feet need reinforcement for stability. Taller walls are prone to tipping or collapsing without proper support, such as geogrids or rebar. Always ensure that higher walls have the necessary structural support to withstand the weight and pressure.

4. Overlook Drainage Needs

Ignoring drainage can cause water buildup behind the wall, leading to erosion or collapse. Install proper drainage solutions like French drains, weep holes, and gravel to ensure water flows freely and prevent hydrostatic pressure from weakening the structure over time.

5. Stack Stones Too Tightly

Stack Stones Too Tightly

Stacking stones too tightly can block proper drainage and cause instability. Leave space between stones to allow water to flow through and prevent pressure from building up. This also allows the wall to settle naturally without compromising its strength.

6. Forget to Account for Wall Settlement

Retaining walls naturally settle over time. Failure to account for this can cause cracks and gaps. Leave some slack when placing stones, and avoid over-compacting the base. This ensures the wall can adjust without becoming unstable or requiring costly repairs.

7. Rush the Project

Rushing the construction process can lead to misaligned stones, uneven layers, or skipped steps. Take your time to level each stone carefully and ensure proper alignment. Patience ensures a strong, well-built wall that will stand the test of time.

When to Call a Professional

When to Call a Professional

While building a stone retaining wall can be a rewarding DIY project, some situations require professional expertise to ensure safety, stability, and durability. Here’s when you should call in the experts:

  • Walls Over 1 Metre in Height: Taller walls require structural reinforcement to prevent collapse. Professionals ensure proper engineering for safety and durability.
  • Complex Designs: Curved, tiered, or intricate designs demand precision and expertise. A professional ensures both structural stability and visual appeal.
  • Unstable Soil Conditions: Loose, sandy, or clay-heavy soil complicates foundation preparation. Experts use specialised methods to stabilise and secure the wall.
  • Persistent Drainage Issues: Poor drainage can cause erosion or wall failure. Professionals implement advanced systems to manage water effectively.
  • Safety and Longevity Concerns: Uncertainty about the wall’s integrity warrants professional input. They guarantee a safe, long-lasting structure that meets your needs.

Maintenance and Care for Your Stone Retaining Wall

Maintenance and Care for Your Stone Retaining Wall

To keep your stone retaining wall in top shape and ensure its longevity, follow these essential maintenance tips:

  • Inspect Regularly: Check for shifting stones, cracks, or erosion at least once a year. Early detection can prevent structural damage and ensure the wall’s long-term stability. Regular inspections are vital.
  • Clear Drainage Systems: Ensure weep holes, drainage pipes, and gravel are debris-free. Blocked drainage can cause water to accumulate behind the wall, leading to erosion and eventual collapse. Keep it clear.
  • Clean Periodically: Wash away dirt, moss, and algae using a mild detergent and warm water. Avoid harsh chemicals that could damage the surface or leave stains. Regular cleaning preserves the wall’s appearance.
  • Seal the Stone: Apply a high-quality sealant to protect your stone from moisture and stains. Sealing enhances the wall’s durability and beauty, preventing weathering over time.
  • Address Settling: Walls naturally settle over time. Refill gaps and relevel stones to prevent unevenness or cracks. Regular maintenance will ensure the wall stays stable and secure in the long run.
  • Check for Vegetation Growth: Plants, moss, or weeds growing through gaps can damage the wall and affect its stability. Remove any unwanted growth to maintain the integrity of your stone structure.

Conclusion

Building a stone retaining wall is a rewarding DIY project, but success lies in the details. By following the do’s and avoiding the don’ts, you can create a sturdy and visually appealing feature that enhances your landscape. 

Regular maintenance will ensure its longevity and performance. Ready to get started? Visit Splendour in Stone for premium materials and expert advice to help bring your retaining wall vision to life. Your dream garden begins with the proper foundation!

In SQM?

Please fill your details to download.


      Request Callback


        Enquiry Form


        Please fill your details to download.