Register your Information for Free Stone Samples Sent Express to You!

Search
Search
Close this search box.
Search
Close this search box.

The Ultimate Guide to Sealing and Cleaning Natural Stone Pavers

Natural stone pavers add timeless beauty and durability to any outdoor space but require proper care to maintain their appearance and longevity. Sealing and cleaning these surfaces are essential to protect them from stains, weathering, and wear.

Regular maintenance preserves their aesthetic appeal and enhances their resilience against the elements. Sealing acts as a protective barrier, while cleaning removes dirt, debris, and stains that can cause long-term damage.

This guide offers practical tips on adequately sealing and cleaning natural stone pavers, keeping them looking their best.

Why Sealing Natural Stone Pavers is Important

Sealing stone pavers benefits

Sealing natural stone pavers is crucial in preserving their beauty and durability. By creating a protective barrier, sealant prevents stains from liquids, oils, and dirt that can penetrate the stone.

Exposure to weather elements such as rain, sun, and frost can cause the stone to degrade over time, but sealing helps mitigate this damage. Additionally, sealing prevents water absorption, leading to cracking and erosion in colder climates.

Without a proper seal, pavers are more vulnerable to moss, algae, and weed growth, which can ruin their appearance and structure. The suitable sealant enhances the stone’s colour, bringing out its natural vibrancy while maintaining a smooth, clean surface.

It’s not just about aesthetics; sealing increases the lifespan of your pavers, reducing the need for frequent repairs or replacements. Most importantly, sealing provides easier cleaning, as dirt and stains are less likely to adhere to the surface.

For these reasons, regular sealing is a worthwhile investment. It ensures your stone pavers stay protected, functional, and visually appealing for years.

Types of Sealants for Natural Stone Pavers

Stone paver sealant types

Choosing the proper sealant for natural stone pavers is essential to enhance their durability, protect their surface, and maintain their beauty. Here are the main types of sealants:

1. Penetrating Sealers

Penetrating sealers protect natural stone pavers by absorbing water deep into the surface. They create a barrier against water, oil, and stains without altering the stone’s natural appearance. 

Ideal for porous stones like sandstone and limestone, they allow the stone to breathe, preventing moisture buildup and damage. 

Easy to apply, these sealers enhance durability and resistance to weathering while maintaining a natural, matte finish, making them perfect for high-moisture or heavy-traffic areas.

2. Topical Sealers

Topical sealers form a protective layer on natural stone pavers, offering aesthetic and functional benefits. They enhance the stone’s colour with a glossy or matte finish, creating a waterproof barrier that resists stains and liquid penetration.

Ideal for non-porous stones like granite and marble, topical sealers provide high surface protection but may require reapplication due to wear. While slightly altering the stone’s appearance, they offer excellent durability and visual appeal. The application is simple: use a roller or brush.

Step-by-Step Guide to Sealing Your Natural Stone Pavers

How to seal stone pavers

Sealing your natural stone pavers is easier than you might think. Proper preparation is key. The application process ensures lasting protection. Follow these steps for a flawless, long-lasting finish.

1. Preparation

Proper preparation is essential for a successful seal on natural stone pavers. Start by thoroughly cleaning and drying the surface, removing dust, dirt, or debris that could affect adhesion. Use a pressure washer for stubborn grime, ensuring it does not damage the pavers.

 Address any existing stains with suitable cleaners, and inspect the stone for cracks or damage, making repairs where necessary. Allow the surface to dry for at least 24 hours before applying the sealant to ensure moisture-free pavers.

2. Applying the Sealer

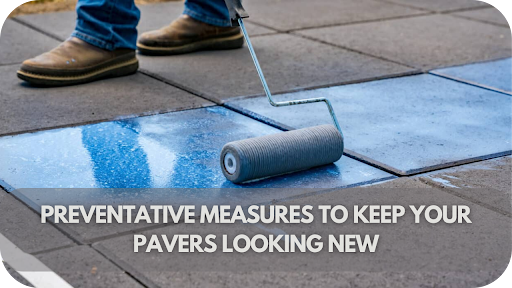
Applying the sealer correctly is essential for long-lasting protection. Choose the right application method—roller, brush, or sprayer—based on the area size and sealer type. Begin at one end, working in small sections for even coverage. Apply thin, even layers, avoiding puddles or thick spots, and allow each coat to dry before applying a second layer. Multiple coats may be needed for deep penetration of porous stones. Don’t forget the edges and joints; allow the sealer to cure completely before use. 

3. Curing and Drying Time

Curing and drying time are crucial after sealing natural stone pavers. The sealer usually requires several hours to dry before it’s safe to walk on, but complete curing may take 24-48 hours, depending on the product and weather conditions. 

Apply the sealer on a dry, mild day for best results. Avoid walking on or cleaning the pavers until completely dry. Exposure to rain or moisture before curing can compromise its effectiveness, so complete curing is allowed for long-lasting protection.

4. Regular Cleaning Techniques

Stone paver cleaning tips

Regular cleaning is essential for maintaining the appearance of natural stone pavers. Sweep the surface regularly to remove dirt, leaves, and debris, which can cause scratches or staining. A wash with mild detergent and warm water is often enough for routine cleaning.

Use a soft-bristle brush to scrub gently, avoiding damage. Harsh chemicals or acidic cleaners should be avoided as they can erode the stone. A pressure washer on low can help with stubborn stains, but use it cautiously. Ensure the pavers are thoroughly dry after cleaning.

5. Using Pressure Washing

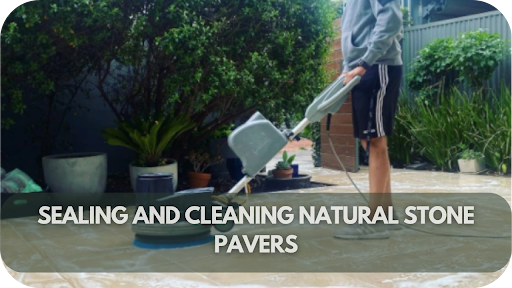
A pressure washer can effectively clean natural stone pavers, especially for removing stubborn dirt, moss, or algae. Use a 1,500 to 2,000 psi pressure setting to avoid damaging the surface or stripping the sealer. Begin by rinsing with water to loosen dirt, then use sweeping motions for even cleaning. 

Always hold the nozzle at a slight angle, a few inches away from the pavers, to prevent damage. For persistent stains, use a mild cleaning solution. Allow the pavers to dry entirely before resealing.

6. Dealing with Stubborn Stains

Stubborn stains on natural stone pavers can be challenging but are manageable. First, identify the type of stain—oil, rust, or organic matter—to choose the right treatment. For oil stains, apply a poultice of baking soda and water, leaving it for hours. 

Use a rust remover for rust stains, testing it on a small area first. Organic stains can be treated with a water-vinegar mixture. Avoid acidic cleaners on sensitive stones like limestone. After cleaning, scrub gently, rinse thoroughly, and reseal the pavers.

How to Clean Natural Stone Pavers

Clean stone pavers

Cleaning natural stone pavers doesn’t have to be complicated. Start with regular sweeping to remove debris. For deeper cleaning, use a mild detergent and soft brush. Follow these simple steps to maintain beauty.

1. Routine Cleaning

Routine cleaning is essential to keep natural stone pavers looking their best. Start by sweeping the surface regularly to remove loose dirt, leaves, and debris. A mild detergent with warm water is usually sufficient for effective cleaning. 

Use a soft-bristle brush to scrub gently, focusing on joints. Pressure washing can be used occasionally on a low setting to prevent damage. Avoid harsh chemicals that can strip the sealer or stain the stone. After cleaning, rinse thoroughly and allow the pavers to dry completely.

2. Deep Cleaning

Deep cleaning removes stubborn stains and grime that routine cleaning can’t tackle. Use a pressure washer on a low setting to blast away embedded dirt. Apply a suitable cleaner for persistent stains, like a stone-safe degreaser for oil or a rust remover for discolouration. 

Allow the cleaner to sit before gently scrubbing with a soft-bristle brush. For organic stains like moss or algae, use a vinegar-water mix. After cleaning, rinse thoroughly and allow the pavers to dry completely, then consider resealing for protection.

3. Removing Weeds and Moss on Stone Pavers

If left unchecked, weeds and moss can ruin the appearance of natural stone pavers. Start by manually pulling visible weeds from the joints, using a weeding tool to remove the roots. For stubborn moss, spray a vinegar and water solution directly onto the affected area. 

Once the moss is dead, gently brush to remove the remaining growth. Regular pressure washing helps prevent moss buildup, especially in damp areas. Use a joint stabiliser or weed prevention product, and reseal the pavers for protection.

4. Dealing with Stubborn Stains

Stubborn stains on natural stone pavers require a targeted approach. Identify the stain type—oil, rust, or organic—to select the proper treatment. Oil stains can be removed with baking soda and water poultice and left for several hours. 

Rust stains need a specialised cleaner that is safe for stone surfaces. A vinegar and water mix works well for organic stains, like moss or plant matter. Scrub gently with a soft brush, rinse thoroughly and dry completely. If stains persist, consider resealing the pavers.

Common Mistakes to Avoid When Sealing and Cleaning Stone Pavers

Paver mistakes to avoid

Sealing and cleaning natural stone pavers is essential for their beauty and longevity. Common mistakes to avoid ensure adequate protection, prevent damage, and keep your pavers looking their best. Here are key pitfalls to watch out for when caring for your stone.

  • Over-Applying Sealer: Applying too much sealer can create a slippery surface or an unattractive, cloudy finish. Always follow the manufacturer’s instructions.
  • Using Harsh Chemicals: Avoid acidic or abrasive cleaners that can damage the stone’s surface and reduce its natural shine.
  • Neglecting Proper Preparation: Skipping steps like cleaning the pavers thoroughly or ensuring they are dry before sealing can lead to uneven results.
  • Ignoring Routine Maintenance: Failing to clean and reseal regularly allows dirt, stains, and weathering to degrade the pavers.
  • Sealing in wet conditions: Sealing in damp conditions can prevent proper bonding, reducing the sealant’s effectiveness.
  • Not allowing sufficient curing time: After applying the sealer can lead to premature wear or damage. Always follow the recommended drying time.

Maintaining Sealed and Cleaned Pavers

Maintain sealed pavers

Maintaining sealed and cleaned pavers is essential for keeping them in top condition. Regular upkeep helps prevent damage, keeps your outdoor space looking pristine, and extends the life of your stone pavers.  Sweep your pavers frequently to remove dirt, leaves, and debris, which can scratch the surface or affect the sealant. 

Clean stains promptly using a stone-safe cleaner to prevent them from setting. Reseal your pavers every 1-2 years to protect them from stains, moisture, and weathering, ensuring the sealant remains effective.  Check for cracks or chips and repair them promptly to prevent further deterioration. 

When pressure washing, use a low setting to avoid damage. Avoid harsh chemicals that can strip the sealant or cause discolouration, and monitor for weed or moss growth to address issues quickly. Lastly, keep the area dry after rain or cleaning to prevent moisture absorption.

Conclusion

Properly sealing and cleaning natural stone pavers enhances their beauty and longevity. Regular care ensures they stay stunning and durable against the elements. 

Ready to elevate your outdoor spaces? Explore premium natural stone solutions with Splendour in Stone today. Contact us for expert advice and make your pavers a timeless masterpiece!

Travertine Walling Stone Maintenance & Care: Preserving Its Natural Beauty

Travertine walling stone has long been admired for its timeless charm, unique textures, and versatility. Whether enhancing a modern living room or adding character to a garden wall, this natural stone elevates any space with its understated elegance. 

However, travertine’s beauty can fade over time without proper care. Regular maintenance is essential to preserve its natural allure, protect it from wear, and extend its lifespan. 

In this guide, we’ll share practical tips and expert advice on maintaining your travertine walling stone and keeping it looking as stunning as the day it was installed.

Why Proper Maintenance is Essential for Travertine

travertine maintenance importance

Travertine, a naturally porous stone, exudes elegance and sophistication, but its delicate structure requires diligent care. 

Without proper maintenance, its surface is vulnerable to stains from liquids, such as wine or coffee, and damage from acidic substances like citrus juice. Over time, dirt and grime can seep into its pores, dulling its natural beauty.

Weather exposure poses another challenge for outdoor travertine installations. UV rays can cause fading, while rain and frost may lead to cracks or structural weakening. Regular care, including cleaning and sealing, not only preserves its aesthetics but also extends its lifespan.

Moreover, well-maintained travertine retains its value, making it a cost-effective investment in the long run. By implementing a consistent care routine, you can prevent costly repairs and ensure your travertine walling remains a stunning feature of your property for years to come.

Essential Maintenance Tips for Travertine Walling Stone

essential maintenance tips travertine

Travertine walling stone exudes timeless elegance, but its natural beauty can fade without proper care. The good news? With a few simple steps, you can keep it looking as stunning as the day it was installed. Here’s how to maintain and protect your travertine for years to come.

1. Seal Your Travertine Walling Stone

Sealing is the first step in protecting travertine. Use a high-quality penetrating sealer to prevent water absorption, stains, and moisture damage. Reseal periodically, especially for outdoor walling, to maintain the stone’s durability and protect its porous surface from environmental wear.

2. Clean Regularly with pH-Neutral Solutions

Travertine requires gentle cleaning to maintain its natural charm. Use warm water and pH-neutral cleaners to avoid damaging the stone. Harsh chemicals and acidic solutions, like vinegar, can cause etching and discolouration, so stick to soft cloths or mops for safe and effective cleaning.

3. Dust and Sweep Frequently

Dust and debris can settle in travertine’s natural pores, dulling its appearance over time. Regularly sweep or dust the stone using a soft brush or cloth to prevent buildup. For stubborn dirt, a gentle wipe with a damp cloth works wonders without scratching the surface.

4. Address Scratches and Wear Promptly

Scratches and surface wear can diminish travertine’s beauty. Professional honing or polishing can smooth out imperfections and restore its finish without compromising the stone’s integrity. Acting quickly on minor damage will help preserve its pristine appearance and long-lasting elegance.

5. Protect Travertine from Heavy Impact

Travertine is durable but not invincible. Avoid placing heavy or sharp objects directly against the stone to prevent chips or cracks. Use protective pads under furniture and décor, especially in high-traffic areas. For outdoor walling, take care during landscaping or construction to prevent accidental damage to the stone.

Common Challenges with Travertine Walling

travertine challenges

Travertine walling stone brings unmatched elegance to any space, but it’s not without its challenges. Understanding these natural traits and potential issues is key to preserving its timeless beauty. Here’s what you need to know to keep your travertine looking its best.

1. Water Absorption and Staining

Travertine’s porous surface absorbs moisture, causing stains and discolouration. Clean stubborn stains with a pH-neutral cleaner or a baking soda paste, avoiding harsh chemicals. Prompt cleaning and addressing water issues early help preserve the stone’s structure and natural beauty.

2. Etching and Surface Marks

Acidic substances like wine, fruit juice, or harsh cleaners can leave etching—dull spots that disrupt travertine’s smooth finish. This natural sensitivity requires careful handling and avoidance of reactive materials, particularly on polished surfaces.

3. Surface Cracks and Chips

Despite its durability, travertine can crack or chip under heavy impact or environmental stress. Outdoor walls are especially vulnerable to shifting soil or temperature fluctuations. Early detection and repair of damaged stone helps to maintain its structural integrity and visual appeal.

4. Uneven Weathering Outdoors

Exposure to outdoor elements like sunlight, rain, and freeze-thaw cycles can cause uneven weathering. Over time, surfaces may erode or develop inconsistent textures and colours. While this is a natural ageing process, it can affect the stone’s visual appeal.

5. Dirt and Natural Pore Buildup

Travertine’s natural pores trap dirt and debris, dulling its beauty. High-traffic areas or outdoor walls are particularly prone to buildup, making the stone appear aged and neglected if not cleaned regularly.

Common Mistakes to Avoid When Using Travertine Walling Stone

travertine mistakes

Travertine walling is a timeless addition to any space, but minor missteps can lead to big problems. From improper cleaning to neglecting sealing, here’s how to avoid costly mistakes and keep your travertine looking flawless.

  • Neglecting to Seal the Stone: Travertine’s porous nature absorbs moisture and stains quickly. Without proper sealing, it can weaken over time, especially outdoors, leading to permanent discolouration and structural damage.
  • Using Harsh or Acidic Cleaners: Acidic cleaners like vinegar or bleach cause etching and dull spots on travertine surfaces. Always choose gentle, pH-neutral cleaners to preserve its finish and natural beauty.
  • Improper Installation: Using the wrong adhesives or ignoring natural movement can result in cracks or loose stones. Professional installation ensures stability and prevents costly structural issues later.
  • Ignoring Regular Maintenance: Dirt and debris settle into travertine’s pores, dulling its appearance. Regular gentle cleaning helps maintain its finish and prevents long-term damage from buildup.
  • Placing Excessive Weight or Pressure: Hanging heavy objects or applying undue force can cause cracks or chips in travertine. Avoid excessive pressure to protect its integrity and visual appeal.

Tips for Long-Term Maintenance

long term tips

Maintaining travertine walling stone for the long haul requires a combination of proactive care and routine upkeep. These tips will help preserve its natural beauty and structural integrity:

  • Regular Cleaning Routine: Dust the surface frequently to prevent dirt buildup. Use a soft, damp cloth or mop with a pH-neutral cleaner to maintain its polished appearance.
  • Seal and Reseal: Sealing travertine is essential to protect it from stains and moisture penetration. Reseal every 1–2 years or as recommended by your sealant manufacturer.
  • Immediate Spill Cleanup: Wipe up spills as soon as they occur to prevent liquids from seeping into the stone. Avoid using acidic or abrasive cleaners that can etch the surface.
  • Protect Against Scratches: Place felt pads under furniture near travertine walls to prevent scratching. Avoid dragging heavy objects across the surface.
  • Weatherproof Outdoor Travertine: Apply weatherproofing treatments to outdoor installations to shield them from UV rays, rain, and frost. Ensure proper drainage to prevent water pooling.
  • Periodic Deep Cleaning: Schedule occasional deep cleaning to remove grime and stains that accumulate over time. Always use products designed specifically for natural stone.
  • Inspect for Damage: Regularly inspect your travertine for cracks, chips, or dull spots. Address minor repairs promptly to prevent them from worsening.
  • Professional Maintenance Services: Engage professional cleaning or restoration services for thorough care. Experts can revitalise worn surfaces and perform repairs with precision.

Conclusion

Travertine walling stone adds timeless elegance to any space, but preserving its natural beauty requires proper care and attention. 

From sealing and cleaning to addressing common challenges, proactive maintenance ensures your travertine stands the test of time. By following these essential tips, you can enjoy its unique charm and durability for years.

Ready to enhance your space with stunning travertine walling? Contact Splendour in Stone today and let us help bring your vision to life!

In SQM?

Please fill your details to download.


      Request Callback


        Enquiry Form


        Please fill your details to download.