Are your outdoor porcelain pavers losing their shine and looking grimy?
Dirt, grime, and weather elements can quickly dull the appearance of your beautiful pavers, making them look neglected and worn out.
This article will guide you through the most effective methods for cleaning outdoor porcelain pavers, helping you restore their pristine condition and maintain their elegance. Discover easy, step-by-step cleaning techniques to keep your outdoor spaces immaculate year-round.
Here’s a step-by-step process for cleaning outdoor porcelain pavers, focusing on practical, easy-to-follow instructions that will keep your pavers looking pristine.
Step 1: Gather Your Cleaning Supplies
Before starting the cleaning process, you must ensure you have all the necessary supplies to make the task as efficient and effective as possible.
For cleaning outdoor porcelain pavers, you’ll need a few essential items: a soft-bristled broom or brush for sweeping away loose debris, a pH-neutral cleaner designed explicitly for porcelain to avoid any surface damage, warm water, and a bucket for mixing the solution.
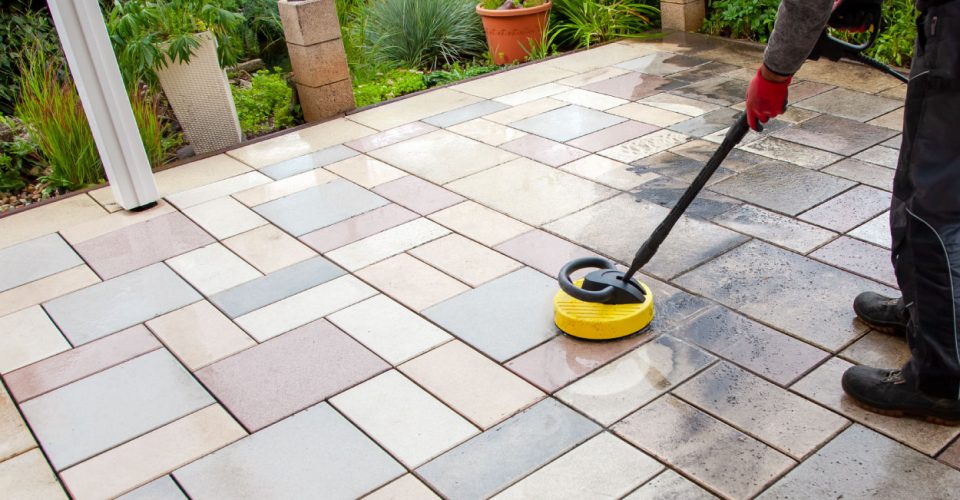
Additionally, a mop or a soft cloth will help you apply the cleaner, while a sponge can be helpful to for spot-cleaning stubborn stains. For deeper cleaning, especially in high-traffic areas, consider using a pressure washer, but ensure it’s set to a low pressure to prevent damage to the pavers.
Having the right tools and products ready saves time and ensures that your porcelain pavers remain pristine throughout the cleaning process. Proper preparation is key to achieving the best results and maintaining your outdoor space’s long-term beauty and durability.
Step 2: Sweep and Remove Loose Debris
The first essential step in cleaning your outdoor porcelain pavers is to sweep and remove any loose debris thoroughly. This process helps prevent dirt, leaves, and other materials from embedding into the surface or accumulating in the grout lines, which can cause staining over time.
Using a soft-bristled broom, gently sweep the entire area to remove loose dirt and debris. A leaf blower can be an effective tool if you’re dealing with a larger area or want to speed up the process.
It’s crucial to ensure the surface is completely free of loose particles before moving on to the next cleaning steps. This prevents scratches on the porcelain and allows your cleaning solution to work more effectively.
Step 3: Prepare the Cleaning Solution
Preparing the right cleaning solution is key to effectively cleaning outdoor porcelain pavers. Start by selecting a mild, pH-neutral detergent, as harsh chemicals can damage the pavers’ surface. If you’re using a specialized porcelain cleaner, follow the manufacturer’s instructions closely to ensure proper dilution.
Typically, you’ll want to mix about 1/4 to 1/2 cup of detergent with a gallon of warm water. Use a clean bucket for mixing, and ensure the solution is well-blended. This creates a gentle but effective mixture that can tackle dirt and stains without harming the pavers.
Before applying the solution, it’s essential to protect yourself. Wear rubber gloves to prevent skin irritation and safety goggles to shield your eyes from splashes. Remember, never use abrasive cleaners or acidic substances like bleach or ammonia, as they can erode the finish and compromise the integrity of your porcelain pavers.
Step 4: Apply the Cleaning Solution
Once your cleaning solution is prepared, it’s time to apply it to your outdoor porcelain pavers. Work in small, manageable sections to ensure even coverage and effective cleaning. Apply the solution gently onto the pavers using a soft-bristled brush, mop, or sponge. Focus on scrubbing circularly, especially in areas with visible stains or dirt buildup.
Avoid using excessive force, as this can potentially scratch the paver surface. If you encounter stubborn stains, let the solution sit on the affected area for a few minutes before scrubbing again. This will allow the cleaner to penetrate and loosen the dirt more effectively.
Remember, the goal is to clean without causing any damage, so always use non-abrasive tools and avoid harsh chemicals. If you’re using a specialized porcelain cleaner, follow the manufacturer’s instructions closely to maintain the integrity of the pavers.
After applying the solution to the entire area, prepare for the next step: thoroughly rinsing the cleaner with clean water to remove any residue.
Step 5: Rinse Thoroughly with Clean Water
After applying the cleaning solution, it’s crucial to rinse your outdoor porcelain pavers thoroughly to remove any remaining cleaner and loosened dirt.
Start using a garden hose with a spray nozzle or a low-pressure washer to distribute water evenly across the pavers. Hold the nozzle at a slight angle, ensuring you cover the entire surface. This helps to avoid any streaks or residue that could dull the pavers’ finish.
Be attentive to corners, edges, and grooves between the pavers where dirt and cleaning solution might accumulate. A thorough rinse removes the cleaning agent and prevents potential damage from any chemical residue that might otherwise linger. If you’re dealing with a large area, consider working in sections to ensure no spot is missed.
Once rinsed, allow the pavers to air dry completely before placing any furniture or decor back on them. This final step ensures that your porcelain pavers remain spotless and pristine.
Step 6: Spot Clean Stubborn Stains
Even with regular cleaning, outdoor porcelain pavers can occasionally develop stubborn stains that require targeted treatment. To effectively tackle these tricky spots, identify the type of stain—from oil, food, or natural elements like berries or leaves.
A mixture of warm water and mild detergent is sufficient for most stains. Apply the solution directly to the stained area and use a soft-bristled brush to scrub the surface gently. Rinse thoroughly with clean water afterwards to prevent soap residue from dulling the pavers’ finish.
For more persistent stains, such as oil or wine, you should use a specialised porcelain-safe cleaner. Always follow the manufacturer’s instructions and test the cleaner on an inconspicuous area first to ensure it doesn’t damage the paver’s surface.
Patience is key; you may need to repeat the process several times for particularly stubborn marks. Remember, using gentle methods and avoiding harsh chemicals will help preserve the integrity and appearance of your porcelain pavers.
Step 7: Pressure Wash for a Deep Clean (Optional)
For those looking to achieve a deep clean, pressure washing your outdoor porcelain pavers can be a practical yet optional step. Pressure washing removes embedded dirt, grime, and mildew that regular cleaning might miss. However, using this method carefully is crucial to avoid damaging the pavers.
Begin by selecting a pressure washer with adjustable settings. Set it to the lowest pressure to prevent the pavers’ surface damage. Attach a wide fan tip to the nozzle, which helps disperse the water evenly and reduces the risk of concentrated force that could chip or crack the porcelain. Maintain a 12 to 18-inch distance between the nozzle and the paver surface to ensure effective, safe cleaning.
Work in sections, moving methodically across the area. Avoid lingering in one spot too long, as this could weaken the paver’s finish. After pressure washing, it’s essential to rinse the entire area with clean water to remove any loosened debris and cleaning solution residue.
Step 8: Dry and Inspect the Pavers
Once you’ve completed the cleaning process, allowing your outdoor porcelain pavers to dry thoroughly is crucial.
Begin by letting the pavers air dry naturally, which typically takes a few hours, depending on weather conditions. Ensure the area is free from foot traffic during this time to prevent any new dirt or debris from settling on the clean surface.
After the pavers are completely dry, scrutinize them for any remaining stains, cracks, or other issues. Pay particular attention to the joints and edges, as these areas are more prone to wear and damage.
If you notice any cracks or loose pavers, it’s best to address these issues promptly to prevent further deterioration. Regular inspections and maintenance will help keep your porcelain pavers pristine and extend their lifespan.
Step 10: Optional: Apply a Sealant
Applying a sealant to your outdoor porcelain pavers is an optional but highly beneficial step that can enhance the longevity and appearance of your paving.
While porcelain pavers are naturally durable and resistant to moisture, applying a sealant adds an extra layer of protection against stains, UV rays, and the elements. This is particularly useful in high-traffic areas or regions with harsh weather conditions.
To apply the sealant, ensure the pavers are completely clean and dry. Choose a sealant specifically designed for porcelain, preferably one that offers UV resistance to maintain the colour and finish of your pavers.
Apply the sealant evenly across the surface using a roller or sprayer, ensuring complete coverage without pooling. Allow the adhesive to cure per the manufacturer’s instructions, which usually takes 24 to 48 hours.
While sealing is not mandatory, it can make future cleaning more accessible and help maintain the pristine look of your pavers for years to come.
Conclusion
Maintaining the beauty and durability of your outdoor porcelain pavers is simple with regular cleaning and care. Following these steps will ensure your pavers stay pristine and resilient. Ready to transform your outdoor space? Start implementing these tips today and enjoy a cleaner, more inviting patio all year round!
More To Explore

Top Outdoor Paving Ideas for Aussie Backyards
Are you ready to transform your Aussie backyard with stunning paving ideas? Whether you’re looking to create a stylish outdoor entertaining area, a functional pathway,

Small Backyard? Here’s How to Maximise with Stone
Struggling to make the most of your small backyard space? Many homeowners with limited outdoor areas feel restricted when it comes to design. But what


