Register your Information for Free Stone Samples Sent Express to You!

Search
Search
Close this search box.
Search
Close this search box.

Is Tuscano Limestone Easy to Maintain?

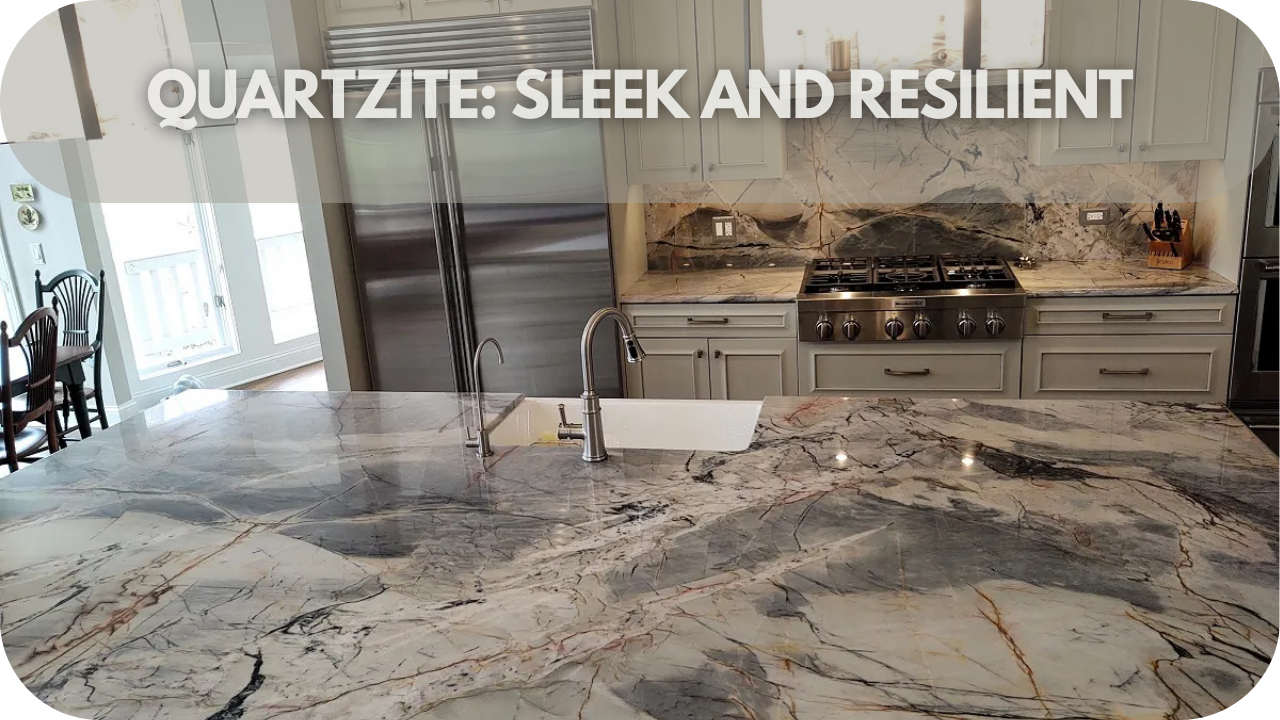
Tuscano Limestone has become a favourite among homeowners and designers for its timeless beauty and natural charm. Whether used for flooring, countertops, or outdoor spaces, its warm tones and durability make it a sought-after choice. 

But how easy is it to maintain? If you’re considering Tuscano Limestone for your home or project, understanding its care requirements is crucial. 

This guide delves into everything you need to know to keep your limestone looking its best with minimal effort.

Is Tuscano Limestone Easy to Maintain?

Tuscano Limestone is easy to maintain with proper care. Its natural resistance to stains and scratches makes it ideal for busy spaces. Regular sweeping and mopping with a pH-neutral cleaner keep it spotless while sealing every 1–2 years enhances durability. Avoid acidic or abrasive cleaners to preserve their finish. Whether used indoors or outdoors, Tuscano Limestone combines beauty and practicality, offering long-lasting appeal.

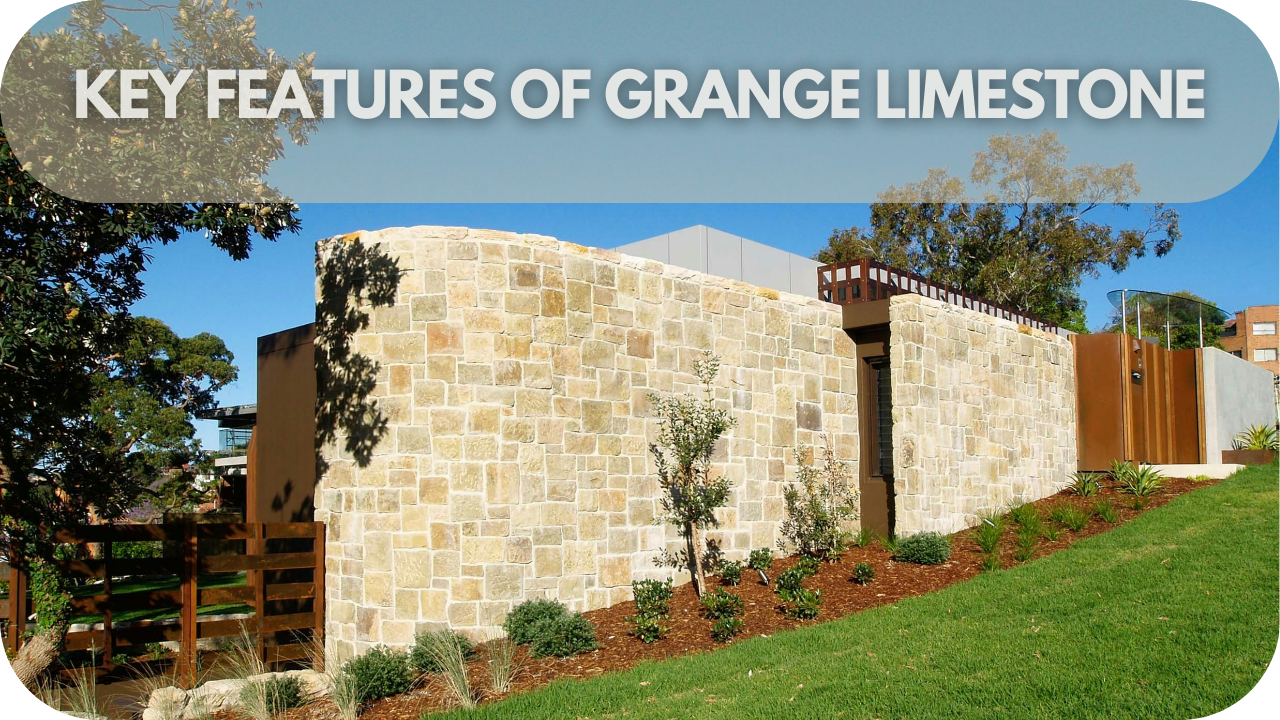
Key Maintenance Features of Tuscano Limestone

Durable and versatile, Tuscano Limestone combines beauty and practicality, making it a favourite for homes and commercial spaces.

1. Natural Resistance to Stains and Scratches

Tuscano Limestone is renowned for its natural resilience against stains and scratches, making it an excellent choice for high-traffic areas. Unlike more delicate materials, it handles daily wear with ease, maintaining its elegant appearance over time. 

Proper sealing further enhances its durability, ensuring that spills and dirt don’t penetrate the surface. This resistance makes it particularly suitable for households with pets or children, where accidental messes are common.

Whether installed in kitchens, hallways, or living spaces, Tuscano Limestone offers a reliable, low-maintenance option that retains its charm even with frequent use.

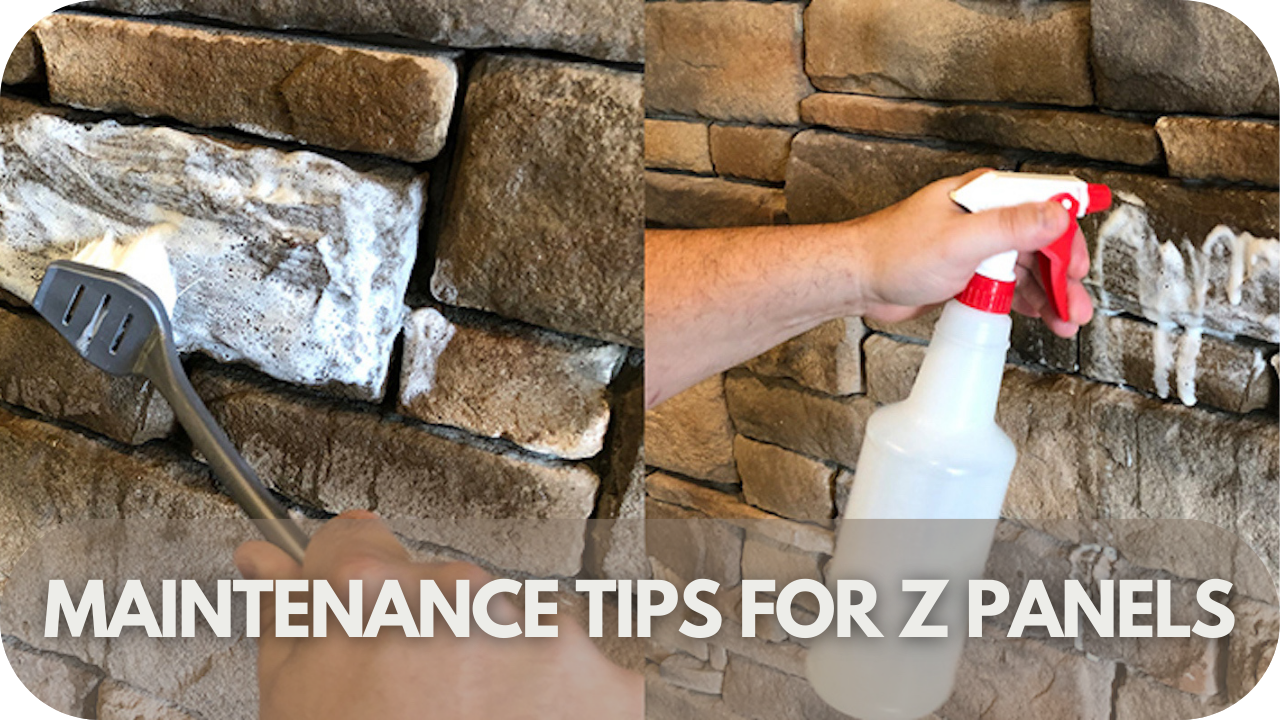
2. Simple Cleaning Requirements

Maintaining Tuscano Limestone requires minimal effort, thanks to its forgiving nature. Regular sweeping or vacuuming removes dirt and debris that could scratch the surface. A weekly mop with a damp cloth and a pH-neutral cleaner ensures the stone stays spotless without damaging its finish. 

Avoid acidic or abrasive cleaners, as they can dull the surface. Spills should be wiped immediately to prevent potential staining. This straightforward routine not only preserves the limestone’s appearance but also keeps it hygienic and inviting for years to come.

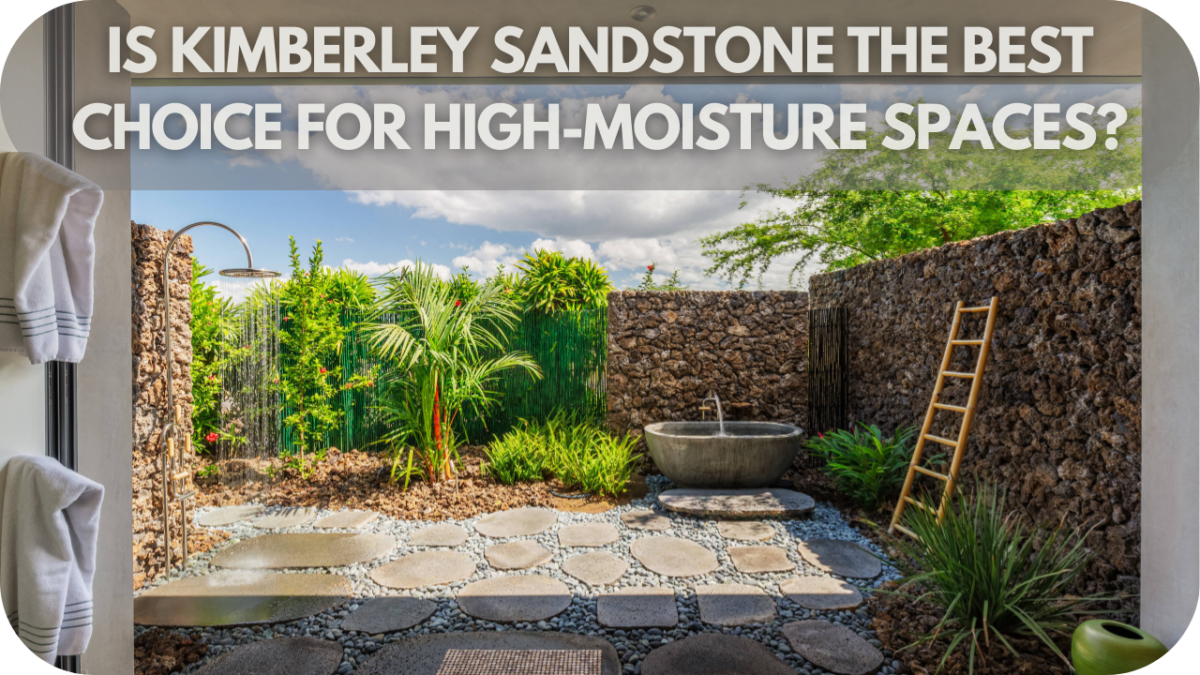
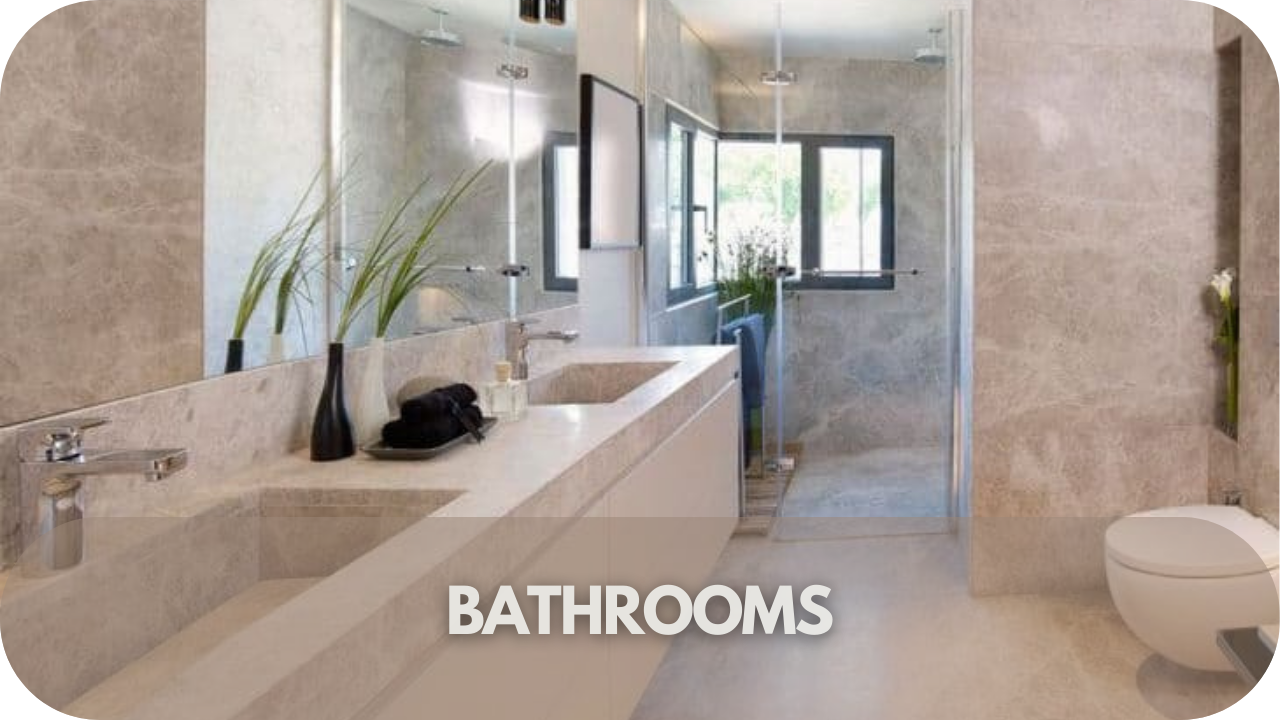
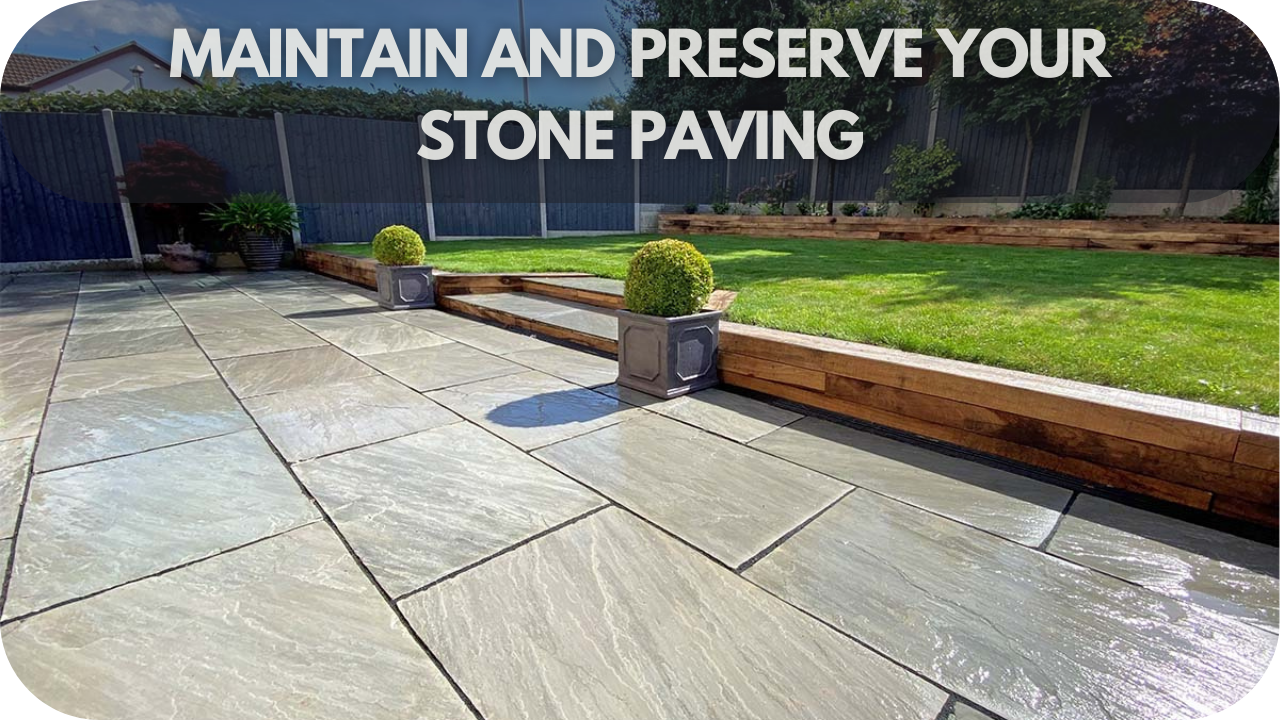
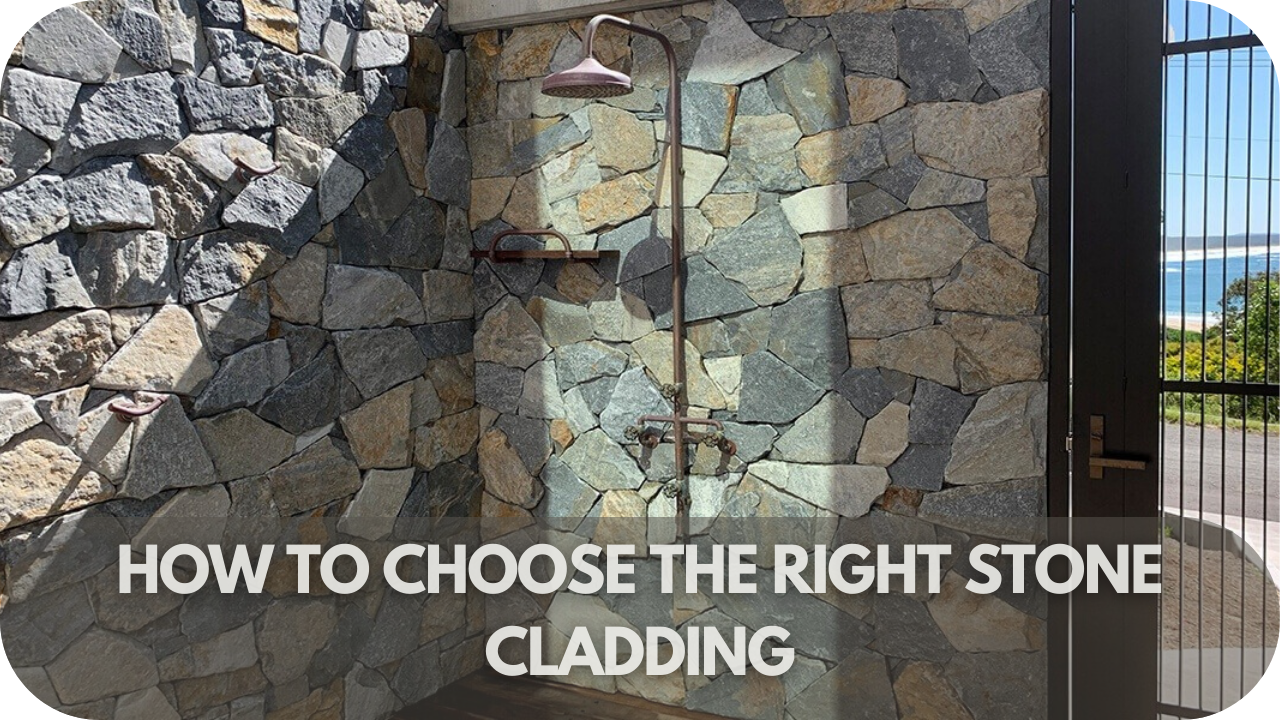
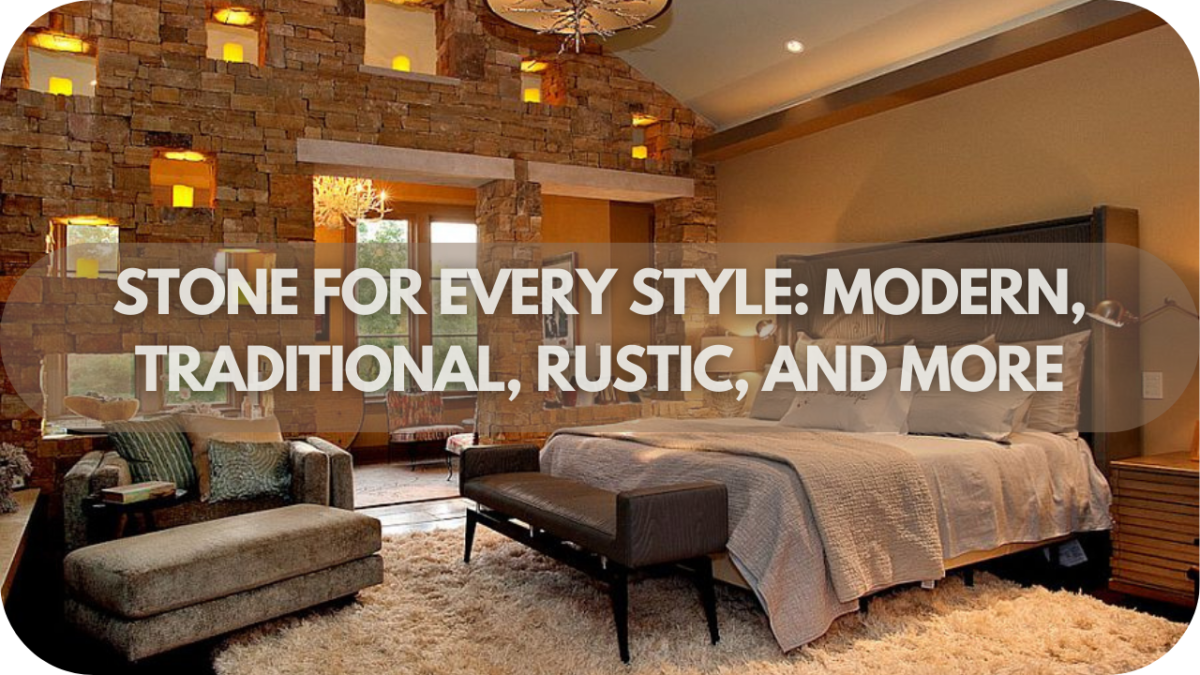
3. Performance in Indoor and Outdoor Spaces

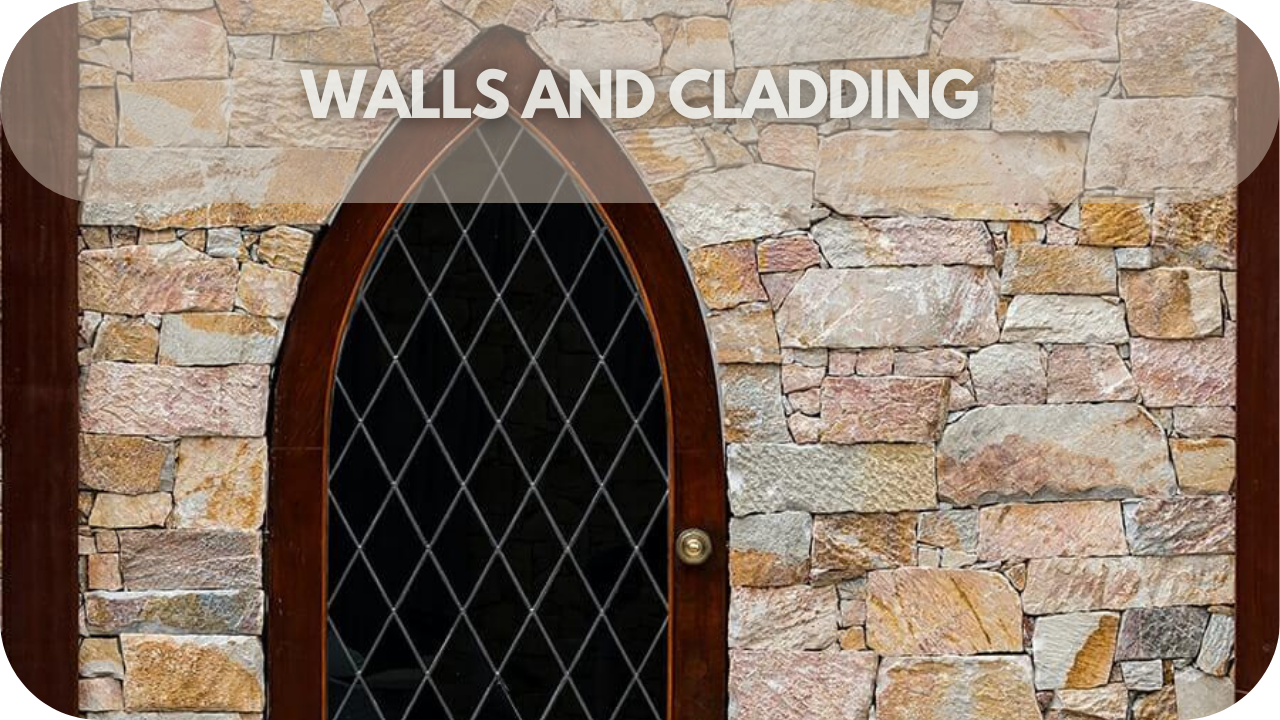
Tuscano Limestone excels in various settings due to its ability to withstand temperature changes and moisture. Indoors, it enhances flooring, countertops, and walls with its timeless aesthetic. 

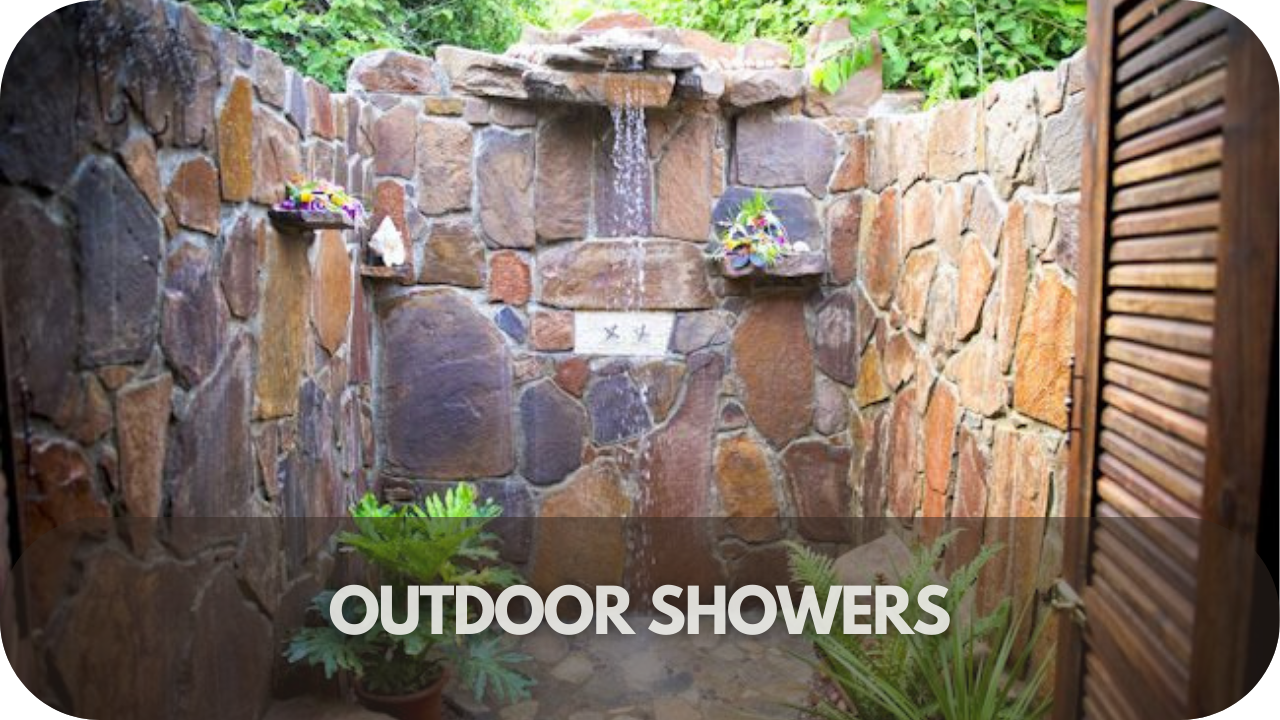
Outdoors, its durability against weathering makes it a favourite for patios, pathways, and pool surrounds. However, periodic sealing is essential to protect the stone from the elements and maintain its finish. 

This adaptability makes Tuscano Limestone a versatile material, offering a seamless transition between indoor and outdoor designs while ensuring long-term value.

Tips for Maintaining Tuscano Limestone

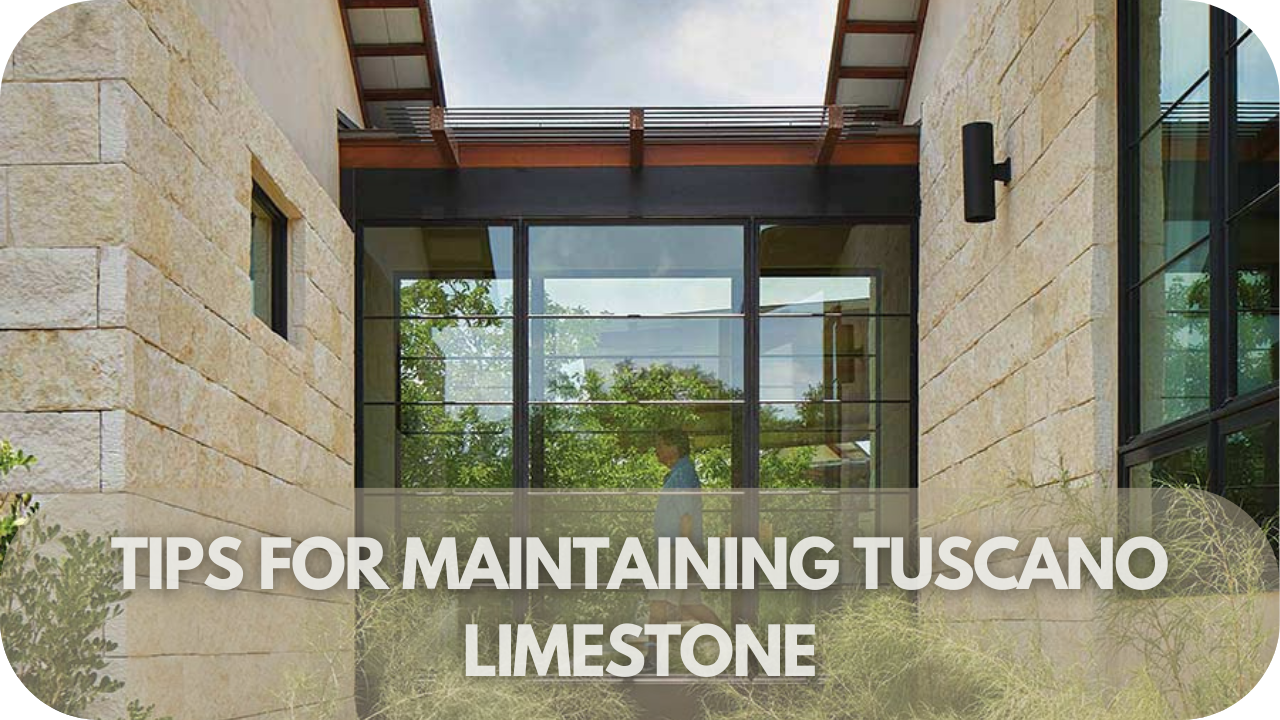
Keeping Tuscano Limestone looking its best is simple with the right care. These essential tips will help preserve its beauty and durability.

1. Use the Right Cleaning Products

To maintain the integrity of Tuscano Limestone, always choose pH-neutral cleaners specifically designed for natural stone. Acidic or abrasive products can strip the surface, causing permanent damage or dulling the finish. 

Harsh chemicals like vinegar, bleach, or ammonia should be avoided at all costs. Instead, opt for stone-friendly cleaning solutions that are gentle yet effective. 

A soft microfiber cloth or mop works best for application, ensuring no scratches or residue are left behind. This simple choice makes a significant difference in preserving the stone’s natural charm.

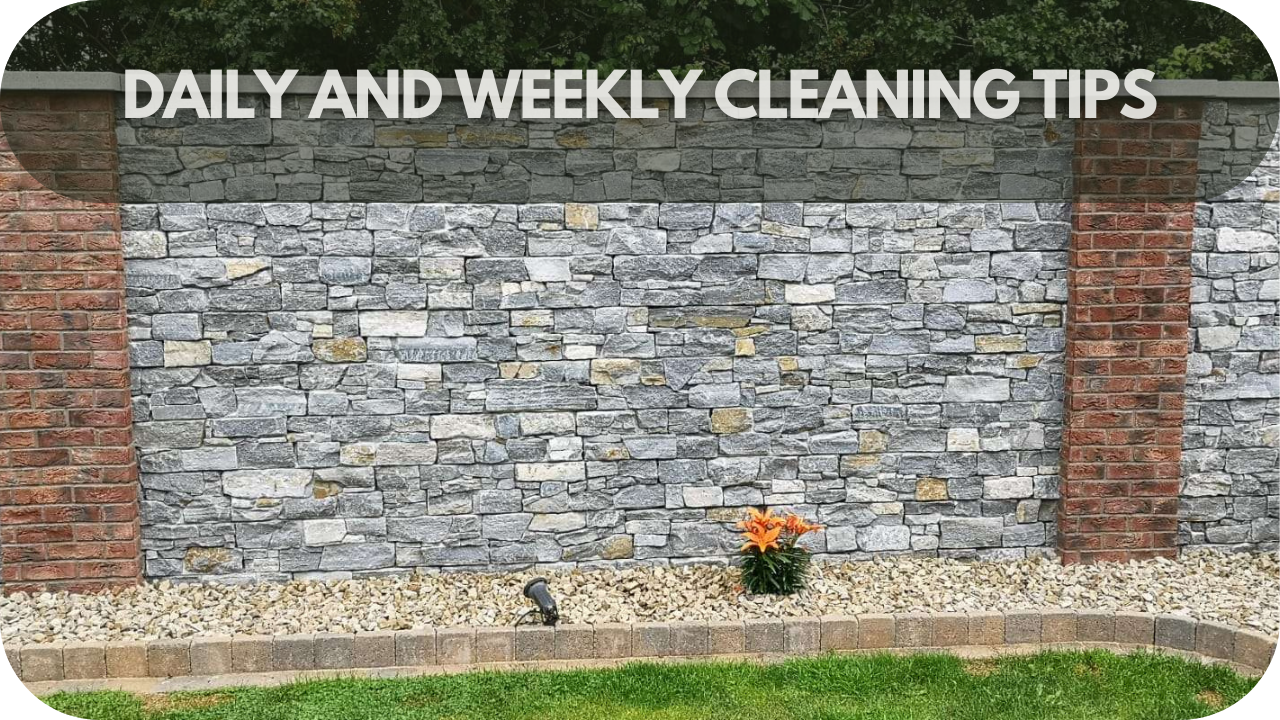
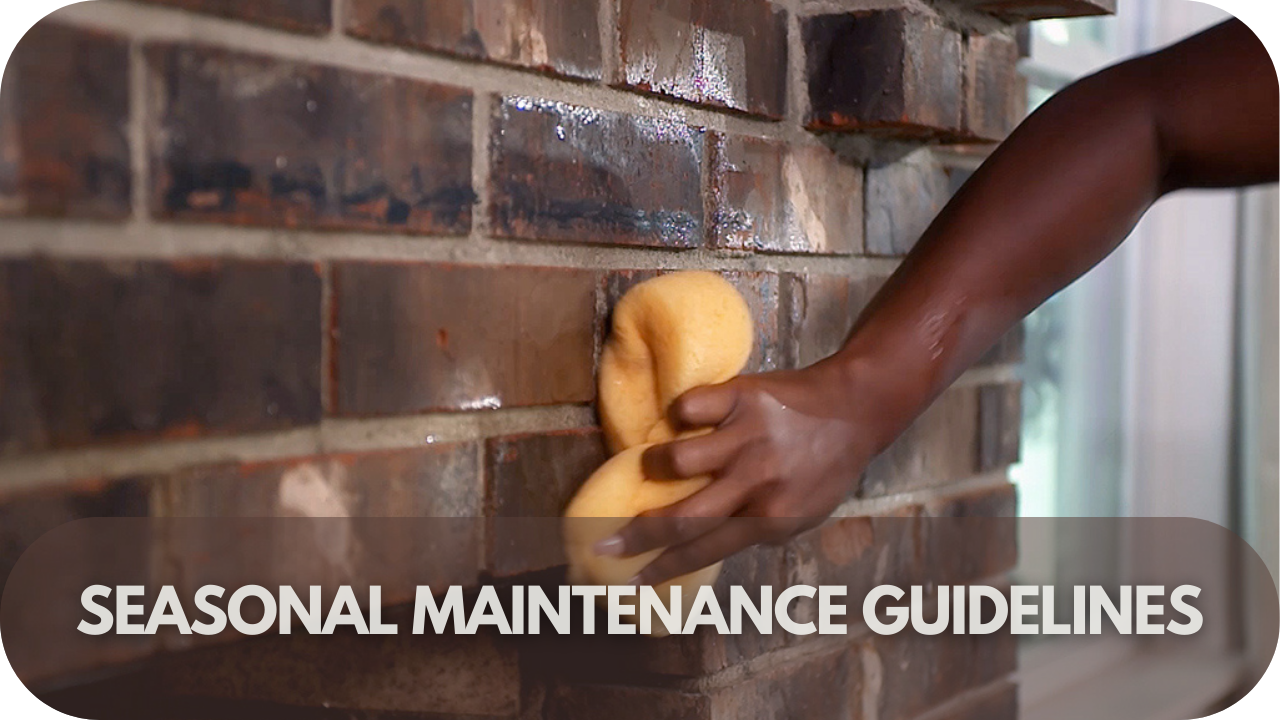
2. Adopt a Regular Cleaning Routine

A consistent cleaning routine keeps Tuscano Limestone spotless and long-lasting. Sweeping or vacuuming regularly prevents dirt from scratching the surface. Mopping once a week with warm water and a mild stone cleaner maintains its natural shine without harming the finish. 

Spills should be wiped up immediately to avoid stains. Use a soft, damp cloth or absorbent towel to tackle liquid messes promptly. By establishing these habits, you’ll keep your limestone looking flawless with minimal effort.

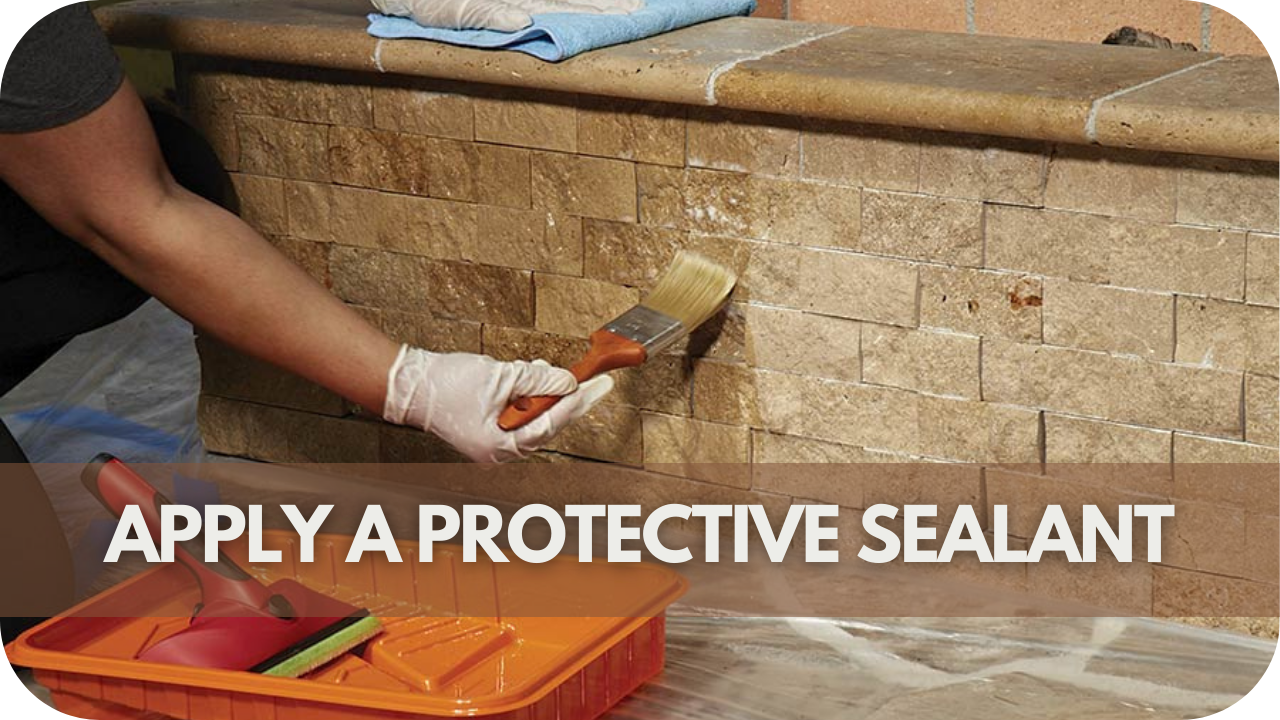
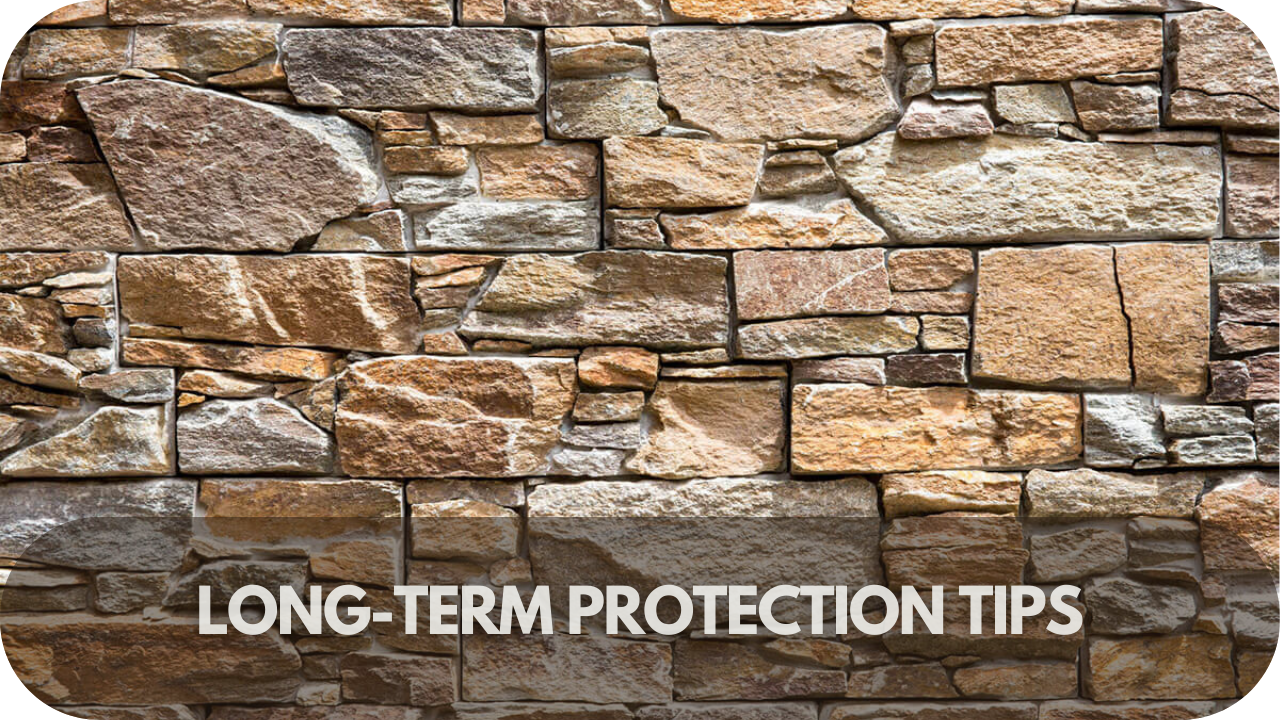
3. Seal for Long-Term Protection

Sealing is one of the most crucial steps in maintaining Tuscano Limestone. A high-quality impregnating sealant creates a protective barrier against stains and moisture, ensuring the stone stays durable and resistant to wear. 

It’s recommended to reseal every 12–24 months, depending on the level of use and exposure. Before sealing, ensure the surface is thoroughly cleaned and dry for the best results. This extra layer of protection not only enhances the stone’s longevity but also reduces the risk of costly damage.

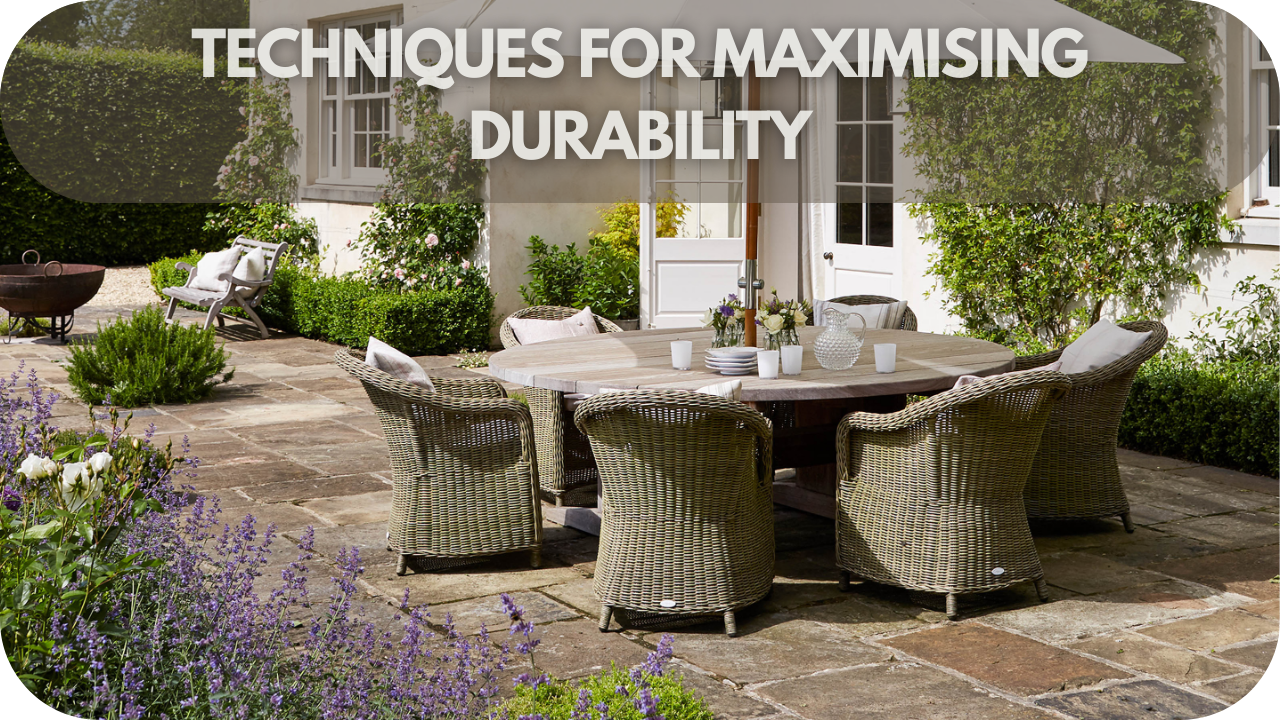
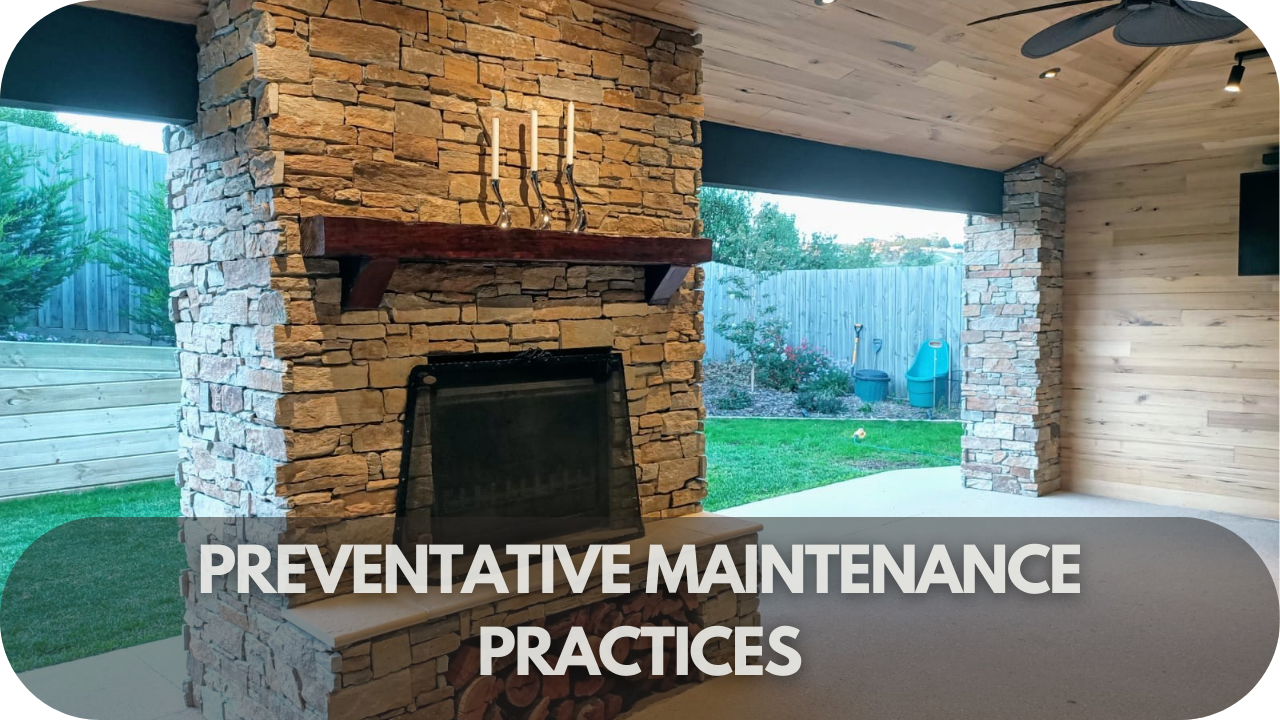
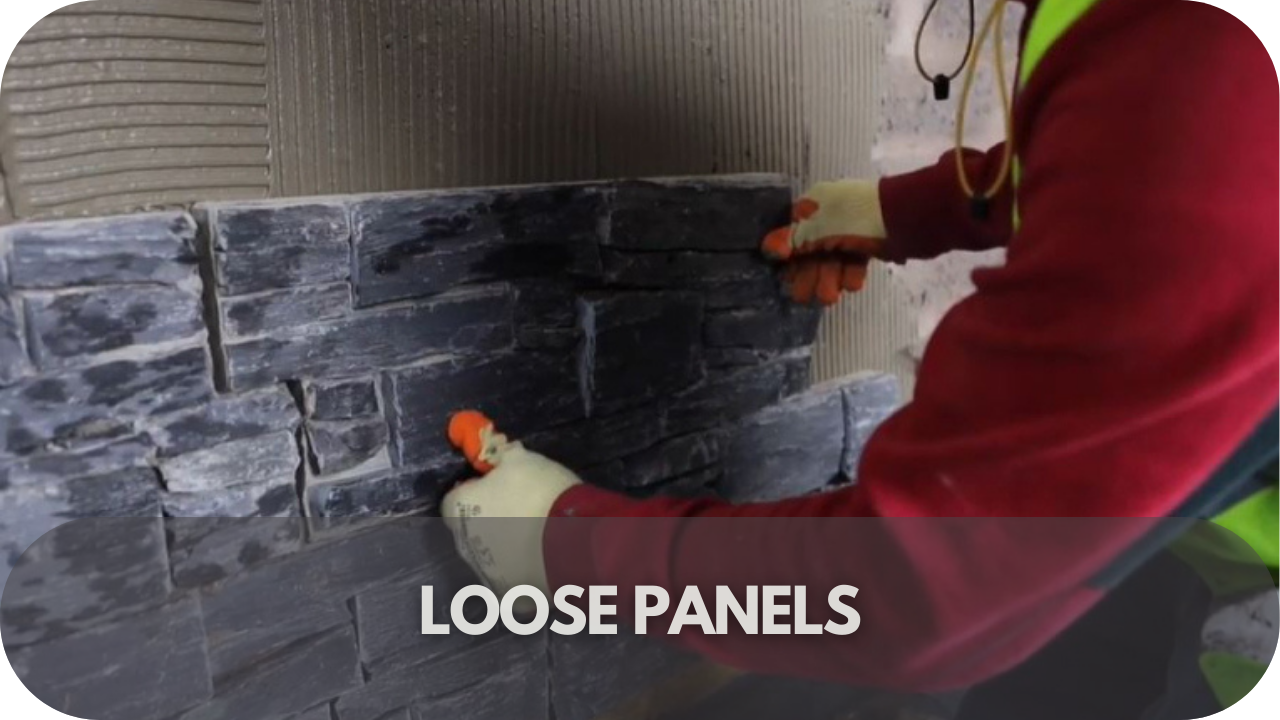
4. Prevent Scratches

Tuscano Limestone’s surface can stay smooth and unblemished with preventive measures. Placing mats or rugs in high-traffic areas, especially near entrances, helps reduce dirt and grit. 

Felt pads under furniture legs prevent scratches during movement. When rearranging heavy items, lift rather than drag them across the surface. These simple precautions go a long way in preserving the stone’s appearance, making it a durable and stylish feature in any space.

Common Challenges and How to Address Them

Although Tuscano Limestone is durable and low-maintenance, addressing potential challenges promptly is key to preserving its beauty and functionality.

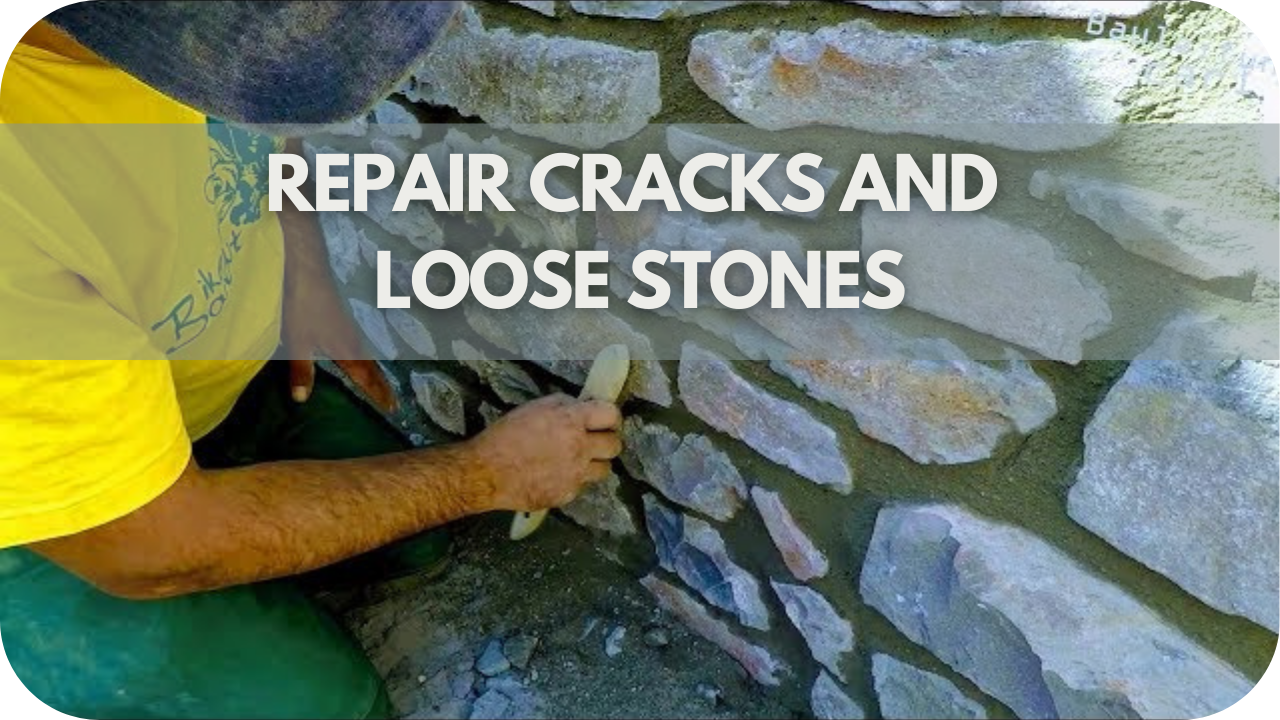
1. Stains and How to Handle Them

Stains are one of the most common issues with Tuscano Limestone, especially from liquids like wine, coffee, or oil. The porous nature of the stone can cause these substances to seep in, leaving marks. 

To prevent permanent staining, always blot spills immediately with a soft cloth—don’t rub, as this can spread the stain. For stubborn stains, use a stone-safe stain remover designed for natural stone surfaces. 

In cases where stains have deeply penetrated the stone, a poultice can draw out the residue. Regular sealing significantly reduces the likelihood of stains, offering an extra layer of protection against everyday messes.

2. Etching and Surface Dulling

Etching occurs when acidic substances like vinegar, citrus, or harsh cleaners dull the stone’s finish. While sealing reduces the impact of etching, it doesn’t make the surface completely impervious. 

The best way to avoid this issue is by immediately cleaning up acidic spills and avoiding abrasive or acidic cleaning products. If etching has already occurred, professional polishing may be necessary to restore the stone’s smooth finish. 

Polishing not only repairs the damage but also brings back the stone’s natural lustre, ensuring it looks as good as new.

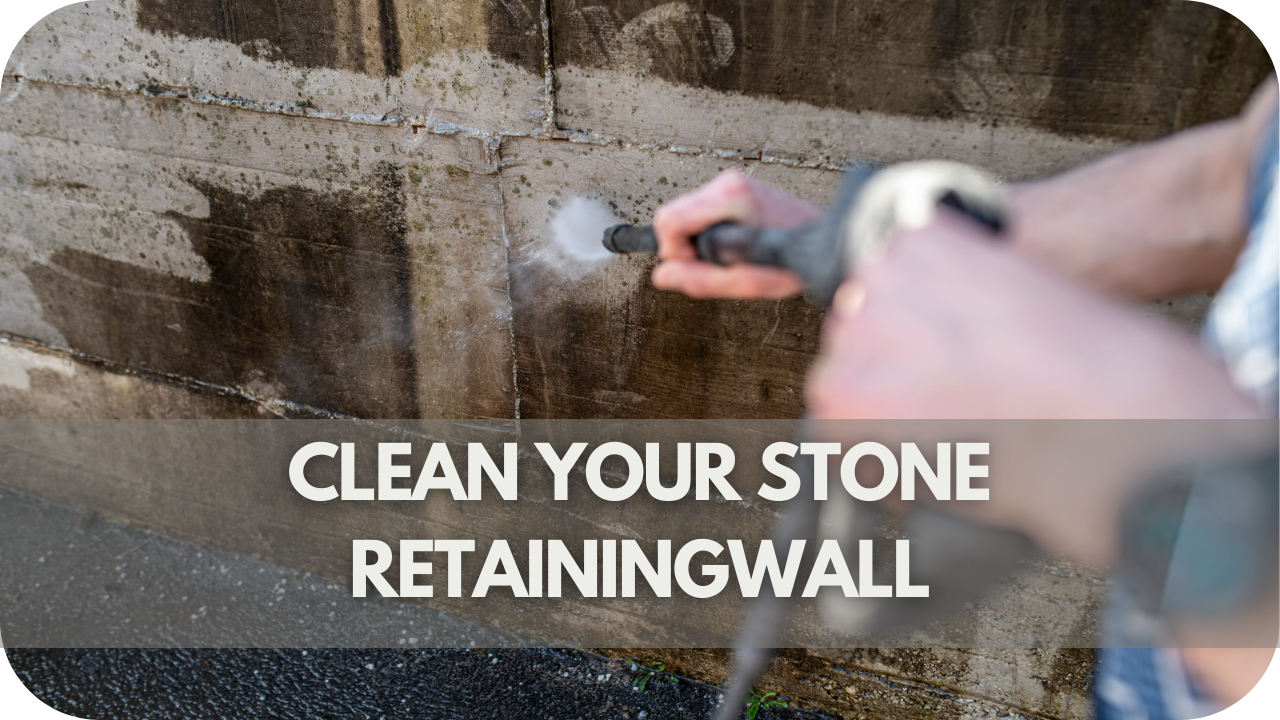
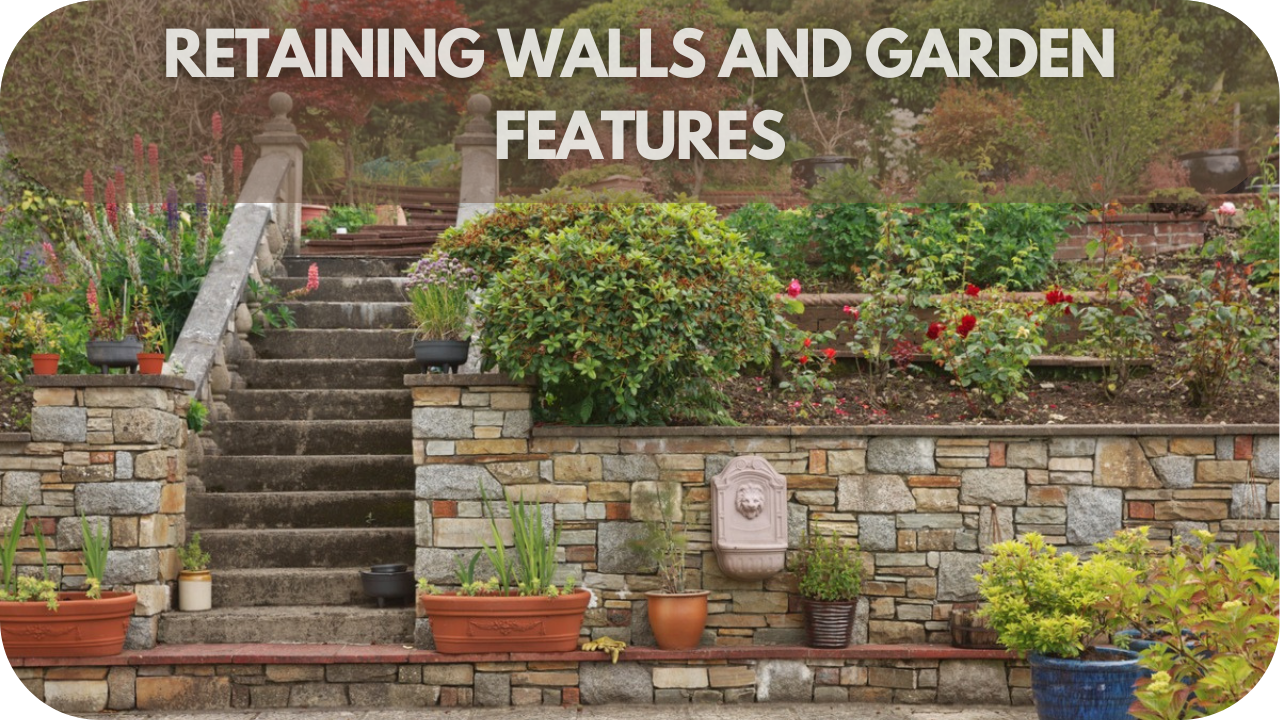
3. Outdoor Challenges: Weathering and Moss Growth

For outdoor applications, weathering and moss growth can affect the stone’s appearance over time. Exposure to rain, sun, and temperature changes can cause the surface to fade or wear unevenly. 

Moss and algae can develop in damp areas, especially if the stone isn’t regularly cleaned. To address these issues, clean the surface with a pressure washer or a natural stone-safe outdoor cleaner. 

Sealing the stone adds another layer of protection against moisture and weathering, prolonging its lifespan. Regular maintenance ensures your outdoor Tuscano Limestone stays in excellent condition despite exposure to the elements.

Cost-Effectiveness of Maintaining Tuscano Limestone

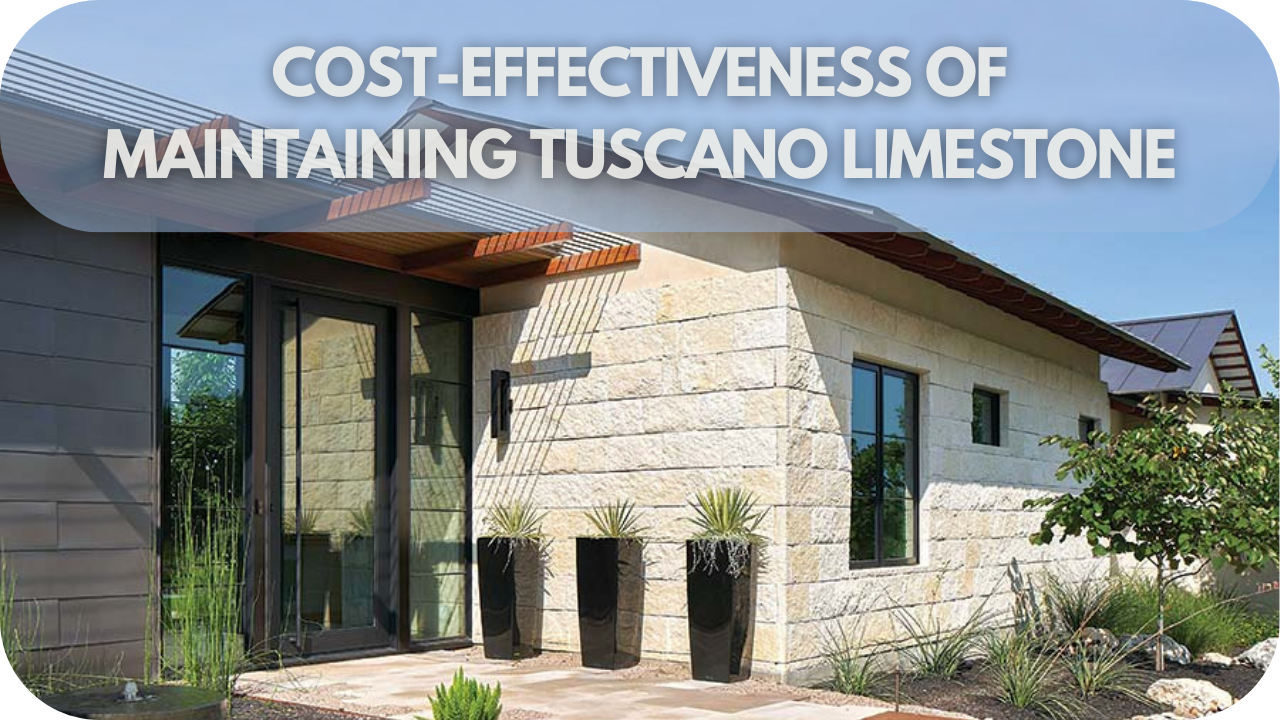
Tuscano limestone is a cost-effective choice for homeowners and businesses due to its low maintenance needs and long lifespan. While the upfront cost of installation may be higher than some materials, the long-term savings make it a smart investment. With regular cleaning and proper sealing, this natural stone resists stains, moisture, and wear, reducing the need for costly repairs.

Maintenance costs mainly include periodic sealing, which protects the stone from damage. Sealant application every 1–2 years helps prevent water absorption and staining, keeping the surface looking fresh. Routine cleaning with mild soap and water avoids the need for expensive chemical treatments. 

Unlike some flooring options that require frequent polishing or refinishing, Tuscano limestone maintains its beauty with minimal effort.

If damage does occur, individual tiles or slabs can be replaced without the need for a full renovation, making repairs affordable. Additionally, its durability means fewer replacements over time compared to softer materials. 

Conclusion

Tuscano Limestone is not only beautiful but also practical and easy to care for when proper steps are taken. Its resistance to wear, versatility, and timeless elegance make it an excellent choice for any space. With regular cleaning, sealing, and a little attention to potential challenges, maintaining this natural stone becomes a breeze.

Ready to transform your space with the enduring beauty of Tuscano Limestone? Contact splendour in stone today and enjoy the perfect blend of style and functionality.

Which Tiles Are Non-Slip or Suitable For Wet Areas?

Stepping onto a slick floor in a wet area can be more than a minor inconvenience—it’s a potential hazard. 

Whether you’re revamping a bathroom, kitchen, or poolside area, choosing suitable non-slip tiles can make all the difference. 

Let’s uncover the top options to keep your home safe and visually appealing without compromising quality or style.

Popular Non-Slip Tile Materials

Popular Non-Slip Tile Materials

Choosing tiles for wet areas doesn’t mean sacrificing style. With options like versatile porcelain and unique terrazzo tiles, these popular non-slip materials combine safety, durability, and design. Let’s dive into the top choices to uncover which tile best suits your needs for both indoor and outdoor wet spaces.

1. Porcelain Tiles

Porcelain tiles are a go-to for wet areas due to their water resistance and durability. With a dense structure and low porosity, porcelain is ideal for spaces prone to moisture, such as bathrooms, kitchens, and poolside areas. 

Non-slip finishes, often with a matte or textured surface, add extra grip, enhancing safety without sacrificing style. These tiles are also available in various designs, from natural stone looks to sleek modern finishes, making them versatile and visually appealing. 

2. Ceramic Tiles

Ceramic tiles are famous for their versatility and affordability. They are often seen in kitchens and bathrooms, where slip-resistance is crucial. 

Made from natural clay and minerals, ceramic tiles can be manufactured with textured or matte finishes that offer better traction in wet conditions. They are available in various colours, patterns, and sizes, allowing homeowners to maintain a cohesive design without compromising safety. 

3. Limestone Tiles

Limestone tiles offer a naturally rough texture that enhances slip resistance, which is ideal for wet or humid environments. 

Their muted tones and subtle patterns add an understated elegance, perfect for bathrooms, kitchens, and garden pathways. Although limestone is slightly softer than other stone tiles, it is highly durable and can withstand everyday wear and tear. 

Regular sealing helps protect the stone’s surface, preserving its appearance and slip resistance over time. Limestone’s natural beauty and safety features make it a desirable option for those seeking a classic, timeless look with functional benefits.

4. Travertine Tiles

Travertine tiles bring a unique blend of beauty and practicality to wet areas. Formed from natural stone, travertine has a naturally pitted surface that provides excellent grip, which is particularly useful for poolside patios and garden paths. 

Available in a range of earthy colours, such as beige, ivory, and rust, travertine tiles add warmth and texture to any space. Regular sealing is recommended to protect the stone from water absorption and staining, enhancing its durability in moist environments. 

5. Granite Tiles

Granite Tiles

Granite tiles are known for their incredible durability and natural slip-resistant texture, making them suitable for indoor and outdoor wet areas. 

The stone’s high density and low water absorption make it ideal for bathrooms, entryways, and pool decks. Granite tiles are available in various colours and finishes, from polished to flamed, allowing for safety and style. 

6. Concrete Tiles

Concrete tiles are durable and provide a solid, textured surface that offers excellent slip resistance, particularly when treated with a non-slip finish. 

Concrete tiles are commonly used for outdoor patios, pathways, and pool surrounds. They are highly resistant to water damage and wear and come in a range of finishes, from smooth to highly textured, allowing for customisation based on the area’s slip-resistance needs. 

7. Terrazzo Tiles

Terrazzo tiles, made from a blend of marble, granite, and other natural stones, are gaining popularity for their slip-resistant qualities and eye-catching appearance. 

These tiles have a naturally gritty surface that can be enhanced with non-slip finishes, making them suitable for bathrooms, kitchens, and even outdoor spaces. Terrazzo is known for its durability and stain resistance, and it comes in a wide range of colours and patterns. 

The unique composition of terrazzo provides a non-slip surface with a customisable look, allowing homeowners to add style and safety to any wet area.

8. Vinyl Tiles

Vinyl tiles are becoming a popular choice for indoor wet areas. They offer a soft, slip-resistant surface and are available in various finishes and textures that enhance traction, making them ideal for family homes. 

Vinyl is water-resistant, easy to clean, and comfortable underfoot, which makes it suitable for bathrooms, kitchens, and laundry rooms. Additionally, vinyl tiles are affordable and come in many designs that mimic natural materials, allowing homeowners to create a stylish look without sacrificing practicality.

9. Mosaic Tiles

 Mosaic Tiles

Mosaic tiles, typically small in size, offer enhanced traction due to the increased number of grout lines between each tile. These tiles are an excellent choice for shower floors, wet rooms, and areas requiring extra grip. 

Mosaic tiles are made from various materials, such as glass, ceramic, and stone, and they offer creative design options that add unique style to any space. Their non-slip properties, combined with their versatility in pattern and colour, make mosaic tiles a practical and visually appealing choice for wet areas.

10. Slate Tiles

Slate tiles are a popular choice for both indoor and outdoor wet areas. They are prized for their natural texture, which enhances slip resistance. This durable stone performs well in places like bathrooms, patios, and pool surrounds, where moisture is constant. 

Slate tiles are available in various natural shades, from dark greys to greens, lending a rustic and earthy appeal to any space. Although slightly more maintenance-intensive, slate’s aesthetic appeal and functionality make it a sought-after option for high-moisture areas.

Tile Options for Indoor Wet Areas

Finding suitable tiles for indoor wet areas is essential to balancing safety and aesthetics. Various options tailored to bathrooms, kitchens, wet rooms, and laundry spaces can make every area safe and stylish.

  • Bathrooms: Porcelain, ceramic, and mosaic tiles are ideal for bathrooms due to their water-resistant properties and availability in anti-slip finishes, making them suitable for both flooring and walls. 
  • Wet Rooms: Large-format porcelain and mosaic tiles are excellent choices for wet rooms. Large-format porcelain creates a sleek, seamless look with fewer grout lines, perfect for a modern aesthetic. 
  • Kitchens: Textured porcelain, ceramic, and vinyl tiles work well in kitchens, offering slip-resistant surfaces that are easy to clean. Vinyl tiles provide a softer feel underfoot and additional grip, making them especially suitable for family-friendly environments where safety and comfort are paramount.
  • Laundry Rooms: Ceramic and vinyl tiles are recommended for laundry rooms as they effectively handle moisture and are low-maintenance. Vinyl offers extra slip resistance and a softer surface, making it comfortable for prolonged standing during tasks. 

Best Outdoor Non-Slip Tiles for Wet Areas

Outdoor wet areas need suitable tiles to ensure safety without sacrificing design. From pool decks to garden paths, these top non-slip tile options will keep your exterior spaces secure and visually appealing.

Pool Surrounds and Patios

Textured porcelain tiles are ideal for pool surrounds and patios due to their non-slip surface and durability. These tiles are designed to withstand temperature changes and maintain their grip in wet conditions, ensuring a safe, stylish environment around water features and seating areas.

Pool Decks and Garden Paths 

Travertine tiles are an excellent choice for pool decks and garden paths, as their natural texture enhances traction in wet conditions. The earthy tones of travertine blend seamlessly with outdoor landscapes, providing functionality and visual appeal in spaces requiring slip resistance.

Rustic Outdoor Spaces

Slate tiles add a rustic charm to outdoor areas with a naturally uneven texture that effectively resists slips. Highly durable and suitable for high-moisture environments, slate tiles are perfect for pathways and patios that aim for a more natural, earthy aesthetic.

Driveways and Walkways 

Concrete tiles with non-slip finishes work well for driveways and walkways. They offer a solid, textured surface ideal for high-traffic areas. Concrete tiles are easy to maintain and provide reliable slip resistance in areas that require extra durability and functionality.

Factors to Consider When Choosing Non-Slip Tiles

Choosing non-slip tiles goes beyond style; it’s about ensuring durability, safety, and ease of maintenance. Keep these key factors in mind to find tiles that meet both practical needs and aesthetic goals.

  • Surface Texture: Rough or textured tiles provide better grip, reducing slip risks in wet areas. Smaller tiles, like mosaics, offer increased traction due to more grout lines, making them suitable for showers and entryways.
  • Material Durability: For outdoor areas or high-traffic spaces, durable materials are essential to withstand weather changes and frequent use, ensuring long-lasting performance.
  • Colour and Finish: Matte or honed finishes are safer for wet areas than polished surfaces. Lighter-coloured tiles also enhance visibility by reflecting light, which is beneficial in dimmer spaces.
  • Maintenance Requirements: Some materials, such as natural stone, require regular sealing to maintain slip resistance. Considering maintenance needs ensures your tiles remain safe and easy to care for.

Installation Tips for Non-Slip Tiles

Proper installation of non-slip tiles is crucial to maximise their effectiveness and ensure long-lasting performance. Here are essential tips to follow for a successful installation:

  • Surface Preparation: Ensure the substrate is clean, level, and dry before installing. Any unevenness or debris can affect the tiles’ adhesion and durability.
  • Use the Right Adhesive: Select an adhesive designed explicitly for non-slip tiles and suitable for the intended environment (e.g., wet areas). Follow the manufacturer’s instructions for mixing and application.
  • Layout Planning: Plan the tile layout before starting to ensure a balanced and symmetrical appearance. This step helps avoid awkward cuts and ensures the tiles are placed in the most effective pattern for slip resistance.
  • Proper Grouting: Choose a grout that complements the tiles’ non-slip properties. Apply it evenly and ensure it fills all gaps to prevent water penetration and maintain the non-slip surface.
  • Tile Spacing: Use spacers to maintain consistent spacing between tiles. Adequate spacing ensures proper grout application and contributes to the floor’s overall slip resistance.
  • Sealing: To enhance the water resistance and durability of natural stone tiles, apply a suitable sealer that is compatible with their non-slip properties.
  • Post-Installation Cleaning: Thoroughly clean the tiles after installation to remove any adhesive or grout residue. This step is crucial to maintaining the non-slip surface.
  • Regular Maintenance: Establish a regular cleaning routine to keep the tiles free from dirt and grime, which can compromise their slip resistance over time.

Maintenance Tips for Non-Slip Tiles

Proper maintenance is essential to ensure the longevity and effectiveness of non-slip tiles. Regular upkeep not only preserves their appearance but also maintains their slip-resistant properties. Here are essential maintenance tips to keep your non-slip tiles in top condition:

  • Regular Cleaning: Clean non-slip tiles regularly to prevent the build-up of dirt, grime, and soap residue. Use a mild detergent and warm water with a soft brush or mop to scrub the surface gently. Avoid harsh chemicals that can degrade the tile’s non-slip properties.
  • Avoid Wax and Polish: Do not use wax or polish on non-slip tiles, as these substances can create a slippery surface. Instead, stick to cleaners designed explicitly for non-slip tiles.
  • Grout Care: Pay attention to the grout lines, as they can accumulate dirt and mould. Clean the grout with a suitable grout cleaner and a small brush. Sealing the grout can also help to protect it from moisture and stains.
  • Immediate Spill Cleanup: Promptly clean up any spills to prevent staining and maintain the slip resistance of the tiles. Use a damp cloth or mop to remove spills and avoid letting liquids sit on the surface for extended periods.
  • Periodic Deep Cleaning: Schedule deep cleaning sessions periodically to address any stubborn dirt or stains. Use a non-abrasive scrubber and a pH-neutral cleaner to thoroughly clean the tiles without damaging their texture.
  • Inspect and Repair: Regularly inspect the tiles for any signs of damage or wear. Replace or repair damaged tiles promptly to ensure continuous slip resistance and safety.

Conclusion

Choosing the suitable non-slip tiles for wet areas is crucial for safety and functionality. By considering factors like slip resistance, material, and maintenance, you can ensure a safe environment. 

For expert advice and a wide selection of non-slip tiles, visit our showroom or contact us today to find the perfect solution for your needs.

DIY Z Panel Installation: Is It Feasible? A Guide for Homeowners

A plain wall has the potential to become a stunning stone feature, and DIY Z panel installation offers the chance to make it happen. 

For homeowners seeking a budget-friendly, hands-on project, it seems like the perfect fit. But with challenges like uneven surfaces and precise alignments, it’s not always as simple as it looks. 

Will you achieve a flawless, professional finish, or will unexpected obstacles derail your efforts? Before you pick up your tools, let’s break down what it takes to tackle this ambitious project successfully.

What Are Z Panels?

Z panels are pre-fabricated cladding panels designed to create seamless, interlocking finishes for walls and surfaces. Named for their unique “Z” shape, these panels ensure a tight fit, minimising visible joints and enhancing the overall aesthetic. 

They are available in various materials, including natural stone, wood, and composite, catering to diverse styles and preferences. Renowned for their durability, ease of installation, and timeless appeal, Z panels are ideal for both interior and exterior applications. 

Tools and Materials Needed

Tools and Materials Needed

Before starting your DIY Z panel installation, having the right tools and materials is key to success. The right preparation not only saves time but also ensures a seamless, professional finish. Here’s a list of essential tools and materials you’ll need to get started:

  • Measuring Tape: Ensures accurate dimensions for Z panels, avoiding misalignments and ensuring a precise fit for your installation.
  • Spirit Level: Critical for achieving perfectly level panels, preventing uneven or crooked finishes on walls and surfaces.
  • Notched Trowel: Ideal for evenly spreading adhesive or mortar, ensuring secure attachment and reducing the risk of weak spots.
  • Stone Saw or Grinder: Essential for clean, precise cuts, especially for edges, corners, and custom adjustments to fit panels perfectly.
  • Safety Gear: Includes gloves, goggles, and a dust mask to protect against sharp edges, debris, and inhalation of fine dust.
  • Z Panels: The main material, available in various styles and finishes, providing the aesthetic appeal and durability desired.
  • High-Quality Adhesive: Ensures strong adhesion to the wall surface, suitable for the weight and type of Z panels used.
  • Primer: Necessary for preparing non-porous or uneven surfaces, improving adhesive performance and ensuring a lasting bond.
  • Spacers: Used to maintain even spacing and alignment between panels, creating a professional, seamless look.
  • Sealant: Optional but recommended for outdoor installations, protecting the panels from moisture, weather, and long-term wear.

Preparing for Installation

Preparing for Installation

A flawless Z-panel installation starts long before the first panel is placed. Proper preparation not only ensures a stunning finish but also prevents costly mistakes—so let’s get it right.

1. Assess the Surface

Ensure the wall is structurally sound, clean, and level. Uneven or damaged surfaces can compromise the alignment and stability of Z panels, leading to unsatisfactory results. If necessary, fill gaps, repair damage, or sand down uneven areas to create a smooth, reliable base for installation.

2. Clean the Area

Remove all dust, grease, and debris from the surface. A clean wall is crucial for proper adhesion. Use a damp cloth or a mild cleaning solution, and let the wall dry thoroughly before proceeding. For porous surfaces, consider applying a primer to enhance adhesive bonding.

3. Measure and Plan

Accurate measurements are key to a flawless fit. Measure the wall dimensions carefully and calculate the number of Z panels required, factoring in cuts, corners, and wastage. Mark guidelines on the wall to help with alignment and reduce the chances of errors during installation.

Step-by-Step Installation Process

Step-by-Step Installation Process

Transforming your walls with Z panels might seem complex, but with the right approach, it’s simpler than you think. Follow these clear, actionable steps to achieve a flawless finish.

Step 1: Dry Fit the Panels

Lay the Z panels on the wall without adhesive to test the alignment and ensure a snug fit. This step allows you to visualise the layout, identify irregularities, and mark areas requiring cuts. A precise dry fit ensures a smooth installation process and a professional finish.

Step 2: Apply Adhesive

Spread a suitable adhesive evenly on the back of the panel and the wall using a notched trowel. Avoid overapplying, as excess adhesive can cause uneven surfaces. Begin at the base of the wall, pressing each panel firmly into place to create a strong bond.

Step 3: Align and Secure Panels

Use a spirit level to check alignment as you install each panel. Starting from the bottom corner, work upward, ensuring panels interlock seamlessly. Insert spacers between panels if needed to maintain uniform spacing and prevent gaps.

Step 4: Cut Panels for Edges and Corners

Measure edges and corners carefully, then cut the panels to fit using a grinder or saw. Precision is crucial to maintain a cohesive look. Always wear safety equipment when cutting panels to protect yourself from debris.

Step 5: Clean and Seal the Panels

Remove any excess adhesive immediately to avoid stains. Once the panels are in place, apply a sealant (if recommended) to protect against moisture and enhance durability. Allow sufficient drying time before making any additional adjustments or decorating the area.

Common Challenges in DIY Z Panel Installation and How to Fix Them

Common Challenges in DIY Z Panel Installation and How to Fix Them

Installing Z panels yourself can be rewarding, but common pitfalls can quickly turn the process frustrating. Knowing these challenges—and how to fix them—can save you time, effort, and costly mistakes.

1. Uneven Wall Surfaces

Uneven walls are a common challenge that can result in misaligned Z panels. To fix this, clean and level the surface using a levelling compound. Sand down any protrusions, and ensure the wall is dry and stable before installation. A smooth surface is essential for a seamless and professional finish.

2. Precision Cutting

Cutting panels accurately, especially for edges and corners, can be tricky. Use a high-quality angle grinder or tile saw tailored to your panel material. Double-check all measurements before cutting, and practice on scrap material if needed. Patience and precision will prevent gaps and ensure a clean look.

3. Alignment Issues

Panels that shift during installation can disrupt the aesthetic. Use a spirit level and spacers to maintain consistent alignment. Start from a straight reference point, such as the bottom row, and work your way up carefully. Regularly check alignment to avoid rework and ensure a polished result.

4. Adhesive Application

Applying adhesive unevenly can cause panels to loosen or excess adhesive to seep through joints. Spread the adhesive evenly with a notched trowel and press panels firmly into place. Remove any excess immediately with a damp cloth to keep joints clean and secure a strong bond.

When to Hire a Professional

When to Hire a Professional

While DIY can be rewarding, some projects demand precision and expertise. Knowing when to bring in a professional ensures your Z panel installation is flawless, durable, and stress-free.

  • Wall and Surface Conditions: Uneven walls, poor structural integrity, or challenging layouts may require professional expertise to ensure a flawless result.
  • The scale of the Project: Large-scale installations can be time-consuming and physically demanding for DIYers, making professional help a more practical choice.
  • Complexity of Design: Projects with intricate patterns, tricky corners, or custom cuts demand the precision and tools that professionals bring.
  • Material-Specific Expertise: Different materials like stone, wood, or composite panels require tailored handling and installation techniques for durability and safety.
  • Weather-Exposed Installations: Outdoor Z panel installations must withstand weather fluctuations, making proper sealing and fixing crucial.
  • Time Constraints: For homeowners with tight schedules, professionals can complete the project efficiently without sacrificing quality.
  • Cost Efficiency: While upfront costs may be higher, professional installation reduces the risk of costly mistakes and ensures long-lasting results.
  • Peace of Mind: Professionals handle all aspects of the project, from preparation to cleanup, allowing you to enjoy a stress-free experience.

Maintenance Tips for Z Panels

Maintenance Tips for Z Panels

Keep your Z panels in pristine condition and extend their lifespan with these essential maintenance tips, ensuring they retain their stunning appearance and durability for years to come.

  • Clean regularly: Use a soft brush or cloth to remove dust and debris, and avoid harsh chemicals that could damage or discolour the material.
  • Reapply sealant: Apply a sealant every 1–2 years for natural stone panels to protect against moisture, stains, and weathering; use UV-resistant sealant for outdoor installations to prevent fading.
  • Inspect periodically: Check for cracks, loose edges, or weakened adhesive, especially after extreme weather, and address any issues promptly to prevent further damage.
  • Treat composite and wood panels: Follow manufacturer-recommended treatments to maintain their colour, texture, and resistance to wear over time.
  • Trim nearby vegetation: Minimise moisture buildup and prevent mould or mildew growth by keeping plants and foliage around outdoor panels well-trimmed.
  • Avoid heavy impacts: Prevent accidental chips or damage by not leaning heavy objects against the panels.

Conclusion

DIY Z panel installation offers a cost-effective way to transform your space while giving you the satisfaction of hands-on work. However, achieving a professional finish requires preparation, the right tools, and attention to detail. 

If you’re unsure about tackling the project yourself, professional installation ensures a flawless result. Splendour in Stone provides premium Z panels and expert guidance to help you create the perfect look for your home. Contact us today to get started on your next project.

Top Expert Tips For Stone Retaining Wall Maintenance For Long-Term Durability

Maintaining a stone retaining wall is essential for preserving its strength and appearance over time. Regular upkeep helps prevent damage from the elements and natural aging, ensuring long-term durability. 

Follow these best practices to keep your stone retaining wall sturdy and visually appealing for years to come.

This guide provides expert tips on proper care, from routine inspections to effective cleaning and repair techniques. 

1. Inspect Your Wall Regularly

Inspect Your Wall Regularly

Regular inspections are the first step in preventing costly damage. Every few months, walk along your stone retaining wall and look for signs of wear, such as cracks, loose stones, or bulging areas. 

Soil movement or water pressure may cause structural issues over time, so it’s crucial to catch these early. Pay special attention after heavy rain or freezing conditions, as these can accelerate wear. 

Any small problem left unchecked can quickly escalate, leading to expensive repairs. Consistent monitoring helps maintain the wall’s strength and longevity, ensuring it remains both functional and visually appealing.

2. Ensure Proper Drainage

Ensure Proper Drainage

Effective drainage is crucial for the health of your stone retaining wall. Water build-up behind the wall can cause pressure, leading to cracks or shifting. 

Ensure drainage systems, such as weep holes or gravel layers, are clear and functioning correctly. Without proper drainage, moisture can seep into the stone, weakening the structure over time. 

You should also inspect the surrounding soil to ensure it slopes away from the wall, preventing water from pooling. Maintaining adequate drainage will protect your wall from erosion and help preserve its long-term stability and durability.

3. Repair Cracks and Loose Stones

Repair Cracks and Loose Stones

Addressing cracks and loose stones promptly is essential to maintaining your wall’s integrity. Even tiny cracks can quickly worsen if left untreated, especially when exposed to water or extreme temperatures. 

Check for loose stones regularly and secure them with appropriate mortar before they become a bigger issue. 

Cracks should be filled with stone-compatible filler to prevent water from entering and causing further damage. Ignoring these minor repairs can lead to larger, more expensive problems down the line. 

4. Keep Vegetation Under Control

Vegetation growing near or on your stone retaining wall may look appealing but can cause significant damage over time. Roots from nearby plants can displace stones or weaken mortar, compromising the wall’s stability. Regularly trimming plants and removing weeds between the stones is essential to prevent root intrusion. 

Avoid planting large trees or shrubs too close to the wall, as their roots can cause long-term structural issues. Keeping vegetation under control ensures your retaining wall remains secure, helping to prevent the need for costly repairs in the future.

5. Clean Your Stone Retaining Wall

Clean Your Stone Retaining Wall

Keeping your stone retaining wall clean is essential for its appearance and durability. Over time, moss, algae, and dirt can accumulate, which may trap moisture and cause damage. Gently scrubbing the surface with a mild detergent and water helps remove these build-ups. 

For tougher stains, a pressure washer on a low setting can be used to avoid damaging the stone. Regular cleaning not only preserves the wall’s beauty but also prevents the growth of harmful substances that can weaken the structure. 

6. Apply a Protective Sealant

Apply a Protective Sealant

Sealing your stone retaining wall is vital in protecting it from weather damage. A high-quality sealant helps prevent water from seeping into the stone, which can lead to cracks during freeze-thaw cycles. 

Applying a sealant reduces the risk of moisture absorption, staining, and erosion. Depending on exposure to the elements, it is recommended that your wall be resolved every few years. Ensure the sealant is compatible with the type of stone used in your wall for the best results. 

7. Prevent Soil Erosion Around the Base

Soil erosion around the base of your stone retaining wall can undermine its stability. Over time, rainwater can wash away the soil, weakening the foundation. Adding gravel or mulch around the base can help stabilise the soil and improve drainage. 

Installing landscape fabric can also reduce erosion by holding the soil in place. Avoid planting large shrubs or trees too close to the wall, as their roots may disrupt the soil. Preventing soil erosion not only protects the foundation but also ensures the long-term durability of your retaining wall.

8. Distribute Load Evenly Behind the Wall

Distribute Load Evenly Behind the Wall

Maintaining even load distribution behind your stone retaining wall is essential for its stability. Placing heavy objects, like garden beds or structures, too close to the wall can create uneven pressure, leading to bulging or collapse. Ensure the soil and landscaping features are evenly distributed to avoid concentrating weight in one area. 

When planning your garden, leave sufficient space between the wall and heavy elements to minimise stress. Proper load distribution not only extends the life of your retaining wall but also helps prevent costly structural damage in the future.

9. Prepare for Winter Weather

Winter can be tough on stone retaining walls, especially in colder climates. Freezing and thawing cycles cause water to expand within the stone, leading to cracks. Before winter arrives, inspect your wall for any cracks or weaknesses and address them immediately. 

Ensure that drainage systems are clear to prevent water build-up. Applying a sealant before the cold sets in adds an extra layer of protection against moisture. Removing snow and ice promptly will also reduce the chances of water seeping into cracks.

10. Know When to Call a Professional

Sometimes, DIY maintenance isn’t enough to keep your stone retaining wall in good shape. If you notice significant cracks, leaning, or bulging, it’s time to bring in an expert. Large structural issues may require professional repair to prevent collapse or further damage. Trying to fix complex problems yourself can lead to bigger issues down the line. 

A qualified professional can assess the extent of the damage and recommend the best course of action. Don’t wait until the problem worsens—acting early will save you from costly repairs and ensure your wall’s long-term stability.

Conclusion

By following these expert tips, you’ll keep your stone retaining wall strong, durable, and visually appealing for years to come. Regular maintenance is key to preventing costly repairs and preserving its structure. 

For professional help or further advice on maintaining your wall, contact Splendour In Stone Melbourne today and ensure your wall’s long-term stability.

How Can I Use Grange Limestone to Add Warmth to My Space?

Picture a space that feels inviting the moment you step in—a harmonious blend of elegance and warmth. Grange Limestone offers exactly that, with its earthy tones and natural textures that elevate both interior and exterior designs. 

Whether it’s creating a cosy retreat in your living room or transforming your outdoor patio into a welcoming haven, Grange Limestone provides timeless appeal and unmatched versatility. 

Ready to see how it can redefine your space? Let’s delve into the possibilities.

How Can I Use Grange Limestone to Add Warmth to My Space?

Grange Limestone adds warmth to spaces with its earthy tones, natural textures, and timeless appeal. Use it for flooring, walls, fireplaces, or outdoor patios to create a cosy and elegant atmosphere. Its versatility, durability, and ability to blend with various design styles make it ideal for both modern and traditional settings.

Key Features of Grange Limestone

Key Features of Grange Limestone

Looking to enhance your space with warmth and elegance? Grange Limestone offers unmatched versatility and timeless appeal. Here’s what makes it stand out:

  • Natural Tones and Textures: Soft creams, greys, and sandy hues bring depth and sophistication to any design.
  • Versatility in Design: Works beautifully in both modern and traditional spaces, making it a flexible choice for varied styles.
  • Durability: Withstands wear and tear, making it ideal for high-traffic areas like kitchens, hallways, and outdoor spaces.
  • Low Maintenance: Easy to clean and care for, requiring minimal effort to retain its charm.
  • Light-Reflecting Qualities: Subtly brightens spaces by enhancing natural and artificial light.
  • Eco-Friendly Material: Sourced naturally, Grange Limestone is a sustainable choice for environmentally conscious designs.
  • Timeless Aesthetic: Its enduring appeal ensures it remains stylish and relevant for years to come.

Practical Uses for Grange Limestone

Grange Limestone transforms any space into a warm, inviting haven. Its versatility makes it ideal for various applications, allowing homeowners to craft unique and elegant spaces. Here’s how Grange Limestone can elevate your interiors and exteriors:

1. Walls and Cladding

Walls and Cladding

Grange Limestone cladding turns ordinary walls into striking focal points. Its textured surfaces and natural variations create depth and dimension, adding visual interest without overpowering a room. 

Feature walls in living rooms, bedrooms, or hallways gain sophistication and warmth when clad with limestone, blending traditional elegance with modern simplicity. The stone’s neutral tones provide a versatile canvas, pairing beautifully with wood accents, metal finishes, or lush greenery for a balanced look. 

Its durability ensures it maintains its charm over time, even in areas exposed to wear or moisture. For those seeking a cohesive aesthetic, combining limestone cladding with matching flooring can unify the design. 

Whether you want to highlight a fireplace, enhance an entryway, or elevate your bedroom’s ambience, Grange Limestone cladding adds timeless charm and a tactile, luxurious feel to any space.

2. Flooring

Grange Limestone flooring creates a solid foundation of elegance and warmth. The natural tones—ranging from creamy whites to soft greys—complement diverse design styles, from rustic charm to modern minimalism. 

Its ability to blend with wood furniture, soft textiles, and neutral dĂ©cor ensures a cohesive design throughout your home. In open-plan layouts, limestone flooring establishes continuity, linking different zones seamlessly. 

Beyond aesthetics, its durability makes it suitable for high-traffic areas like hallways, kitchens, and living rooms. Additionally, the stone’s light-reflective properties brighten darker rooms, enhancing the feeling of spaciousness. 

As a low-maintenance choice, it’s easy to clean and resistant to wear, ensuring longevity and practicality. Whether paired with radiant heating for added comfort or left in its natural form, Grange Limestone flooring provides a sophisticated yet functional base for any interior design.

3. Fireplaces

 Fireplaces

A Grange Limestone fireplace is a timeless centrepiece that radiates warmth and character. The natural stone’s earthy tones pair harmoniously with the flicker of flames, creating an inviting atmosphere for gatherings or relaxation. 

Whether framing a traditional wood-burning hearth or surrounding a sleek, modern gas fireplace, limestone adds rustic charm and a touch of luxury. Its heat-resistant properties ensure it stands up to high temperatures, maintaining its beauty and integrity over time. 

The versatility of Grange Limestone allows homeowners to customise the design, from simple mantels to intricate surrounds, ensuring a perfect fit for their aesthetic preferences. 

Additionally, the material’s ability to blend with both traditional and contemporary interiors makes it an adaptable choice for any home. A limestone fireplace not only enhances the room’s warmth but also becomes a stunning focal point, drawing attention and admiration from anyone who enters.

4. Outdoor Spaces

Grange Limestone elevates outdoor spaces with natural charm and enduring durability. Its earthy tones blend seamlessly with gardens, patios, and pathways, creating an inviting ambience that connects the home to its natural surroundings. 

The stone’s non-slip properties make it a safe and practical choice for outdoor areas, including pool decks and walkways. Its resilience against weather conditions ensures it remains visually stunning despite exposure to rain, sun, or frost. 

When used for outdoor seating areas, Grange Limestone adds a cosy, timeless appeal, ideal for entertaining or quiet evenings under the stars. Incorporating the stone into retaining walls, garden edging, or decorative features further enhances the overall landscape design. 

Minimal maintenance ensures your outdoor spaces remain effortlessly beautiful, making Grange Limestone a lasting investment in your home’s exterior. From functional pathways to stylish patios, this versatile material transforms outdoor areas into spaces of warmth and elegance.

Design Tips for Using Grange Limestone

Design Tips for Using Grange Limestone

Grange Limestone’s natural elegance can transform any space, but thoughtful design choices help maximise its beauty and functionality. Here’s how to make the most of it:

1. Pairing with Complementary Materials

Grange Limestone pairs beautifully with natural wood, metal accents, and soft textiles, creating a harmonious and welcoming aesthetic. Wood enhances the stone’s warmth, while metal adds a sleek, modern contrast. 

Incorporate soft furnishings like neutral-coloured rugs or curtains to balance the space and make it feel inviting. For kitchens or bathrooms, consider pairing limestone with metallic fixtures for a luxurious yet grounded look. 

By blending materials thoughtfully, you can create a layered, cohesive design that feels both timeless and contemporary. This approach ensures the limestone remains the focal point, accentuating its natural tones and textures while complementing your overall interior style.

2. Optimising Lighting

Lighting plays a crucial role in highlighting Grange Limestone’s textures and tones. Warm lighting enhances its earthy hues, creating a cosy and inviting atmosphere, especially in the evening. 

Position lights to accentuate the stone’s subtle variations, such as recessed lights above walls or floor lamps near key areas. Natural light during the day also enhances limestone’s beauty, so place it in spaces with ample sunlight for added brilliance. 

3. Choosing Finishes

Choosing Finishes

The finish of Grange Limestone dramatically influences its aesthetic and functionality. Opt for a honed finish to achieve a smooth, modern look that works well in minimalist interiors or high-traffic areas like kitchens. 

For a rustic or traditional appeal, a brushed finish adds texture and depth, perfect for living rooms or feature walls. Polished finishes, while less common, provide a sleek, luxurious touch for statement pieces. 

Selecting the right finish ensures the limestone complements the desired aesthetic, whether you aim for understated elegance or bold sophistication.

4. Incorporating Statement Features

Grange Limestone can be used to create stunning statement features in any room. Consider using it for a feature wall, fireplace surround, or custom furniture pieces like coffee tables. 

Its natural textures and earthy tones make it a focal point that draws attention without overwhelming the space. For outdoor spaces, a Grange Limestone fountain or patio adds timeless charm and connects the area to the surrounding landscape. These unique applications not only showcase the material’s versatility but also add a personalised touch to your design.

5. Coordinating Colour Schemes

The earthy tones of Grange Limestone work best with complementary colour schemes. Neutral palettes, such as beige, cream, or soft grey, emphasise its natural warmth, creating a soothing atmosphere. 

For bolder accents, pair limestone with deep blues, greens, or charcoal hues to provide striking contrast while maintaining harmony. Coordinating your colours ensures a cohesive and polished look that enhances the limestone’s beauty and integrates seamlessly into your overall design.

Maintenance Tips for Long-Lasting Warmth

Grange Limestone is a durable and timeless material, but maintaining its natural beauty requires a little care and attention. Follow these tips to keep it looking warm and inviting for years:

  • Regular Cleaning: Sweep or vacuum frequently to remove dust and debris. Use a damp mop with pH-neutral cleaners to avoid damaging the stone.
  • Sealing the Surface: Seal Grange Limestone to protect it from stains and moisture. Regular resealing ensures its durability and enhances its resistance to daily wear.
  • Preventive Measures: Use rugs or mats in high-traffic areas to reduce wear. Placing coasters under drinks and felt pads on furniture legs helps prevent scratches.
  • Address Spills Immediately: Clean up spills quickly, especially acidic ones like wine or citrus juice, to avoid staining or etching the surface. Use a soft cloth and a gentle cleaner for the best results.
  • Avoid Abrasive Tools: Refrain from using harsh scrubbers or abrasive tools that could scratch or dull the stone. Opt for soft-bristled brushes or microfibre cloths for regular upkeep.
  • Protect Outdoor Areas: For outdoor limestone, clear debris like leaves or dirt regularly and consider occasional pressure washing on a low setting. Weather-resistant sealants help maintain the stone’s charm in exposed environments.

Conclusion

Grange Limestone enhances any space with its warmth, durability, and classic charm. Its natural tones seamlessly blend with various design styles, adding a welcoming and sophisticated touch.  Ready to elevate your home? Reach out to Splendour in Stone today and bring the charm of Grange Limestone to life.

Is stone retaining wall better than concrete?

Picture a serene bathroom with earthy tones or a pool deck that feels like a natural oasis. Choosing the right material is crucial, especially for areas prone to moisture. 

Kimberley sandstone, known for its timeless beauty and versatility, often emerges as a top contender. 

But is it truly the best choice for high-moisture spaces? In this article, we’ll evaluate its properties, benefits, drawbacks, and how it compares to other materials to help you make an informed decision.

Is Kimberley Sandstone the Best Choice for High-Moisture Spaces

Kimberley sandstone is a durable, slip-resistant material ideal for high-moisture spaces like bathrooms and pool decks. Its natural porosity helps manage moisture when properly sealed, reducing water damage and mould growth. Additionally, it offers a timeless aesthetic with earthy tones and unique textures, enhancing the look of wet areas.

Properties of Kimberley Sandstone

Properties of Kimberley Sandstone

Kimberley sandstone boasts natural characteristics that make it an exceptional choice for wet spaces. Its porous structure allows it to absorb water, but when sealed properly, this feature becomes an advantage. 

The stone’s ability to manage moisture without becoming waterlogged reduces the risk of mould and mildew, ensuring a cleaner, healthier environment in high-moisture areas. This makes it a reliable option for bathrooms, pool decks, and other spaces prone to water exposure.

In addition to moisture management, Kimberley sandstone offers outstanding slip resistance, making it safer to use in environments where water is frequently present. This characteristic is particularly valuable for families or public spaces where accidents are a concern.

The stone is also renowned for its impressive durability, withstanding wear and tear even under harsh conditions. Its natural composition resists cracking, chipping, and other damage, ensuring longevity in areas where other materials may fail.

Visually, Kimberley sandstone stands out with its warm, earthy tones and unique textures. These features add a touch of sophistication and seamlessly complement both modern and traditional designs. 

Benefits of Kimberley Sandstone in High-Moisture Spaces

Benefits of Kimberley Sandstone in High-Moisture Spaces

Kimberley sandstone is more than just a beautiful material; it’s also engineered by nature to perform exceptionally well in wet environments. Here are the key reasons why it stands out:

  • Resistance to Water Damage: When properly sealed, Kimberley sandstone becomes highly resistant to water penetration, significantly reducing the risk of mould and mildew formation.
  • Slip Safety: Its natural texture provides superior grip, even when wet, making it an ideal choice for areas like bathrooms, kitchens, or pool surrounds where safety is a priority.
  • Durable and Long-Lasting: Kimberley sandstone endures heavy use and prolonged exposure to moisture without losing its structural integrity. This ensures it remains a cost-effective, long-term investment for your space.
  • Aesthetic Versatility: With warm, earthy tones and unique textures, Kimberley sandstone enhances both traditional and modern designs. Its natural beauty pairs effortlessly with other materials for a cohesive and sophisticated look.
  • Thermal Resistance: Kimberley sandstone stays cool underfoot, even in direct sunlight, making it perfect for outdoor wet areas like pool decks and patios.
  • Eco-Friendly Option: As a natural material, Kimberley sandstone is a sustainable choice that aligns with environmentally conscious building practices, offering both performance and a reduced environmental impact.

Potential Drawbacks

While Kimberley sandstone offers remarkable benefits, it’s essential to be aware of its challenges to make an informed decision. Here are the potential drawbacks to keep in mind:

  • Porosity Requires Maintenance: The stone’s porous nature demands regular sealing to prevent excessive water absorption and staining. Without this, discolouration and reduced durability can occur over time.
  • Higher Costs: Kimberley sandstone is often more expensive than alternatives like porcelain or concrete tiles, both in terms of initial purchase and ongoing maintenance.
  • Cleaning Challenges: Its natural texture, while visually appealing, may require careful cleaning to prevent dirt and debris from accumulating in grooves or patterns.
  • Limited Availability: Kimberley sandstone may not be readily available in all regions, which can increase costs and extend project timelines if it needs to be sourced from specific suppliers.
  • Vulnerability to Harsh Chemicals: Certain cleaning products and chemicals can damage the stone’s surface or reduce its protective seal, requiring careful selection of maintenance products.

Comparing Kimberley Sandstone to Alternatives

Comparing Kimberley Sandstone to Alternatives

When deciding whether Kimberley sandstone is the right choice, it’s essential to see how it stacks up against other popular materials. 

Here’s a detailed comparison of its key attributes with alternatives commonly used in high-moisture spaces:

MaterialDurabilitySlip ResistanceAesthetic AppealMaintenanceCost
Kimberley SandstoneHighly durable; resists cracking and weathering when sealed.Excellent natural texture provides superior grip, even when wet.Warm, earthy tones and unique textures for a natural, elegant look.Requires regular sealing to maintain water resistance and prevent staining.Moderate to high, depending on sourcing and sealing requirements.
Porcelain TilesExtremely durable and non-porous, withstanding heavy use without damage.Generally good, but may require special coatings for added grip.Wide variety of designs but lacks the natural warmth of stone.Low maintenance; easy to clean and doesn’t require sealing.Affordable to mid-range.
GraniteVery durable; resists scratches and stains but requires sealing in wet areas.Limited slip resistance unless treated with specialised finishes.Luxurious appearance but is less natural in texture than sandstone.Requires periodic sealing to maintain water resistance.High; often more expensive than sandstone.
Concrete TilesDurable and can withstand heavy use, but prone to cracking over time.Moderate; smoother finishes may become slippery when wet.Functional and modern, but lacks the richness of natural stone.Low maintenance but may need resealing occasionally.Low; cost-effective for large areas.
MarbleDurable but softer than granite, prone to etching and scratching in wet areas.Poor slip resistance unless textured or treated.Luxurious and timeless, but more delicate than sandstone.High maintenance; requires careful cleaning and sealing.Very high; one of the most expensive options.
Ceramic TilesDurable but less strong than porcelain; may chip or crack in high-traffic areas.Moderate; can be slippery unless textured.Wide range of styles but lacks the unique appeal of natural stone.Low maintenance; easy to clean and doesn’t need sealing.Affordable; budget-friendly.

Best Applications for Kimberley Sandstone in High-Moisture Spaces

Kimberley sandstone is a versatile material with unique qualities that make it ideal for various high-moisture environments. Its natural beauty and durability shine in settings where functionality meets style. Here are the best applications:

1. Bathrooms

Bathrooms

Kimberley sandstone is a standout choice for bathroom floors and walls. Its slip-resistant surface enhances safety, especially in wet conditions, making it perfect for showers and wet rooms. The natural textures and warm tones create a spa-like ambience, adding sophistication to any design.

When sealed correctly, it becomes highly resistant to water absorption, reducing the risk of mould or mildew. Kimberley sandstone also pairs beautifully with other materials like glass or wood, creating a cohesive and timeless aesthetic. 

Proper maintenance, including sealing and gentle cleaning, ensures the stone remains in excellent condition for years.

2. Pool Decks

For pool decks, Kimberley sandstone offers an unbeatable combination of durability and heat resistance. Unlike many materials, it remains cool underfoot even during hot summer days, ensuring comfort for barefoot use. 

Its textured surface provides excellent slip resistance, making it safe for areas with heavy water exposure.

The stone’s earthy tones complement outdoor settings, blending seamlessly with landscaping and water features. 

3. Kitchens

Kimberley sandstone adds character to kitchen splashbacks and countertops while maintaining functionality. Its unique textures and colours lend a natural elegance, elevating the overall design. The stone’s resilience against occasional spills and heat exposure makes it practical for daily use.

Sealing the sandstone is crucial to protect it from staining or damage caused by oils and acidic substances. With proper care, Kimberley sandstone remains a durable and stylish option, providing both charm and practicality in high-moisture kitchen areas.

4. Outdoor Showers

Outdoor Showers

Kimberley sandstone excels in outdoor showers, where it combines beauty with performance. Its slip-resistant surface ensures safety, even in spaces exposed to constant water flow. The stone’s natural textures and tones blend harmoniously with outdoor environments, creating a serene and luxurious look.

The material’s ability to withstand moisture and temperature changes ensures long-lasting performance in open-air conditions. Regular sealing enhances its durability, protecting it from staining or weather-related wear. 

5. Water Features and Ponds

Kimberley sandstone is perfect for water features and ponds, where its natural appearance enhances the aesthetic of flowing water. The stone’s durability and resistance to moisture make it ideal for lining pond edges, waterfalls, or decorative fountains.

Its slip-resistant properties are an added benefit in areas that may be walked on or splashed frequently. Kimberley sandstone’s earthy tones complement the organic feel of water features, creating a harmonious and tranquil environment. 

Conclusion

Kimberley sandstone offers a unique combination of aesthetic appeal, slip resistance, and durability, making it a standout choice for high-moisture spaces.

If you’re ready to enhance your high-moisture spaces with Kimberley sandstone, consult us for proper installation and sealing to maximise its longevity. Elevate your home with a material that brings both functionality and timeless charm.

Stone Paving Guide: How to Create Beautiful and Durable Outdoor Spaces

Transforming your outdoor space into a stunning and long-lasting haven begins with the right stone paving approach. 

Whether you’re creating a garden path, a patio for entertaining, or a driveway with timeless charm, understanding the key steps can turn your vision into reality. 

This guide walks you through everything you need to know, from planning and stone selection to installation and maintenance, ensuring your space is both elegant and built to last. Let’s get started.

1. Understand Your Vision

Before embarking on a stone paving project, clarity in purpose and design is crucial. Start by defining how you want the space to function. Is it a patio where you’ll host gatherings, a pathway to guide you through your garden, or a driveway that complements your home’s architecture? Identifying the primary purpose will guide every subsequent decision, from material selection to layout and maintenance.

Equally important is visual harmony. Consider how your outdoor area blends with your home’s overall style. A modern design calls for sleek, uniform patterns, while a rustic style benefits from irregular shapes and earthy tones. 

Think about the scale of your space as well. Small areas may appear cluttered with intricate patterns, while large spaces can benefit from bold designs or contrasting elements.

Functionality and aesthetics should coexist seamlessly. For example, choosing lighter-coloured stones can reflect heat and keep patios cooler, while darker tones lend a sophisticated edge. 

2. Choose the Right Stone for Beauty and Strength

Choose the Right Stone for Beauty and Strength

Selecting the appropriate stone is vital to achieving a long-lasting and visually appealing surface. Natural stones such as granite, sandstone, and limestone each offer unique qualities suited to different applications. 

Granite, known for its strength and resistance to wear, is perfect for high-traffic areas like driveways. Sandstone, with its warm and earthy hues, is an excellent choice for patios or garden pathways, while limestone provides a softer, more refined aesthetic ideal for decorative areas.

When choosing stones, consider environmental factors such as climate. Granite is ideal for areas with fluctuating temperatures, while sandstone performs well in moderate climates. Additionally, the texture of the stone can influence its overall look and functionality. 

A smooth finish is ideal for modern spaces, while a rugged texture complements natural or rustic designs.

Colour selection plays a significant role in achieving the desired visual impact. Neutral tones like grey, beige, or cream are versatile and timeless, while bold colours such as terracotta or slate create a striking effect. By combining strength with aesthetics, the right stone choice will not only enhance the beauty of your space but also ensure its durability.

3. Site Preparation for a Strong Foundation

Site Preparation for a Strong Foundation

A robust foundation is the backbone of any successful stone paving project. Begin by clearly marking the area you intend to pave. This ensures accurate measurements and prevents errors during installation. Once marked, clear the space of debris, vegetation, and loose soil. Proper site preparation minimises the risk of uneven paving or water damage in the future.

Excavation is a critical step in this process. Dig to an appropriate depth—usually between 100mm and 150mm—depending on the stone type and intended use of the space. For driveways, a deeper base may be necessary to accommodate heavier loads. 

Once the area is excavated, lay a base layer of crushed stone or gravel. This layer provides stability and facilitates drainage, which is essential for preventing water accumulation and subsequent damage.

After laying the base, compact it thoroughly to eliminate air pockets and create a level surface. A well-compacted base ensures that the paving stones remain stable and reduces the likelihood of shifting or sinking over time. The final step is to add a thin layer of sand or mortar as a bedding layer for the stones. Proper site preparation is time-intensive but ensures a flawless and enduring foundation.

4. Laying the Stones for Aesthetic Appeal

The way you lay your stones determines both the visual impact and the stability of your paved area.

1. Choose a Pattern That Complements Your Space

Select a paving pattern that aligns with your design vision and fits the size of your area. Common options include herringbone, basketweave, and linear arrangements. Patterns not only enhance the aesthetic appeal but also contribute to the stability of the paving.

2. Start Laying Stones from One Corner

Begin placing stones from a fixed corner and work your way outward. Position each stone firmly onto the prepared bedding layer, ensuring even spacing between them. Using spacers can help maintain uniform gaps for a polished finish. Adjust stones as needed, particularly in curved or irregular sections.

3. Fill the Joints for Stability

Once all stones are laid, sweep joint sand or grout into the gaps. This step secures the stones in place and minimizes shifting over time.

4. Compact the Paving Surface

Use a plate compactor to firmly set the stones into position. This ensures a stable and durable surface that can withstand foot traffic and weather conditions.

5. Techniques for Maximising Durability

Techniques for Maximising Durability

Durability is a critical aspect of stone paving, particularly in areas exposed to heavy use or varying weather conditions. 

  • Seal the Stones Immediately: Apply a quality sealant right after installation to protect against stains, moisture, and UV damage. This helps preserve the appearance and longevity of the paving.
  • Ensure Proper Drainage: Slope the surface slightly away from buildings to direct water runoff. This prevents pooling, which can weaken the foundation and damage the stones over time.
  • Reinforce the Edges: Use edging stones or concrete borders to keep the paving stones in place and prevent shifting. This also adds a clean, finished look.
  • Maintain Joint Stability: Refill sand-based joints periodically to keep the paving stable and prevent gaps from forming due to erosion.
  • Use Thicker Stones in High-Traffic Areas: Choose thicker stones for durability in areas with heavy foot traffic to prevent cracking and wear.
  • Follow These Steps for Long-Lasting Paving: Proper sealing, drainage, edging, and maintenance will ensure your paving remains intact and visually appealing for years.

6. Incorporate Design Elements to Elevate Beauty

Stone paving can become the centrepiece of a beautifully designed outdoor space when combined with thoughtful design elements. Surround the paved area with natural elements such as shrubs, flowers, or ornamental grasses. These features soften the stone’s appearance and create a harmonious transition between hard and soft landscaping.

Incorporating lighting enhances both aesthetics and functionality. Pathway lights, spotlights, or string lights highlight the paving at night, creating a welcoming ambience. For a more dynamic effect, consider using stones in contrasting colours or textures to create borders or decorative patterns.

Functional elements such as outdoor furniture, pergolas, or fire pits add utility while complementing the paving. Integrating these elements ensures your outdoor space is not only visually appealing but also highly practical for everyday use.

7. Maintain and Preserve Your Stone Paving

Maintain and Preserve Your Stone Paving

Regular maintenance is essential to keeping your stone paving in pristine condition. Begin with routine cleaning to remove dirt, leaves, and other debris that can accumulate on the surface. Use a mild detergent and water for deeper cleaning, avoiding harsh chemicals that might damage the stone.

Inspect the paving regularly for signs of wear, such as cracks or loose stones. Address minor issues promptly to prevent them from escalating. Resealing the stones every few years ensures they remain protected from weather exposure and stains. Seasonal care is equally important. 

Clear snow and ice promptly during winter, using non-corrosive methods to avoid damaging the surface. Consistent maintenance not only preserves the beauty of the paving but also extends its lifespan, ensuring it remains a focal point of your outdoor space.

Conclusion

Creating a beautiful and durable outdoor space with stone paving requires thoughtful planning, careful execution, and ongoing maintenance. From envisioning your ideal space and choosing the right materials to precise installation and regular care, each step contributes to a long-lasting and visually stunning result. 

Ready to transform your outdoors? Browse our premium selection at Splendour in Stone and start your project today for timeless elegance that lasts for years to come.

The Ultimate Guide to Stone Cladding: Benefits and Exterior Design Ideas

Stone cladding offers the perfect solution, blending natural beauty with incredible durability. 

Whether you’re enhancing curb appeal or creating standout outdoor spaces, this guide will equip you with everything you need to know. 

From key benefits to inspiring design ideas, learn how stone cladding can elevate your property to new heights of sophistication. Ready to get started? Let’s dive in!

What Is Stone Cladding?

Stone cladding is a versatile architectural feature that involves applying a thin layer of stone to surfaces such as walls or facades. It mimics the look of solid stone while being lightweight, cost-effective, and easier to install. The material can be natural stone, such as granite or limestone, or manufactured stone, crafted to replicate natural textures and colours.

Its primary purpose is to enhance the aesthetics of a building while providing additional protection to the underlying structure. Stone cladding works well for both modern and traditional designs, making it a popular choice for residential and commercial properties alike.

Unlike solid stone, cladding doesn’t require extensive structural reinforcements. This means you can achieve a luxurious appearance without the hefty price tag. It’s commonly used on external walls, garden features, fireplaces, and even interior accent walls.

Key Benefits of Stone Cladding

Key Benefits of Stone Cladding

Looking for a material that enhances your home’s appearance while offering functional advantages? Stone cladding checks all the boxes. Here are the top reasons why it’s an excellent choice for your property:

  • Durability and Longevity: Stone cladding is highly resistant to weather, impact, and wear, making it ideal for exterior applications. It holds up against harsh sunlight, rain, and wind without losing its appeal.
  • Timeless Aesthetic Appeal: Few materials match the sophistication of stone. Its natural textures and colours add depth and character to any surface, elevating the overall look of your home.
  • Versatility in Design: Stone cladding adapts seamlessly to various architectural styles, from contemporary minimalist homes to rustic countryside cottages. Its flexibility in application enhances its appeal.
  • Energy Efficiency: Certain types of stone cladding improve insulation, helping to maintain comfortable indoor temperatures. This can lead to reduced energy bills, especially in regions with extreme climates.
  • Low Maintenance: Compared to wood or painted surfaces, stone cladding requires minimal upkeep. Occasional cleaning with water and mild detergent keeps it looking pristine.
  • Fire Resistance: Stone cladding offers excellent fire resistance, providing an extra layer of safety for your property. This makes it particularly appealing in areas prone to bushfires or extreme heat.
  • Sustainability: Natural stone is an eco-friendly material that can be sourced sustainably. Its durability also reduces the need for frequent replacements, lowering the overall environmental impact.
  • Property Value Boost: Installing stone cladding significantly enhances the perceived value of your home. Its premium look and functional benefits can make your property stand out in the market.

Top Exterior Design Ideas with Stone Cladding

Exterior Design Ideas with Stone Cladding

Transforming your outdoor spaces doesn’t have to be complicated. Stone cladding offers endless opportunities to elevate your home’s exterior, combining aesthetic appeal with practical benefits. Below are some of the best design ideas to consider:

1. Facade Enhancements

A home’s facade sets the tone for its overall appearance, and stone cladding is one of the most impactful ways to enhance it. A full stone-clad wall exudes grandeur and gives your property a distinguished look. 

For those seeking subtle sophistication, partial cladding around windows or door frames adds just the right amount of detail.

Stone cladding also allows for creative combinations of textures and colours, giving your facade a layered, dimensional feel. Natural stones like limestone and slate bring warmth, while sleek manufactured stones lend themselves to modern aesthetics. Beyond beauty, a stone-clad facade offers durability, shielding the structure from harsh weather and wear.

2. Accent Walls

Accent Walls

Accent walls with stone cladding make bold statements in outdoor entryways, porches, or patios. They serve as eye-catching focal points, adding texture and depth that other materials struggle to match.

Consider a striking stone wall behind a seating area or framing the entrance to your home. Paired with the right lighting, the textures of the stone come alive, creating a dramatic effect at night. For a more cohesive look, match the cladding with outdoor furniture or nearby garden features.

Accent walls also enhance functional spaces, such as outdoor kitchens or entertainment areas, by tying the design together. Whether rustic or modern, a stone accent wall adds character that transforms ordinary spaces into memorable ones.

3. Outdoor Fireplaces and BBQ Areas

Outdoor fireplaces and BBQ areas are not just functional but also central to social gatherings. Stone cladding elevates these spaces, providing both aesthetic and practical benefits. Natural stones are highly heat-resistant, making them ideal for areas exposed to fire or heat.

A stone-clad fireplace creates a cosy and inviting atmosphere for evenings spent outdoors. For BBQ areas, using stone for the base or surrounding structures ensures durability and resistance to grease or smoke stains. Adding stone cladding to these features enhances the overall design while complementing the natural elements of your outdoor space.

To tie everything together, consider matching the stone cladding with nearby seating, garden paths, or accent walls. The result is a unified, luxurious outdoor area perfect for entertaining.

4. Retaining Walls and Garden Features

Walls and Garden Features

Retaining walls and garden features are essential in landscaping, and stone cladding turns them into design statements. Rather than plain concrete walls, stone-clad retaining walls add natural beauty and character to your garden.

Pair stone-clad walls with greenery for a harmonious contrast. Plants such as ivy or flowers that grow along the walls amplify the organic feel. For planters, cladding their outer surfaces with stone enhances their visual appeal, blending them seamlessly into the landscape.

Stone cladding also works beautifully for water features like fountains or ponds. The rough textures of natural stone complement the smooth flow of water, creating a calming and balanced effect. With proper design, these features become a centrepiece in your garden, offering both functionality and aesthetic value.

5. Mixed Material Designs

For homeowners seeking contemporary styles, combining stone cladding with other materials creates dynamic contrasts that stand out. Pairing stone with wood adds warmth and rustic charm while combining it with glass or metal introduces a modern, sleek look.

For example, a stone-clad wall with wooden accents creates a balanced design for outdoor seating areas. In modern homes, pairing stone with steel railings or glass balustrades achieves a minimalist aesthetic that feels fresh and inviting.

When using mixed materials, consistency is key. Stick to a cohesive colour palette and complementary textures to avoid a cluttered appearance. This approach highlights the strengths of each material, making your outdoor spaces visually stunning and unique.

How to Choose the Right Stone Cladding

How to Choose the Right Stone Cladding

Finding the perfect stone cladding involves more than just picking a style you like. By considering essential factors, you can make an informed decision that suits both your design needs and practical requirements. Here’s what to keep in mind:

  • Style and Aesthetics: Choose colours and textures that complement your home’s existing design. For a modern look, opt for sleek finishes and neutral tones; for a rustic vibe, choose rougher textures and earthy shades.
  • Material Type: Decide between natural stone for authenticity or manufactured stone for affordability. Natural stone offers a timeless, organic feel, while manufactured options mimic natural textures at a lower cost.
  • Durability: Ensure the material is weather-resistant and suitable for your region’s conditions. For areas with extreme climates, opt for stones that can withstand heat, frost, or heavy rains without cracking.
  • Budget: While stone cladding is cost-effective compared to solid stone, premium options can vary in price. Establish your budget early to narrow your choices and avoid overspending.
  • Weight and Installation Requirements: Stone cladding varies in weight, which impacts installation methods. Heavier stones might require structural reinforcements, while lightweight options are easier to apply and cost less to install. Consider the load-bearing capacity of your walls before making a choice.
  • Maintenance Needs: Different types of stone cladding come with varying maintenance requirements. Polished stones may need occasional resealing, while rougher finishes are more forgiving of dirt and stains. Choose a material that matches your willingness to maintain its appearance over time.
  • Environmental Impact: If sustainability matters to you, select cladding made from eco-friendly or reclaimed materials. Natural stone is often more sustainable, especially when sourced locally, reducing transportation emissions and promoting responsible resource use.

Conclusion

Stone cladding offers an exceptional way to elevate the exterior of your home, combining beauty, durability, and versatility. Whether you’re creating an eye-catching facade, a cosy outdoor fireplace, or enhancing your garden features, the possibilities are endless. 

Ready to transform your property into a work of art? Reach out to our expert team today and take the first step towards stunning stone cladding solutions tailored to your needs!

Caring for Z Panels: Maintenance Tips to Protect Your Investment

Imagine investing in beautiful Z panels to elevate the look and functionality of your space, only to see them deteriorate due to poor maintenance. These panels, known for their sleek appearance and durability, are an excellent addition to any property. 

However, their longevity depends on proper care. You can preserve their value and functionality by implementing the right cleaning and maintenance routine for years. Let’s dive into the essential tips to keep your Z panels looking and performing their best.

Understanding Z Panels

Z panels are widely used in construction and design for their versatility, durability, and modern aesthetic appeal. Typically made from materials like aluminium, steel, or composite, they are popular for both exterior and interior applications, including cladding, walls, and facades.

Why proper care matters: Without maintenance, even the most robust materials can succumb to wear and tear. Environmental factors such as UV exposure, moisture, and pollution can degrade their performance and appearance over time. 

Knowing what Z panels are made of will guide you in choosing the right care techniques, ensuring they remain structurally sound and visually appealing.

By understanding their composition, you can focus on maintaining their specific material properties and avoid damage from improper cleaning methods.

Daily and Weekly Cleaning Tips

Keep Them Sparkling: Your Daily & Weekly Cleaning Routine

Maintaining the pristine appearance and durability of your Z panels starts with consistent cleaning. Dust and dirt, if left unchecked, can dull the surface and lead to potential damage over time. Following a simple daily and weekly cleaning routine can preserve their shine and functionality.

1. Wipe Down Daily

A simple daily wipe-down can work wonders for maintaining your Z panels. Over time, dust and debris accumulate on their surface, which can dull their appearance and even cause scratches if left unattended. 

Use a soft, non-abrasive cloth or a microfibre duster to gently remove dust and dirt. This quick routine helps keep your panels looking clean and reduces the chances of long-term damage.

Pay close attention to edges and corners, where dirt often collects. Avoid using rough or abrasive materials that might leave marks or scratches. By dedicating just a few minutes each day, you can protect your panels’ surface and save yourself the hassle of dealing with stubborn grime later.

2. Weekly Wash

Freshen Up: Your Weekly Wash Guide

A weekly wash goes beyond daily dusting to remove grime and stubborn stains. Mix a mild detergent with warm water to create a gentle cleaning solution. Using a soft sponge, gently scrub the panels, focusing on any areas where dirt may have accumulated. 

Once done, rinse thoroughly with clean water to remove all soap residue, as the leftover detergent can dull the surface or attract more dirt over time.

Never skip the rinse step—soap scum can be just as damaging as dirt. Be thorough but gentle, and always clean in the direction of the panel’s grain or texture to preserve its natural finish. Regular washing not only enhances the panels’ appearance but also contributes to their long-term durability.

3. Avoid Harsh Chemicals

The wrong cleaning agents can do more harm than good to your Z panels. Harsh chemicals like bleach, ammonia, or strong acids can corrode metal, strip protective coatings, and even discolour the panels. Stick to mild cleaning solutions designed specifically for your panel material.

Before using any product, test it on a small, inconspicuous area to ensure it won’t cause damage. Using harsh chemicals may save time initially but can lead to costly repairs or replacements later. 

Always prioritise gentle and safe cleaning practices to maintain the structural integrity and aesthetic appeal of your panels. Protect your investment by choosing the right tools and products for the job.

Preventative Maintenance Practices

Stay Ahead: Smart Practices for Preventative Maintenance

Routine maintenance is essential to avoid minor issues turning into expensive repairs. The key is to identify potential problems early and implement protective measures to ensure your Z panels remain in optimal condition. Below are six effective preventative practices:

  • Inspect Regularly: Make it a habit to check your panels for signs of wear, rust, or dents at least once a month. Corners and edges are particularly vulnerable to damage and should be inspected closely. Promptly addressing any issues found during inspections can prevent further deterioration.
  • Protect Against Moisture: Moisture is one of the biggest threats to Z panels. It can cause corrosion or lead to mould growth, especially on materials like steel or wood composites. Ensure all panels are sealed properly and repair cracks or gaps immediately to prevent water ingress.
  • Minimise Direct Sunlight: Prolonged UV exposure can fade the colours of outdoor panels and weaken protective coatings. To combat this, consider installing shade structures, applying UV-resistant coatings, or positioning panels strategically to limit direct sunlight.
  • Clean Surrounding Areas: Keep nearby areas free from debris, leaves, and water pooling, which can transfer dirt or moisture to the panels. Proper drainage systems are also vital to preventing water accumulation near the base of the panels.
  • Check Fasteners and Joints: Over time, screws, clips, or other fasteners may loosen due to vibrations or weather conditions. Tighten these elements regularly and replace any that show signs of corrosion or wear to maintain the structural integrity of the panels.
  • Apply Protective Coatings: Adding a layer of protection, such as sealants or specialised coatings, can help shield the panels from environmental damage. These coatings enhance durability while reducing the need for frequent repairs by creating a barrier against moisture, UV rays, and pollutants.

Seasonal Maintenance Guidelines

Seasonal Care: Your Go-To Maintenance Checklist

Adapting your Z panel maintenance routine to the seasons is essential for ensuring their longevity. Each season brings unique challenges that can impact the panels’ durability and appearance.

In winter, snow and ice can add unnecessary strain to your panels. Promptly remove any accumulation using soft tools to avoid scratching the surface or causing weight-related damage. 

In summer, intense UV rays can weaken protective coatings and fade the panels’ colour. To combat this, inspect the panels regularly for signs of sun damage and reapply UV-resistant coatings as needed to maintain their integrity. 

During autumn and spring, debris such as leaves, dirt, and pollen often collects around joints and edges. Clearing these areas thoroughly prevents buildup that can lead to long-term deterioration or blocked drainage.

How to Address Minor Repairs

Even with the best care, minor issues with your Z panels may arise over time. Addressing these problems promptly not only preserves the panels’ functionality but also saves you from costly repairs in the long run. Below are three common issues and how to handle them effectively.

1. Scratches and Scuffs

Scratches and scuffs are among the most common issues with Z panels, but they are also the easiest to fix. Use a colour-matched touch-up paint or repair kit specifically designed for your panel material. These kits are widely available for both metal and composite panels and allow you to restore the surface without extensive effort.

When applying touch-up paint, ensure the area is clean and free of dust to achieve a smooth finish. Properly addressing scratches prevents them from worsening into deeper imperfections that may eventually compromise the panel’s appearance. With a bit of attention, your Z panels can look as good as new.

2. Loose Panels

Secure and Steady: Fixing Loose Panels with Ease

Over time, screws or clips holding your panels in place may become loose due to vibrations or external factors. Regularly inspect these components to ensure they remain secure. Use appropriate tools to tighten any loose fastenings but be cautious not to over-tighten, as this can warp the material or damage the structure.

If a fastening is damaged or corroded, replace it with a similar component to maintain the panel’s stability. Keeping your panels firmly in place ensures both their functionality and safety over time. Regular checks can prevent loose panels from becoming a more significant issue.

3. Corrosion or Rust

Rust and corrosion are serious threats to metal Z panels, especially in humid or coastal environments. If rust develops, act quickly to prevent it from spreading. Begin by gently sanding the affected area to remove the corrosion. Once the surface is smooth and rust-free, apply a rust-preventative primer followed by a fresh coat of paint.

Timely intervention not only restores the panel’s appearance but also prevents structural weakening caused by prolonged rust exposure. Consider adding a protective coating to prevent future rust formation, especially in high-moisture areas. Proper care ensures the longevity of your Z panels and keeps them in excellent condition.

Long-Term Protection Tips

Safeguard for the Future: Long-Term Protection Tips

Extending the life of your Z panels requires proactive protection. Preventative measures are essential to maintaining their functionality and aesthetic appeal over time. Here are six effective strategies to ensure durability:

  • Apply Protective Coatings: For metal panels, a protective layer can shield against rust, scratches, and UV damage. These coatings also simplify cleaning by creating a smooth, non-stick surface.
  • Seal Gaps: Regularly check and reseal joints or gaps to prevent water or debris from seeping in. Proper sealing safeguards the panels against moisture-related damage.
  • Maintain Adjacent Areas: Keeping gutters, roofs, or surrounding areas clean minimises debris or water run-off onto the panels. This prevents dirt accumulation and reduces exposure to moisture.
  • Install Protective Screens: For outdoor panels, consider installing mesh or protective screens to shield against flying debris during storms or windy conditions. This adds an extra layer of protection against scratches or dents.
  • Schedule Professional Inspections: Hiring professionals to inspect your panels periodically ensures any hidden issues are addressed promptly. This prevents minor problems from escalating into costly repairs.
  • Trim Nearby Vegetation: Overhanging branches or nearby plants can scratch or damage the panels during strong winds. Keeping vegetation trimmed reduces this risk and maintains the panels’ appearance.

Conclusion

Caring for Z panels doesn’t have to be complicated, but it does require consistency and attention to detail. Regular cleaning, preventative measures, and seasonal adjustments ensure your panels remain in excellent condition. By investing in proper maintenance, you safeguard not only their visual appeal but also their long-term functionality.

Start implementing these tips today and enjoy the lasting benefits of well-maintained Z panels. If you’re unsure about any steps, consult us for expert advice—your investment deserves the best care.

Stone for Every Style: Modern, Traditional, Rustic, and More

Stone is more than just a building material; it’s a statement of style, durability, and elegance. From sleek and minimalist interiors to cosy rustic spaces, the right stone transforms a house into a home that reflects personality and taste. 

Whether you prefer the clean lines of modern design, the charm of traditional décor, or the warmth of rustic elements, there’s a stone that fits every aesthetic. Let’s get started!

Modern Style: Sleek Stones for Contemporary Spaces

Modern design emphasises clean lines, minimalism, and functionality. Polished stones such as granite, quartzite, and marble are pivotal in achieving this aesthetic, blending practicality with sophistication. Let’s delve into how each stone elevates contemporary spaces.

1. Granite: Durable and Versatile

Granite remains one of the most sought-after stones for modern interiors due to its unmatched durability and low upkeep. This igneous rock offers natural patterns and speckles that introduce understated charm to minimalist spaces. 

Its neutral palette, ranging from deep blacks to light greys and crisp whites, complements modern furnishings and metallic accents effortlessly. Granite’s heat and scratch resistance make it an excellent choice for kitchen countertops, maintaining both form and function.

In addition to countertops, granite excels as polished flooring, where its reflective surface enhances natural light and adds a sense of spaciousness to living areas. 

Outdoor spaces also benefit from granite’s robust nature; it withstands harsh weather, making it perfect for patios or garden paths. By pairing granite with sleek cabinetry and understated lighting, you create a cohesive, contemporary look.

2. Quartzite: Sleek and Resilient

Quartzite: Sleek and Resilient

Quartzite is a versatile natural stone that seamlessly blends elegance and functionality, making it ideal for modern spaces. Its aesthetic appeal lies in its marble-like appearance, featuring subtle veining and neutral tones that harmonise with contemporary designs. 

Quartzite is especially valued in areas prone to moisture, such as bathrooms and kitchens, where its superior water resistance outperforms many other materials.

Shower walls and vanity tops made of quartzite not only look crisp and clean but also stand the test of time. Available in shades of white, grey, or even soft pastels, quartzite complements minimalist colour schemes effortlessly. 

Its durability allows it to endure daily wear, while its polished or honed finishes enhance its modern appeal. Paired with chrome fixtures or geometric patterns, quartzite elevates any space to a sophisticated level.

3. Marble: Luxurious and Timeless

Few materials rival marble’s timeless beauty and ability to exude luxury. With its iconic veining and polished surface, marble has become a staple in modern design. 

Whether used for kitchen islands, backsplashes, or accent walls, it creates a striking focal point. White marble varieties such as Carrara and Calacatta are especially prized for their subtle grey veining and ability to brighten spaces.

While undeniably elegant, marble requires mindful care. Its porous nature makes it prone to staining, but protective sealants or honed finishes can reduce maintenance concerns. Marble works wonderfully as a backdrop for bold metallic accents, dark wood furniture, or minimalist lighting. 

Its reflective qualities enhance natural light, creating a bright and inviting environment. In modern interiors, marble is more than material—it’s a symbol of refined taste and timeless style.

Traditional Style: Classic Stones That Never Go Out of Fashion

Traditional Style

Traditional design is synonymous with timeless elegance, where intricate details and warm tones create inviting spaces. Stones like limestone and travertine embody these qualities, enhancing traditional interiors with their enduring charm.

1. Limestone: Understated Elegance

Limestone’s natural beauty lies in its soft, neutral tones and subtle textures, making it a timeless choice for traditional interiors. Its versatility allows it to complement ornate furnishings, intricate mouldings, and classic architectural details without overwhelming the design. 

Applications such as fireplace surrounds, grand entryways and decorative columns showcase limestone’s ability to blend seamlessly into elegant spaces.

Polished limestone flooring is a popular choice for formal dining rooms and hallways, where its smooth surface adds sophistication and reflects natural light. In more casual areas, tumbled limestone finishes lend a softer, more lived-in feel, perfect for creating warmth and comfort. 

When paired with antique furniture and traditional décor, limestone serves as a neutral backdrop that enhances the overall charm of a space. Its durability and timeless appeal make it a favourite for those seeking understated elegance.

2. Travertine: Warm and Welcoming

Travertine’s warm, earthy tones and distinctive patterns bring a sense of character and sophistication to traditional interiors. Its natural pitting and veining create visual interest, making each piece unique. 

Travertine is particularly popular in flooring and wall cladding, where its ability to blend with rich wooden furniture and classic design elements shines. A polished travertine floor in a grand hallway can elevate the space, adding a luxurious yet inviting touch.

For a softer, more antique aesthetic, honed or tumbled finishes are ideal. These finishes accentuate the travertine’s rustic qualities, creating a warm and welcoming atmosphere. Travertine pairs beautifully with ornate lighting fixtures, traditional rugs, and detailed woodwork, making it a versatile material for spaces where cohesion and charm are paramount. 

Rustic Style: Raw and Natural Stones for a Cosy Ambience

Rustic Style

The rustic design embraces the beauty of imperfection, using natural materials to create warm, lived-in spaces. Stones such as slate and fieldstone perfectly capture this aesthetic with their rugged textures and earthy tones.

1. Slate: Textured and Durable

Slate is a robust and visually striking stone that perfectly complements rustic designs with its rich palette of greys, blacks, and earthy rust tones. Its naturally cleft surface introduces a tactile quality that adds depth and character to any space. Slate is highly durable, making it an excellent choice for areas that experience heavy foot traffic, such as floors, patios, and hallways.

Slate flooring pairs seamlessly with exposed wooden beams, stone hearths, and textured fabrics, enhancing the cosy and natural feel of rustic interiors. Its slip-resistant nature also makes it ideal for outdoor applications like garden paths and poolside areas. 

Because of its ability to resist wear and tear, slate is a long-lasting option for both indoor and outdoor designs. When paired with warm lighting, slate transforms spaces into havens of comfort and style.

2. Fieldstone: Natural and Timeless

Fieldstone embodies the essence of rustic charm with its raw, uneven shapes and natural earthy hues. Its rugged appearance makes it a popular choice for creating authentic, inviting interiors. Fieldstone fireplaces serve as stunning focal points, radiating warmth and character in living rooms or open-plan spaces.

Accent walls constructed with fieldstone bring texture and depth, making them ideal for creating a grounded, natural atmosphere. Whether indoors or outdoors, this stone connects the space to its surrounding environment, adding a harmonious flow. 

Fieldstone’s versatility also extends to garden walls and outdoor seating areas, enhancing the rustic appeal of patios and landscapes. Paired with elements like weathered wood and soft textiles, fieldstone helps craft spaces that feel both timeless and uniquely personal.

Versatile Stones for Blending Styles

Versatile Stones for Blending Styles

When combining design aesthetics, stones like sandstone and bluestone offer unmatched adaptability, effortlessly transitioning between modern, traditional, and rustic styles.

1. Sandstone: Neutral and Adaptable

Sandstone’s soft, earthy tones and fine grain make it a versatile option that works well in both contemporary and classic interiors. Its warm hues, ranging from beige to light gold, serve as a neutral backdrop, allowing it to blend seamlessly with various design styles. 

Sandstone is especially popular for flooring, feature walls, and outdoor landscaping, creating a cohesive flow between indoor and outdoor areas.

Its adaptability makes it a practical choice for patios, living rooms, or even garden paths. Sandstone’s durability ensures it stands up to daily wear, while its natural texture adds a subtle, timeless elegance to any space. 

When used in transitional spaces, such as verandas or entryways, sandstone provides a smooth connection between different design elements. Paired with soft furnishings or bold accents, sandstone helps create a balanced and inviting atmosphere.

2. Bluestone: Cool and Contemporary

Bluestone is renowned for its deep grey and blue tones, making it a sophisticated choice for spaces that blend modern and rustic design. Its durability and versatility make it a favourite for outdoor applications like patios, pathways, and garden steps. 

In open-plan designs, bluestone creates a seamless connection between indoor and outdoor areas, enhancing the flow of the overall space.

Its smooth finish and refined texture allow bluestone to transition effortlessly into sleek indoor flooring, adding a contemporary edge to kitchens, living rooms, or hallways. The stone’s ability to withstand harsh weather conditions also makes it an excellent choice for external cladding or poolside areas. 

Bluestone works beautifully with neutral colour palettes and natural materials, such as timber and metal, creating a cohesive yet striking aesthetic. Whether indoors or out, bluestone adds a sense of sophistication and harmony to any space.

Factors to Consider When Choosing Stone for Your Style

Factors to Consider When Choosing Stone for Your Style

Choosing the right stone involves more than aesthetic preferences. Practical considerations such as durability, maintenance, and budget play a critical role in ensuring your investment lasts. Here are additional factors to help guide your decision:

  • Durability: Select stones like granite or quartzite for high-traffic areas, while softer stones like limestone suit decorative applications.
  • Maintenance: Polished stones such as marble may require sealing to prevent stains, whereas rougher finishes like slate are more forgiving.
  • Budget: Stone types vary widely in cost; balance your design goals with your financial plan. Travertine and sandstone are budget-friendly yet stylish options, while marble and quartzite may require a higher investment.
  • Colour and Texture: Neutral tones offer versatility, while bold colours and textures create statement pieces. Choose finishes that align with the overall feel of your space, whether polished for modern or tumbled for rustic designs.
  • Environmental Impact: Consider the sourcing of the stone to ensure it aligns with sustainability goals. Locally sourced stones reduce transportation emissions, while recycled stone options are eco-friendly.
  • Climate Suitability: Match the stone to the local climate for durability. For instance, granite and bluestone withstand freezing temperatures, making them ideal for outdoor use, while softer stones like sandstone may be better suited to milder climates.
  • Application-Specific Features: Certain stones are better suited for specific applications. Quartzite and granite excel in areas exposed to moisture, such as bathrooms and kitchens, due to their resistance to water damage. Softer stones, like limestone, are better suited for decorative wall features or low-traffic areas.

Conclusion

Stone is more than a material; it’s a tool to shape spaces that reflect your style and personality. Whether it’s the sleek lines of granite in modern interiors, the timeless elegance of travertine in traditional settings, or the rugged charm of slate in rustic designs, stone has the power to transform your home.

Ready to create a space that feels uniquely yours? Contact our experts today for tailored guidance on choosing the perfect stone for your style.

In SQM?

Please fill your details to download.


      Request Callback


        Enquiry Form


        Please fill your details to download.