Register your Information for Free Stone Samples Sent Express to You!

Search
Search
Close this search box.
Search
Close this search box.

Travertine Walling Stone Patterns & Layouts: Unleashing Your Creativity

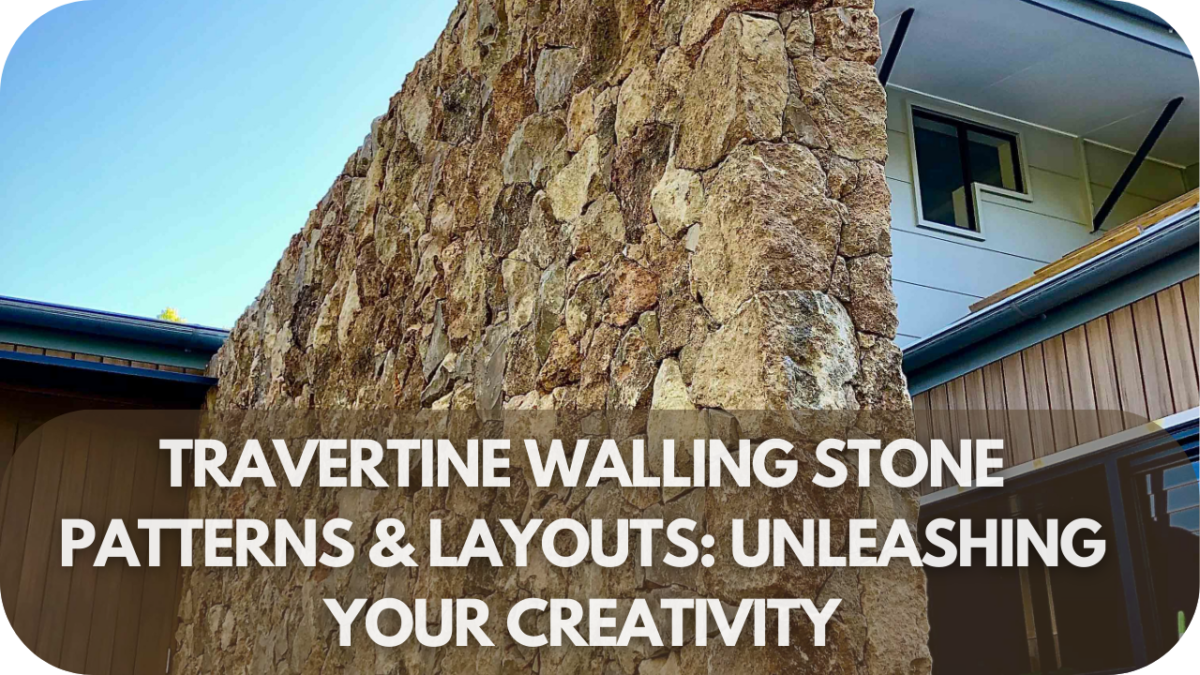
Travertine walling stones can add a touch of elegance and style to any space, but how do you make the most of them? The key lies in choosing the right patterns and layouts. 

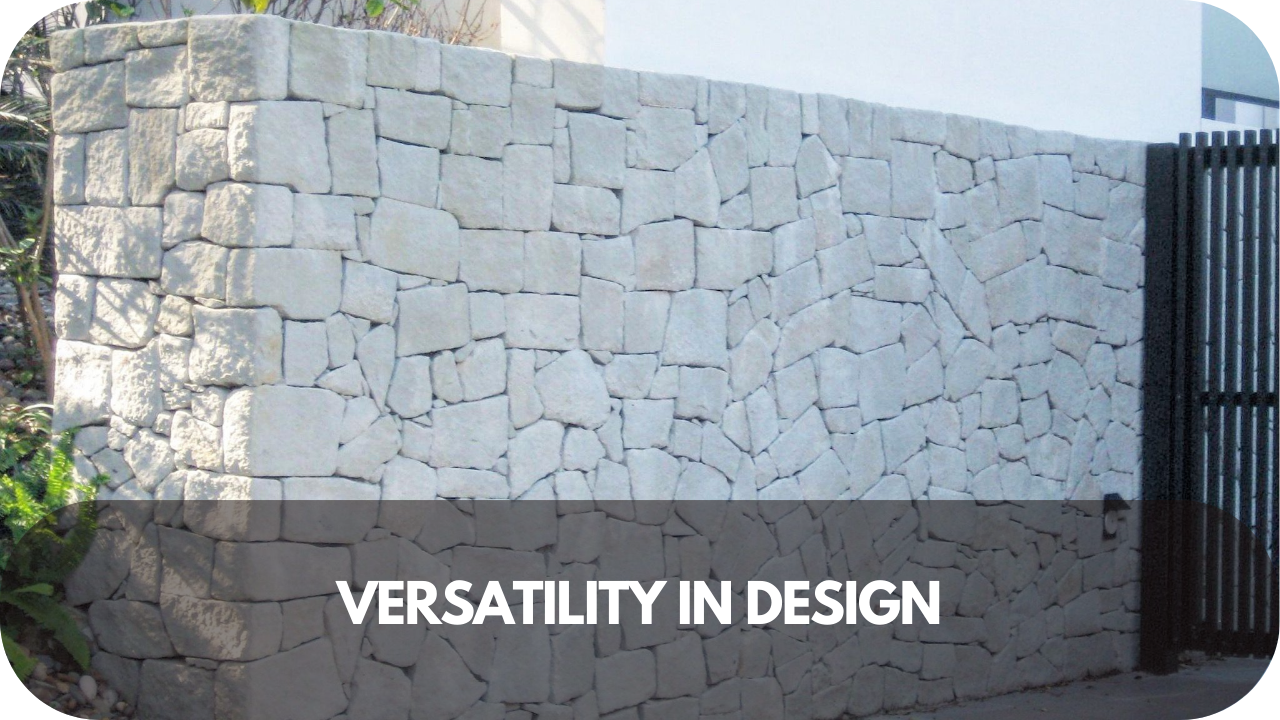
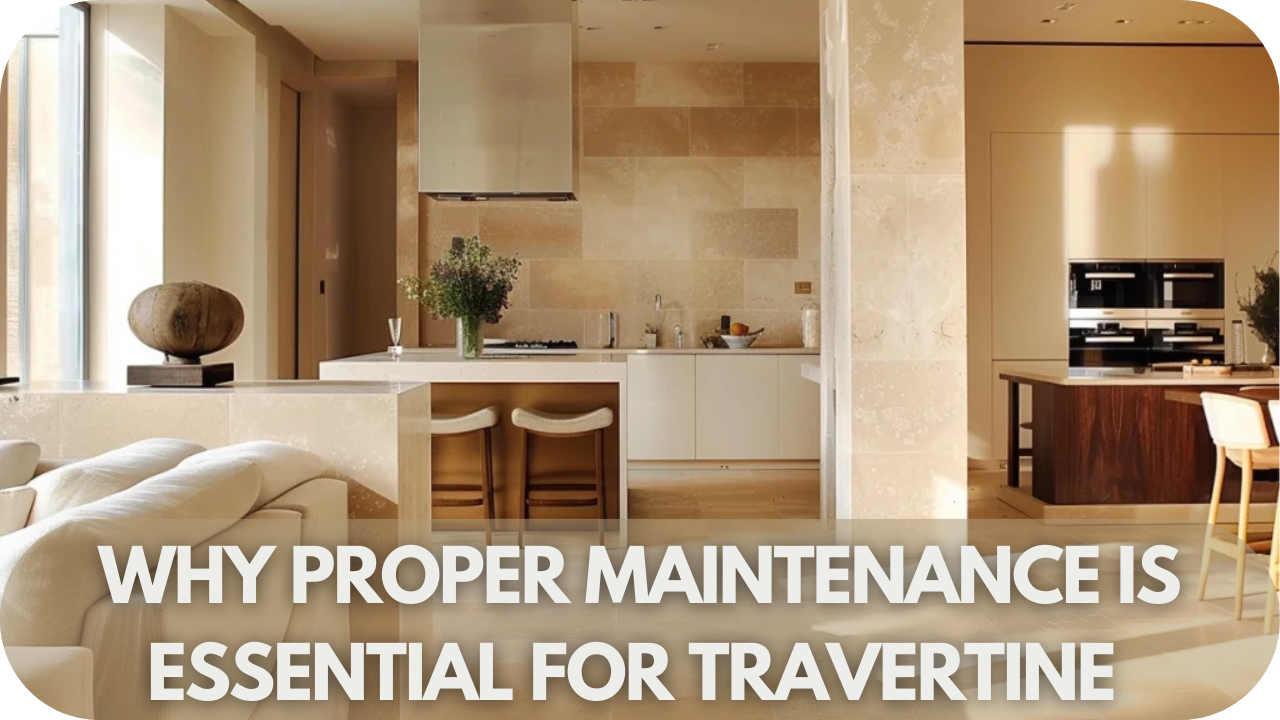
With so many options to play with, you can create everything from rustic charm to modern sophistication. Whether you’re working on an indoor feature wall or an outdoor patio, Travertine offers endless possibilities. 

In this article, we’ll show you how to get creative and turn your walls into a beautiful masterpiece.

Popular Travertine Walling Patterns

Top travertine walling patterns

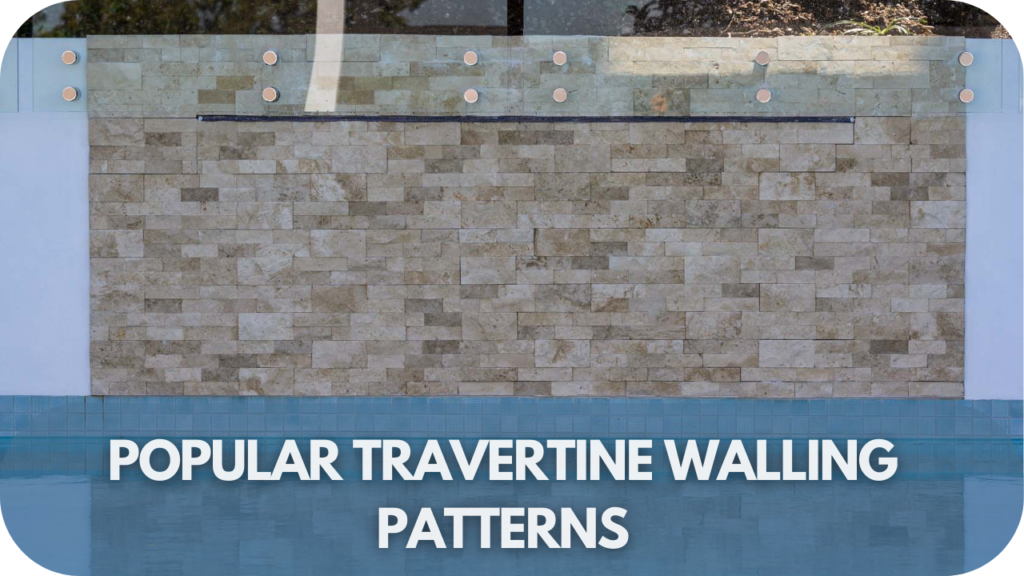
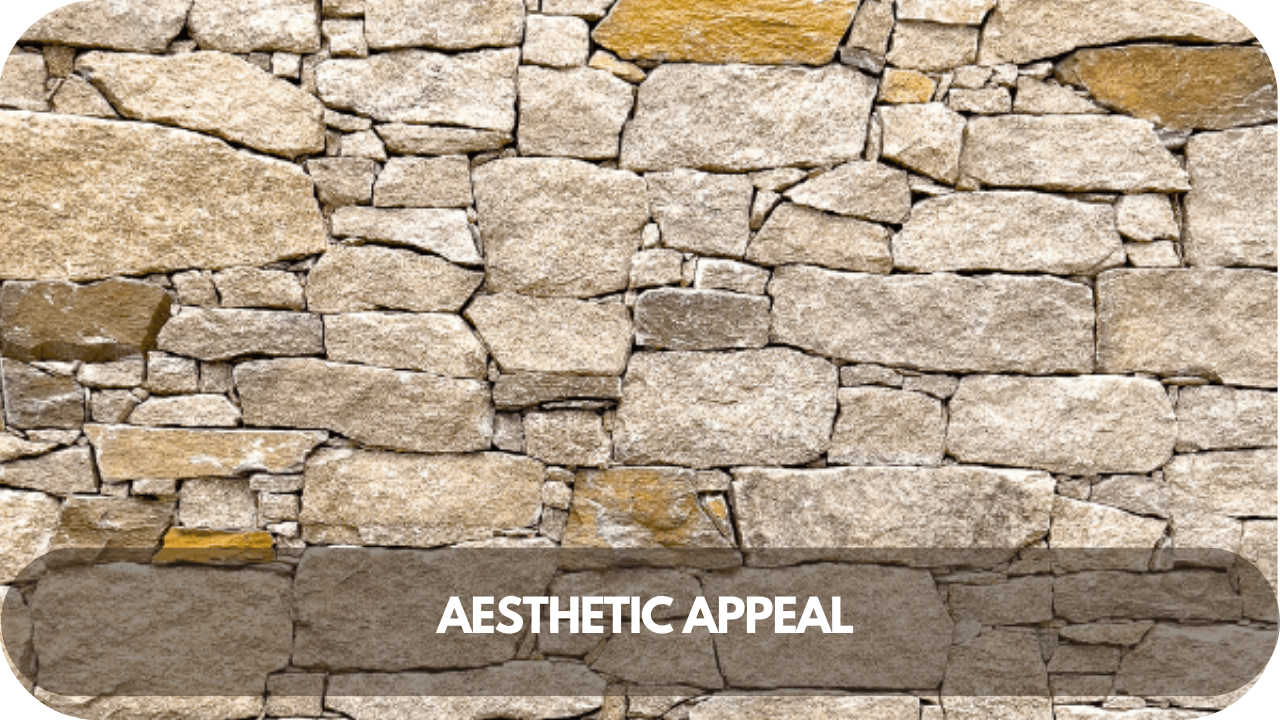
Travertine walling stones offer a range of patterns that can dramatically enhance the aesthetics of your space. Here are some of the most popular patterns:

1. Stacked Bond

The stacked bond pattern is a simple yet striking way to use travertine walling stones. It involves placing the stones directly on top of each other in neat, vertical and horizontal lines. This layout creates a clean, modern aesthetic with a sense of order and symmetry. 

Stacked bond works particularly well with rectangular or square travertine tiles and suits spaces where a minimalist style is preferred. 

The precise alignment highlights the natural textures and subtle variations in the stone’s colour. Whether used indoors or outdoors, it provides a sleek and timeless finish, making it a favourite for accent walls, fireplaces, and garden features. 

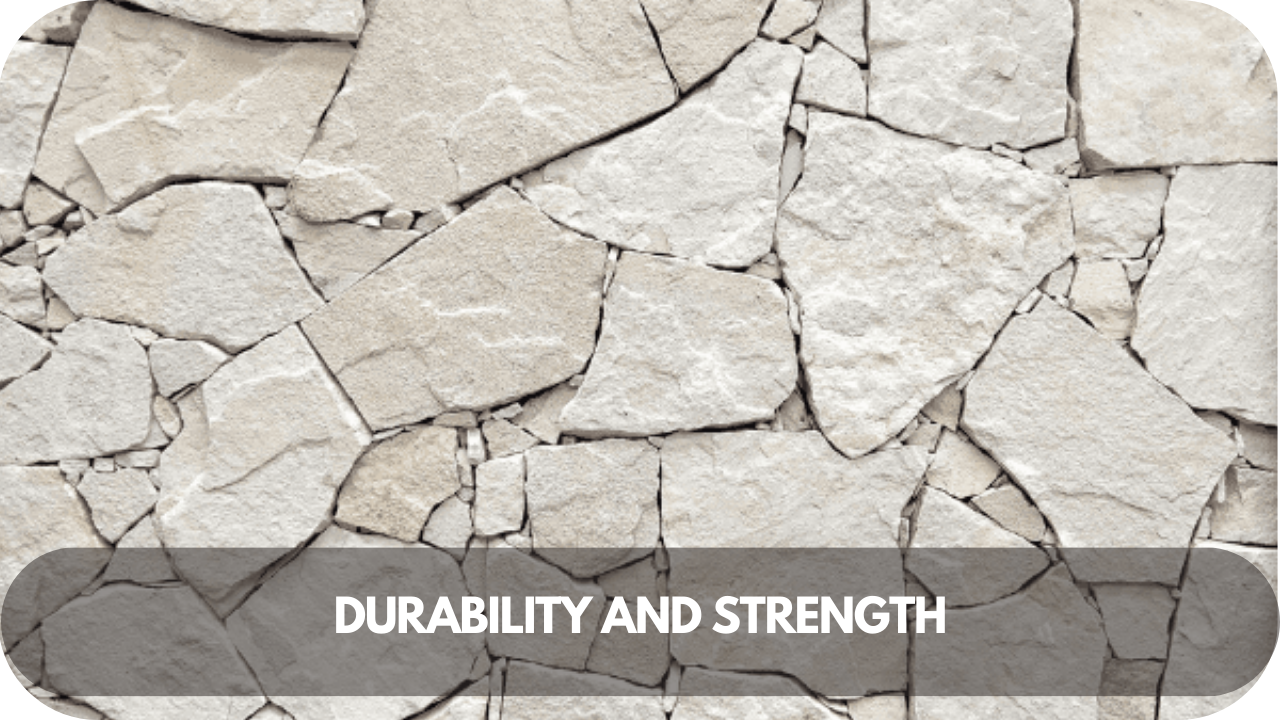
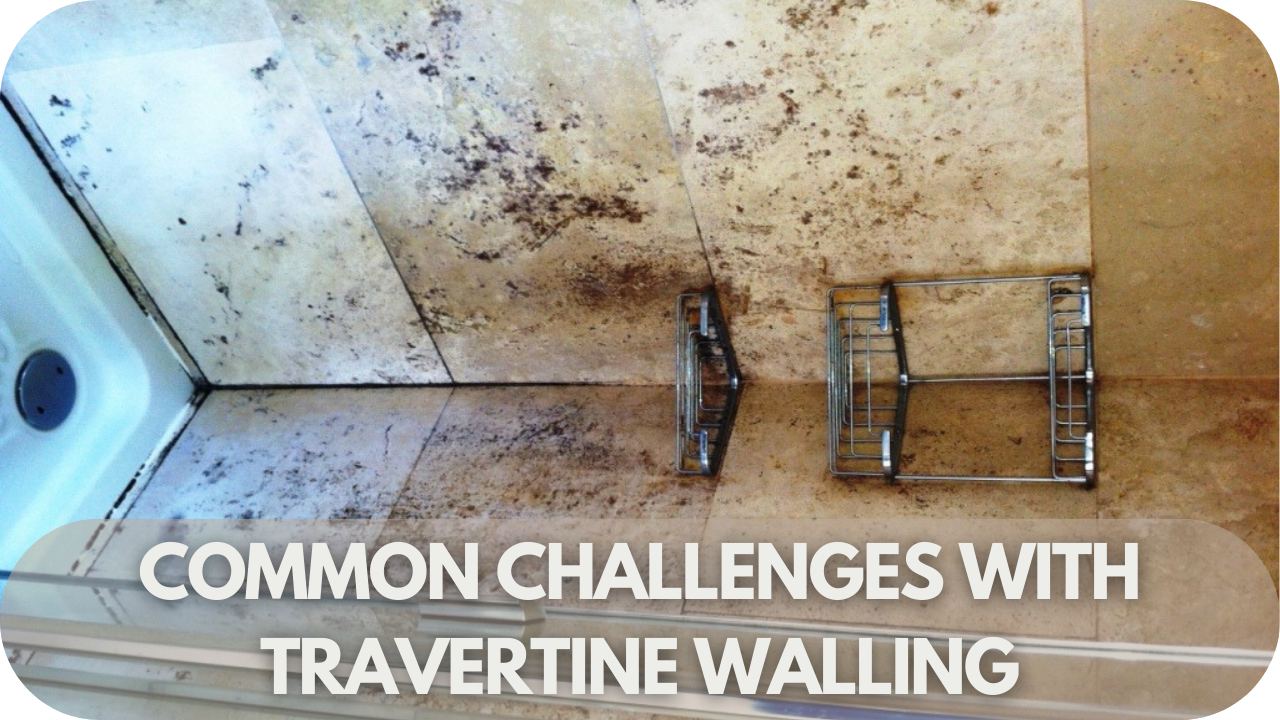
However, because the joints run in straight lines, this pattern might rely more on mortar strength, so it’s essential to ensure proper installation for durability.

2. Running Bond (Brick Pattern)

Running bond, often called the brick pattern, is one of the most versatile and timeless layouts for travertine walling. 

In this design, stones are laid in rows, with each stone in a row offset by half the length of the stone in the row below it. This creates a staggered effect that is visually appealing and functional, as it adds structural stability. 

The pattern’s overlapping joints break up straight lines, giving walls a more natural and relaxed appearance. 

Running bond works beautifully in both traditional and contemporary spaces and complements various travertine tones and finishes. It’s particularly effective in emphasising length, making it a great choice for elongating walls or creating the illusion of a larger area.

3. Herringbone

Herringbone is a dynamic and eye-catching pattern that brings energy and movement to travertine walling. It is created by arranging rectangular tiles in a zigzag layout, where each tile is placed at a 45-degree angle to form a V-shaped pattern. 

This design works well for creating focal points, such as feature walls or fireplace surrounds. Herringbone highlights the natural veining and colour variations of travertine, adding depth and texture to the surface.

 It’s a popular choice for spaces that need a bold statement or a touch of sophistication. While the pattern requires precision during installation, the result is a refined and timeless look that transforms any wall into a work of art.

4. Basket Weave

Basket weave travertine pattern

The basket weave pattern offers a classic and charming look for travertine walling. This design involves arranging rectangular tiles in pairs, with the pairs laid perpendicularly to one another, mimicking the interwoven appearance of a woven basket. 

The pattern adds a sense of craftsmanship and detail, making it ideal for spaces that benefit from an intricate touch. 

Basketweave works particularly well with travertine tiles in contrasting shades or finishes, as it highlights the structure of the pattern. 

It’s a popular choice for smaller accent walls, as the compact design can make a space feel cosy and inviting. This layout is a nod to traditional design but remains timeless and adaptable to modern aesthetics.

5. Versailles (French Pattern)

The Versailles or French pattern is a sophisticated and elegant layout often associated with old-world charm. It combines tiles of various sizes to create an irregular yet harmonious arrangement. This pattern showcases the natural beauty of travertine while providing a unique and intricate appearance. 

The interplay of large and small tiles creates a sense of flow and visual interest, making it perfect for larger wall surfaces. 

Its versatility allows it to work well in both rustic and modern settings, adding warmth and character to any space. While the installation requires careful planning to fit the pieces together seamlessly, the result is a stunning and luxurious wall design.

6. Random Ashlar

Random ashlar is a timeless and versatile pattern that mimics the look of natural stone walls. This layout involves placing tiles of varying sizes in a seemingly random arrangement, though the placement is carefully planned to achieve balance and avoid monotony. 

The pattern creates an organic, rustic look that highlights the natural textures and tones of travertine. It’s particularly effective in outdoor spaces, such as garden walls or facades, where it blends effortlessly with the surrounding environment. 

Random ashlar’s irregularity adds depth and interest, making each installation unique. Proper craftsmanship is key to ensure a natural yet cohesive finish that will last for years.

Custom Patterns

Custom travertine wall patterns

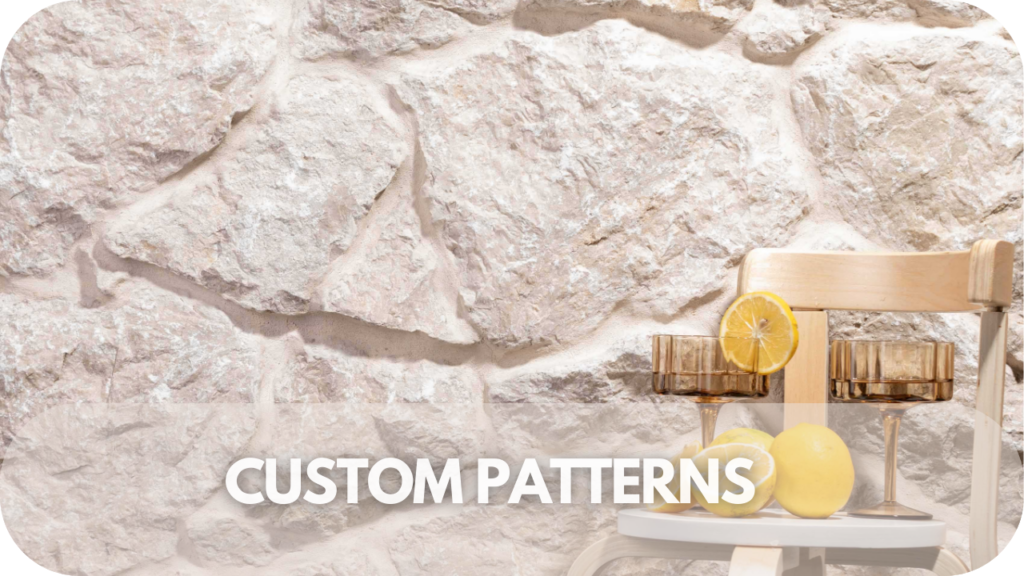
Custom patterns with travertine walling stones provide endless creative possibilities, allowing you to design a space that is uniquely yours. These bespoke designs can reflect your style and enhance the character of any area in your home. 

By integrating travertine with materials like glass, metal, or wood, you can create striking contrasts or subtle blends that add a modern touch to traditional stonework. 

For a more intricate look, use smaller pieces of travertine to create mosaic patterns, which offer detailed artwork on your walls, from abstract designs to specific images or motifs. 

To add dynamic energy to your space, try using diagonal layouts instead of conventional horizontal or vertical patterns—this simple shift creates a fresh perspective and visual interest. 

Additionally, inlay patterns incorporating different colours or textures can highlight specific areas, adding depth to your design. For a more contemporary feel, consider asymmetrical arrangements, mixing different tile sizes and shapes in non-uniform patterns for a stylish edge. 

Finally, customising your patterns to match specific themes like Mediterranean, Moroccan, or Art Deco allows you to create a truly personalised space with complementary colours and finishes.

Choosing the Right Pattern for Your Space

Choosing the ideal travertine pattern

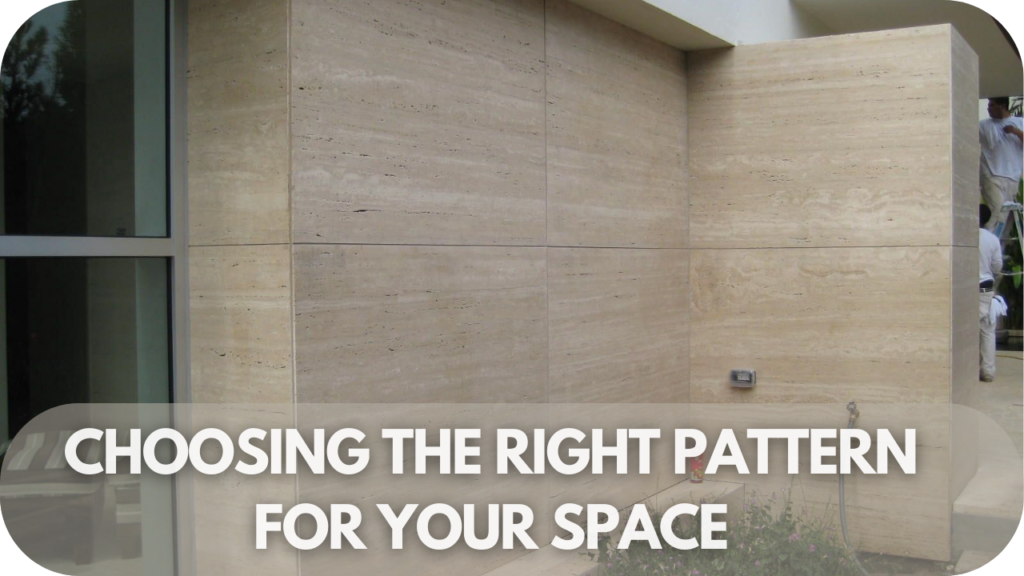
Selecting the right travertine walling stone pattern for your space involves considering various factors to ensure the design complements your overall aesthetic and functional needs.

  • Space Size and Proportion: Larger spaces can handle bold patterns like herringbone or Versailles without feeling overwhelming, while smaller areas may benefit from simpler patterns like stacked bonds or running bonds to avoid visual clutter.
  • Style and Theme: Your chosen pattern should align with the overall style of your home. For a contemporary look, consider sleek, modern patterns like diagonal layouts or asymmetrical designs. Traditional spaces might benefit from classic patterns like brick or basketweave.
  • Colour Scheme: The pattern you choose should work harmoniously with the colour scheme of your space. Neutral patterns can blend seamlessly, while contrasting colours can make the pattern stand out as a focal point.
  • Functionality: Consider the practical aspects of the pattern. High-traffic areas may require more durable and easy-to-clean patterns, while decorative areas can explore more intricate designs.
  • Personal Preference: Ultimately, your taste plays a significant role. Choose a pattern that resonates with you and enhances your enjoyment of the space.
  • Expert Advice: Consult with a professional to ensure your chosen pattern is feasible for your space and meets any specific structural requirements.

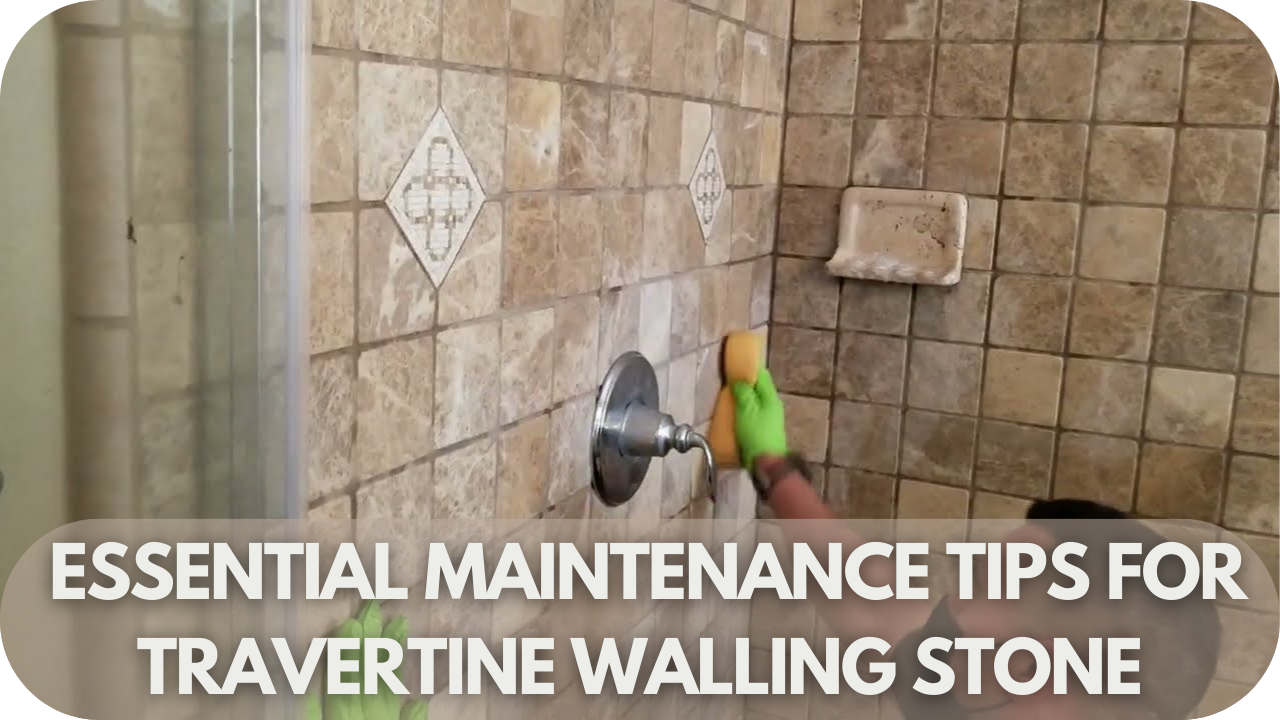
Installation Tips for Travertine Patterns

Travertine pattern installation tips

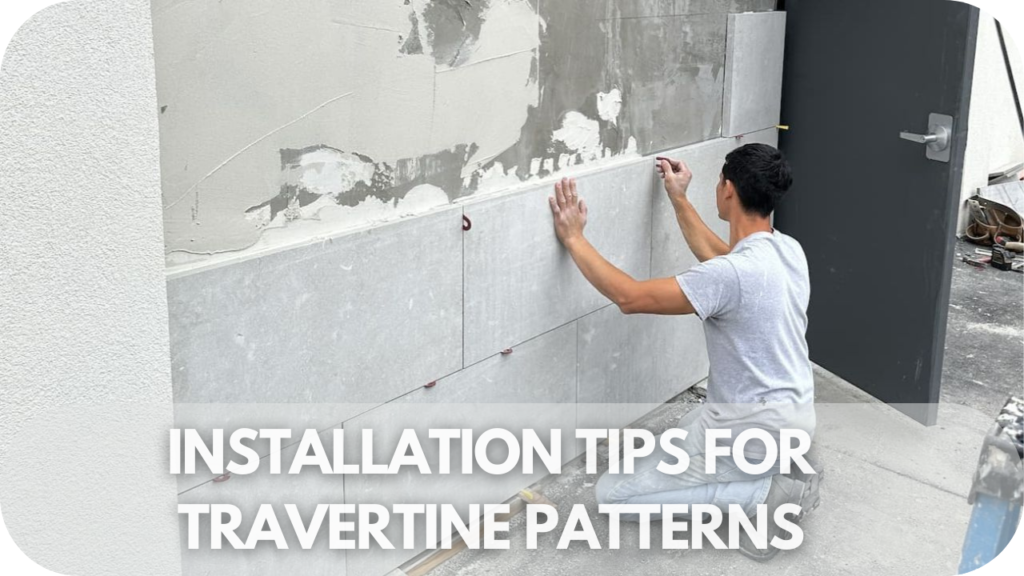
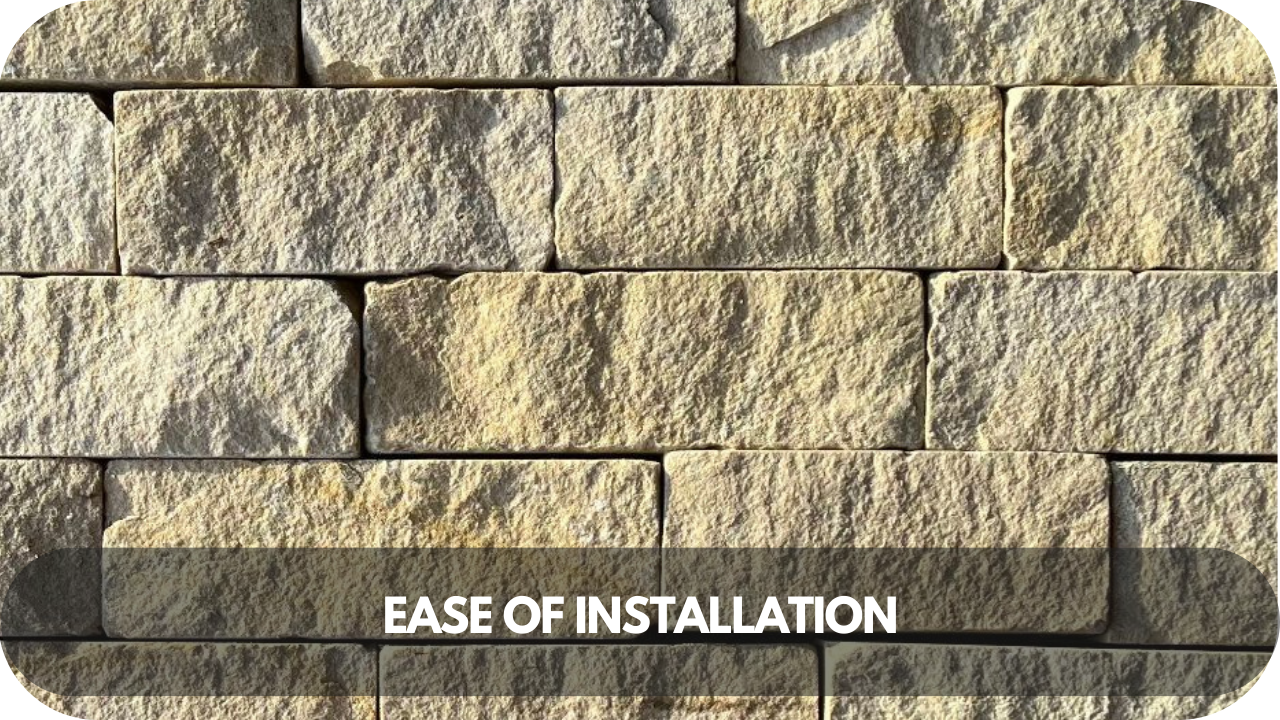
Installing travertine walling stones with intricate patterns requires precision and attention to detail. Here are essential tips to ensure a successful installation:

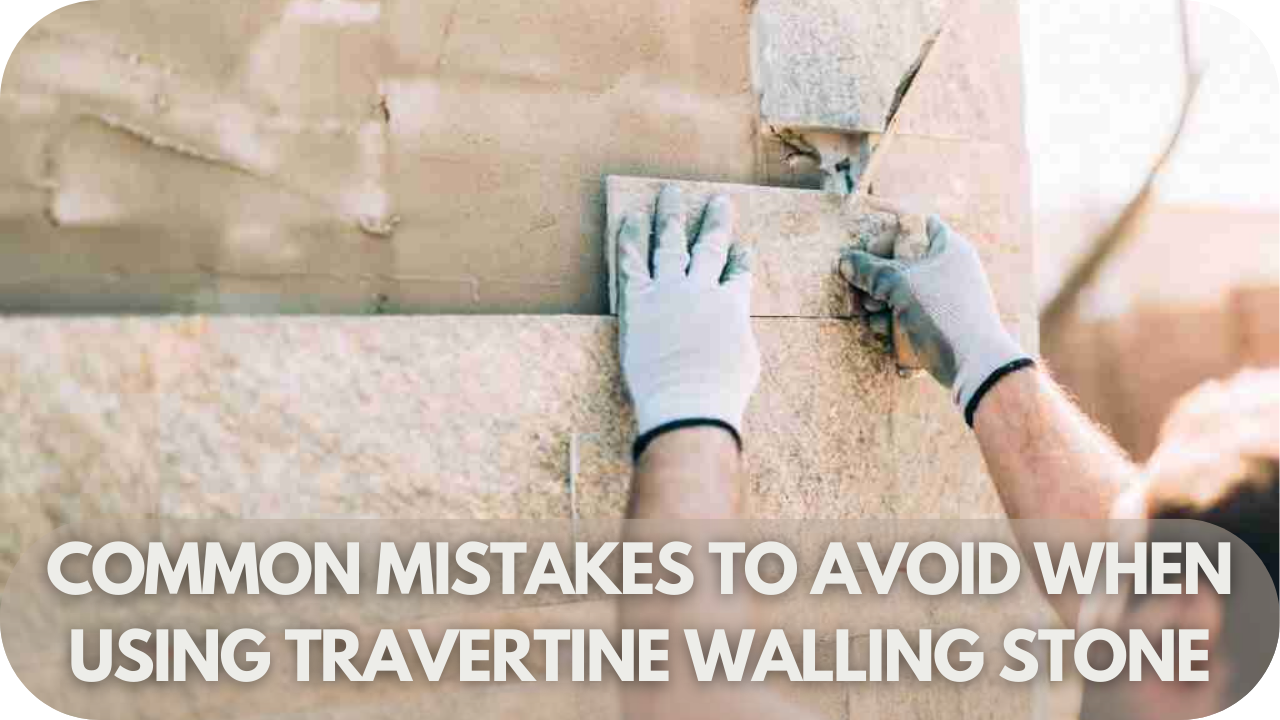
  • Plan Your Layout: Before starting, carefully plan your layout. Measure the wall space and sketch your chosen pattern. This helps visualise the final look and ensures you have enough material. Dry lay the tiles on the ground to see how they fit together and make adjustments as needed.
  • Prepare the Surface: Ensure the wall surface is clean, dry, and level. Remove any debris or old adhesive. For best results, apply a primer or bonding agent to enhance the adhesive’s grip on the wall.
  • Use Quality Adhesive: Select a high-quality adhesive suitable for travertine and the specific wall type. Apply the adhesive evenly with a notched trowel, ensuring full coverage to prevent gaps and ensure strong adhesion.
  • Start from the Bottom: Begin installing tiles from the bottom of the wall, working your way up. Use a level to keep the tiles straight, especially if you’re creating a pattern. Maintain consistent spacing between tiles with spacers to ensure uniform grout lines.
  • Cutting Tiles: Use a wet saw with a diamond blade to cut travertine tiles to fit around edges and corners. Measure carefully and make precise cuts to maintain and care for the integrity of the pattern.
  • Grouting and Sealing: After the adhesive sets, typically 24 hours, apply grout between the tiles. Choose a grout colour that complements your travertine. Once the grout is dry, seal the tiles to protect them from moisture and stains.
  • Final Inspection: Inspect the installation for any uneven tiles or gaps. Make necessary adjustments before the adhesive fully cures.

Enhancing Patterns with Finishes and Textures

Enhancing travertine with finishes and textures

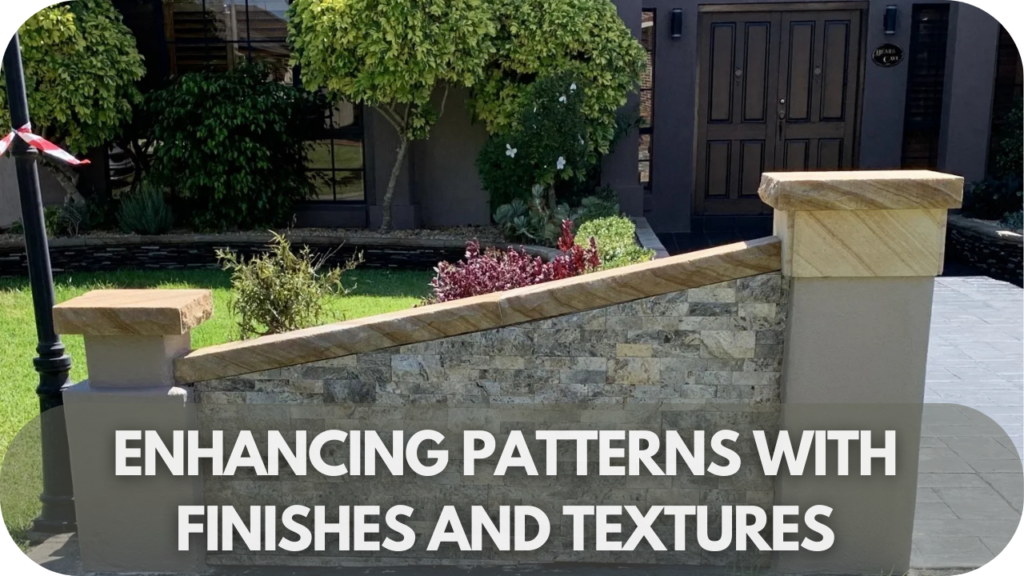
Enhancing travertine patterns with the right finishes and textures can significantly elevate the aesthetic appeal of your walling, making it a statement feature in any space. 

A polished finish gives travertine a smooth, glossy surface that reflects light, adding a luxurious touch and highlighting intricate patterns. This finish is perfect for modern or high-end settings, where you want to draw attention to fine details. 

The honed finish, on the other hand, provides a matte, smooth surface that is less reflective. It enhances the natural beauty of travertine and creates a softer, more subtle appearance, ideal for living rooms or bedrooms where a calm and elegant look is desired. 

If you’re looking for a more rustic feel, a tumbled finish adds a weathered charm with rounded edges and a slightly rough texture, creating a vintage look perfect for traditional or rustic designs in kitchens or outdoor spaces. 

A brushed finish gives the stone a slightly textured feel, highlighting natural veins and adding depth, which is ideal for timeless, classic looks in entryways or hallways. 

Lastly, a chiselled edge provides a hand-crafted, rough look, adding rustic charm and texture, making it perfect for exterior walls or garden pathways.

Conclusion

Transforming your space with Travertine walling stones is all about creativity and choosing the right patterns. With the right design, you can elevate any room or outdoor area. 

Ready to bring your vision to life? Visit Splendour in Stone for premium Travertine options and expert advice, and start creating stunning, lasting designs today!

How to Choose the Best Sealants for Stacked Stone Fireplaces

Stacked stone fireplaces are stunning, but their porous nature makes them vulnerable to damage.  Without the right sealer, their natural beauty can quickly fade due to moisture, stains, and heat damage. 

Choosing the perfect sealing product might seem daunting, but it doesn’t have to be. From protecting against everyday wear to enhancing the stone’s rich textures, the right sealer makes all the difference. 

This article breaks down the top factors and products to make the perfect choice stress-free.

Why Sealing Your Stacked Stone Fireplace is Essential

Sealing stacked stone fireplace

Sealing your stacked stone fireplace is done to maintain its appearance and durability. Stacked stone, while visually appealing, is porous, which means it can absorb moisture, dirt, and stains over time. Without a protective seal, these elements can cause damage, discolouration, and degradation, especially in high-heat areas like a fireplace.

One primary reason to seal your fireplace is to protect it from moisture infiltration. Moisture can seep into the stone, leading to potential mould growth, staining, and even structural damage. 

In addition, the intense heat from the fireplace can cause the unsealed stone to crack or degrade over time, especially if exposed to frequent temperature fluctuations. Sealing helps mitigate these risks, ensuring the stone remains intact and retains its natural beauty.

Sealers also protect against dirt, oils, and other contaminants that stain or mark the stone’s surface. Regular cleaning can become much easier when your stacked stone is sealed, as debris will sit on the surface rather than being absorbed.

Key Factors to Consider When Selecting a Sealer for Stacked Stone

Selecting sealer for stacked stone

When selecting a sealer for your stacked stone fireplace, it’s essential to consider several key factors to ensure the product is compatible, durable, and practical. Here are the main points to keep in mind:

  • Compatibility with Stone Type: Not all sealers work well with every type of stone. Ensure the sealer is designed for natural stones like slate, granite, or limestone, as some may be too harsh or unsuitable for porous materials like stacked stone.
  • Durability and Longevity: Choose a sealer that offers long-lasting protection. High-quality sealers are designed to withstand the heat and moisture exposure that fireplaces experience. 
  • Penetrating vs. Surface Sealers: Penetrating sealers absorb into the stone, offering protection from within, and are ideal for preventing stains and moisture damage.
  • Heat Resistance: Since fireplaces are subjected to high temperatures, selecting a heat-resistant sealer is critical. Look for products specifically designed to withstand heat without breaking down or discolouring.
  • Ease of Application: Some sealers are easier to apply than others, requiring fewer coats or less preparation. Choose a product that suits your DIY skills, or consider professional-grade sealers for a more thorough application.
  • Finish and Aesthetic: Sealers come in various finishes, from matte to glossy. Choose one that complements the look of your stacked stone and enhances its natural texture without drastically altering its appearance.

The Different Types of Sealers for Stacked Stone Fireplaces

Types of sealers for stacked stone

Choosing the right sealer is essential for protecting and enhancing your stacked stone fireplace. Below, we explore the key types of sealers, highlighting their features, uses, and advantages to help you make an informed decision.

1. Penetrating Sealers

Penetrating sealers are an excellent choice for stacked stone fireplaces, absorbing deeply into the stone to provide long-lasting, invisible protection. They maintain the natural texture and appearance, making them ideal for an authentic look. 

These sealers repel moisture, stains, and contaminants while allowing the stone to breathe, preventing efflorescence and trapped moisture damage. Heat-resistant and durable, they are perfect for high-temperature areas like fireplaces. 

2. Enhancing Sealers

Enhancing sealers

Enhancing sealers combine protection with aesthetic improvement, enriching stacked stone fireplaces’ natural colours and textures. They are especially effective for darker or multicoloured stones, intensifying tones while retaining a matte finish. Along with visual enhancement, these sealers protect against moisture, stains, and heat. 

They simplify maintenance by preventing dirt and oils from penetrating the surface. Enhancing sealers are ideal for homeowners seeking durable protection and enhanced visual appeal, ensuring their fireplace remains vibrant and well-preserved.

3. Topical Sealers

Topical sealers form a protective layer on the surface of stacked stone fireplaces, available in glossy, semi-gloss, or matte finishes. They guard against stains water infiltration, and wear while adding a decorative sheen to enhance texture. 

Ideal for indoor fireplaces, topical sealers create a polished look but require more maintenance as the coating may wear down over time. For those seeking a refined and elegant appearance, topical sealers offer adequate protection with proper care and upkeep.

4. Water-Based Sealers

Water-based sealer

Water-based sealers are eco-friendly and perfect for stacked stone fireplaces. They provide reliable protection against water, stains, and oils while maintaining the stone’s natural appearance. Low VOC emissions, minimal odour, and quick-drying properties are ideal for indoor use and ensure good air quality. 

While they may require more frequent reapplication than solvent-based options, water-based sealers are easy to apply and versatile across stone types. They are excellent for environmentally conscious homeowners seeking safe and effective stone protection.

5. Solvent-Based Sealers

Solvent-based sealers deliver superior durability and long-lasting protection for stacked stone fireplaces. They deeply penetrate the stone, forming a strong barrier against water, oils, and stains, making them ideal for challenging environments. These sealers may slightly enhance the stone’s colour, adding richness to its appearance. 

While they emit more pungent odours during application, proper ventilation mitigates this issue. Solvent-based sealers are perfect for homeowners prioritising maximum protection and longevity, keeping their stacked stone fireplaces resilient and visually appealing for years.

Features to Look for in the Best Sealing Products

Features of best sealers

When choosing a sealer for your stacked stone fireplace, prioritise the following features to ensure the best results:

  • Deep Penetration: Opt for sealers that absorb into the stone for long-lasting, invisible protection.
  • Moisture Resistance: Effective sealers repel water and prevent mould, efflorescence, and structural damage.
  • Heat Resistance: Ensure the sealer withstands high temperatures, especially for fireplaces exposed to frequent heat fluctuations.
  • Breathability: A breathable formula allows moisture to escape while blocking new contaminants.
  • Finish Options: Choose natural, matte, or glossy finishes to match your aesthetic preferences.
  • Ease of Application: User-friendly products, such as spray or roll-on sealers, save time and effort.
  • Low VOCs: Environmentally friendly, low-odour sealers are ideal for indoor use.

Step-by-Step Guide to Applying Sealer to Your Stacked Stone Fireplace

Applying sealer to stacked stone

Properly sealing your stacked stone fireplace ensures lasting protection and a polished look. Following the correct steps will prevent moisture, stains, and damage while preserving its natural beauty. This guide breaks down the process into simple, actionable steps for a professional-quality result every time.

1. Clean the Surface

Start by thoroughly cleaning the stacked stone. Use a stone-safe cleaner to remove dust, dirt, and any stains. Allow the surface to dry completely before applying the sealer, as moisture can hinder its effectiveness.

2. Test the Sealer

Before completing the application, test the sealer on a small, inconspicuous area. This ensures compatibility and helps you confirm the final look, significantly if the product enhances colour or adds a finish.

3. Apply the Sealer

Apply the sealer to the stacked stone using a brush, roller, or sprayer. Work in sections, ensuring full coverage without over-saturating the surface. For spray sealers, maintain a consistent distance for even application.

4. Allow Penetration

Let the sealer penetrate the stone for the time recommended on the product label, typically 5-10 minutes. A second coat may be needed for highly porous stones for maximum protection.

5. Wipe Away Excess

After the sealer has had time to absorb, wipe off any excess with a clean, dry cloth. This step prevents residue or streaking on the stone’s surface.

6. Allow to Cure

Let the sealer cure fully, which can take anywhere from a few hours to 24 hours, depending on the product. Keep the area clean and avoid exposing the fireplace to heat until the curing process is complete.

Common Mistakes to Avoid When Sealing Your Fireplace

Mistakes when sealing fireplace

Sealing your stacked stone fireplace is essential for its protection and longevity, but simple errors can lead to poor results or damage. Knowing common mistakes when sealing will help you achieve a professional finish, ensuring your fireplace stays beautiful, protected, and easy to maintain for years.

  • Skipping Surface Cleaning: Applying sealer to a dirty surface traps dust and grime, reducing effectiveness.
  • Using the Wrong Sealer: Not all sealers suit natural stone—choose one designed for stacked stone fireplaces.
  • Over-Application: Applying too much sealer leaves a sticky residue or a cloudy, uneven finish.
  • Ignoring Drying Time: Rushing the process prevents proper absorption, compromising the sealer’s durability.
  • Neglecting Reapplication: Sealers wear over time; failing to reseal regularly leaves the stone unprotected.
  • Not Testing First: Skipping a test patch can result in unwanted colour changes or finishes.
  • Using Harsh Cleaners: Acidic or abrasive cleaners can damage the stone, impacting the sealer’s adhesion.

How Often Should You Reseal Your Stacked Stone Fireplace?

Re-sealing stacked stone frequency

The frequency of resealing your stacked stone fireplace depends on several factors, including the type of sealer used, the stone’s porosity, and its exposure to heat, moisture, and general wear. 

Penetrating sealers typically last 3 to 5 years, providing deep, long-lasting protection. In contrast, topical sealers, which form a surface barrier, may need reapplication every 1 to 3 years, particularly in high-heat environments like fireplaces.

Regularly using your fireplace, exposure to fluctuating temperatures, or heavy cleaning can reduce the sealer’s lifespan. To determine when resealing is needed, perform a simple water test: Place a few drops of water on the stone surface. If the water is absorbed or darkens the stone, it’s time to reseal.

Annual inspections are key to maintaining the stone’s protection and aesthetic appeal. Look for signs of moisture absorption, staining, or a dull, uneven finish. Resealing at the correct intervals prevents damage, discolouration, and deterioration, ensuring your stacked stone fireplace remains a stunning and durable focal point in your home for years.

Wrap-Up

The right sealer transforms your stacked stone fireplace, protecting it from stains, moisture, and heat damage. Choosing wisely makes all the difference whether you want invisible protection or a vibrant finish. Take control of your fireplace’s longevity—start sealing with the best products now!

How Durable is Blanco Quartz Over Time?

Are you worried about the longevity of your quartz surfaces?

Many homeowners face disappointment when their chosen materials start to show wear and tear after a few years. Blanco Quartz, known for its elegance and versatility, is no exception to these concerns.

In this article, we’ll explore how durable Blanco Quartz is over time, providing you with the insights needed to make an informed decision and ensure your surfaces remain pristine for years to come.

How Durable is Blanco Quartz Over Time?

Blanco Quartz is highly durable over time, thanks to its tough quartz composition and non-porous surface. It resists scratches, stains, and everyday wear, making it ideal for kitchens and bathrooms. With proper care, Blanco Quartz retains its beauty and strength for years, offering a reliable and stylish surface that stands up to daily use.

What Makes Blanco Quartz Durable?

blanco quartz durability

Blanco Quartz is renowned for its durability, but what makes it such a reliable choice? Here are the key factors that ensure its long-lasting performance:

1. High Quartz Content

Blanco Quartz is made up of 90-95% natural quartz crystals, a material known for its remarkable strength. These quartz crystals are incredibly hard, making the surface resistant to scratches, chips, and cracks. 

This high quartz content gives Blanco Quartz its exceptional durability, which means it can withstand daily wear and tear, as well as heavier impacts. Whether in kitchens, bathrooms, or other high-traffic areas, Blanco Quartz can handle the demands of everyday life. 

Its tough surface resists damage from objects like dropped utensils or heavy cookware, ensuring the material remains in great condition for many years. This makes Blanco Quartz an excellent investment for areas that require both style and functionality.

2. Non-Porous Surface

Blanco Quartz is designed with a non-porous surface, meaning it doesn’t absorb liquids like water, wine, coffee, or oils. This feature is crucial in maintaining a clean and hygienic environment, as it prevents stains from penetrating the surface. 

Spills are easy to wipe away, and the material does not absorb bacteria or mould, making it especially suitable for kitchens and bathrooms. 

Over time, this non-porous nature helps the surface stay looking fresh, as there’s no risk of discolouration or lingering marks. This quality also eliminates the need for sealing, which is often required with natural stones like granite. 

With Blanco Quartz, you can enjoy a smooth, stain-resistant surface with minimal effort.

3. Resins and Polymers

Resins and Polymers

Blanco Quartz incorporates resins and polymers, which are blended with the natural quartz crystals. These materials help bind the quartz together, enhancing its overall structural integrity. 

This bonding process makes Blanco Quartz less prone to fractures and cracks, even under stress or impact. 

The resins and polymers also contribute to the material’s smooth, glossy finish, which enhances its aesthetic appeal. 

Additionally, they improve Blanco Quartz’s resistance to wear and tear, making it a highly durable option for high-use areas. Over time, the resins help maintain the strength and reliability of the surface, ensuring it remains resilient and functional for many years without losing its beauty.

4. Heat and Impact Resistance

Blanco Quartz is highly resistant to heat and moderate impacts, making it a practical choice for busy kitchens and bathrooms. 

The material can withstand high temperatures, meaning hot pans or pots won’t damage its surface, though using trivets or heat pads is recommended to protect it. Its heat resistance ensures that the surface maintains its integrity even when exposed to direct heat for short periods. 

Additionally, Blanco Quartz’s strength makes it capable of handling moderate impacts, such as when objects are dropped onto the surface. 

However, while it is tough, it’s still important to avoid dropping very heavy items to ensure the surface stays in pristine condition. This combination of heat and impact resistance adds to Blanco Quartz’s robustness and longevity.

Factors Affecting Durability Over Time

factors affecting quartz durability

Even the toughest materials can wear down under certain conditions. Here are the factors that might affect Blanco Quartz’s durability over time:

  • Improper Maintenance: Neglecting regular cleaning or using harsh chemicals can damage the surface and dull its shine. Gentle cleaning with mild soap preserves its beauty.
  • High-Impact or Dropping Heavy Items: While Blanco Quartz is tough, excessive impact from heavy objects can lead to cracks or chips. Careful handling helps minimise damage.
  • Exposure to Extreme Heat: Although heat-resistant, prolonged exposure to high temperatures without protection, like a trivet, can weaken the surface and cause discolouration.
  • Direct Sunlight: Constant exposure to UV rays may fade the pigments over time, making it less vibrant. Using it in shaded areas can maintain its appearance.
  • Poor Installation: An improper fit or lack of support during installation can lead to stress fractures. Professional installation ensures longevity.

How Does Blanco Quartz Age Over Time?

blanco quartz aging

Blanco Quartz ages gracefully, maintaining its functionality and aesthetic appeal for many years. Thanks to its non-porous surface, it resists stains and keeps its original beauty with minimal maintenance. 

While natural wear may result in subtle dulling of the surface, proper care ensures it stays polished and vibrant.

Pigments used in manufacturing may fade slightly if exposed to direct sunlight for extended periods. This is why it’s ideal for indoor use or shaded areas. Over time, minor scratches or chips may occur with heavy use, but these are rare and often easy to repair.

Compared to many materials, Blanco Quartz stands out as a reliable and durable choice that ages well, offering a timeless look with proper care.

Maintenance Tips to Enhance Durability

quartz durability tips

Regular care can extend the life of your Blanco Quartz surfaces. Here’s how you can keep it in top condition:

  • Clean Daily with Mild Soap: Use a soft cloth and mild soap to clean the surface. Avoid abrasive sponges or harsh chemicals that could scratch or dull the finish.
  • Use Trivets and Cutting Boards: Protect the surface from direct heat by placing hot pans on the trivets. Always use cutting boards to prevent knife scratches.
  • Wipe Spills Immediately: While it resists stains, cleaning up spills quickly prevents potential marks, especially from acidic substances like lemon juice or wine.
  • Avoid Harsh Cleaners: Stick to non-abrasive, pH-neutral cleaners. Strong chemicals can erode the resin and affect the surface over time.
  • Polish Occasionally: Use a quartz-safe polish to maintain its shine. Polishing every few months keeps the surface looking new.

Blanco Quartz vs. Other Materials

blanco quartz comparison

Blanco Quartz stands apart from other materials due to its unique qualities. Here’s how it compares:

FeatureBlanco QuartzGraniteMarbleLaminate
DurabilityHighly durableDurable but porousSoft and prone to chipsLess durable
Stain ResistanceNon-porous resists stainsNeeds sealingStains easilyLow resistance
MaintenanceLowModerateHighLow
Aesthetic VarietyWide range of coloursLimited natural coloursUnique patternsWide range
CostMid-rangeHighHighLow

Conclusion

Blanco Quartz is a stunning choice for any space, offering style and durability that lasts through the years. To ensure your project combines beauty with quality, trust Splendour in Stone. 

Explore our range of premium Blanco Quartz and let us guide you in creating a space that’s built to endure and impress. Visit us today!

What Makes Roman Sandstone a Popular Choice for Walls?

Through centuries, Roman sandstone has proven its worth in building functional and visually striking walls. From the grandeur of ancient Roman architecture to today’s contemporary designs, this natural stone remains a trusted favourite among homeowners, builders, and architects. 

Its unmatched combination of beauty, strength, and versatility has cemented its status as a leading wall choice. Whether used in gardens, homes, or commercial projects, Roman sandstone brings an air of timeless charm and durability. So, what makes it truly exceptional? 

Let’s explore its unique features and benefits.

1. Aesthetic Appeal

Aesthetic appeal

The natural elegance that Roman sandstone offers enhances any wall design. Its earthy tones, ranging from warm creams to deep greys, blend seamlessly with various architectural styles and provide a versatile colour palette

The stone’s unique textures add depth and character, creating a striking visual effect that draws the eye. For those seeking a rustic yet refined look, the subtle veining and fossil imprints in Roman sandstone make each wall one-of-a-kind.

Designers often choose Roman sandstone because it complements both traditional and modern aesthetics. It takes on a natural patina in outdoor settings, enhancing its appeal over time. Indoors, it provides warmth and richness, adding charm to feature walls or fireplaces

Additionally, Roman sandstone’s ability to be cut and shaped into various forms allows for different design possibilities, whether rough-cut blocks or smooth tiles

For an enduring aesthetic as practical as beautiful, Roman sandstone remains a top choice for walls that make a statement.

2. Durability and Strength

 Durability strength

 Durability strength

Roman sandstone stands out for its remarkable durability, making it a wise investment for long-lasting walls. This stone’s dense composition enables it to withstand heavy impacts and natural wear, ensuring structural integrity even in high-traffic or exposed areas

Roman sandstone endures, unlike other materials that may crack or fade over time, retaining its form and aesthetic appeal. Known for its resilience against weather extremes, 

Roman sandstone is durable in hot and cold climates. Its moisture resistance is another asset, preventing issues like mould or erosion in humid environments

Roman sandstone is an excellent choice for those looking to build in coastal or rainy regions.

Maintenance is straightforward—occasional cleaning and sealing can help extend its life even further. 

With a balance of beauty and strength, Roman sandstone continues to be favoured in projects where durability is paramount. Choosing Roman sandstone means investing in walls that will look stunning and stay strong for generations.

3. Versatility in Design

Versatile design

This stone can be cut into various shapes and sizes, allowing for creative uses in everything from large feature walls to minor decorative details. Roman sandstone is exceptionally versatile, adapting beautifully to interior and exterior design needs.

Its natural colour palette, with tones ranging from sandy creams to earthy browns, pairs well with diverse architectural styles, whether rustic or modern.

In traditional settings, Roman sandstone brings warmth and character, enhancing spaces with a timeless aesthetic. For more contemporary designs, its clean lines and smooth finishes offer a refined, minimalistic look. 

Outdoor walls also benefit—Roman sandstone complements gardens and landscapes, blending harmoniously with natural surroundings. Textures can also be customised, from rough-hewn finishes that add depth to sleek, polished surfaces that emphasise sophistication. 

This adaptability makes Roman sandstone an excellent choice for homeowners, architects, and designers, enabling them to achieve unique, enduring results. Whether aiming for bold or subtle, Roman sandstone offers endless possibilities for transforming spaces into works of art.

4. Thermal Insulation Properties

Thermal insulation

This stone helps regulate indoor temperatures, keeping spaces cooler in summer and warmer in winter. Roman sandstone offers excellent thermal insulation, making it a smart choice for energy-conscious designs.

Its density minimises heat transfer, which means less reliance on heating and cooling systems and reduced energy costs.

Roman sandstone’s insulating properties add value to homes and commercial buildings by enhancing comfort year-round. 

It can absorb and release heat gradually in hot climates, preventing temperature spikes. Conversely, it retains warmth during colder months, creating a cosy atmosphere indoors.

Installing Roman sandstone walls provides structural durability and improved energy efficiency, an increasingly essential factor in sustainable construction

This natural thermal barrier makes Roman sandstone walling look stunning and promotes a balanced, comfortable indoor environment.

5. Ease of Installation

Easy installation

Its beauty and straightforward installation make it familiar. Its natural composition allows it to be cut and shaped relatively quickly, making it adaptable for many walling projects. 

Pre-cut blocks and panels are available, simplifying the installation process and reducing the time needed to achieve a polished, professional look.

Builders appreciate Roman sandstone for its workability. Lightweight compared to other natural stones, it can be handled easily without excessive manpower or specialised equipment. 

This reduces labour costs and makes it a practical choice for residential and commercial projects.

In addition, Roman sandstone’s ability to adhere well with common masonry materials ensures a secure fit. Roman sandstone is a top choice for quick, durable installation with minimal hassle. 

6. Low Maintenance Requirements

Low maintenance

Looking for a hassle-free choice for walls? Roman sandstone is a  low-maintenance naturally resistant to weathering so it can endure years of exposure with minimal upkeep. 

It typically needs occasional cleaning with a mild, pH-neutral detergent to maintain its natural beauty and colour.

Unlike materials that require frequent sealing, Roman sandstone is highly resilient without constant treatments. A light sealant can be applied every few years for added protection in high-traffic or outdoor areas, though it’s not essential for durability.

Stains are rarely an issue, as the stone’s dense structure resists absorption. A gentle brush or soft cloth can easily remove dirt or debris for minor surface marks. 

Roman sandstone’s natural durability means less time spent on care and more time enjoying its aesthetic appeal, making it a practical and attractive choice for busy homeowners and commercial spaces!

7. Eco-Friendly and Sustainable Choice

Eco-friendly choice

It is an excellent eco-friendly option. It’s a natural material that requires minimal processing. Extracted directly from the earth, it has a lower environmental impact than synthetic materials. 

This reduced manufacturing means fewer pollutants and lower energy consumption, contributing to a greener construction approach.

Durability is another factor that enhances its sustainability. Built to last for decades, Roman sandstone requires fewer replacements, reducing waste over time. 

Furthermore, its natural weather resistance minimises the need for chemical treatments or frequent maintenance, making it both a cost-effective and environmentally conscious choice.

For eco-conscious builders and homeowners, Roman sandstone supports sustainable practices by blending functionality with minimal environmental impact. 

8. Cost-Effectiveness

Cost-effective

Combining durability with an affordable price, Roman sandstone offers impressive value for money. Often more budget-friendly than other natural stones, it provides high quality without the steep costs, making it accessible for many projects. 

Maintenance costs are also minimal, as Roman sandstone’s natural resilience means fewer repairs and less upkeep. This durability translates to significant savings for those seeking a long-term investment. 

Unlike materials that wear down quickly and need replacement, this stone remains solid and visually appealing, reducing costly replacements. 

Installation is also straightforward, which can lower labour expenses compared to more complex walling materials.

Roman sandstone’s thermal insulation properties can also help cut energy costs, providing a natural buffer against temperature changes.

Conclusion

Roman sandstone offers a perfect blend of durability, aesthetic appeal, and cost-effectiveness, making it an excellent choice for any wall project. Its versatility and minimal upkeep ensure long-term value.

Ready to enhance your space with this timeless material? Let Splendour In Stone Melbourne guide you towards a lasting investment in beauty and strength.

Weatherproof Your Patio: Stunning Bluestone Designs for Every Climate

Patios endure constant exposure to weather, from freezing winters to blazing summers, and poorly chosen materials often succumb to cracking, erosion, or fading.

Patios can quickly become unsightly and require costly repairs without the right design or materials. Harsh weather conditions also put immense strain on their durability and appearance.

Bluestone, a robust and versatile natural stone, offers unmatched resilience and elegance for any climate. This article explores weather-resistant bluestone patio designs tailored to withstand the elements, ensuring long-lasting performance and timeless appeal.

Why Choose Bluestone for Your Patio?

Why Bluestone patios

Bluestone is a top choice for patios due to its exceptional durability, timeless aesthetic, and adaptability to various climates. This natural stone is renowned for its ability to withstand extreme weather conditions, including freezing winters, scorching summers, and heavy rainfall. 

Its dense composition makes it resistant to cracking, chipping, and erosion, ensuring longevity even in high-traffic areas.

A key advantage of bluestone is its versatility in design. It complements traditional and contemporary outdoor spaces and is available in various finishes, such as thermal for slip resistance or honed for a sleek, modern look. 

Bluestone’s natural colour palette, ranging from rich blues to earthy greys, allows it to blend seamlessly with diverse landscaping styles.

Bluestone requires relatively little maintenance. A high-quality sealant enhances its weather resistance, protecting against moisture, stains, and UV damage. Its non-slip surface is ideal for patios exposed to wet or icy conditions, ensuring safety for all users.

Best Design Practices for Weather-Resistant Bluestone Patios

Weather-resistant Bluestone designs

Creating a weather-resistant bluestone patio requires thoughtful design choices to ensure durability and functionality across various climates. Here is a list of some of the designs:

1. Classic Rectangular Layout

The classic rectangular layout is a timeless choice for bluestone patios. It offers clean lines and a straightforward design that works in any climate. 

This layout is highly functional, allowing for easy furniture placement and accessibility. To make it weather-resistant, ensure a strong base with compacted gravel and sand, preventing shifting or cracking over time. 

Use thermal-finished bluestone for slip resistance, especially in icy or rainy conditions. Proper drainage is essential—maintain a slight slope (1-2%) away from structures to prevent water pooling. 

This design complements traditional and modern homes, creating a versatile outdoor space that withstands the elements while maintaining a polished aesthetic.

2. Multi-Level Patio Design

A multi-level bluestone patio is ideal for sloped landscapes or creating distinct zones for dining, lounging, or entertaining. This design adds visual interest and maximises space utility. 

To ensure weather resistance, reinforce each level with proper retaining structures and provide the base is stable to prevent erosion or shifting. 

Drainage is critical—integrate perforated pipes or gravel layers to guide water away from each tier. Use thicker bluestone slabs (2-3 inches) for added durability, especially on higher levels. 

This design offers functionality and elegance, allowing you to create a dynamic, weather-resistant outdoor area suited to varying climates and terrains.

3. Curved Bluestone Patio

Curved Bluestone patio

A curved bluestone patio softens the overall appearance of outdoor spaces, creating a natural and inviting atmosphere. This design works particularly well in gardens or near-water features, blending seamlessly with organic landscaping. To ensure weather resistance, prepare a sturdy base and use consistent jointing materials to secure the stones. 

Curves require precise cutting, so plan accordingly to maintain a smooth and cohesive design. Drainage considerations are crucial—strategically position weep holes or gravel drains along the curve. 

Opt for a thermal finish to provide slip resistance in wet climates. This design is functional and visually striking, perfect for any weather conditions.

4. Geometric Patterned Patio

Geometric patterns, such as herringbone, basket weave, or random ashlar, add texture and sophistication to a bluestone patio. 

When installed correctly, these designs are aesthetically pleasing and highly durable. For weather resistance, ensure the pattern allows proper drainage and minimises water pooling. 

A stable, level base with compacted gravel and sand is critical to prevent settling or cracking. Enhance the stone’s longevity with a high-quality sealer to protect against moisture, UV rays, and stains. 

Geometric patterns offer flexibility in design, allowing you to customise your patio while ensuring it performs well in varying climates and weather conditions.

5. Integrated Bluestone and Gravel Design

Bluestone and gravel design

Combining bluestone with gravel creates a practical, cost-effective patio design that excels in water drainage. While gravel fills the surrounding areas, bluestone slabs can be focal points or pathways. This design suits rainy or humid climates, as gravel prevents water pooling and reduces erosion risk. 

Ensure the bluestone pieces are securely placed with a compacted base to prevent movement. Use a border to separate the gravel and stone for a clean, organised appearance. 

This hybrid design balances functionality and style, creating a weather-resistant patio that suits traditional and modern outdoor spaces.

6. Circular Bluestone Patio

A circular bluestone patio creates a striking focal point in any outdoor setting, ideal for fire pits or central gathering areas. This design requires precise stone cutting to achieve a perfect circle while maintaining stability. To make it weather-resistant, start with a compacted gravel base and ensure the stones are tightly fitted with consistent joint materials. 

Incorporate a slight slope outward to prevent water pooling in the centre. Use a thermal finish for slip resistance, particularly in icy or wet climates. The circular layout adds charm and functionality, making it a durable and visually appealing option for weather conditions.

7. Mixed Material Patio

Mixed material patio

A mixed material patio combines bluestone with brick, concrete, or wood for a unique and personalised design. This approach enhances texture and visual interest while offering flexibility in cost and aesthetics. Use sealed bluestone in high-traffic or exposed areas and integrate other materials in protected zones for weather resistance. 

Proper drainage is essential, so include gravel channels or a slightly sloped surface. Ensure that the base supports all materials equally to prevent shifting. This design balances style and practicality, creating an outdoor space that adapts to varying climates while showcasing a creative blend of materials.

8. Bluestone Patio with Built-In Features

A bluestone patio with integrated features such as seating walls, fire pits, or planters enhances usability and weather resistance. The built-in elements act as stabilisers, reducing the impact of shifting soil and erosion. To ensure durability, anchor these features securely to the base and use thick bluestone for additional support. 

Incorporate drainage solutions, like weep holes, around the built-in elements to prevent water accumulation. Apply a weather-resistant sealer to all exposed surfaces for protection against moisture, stains, and UV damage. This design combines functionality with aesthetics, creating a long-lasting patio tailored to withstand any climate.

Tips for Selecting Weather-Resistant Bluestone

Selecting weather-resistant Bluestone

Bluestone patios blend durability and elegance perfectly, making them ideal for all climates. Their natural resilience to weather conditions ensures long-lasting beauty and functionality. With the right design and materials, they can transform any outdoor space. Here are some of the best tips for choosing bluestone.

  • Choose the Right Finish: Opt for a finish that suits your climate. A thermal finish offers excellent slip resistance for wet or icy conditions, while a honed finish provides a smoother surface ideal for dry climates.
  • Check Stone Thickness: Thicker bluestone slabs (at least 2 inches) are more durable and less prone to cracking, especially in high-traffic areas or regions with extreme temperature fluctuations.
  • Look for Low Porosity: Select bluestone with low water absorption to prevent damage from freeze-thaw cycles in colder climates or moisture-related issues in humid areas.
  • Consider the Colour: Lighter shades reflect heat, making them more suitable for hot climates, while darker tones can retain warmth, which may be preferable in cooler regions.
  • Assess the Source: Ensure the bluestone is sourced from reputable suppliers who provide high-quality, weather-resistant materials. This ensures consistency and durability.
  • Use a Compatible Sealer: Invest in a high-quality stone sealer to enhance the bluestone’s resistance to moisture, stains, and UV damage. Make sure the sealer matches your patio’s intended use and climate.
  • Think About Maintenance: Choose bluestone that is easy to clean and maintain. Some varieties require less frequent resealing, which can be a practical choice for busy homeowners.

Maintenance Tips for Longevity

Bluestone maintenance tips

Regular maintenance for your bluestone patio is essential to ensure its longevity and durability. Start with routine cleaning to remove debris, dirt, and stains that can compromise the stone’s appearance and durability. 

Use a pH-neutral cleaner to avoid damaging the surface, and rinse thoroughly to prevent residue buildup. Sealing the bluestone with a high-quality, weather-resistant sealer every 1-2 years protects it from moisture, UV rays, and stains, especially in harsh climates. 

Inspect the patio periodically for cracks, loose stones, or drainage issues and address them promptly to prevent further damage.

Avoid de-icing salts in regions with freezing temperatures, as they can erode the stone; instead, opt for sand for added traction. Trimming surrounding plants and ensuring proper drainage prevent moisture-related problems like moss or mildew growth.

Final Thoughts

Your outdoor space deserves to be as stunning and enduring as the memories you’ll make there. Bluestone patios combine elegance with resilience, ensuring a perfect setting no matter the weather. 

Let your creativity shine as you design a uniquely yours patio built to last.   Contact us to discuss how we can help you bring your vision of the perfect bluestone patio to life!Working offline

Top Preventative Measures to Keep Your Pavers Looking Brand New

Maintaining the appearance of your pavers is essential for keeping your outdoor space looking its best. Over time, weather, foot traffic, and spills can take a toll, leaving your pavers dull and worn. 

You can protect their surface by implementing straightforward preventative measures and ensuring they remain vibrant and inviting. With the proper care, your pavers can retain their beauty for years, enhancing the charm and appeal of your garden or patio. 

Let’s look at how to keep them looking new with minimal effort.

1. Regular Cleaning Routine

A consistent cleaning routine is essential to maintain the pristine appearance of your pavers. Regular sweeping and washing help prevent dirt, debris, and grime from settling into the surface, which can cause discolouration and damage over time. 

Sweep your pavers at least once a week using a stiff-bristled broom to remove loose dirt, leaves, and other debris, stopping them from causing stains or harm. Use water and a mild detergent for washing, avoiding harsh chemicals that could erode the surface. 

A garden hose with a spray nozzle or a pressure washer on a low setting works well. Consider a deeper clean with a pH-neutral cleaner and a soft brush, especially after heavy use or extreme weather. 

Finally, ensure the pavers are completely dry before applying any sealants or protective treatments, as this prevents moisture-related issues like mould or mildew.

2. Sealing Your Pavers

Seal pavers

Sealing your pavers is essential for preserving their appearance and durability. A high-quality sealant prevents water absorption, leading to cracks and erosion over time. It also protects against stains from oil, food, and other spills while enhancing the natural colours of your pavers for a fresh, vibrant look.

There are two main types of sealants: penetrating and film-forming. Penetrating sealants soak into the paver material, providing long-lasting protection without changing the surface texture. In contrast, film-forming sealants create a protective layer on the surface, adding a slight sheen.

Before sealing, ensure your pavers are clean and dry. Apply the sealant evenly, following the manufacturer’s instructions, and apply two coats for optimal results. Regularly reseal your pavers every 2-3 years to maintain their condition.

3. Weed and Moss Prevention

Prevent weeds

Weeds and moss can quickly ruin the appearance of your pavers, so regular prevention is essential. Start with regular maintenance by sweeping your pavers often to remove dirt and organic material, particularly from the joints, where weeds and moss thrive. 

Installing a weed barrier under your pavers during installation can significantly reduce weed growth by blocking sunlight and preventing weeds from sprouting. 

For further control, apply pre-emergent herbicides to prevent weed seeds from germinating and use a post-emergent herbicide for existing weeds. If you prefer a chemical-free approach, vinegar and water can kill weeds naturally. 

Moss control involves improving drainage and ensuring your pavers receive sufficient sunlight, which can be done by trimming back overhanging branches. For existing moss, use a stiff brush and a mixture of water and baking soda to scrub the surface clean.

4. Protecting Against Stains

Avoid stains

Preventing stains is essential to maintain the fresh appearance of your pavers. The best way to avoid stains is to immediately clean up spills from food, drink, or oil. Prompt action prevents these substances from penetrating the surface and causing discolouration. 

In addition, applying a high-quality sealant creates a protective barrier that repels water, oil, and other staining agents, making it easier to clean up spills before they cause permanent damage. Reapply the sealant every 2-3 years for continued protection.

To further protect your pavers, place mats or rugs in high-traffic areas and under furniture to prevent stains from spills, rust, or scratches. Using pads under furniture legs prevents rust and other metal stains. 

Regular maintenance, including sweeping and washing with mild detergent, will help remove dirt and organic matter that can lead to staining. Use a paver-specific cleaner designed for oil or grease for more persistent stains. Always follow the manufacturer’s instructions for the best results.

5. Addressing Water Drainage Issues

Fix drainage

Effective water drainage is crucial for maintaining the integrity and appearance of your pavers. Water can pool on the surface without proper drainage, leading to stains, erosion, and potential structural damage. To facilitate appropriate runoff, install your pavers with a slight slope. 

This prevents water from collecting and seeping into the ground, which can cause instability. Incorporating drainage systems like French drains, permeable pavers, or gravel-filled trenches around your paved areas helps direct water away, preventing pooling. 

Regular inspection is essential to detect issues like pooling or sinking pavers. Clean gutters and downspouts are also important, as clogged gutters can cause overflow, leading to excess water around your pavers. 

Additionally, during installation, use a well-compacted base of gravel and sand to promote drainage and support, preventing water from saturating the ground beneath your pavers.

6. Protect Your Pavers from Heavy Impact

Prevent impact

Managing heavy loads and high traffic is crucial for maintaining your pavers’ condition. Proper installation on a well-compacted base is key, especially in areas with heavy loads or frequent traffic. 

A solid foundation helps distribute weight evenly, preventing shifting or cracking. In high-traffic zones, use thicker pavers for increased strength and durability, and consider adding extra layers of gravel or sand for additional support.

Edge restraints are essential for keeping pavers in place, preventing movement and ensuring evenly distributed weight. High-traffic areas are regularly inspected to detect cracks, loose pavers, or depressions. 

Promptly addressing these problems can prevent further damage. To reduce wear, limit heavy vehicle traffic and use protective mats to disperse weight, keeping your pavers in excellent condition for longer.

7. Repairing Damage Promptly 

Fix damage

Properly addressing damage to your pavers is essential to maintain their appearance and structural integrity. Ignoring minor issues can lead to more significant problems, so timely repairs are crucial. 

Regularly inspect your pavers for early signs of damage, such as cracks, chips, or loose pavers. Early detection allows for quick, cost-effective repairs before the damage worsens.

For minor issues, DIY repairs using a paver repair kit can help. For extensive damage, such as large cracks or sunken areas, it’s best to hire a professional. After repairing, consider applying a sealant to protect the pavers.

8. Protect Against Weather Damage

Weatherproof pavers

Weather conditions can cause wear and tear on your pavers, leading to fading, cracking, and displacement. Extreme temperatures are particularly damaging, as freezing water can expand within the pavers, causing them to crack. 

To prevent this, applying a high-quality sealant helps form a protective layer, preventing moisture from seeping in. In hot weather, UV rays can cause colours to fade and weaken the pavers’ structure. 

A good practice is to use protective covers or move furniture during intense sun exposure to reduce the impact. Avoid de-icing salts in winter; they can erode the surface and lead to long-term damage.

Regularly check the drainage around your pavers to ensure water flows away from the surface, as stagnant water can cause pavers to sink or shift. Proper installation with adequate base materials also reduces the risk of weather-related damage. 

9. Avoid Harsh Chemicals

No harsh chemicals

Harsh chemicals can severely damage your pavers, causing them to deteriorate faster. Bleach, ammonia, and acid-based cleaners can strip away protective layers, leading to staining and weakening the surface. Using abrasive cleaners can also leave lasting marks or scratches that compromise the aesthetic appeal.

To maintain their integrity, opting for gentle, paver-safe cleaning products is essential. Many specialised stone cleaners are designed to clean without causing harm, protecting your pavers’ appearance and longevity.

Natural cleaning solutions, such as a mild vinegar and water mix, are effective and eco-friendly. Harsh chemicals not only degrade your pavers but can also harm the surrounding environment.

By sticking to safe alternatives, you preserve the beauty of your pavers while avoiding long-term damage. Always read product labels carefully, and choose a cleaner specifically designed for stone surfaces when in doubt.

10. Replace Sand in Joints

Over time, the sand between paver joints can wash away, leaving gaps that allow weeds to grow and water seep through. Replenishing the sand in these joints is a crucial step to maintaining the structural integrity of your pavers.

To start, choose high-quality joint sand designed for pavers, which helps lock the stones. Simply brush the sand into the gaps and use a compactor to press it down, ensuring a secure fit. This process also helps prevent shifting, which can cause uneven surfaces.

Regularly inspect your pavers for signs of eroded sand as a preventive measure. If you notice significant gaps or loose pavers, replace the sand immediately to prevent further damage. Additionally, sealant can be applied to the sand after replacement to reduce erosion from rain and foot traffic. 

Conclusion

Maintaining your pavers’ pristine look requires regular care and strategic preventative measures. Implement these tips to preserve their beauty and durability. 

Contact us today for professional assistance and expert advice, and ensure your pavers remain in top condition year-round. Act now to keep your outdoor space looking its best.

The Ultimate Guide to Sealing and Cleaning Natural Stone Pavers

Natural stone pavers add timeless beauty and durability to any outdoor space but require proper care to maintain their appearance and longevity. Sealing and cleaning these surfaces are essential to protect them from stains, weathering, and wear.

Regular maintenance preserves their aesthetic appeal and enhances their resilience against the elements. Sealing acts as a protective barrier, while cleaning removes dirt, debris, and stains that can cause long-term damage.

This guide offers practical tips on adequately sealing and cleaning natural stone pavers, keeping them looking their best.

Why Sealing Natural Stone Pavers is Important

Sealing stone pavers benefits

Sealing natural stone pavers is crucial in preserving their beauty and durability. By creating a protective barrier, sealant prevents stains from liquids, oils, and dirt that can penetrate the stone.

Exposure to weather elements such as rain, sun, and frost can cause the stone to degrade over time, but sealing helps mitigate this damage. Additionally, sealing prevents water absorption, leading to cracking and erosion in colder climates.

Without a proper seal, pavers are more vulnerable to moss, algae, and weed growth, which can ruin their appearance and structure. The suitable sealant enhances the stone’s colour, bringing out its natural vibrancy while maintaining a smooth, clean surface.

It’s not just about aesthetics; sealing increases the lifespan of your pavers, reducing the need for frequent repairs or replacements. Most importantly, sealing provides easier cleaning, as dirt and stains are less likely to adhere to the surface.

For these reasons, regular sealing is a worthwhile investment. It ensures your stone pavers stay protected, functional, and visually appealing for years.

Types of Sealants for Natural Stone Pavers

Stone paver sealant types

Choosing the proper sealant for natural stone pavers is essential to enhance their durability, protect their surface, and maintain their beauty. Here are the main types of sealants:

1. Penetrating Sealers

Penetrating sealers protect natural stone pavers by absorbing water deep into the surface. They create a barrier against water, oil, and stains without altering the stone’s natural appearance. 

Ideal for porous stones like sandstone and limestone, they allow the stone to breathe, preventing moisture buildup and damage. 

Easy to apply, these sealers enhance durability and resistance to weathering while maintaining a natural, matte finish, making them perfect for high-moisture or heavy-traffic areas.

2. Topical Sealers

Topical sealers form a protective layer on natural stone pavers, offering aesthetic and functional benefits. They enhance the stone’s colour with a glossy or matte finish, creating a waterproof barrier that resists stains and liquid penetration.

Ideal for non-porous stones like granite and marble, topical sealers provide high surface protection but may require reapplication due to wear. While slightly altering the stone’s appearance, they offer excellent durability and visual appeal. The application is simple: use a roller or brush.

Step-by-Step Guide to Sealing Your Natural Stone Pavers

How to seal stone pavers

Sealing your natural stone pavers is easier than you might think. Proper preparation is key. The application process ensures lasting protection. Follow these steps for a flawless, long-lasting finish.

1. Preparation

Proper preparation is essential for a successful seal on natural stone pavers. Start by thoroughly cleaning and drying the surface, removing dust, dirt, or debris that could affect adhesion. Use a pressure washer for stubborn grime, ensuring it does not damage the pavers.

 Address any existing stains with suitable cleaners, and inspect the stone for cracks or damage, making repairs where necessary. Allow the surface to dry for at least 24 hours before applying the sealant to ensure moisture-free pavers.

2. Applying the Sealer

Applying the sealer correctly is essential for long-lasting protection. Choose the right application method—roller, brush, or sprayer—based on the area size and sealer type. Begin at one end, working in small sections for even coverage. Apply thin, even layers, avoiding puddles or thick spots, and allow each coat to dry before applying a second layer. Multiple coats may be needed for deep penetration of porous stones. Don’t forget the edges and joints; allow the sealer to cure completely before use. 

3. Curing and Drying Time

Curing and drying time are crucial after sealing natural stone pavers. The sealer usually requires several hours to dry before it’s safe to walk on, but complete curing may take 24-48 hours, depending on the product and weather conditions. 

Apply the sealer on a dry, mild day for best results. Avoid walking on or cleaning the pavers until completely dry. Exposure to rain or moisture before curing can compromise its effectiveness, so complete curing is allowed for long-lasting protection.

4. Regular Cleaning Techniques

Stone paver cleaning tips

Regular cleaning is essential for maintaining the appearance of natural stone pavers. Sweep the surface regularly to remove dirt, leaves, and debris, which can cause scratches or staining. A wash with mild detergent and warm water is often enough for routine cleaning.

Use a soft-bristle brush to scrub gently, avoiding damage. Harsh chemicals or acidic cleaners should be avoided as they can erode the stone. A pressure washer on low can help with stubborn stains, but use it cautiously. Ensure the pavers are thoroughly dry after cleaning.

5. Using Pressure Washing

A pressure washer can effectively clean natural stone pavers, especially for removing stubborn dirt, moss, or algae. Use a 1,500 to 2,000 psi pressure setting to avoid damaging the surface or stripping the sealer. Begin by rinsing with water to loosen dirt, then use sweeping motions for even cleaning. 

Always hold the nozzle at a slight angle, a few inches away from the pavers, to prevent damage. For persistent stains, use a mild cleaning solution. Allow the pavers to dry entirely before resealing.

6. Dealing with Stubborn Stains

Stubborn stains on natural stone pavers can be challenging but are manageable. First, identify the type of stain—oil, rust, or organic matter—to choose the right treatment. For oil stains, apply a poultice of baking soda and water, leaving it for hours. 

Use a rust remover for rust stains, testing it on a small area first. Organic stains can be treated with a water-vinegar mixture. Avoid acidic cleaners on sensitive stones like limestone. After cleaning, scrub gently, rinse thoroughly, and reseal the pavers.

How to Clean Natural Stone Pavers

Clean stone pavers

Cleaning natural stone pavers doesn’t have to be complicated. Start with regular sweeping to remove debris. For deeper cleaning, use a mild detergent and soft brush. Follow these simple steps to maintain beauty.

1. Routine Cleaning

Routine cleaning is essential to keep natural stone pavers looking their best. Start by sweeping the surface regularly to remove loose dirt, leaves, and debris. A mild detergent with warm water is usually sufficient for effective cleaning. 

Use a soft-bristle brush to scrub gently, focusing on joints. Pressure washing can be used occasionally on a low setting to prevent damage. Avoid harsh chemicals that can strip the sealer or stain the stone. After cleaning, rinse thoroughly and allow the pavers to dry completely.

2. Deep Cleaning

Deep cleaning removes stubborn stains and grime that routine cleaning can’t tackle. Use a pressure washer on a low setting to blast away embedded dirt. Apply a suitable cleaner for persistent stains, like a stone-safe degreaser for oil or a rust remover for discolouration. 

Allow the cleaner to sit before gently scrubbing with a soft-bristle brush. For organic stains like moss or algae, use a vinegar-water mix. After cleaning, rinse thoroughly and allow the pavers to dry completely, then consider resealing for protection.

3. Removing Weeds and Moss on Stone Pavers

If left unchecked, weeds and moss can ruin the appearance of natural stone pavers. Start by manually pulling visible weeds from the joints, using a weeding tool to remove the roots. For stubborn moss, spray a vinegar and water solution directly onto the affected area. 

Once the moss is dead, gently brush to remove the remaining growth. Regular pressure washing helps prevent moss buildup, especially in damp areas. Use a joint stabiliser or weed prevention product, and reseal the pavers for protection.

4. Dealing with Stubborn Stains

Stubborn stains on natural stone pavers require a targeted approach. Identify the stain type—oil, rust, or organic—to select the proper treatment. Oil stains can be removed with baking soda and water poultice and left for several hours. 

Rust stains need a specialised cleaner that is safe for stone surfaces. A vinegar and water mix works well for organic stains, like moss or plant matter. Scrub gently with a soft brush, rinse thoroughly and dry completely. If stains persist, consider resealing the pavers.

Common Mistakes to Avoid When Sealing and Cleaning Stone Pavers

Paver mistakes to avoid

Sealing and cleaning natural stone pavers is essential for their beauty and longevity. Common mistakes to avoid ensure adequate protection, prevent damage, and keep your pavers looking their best. Here are key pitfalls to watch out for when caring for your stone.

  • Over-Applying Sealer: Applying too much sealer can create a slippery surface or an unattractive, cloudy finish. Always follow the manufacturer’s instructions.
  • Using Harsh Chemicals: Avoid acidic or abrasive cleaners that can damage the stone’s surface and reduce its natural shine.
  • Neglecting Proper Preparation: Skipping steps like cleaning the pavers thoroughly or ensuring they are dry before sealing can lead to uneven results.
  • Ignoring Routine Maintenance: Failing to clean and reseal regularly allows dirt, stains, and weathering to degrade the pavers.
  • Sealing in wet conditions: Sealing in damp conditions can prevent proper bonding, reducing the sealant’s effectiveness.
  • Not allowing sufficient curing time: After applying the sealer can lead to premature wear or damage. Always follow the recommended drying time.

Maintaining Sealed and Cleaned Pavers

Maintain sealed pavers

Maintaining sealed and cleaned pavers is essential for keeping them in top condition. Regular upkeep helps prevent damage, keeps your outdoor space looking pristine, and extends the life of your stone pavers.  Sweep your pavers frequently to remove dirt, leaves, and debris, which can scratch the surface or affect the sealant. 

Clean stains promptly using a stone-safe cleaner to prevent them from setting. Reseal your pavers every 1-2 years to protect them from stains, moisture, and weathering, ensuring the sealant remains effective.  Check for cracks or chips and repair them promptly to prevent further deterioration. 

When pressure washing, use a low setting to avoid damage. Avoid harsh chemicals that can strip the sealant or cause discolouration, and monitor for weed or moss growth to address issues quickly. Lastly, keep the area dry after rain or cleaning to prevent moisture absorption.

Conclusion

Properly sealing and cleaning natural stone pavers enhances their beauty and longevity. Regular care ensures they stay stunning and durable against the elements. 

Ready to elevate your outdoor spaces? Explore premium natural stone solutions with Splendour in Stone today. Contact us for expert advice and make your pavers a timeless masterpiece!

Travertine Walling Stone Maintenance & Care: Preserving Its Natural Beauty

Travertine walling stone has long been admired for its timeless charm, unique textures, and versatility. Whether enhancing a modern living room or adding character to a garden wall, this natural stone elevates any space with its understated elegance. 

However, travertine’s beauty can fade over time without proper care. Regular maintenance is essential to preserve its natural allure, protect it from wear, and extend its lifespan. 

In this guide, we’ll share practical tips and expert advice on maintaining your travertine walling stone and keeping it looking as stunning as the day it was installed.

Why Proper Maintenance is Essential for Travertine

travertine maintenance importance

Travertine, a naturally porous stone, exudes elegance and sophistication, but its delicate structure requires diligent care. 

Without proper maintenance, its surface is vulnerable to stains from liquids, such as wine or coffee, and damage from acidic substances like citrus juice. Over time, dirt and grime can seep into its pores, dulling its natural beauty.

Weather exposure poses another challenge for outdoor travertine installations. UV rays can cause fading, while rain and frost may lead to cracks or structural weakening. Regular care, including cleaning and sealing, not only preserves its aesthetics but also extends its lifespan.

Moreover, well-maintained travertine retains its value, making it a cost-effective investment in the long run. By implementing a consistent care routine, you can prevent costly repairs and ensure your travertine walling remains a stunning feature of your property for years to come.

Essential Maintenance Tips for Travertine Walling Stone

essential maintenance tips travertine

Travertine walling stone exudes timeless elegance, but its natural beauty can fade without proper care. The good news? With a few simple steps, you can keep it looking as stunning as the day it was installed. Here’s how to maintain and protect your travertine for years to come.

1. Seal Your Travertine Walling Stone

Sealing is the first step in protecting travertine. Use a high-quality penetrating sealer to prevent water absorption, stains, and moisture damage. Reseal periodically, especially for outdoor walling, to maintain the stone’s durability and protect its porous surface from environmental wear.

2. Clean Regularly with pH-Neutral Solutions

Travertine requires gentle cleaning to maintain its natural charm. Use warm water and pH-neutral cleaners to avoid damaging the stone. Harsh chemicals and acidic solutions, like vinegar, can cause etching and discolouration, so stick to soft cloths or mops for safe and effective cleaning.

3. Dust and Sweep Frequently

Dust and debris can settle in travertine’s natural pores, dulling its appearance over time. Regularly sweep or dust the stone using a soft brush or cloth to prevent buildup. For stubborn dirt, a gentle wipe with a damp cloth works wonders without scratching the surface.

4. Address Scratches and Wear Promptly

Scratches and surface wear can diminish travertine’s beauty. Professional honing or polishing can smooth out imperfections and restore its finish without compromising the stone’s integrity. Acting quickly on minor damage will help preserve its pristine appearance and long-lasting elegance.

5. Protect Travertine from Heavy Impact

Travertine is durable but not invincible. Avoid placing heavy or sharp objects directly against the stone to prevent chips or cracks. Use protective pads under furniture and décor, especially in high-traffic areas. For outdoor walling, take care during landscaping or construction to prevent accidental damage to the stone.

Common Challenges with Travertine Walling

travertine challenges

Travertine walling stone brings unmatched elegance to any space, but it’s not without its challenges. Understanding these natural traits and potential issues is key to preserving its timeless beauty. Here’s what you need to know to keep your travertine looking its best.

1. Water Absorption and Staining

Travertine’s porous surface absorbs moisture, causing stains and discolouration. Clean stubborn stains with a pH-neutral cleaner or a baking soda paste, avoiding harsh chemicals. Prompt cleaning and addressing water issues early help preserve the stone’s structure and natural beauty.

2. Etching and Surface Marks

Acidic substances like wine, fruit juice, or harsh cleaners can leave etching—dull spots that disrupt travertine’s smooth finish. This natural sensitivity requires careful handling and avoidance of reactive materials, particularly on polished surfaces.

3. Surface Cracks and Chips

Despite its durability, travertine can crack or chip under heavy impact or environmental stress. Outdoor walls are especially vulnerable to shifting soil or temperature fluctuations. Early detection and repair of damaged stone helps to maintain its structural integrity and visual appeal.

4. Uneven Weathering Outdoors

Exposure to outdoor elements like sunlight, rain, and freeze-thaw cycles can cause uneven weathering. Over time, surfaces may erode or develop inconsistent textures and colours. While this is a natural ageing process, it can affect the stone’s visual appeal.

5. Dirt and Natural Pore Buildup

Travertine’s natural pores trap dirt and debris, dulling its beauty. High-traffic areas or outdoor walls are particularly prone to buildup, making the stone appear aged and neglected if not cleaned regularly.

Common Mistakes to Avoid When Using Travertine Walling Stone

travertine mistakes

Travertine walling is a timeless addition to any space, but minor missteps can lead to big problems. From improper cleaning to neglecting sealing, here’s how to avoid costly mistakes and keep your travertine looking flawless.

  • Neglecting to Seal the Stone: Travertine’s porous nature absorbs moisture and stains quickly. Without proper sealing, it can weaken over time, especially outdoors, leading to permanent discolouration and structural damage.
  • Using Harsh or Acidic Cleaners: Acidic cleaners like vinegar or bleach cause etching and dull spots on travertine surfaces. Always choose gentle, pH-neutral cleaners to preserve its finish and natural beauty.
  • Improper Installation: Using the wrong adhesives or ignoring natural movement can result in cracks or loose stones. Professional installation ensures stability and prevents costly structural issues later.
  • Ignoring Regular Maintenance: Dirt and debris settle into travertine’s pores, dulling its appearance. Regular gentle cleaning helps maintain its finish and prevents long-term damage from buildup.
  • Placing Excessive Weight or Pressure: Hanging heavy objects or applying undue force can cause cracks or chips in travertine. Avoid excessive pressure to protect its integrity and visual appeal.

Tips for Long-Term Maintenance

long term tips

Maintaining travertine walling stone for the long haul requires a combination of proactive care and routine upkeep. These tips will help preserve its natural beauty and structural integrity:

  • Regular Cleaning Routine: Dust the surface frequently to prevent dirt buildup. Use a soft, damp cloth or mop with a pH-neutral cleaner to maintain its polished appearance.
  • Seal and Reseal: Sealing travertine is essential to protect it from stains and moisture penetration. Reseal every 1–2 years or as recommended by your sealant manufacturer.
  • Immediate Spill Cleanup: Wipe up spills as soon as they occur to prevent liquids from seeping into the stone. Avoid using acidic or abrasive cleaners that can etch the surface.
  • Protect Against Scratches: Place felt pads under furniture near travertine walls to prevent scratching. Avoid dragging heavy objects across the surface.
  • Weatherproof Outdoor Travertine: Apply weatherproofing treatments to outdoor installations to shield them from UV rays, rain, and frost. Ensure proper drainage to prevent water pooling.
  • Periodic Deep Cleaning: Schedule occasional deep cleaning to remove grime and stains that accumulate over time. Always use products designed specifically for natural stone.
  • Inspect for Damage: Regularly inspect your travertine for cracks, chips, or dull spots. Address minor repairs promptly to prevent them from worsening.
  • Professional Maintenance Services: Engage professional cleaning or restoration services for thorough care. Experts can revitalise worn surfaces and perform repairs with precision.

Conclusion

Travertine walling stone adds timeless elegance to any space, but preserving its natural beauty requires proper care and attention. 

From sealing and cleaning to addressing common challenges, proactive maintenance ensures your travertine stands the test of time. By following these essential tips, you can enjoy its unique charm and durability for years.

Ready to enhance your space with stunning travertine walling? Contact Splendour in Stone today and let us help bring your vision to life!

Is Charlotte Sandstone Suitable for Outdoor Use?

Looking to transform your outdoor space with a natural, elegant touch? Charlotte Sandstone is the perfect choice. But is it durable enough to withstand the UK’s unpredictable weather? Choosing the right stone is crucial when planning a stunning patio, garden path, or feature wall. 

This article will delve into Charlotte Sandstone’s strengths, assess its suitability for outdoor use, and discuss ways to ensure its durability over time. Are you curious if this stunning stone is the perfect choice for your project? Let’s get started!

Is Charlotte Sandstone Suitable for Outdoor Use?

Charlotte Sandstone is a durable and visually appealing option for outdoor projects like patios, pathways, and garden features. Its natural resilience allows it to withstand varying weather conditions, making it a reliable choice for long-term use. Proper care and sealing enhance its longevity, ensuring it remains a beautiful and practical addition to any outdoor space.

Key Characteristics That Make It Outdoor-Friendly

Close-up of Charlotte Sandstone's texture showcasing durability and charm

Charlotte Sandstone is a popular choice for outdoor applications due to its unique blend of aesthetic appeal and robust properties. Understanding its characteristics can help determine its suitability for various outdoor projects.

1. Durability

Charlotte Sandstone is durable and aesthetically pleasing, perfect for outdoor applications like patios, pathways, and garden features. 

Its ability to endure varying weather conditions and proper care and sealing ensures long-lasting performance. 

This natural stone enhances outdoor spaces’ timeless appeal, creating a reliable and visually stunning solution for any project.

2. Appearance

Charlotte Sandstone offers a beautiful range of earthy tones, including beige, brown, and grey, which blend effortlessly into outdoor landscapes. These natural hues enhance the elegant aesthetic appeal of gardens, patios, and walkways. 

The stone features a slightly rough texture, providing a non-slip surface perfect for outdoor use. Its natural finish adds a rustic charm, making it ideal for creating a warm, inviting atmosphere in any outdoor setting.

3. Porosity

Charlotte Sandstone is a durable and visually appealing material for outdoor use. It is ideal for patios, pathways, and garden features, withstanding varying weather conditions when correctly cared for. 

Regular sealing enhances its longevity, ensuring it remains a reliable and attractive choice for outdoor projects.

4. Environmental Impact

Charlotte Sandstone is an eco-friendly choice. It is a natural stone with a lower environmental impact than synthetic materials. 

Its extraction and processing are less resource-intensive, making it a more sustainable option for outdoor projects. 

By choosing Charlotte Sandstone, you’re enhancing your outdoor space and making a more environmentally conscious decision supporting sustainability.

Where Can You Use Charlotte Sandstone Outdoors?

Beautiful outdoor space featuring Charlotte Sandstone in landscaping and architecture

Charlotte Sandstone is a premium choice for various outdoor applications, combining practicality with aesthetic appeal. Here’s how you can use it:

1. Patios

Charlotte Sandstone is ideal for patios due to its durability and timeless aesthetic. Its natural colours and textures create a warm and inviting atmosphere, making it perfect for entertaining spaces or relaxing retreats.

2. Pathways

Whether for garden paths or main walkways, Charlotte Sandstone provides a sturdy and visually appealing surface. 

Its strength ensures it can handle regular foot traffic, while proper sealing protects against wear over time.

3. Driveways

Charlotte Sandstone stands out for its distinctive and robust driveway. Its resilience to weather and heavy loads makes it practical and stylish for vehicular use.

4. Garden Features

Charlotte Sandstone can enhance the appeal of garden features such as retaining walls, raised beds, or decorative borders. 

Its natural appearance blends seamlessly with greenery, adding character to outdoor landscapes.

5. Steps and Staircases

Sandstone steps or staircases provide a safe and elegant transition between levels in your garden or outdoor area. 

Its durable surface withstands consistent use and retains its beauty over time.

What to Keep in Mind Before Choosing Charlotte Sandstone

Thoughtful homeowner inspecting Charlotte Sandstone for outdoor suitability

Charlotte Sandstone is a top choice for outdoor spaces, but to ensure it meets your needs, there are critical factors to evaluate:

1. Weather Resistance

Charlotte Sandstone is resilient but requires attention in regions with extreme weather. The stone may crack if improperly sealed in areas prone to freeze-thaw cycles. 

Regular maintenance ensures it withstands temperature changes and remains structurally sound.

2. Sealing Requirements

Sealing protects the stone from moisture absorption, staining, and weather-related damage. 

Regular resealing enhances its resistance to the elements and preserves its natural texture and appearance, ensuring longevity for outdoor applications.

3. Surface Preparation

Proper surface preparation is critical for a successful installation. Ensure the area is level and has adequate drainage to prevent water pooling, which can lead to erosion or instability over time. 

A well-prepared base maximises the stone’s durability.

4. Colour and Texture

Charlotte Sandstone is available in various colours and textures, allowing you to customise its use. 

Selecting the right finish complements your design while being functional for its intended application, such as patios or pathways.

5. Maintenance Commitment

Although sandstone is relatively low maintenance, periodic cleaning and sealing are essential to prevent moss, algae, or grime buildup. 

Regular care retains its aesthetic appeal and functionality, particularly in areas with high moisture or shaded conditions.

6. Budget and Sourcing

Consider the upfront costs of the stone and ongoing maintenance when planning your budget. 

Always source from reputable suppliers to ensure premium-quality sandstone that performs well and adds long-lasting value to your outdoor space.

Maintenance Requirements

Simple tools and techniques for maintaining Charlotte Sandstone outdoors

Maintaining Charlotte Sandstone in outdoor spaces is straightforward. Proper care involves a few key practices that are easy to follow, ensuring its longevity and preserving its natural beauty.

  • Regular Cleaning: Sweep the surface regularly to remove dirt and debris; wash occasionally with mild detergent and water to keep the stone clean. Avoid using acidic or harsh chemicals, as they can damage the surface.
  • Pressure Washing: For deeper cleaning, use pressure washing on a moderate setting to avoid damaging the stone’s surface.
  • Sealing: Apply a high-quality stone sealant after installation to improve water resistance and prevent staining; re-seal every 1-2 years, depending on weather exposure and foot traffic.
  • Stain Prevention: Clean spills immediately, especially oils, wines, or acidic substances, using a soft cloth and mild detergent. Avoid harsh chemicals like bleach, which can discolour and damage the stone.
  • Repair and Inspection: Periodically inspect the stone for cracks or chips; repair minor damage promptly with stone repair kits to maintain its appearance.
  • Protection from Extreme Conditions: In regions with harsh weather, cover the stone during winters or intense sun exposure to prevent damage.

Why Choose Splendour in Stone for Charlotte Sandstone?

Splendour in Stone is a trusted name for premium-quality Charlotte Sandstone, offering products that combine durability and aesthetic excellence. 

With an unwavering commitment to quality, every sandstone is meticulously sourced to ensure it meets the highest standards for outdoor applications.

Beyond the superior quality of materials, Splendour in Stone provides expert guidance tailored to your specific needs. Whether you’re designing a patio, pathway, or garden feature, their experienced team helps you select the ideal shade, texture, and finish to complement your outdoor space.

Additionally, Splendour in Stone ensures seamless delivery and competitive pricing, making it a reliable partner for projects of any scale. Choosing them means investing in a product backed by expertise, exceptional customer service, and an excellent reputation. 

Elevate your outdoor projects with the assurance that you use the best materials available.

Conclusion

Charlotte Sandstone offers both beauty and durability, making it an excellent choice for outdoor projects. It’s natural strength and timeless appeal can transform any space, from patios to garden pathways. 

Ready to elevate your outdoor design? Explore Charlotte Sandstone’s full potential and bring your vision to life with the stunning elegance only Splendour in Stone can provide!

How to Refresh Your Garden for the New Year with Stone Pathways and Patios

Your garden deserves better than worn paths and tired spaces. Overgrown walkways and dull patios can make even the most beautiful landscapes feel neglected.

Unsurprisingly, over 70% of homeowners plan garden updates yearly—because a refreshed outdoor space sets the tone for a new beginning! Imagine your garden as a vibrant retreat, yet it’s far from that.

In this article, I’ll guide you through Stone pathways and patios to give your garden a stunning makeover using durable and timeless stone features. This will ensure that your outdoor space is ready for the year ahead.

1. Design Stone Pathways

Elegant stone pathway weaving through a lush green garden.

Stone pathways are a versatile and timeless feature that can enhance the beauty and functionality of any garden. They guide visitors through your outdoor space, creating a sense of flow while protecting delicate plants from foot traffic.

Begin by choosing a layout that complements your garden’s style—winding paths for a natural, organic feel or straight paths for a more formal appearance. Select materials like flagstone, gravel, or cobblestone to suit the aesthetic

Prepare the ground by clearing and levelling the area, then lay a base of gravel or sand for stability. Arrange the stones carefully, leaving space for plants or ground cover if desired.

To add character, consider varying the stone shapes or incorporating decorative elements like stepping stones with mosaic designs. Stone pathways not only make your garden more accessible but also provide a charming visual element that ties your landscape together.

2. Create a Patio Space

Cozy patio space with stylish stone flooring and inviting seating.

Creating a patio space requires a careful blend of design, functionality, and site preparation to maximise usability and aesthetic appeal. 

Start by selecting an ideal location—ideally, one that enjoys enough sunlight for lounging but offers some shade for comfort. Consider proximity to your home for easy access, particularly if you plan to use the outdoor dining or entertaining space.

Once you’ve chosen the spot, define the patio’s purpose and size. A smaller area with comfortable chairs may suffice for casual seating, but if you envision hosting gatherings, ensure the deck is spacious enough for furniture and easy movement.

Next, choose suitable stone materials based on style and durability. Natural stones like limestone and slate add elegance and withstand weather well, though options like concrete pavers offer a more budget-friendly alternative while still achieving a polished look.

Plan for foundational stability by laying a solid base, typically a mix of gravel and sand, to prevent stones from shifting or sinking over time. Add finishing touches like surrounding plants, lighting, and furniture to create a warm, inviting atmosphere.

Thoughtful patio design enhances your garden and provides a versatile outdoor space for relaxation and socialising year-round.

3. Add Greenery and Accents Around the Stonework

Vibrant greenery and decorative accents enhancing stone pathways and patios.

Enhancing stone pathways and patios with greenery and accents can transform them into inviting, vibrant spaces that blend seamlessly with the garden. 

Begin by selecting plants that complement the style of your stonework and thrive in the local climate. Low-growing ground covers, such as creeping thyme or moss, fill gaps between stones. They add softness and texture while being durable enough for foot traffic.

Border your pathways or patio edges with small shrubs, ornamental grasses, or flowering plants to create a natural frame that defines the space

For a layered effect, combine plants of varying heights and textures, such as taller ornamental grasses with shorter, colourful blooms. This adds depth and visual interest while maintaining a balanced, cohesive look.

Integrate decorative accents like lanterns, garden statues, or even a small water feature near the stonework. These elements add character and make the space more inviting, especially in the evening. 

Solar-powered path lights are a practical addition to pathways. They ensure safe passage after dark and subtly highlight the beauty of your stonework.

Finally, consider placing pots with seasonal plants around your patio area. These are easy to change out, providing a fresh look throughout the year. Thoughtful use of greenery and accents will elevate the stonework, blending hard and soft elements for a harmonious outdoor space.

4. Create a Curved Stone Pathway for a Natural Flow

Graceful curved stone pathway blending seamlessly with garden landscapes.

Incorporating a curved stone pathway into your garden design can transform its atmosphere, adding charm and a sense of natural movement. Unlike straight paths, which can feel rigid, curved pathways mimic natural organic shapes, encouraging exploration and providing a softer aesthetic.

To create this feature, choose stones that complement your garden’s style—flagstone for a rustic appeal or smooth pebbles for a modern touch. Begin by mapping out the path with a garden hose or rope to ensure a gentle curve.

Prepare the ground by clearing debris and levelling the area before laying a foundation of sand or gravel. Arrange the stones thoughtfully, allowing space for grass or low-growing plants to peek through for added texture.

A curved pathway enhances the visual appeal and guides visitors through your garden, making it more spacious and inviting for the new year.

5. Install a Central Stone Patio as an Outdoor Living Area

Spacious central stone patio designed for relaxing outdoor living.

A central stone patio can become the heart of your garden, providing a functional and beautiful space for relaxation and entertaining. Strategically placed, it is a focal point while harmonising with the natural surroundings.

Choosing durable and weather-resistant stones such as slate, limestone, or granite to ensure longevity when designing your patio. Consider patterns like herringbone for a classic look or irregular flagstones for a more organic feel. 

Start by levelling the ground and adding a gravel or sand base for stability, then carefully lay the stones, ensuring they are secure and evenly spaced.

Enhance the ambience by framing the patio with lush greenery, container plants, or even a pergola for partial shade. 

Add comfortable seating and decorative elements such as fire pits or outdoor lighting to create a cosy retreat. This central patio will elevate your garden into a vibrant outdoor living area, perfect for the new year.

6. Use Gravel and Stone Mix for a Textured Walkway

Textured walkway combining gravel and stone for a rustic garden charm.

Creating a textured walkway using a mix of gravel and stones is an excellent way to refresh your garden for the new year. This combination adds a visually appealing element to your outdoor space and offers practical benefits like improved drainage and easy maintenance. 

Gravel provides a soft, rustic base, while larger stones can frame or accentuate the pathway, giving it a polished and structured look.

To start, outline your desired path and remove any grass or debris. Lay a weed barrier to prevent unwanted growth, then spread the gravel evenly. Incorporate flat stepping stones or irregularly shaped flagstones to add dimension and functionality. 

This versatile design can complement various garden styles, from modern to cottage-inspired. The interplay of textures and colours will create a dynamic and inviting pathway that enhances the natural charm of your garden.

7. Introduce a Zen Garden with Stone Paths

Peaceful Zen garden featuring minimalist stone paths and serene landscaping.

Transform your outdoor space into a peaceful retreat by incorporating a Zen garden with thoughtfully placed stone paths. Inspired by traditional Japanese designs, these gardens emphasise simplicity, natural materials, and the calming interplay of textures.

Begin by selecting a quiet garden area and laying a raked gravel or sand foundation to symbolise water. 

Integrate stone paths using stepping stones or irregular slabs that meander through the space, guiding movement and creating moments of reflection. Arrange stones intentionally, balancing their size, shape, and placement to evoke harmony.

Complement the paths with minimalist elements such as moss, bamboo, or a small stone lantern to enhance the serene atmosphere. 

The path can lead to a focal point like a bench, a water feature, or a meditation space. A Zen garden with stone paths beautifies your garden and invites mindfulness and tranquillity into your daily life.

8. Define Garden Sections with Stone Edging

Neat garden sections highlighted by elegant stone edging for clear boundaries.

Stone edging is a practical and aesthetic way to define sections of your garden, creating clear boundaries while adding a polished look to your outdoor space. Whether you’re separating flower beds, vegetable plots, or pathways, stone edging offers timeless charm and durability.

Start by selecting stones that suit your garden’s design—natural fieldstones for a rustic feel, sleek pavers for a modern touch, or cobblestones for a classic look. 

Outline the desired sections, then dig a shallow trench to anchor the stones securely. Consider levelling the rocks and filling gaps with soil or small gravel for a seamless finish.

Stone edging prevents mulch and soil from spilling over and makes maintenance more manageable by keeping grass and weeds at bay. Using this method, you can create well-defined, organised garden sections that enhance functionality and visual appeal.

9. Build a Stone Fire Pit Area within the Patio

Inviting stone fire pit area nestled within a cozy patio setting.

A stone fire pit area can elevate your patio into a cosy gathering spot, perfect for year-round enjoyment. This feature creates warmth, ambience, and a natural focal point for your outdoor space.

To start, choose a central location on your patio that allows for safe clearance from nearby structures and plants. Use durable stones such as fire-rated bricks, natural stone, or heat-resistant pavers to construct the fire pit. 

Begin by laying a stable base, then stack the stones in a circular or square shape, securing them with fireproof adhesive or mortar for added stability.

Surround the fire pit with comfortable seating like benches or outdoor chairs, and add decorative elements such as cushions or string lights to enhance the atmosphere. 

A stone fire pit makes your patio more inviting and transforms it into a versatile space for entertaining, relaxing, or roasting marshmallows under the stars.

10. Highlight Garden Features with Stone Pillars or Columns

Striking garden features enhanced by elegant stone pillars or columns.

Stone pillars or columns can add a touch of elegance and structure to your garden, serving as striking accents highlighting key features. Whether framing an entryway, supporting an arbour, or marking transitions between garden zones, these timeless elements bring sophistication and functionality to your outdoor space.

Choose materials that complement your garden’s style—stacked natural stone for a rustic appeal or polished stone for a modern look. Position the pillars to draw attention to specific areas, such as a seating nook, fountain, or pathway. Consider topping them with decorative lanterns, planters, or sculptures for added visual impact.

Building stone pillars involves stacking stones over a stable base, using mortar for durability, or opting for pre-made stone veneer over a concrete core. These features enhance your garden’s aesthetic, create focal points that guide the eye, and define the space with character and charm.

11. Add a Water Feature with a Stone Base

Tranquil water feature flowing over a beautifully crafted stone base.

A water feature with a stone base can bring tranquillity and a touch of elegance to your garden. The flowing water and natural stone create a soothing ambience while serving as a beautiful focal point.

Start by selecting a location that allows the feature to be appreciated from multiple angles, such as a central garden area or near a patio. 

Choose a style that fits your aesthetic—a cascading fountain, a bubbling rock, or a small pond. Stones like slate, granite, or river rock are used for the base to ensure stability and complement the natural surroundings.

Install a waterproof liner and a submersible pump to maintain a steady water flow. Surround the feature with plants or smaller stones to blend it seamlessly into your garden. A stone-based water feature elevates your garden’s charm and introduces the calming sound of water to your outdoor oasis.

12. Design a Raised Stone Patio for Better Views

Elevated stone patio offering stunning views of the surrounding garden.

A raised stone patio offers the perfect solution for enjoying breathtaking views and creating a functional outdoor living area. Elevating your patio can help you make the most of natural surroundings, whether overlooking a garden, a scenic landscape, or a city skyline.

Select an ideal spot that maximises the view to design a raised patio. Use sturdy materials like natural stone, brick, or pavers to build the patio’s foundation, ensuring proper drainage and structural integrity. You may need to incorporate a retaining wall or steps to elevate the area while maintaining stability.

Enhance the space with comfortable seating, a dining area, or a fire pit to encourage relaxation and entertaining. 

Surround the patio with lush plants or decorative features to frame the view. A raised stone patio transforms your garden into a scenic retreat, providing a perfect place to unwind while enjoying the beauty of your surroundings.

Conclusion

Stone pathways and patios asdd beauty and functionality to any garden. You create a cohesive, inviting space that enhances usability and charm by carefully selecting materials, planning layouts, and adding greenery. 

With quality materials and solid installation, your garden becomes a lasting retreat that evolves beautifully through the seasons.

In SQM?

Please fill your details to download.


      Request Callback


        Enquiry Form


        Please fill your details to download.