Register your Information for Free Stone Samples Sent Express to You!

Search
Search
Close this search box.
Search
Close this search box.

Safe and Effective Ways to Remove Moss and Algae From Limestone

To ensure your marble surfaces retain their pristine appearance, adopt a routine that combines regular care with the right polishing approach. 

Whether you choose DIY methods for light maintenance or seek professional expertise for more severe conditions, prioritize the preservation of your marble. 

Remember, investing in proper care today safeguards the splendour of your surfaces for years to come.

Understanding Moss and Algae Growth on Limestone

Understanding Moss and Algae Growth on Limestone

Moss and algae growth on limestone surfaces is a common issue, particularly in moist and shaded environments. Understanding the conditions that foster this growth is essential for effective prevention and removal.

  • Moisture and Shade: Limestone, being a porous stone, readily absorbs moisture. This characteristic, combined with limited sunlight, creates an ideal environment for moss and algae. Areas that are frequently damp, such as those near downspouts, in shady gardens, or north-facing walls, are particularly susceptible.
  • Nutrient Deposits: Moss and algae thrive not only on moisture but also on nutrients. These can accumulate on limestone from organic debris like leaves and twigs, or from environmental pollutants. As these materials decay, they release nutrients that feed moss and algae, promoting their growth.
  • Air Quality: Poor air quality can accelerate the growth of moss and algae on limestone. Pollutants like sulfur dioxide can interact with the stone, altering its chemistry and making it more hospitable to growths.

Understanding these factors is crucial for tackling the problem effectively. By controlling moisture, reducing nutrient buildup, and improving air quality around limestone surfaces, you can significantly diminish the prevalence of moss and algae, maintaining the aesthetic and structural integrity of the stone.

Precautions and Safety Measures

Precautions and Safety Measures

When removing moss and algae from limestone, it’s crucial to undertake precautions to ensure both the safety of the individual performing the task and the preservation of the limestone itself.

  • Chemical Use: If you opt for chemical cleaners, choose products specifically designed for use on limestone to prevent etching or discoloration of the stone. Always wear gloves and protective eyewear to avoid skin and eye irritation from chemical splashes.
  • Physical Removal: For mechanical removal methods, such as scraping or using a stiff brush, proceed with caution. Use soft-bristled brushes rather than metal tools, which can scratch limestone surfaces. Gentle brushing minimizes damage to the stone while effectively dislodging moss and algae.
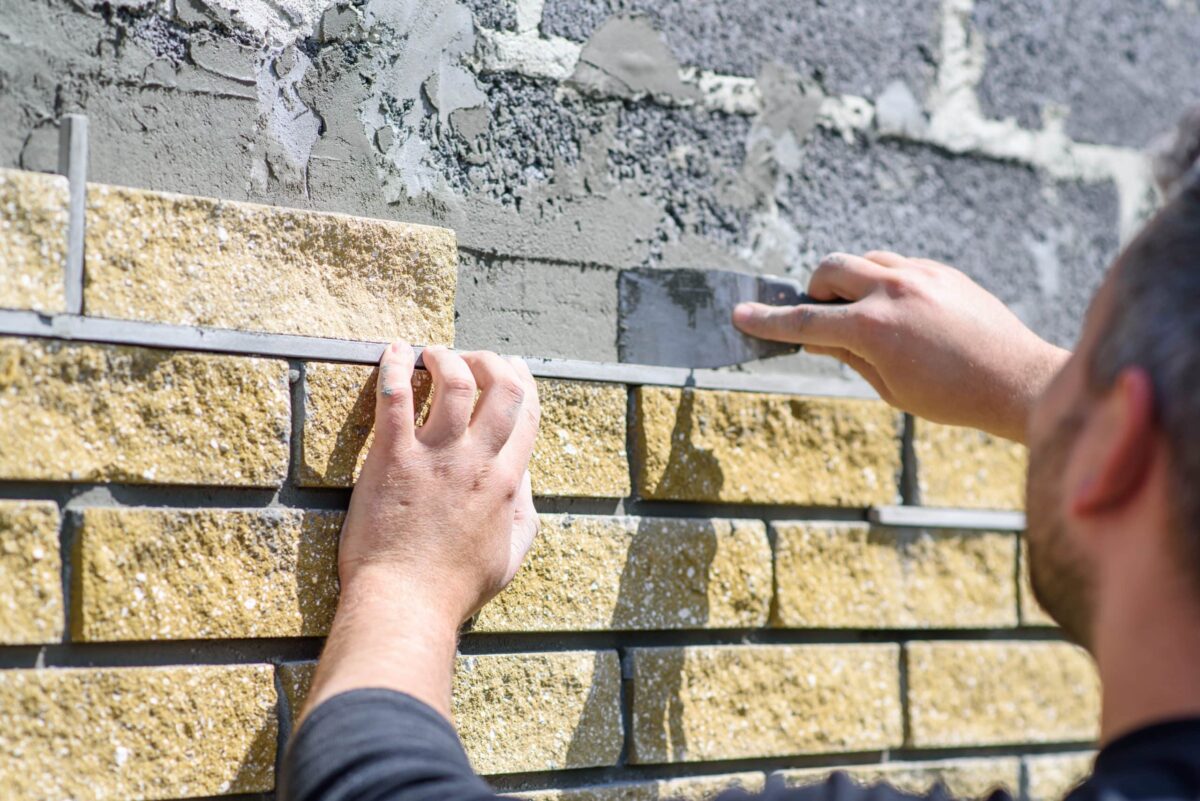
  • Pressure Washing: While pressure washing can be effective, it must be done carefully. High pressure can erode limestone. Always use the lowest effective setting and keep the nozzle at least 12 inches away from the surface. Test on a small, inconspicuous area first to ensure it doesn’t damage the stone.
  • Environmental Considerations: Be mindful of runoff when using chemicals or large amounts of water, as it can affect surrounding vegetation and water sources. Always follow local regulations regarding chemical use and disposal.

By following these safety measures and precautions, you can effectively remove moss and algae from limestone without compromising the stone’s integrity or your safety.

Moss and Algae Manual Removal Methods From Limestone

Moss and Algae Manual Removal Methods From Limestone

Manual removal of moss and algae from limestone is a safe and effective method, especially suitable for delicate surfaces or small areas. Here’s how to approach it:

  • Brushing: Start with a dry, stiff-bristled brush to scrape off as much of the moss and algae as possible. This method is purely mechanical and avoids the use of chemicals, making it environmentally friendly and safe for the limestone. Ensure the brush is not metallic to avoid scratching the surface.
  • Scraping: For tougher patches where a brush might not suffice, use a plastic scraper. It’s critical to use gentle pressure to prevent gouging the stone. Scraping is more direct than brushing and can remove more stubborn growths.
  • Boiling Water: Pouring boiling water directly onto the moss and algae can help loosen their hold on the limestone. After application, let the area sit for a few minutes before scrubbing with the brush. This method enhances the effectiveness of mechanical removal without introducing chemicals.
  • Regular Maintenance: Regularly sweeping and keeping limestone dry reduces moss and algae buildup. Ensure proper drainage around limestone installations to prevent water from pooling.

By employing these manual methods, you can maintain the integrity and appearance of limestone surfaces without the risks associated with harsh chemicals or abrasive techniques.

Moss and Algae Chemical Removal Options

Moss and Algae Chemical Removal Options

When choosing chemical methods to remove moss and algae from limestone, it’s essential to select appropriate solutions that ensure efficacy without harming the stone or the environment.

  • Appropriate Chemicals: Opt for pH-neutral or alkaline-based cleaners specifically designed for limestone. Acidic solutions, like vinegar or bleach, can damage limestone, causing pitting and discoloration. Products containing ammonium bifluoride are also advisable to avoid.
  • Application: Apply the chosen cleaner according to the manufacturer’s instructions. Typically, you would dilute the solution (if required), apply it to the affected areas, and allow it to sit for the prescribed time—usually between 10 to 30 minutes. This dwell time is crucial for the chemical to break down the biological growth.
  • Safety Gear: Wear protective gloves, goggles, and suitable clothing to protect your skin and eyes from splashes, as chemical cleaners can be irritant.
  • Rinsing: After the treatment time has elapsed, thoroughly rinse the limestone with clean water to remove all chemical residues. This step is critical to prevent any long-term damage to the stone.
  • Environmental Considerations: Be mindful of runoff when using chemicals. Prevent the solution from entering nearby soil or water bodies, as it can harm vegetation and aquatic life. Always follow local regulations for chemical use and disposal.

By carefully selecting and applying chemical agents, you can effectively remove moss and algae from limestone surfaces while preserving both the stone’s integrity and the surrounding environment.

Natural Remedies for Moss and Algae Removal From Limestone

Natural remedies offer a gentle yet effective approach to removing moss and algae from limestone, minimizing the risk of damage to the stone and the environment.

  • Boiling Water: A simple and immediate method is to pour boiling water over the affected areas. The high temperature helps to kill moss and algae, making them easier to brush away. This method requires caution to avoid burns and ensure complete coverage of the area.
  • Salt Solution: Mixing a strong saltwater solution can also be effective. Dissolve a cup of salt in a gallon of water, apply it to the moss and algae, and leave it to dry. Salt dehydrates and kills these growths. However, be mindful of the surrounding vegetation, as salt can harm plants and soil health.
  • Baking Soda: Sprinkling baking soda directly on moss and algae spots is another eco-friendly option. Baking soda is mildly abrasive and creates an inhospitable environment for growths due to its alkaline nature. After application, leave it for a few days before scrubbing off with a brush.

These natural methods are safe for limestone and are ideal for those seeking eco-friendly solutions. Regular application and maintenance can prevent the recurrence of moss and algae, preserving the natural beauty of limestone surfaces.

Moss and Algae Application Techniques

Moss and Algae Application Techniques

Effectively applying treatments to remove moss and algae from limestone requires precise techniques to ensure thorough coverage and prevent damage to the stone.

  • Preparation: Before any application, clear the limestone surface of loose debris using a soft brush. This helps the treatment adhere directly to the moss and algae, enhancing effectiveness.
  • Direct Application: When using liquids, whether chemical solutions or natural remedies, use a spray bottle or a garden sprayer for even distribution. This method minimizes runoff and ensures that the solution penetrates the porous surfaces of the limestone. Spray in a consistent, sweeping motion to cover all affected areas thoroughly.
  • Dwell Time: Allow the solution to sit on the surface according to the instructions specific to the chosen treatment. This dwell time is crucial for the solution to penetrate and act on the moss and algae. Avoid letting the solution dry completely, as this can make subsequent rinsing less effective.
  • Scrubbing: After the treatment has set, gently scrub the area with a soft-bristle brush. This action helps to dislodge the weakened moss and algae from the stone’s surface.
  • Rinsing: Finally, rinse the area thoroughly with clean water. A low-pressure hose is ideal for washing away all residues without eroding or saturating the limestone.

These application techniques are designed to maximize the efficiency of moss and algae removal while preserving the integrity of limestone surfaces.

Moss and Algae Post-Removal Maintenance on Limestone

Post-removal maintenance is critical in preventing the recurrence of moss and algae on limestone surfaces. Implementing consistent and effective maintenance strategies ensures the longevity and aesthetic appeal of the limestone.

  • Regular Cleaning: Schedule routine cleaning sessions to remove dirt and organic debris that contribute to moss and algae growth. Use a soft brush or cloth and a pH-neutral cleaner designed for limestone to gently clean the surfaces without damaging them.
  • Moisture Control: Since moisture is a primary factor in the growth of moss and algae, ensure that drainage around limestone installations is optimal. Fix leaks, reroute downspouts, and adjust landscaping to prevent water accumulation near limestone surfaces.
  • Sunlight Exposure: Increase sunlight exposure where possible. Trimming overhanging branches and removing obstructions can reduce shade, drying the limestone more quickly and discouraging the growth of moss and algae.
  • Protective Sealants: Apply a breathable sealant that’s appropriate for limestone. This sealant helps to repel water and contaminants, reducing the likelihood of moss and algae taking hold. Ensure the sealant is reapplied as per the manufacturer’s recommendations or as needed based on wear and exposure.

By adhering to these post-removal maintenance practices, you can significantly reduce the potential for moss and algae reformation, preserving the pristine condition of limestone surfaces.

Moss and Algae Prevention Strategies

Moss and Algae Prevention Strategies

Effective prevention of moss and algae on limestone is key to maintaining its appearance and structural integrity. Here are strategic approaches to minimize the risk of these growths:

  • Environmental Modification: Adjust the surrounding environment to decrease moisture and increase sunlight exposure. Trim overhanging branches to reduce shade and ensure that limestone surfaces receive adequate sunlight, which helps keep the stone dry and less hospitable to moss and algae.
  • Improved Drainage: Ensure proper drainage around limestone installations. Slope the ground away from limestone surfaces to prevent water accumulation. Clean gutters and downspouts regularly to avoid overflow and water spillage that could seep into limestone areas.
  • Routine Cleaning: Regularly sweep and clean limestone surfaces to remove organic materials such as leaves and twigs, which can trap moisture and provide nutrients for moss and algae. Use a pH-neutral cleaner suitable for limestone to avoid chemical damage.
  • Use of Sealants: Consider applying a high-quality sealant that is specifically formulated for limestone. This can create a barrier that resists water penetration and helps prevent the adherence of moss and algae spores to the stone surface.

By integrating these strategies, you can effectively prevent the growth of moss and algae, ensuring your limestone remains clean and attractive while avoiding the need for frequent intensive cleaning.

Conclusion: Encouragement for  Long-Term Limestone Protection

In conclusion, maintaining your limestone free from moss and algae involves thoughtful prevention, proper cleaning techniques, and regular maintenance. 

Adopt these practices to ensure your limestone surfaces remain pristine and durable. 

Start protecting your stone today; the longevity and beauty of your limestone depend on your proactive care.

Maximizing the Lifespan of Your Outdoor Sandstone Features

Outdoor sandstone features can deteriorate quickly if not properly maintained, losing their aesthetic appeal.

Factors like weather exposure, moisture, and wear take a toll, causing fading, staining, and erosion.

This article offers expert advice on maximizing the lifespan of your sandstone through effective maintenance strategies. Discover how simple practices can protect and rejuvenate your sandstone, keeping it vibrant and durable for years to come.

Understanding Outdoor Sandstone Characteristics

Understanding Outdoor Sandstone Characteristics

Sandstone is a sedimentary rock composed primarily of sand-sized mineral particles or rock fragments. Here are some critical characteristics to consider:

  • Porosity: Sandstone is notably porous, allowing it to absorb water and other fluids. This characteristic makes it susceptible to weathering and erosion, particularly in environments with freeze-thaw cycles or heavy rainfall.
  • Color Variability: Sandstone comes in a variety of colors, including browns, reds, yellows, and grays, depending on the minerals it contains. While this range offers great versatility in design, the lighter colors may show stains more readily, which can affect maintenance strategies.
  • Strength and Durability: While generally durable, the strength of sandstone can vary significantly based on its composition and the cementing material binding the grains. Stones with quartz cement are typically harder and more weather-resistant than those cemented by clay.
  • Texture and Finish: Sandstone’s texture can range from smooth to gritty, depending on its grain and cement composition. The surface can be left natural, honed, or polished; however, smoother finishes may require more frequent maintenance to retain their appearance.

Choosing the Right Type of Outdoor Sandstone

Choosing the Right Type of Outdoor Sandstone

Here’s how to select the best sandstone for your outdoor environment:

  • Density and Absorption: Opt for denser sandstone varieties, as these are less porous and more resistant to water absorption, minimizing the risk of weathering and erosion over time. High-density sandstones like quartzitic sandstone are more durable against the elements, making them suitable for areas with severe weather conditions.
  • Color Consistency: Consider the consistency of the stone’s color and how it complements your outdoor space. Sandstone colors range from whites and creams to deeper reds and browns. Darker colors may retain more heat, which can be a factor in very sunny areas.
  • Finish Type: The surface finish of sandstone affects both its look and maintenance needs. A honed or polished finish might require more care to maintain its appearance but will offer a modern and sophisticated look. Rough-textured finishes are more forgiving with stains and wear but may require regular cleaning to prevent dirt buildup.
  • Grain Size: The size of the grains in the sandstone can affect its overall strength and aesthetic. Coarser grains typically provide a rustic appearance, while finer grains are better for a sleek, smooth look.

Proper Installation Techniques for Outdoor Sandstone

Proper Installation Techniques for Outdoor Sandstone

Proper installation is essential for maximizing the lifespan of outdoor sandstone features. Here are critical techniques to ensure a durable and stable installation:

Foundation Preparation

Start with a solid foundation. Ensure that the sub-base is well-compacted and level. A mixture of gravel and sand is typically used for the base, providing adequate drainage and stability. The depth of the base should be adjusted based on the load it will bear and the local soil conditions.

Drainage Considerations

Good drainage is crucial to prevent water retention, which can lead to freeze-thaw damage in colder climates. Install the sandstone so that it slopes away from structures to facilitate water runoff. In areas with heavy rainfall, consider incorporating a drainage system beneath the stone to help manage excess water.

Mortar and Jointing

Use a flexible mortar suitable for outdoor and possibly freeze-thaw conditions. 

Mortar should be applied evenly to avoid air pockets, which can cause water to accumulate and weaken the structure. For paving, ensure joints between the stones are filled with sand or a jointing compound that allows for some movement without cracking.

Sealing

Although not always necessary, applying a sealant can protect the sandstone from stains and reduce porosity, enhancing its resistance to weathering. Choose a breathable sealant that won’t trap moisture inside the stone.

Regular Cleaning and Maintenance of Outdoor Sandstone

Regular Cleaning and Maintenance of Outdoor Sandstone

Here’s a detailed guide on how to keep your sandstone in top condition:

  • Routine Cleaning: Regularly sweep or rinse your sandstone to remove debris, dirt, and leaves that can accumulate and cause staining. For a deeper clean, use a mild detergent mixed with water and a soft brush to gently scrub the surface. Avoid using harsh chemicals or pressure washers, which can erode the stone’s surface.
  • Stain Management: Address spills and stains immediately to prevent them from setting in. Organic stains from leaves or berries can be cleaned with a solution of 12% hydrogen peroxide and a few drops of ammonia. Oil-based stains may require a poultice to draw out the oil from the pores of the stone.
  • Sealing: Consider sealing sandstone to enhance its resistance to weathering and staining. A breathable sealant is ideal as it allows moisture within the stone to evaporate. Reapply sealant every two to five years, depending on exposure to weather elements and foot traffic.
  • Regular Inspections: Periodically inspect your sandstone for signs of wear or damage, such as chipping or cracking. Early detection of minor issues can prevent more significant problems down the line.

Protecting Outdoor Sandstone Against Weathering and Environmental Damage

Protecting Outdoor Sandstone Against Weathering and Environmental Damage

Protecting outdoor sandstone from weathering and environmental damage is vital for preserving its structural integrity and aesthetic. Here are effective strategies:

  • Sealing: Apply a high-quality sealant to create a protective barrier against moisture, which is a primary cause of weathering. Sealants help prevent the penetration of water and pollutants, reducing the risk of erosion and staining. Opt for a breathable sealant to allow trapped moisture to escape, preventing damage from within.
  • Positioning: Consider the placement of sandstone features. Avoid areas where water pools or where they are directly exposed to harsh weather elements. Use strategic landscaping to divert water away from the sandstone and provide shade to minimize exposure to intense sunlight.
  • Regular Maintenance: Keep the sandstone clean from organic materials like leaves and twigs, which can retain moisture and cause staining. Periodically check for and repair any cracks or chips that could allow water ingress, exacerbating freeze-thaw cycles and erosion.

Preventing Biological Growth on Outdoor Sandstone

Preventing Biological Growth on Outdoor Sandstone

Preventing biological growth, such as moss, algae, and lichen, on outdoor sandstone is essential to maintain both its appearance and structural integrity. Here are targeted strategies to help you manage this issue:

  • Regular Cleaning: Keep the sandstone clean and free of debris. Use a soft brush and a solution of mild detergent and water to gently clean the stone. This routine helps prevent spores from taking hold and thriving on the surface.
  • Improve Drainage: Ensure that the area around your sandstone features has good drainage. Stagnant water encourages the growth of moss and algae. If necessary, adjust the landscaping to promote better water runoff away from the stone surfaces.
  • Sun Exposure: Whenever possible, allow for maximum sun exposure to the sandstone areas. Sunlight is a natural deterrent to moss and algae growth because these organisms typically thrive in damp, shaded conditions.
  • Use of Fungicides: For persistent biological growth, consider the application of a fungicide designed for use on stone. Choose a product that is safe for sandstone and apply according to the manufacturer’s instructions to avoid discoloration or damage to the stone.
  • Sealing: Apply a breathable sealant that includes anti-fungal properties to help prevent spores from penetrating the porous stone and establishing growth

Avoiding Harsh Cleaning Methods of Outdoor Sandstone

Avoiding Harsh Cleaning Methods of Outdoor Sandstone

Preserving outdoor sandstone involves using gentle cleaning methods that protect its porous surface from damage. Harsh cleaning techniques can accelerate erosion and compromise the stone’s natural beauty. Here’s how to safely care for your sandstone:

  • Avoid High-Pressure Washing: High-pressure water jets can erode the surface of sandstone, stripping away its protective layers. Instead, use a garden hose with a gentle spray to wash off dirt and debris.
  • Steer Clear of Acidic Cleaners: Acid-based cleaners, including vinegar and some commercial stone cleaners, can etch sandstone, causing permanent damage. Always use pH-neutral cleaning solutions designed for use on natural stone.
  • Soft Cleaning Tools: Use a soft-bristled brush or sponge for cleaning. Hard brushes or abrasive tools can scratch the sandstone surface, making it more susceptible to staining and weathering.
  • Spot Cleaning Stains: For localized stains, apply a poultice specifically formulated for stone. This method draws out the stain without the need for vigorous scrubbing that might harm the sandstone.
  • Routine Maintenance: Regular, gentle cleaning is preferable to less frequent, more aggressive treatments. This approach helps maintain the stone’s integrity and appearance without exposing it to harsh methods.

Inspecting and Repairing Outdoor Sandstone Damage

Inspecting and Repairing Outdoor Sandstone Damage

Regular inspection and timely repair of outdoor sandstone damage are crucial for maintaining its longevity and appearance. Here’s how to effectively manage this:

  • Routine Inspection: Periodically inspect your sandstone features for signs of wear, such as cracks, chips, or erosion. Pay attention to areas prone to water accumulation, as these are more susceptible to damage.
  • Immediate Action: Address any issues promptly to prevent them from worsening. Small cracks or chips can be repaired using a suitable stone epoxy or filler. Ensure the repair material matches the color and texture of the surrounding stone for a seamless finish.
  • Professional Assistance: For extensive damage or structural concerns, seek professional help. Stone restoration experts can assess the damage and recommend appropriate repair methods to restore the sandstone’s integrity.

Conclusion: Enjoying Long-Lasting Outdoor Sandstone Features

With diligent maintenance and proactive care, your outdoor sandstone features can withstand the test of time while retaining their natural beauty. 

Don’t wait until issues arise; take proactive steps now to preserve and protect your investment, ensuring years of enjoyment in your outdoor space.

Eco-Friendly Approaches to Sandstone Walls Care and Maintenance

Maintaining sandstone walls can be a challenge, especially when traditional methods harm the environment. 

Chemical cleaners and harsh treatments not only degrade the stone but also contribute to ecological damage. Homeowners often face the dilemma of choosing between preservation and sustainability. 

However, there’s a better way. By adopting eco-friendly approaches to care and maintenance, we can protect both our sandstone walls and the planet. In this article, we’ll explore sustainable solutions to keep your sandstone walls pristine while minimizing environmental impact.

Sandstone Composition and Vulnerabilities

Understanding Sandstone Composition and Vulnerabilities

Understanding the composition and vulnerabilities of sandstone is crucial for effective care and maintenance. Sandstone is primarily composed of quartz grains, cemented together by various minerals like silica, calcite, or iron oxide

Its porous nature makes it susceptible to water absorption, leading to erosion, staining, and biological growth.

One vulnerability is its sensitivity to acidic substances, which can cause etching and discoloration. Additionally, sandstone can be prone to spalling, especially in freezing climates, where water expands within its pores, causing the surface to flake off.

To mitigate these vulnerabilities, it’s essential to choose cleaning agents with a neutral pH to avoid damaging the stone. 

Sealing the surface with a breathable, water-repellent sealant helps prevent moisture infiltration while allowing the stone to breathe. Regular inspections for signs of damage, such as cracks or efflorescence, enable early intervention and preservation of the sandstone’s integrity.

Eco-Friendly Sandstone Walls Cleaning Methods

Eco-Friendly Sandstone Walls Cleaning Methods
  1. Vinegar Solution: Dilute vinegar with water and apply using a soft brush to remove dirt and stains effectively.
  2. Lemon Juice: Mix lemon juice with water for spot-treating stains or gentle overall cleaning, thanks to its citric acid content.
  3. Baking Soda Paste: Create a paste with water and baking soda to tackle stubborn stains or biological growth, using its abrasive texture for effective cleaning.
  4. Test First: Always test any cleaning solution on a small area to ensure compatibility and avoid damaging the sandstone or the environment.

Preventive Sandstone Walls Maintenance Strategies

Preventive Sandstone Walls Maintenance Strategies
  • Regular Inspection: Conduct regular visual inspections of the sandstone walls to identify any signs of damage. Look for cracks, chips, or efflorescence, which may indicate underlying issues. 
  • Keep Walls Clean: Regularly remove dirt, dust, and organic matter from the surface of the walls. This prevents staining and reduces the likelihood of biological growth such as moss or algae. Use a soft brush or cloth to gently clean the walls without causing abrasion or damage to the stone surface.
  • Vegetation Management: Trim vegetation such as bushes, trees, or vines that grow near the walls. Overhanging branches or dense vegetation can trap moisture against the walls, leading to increased moisture retention and potential damage. Keeping vegetation trimmed helps promote airflow and reduces the risk of structural damage caused by roots or falling branches.
  • Sealant Application: Apply a breathable sealant specifically formulated for natural stone to the surface of the sandstone walls. A breathable sealant helps protect the stone from water infiltration while still allowing moisture to escape, preventing issues such as efflorescence or moisture damage. Follow the manufacturer’s instructions for proper application and reapplication as needed.
  • Avoid Heavy Loads: Avoid placing heavy objects against or on the sandstone walls, as this can exert excessive pressure and lead to structural damage over time. Additionally, avoid leaning ladders or other equipment against the walls, as this can cause scratches or gouges in the stone surface. Be mindful of any activities that could potentially damage the walls and take precautions to prevent them.

Sustainable Repair Practices

Sustainable Repair Practices
  • Eco-Friendly Materials: Use lime-based mortars or natural stone fillers for repairs to reduce environmental impact and ensure compatibility with the sandstone.
  • Thorough Cleaning: Before repairing, clean the damaged area thoroughly to remove debris, ensuring proper adhesion of repair materials. Employ gentle cleaning methods to avoid further harm to the stone surface.
  • Seamless Integration: When applying mortar or filler, strive for a seamless blend with the existing stone to maintain the wall’s aesthetic appeal. Match the color and texture of the repair materials for a cohesive finish.
  • Long-Term Sustainability: Consider the durability and weather resistance of repair materials to minimize the need for future interventions. Opting for sustainable solutions promotes the longevity of sandstone walls while contributing to environmental conservation efforts.

Preservation Through Conservation

Preservation Through Conservation

Preservation through conservation involves protecting natural resources like sandstone walls and their environment sustainably, ensuring their integrity for future generations while minimizing ecological harm.

  • Habitat Preservation: Maintain a healthy ecosystem around the walls by preserving vegetation and wildlife, reducing susceptibility to environmental stressors like erosion.
  • Erosion Control Measures: Implement strategies such as retaining walls, erosion-resistant vegetation, and mulching to prevent soil loss around the base of the walls.
  • Limit Human Activity: Reduce disturbances near the walls by establishing designated paths or viewing areas, minimizing trampling of vegetation and soil erosion.
  • Regular Monitoring: Conduct routine inspections to identify signs of degradation or stress, enabling prompt intervention to prevent further deterioration.
  • Conservation Prioritization: By prioritizing conservation practices, homeowners contribute to the preservation of sandstone walls and their natural surroundings for future generations.

Harnessing Renewable Energy for Sandstone Walls Maintenance

Harnessing Renewable Energy for Sandstone Walls Maintenance

Harnessing renewable energy for sandstone wall maintenance offers an eco-friendly approach to power tools and equipment needed for care and upkeep. Solar energy, in particular, presents a viable option for powering electric tools such as pressure washers or lighting systems used during maintenance tasks. 

By installing solar panels on nearby structures, homeowners can tap into clean and sustainable energy sources to reduce reliance on fossil fuels and minimize carbon emissions. 

Additionally, utilizing solar-powered lighting along the walls can enhance visibility during inspections or maintenance activities without increasing energy consumption.

Community Engagement and Collaboration

Community Engagement and Collaboration

Community engagement and collaboration play a vital role in promoting eco-friendly approaches to sandstone wall care and maintenance. Establishing partnerships with local community organizations, conservation groups, or governmental agencies can provide valuable resources and support for preservation efforts. 

Hosting workshops, seminars, or volunteering events allows community members to learn about sustainable practices and participate in hands-on conservation activities.

Furthermore, engaging with neighboring property owners fosters a sense of shared responsibility for the preservation of sandstone walls and their surrounding environment.

Collaborating on maintenance projects, sharing resources, or coordinating efforts for erosion control can enhance the effectiveness of conservation initiatives.

Community involvement also promotes awareness and appreciation of the cultural and historical significance of sandstone walls, fostering a collective commitment to their protection and preservation for future generations. 

Monitoring and Evaluation of Sandstone Walls

Monitoring and Evaluation of Sandstone Walls

Monitoring and evaluation are essential aspects of sandstone walls care and maintenance to ensure their long-term preservation. 

Regular monitoring involves inspecting the walls for signs of damage, deterioration, or environmental stressors such as erosion or biological growth. 

This includes visually assessing the condition of the stone surface, checking for cracks, chips, or discoloration, and identifying any areas in need of repair or intervention.

Evaluation involves analyzing the effectiveness of maintenance strategies and identifying areas for improvement.

This may include assessing the performance of cleaning methods, sealants, or repair materials in terms of their durability, compatibility with the sandstone, and environmental impact.

Additionally, evaluating the success of erosion control measures or conservation efforts helps refine future conservation strategies and optimize resource allocation.

Conclusion

Embracing eco-friendly practices is paramount for preserving sandstone walls and our environment. Let’s commit to sustainable cleaning methods, habitat conservation, and community collaboration. Together, we can safeguard these historical treasures for future generations. Take action today to ensure the longevity of our sandstone heritage.

How to Enhance the Colour of Your Jasper Limestone Naturally

Are you frustrated with the dull appearance of your Jasper limestone?

Over time, exposure to elements can rob it of its vibrant colour, leaving it lackluster and unappealing.

Fortunately, there are natural methods to revitalize its hues and restore its beauty. In this article, we’ll explore effective techniques to enhance the color of your Jasper limestone, bringing back its natural brilliance without resorting to harsh chemicals or expensive treatments.

Understanding Jasper Limestone 

Understanding Jasper Limestone 

Jasper limestone is a sedimentary rock renowned for its unique blend of colors and patterns, making it a popular choice for both interior and exterior applications. 

Composed primarily of calcium carbonate, it features varying concentrations of iron oxides and organic matter, which contribute to its distinctive hues ranging from reds and browns to yellows and greens. 

The presence of these minerals also influences the stone’s hardness and durability, making it suitable for a wide range of architectural and decorative purposes.

Geologically, jasper limestone forms through the accumulation and compaction of marine organisms, such as coral and shell fragments, over millions of years. This process, combined with subsequent pressure and mineralization, results in the characteristic layering and veining patterns seen in jasper limestone.

One of the key factors affecting the colour of jasper limestone is its exposure to environmental factors like sunlight, moisture, and atmospheric pollutants. Over time, these elements can cause the colours to fade or become muted, detracting from the stone’s natural beauty.

Importance of Natural Colour Jasper Limestone Enhancement

Importance of Natural Color Jasper Limestone Enhancement

Preserving the natural color of jasper limestone is paramount for maintaining the aesthetic appeal and integrity of architectural and decorative installations. 

Unlike artificial color enhancement methods, which may produce temporary or unnatural results, natural techniques ensure that the stone’s inherent beauty is accentuated without compromising its authenticity.

Enhancing the color of jasper limestone naturally not only revitalizes its appearance but also contributes to its longevity and durability. By utilizing non-invasive methods that work in harmony with the stone’s composition, you can avoid potential damage or deterioration caused by harsh chemicals or invasive procedures.

Furthermore, natural colour enhancement techniques align with sustainable practices, minimizing environmental impact and promoting eco-friendly alternatives to traditional stone treatments. This is especially important in today’s eco-conscious society, where consumers prioritize environmentally responsible choices in both design and construction projects.

Cleaning and Preparing the Jasper Limestone Surface

Cleaning and Preparing the Jasper Limestone Surface
  • Regular Cleaning: Keep the jasper limestone surface clean by regularly removing dirt, dust, and debris. Utilize a soft brush or cloth to prevent scratching the surface.
  • Inspect for Damage: Periodically check the limestone for any signs of new chips, cracks, or deterioration. Promptly address any issues to prevent further damage.
  • Sealing and Waterproofing: Consider applying a sealant or waterproofing product to protect the jasper limestone from moisture penetration, which can lead to damage over time. Follow the manufacturer’s instructions for proper application.
  • Avoid Harsh Chemicals: When cleaning or maintaining the limestone, steer clear of harsh chemicals or abrasive cleaners that may harm the surface. Opt for mild, pH-neutral cleaners instead.
  • Address Drainage Issues: Ensure adequate drainage around the jasper limestone to prevent water from pooling or seeping into the foundation. Promptly resolve any drainage problems to prevent water damage.
  • Professional Inspection: Schedule periodic inspections of the jasper limestone by a professional to identify potential issues early and address them before they escalate.

Applying Natural Enhancers

Applying Natural Enhancers

Applying natural enhancers to sandstone walls can enhance their appearance and provide additional protection. Here’s what you need to know:

  • Sealers: Natural sealers, such as linseed oil or tung oil, can penetrate the surface of the sandstone, providing protection against moisture and staining without altering its natural appearance.
  • Enhancing Sealers: Some sealers are specifically formulated to enhance the natural color and texture of sandstone while providing protection. These sealers can deepen the color of the stone and highlight its natural features.
  • Application: Follow the manufacturer’s instructions for applying natural enhancers to ensure proper coverage and penetration. Use a brush or roller to apply the sealer evenly, and allow it to dry thoroughly before exposing the wall to moisture.
  • Maintenance: Periodically reapply natural enhancers to maintain the protection and appearance of the sandstone walls. The frequency of reapplication will depend on factors such as weather exposure and the porosity of the stone.

Rubbing Techniques for Intensifying Jasper Limestone Color

Rubbing Techniques for Intensifying Jasper Limestone Color

Rubbing techniques can intensify the color of jasper limestone, enhancing its natural beauty. Follow these steps for effective color intensification:

  • Surface Preparation: Begin by cleaning the limestone surface to remove any dirt, dust, or debris. Use a mild detergent and water, and allow the surface to dry completely.
  • Choose the Right Rubbing Agent: Select a rubbing agent that is suitable for limestone surfaces. Options include chalk, pumice stone, or fine-grit sandpaper.
  • Test in a Small Area: Before proceeding, test the rubbing agent in a small, inconspicuous area to ensure it achieves the desired result without causing damage to the limestone.
  • Rubbing Technique: Apply the rubbing agent to the limestone surface and gently rub in circular motions. Apply consistent pressure to gradually intensify the color of the limestone. Take care not to rub too vigorously, as this could damage the surface.
  • Finish and Protect: Once you’ve achieved the desired color intensity, clean the surface again to remove any residue from the rubbing agent. Consider applying a sealant or protective coating to preserve the enhanced color and protect the limestone from future damage.

Sunlight Exposure for Jasper Limestone Natural Aging

Sunlight Exposure for Jasper Limestone Natural Aging

Sunlight exposure plays a crucial role in the natural aging process of jasper limestone, influencing its color and texture over time. Here’s what you need to know:

  • Color Changes: Direct sunlight exposure can cause jasper limestone to undergo color changes, typically becoming lighter or more vibrant over time. This natural aging process adds character and depth to the stone’s appearance.
  • Texture Alterations: Sunlight exposure also affects the texture of jasper limestone, gradually smoothing rough surfaces and enhancing its natural patina. This can result in a more polished and refined appearance, enhancing the overall aesthetic appeal of the stone.
  • Protection Considerations: While sunlight exposure is beneficial for the natural aging of jasper limestone, prolonged exposure to intense sunlight can cause fading or discoloration. Consider providing shading or using protective coatings to minimize the risk of damage and preserve the stone’s beauty.

Jasper Limestone Maintenance and Preservation Tips

Jasper Limestone Maintenance and Preservation Tips

Here are some tips to help you care for your jasper limestone:

  • Regular Cleaning: Clean the surface of the jasper limestone regularly to remove dirt, dust, and debris. Use a mild detergent and water solution, and avoid harsh chemicals that could damage the stone.
  • Avoid Abrasive Cleaners: Refrain from using abrasive cleaners or scrubbing brushes that could scratch or erode the surface of the limestone. Opt for gentle cleaning methods to preserve its natural beauty.
  • Sealant Application: Consider applying a sealant to protect the jasper limestone from moisture, stains, and other environmental damage. Choose a sealant specifically formulated for limestone and follow the manufacturer’s instructions for application.
  • Avoid Direct Sunlight: Minimize direct sunlight exposure to prevent fading or discoloration of the jasper limestone. Use shading or protective coverings to shield the stone from intense sunlight, especially in outdoor settings.
  • Professional Inspection: Periodically have the jasper limestone inspected by a professional to identify any potential issues or damage. Prompt repairs and maintenance can prevent further deterioration and prolong the life of the stone.

Conclusion: 

Harnessing natural methods to enhance the colour of your jasper limestone can yield stunning results. Embrace sunlight exposure and gentle rubbing techniques to bring out the stone’s natural beauty. Take action now to transform your jasper limestone into a captivating focal point for your space.

Tips for Repairing Chips and Cracks in Sandstone Walls

Damaged sandstone walls detract from your property’s beauty and can worsen over time, leading to structural issues.  

Ignoring chips and cracks in sandstone can result in costly repairs and compromise the integrity of your walls.  

Learn effective techniques for repairing sandstone damage to maintain the aesthetics and stability of your walls.

Assessing the Sandstone Walls Damage

Assessing the Sandstone Walls Damage
  • Visual Inspection: Examine the surface for visible chips, cracks, and weathering. Use a flashlight to check for hidden damage.
  • Severity Assessment: Determine the extent of the damage, from minor surface flaws to deeper cracks or structural issues.
  • Location Analysis: Note where the damage is concentrated and consider environmental factors like moisture and sunlight exposure.
  • Identifying Causes: Look for underlying factors contributing to the damage, such as nearby trees or poor drainage.

Preparation for Sandstone Walls Repair

Preparation for Sandstone Walls Repair

Preparation is key before repairing chips and cracks in sandstone walls. Here’s how to get ready:

  • Clean the Surface: Begin by thoroughly cleaning the damaged area using a mild detergent and water. Remove any dirt, debris, or loose particles that could interfere with the repair process.
  • Dry the Area: Allow the cleaned surface to dry completely before proceeding with repairs. Moisture can affect the adhesion of repair materials, so ensure the area is dry to achieve optimal results.
  • Choose the Right Repair Material: Select a suitable repair material based on the severity and location of the damage. For minor chips and cracks, epoxy or acrylic-based fillers work well, while larger cracks may require mortar or specialized sandstone repair products.
  • Gather Tools and Equipment: Collect all necessary tools and equipment for the repair job, including gloves, safety glasses, a putty knife or trowel, and any specific tools recommended for the chosen repair material.
  • Protect Surrounding Areas:Use painter’s tape or plastic sheeting to protect surrounding surfaces from accidental damage or overspill during the repair process.

Choosing the Right Sandstone Walls Repair Materials

Choosing the Right Sandstone Walls Repair Materials

Selecting the appropriate repair materials is essential for effectively fixing chips and cracks in sandstone walls. Consider the following factors to choose the right products:

  • Type of Damage:Assess the extent and nature of the damage to determine the suitable repair material. Epoxy or acrylic-based fillers are ideal for minor chips and hairline cracks, while larger cracks may require mortar or specialized sandstone repair compounds.
  • Compatibility: Ensure that the chosen repair material is compatible with sandstone. Some products may not adhere well to the porous surface of sandstone or may cause discoloration, so it’s crucial to select products specifically designed for sandstone repair.
  • Color Matching: Opt for repair materials that closely match the color and texture of your sandstone walls to achieve a seamless finish. Many manufacturers offer a variety of colors and textures to match different types of sandstone.
  • Ease of Application: Choose repair materials that are easy to apply and work with, especially if you’re tackling the repair job yourself. Follow the manufacturer’s instructions carefully for best results.
  • Durability: Prioritize durability when selecting repair materials to ensure long-lasting results. Look for products that are weather-resistant and designed to withstand the elements for years to come.

Repair Techniques for Chips

Repair Techniques for Chips

Repairing chips in sandstone walls requires careful attention to detail to achieve a seamless finish. Follow these steps for effective chip repair:

  • Clean the Area: Begin by thoroughly cleaning the chip and its surrounding area to remove dirt, debris, and loose particles. Use a mild detergent and water, and allow the area to dry completely.
  • Fill the Chip:Apply a suitable repair material to fill the chip, such as epoxy or acrylic-based filler. Use a putty knife or trowel to spread the filler evenly over the damaged area, ensuring it fills the chip completely.
  • Smooth the Surface: Once the filler is applied, use a putty knife or wet finger to smooth the surface and blend it with the surrounding sandstone. Work carefully to achieve a seamless finish.
  • Allow to Cure: Follow the manufacturer’s instructions for curing time, allowing the repair material to fully harden and bond with the sandstone.
  • Sand and Finish: Once the repair material is fully cured, lightly sand the repaired area to smooth out any rough edges or imperfections. Finish by applying a matching sealant or finish to protect the repaired chip and maintain the appearance of the sandstone wall.

Repair Techniques for Cracks

Repair Techniques for Cracks

Repairing cracks in sandstone walls requires careful attention to ensure a strong and long-lasting repair. Follow these steps for effective crack repair:

  • Clean and Prepare the Crack: Start by cleaning the crack and its surrounding area to remove dirt, debris, and loose particles. Use a brush or compressed air to ensure the crack is free from any contaminants.
  • Fill the Crack: Choose a suitable repair material for filling the crack, such as mortar or specialized sandstone repair compound. Apply the material into the crack using a putty knife or trowel, ensuring it fills the entire crack and is level with the surface of the wall.
  • Press and Pack: Press the repair material firmly into the crack to ensure a strong bond with the surrounding sandstone. Use a tool or your fingers to pack the material tightly, removing any air pockets or voids.
  • Smooth and Blend: Once the crack is filled, use a wet finger or tool to smooth the surface and blend the repair material with the surrounding sandstone. Work carefully to achieve a seamless finish.
  • Allow to Cure: Follow the manufacturer’s instructions for curing time, allowing the repair material to fully harden and bond with the sandstone.
  • Finish and Seal: After the repair material has cured, sand the repaired area lightly to smooth out any rough edges. Finish by applying a matching sealant or finish to protect the repair and maintain the appearance of the sandstone wall.

Complex Sandstone Walls Repair Scenarios

Complex Sandstone Walls Repair Scenarios

In more complex scenarios involving extensive damage or structural issues in sandstone walls, professional intervention may be necessary. Here’s how to approach such situations:

  • Structural Assessment: Begin by assessing the extent of the damage and any underlying structural issues. Consult with a structural engineer if needed to determine the best course of action.
  • Specialized Repair Techniques: Complex repairs may require specialized techniques such as pinning, stitching, or reinforcing with steel rods or anchors. These methods can help stabilize the wall and prevent further deterioration.
  • Professional Restoration: In cases where the damage is severe or beyond DIY repair, it’s advisable to seek professional assistance from experienced stonemasons or restoration experts. They have the expertise and equipment to tackle complex repair projects safely and effectively.
  • Preservation Measures: Once repairs are completed, consider implementing preservation measures to protect the sandstone walls from future damage. This may include applying protective coatings, improving drainage systems, or addressing underlying issues contributing to the damage.

Safety Considerations for Sandstone Walls

Safety Considerations for Sandstone Walls

When repairing chips and cracks in sandstone walls, prioritize safety to prevent accidents and ensure a successful outcome. Here are key safety considerations:

  • Protective Gear: Wear appropriate safety gear, including gloves, safety glasses, and a dust mask, to shield yourself from debris and dust during the repair process.
  • Stable Work Surface: Ensure the work area is stable and secure to prevent trips and falls. Use ladders or scaffolding if necessary, and avoid working on unstable or uneven surfaces.
  • Tool Safety: Use tools and equipment properly to avoid injury. Keep sharp tools, such as chisels or putty knives, away from your body and use caution when handling heavy materials.
  • Chemical Exposure:Follow safety guidelines when using repair materials, such as epoxy or mortar, to minimize exposure to harmful chemicals. Work in a well-ventilated area and wear appropriate respiratory protection if needed.
  • Electrical Hazards: Be aware of any electrical hazards near the work area, such as power lines or outlets. Use insulated tools and avoid working in wet conditions to reduce the risk of electric shock.
  • Emergency Preparedness: Have a first aid kit nearby and know how to respond to emergencies such as cuts, falls, or chemical exposure.

Post-Repair Sandstone Walls Maintenance

Post-Repair Sandstone Walls Maintenance

After repairing chips and cracks in sandstone walls, proper maintenance is essential to preserve the repairs and prolong the lifespan of the walls. Here’s what you need to know:

  • Regular Cleaning: Keep the repaired areas and the entire sandstone wall clean by regularly removing dirt, dust, and debris. Use a soft brush or cloth to avoid scratching the surface.
  • Inspect for Damage: Periodically inspect the walls for any signs of new chips, cracks, or deterioration. Promptly address any issues to prevent them from worsening over time.
  • Sealing and Waterproofing: Consider applying a sealant or waterproofing product to protect the sandstone from moisture penetration, which can cause damage over time. Follow the manufacturer’s instructions for application.
  • Avoid Harsh Chemicals: When cleaning or maintaining the walls, avoid using harsh chemicals or abrasive cleaners that could damage the sandstone surface. Opt for mild, pH-neutral cleaners instead.
  • Address Drainage Issues: Ensure proper drainage around the sandstone walls to prevent water from pooling or seeping into the foundation. Address any drainage problems promptly to avoid water damage.
  • Professional Inspection: Periodically have the sandstone walls inspected by a professional to identify any potential issues early on and address them before they escalate.

Conclusion

By following these expert tips for repairing chips and cracks in sandstone walls, you can restore their beauty and structural integrity with confidence.

Don’t wait for further deterioration. Act now to protect and maintain your sandstone walls for long-lasting durability and aesthetic appeal.

How to Protect Your Stone Patio From Weather Extremes

Stone patios endure relentless weather extremes, leading to erosion and deterioration over time.

Harsh sunlight, heavy rain, and freezing temperatures can cause cracks, fading, and discoloration, robbing your patio of its charm and longevity.

Explore our guide to discover practical strategies and expert tips for protecting your stone patio from weather extremes. With the right approach, you can safeguard your outdoor space and enjoy its beauty for years to come.

Understanding Stone Patio Materials

Understanding Stone Patio Materials

Understanding the various materials used for stone patios is crucial for effective protection against weather extremes. Common materials include:

  • Flagstone: Known for its natural, irregular shapes, flagstone offers a rustic charm to patios. It’s durable and resistant to weathering but may require sealing to prevent staining.
  • Slate: Slate is prized for its elegant appearance and durability. It’s resistant to moisture and freezing temperatures, making it suitable for outdoor use in various climates.
  • Limestone: Limestone is a popular choice for patios due to its affordability and natural beauty. However, it’s more susceptible to weathering and may require regular maintenance to prevent erosion and discoloration.
  • Granite: Granite is incredibly durable and resistant to weathering, making it an ideal choice for outdoor patios. It’s resistant to moisture, staining, and scratching, but it can be more expensive than other options.

Weather Extremes and Their Impact on Stone Patios

Weather Extremes and Their Impact on Stone Patios

Weather extremes can have a significant impact on stone patios, leading to various forms of damage over time. 

Exposure to harsh sunlight can cause fading and discoloration, especially on lighter-colored stones. Additionally, prolonged exposure to moisture from heavy rain or snow can lead to erosion, staining, and the growth of mold or mildew. 

Freezing temperatures can exacerbate these issues by causing expansion and contraction of the stone, leading to cracks and fractures.

Furthermore, wind-blown debris during storms can scratch and chip the surface of the patio, compromising its integrity. In regions prone to extreme weather events like hurricanes or tornadoes, the risk of severe damage to stone patios increases significantly.

Protective Measures for Stone Patios 

Protective Measures for Stone Patios 

Protecting your stone patio from weather extremes requires implementing various protective measures to maintain its durability and aesthetic appeal. Here are essential strategies to consider:

  • Sealing: Apply a high-quality penetrating sealer to the stone patio surface to create a protective barrier against moisture, stains, and UV damage. Reapply the sealer periodically as recommended by the manufacturer.
  • Regular Cleaning: Keep the patio clean by regularly sweeping away debris and washing the surface with a gentle detergent and water. Avoid using harsh chemicals or abrasive cleaners that can damage the stone.
  • Shade Structures: Install shade structures such as umbrellas, awnings, or pergolas to provide protection from direct sunlight, reducing the risk of fading and discoloration.
  • Drainage: Ensure proper drainage to prevent water from pooling on the patio surface, which can lead to erosion and staining. Install drainage systems or slope the patio surface away from the house to facilitate water runoff.
  • Maintenance: Inspect the patio regularly for signs of damage or wear, such as cracks, chips, or loose stones. Address any issues promptly to prevent further deterioration.

Regular Maintenance and Inspection of Stone Patios

Regular Maintenance and Inspection of Stone Patios

Regular maintenance and inspection are essential for preserving the longevity and beauty of stone patios, especially in the face of weather extremes. Here’s how to effectively maintain and inspect your patio:

  • Scheduled Cleaning: Regularly sweep or rinse the patio surface to remove dirt, debris, and organic matter that can cause staining and deterioration.
  • Inspect for Damage: Routinely inspect the patio for signs of damage such as cracks, chips, or loose stones. Address any issues promptly to prevent further deterioration.
  • Weed Control: Remove any weeds or vegetation growing between the stones to prevent them from causing structural damage or lifting the stones.
  • Sealing Maintenance: Monitor the condition of the sealant applied to the patio surface and reapply as needed to maintain its protective barrier against moisture and stains.
  • Pest Prevention: Check for signs of pest infestation, such as ant colonies or termite activity, and take appropriate measures to eliminate them before they cause damage to the patio.

Seasonal Care Tips for Stone Patios

Seasonal Care Tips for Stone Patios

Seasonal care is crucial for maintaining the integrity of stone patios throughout the year, especially in regions with varying weather conditions. Here are seasonal care tips to keep your stone patio in optimal condition:

  • Spring: Inspect the patio for any damage caused by winter frost, such as cracks or lifting stones. Clean the surface thoroughly to remove debris and prepare for outdoor activities.
  • Summer: Protect the patio from intense sunlight by installing shade structures or using patio umbrellas. Regularly sweep or rinse the surface to remove dirt and prevent stains from setting in.
  • Fall: Clear fallen leaves and debris from the patio to prevent staining and mold growth. Trim nearby vegetation to prevent overhanging branches from damaging the patio surface.
  • Winter: Protect the patio from freezing temperatures and moisture by applying a fresh coat of sealant before the onset of winter. Use patio heaters or fire pits to extend outdoor enjoyment during colder months.

Proper Stone Patio Installation Practices 

Proper Stone Patio Installation Practices 

Proper installation practices are paramount for ensuring the longevity and durability of a stone patio, especially when it comes to withstanding weather extremes. Here’s what to consider for a successful installation:

  • Site Preparation: Start with thorough site preparation, including proper grading and leveling to ensure water drainage away from the patio area. This prevents pooling and potential water damage.
  • Base Material: Use a sturdy base material, such as crushed stone or gravel, to provide a stable foundation for the patio. Compacting the base material thoroughly helps prevent settling and shifting over time.
  • Edge Restraints: Install edge restraints, such as concrete or metal borders, to prevent the patio stones from shifting or spreading outwards. This helps maintain the integrity of the patio surface, especially in areas prone to freeze-thaw cycles.
  • Proper Jointing: Use a polymeric sand or mortar mix to fill the joints between the patio stones. This helps prevent weed growth, enhances stability, and reduces water penetration, ultimately extending the patio’s lifespan.
  • Sealing: Apply a high-quality sealant to the patio surface after installation to protect the stones from moisture, stains, and UV damage.

Stone Patio Landscaping Considerations

Stone Patio Landscaping Considerations

When landscaping around a stone patio, several considerations can help enhance its beauty and resilience against weather extremes:

  • Plant Selection: Choose plants that are suitable for your climate and can withstand weather extremes. Opt for drought-resistant species to minimize watering and erosion risks.
  • Placement: Position plants strategically to provide shade and wind protection for the patio. Trees and shrubs can act as natural barriers, shielding the patio from harsh sunlight and strong winds.
  • Grading: Ensure proper grading around the patio to direct water away from the area and prevent pooling or erosion. Incorporate swales or drainage systems to channel water safely off the property.
  • Hardscaping Features: Integrate hardscaping elements such as retaining walls, raised beds, or decorative rocks to add visual interest and provide additional protection against erosion and weather-related damage.
  • Mulching: Apply a layer of mulch around plants to conserve moisture, regulate soil temperature, and reduce weed growth. Organic mulches also improve soil structure and fertility over time.

Conclusion: Regular Proactive Maintenance

Ensure your stone patio stands the test of time against weather extremes with proactive protection measures. 

From proper installation to seasonal care and landscaping considerations, every step counts. Implement these strategies today to safeguard your outdoor oasis and enjoy its beauty for years to come.

Sustainable Stone Care Practices

Traditional stone care practices often rely on chemical-laden cleaners and energy-intensive methods, contributing to environmental degradation.

Harmful chemicals leach into soil and water, while excessive water usage depletes resources and leads to pollution. Additionally, energy-intensive processes generate emissions and degrade air quality.

Embracing sustainable stone care practices mitigates these environmental impacts. By utilizing eco-friendly products, innovative water-saving techniques, and advanced machinery, quality maintenance can be achieved while preserving the planet’s health.

Understanding Environmental Impact 

Understanding Environmental Impact 

Understanding the environmental impact of traditional stone care practices is crucial for adopting more sustainable methods

Conventional techniques often rely on the use of chemical-based cleaners that contain volatile organic compounds (VOCs) and other harmful substances. These chemicals can leach into the soil and waterways, contributing to pollution and negatively affecting wildlife and aquatic ecosystems.

Additionally, the processes involved in stone maintenance, such as cutting and polishing, are typically energy-intensive and generate a significant amount of dust and debris, which can lead to air quality issues and respiratory problems.

Water usage is another critical factor. Traditional stone care methods require large quantities of water, which not only depletes this vital resource but also results in runoff that carries pollutants into our water systems.

The cumulative effect of these practices can be substantial, leading to the degradation of local environments and contributing to the broader impacts of climate change by increasing carbon emissions associated with energy production for water treatment and chemical manufacturing.

By recognizing these impacts, we can explore alternative, more sustainable practices that reduce environmental footprints while maintaining or even enhancing, the quality of care provided to stone surfaces..

Sustainable Stone Care Products and Methods

Transform your stone care routine with sustainable methods, preserving quality while safeguarding the planet

  • Sustainable stone care prioritizes eco-friendly products and energy-efficient methods.
  • Biodegradable cleaners with natural ingredients reduce environmental harm.
  • Avoidance of phosphates, ammonia, and chlorine minimizes water and soil pollution risks.
  • Innovative water-saving techniques like steam cleaning conserve water and prevent runoff pollution.
  • Advanced machinery cuts and polishes stone with less energy and emissions.
  • Durable sealants extend stone surface lifespan, reducing environmental impact over time.
  • Adopting these practices aligns quality maintenance with ecological responsibility.

Implementing Sustainable Practices 

Implementing Sustainable Practices 

Implementing sustainable stone care practices requires a strategic approach to ensure both environmental benefits and maintenance efficacy.

Firstly, transition to eco-friendly products by selecting cleaners and sealants that are certified by environmental organizations, which ensures they meet stringent ecological and health standards. Look for products with labels indicating they are low in VOCs, biodegradable, and derived from renewable resources.

Secondly, upgrade equipment to include water-efficient and energy-saving technology. Invest in high-efficiency stone polishers and water recycling systems that can significantly cut down on water and electricity usage. Such tools not only reduce the environmental impact but also lower operational costs in the long term.

Training staff is equally important; ensure that all team members are knowledgeable about sustainable methods and the proper use of green products. Regular workshops and updated training sessions can help maintain high standards and adherence to eco-friendly practices.

Case Studies and Examples 

Case Studies and Examples 

Case Study 1: “EcoStone Solutions in Urban Landscaping”

EcoStone Solutions, a company specializing in sustainable stone care, implemented a comprehensive approach to maintaining urban landscapes using environmentally friendly practices. They replaced traditional chemical-based cleaners with biodegradable and non-toxic alternatives, reducing harmful runoff into waterways.

Additionally, they employed techniques such as water recycling systems and low-impact machinery to minimize resource consumption during maintenance operations.

Case Study 2: “GreenStone Restoration: Historical Preservation with Sustainability”

GreenStone Restoration undertook the restoration of a historic building facade using sustainable methods. They utilized advanced cleaning technologies that minimized water usage and avoided harsh chemicals, preserving the integrity of the stone while reducing environmental impact.

Through careful documentation and analysis, they identified areas where energy-efficient lighting and climate control systems could be installed, further enhancing the building’s sustainability profile without compromising its historical significance.

Case Study 3: “NatureStone Park: Balancing Conservation and Visitor Experience”

NatureStone Park adopted a holistic approach to stone care within its premises, aiming to strike a balance between conservation efforts and visitor experience. They implemented a regimen of periodic maintenance using natural, locally sourced materials to clean and protect the stone surfaces.

Interpretive signage throughout the park educated visitors on the importance of preserving natural stone formations and the ecological significance of the surrounding environment.

Through regular monitoring and community engagement, NatureStone Park succeeded in fostering a culture of sustainability while offering an immersive and educational experience for visitors.

Consumer Awareness and Education

Consumer Awareness and Education

Consumer Awareness and Education are crucial aspects of promoting sustainable stone care practices. By educating consumers about the environmental impact of conventional stone care methods and the benefits of sustainable alternatives, they can make informed choices that align with their values.

Key components of consumer awareness initiatives include:

  • Information dissemination: Distributing educational materials, such as brochures, website content, and social media posts, that highlight the importance of sustainable stone care and provide practical tips for implementation.
  • Training programs: Offering workshops or online seminars to teach consumers about proper stone care techniques, including the use of eco-friendly cleaning products and water-saving methods.
  • Certification programs: Establishing certification schemes for stone care professionals and products that meet specific sustainability criteria, enabling consumers to easily identify environmentally responsible options.
  • Collaborations with retailers: Partnering with retailers to promote sustainable stone care products and provide educational materials at the point of purchase, empowering consumers to make conscious decisions.
  • Community engagement: Engaging with local communities through outreach events, demonstrations, and partnerships with environmental organizations to raise awareness about the importance of sustainable stone care for the broader ecosystem.

Regulatory and Certification Considerations 

Regulatory and Certification Considerations 

Regulatory and certification considerations are essential for ensuring adherence to sustainable stone care practices. Regulatory bodies, such as environmental agencies and government departments, often establish guidelines and standards to govern the use of chemicals and resources in stone care activities.

Key aspects of regulatory and certification considerations include:

  • Compliance with environmental regulations: Stone care professionals must adhere to local, national, and international regulations governing the use of cleaning agents, water management, waste disposal, and other aspects of stone maintenance to minimize environmental impact.
  • Certification programs: Certification schemes, such as eco-labels or green certifications, validate stone care products and services that meet specific sustainability criteria. These certifications assure consumers and stakeholders about the environmental responsibility of the products or services.
  • Industry standards: Following industry standards and best practices set forth by organizations such as the International Organization for Standardization (ISO) ensures consistency and quality in sustainable stone care practices.
  • Continuous improvement: Stone care professionals should stay updated on regulatory changes, advancements in sustainable technologies, and emerging best practices to continuously improve their operations and minimize environmental impact.

Cost Considerations and Return on Investment (ROI)

Cost Considerations and Return on Investment (ROI)

Cost considerations and return on investment (ROI) play a significant role in the adoption of sustainable stone care practices. While sustainable solutions may initially require higher upfront costs, they often offer long-term financial benefits and environmental advantages.

Key factors in cost considerations and ROI include:

  • Initial investment: Sustainable stone care practices may involve purchasing eco-friendly cleaning products, investing in water-saving technologies, or upgrading equipment. While these initial costs may be higher than conventional methods, they can lead to savings over time through reduced resource consumption and lower operational expenses.
  • Long-term savings: Sustainable practices such as water recycling, energy-efficient equipment, and extended maintenance intervals can result in significant long-term savings on water and energy bills, as well as reduced waste disposal costs.
  • Enhanced reputation: Adopting sustainable stone care practices can enhance a business’s reputation and attract environmentally conscious customers, leading to increased demand for services and higher revenues.
  • Regulatory compliance: By complying with environmental regulations and avoiding potential fines or penalties associated with non-compliance, businesses can mitigate financial risks and ensure operational continuity.
  • Life cycle analysis: Conducting a life cycle analysis can help businesses evaluate the total cost of ownership of different stone care practices, including initial investment, maintenance costs, and environmental impacts, to make informed decisions that maximize ROI over the product or service’s lifespan.

Future Trends and Innovations 

Future Trends and Innovations 

Future trends and innovations in sustainable stone care are driven by advancements in technology, materials, and consumer preferences. Key areas of focus include:

  • Green chemistry: Continued research and development in green chemistry are leading to the formulation of eco-friendly cleaning agents that effectively remove stains and debris from stone surfaces without harming the environment or compromising quality.
  • IoT and smart technology: Integration of Internet of Things (IoT) sensors and smart technology into stone care equipment allows for real-time monitoring of resource usage, predictive maintenance scheduling, and optimization of cleaning processes, resulting in greater efficiency and reduced environmental impact.
  • Nanotechnology: Nanomaterials are being explored for their potential to enhance the durability, stain resistance, and self-cleaning properties of stone surfaces, reducing the need for harsh chemicals and frequent maintenance.
  • Circular economy practices: Adoption of circular economy principles, such as recycling stone waste into new construction materials or repurposing reclaimed stone for landscaping projects, promotes resource efficiency and minimizes waste generation in the stone care industry.
  • Education and awareness: Increasing consumer awareness about the environmental impact of stone care practices and the availability of sustainable alternatives will drive demand for eco-friendly products and services, incentivizing businesses to innovate and invest in sustainable solutions.

Conclusion:  

Embracing sustainable stone care practices is crucial for preserving our environment while upholding quality standards.

By adopting eco-friendly techniques and staying informed about emerging innovations, we can minimize our ecological footprint while ensuring the longevity and beauty of stone surfaces.

Take action today to integrate sustainability into your stone care routine and contribute to a healthier planet.

The Best Cleaning Agents for Marble Surfaces

Marble surfaces are prized for their beauty but are notoriously susceptible to stains and scratches.

Incorrect cleaning agents can exacerbate these issues, leaving permanent marks and dulling the elegant finish. Using harsh or unsuitable cleaners not only risks damage but can also lead to costly repairs or replacements.

Fortunately, our comprehensive guide identifies the best cleaning agents specifically designed for marble surfaces. These products ensure effective cleaning without harming the delicate stone, preserving its luster and extending its life.

Understanding Marble Composition

Understanding Marble Composition

Marble is a metamorphic rock formed from the crystallization of limestone under heat and pressure. Its primary component is calcium carbonate, which is sensitive to acidic substances. 

This sensitivity is the reason why marble can easily stain, etch, or lose its shine when exposed to common acidic household substances like vinegar, lemon juice, or certain cleaning products.

Marble’s distinct veining patterns, which contribute to its aesthetic appeal, are the result of impurities such as clay, sand, silt, and iron oxides present during its formation. These impurities can vary widely, making each marble surface unique in its resilience and reaction to chemicals.

The porosity of marble also plays a critical role in its maintenance. Being more porous than some other natural stones, marble can absorb liquids quickly, leading to stains if spills are not cleaned immediately. Due to its calcite content, marble has a softer and more delicate surface compared to granite, making it more susceptible to scratches and abrasions.

Importance of Marble Surface pH Balance 

Importance of Marble Surface pH Balance 

Marble, primarily composed of calcium carbonate, reacts adversely to acids. This reaction can lead to etching, a process where the surface becomes dull and corroded, permanently damaging the polished finish. Therefore, the importance of using pH-neutral cleaning agents cannot be overstated.

A pH-neutral cleaner helps preserve the integrity and appearance of marble by ensuring that the cleaning process does not chemically interact with the stone

Acidic cleaners, even mild ones like vinegar, can etch the surface, while alkaline solutions may cause streaking or discoloration. These adverse effects not only spoil the aesthetic of the marble but can also necessitate costly professional restoration.

Furthermore, using a cleaner that respects the natural pH balance of marble aids in preventing the breakdown of the sealing applied to the stone. Sealers often provide a protective barrier against staining and etching; however, harsh chemicals can strip away these sealers, leaving the marble vulnerable to damage.

To ensure long-term durability and maintain the lush appearance of marble, always opt for cleaners labeled as “safe for marble” or explicitly pH-neutral. This practice will safeguard your marble surfaces from chemical damage while keeping them clean and lustrous.

Safe and Effective Marble Surface Cleaning Agents 

Safe and Effective Marble Surface Cleaning Agents 

When choosing cleaning agents for marble surfaces, selecting products that are both safe and effective is paramount to preserve the stone’s delicate composition and aesthetic value. Here are key considerations for selecting the right cleaners:

  • pH-Neutral Formula: Always opt for pH-neutral cleaning agents. These products are specially formulated to clean without damaging marble’s sensitive surface. Avoid acidic or highly alkaline cleaners which can etch or stain the stone.
  • Specifically Designed for Marble: Look for cleaners labeled as safe for use on marble. These products have been tested to ensure they won’t harm the stone, and often contain ingredients that enhance the stone’s natural brightness without leaving residues.
  • No Harsh Chemicals: Avoid cleaners containing bleach, ammonia, or other harsh chemicals. These substances can degrade the marble sealer and expose the stone to stains and etches.
  • Mild Detergents: For daily cleaning, mild liquid dish soap diluted in water can be a safe alternative. Use a soft cloth or mop to apply the solution, ensuring it is well wrung out to avoid over-wetting the marble, which can lead to water stains.
  • Specialty Products for Stains: For tough stains, use cleaning products specifically formulated for marble stain removal. These are designed to tackle specific stains like oil, wine, and coffee without damaging the surface.

Avoiding Harsh Chemicals

Avoiding Harsh Chemicals

Avoiding harsh chemicals is crucial when cleaning marble surfaces due to the stone’s vulnerability to chemical damage. Marble is composed primarily of calcium carbonate, which reacts negatively to acids and strong alkaline solutions, causing etching and dulling of the surface.

Key Chemicals to Avoid:

  • Acids: Common acidic substances like vinegar, lemon juice, and some bathroom cleaners can cause etching on marble, permanently marking the surface.
  • Alkalines: Strong bases such as bleach and ammonia can also damage marble, leading to discoloration and degradation of the sealer that protects the stone.
  • Abrasive Cleaners: Powdered cleansers and abrasive scrubbing tools can scratch marble, compromising its polished finish.

Safe Cleaning Practices:

  • Use pH-neutral cleaners: These are specially formulated to safely clean marble without causing chemical reactions that damage the stone.
  • Read labels carefully: Always check product labels to ensure they state that they are safe for use on natural stone, particularly marble.
  • Spot test new products: Before using any new cleaner, test it on a small, inconspicuous area of the marble to observe any adverse reactions.

Specialized Marble Cleaners

Specialized Marble Cleaners

Specialized marble cleaners are essential for maintaining the integrity and appearance of marble surfaces. 

These products are specifically formulated to address the unique properties of marble without causing damage. When selecting a specialized cleaner, consider the following characteristics to ensure you choose the most effective and safe option:

  • pH-Neutral: Specialized marble cleaners should be pH-neutral, meaning they are neither acidic nor alkaline. This balance is critical to prevent chemical reactions that can etch or dull the marble surface.
  • Non-Abrasive: The formulation should be free from abrasive substances that can scratch or wear down the finish of the marble. Look for liquid cleaners that promise a gentle clean.
  • Stain Removal: Some specialized cleaners include ingredients capable of lifting and removing common stains from marble, such as organic stains from food and liquids, without the need for harsh scrubbing.
  • Sealer Compatibility: Good marble cleaners are compatible with sealers commonly used on marble. They clean effectively without stripping the sealer, thereby maintaining the stone’s protective barrier.
  • Ease of Use: The best marble cleaners offer convenience, such as ready-to-use sprays or wipes, which are practical for quick cleanups and regular maintenance.

Testing and Spot Cleaning 

Testing and Spot Cleaning 

Testing and spot cleaning are critical steps in maintaining marble surfaces, ensuring that cleaning agents do not cause damage.

 Before fully applying any product, especially new ones, conducting a spot test is essential. This precautionary step helps to avoid potential discoloration, etching, or other damage to your marble.

Steps for Effective Testing and Spot Cleaning:

  • Select an Inconspicuous Area: Choose a hidden spot on your marble surface, such as behind an appliance or under a piece of furniture, to perform the test.
  • Apply a Small Amount: Place a small amount of the cleaner on the selected area. Follow the product’s specific application instructions, usually involving only a dab of cleaner.
  • Wait and Observe: Allow the cleaner to sit for the recommended time as per the product’s label — typically a few minutes. Monitor the reaction of the marble surface to the cleaner.
  • Rinse Thoroughly: After the waiting period, rinse the area with water and gently wipe it dry with a soft cloth. This removes any residues that could affect the marble’s finish.
  • Examine the Results: Look for any signs of discoloration, etching, or surface damage. If the marble remains unchanged and in good condition, the cleaner is likely safe to use on the rest of the surface.

Marble Surfaces Maintenance Tips

Marble Surfaces Maintenance Tips

Maintaining marble surfaces requires careful attention to both cleaning methods and the products used to ensure the stone’s longevity and beauty. Here are essential tips for effective marble maintenance:

  • Use pH-Neutral Cleaners: Always choose a pH-neutral cleaner specifically formulated for marble. This prevents the chemical reactions that can etch and damage the surface.
  • Blot Spills Immediately: Marble is particularly susceptible to stains due to its porosity. Quickly blotting spills, especially from acidic substances like wine, coffee, and citrus juices, prevents them from penetrating the surface and causing stains.
  • Regular Dusting and Cleaning: Frequent dusting removes abrasive particles that can scratch the marble. For cleaning, use a soft cloth or mop dampened with a mild cleaning solution, and avoid vigorous scrubbing.
  • Use Soft Cloths or Sponges: Always use a soft cloth or sponge for cleaning marble. Abrasive pads or brushes can scratch the surface, damaging its polished finish.
  • Rinse with Clean Water: After cleaning, it’s important to rinse the surface thoroughly with clean water to remove any soap residue, which can attract dirt and lead to a dull appearance.
  • Dry the Surface: Prevent water spots and streaks by drying the marble with a soft, dry cloth after rinsing.
  • Protect the Surface: Use coasters under all glasses, particularly those containing alcohol or citrus juices, and place trays under toiletry products on marble bathroom counters to prevent etching.

Professional Cleaning and Restoration of Marble Surfaces

Professional cleaning and restoration play a critical role in the upkeep of marble surfaces, especially when they are extensively used or have undergone significant wear and tear. Here’s what to consider when opting for professional services:

  • Expert Evaluation: Professionals will first assess the condition of the marble, identifying any issues such as deep stains, etching, or structural damage. This evaluation determines the appropriate restoration methods needed.
  • Deep Cleaning: Using specialized equipment and solutions, professionals perform a deep clean that removes tougher stains and ingrained dirt that regular cleaning can’t address. They use pH-neutral, marble-safe products that cleanse without damaging the stone.
  • Polishing: To restore marble’s natural shine, professionals use industrial diamond polishing pads. This process gently buffs the surface, removing minor abrasions and restoring the smooth, glossy finish of the marble.
  • Sealing: Post-cleaning and polishing, applying a high-quality sealer is crucial. Sealers provide a protective barrier against staining and moisture penetration, crucial for maintaining marble’s appearance and durability.
  • Customized Maintenance Plan: After restoration, professionals can provide tailored advice on how to maintain the marble based on its usage and environmental conditions, ensuring long-lasting results.

Conclusion:  Preserving the Beauty and Longevity of Marble

Ensure the enduring beauty and integrity of your marble surfaces by choosing the right cleaning agents. 

Opt for pH-neutral solutions designed for marble to avoid damage and maintain its luster. Don’t hesitate—start incorporating these specialized cleaners into your routine today to protect and enhance your precious marble surfaces.

Essential Maintenance for Travertine Flooring in High Traffic Areas

While elegant and durable, travertine flooring experiences rapid wear and tear in high-traffic areas, leading to loss of lustre and increased maintenance costs.

This constant exposure not only dulls the appearance but can also result in costly damages that are hard to reverse. Over time, the neglect of proper care can significantly diminish the value and beauty of your flooring.

Fortunately, with the right maintenance strategies, it’s possible to preserve the pristine condition of travertine floors. Our guide provides essential tips to protect your investment and keep your floors looking as good as new.

Understanding Travertine Composition

Understanding Travertine Composition

Travertine is a form of limestone deposited by mineral springs, particularly hot springs. It is characterized by its porous structure, which is formed by the escape of carbon dioxide as the stone solidifies. This unique texture contributes to its aesthetic appeal with various patterns and colours ranging from white to deep browns and impacts its durability.

The porosity of travertine makes it susceptible to staining and erosion if not properly sealed. 

Additionally, travertine has natural pits and troughs, which can accumulate dirt and grime if left unprotected. This can lead to further complications such as breeding bacteria and weakening the stone’s integrity over time.

Travertine’s chemical composition primarily consists of calcium carbonate, which reacts easily with acids. This makes the flooring vulnerable to etching from common acidic substances like wine, juice, and even cleaning products not specifically formulated for natural stone.

Regular Travertine Flooring Cleaning Routine

Regular Travertine Flooring Cleaning Routine

A regular cleaning routine is essential for maintaining the integrity and appearance of travertine flooring in high-traffic areas. 

  1. Daily Dust Mopping: Start with daily dust mopping to remove debris and minimize the grit that can scratch the surface. Use a soft, non-treated, dry dust mop and avoid vacuums with beater bars, which can damage the stone.
  2. Weekly Washing: Wash the flooring weekly with a pH-neutral stone cleaner to avoid the harshness of acidic or alkaline products that can etch or dull the travertine. Dilute the cleaner as the manufacturer directs and apply with a soft mop. Rinse the mop frequently in clean water to prevent re-depositing dirt onto the floor.
  3. Immediate Action for Spills: Immediate action is crucial for spills. Blot—do not wipe—spills with a clean, dry cloth to prevent the liquid from penetrating the stone’s pores. For stubborn stains, a poultice may be needed to draw the stain out without damaging the surface.
  4. Apply a Penetrating Sealer: Lastly, consider the application of a penetrating sealer at least once a year or more frequently in very high-traffic areas. This will help fill the travertine pores and provide a protective barrier against spills and stains, prolonging the life and beauty of the flooring.

Protective Travertine Flooring Measures

Protective Travertine Flooring Measures

To protect travertine flooring in high-traffic areas, several targeted measures should be adopted to extend its lifespan and maintain its aesthetic appeal. 

  • Firstly, sealing the travertine is imperative. Use a high-quality impregnating sealer designed for natural stone, which penetrates the stone’s pores to provide a protective barrier against moisture and stains. This treatment should be applied annually, or more frequently in areas with very high foot traffic.
  • Secondly, floor mats should be employed at all entrances and high-wear locations, such as kitchen sinks and stove areas. Mats help to trap dirt, sand, and other abrasive particles that can scratch or wear down the surface of the travertine. Choose mats with a grippy backing without rubber or latex, which can discolour the stone.
  • Thirdly, utilize furniture protectors under all heavy furniture and avoid dragging objects across the floor to prevent scratches and chips. Opt for felt pads or special coasters made specifically for use on natural stone.
  • Lastly, consider using rugs in strategic spots for commercial spaces or extremely busy areas to further reduce wear. Ensure these rugs are rotated regularly and cleaned to avoid dirt buildup underneath that could scratch the flooring.

Preventive Travertine Flooring Maintenance

Preventive Travertine Flooring Maintenance

Preventive maintenance is vital for preserving travertine flooring in high-traffic areas, ensuring it remains beautiful and functional over time.

Routine sealing is essential. Apply a quality sealant every six to twelve months, depending on the level of traffic, to protect the stone from stains and moisture penetration. This barrier protects and makes future cleaning easier and more effective.

Secondly, a strict policy should be adopted against wearing shoes on the travertine. Encourage the use of indoor shoes or flip-flops if possible. This reduces the introduction of small particles and abrasives from outdoor shoes that can scratch and wear down the surface.

Thirdly, be vigilant about cleaning spills immediately. Acidic substances like coffee, wine, and citrus juices can etch the surface if left unattended. Always blot spills promptly with a soft cloth and clean with a pH-neutral cleaner specifically formulated for natural stone.

Additionally, regular inspections for cracks or chips are important. Addressing these small damages promptly can prevent them from worsening or affecting larger areas of the flooring.

Addressing High Traffic Wear Patterns

Over time, frequent foot traffic can lead to distinct pathways where the stone has visibly dulled or become worn. To manage these effects, it is essential to periodically evaluate and rotate the layout of rugs and furniture to redistribute the wear across different parts of the flooring. This strategy helps prevent excessive wear in any single area.

Implementing area rugs and entrance mats in strategic locations can also significantly reduce direct contact and wear. Choose rugs that do not have a rubber or latex backing, which can discolor the stone, and ensure they are cleaned regularly to prevent dirt buildup.

Regular professional maintenance is recommended to rejuvenate worn areas. This can involve grinding down the surface slightly to remove the top layer of stone where most of the wear is concentrated, followed by polishing and resealing to restore the travertine’s original lustre and protective barrier.

Lastly, it’s essential to maintain consistent cleaning practices using pH-neutral cleaners to avoid further degradation of the travertine. Avoid harsh chemicals and scrubbing tools that can exacerbate wear patterns, opting instead for soft clothes or mops.

Special Considerations forTravertine Flooring on Outdoor Areas

When maintaining travertine flooring in outdoor areas, especially those with high traffic, consider the following specific measures to protect and prolong its durability and appearance:

  • Enhanced Sealing: Outdoor travertine must be sealed more frequently than indoor surfaces due to exposure to weather elements. Use a sealant that offers protection against moisture and stains, and reapply it every six months or annually, depending on the level of exposure and wear.
  • Weather Considerations: In regions with freezing temperatures, ensure that the sealant used is also effective against frost damage. Water can seep into pores and freeze, causing cracks and splits. Select a sealant that specifies freeze-thaw resistance.
  • Regular Cleaning: Sweep outdoor travertine regularly to remove debris, leaves, and dirt that can scratch the surface. Use a mild, pH-neutral cleaner diluted in water for mopping, avoiding acidic cleaners that can etch the stone.
  • Stain Prevention: Immediately clean up spills from barbecue grills, plant pots, or food to prevent permanent stains. Consider using trays under plant pots to catch excess water and prevent mineral deposits on the stone.
  • Damage Inspection: Periodically check for loose tiles, cracks, or chips, especially after harsh weather conditions. Promptly address these issues to prevent further deterioration.

Long-Term Travertine Flooring Preservation Strategies

To ensure long-term preservation of travertine flooring in high-traffic areas, adopt the following strategic measures:

  • Consistent Sealing: Regularly apply a high-quality sealant tailored for travertine to protect against stains and moisture penetration. Schedule sealing every 6-12 months, depending on foot traffic intensity.
  • Professional Resurfacing: Engage professionals for periodic resurfacing and polishing. This process removes superficial damage, restores shine and extends the floor’s lifespan.
  • Controlled Cleaning Regime: Use pH-neutral cleaners specifically designed for natural stone. Avoid harsh chemicals and abrasive scrubbing tools that can damage travertine.
  • Environmental Control: Maintain stable indoor conditions; excessive changes in temperature and humidity can cause travertine to expand and contract, leading to cracks.

Conclusion: Proactive Lifespan Extension

To safeguard the elegance and durability of your travertine flooring in high traffic areas, adhering to a disciplined maintenance routine is key. 

Embrace the specific cleaning practices and protective measures outlined to preserve its beauty.

Don’t hesitate—start implementing these essential tips today to ensure your travertine remains pristine and enduring.

How to Choose the Right Stone Paving

Choosing the right stone paving is daunting due to the myriad of materials and styles available.

Make the wrong choice, and you risk paving that fades or cracks, leading to costly replacements.

This article guides you through selecting a durable, aesthetically pleasing stone that complements your outdoor space perfectly.

Assessing Your Stone Paving Needs

Assessing Your Stone Paving Needs

Assessing your stone paving needs effectively involves carefully considering several critical aspects to ensure the choice of material suits both functionality and aesthetics.

  • Purpose of the Paved Area: Identify the function; driveways require durable materials like granite or basalt for high traffic, while decorative stones like sandstone or limestone are ideal for patios and garden paths.
  • Climate Considerations: Choose appropriate stones for your climate; use frost-resistant granite in areas with severe weather and de-icing needs. For sunny areas, select light-coloured stones that reflect heat and resist UV degradation.
  • Maintenance Needs: Opt for materials that suit your maintenance willingness. Quartzite is low maintenance and durable, while softer stones like marble need regular sealing to prevent stains and wear.
  • Aesthetic Harmony: Match the stone’s colour, texture, and finish with your home’s exterior to ensure visual continuity. Available in various hues and textures, stones can range from sleek, modern finishes to traditional, rustic appearances to suit different architectural styles.

Understanding Paving Stone Types 

Understanding Paving Stone Types 

Understanding the various types of paving stones is crucial for making an informed decision that aligns with your aesthetic preferences and functional requirements. Here are the main categories:

  • Natural Stone: This category includes granite, limestone, sandstone, and slate, each offering unique patterns and durability. Granite is highly durable and available in various colours, making it suitable for high-traffic areas. Limestone provides a more uniform appearance but is softer and requires more maintenance. Sandstone offers a range of colour variations and is relatively easy to work with, while slate is valued for its natural grip and distinct colour layering.
  • Concrete Pavers: These are manufactured to mimic the appearance of natural stone but at a lower cost. Concrete pavers are versatile in colour and shape but may fade over time and require sealing to maintain their appearance.
  • Brick Pavers: Made from clay, brick pavers offer a traditional look that can blend seamlessly with older or historic properties. They are durable but can vary in colour and finish due to the firing process.
  • Composite Pavers: These are made from recycled plastic and rubber, making them an eco-friendly option. They are lightweight and easy to install, available in various colours and styles, and often used in places where drainage and sustainability are concerns.

Evaluating Durability and Maintenance of Paving Stones

Evaluating Durability and Maintenance of Paving Stones

Durability

The longevity of paving stones is influenced by their ability to withstand traffic, weather conditions, and general wear. Granite and basalt are top choices for high-traffic areas due to their hardness and resistance to abrasion. 

Sandstone, while durable, is more porous and may require additional sealing in wet climates to prevent water absorption and weathering. Slate, known for its natural split layers, offers good grip and durability but can be brittle in thinner cuts.

Maintenance

Maintenance needs vary significantly between stone types. Natural stones like limestone and sandstone may require regular sealing to enhance their stain resistance and prevent weather damage. 

Conversely, manufactured options like concrete pavers often need sealing to retain their colour and minimize wear from exposure. Brick pavers generally require less maintenance, only occasional cleaning and sealing to preserve their rich colour.

Considering Installation Factors for Paving Stones

Considering Installation Factors for Paving Stones

Considering installation factors is critical when choosing paving stones, as these affect both the appearance and longevity of your paved area. Here are essential elements to consider:

  • Subbase Preparation: A properly prepared subbase is fundamental to prevent paving from shifting or sinking. Typically, this involves laying a layer of compacted gravel and sand, which provides a stable, level base for the stones. The depth and material of the subbase might vary depending on soil type and drainage needs.
  • Drainage: Effective drainage is crucial to avoid water accumulation that can lead to structural damage or surface wear. Ensure the installation plan includes a slight slope (typically a 1% grade) away from buildings and towards suitable drainage points. Incorporating a permeable paving system could benefit areas with heavy rainfall, allowing water to percolate through the joints between the stones and into the ground.
  • Laying Technique: The method of laying the stones can impact both the aesthetic outcome and the pavement’s durability. Patterns such as herringbone or interlocking designs add visual interest and enhance the pavement’s strength and stability. Ensure the stones are evenly laid, and the joints between them are tightly spaced to minimize movement and weed growth.
  • Edge Restraints: Installing edge restraints is key to preventing the pavers from drifting apart over time. Materials for edge restraints can range from flexible plastic or metal to more natural options like additional rows of bricks or mortared stone.

Environmental Impact of Paving Stones

Environmental Impact of Paving Stones

The environmental impact of paving stones is crucial, particularly regarding sustainability and ecological effects. Here are the primary aspects to consider:

  • Material Sourcing: Quarrying for natural stone can disrupt local ecosystems and cause soil erosion. Choosing locally sourced stones reduces transportation emissions and supports local economies.
  • Manufacturing Process: Concrete and brick pavers require significant energy due to their production processes, which involve high temperatures. Selecting manufacturers that use renewable energy and recycled materials can mitigate these impacts.
  • Permeability: Impermeable surfaces block natural water infiltration, leading to runoff and affecting local waterways. Permeable paving options allow water to pass through, reducing runoff and encouraging groundwater recharge.
  • Durability and Maintenance: Durable materials decrease the need for frequent replacements, reducing long-term environmental impacts. Low-maintenance materials that require fewer chemical treatments also help preserve local air and water quality.

Local Regulations and Restrictions 

Local Regulations and Restrictions 

When choosing the right stone paving in Australia, it’s essential to be aware of local regulations and restrictions, which can vary significantly between states and local councils. 

Here are some key considerations:

  • Planning Permissions: In some areas, especially in heritage-listed or environmentally sensitive zones, you may need planning permission before commencing any paving projects. This often involves submitting plans detailing the work’s type and scope.
  • Water Runoff Regulations: Many Australian councils have strict regulations regarding stormwater management. These rules ensure that new paving does not exacerbate local flooding risks by altering natural water flow patterns. In some cases, permeable paving solutions may be required to promote water absorption into the ground.
  • Building Codes: The Australian Building Codes Board (ABCB) sets out standards that include specifications for outdoor paving to ensure safety and accessibility. Compliance with these codes is mandatory to prevent issues like uneven surfaces, which could pose trip hazards.
  • Environmental Considerations: Some localities may have specific regulations to protect the environment, such as limits on removing existing vegetation and requirements for using sustainable or recycled materials.

Personal Preferences and Style of Paving Stones

Personal Preferences and Style of Paving Stones

Personal preferences and style are pivotal in selecting the right paving stones, as they should harmonize with your home’s architectural style and lifestyle needs. Here’s how to align your choices effectively:

  • Colour and Texture: Choose colours that complement or contrast beautifully with the exterior of your home and existing landscaping. Textures vary from smooth, polished surfaces ideal for modern aesthetics to rough, natural finishes that enhance rustic charm.
  • Size and Shape: The size and shape of the paving stones can influence the perceived space and flow of your outdoor areas. Larger pavers tend to make a small space appear bigger, while smaller, intricate designs can add detail and interest to expansive areas.
  • Pattern: Consider how the laying pattern will affect the area’s overall look. Straight lines offer a formal appearance, whereas irregular patterns can create a more organic, relaxed feel.

Conclusion: Making a Decision

Choosing the right stone paving requires a thoughtful balance of durability, maintenance, aesthetics, and installation specifics.

Ready to transform your outdoor space?

Start exploring your options today and pave the way to a beautifully enhanced exterior that meets all your style preferences.

In SQM?

Please fill your details to download.


      Request Callback


        Enquiry Form


        Please fill your details to download.