Register your Information for Free Stone Samples Sent Express to You!

Search
Search
Close this search box.
Search
Close this search box.

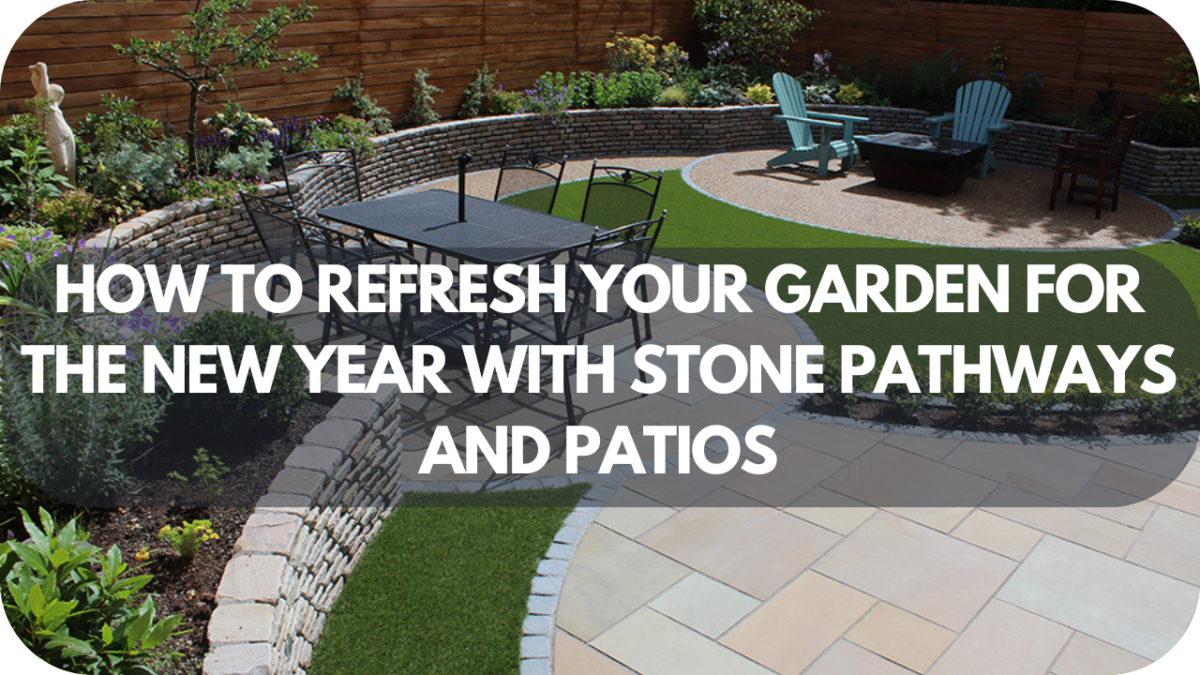
How to Enhance Your Garden with Beautiful Shoreham Quartz Pavers

Your garden deserves more than ordinary paving; it needs a touch of sophistication that enhances its natural beauty. Shoreham quartz pavers offer a blend of elegance, durability, and versatility, making them the perfect choice for your outdoor space. 

From creating visually stunning pathways to durable patios, these pavers elevate your garden’s aesthetic appeal while providing practical benefits. 

Read on to learn why Shoreham quartz pavers are ideal for your garden, how to incorporate them creatively, and the best tips for installation and maintenance.

Why Choose Shoreham Quartz Pavers for Your Garden?

Shoreham quartz pavers are an excellent choice for anyone looking to combine functionality and style. These pavers are crafted from high-quality quartz, a material renowned for its strength and visual appeal.

  • Durability: Quartz is highly resistant to wear and tear, ensuring your garden retains its polished look even in heavy foot-traffic areas.
  • Low Maintenance: Unlike other materials, quartz pavers require minimal upkeep, making them ideal for busy homeowners. A simple rinse can keep them looking fresh and clean.
  • Natural Beauty: Shoreham quartz pavers have a unique sparkle that reflects light beautifully, adding an element of luxury to your garden.
  • Versatility: Available in a variety of shapes, sizes, and finishes, these pavers can complement any garden style, from rustic to contemporary.
  • Weather Resistance: Quartz is naturally resistant to extreme weather conditions, including heavy rain, frost, and UV rays, ensuring your pavers look impeccable year-round.
  • Eco-Friendly Option: Many Shoreham quartz pavers are sourced and produced sustainably, offering an environmentally friendly solution for your garden landscaping needs.

Creative Ways to Incorporate Shoreham Quartz Pavers

Shoreham quartz pavers offer endless possibilities for garden design. Here are some creative ideas to get you started:
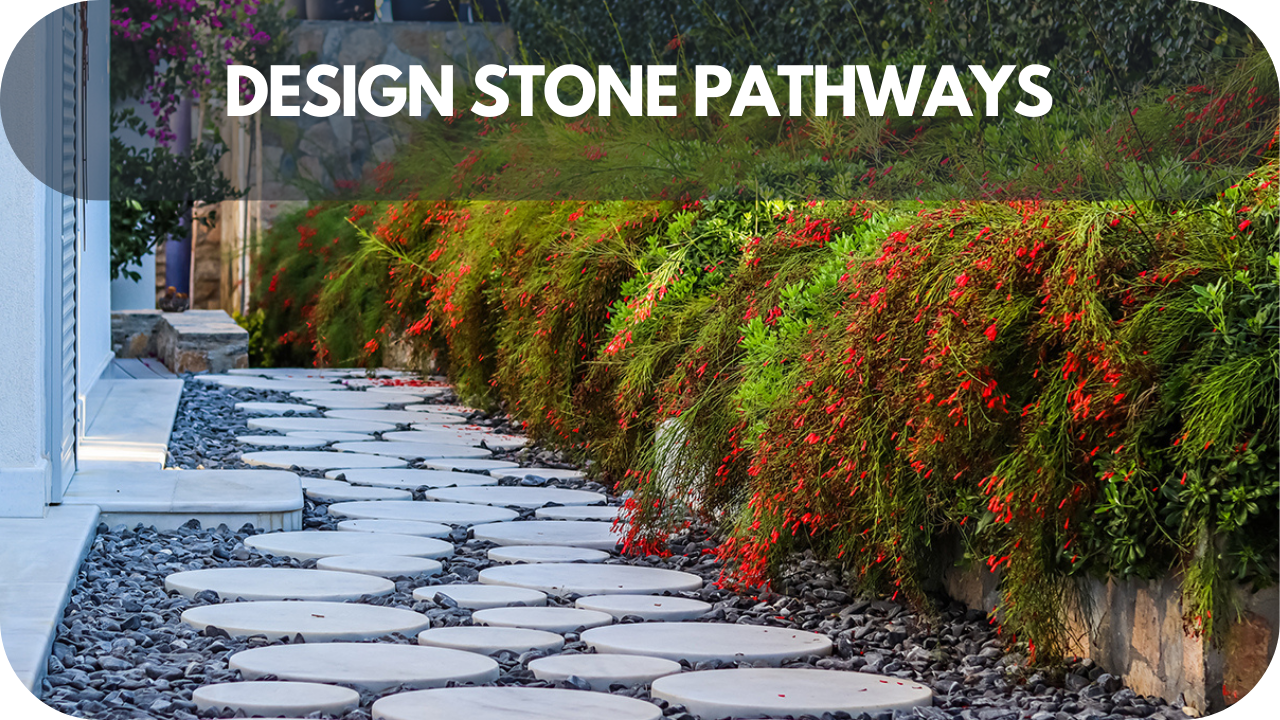
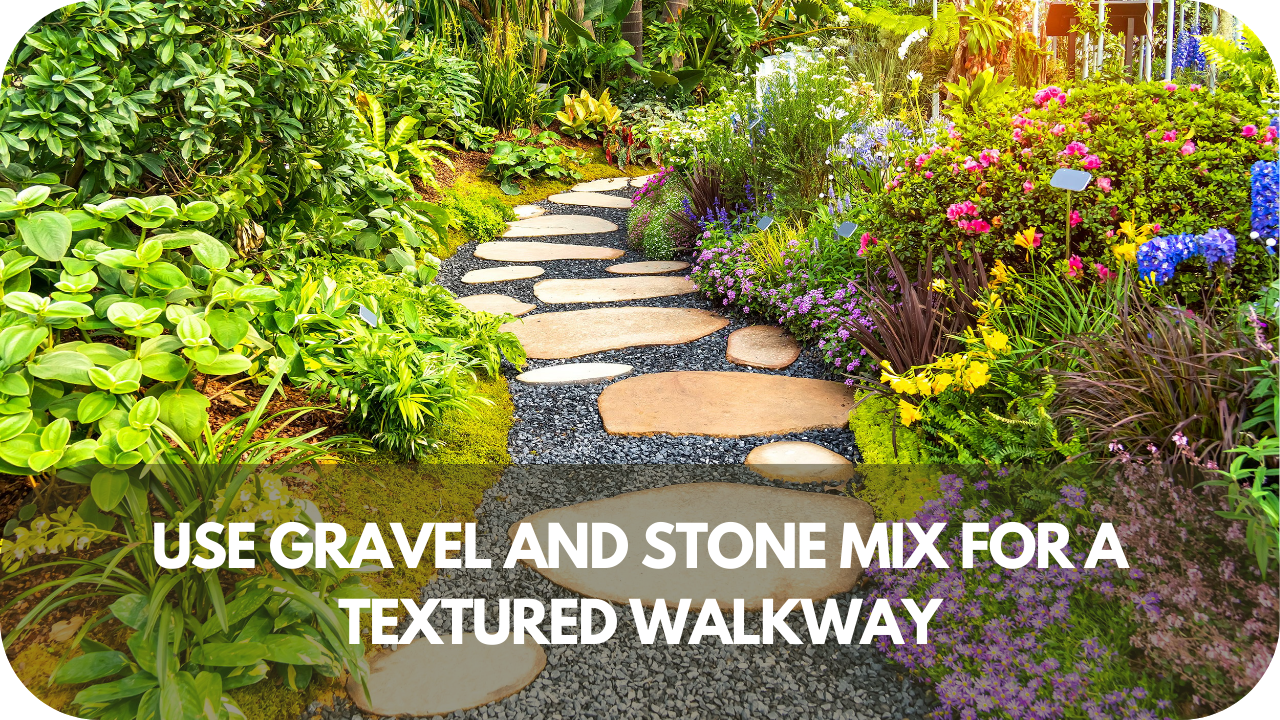
1. Elegant Pathways

Shoreham quartz pavers for elegant pathways

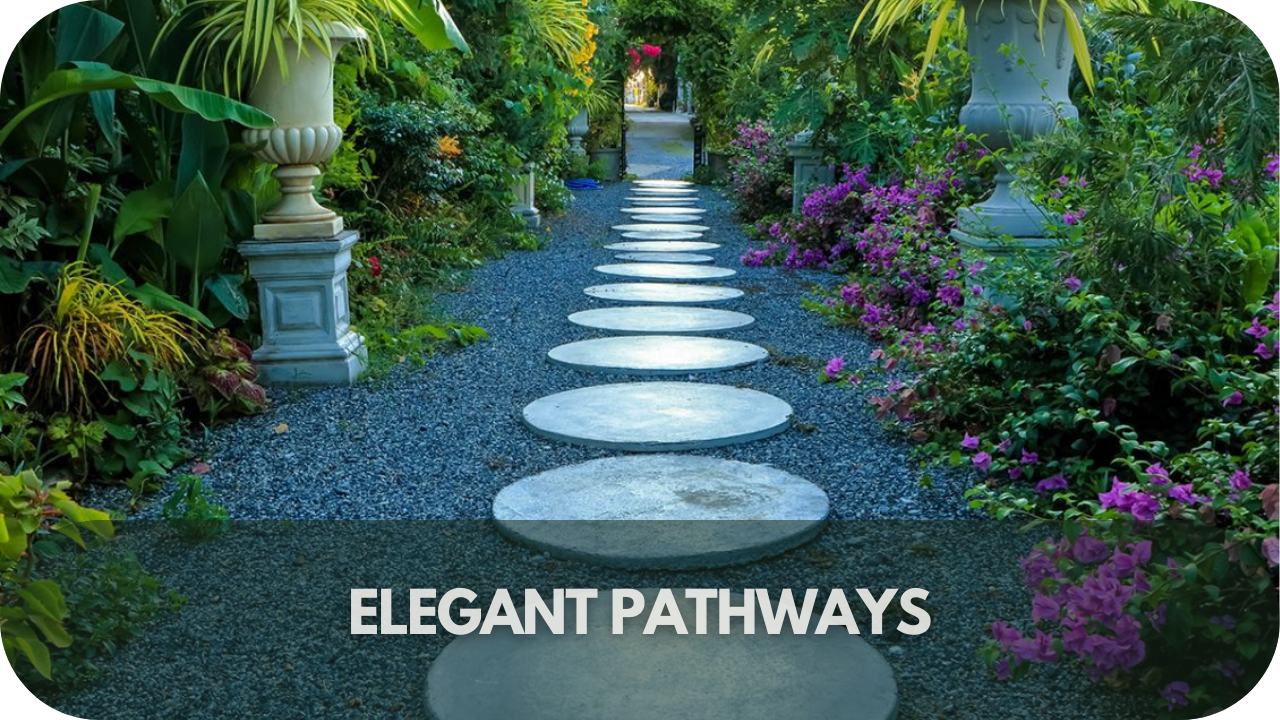
Shoreham quartz pavers make ideal materials for creating durable and beautiful garden pathways. By laying these pavers in intricate patterns such as herringbone or chevron, you can design walkways that not only serve a functional purpose but also enhance the aesthetic appeal of your outdoor space. 

These patterns create a sense of movement and guide guests naturally through the garden. You can further enhance the design by incorporating contrasting grout colours or mixing paver sizes for added texture. 

The durability of quartz ensures your pathways withstand heavy foot traffic and weathering, retaining their charm for years. Whether you’re connecting a garden entrance to a seating area or leading visitors to focal points like a fountain, pathways created with Shoreham quartz pavers provide both practicality and visual interest.
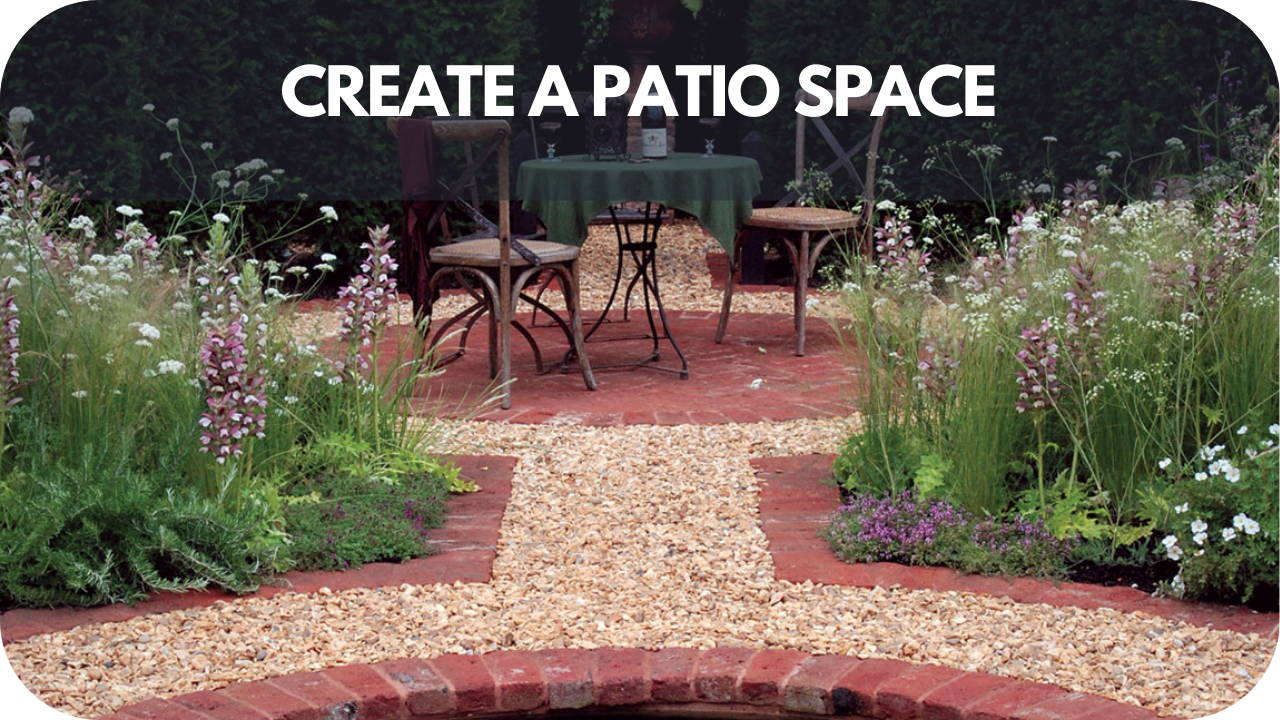
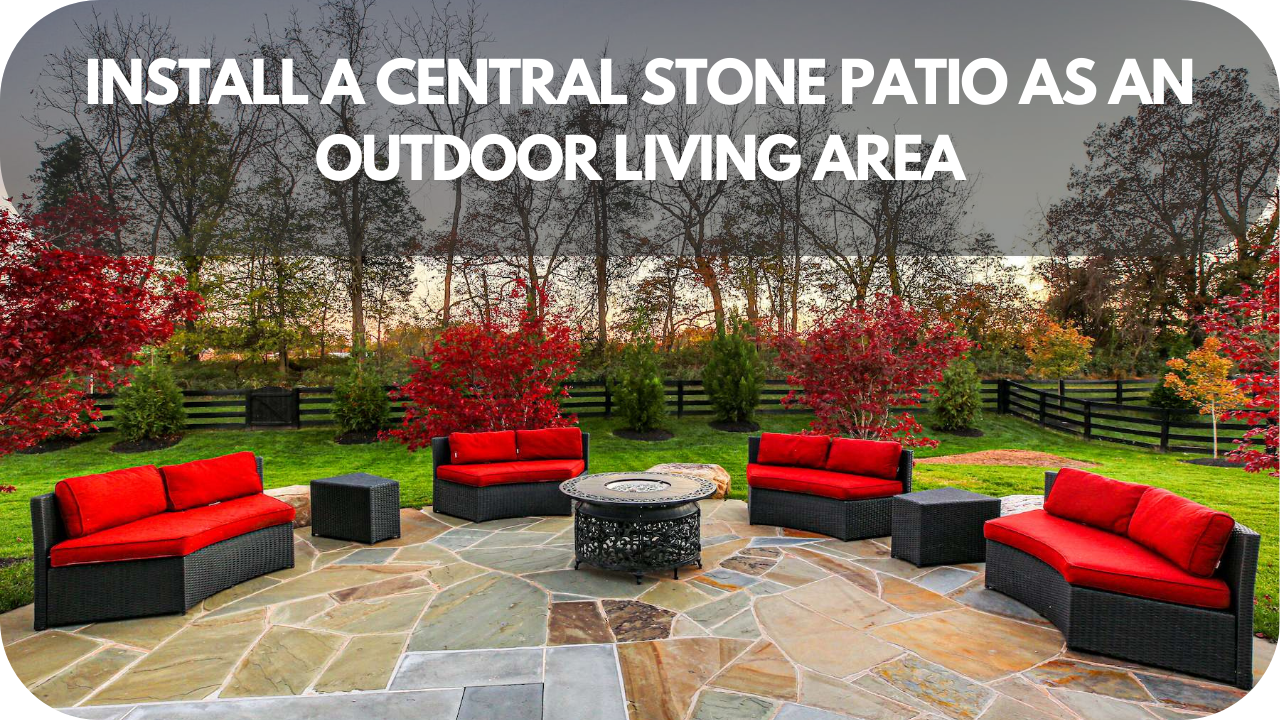
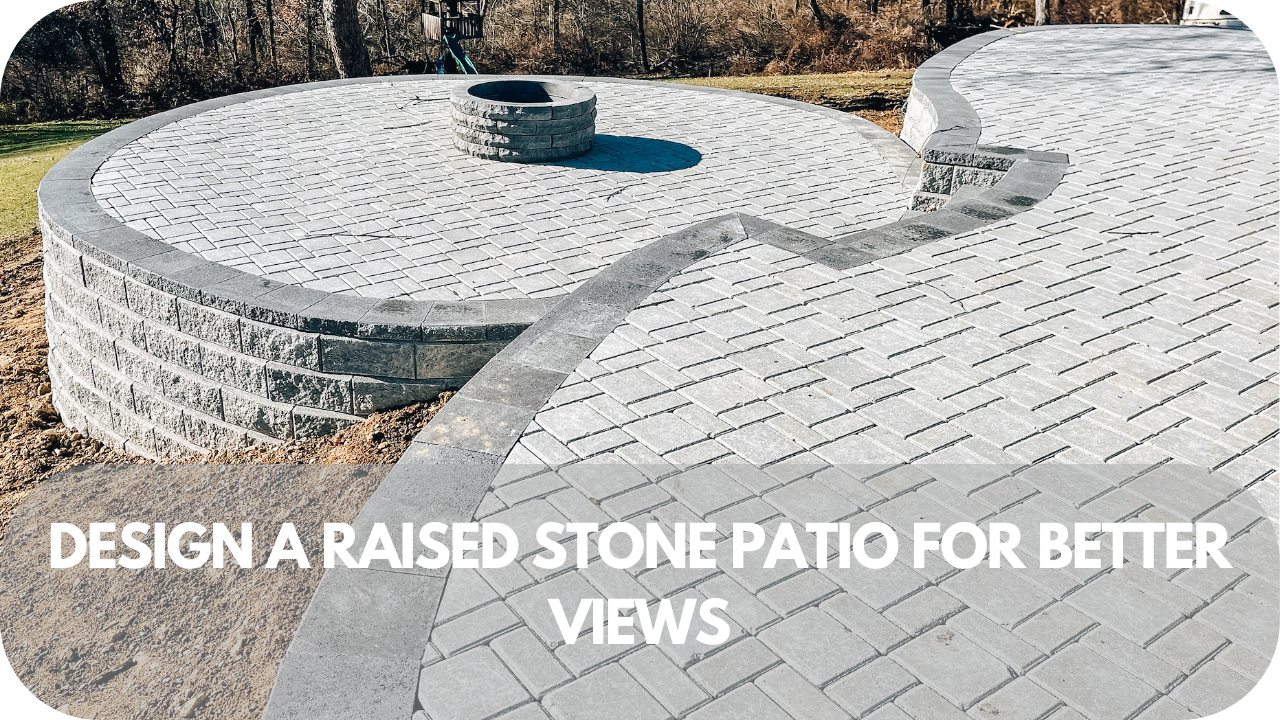
2. Patio Perfection

Transform your outdoor living space with a stunning patio constructed using large-format Shoreham quartz pavers. These pavers are perfect for creating an elegant and inviting area for dining, entertaining, or simply relaxing. 

Large pavers give a seamless and modern appearance, which is ideal for contemporary garden designs. They are also easy to clean, making them a practical choice for spaces where spills and dirt are common. 

By using quartz pavers, you can ensure your patio retains its luxurious look and remains durable, even with exposure to heavy furniture and weather elements. 

To elevate the aesthetic further, consider adding complementary features such as potted plants, outdoor rugs, or ambient lighting. A Shoreham quartz patio serves as the heart of your outdoor space, offering both beauty and functionality.
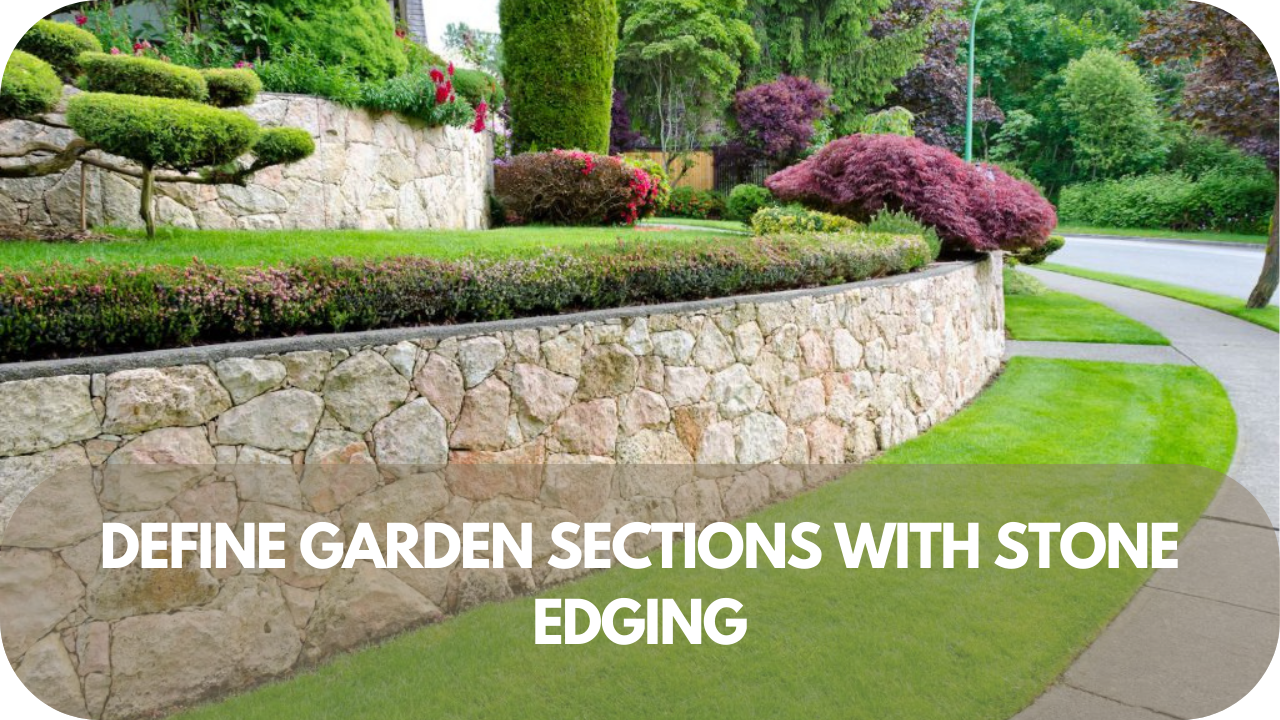
3. Garden Borders

Shoreham quartz pavers for garden borders

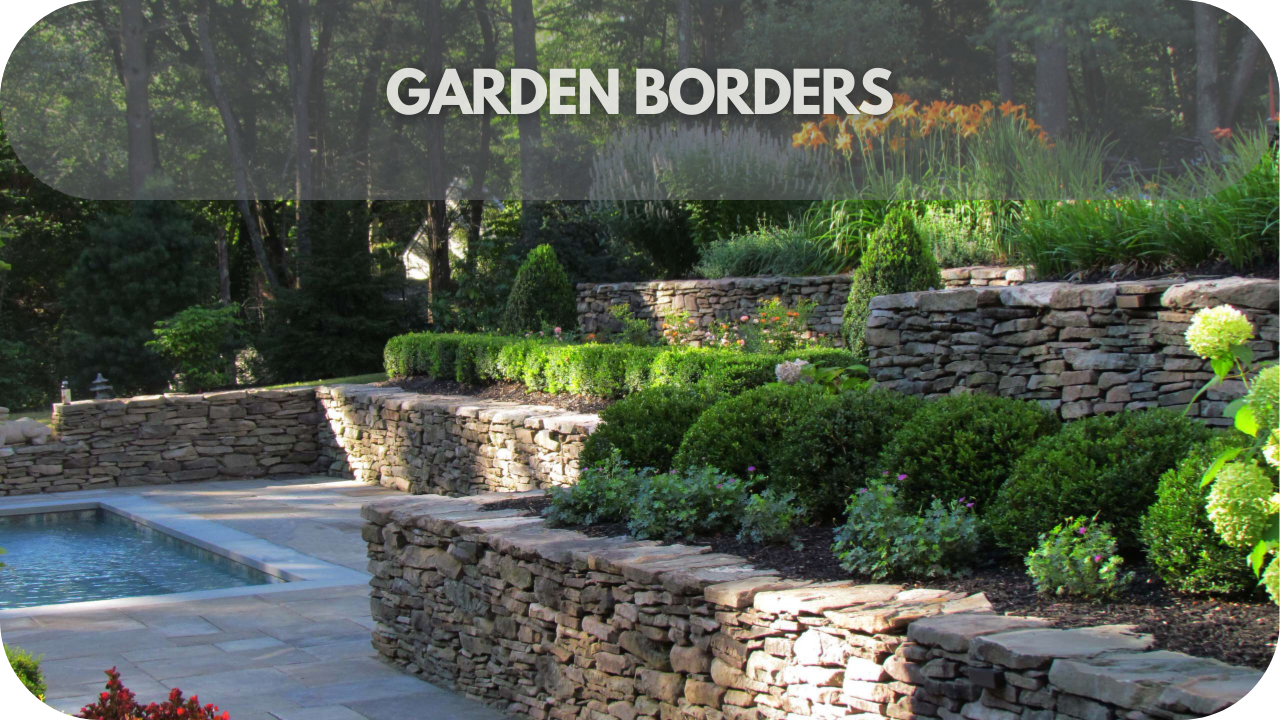
Define and enhance your garden beds with the timeless elegance of Shoreham quartz pavers. These pavers create crisp, structured borders around flower beds, vegetable patches, or lawns, providing a clean and organised look. 

The natural sparkle of quartz adds a touch of sophistication while contrasting beautifully with the vibrant hues of plants and flowers. You can choose from various sizes and finishes to match your garden’s style, whether it’s rustic or modern. 

Beyond aesthetics, quartz pavers offer practical benefits by preventing soil erosion and keeping mulch or gravel in place. They also make mowing and weeding around garden beds easier, streamlining garden maintenance. By framing your greenery with Shoreham quartz pavers, you can achieve a polished and cohesive landscape design.
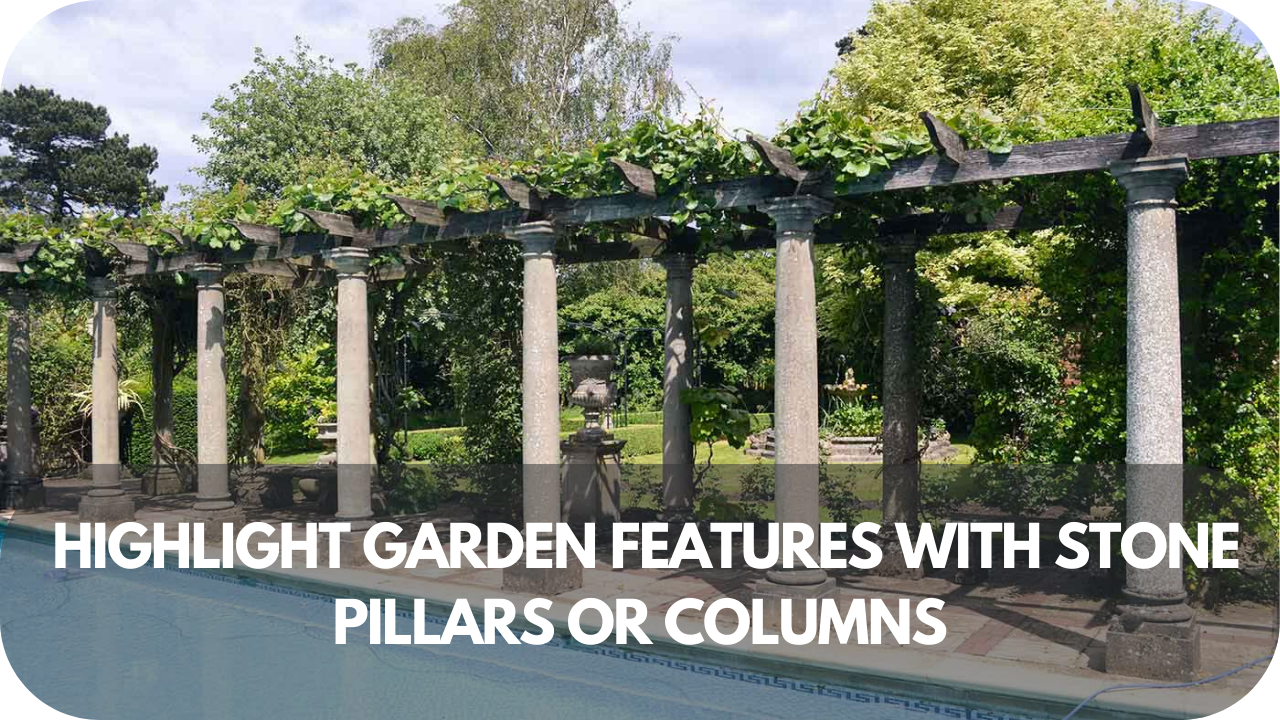
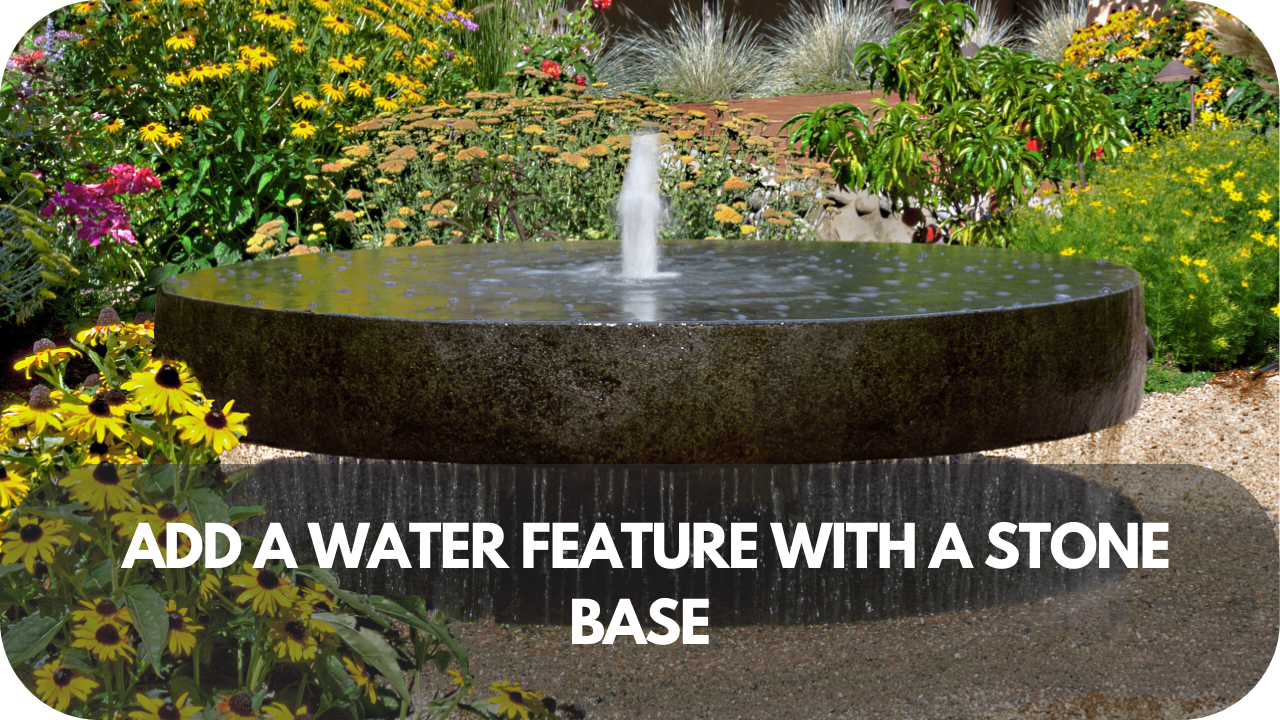
4. Water Features

Enhance the allure of your garden’s water features by incorporating Shoreham quartz pavers. Whether surrounding a tranquil pond, a cascading fountain, or a modern pool, these pavers add a sense of texture and luxury. 

Quartz’s natural sparkle reflects light beautifully, creating a captivating visual effect around water. Additionally, the material’s durability ensures it stands up to moisture without fading or cracking. You can use quartz pavers to build a border around the water feature or to create stepping stones for access. 

Pairing the cool tones of quartz with the gentle flow of water establishes a serene and harmonious atmosphere. This setup not only highlights the water feature but also creates a peaceful retreat in your garden where you can relax and unwind.

5. Outdoor Kitchens

Shoreham quartz pavers for outdoor kitchens

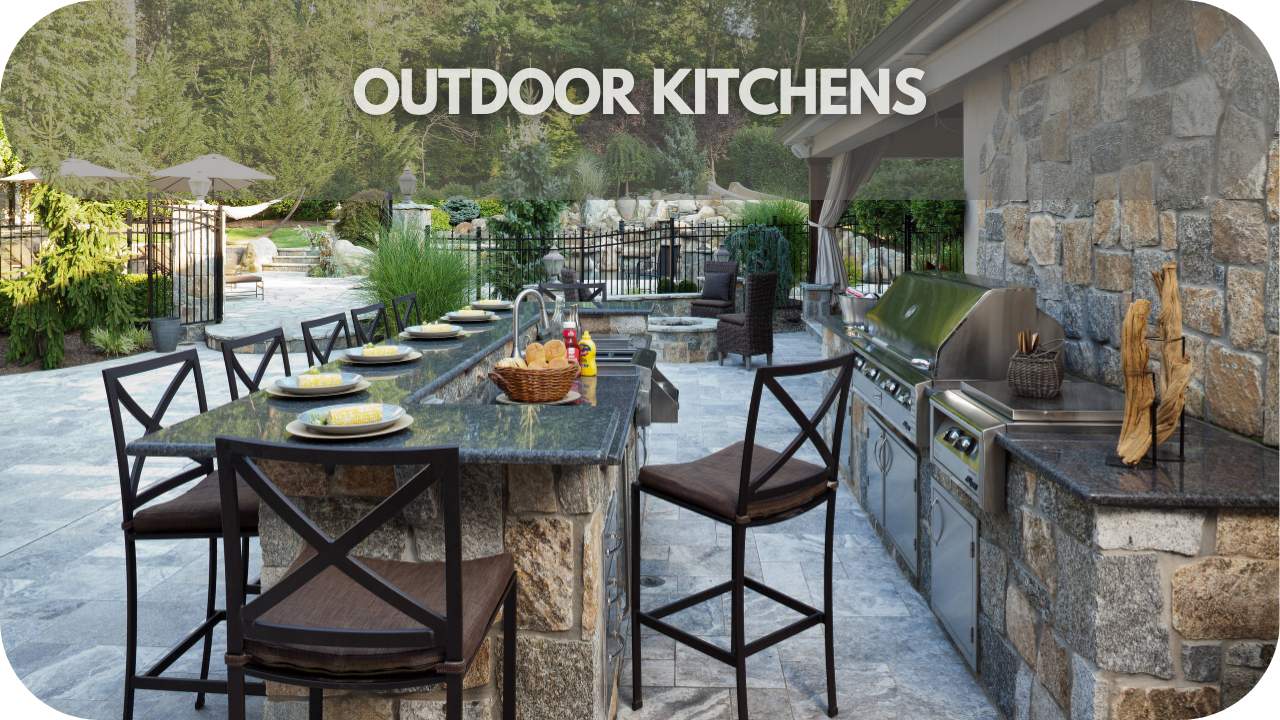
Create the ultimate outdoor culinary space by using Shoreham quartz pavers as the flooring for your kitchen area. Quartz is a practical choice due to its resistance to stains, heat, and moisture—qualities essential in spaces where cooking and dining occur. 

The sleek finish of quartz pavers ensures easy cleaning, while their durability makes them capable of withstanding heavy furniture and appliances. By choosing neutral or earthy tones, you can match the pavers with your garden’s overall aesthetic, ensuring cohesion. 

Consider extending the pavers beyond the kitchen to connect to a dining area or pathway for a seamless look. With the right design elements, quartz pavers can turn your outdoor kitchen into a stylish and functional space that enhances your entertaining experience.

Design Tips for a Cohesive Look

Achieving a cohesive garden design requires careful planning. Here are tips to ensure Shoreham quartz pavers integrate harmoniously into your outdoor space:

1. Choose a Complementary Colour Palette

Complementary colour palette with Shoreham quartz pavers

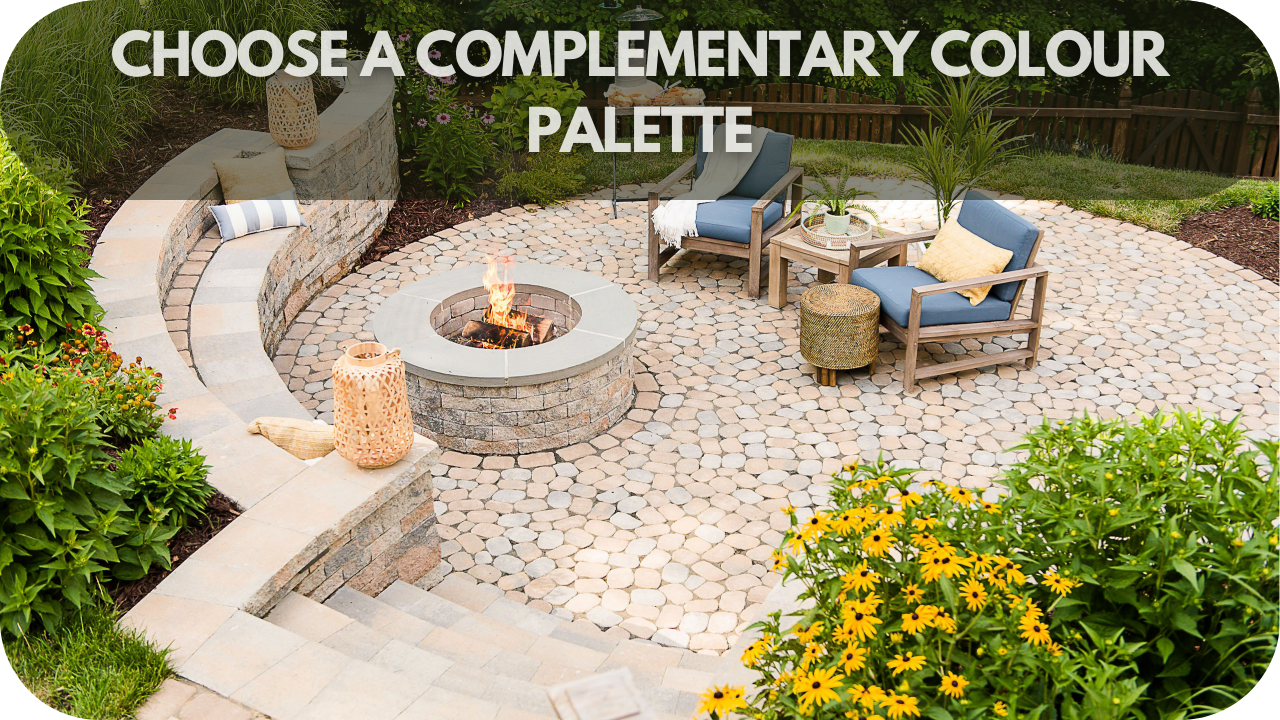
A cohesive garden design starts with selecting the right colours for your Shoreham quartz pavers. Choose tones that complement the existing elements in your garden, such as plants, furniture, and architectural features. 

Neutral shades like grey, beige, or sand work well for blending with natural surroundings, while darker hues can add a touch of drama. Matching the paver colours with your home’s exterior or fencing also creates a seamless connection between indoor and outdoor spaces. 

By focusing on a harmonious colour palette, you can achieve a garden design that feels balanced and visually pleasing.

2. Mix and Match Textures

The texture is key to adding depth and character to your garden, and Shoreham quartz pavers pair beautifully with other materials. Combine the sleek finish of quartz with rougher textures like timber, gravel, or brick to create a striking contrast. 

This technique highlights the unique qualities of each material and prevents the space from feeling flat or monotonous. Ensure the textures you choose are cohesive in tone and style, maintaining a unified aesthetic.
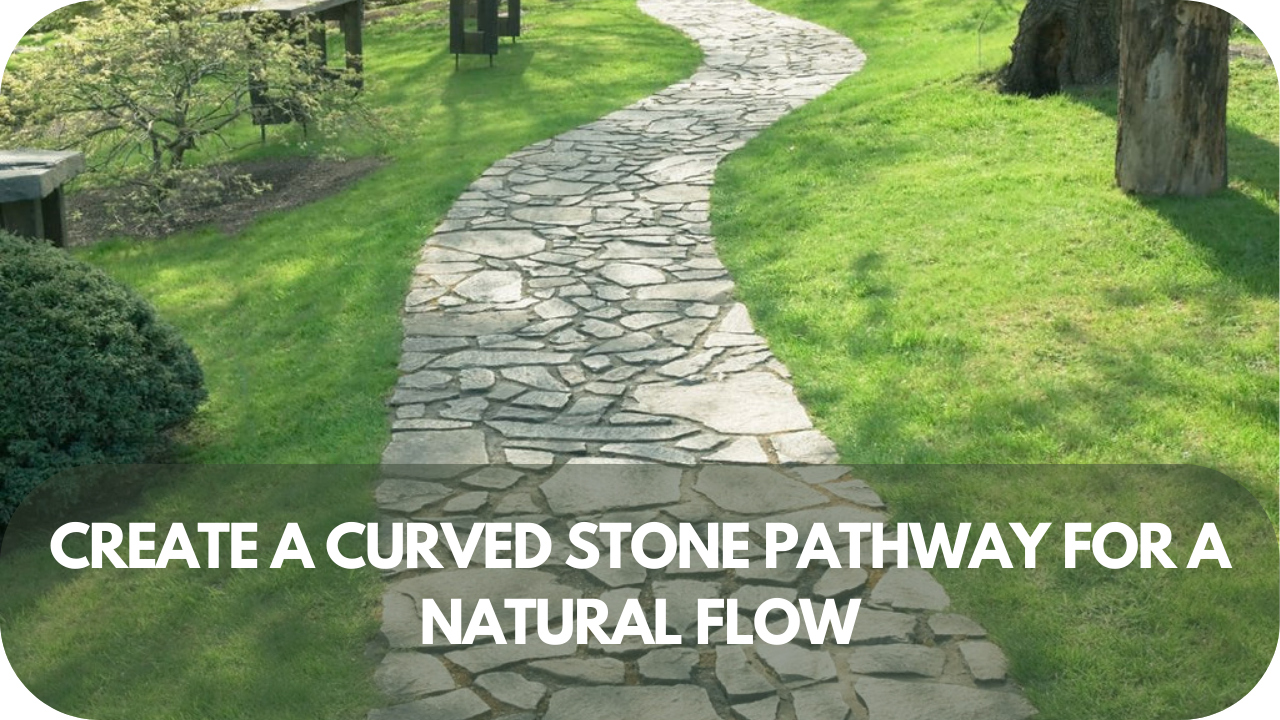
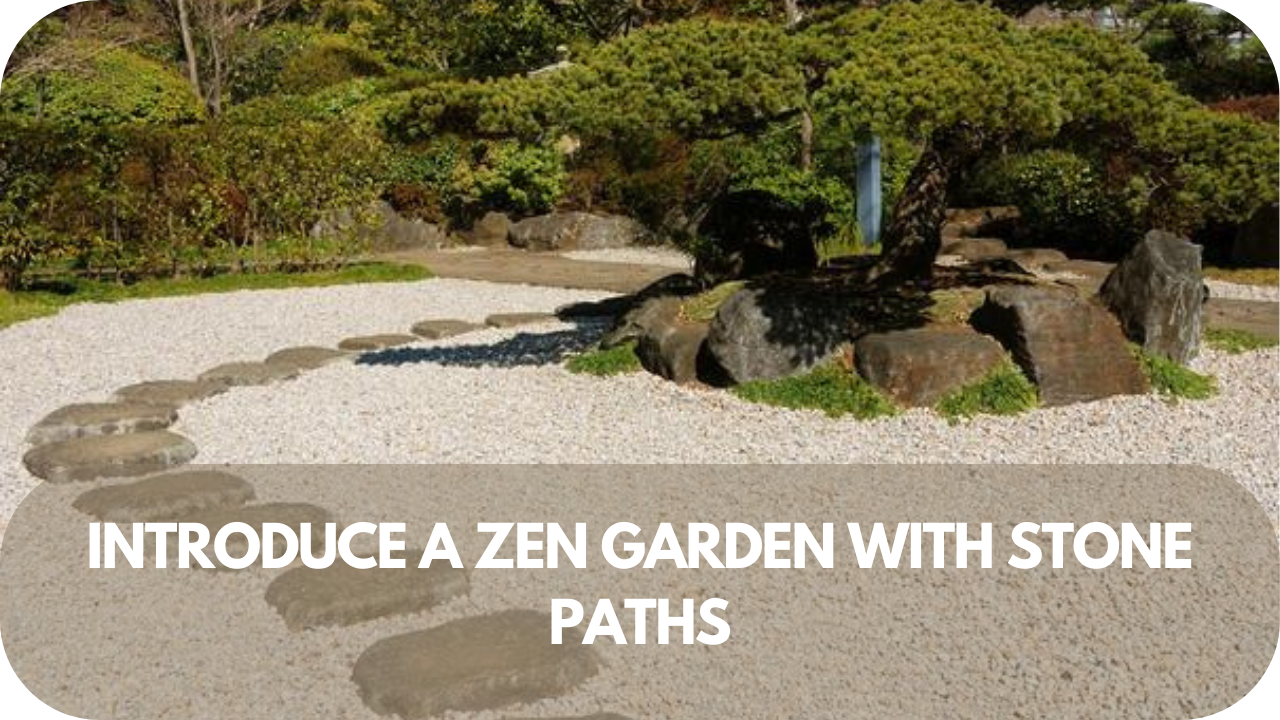
3. Focus on Flow

A well-designed garden flows seamlessly from one area to another, and Shoreham quartz pavers can help guide that flow. Arrange pavers in patterns or layouts that naturally lead the eye through the space, connecting pathways, patios, and garden beds. 

Curved or winding pathways can add a sense of discovery, while straight lines create a more formal look. Avoid abrupt changes in materials or design, as these can disrupt the overall harmony of your garden.

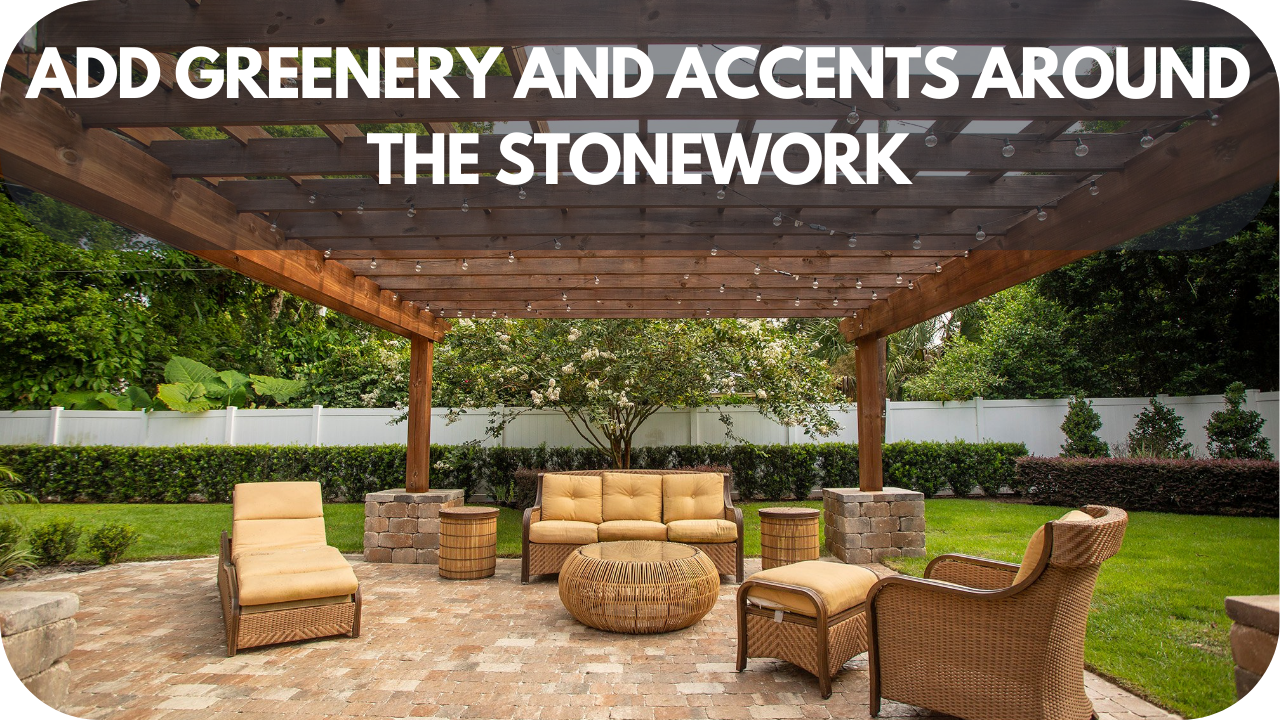
4. Balance Hard and Soft Elements

Balancing hard and soft elements with Shoreham quartz pavers

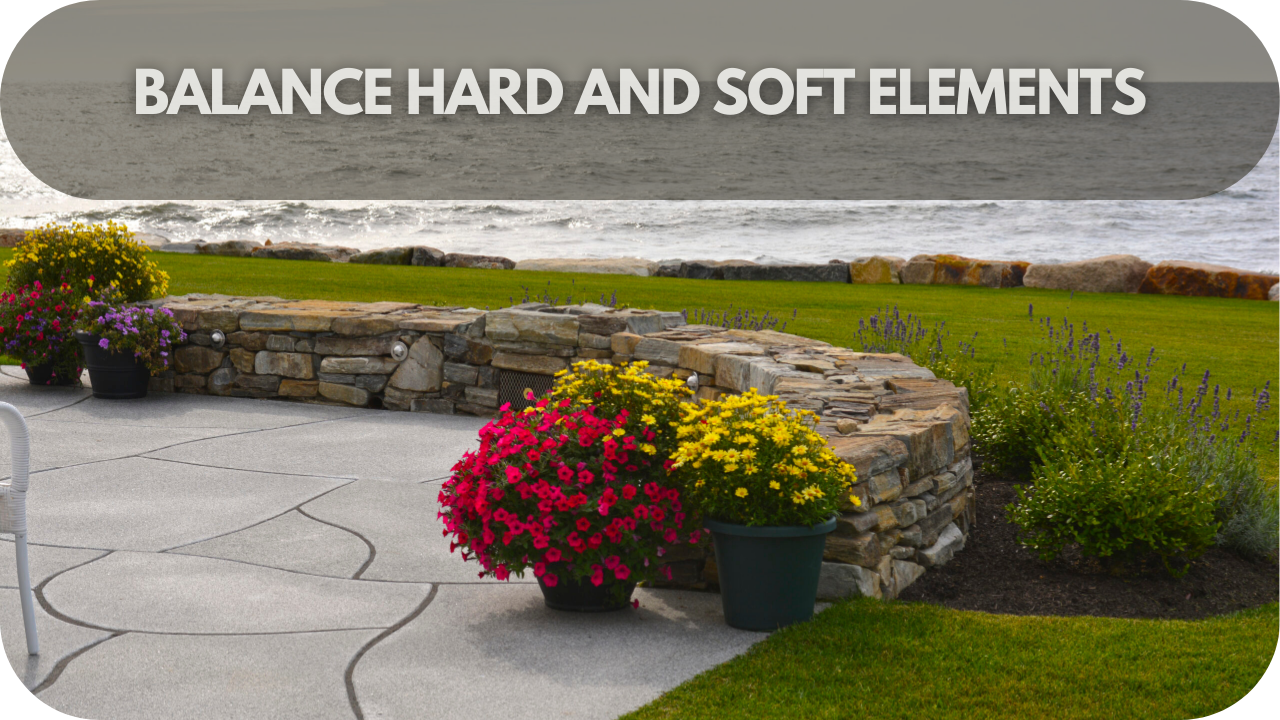
Achieving a balance between the hard surfaces of quartz pavers and the soft greenery of your garden is essential for a natural and inviting look. Incorporate plants such as low shrubs, flowering borders, or climbing vines to soften the edges of the pavers. 

This contrast creates visual harmony and prevents the garden from appearing overly rigid or artificial. The combination of soft and hard elements brings out the best in both, making your garden feel well-rounded and vibrant.

5. Use Lighting Strategically

Lighting can transform the appearance of Shoreham quartz pavers, especially in the evening. Install subtle garden lights along pathways, patios, or around water features to highlight the reflective sparkle of quartz. 

Warm LED lights create a cosy atmosphere, while cooler tones provide a modern and clean aesthetic. Placing lights strategically not only enhances the beauty of the pavers but also improves safety by illuminating key areas. Thoughtful lighting can make your garden a magical retreat after sunset.

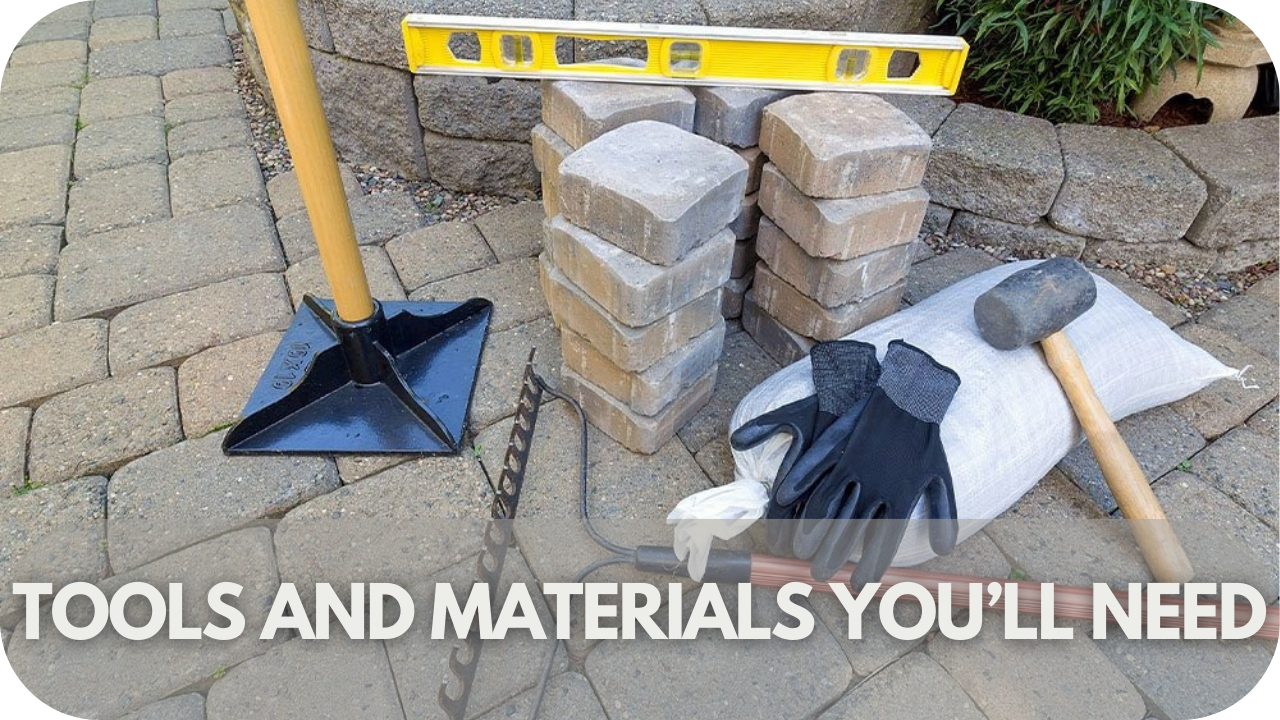
Installation Tips & Maintenance

Shoreham quartz pavers installation and maintenance tips

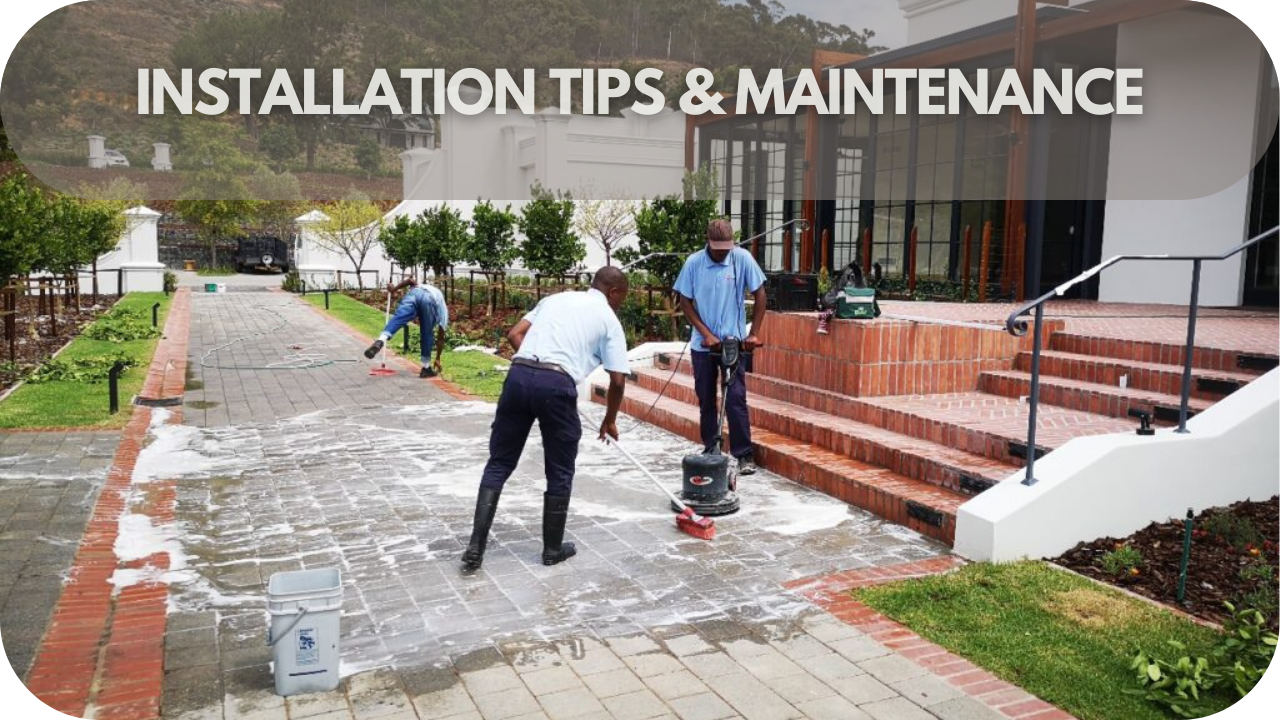
Proper installation and care are essential to maximise the lifespan of Shoreham quartz pavers. Follow these tips to ensure a seamless installation and easy maintenance:

Installation Tips

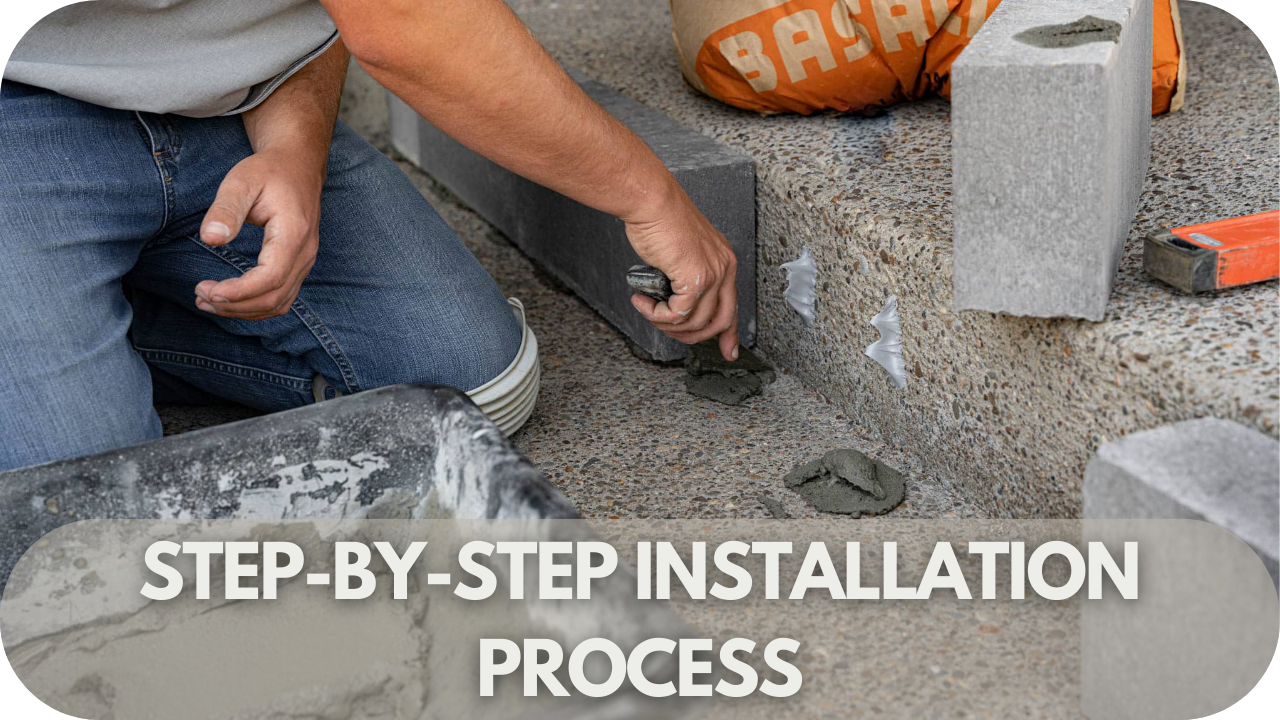
The key to long-lasting and visually stunning Shoreham quartz pavers lies in proper installation. Whether you’re creating a patio, pathway, or garden feature, following these essential tips will ensure a stable and professional finish:

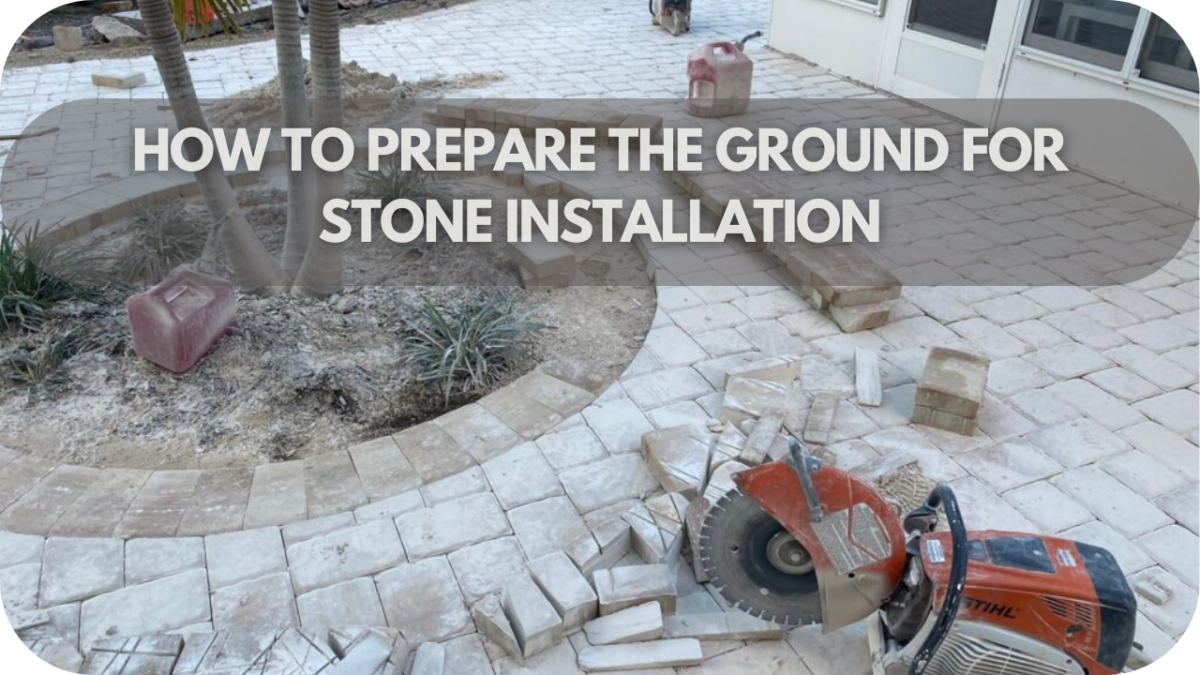
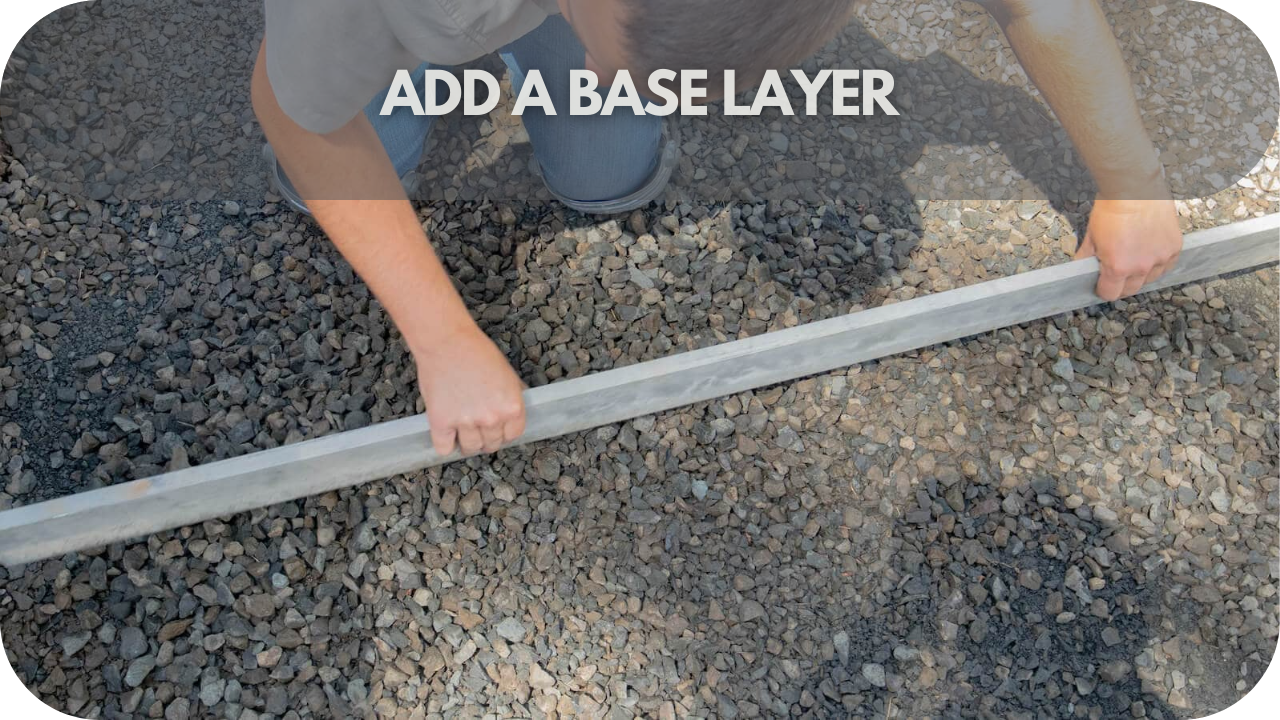
  • Prepare the Base Thoroughly: Start with a well-compacted sub-base to ensure a stable foundation. An uneven or loose base can lead to shifting, sinking, or cracking over time. Use a layer of crushed stone or gravel, compacted firmly, to create a durable and even surface.
  • Choose the Right Adhesive: Use a high-quality, weather-resistant adhesive designed for outdoor paving. This ensures the pavers stay securely in place even under heavy use or extreme weather conditions.
  • Maintain Even Spacing: Use spacers to create consistent gaps between the pavers. This allows for proper grouting or sand-filling, which adds stability and prevents weeds from growing.
  • Ensure Proper Drainage: Slightly slope the surface away from structures to allow water to drain effectively. This prevents water pooling, which can weaken the base and damage the pavers.
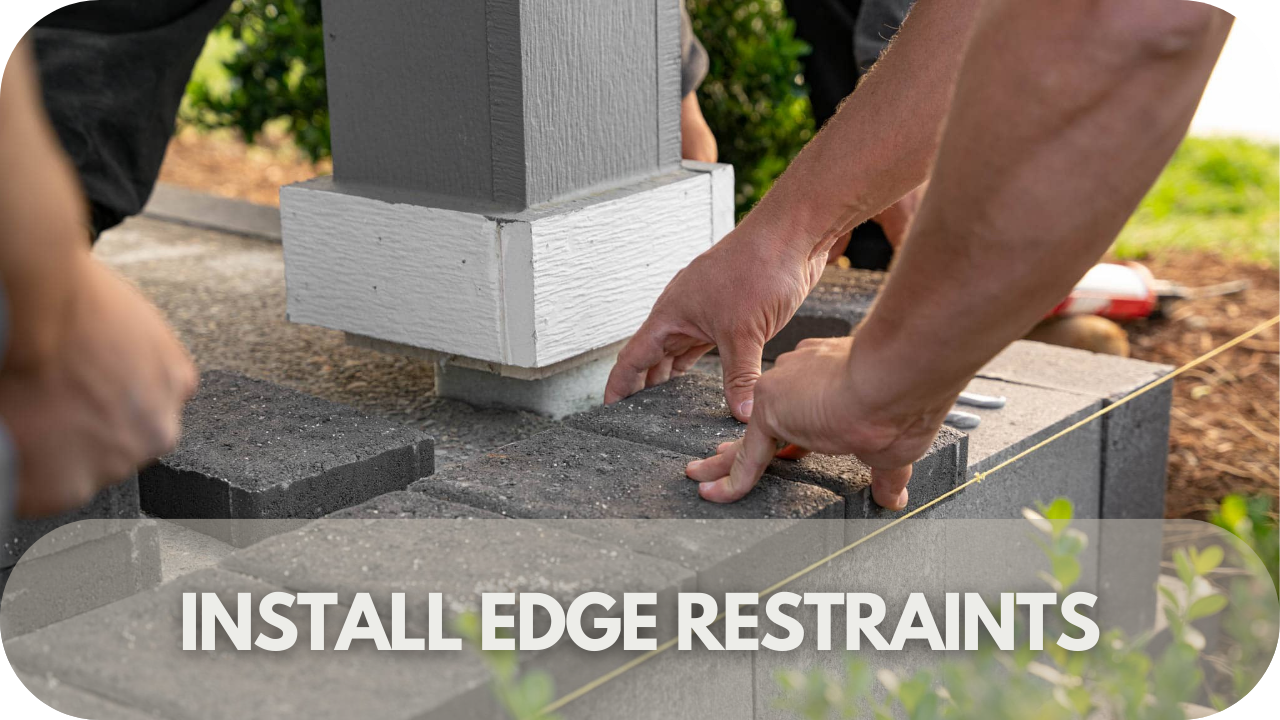
  • Lay Edging Pavers First: For a polished and professional finish, install edge pavers first. These act as a guide for the rest of the installation and help hold the structure in place.

Maintenance Tips

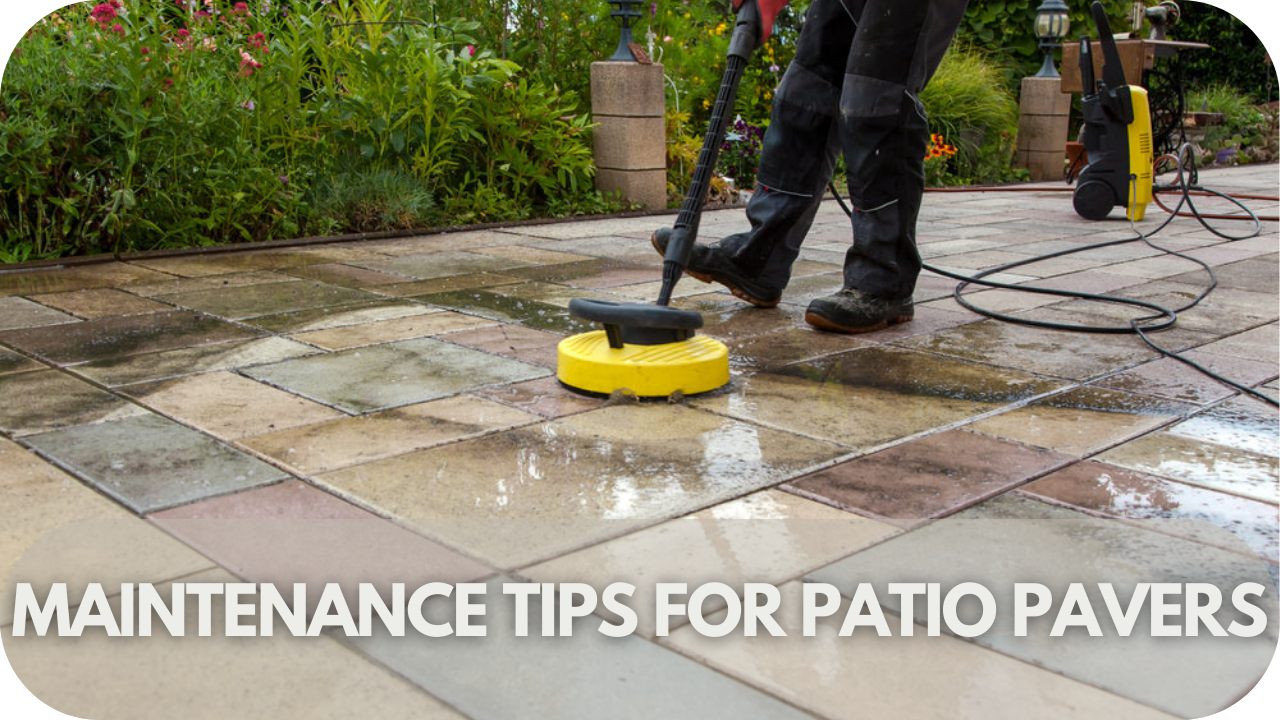
Caring for your Shoreham quartz pavers ensures they remain as stunning and functional as the day they were installed. With a few simple practices, you can keep them looking immaculate and preserve their durability for years to come:

  • Regular Cleaning: Sweep the pavers weekly to remove debris such as leaves, dirt, or twigs that can cause staining or moss growth. For deeper cleaning, use mild soapy water and a soft-bristle brush to maintain their natural shine without damaging the surface.
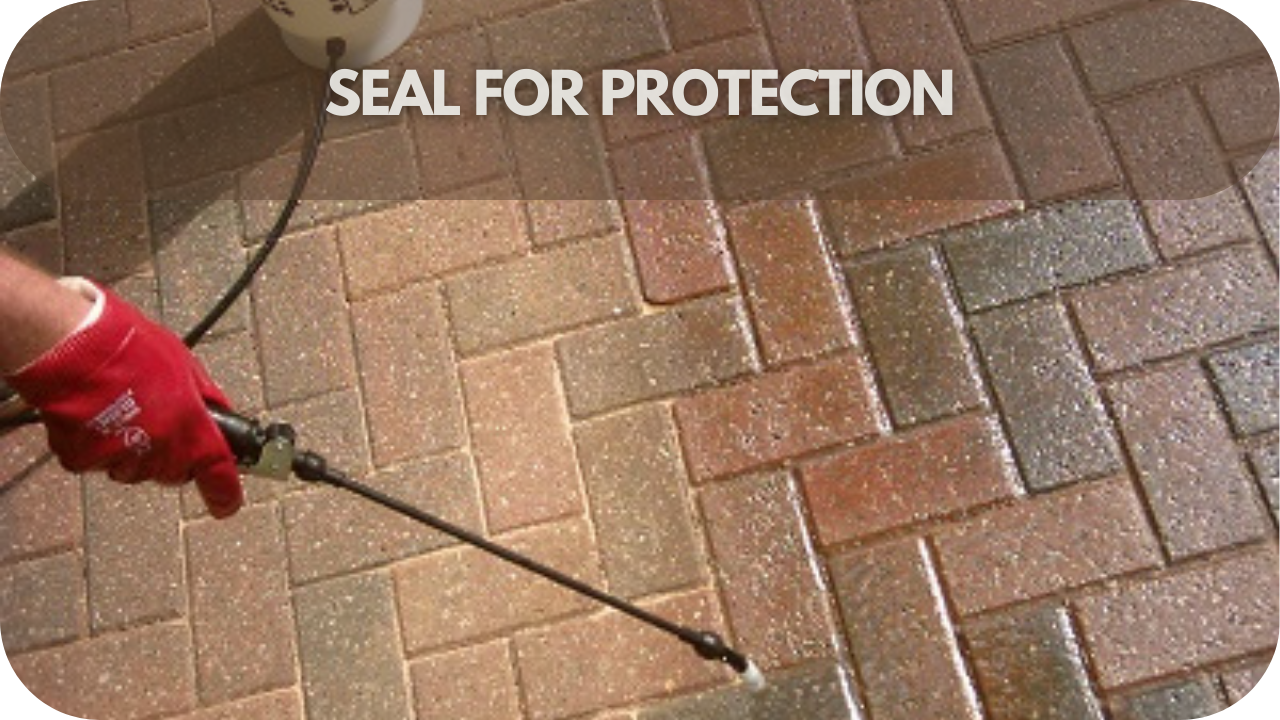
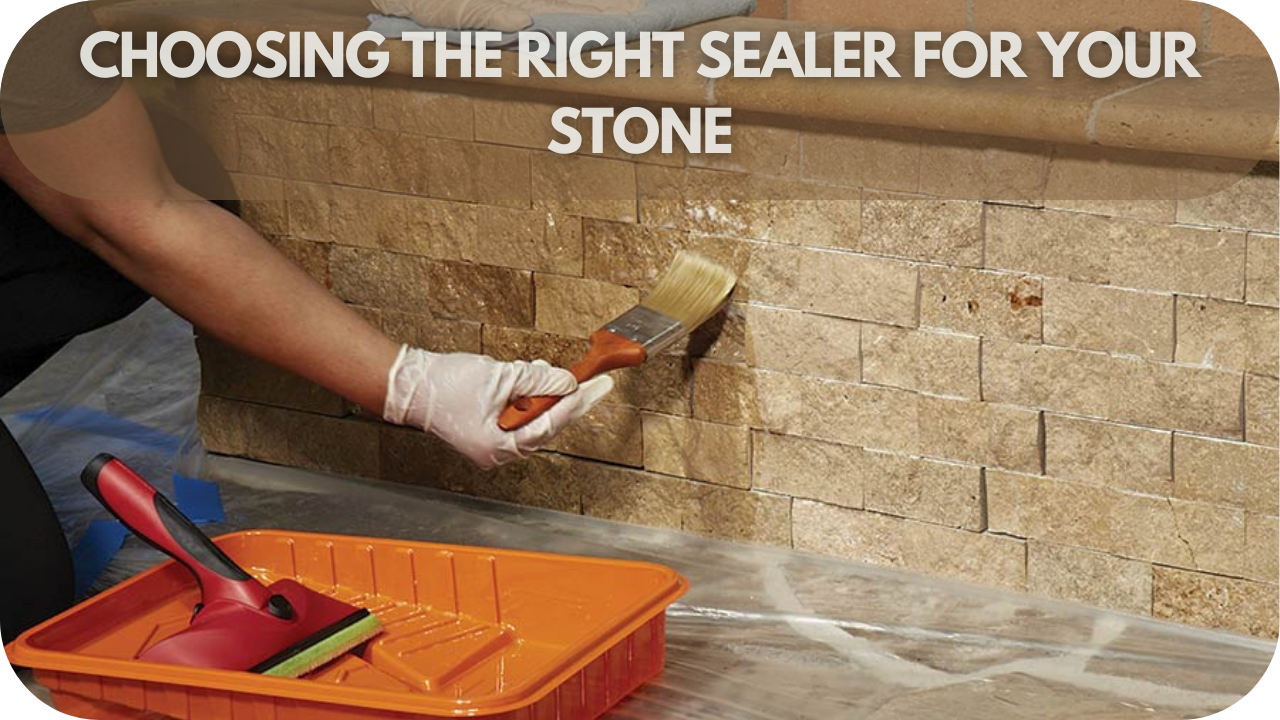
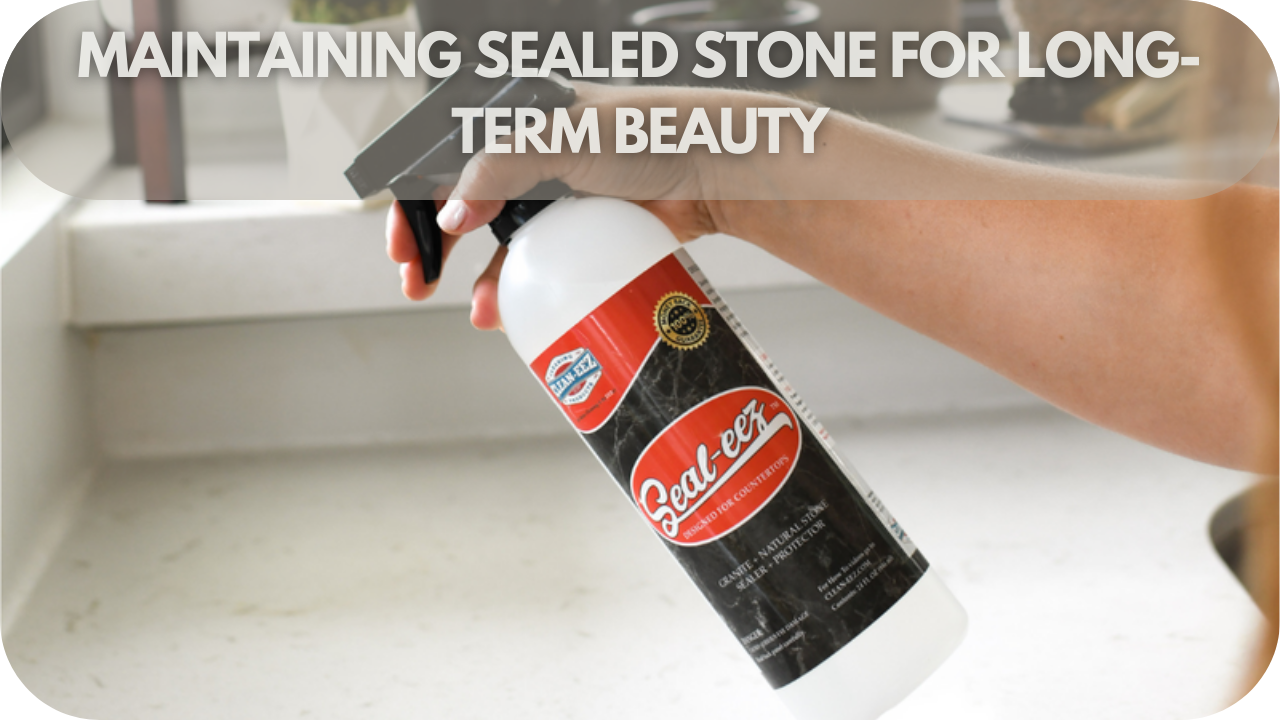
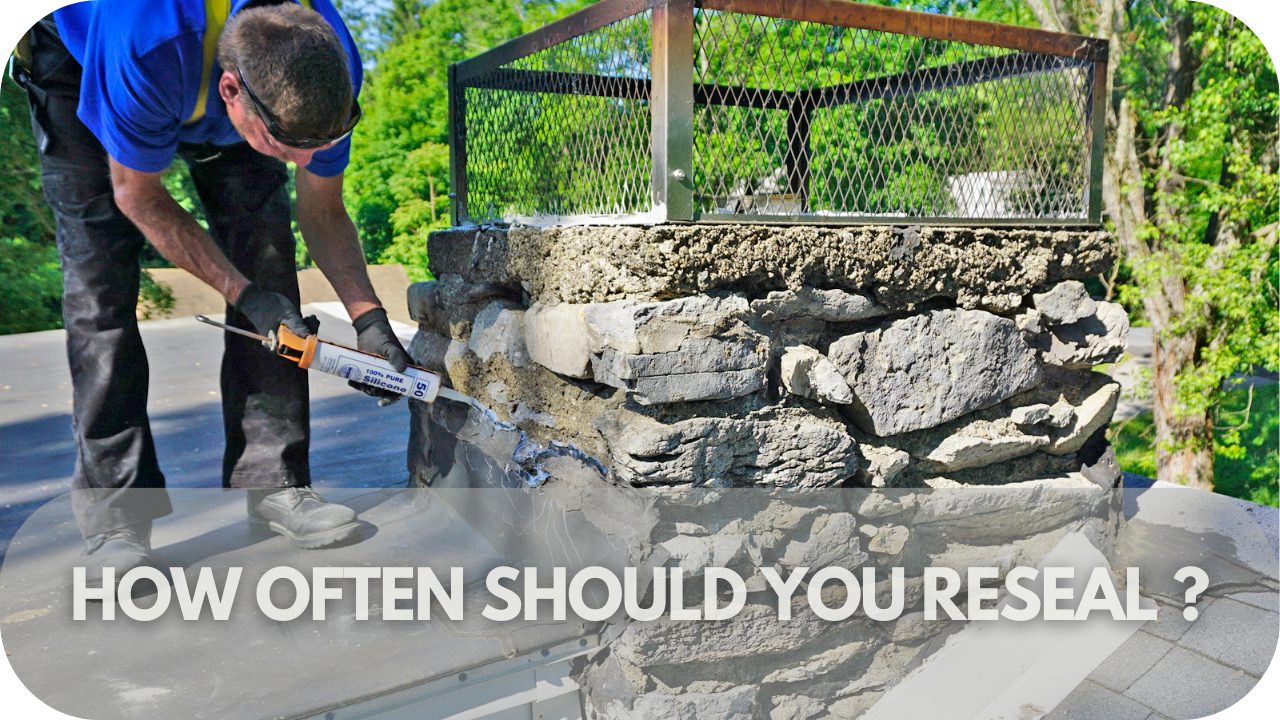
  • Seal for Protection: Apply a protective sealant every 1–2 years to shield the pavers from stains, moisture, and UV damage. Sealing also enhances the pavers’ natural sparkle, ensuring they look pristine year-round.
  • Inspect and Repair Promptly: Regularly check for loose pavers, cracks, or worn grout. Addressing minor issues early can prevent larger, more costly problems in the future.
  • Prevent Weed Growth: Use a joint stabilising sand to fill gaps and minimise weed intrusion. This keeps your pavers looking neat and reduces maintenance efforts.
  • Avoid Harsh Chemicals: When cleaning, avoid using acidic or abrasive products that can damage the quartz surface. Stick to pH-neutral cleaners to preserve the pavers’ finish.

Conclusion

Shoreham quartz pavers combine unmatched durability with a timeless aesthetic, making them a valuable addition to any garden. Whether you’re designing elegant pathways, enhancing outdoor features, or creating a cohesive look with clever design tips, these pavers offer endless possibilities. 

With proper installation and maintenance, they will serve as a beautiful and practical feature in your garden for years to come. Elevate your outdoor space with Shoreham quartz pavers today. Contact our team at Splendour in Stone to get started on your garden transformation!

How to Repair Chips and Scratches in Natural Stone

Natural stone surfaces, whether it’s a marble countertop or a granite floor, can transform your home into a timeless masterpiece. However, over time, chips and scratches are inevitable. 

Don’t let small imperfections ruin the beauty of your stone. In this guide, we’ll show you how to repair chips and scratches in natural stone, ensuring it retains its stunning look for years to come. Read on to learn the secrets to a flawless finish.

Assessing the Damage

Inspecting natural stone for chips and scratches

Before diving into any repair, it’s essential to evaluate the extent of the damage. Not all chips and scratches are the same, and understanding what you’re dealing with is the first step in choosing the right repair method.

For chips, check the size and depth. Minor chips can be easily filled, while deeper or larger ones might need professional attention. If the chip exposes the stone’s underlying structure or is more than a few millimetres deep, it might require additional steps like resin infusion or even a stone patch. 

Scratches, on the other hand, vary in severity. Superficial surface scratches can be buffed out, while deeper gouges may need professional restoration.

The Best Tools and Products for the Job

To achieve professional results, it’s important to have the right tools and materials. Here’s a list of essentials you’ll need for your repair project:

  • Stone Cleaner: This will help clean the surface and prepare it for repair. Avoid harsh chemicals, which could damage your stone.
  • Epoxy or Resin Filler: The perfect solution for chips. Make sure it’s colour-matched to your stone.
  • Polishing Compound: A mild abrasive compound is necessary to buff out surface scratches without causing further damage.
  • Buffing Pads or Cloths: Soft and non-abrasive, these will help you achieve a smooth, polished finish.
  • Stone Sealer: Protects your stone from moisture, dirt, and stains, keeping it looking pristine for longer.

Step-by-Step Guide to Repairing Chips and Scratches

Step-by-step process for repairing chips and scratches

The following step-by-step guide will take you through the entire repair process, from preparation to finishing touches. With the right approach, your natural stone will look as good as new.

1. Clean the Area

Cleaning is the first and most important step in the repair process. Before doing anything, you need to ensure that the damaged area is clean. Use a mild stone cleaner and a soft cloth to remove dust, dirt, and any oils that may have accumulated on the surface. Ensure that the area is dry before proceeding, as moisture can interfere with the bonding process of fillers or sealants.

Once the area is clean, check to ensure there are no remaining debris or oils that could affect the repair. This step might seem simple, but a clean surface is critical to achieving the best repair possible. If the surface is not clean, the repair materials may not adhere properly, leading to an uneven result.

2. Fill in Chips

For chips in your natural stone, epoxy or resin fillers are your best solution. Smaller chips can be repaired quickly by applying a small amount of filler directly into the chip. Carefully follow the manufacturer’s instructions, as the curing time and application process may vary based on the product you choose.

For larger chips, you may need a thicker resin or more than one layer of filler. Apply the filler in stages, allowing each layer to fully cure before adding the next one. Once filled, smooth out the surface of the repair using a spatula or a similar tool. 

After the repair has fully cured, lightly sand the area to ensure it’s level with the rest of the stone. This will create a seamless finish.

3. Buffing Scratches

Buffing out minor surface scratches is a relatively simple process. For scratches that don’t penetrate deeply into the stone, a polishing compound and a soft buffing pad are your best tools. Start by applying a small amount of the compound to the scratch and working it in a circular motion. Be gentle to avoid over-polishing the area.

Continue buffing until the scratch begins to fade. You may need to repeat the process several times for deeper scratches or if the result isn’t as smooth as you’d like. Be patient—this process can take time, but it is worth it for a flawless finish. Once you’re satisfied with the results, wipe the area clean to remove any excess polishing compound.

4. Seal for Protection

Sealing natural stone to prevent future damage

Once the repairs are complete, it’s essential to seal the stone to protect it from further damage. Sealing creates a protective barrier that helps guard against moisture, stains, and additional scratches. Choose a sealant that is suitable for your stone type—whether it’s marble, granite, or quartz—ensuring it provides long-lasting protection.

Apply the sealant as per the manufacturer’s instructions, and allow it to cure completely. Sealing should be done regularly, especially after any repairs, to maintain the stone’s protective layer. A high-quality sealant will help your stone retain its beauty and durability for years to come.

When to Call a Professional

Knowing when to seek professional help for stone repairs

While DIY repairs can handle minor chips and scratches, certain situations call for professional intervention. If the damage is extensive or involves structural damage to the stone, it’s time to bring in a professional. 

Large chips, deep gouges, or cracks that affect the stone’s integrity are often beyond the scope of a simple DIY repair.

Professionals have the tools, skills, and experience needed to perform precise repairs without damaging your valuable stone. They can also address deeper problems such as underlying cracks that may not be visible on the surface. 

Don’t hesitate to call in the experts when the damage is too severe for DIY repairs. Investing in professional restoration can save you from further complications and ensure the long-term health of your stone.

Preventing Future Damage

Prevention is always better than repair. By taking a few simple steps, you can reduce the risk of chips, scratches, and other damage to your natural stone surfaces. Here are some key tips:

  • Use Trivets and Coasters: Always use trivets for hot pots and coasters for drinks. This will prevent both heat marks and scratches from everyday use.
  • Avoid Abrasive Cleaners: Harsh chemicals and abrasives can scratch the stone. Stick to stone-safe cleaners that are gentle yet effective.
  • Regular Sealing: Regularly seal your stone surfaces to protect against moisture, stains, and dirt buildup.
  • Promptly Clean Spills: Clean up spills immediately, especially those involving acidic substances like wine, vinegar, or citrus. These can stain your stone if left for too long.
  • Use Soft Cloths: When cleaning, always use soft cloths or microfibre to avoid scratching the surface.

Conclusion

Repairing chips and scratches in natural stone doesn’t have to be overwhelming. With the right tools, materials, and technique, you can restore your stone surfaces to their original beauty. 

Whether you’re filling in chips, buffing out scratches, or sealing for protection, the process is manageable with a bit of patience and the proper care. Don’t wait for the damage to worsen—act now to protect your investment. 

Start repairing today and enjoy the lasting beauty of your natural stone surfaces for years ahead.

How to Seal Natural Stone for Lasting Beauty

Natural stone surfaces add timeless beauty and sophistication to any home, but without proper care, they can lose their lustre over time. Sealing your natural stone not only preserves its appearance but also ensures its durability for years to come. 

In this guide, you’ll learn why sealing is essential, how to choose the right sealer, and the step-by-step process to achieve lasting beauty for your stone surfaces.

Why Sealing Natural Stone is Essential

Natural stone is porous by nature, which means it can absorb liquids, oils, and dirt, potentially leading to stains, scratches, or discolouration. Sealing your stone helps create a protective barrier, preventing these substances from penetrating and causing irreversible damage. 

It also enhances the colour, texture, and overall aesthetics of the stone, bringing out its natural beauty. Moreover, sealing increases the longevity of your stone, making it resistant to moisture, mildew, and other environmental factors. 

Whether it’s granite countertops, marble floors, or limestone walls, sealing ensures that your stone stays beautiful and functional for years. 

Neglecting to seal your natural stone can lead to costly repairs or replacements, making sealing a crucial step in maintaining its value.

Choosing the Right Sealer for Your Stone

Selecting the perfect stone sealer

Choosing the right sealer for your natural stone is critical for achieving the best results. Not all sealers are created equal, and there are two primary types to consider: penetrating and topical sealers.

Penetrating sealers are absorbed into the stone’s surface, providing deep protection against moisture and stains without altering the stone’s natural appearance. 

This type of sealer is ideal for porous stones, such as sandstone, limestone, and some granites, as it helps prevent liquids from seeping into the stone while maintaining its matte or natural finish. 

Penetrating sealers are often more durable and long-lasting, as they bond with the stone’s surface at a molecular level.

Topical sealers, on the other hand, form a protective layer on the surface of the stone, providing a glossy finish. These sealers are best suited for stones like granite and marble, which require more surface-level protection to keep stains at bay. 

Topical sealers are also excellent for enhancing the shine and colour of stone surfaces, but they can be more prone to wear and may need more frequent reapplication.

When selecting a sealer, it’s important to consider the type of stone you have, as some materials, like marble, may be more sensitive to certain sealers. Choosing the right sealer ensures that you protect the stone without compromising its appearance

Additionally, it’s crucial to think about the desired sheen—whether you prefer a matte, satin, or high-gloss finish. Water resistance and ease of application are also key factors to consider when choosing the ideal product for your stone.

Tools and Materials You’ll Need

To achieve the best results when sealing natural stone, it’s essential to have the right tools and materials. Here’s a comprehensive list:

  • Stone Sealant: Choose between Penetrating Sealers and Topical Sealers. Penetrating sealers for porous stones, providing internal protection, and topical sealers for polished surfaces, enhancing shine and stain resistance with a surface coating.
  • pH-Neutral Stone Cleaner: Necessary to thoroughly clean the stone surface before applying the sealer. Avoid acidic or abrasive cleaners, as they can damage the stone.
  • Clean Cloths or Sponges: Used for both cleaning and applying the sealant. Ensure they are lint-free to avoid leaving residue on the stone.
  • Soft-Bristle Brush: Helps scrub away any stubborn dirt or stains during the cleaning process without scratching the stone surface.
  • Rubber Gloves and Safety Goggles: Essential for protecting your hands and eyes from chemicals in the stone sealant.
  • Masking Tape: Useful when sealing near walls, skirting boards, or other surfaces to prevent accidental contact with the sealant.
  • Measuring Cup (for Dilutable Sealants): Some sealants require mixing or dilution, so a measuring cup helps achieve the correct ratio.
  • Spray Bottle (Optional): Can be used for even application of penetrating sealers, especially on large surfaces like floors or walls.
  • Spirit Level: Helpful when sealing stones on uneven surfaces to ensure proper alignment and prevent pooling of sealant.
  • Soft Towels: Used for buffing the stone surface after sealing to enhance shine and remove any excess sealer.

Step-by-Step Guide to Sealing Natural Stone

Detailed guide for sealing natural stone

Sealing natural stone isn’t as complicated as it may seem, and with the right tools and technique, you can do it yourself. Here’s a simple guide to help you get started:

Step 1: Prepare the Surface

Thoroughly cleaning the stone is the first and most important step. Any dirt, oils, or previous residue must be removed before applying the sealer, as these can interfere with the bonding process. 

Use a pH-neutral cleaner, as harsh chemicals can damage the stone or strip away its natural finish. Be sure to avoid abrasive scrubbers that could scratch or damage the surface. After cleaning, allow the stone to dry completely. Moisture left on the surface can prevent the sealer from adhering properly and affect its effectiveness.

Step 2: Apply the Sealer

Once the stone is clean and dry, it’s time to apply the sealer. Use a soft cloth or sponge to apply the sealer in small, manageable sections. Work in a circular motion to ensure that the sealer is evenly distributed across the surface. 

Do not over-saturate the stone; instead, apply a thin, even layer to prevent streaking or pooling of excess product. Depending on the type of stone and sealer, you may need to apply one or two coats.

Step 3: Allow to Dry

After applying the sealer, let it sit for 15-20 minutes to allow the stone to absorb the product. Wipe off any excess sealer with a clean cloth to prevent a sticky residue. This step ensures that the surface remains smooth and doesn’t develop a thick, shiny layer that could interfere with the stone’s appearance. 

After wiping off the excess, let the stone dry completely before using the surface. For optimal protection, allow the stone to cure for up to 24 hours, depending on the sealer type.

Common Mistakes to Avoid

Avoid these common stone sealing mistakes

Sealing natural stone is a straightforward task, but there are a few common mistakes that can affect the outcome. Be mindful of the following:

  • Sealing Before the Stone is Clean and Dry: One of the biggest mistakes is applying the sealer before ensuring the surface is completely clean and dry. Any leftover dirt or moisture can prevent the sealer from bonding properly, leaving your stone vulnerable to damage.
  • Using the Wrong Sealer: Not all sealers are suitable for every type of stone. For instance, topical sealers may not work well with porous stones like sandstone, while penetrating sealers are ideal for marble and granite. Always check the manufacturer’s recommendations.
  • Over- or Under-Applying the Sealer: Applying too much sealer can result in streaks while applying too little may leave areas unprotected. Ensure that you follow the instructions carefully for optimal coverage. A thin, even layer is all you need for most stones.
  • Sealing in Poor Weather Conditions: Applying sealer in humid, rainy, or extremely hot weather can affect how well it bonds to the stone. Ensure you seal the stone on a dry, mild day for the best results.
  • Not Testing the Sealer First: Skipping the test application on a small, hidden section of the stone can result in unexpected reactions like discolouration or staining. Always test the sealer on a small area to ensure compatibility before applying it to the entire surface.
  • Ignoring Manufacturer’s Instructions: Each stone and sealer type may require specific instructions for optimal results. Failing to follow the manufacturer’s guidelines can lead to improper application, poor protection, and a subpar finish. Always read the instructions carefully before proceeding.

Maintaining Sealed Stone for Long-Term Beauty

Tips for long-term care of sealed stone

Proper maintenance is essential to ensure that your sealed stone continues to look its best over time. With the right care, you can preserve the beauty and durability of your stone surfaces for years to come. 

One of the simplest yet most effective practices is to use a soft, damp cloth to wipe down your stone regularly. This prevents dirt and grime from accumulating and keeps the surface looking fresh. 

However, it’s crucial to avoid harsh abrasives or acidic cleaners, as these can strip away the sealer and damage the stone’s natural surface. Instead, opt for a pH-neutral cleaner that’s gentle yet effective.

Another key aspect of maintaining a sealed stone is resealing it every 1-3 years, depending on the type of stone and the level of use or foot traffic it experiences. Some stones, like granite, may require resealing less frequently, while others, such as marble, might need more frequent attention. 

If water no longer beads up on the surface, it’s a clear sign that the sealer is wearing off, and it’s time to reapply to ensure continued protection.

Lastly, keep an eye out for signs of wear on the surface. If the stone begins to appear dull, or if stains start to penetrate, it may be time for a fresh coat of sealer. 

Resealing your stone ensures that it remains protected from daily wear and tear and continues to look beautiful for years to come. Regular maintenance will not only extend the life of the sealer but also keep your stone looking as vibrant as the day it was sealed.

Conclusion

Sealing natural stone is crucial for preserving its beauty and durability. By choosing the right sealer and maintaining the surface, you can enjoy your stone for years. 

If you haven’t sealed it yet, or it’s time for a reseal, act now to protect your investment. Transform your stone into a lasting masterpiece that enhances your home’s beauty.

How to Prepare the Ground for Stone Installation

Laying stones for a garden path, driveway, or patio may seem straightforward, but achieving a professional and durable finish begins with proper ground preparation. Without the right foundation, your stone installation could shift, crack, or become uneven over time. 

In this article, we’ll guide you through the necessary steps to ensure your stone installation lasts for years and stays stable. Let’s find out!

Key Considerations Before You Start

Before starting any stone installation, there are a few key considerations to keep in mind. The type of stones you’re using and their purpose will determine the preparation needed. For example, heavier stones for a driveway require a different foundation compared to decorative stones for a garden. 

Weather conditions are also important—installing stones during very wet or dry periods may affect the base layer. Make sure to plan accordingly and choose the best time for your project.

Additionally, assess the soil type in your area. Clay soils retain water, while sandy soils drain quickly, affecting the stability of your stone installation. If you’re working with an uneven surface, you may need extra preparation to level it out.

Necessary Tools and Materials

Tools and materials for stone installation

To complete the ground preparation for stone installation, you’ll need a variety of tools and materials. The basic tools include:

Tools:

  • Shovel or Spade: Used for digging and removing soil, grass, or debris from the area.
  • Rake: Helps smooth and level the soil or sand, ensuring an even surface for the base layer.
  • Tape Measure or Measuring Wheel: Essential for measuring the area accurately to ensure precise stone placement.
  • Stakes and String: Used to mark straight edges or curves, guiding the layout of your stone installation.
  • Plate Compactor or Hand Tamper: Used to compact the base material (gravel, sand) to create a stable foundation for the stones.
  • Wheelbarrow: Useful for transporting gravel, sand, and other materials to the site without back-and-forth trips.

Materials:

  • Gravel or Crushed Stone: Forms the base layer, providing stability, drainage, and support for the stones.
  • Sand (Optional): Helps level out any remaining imperfections on the base layer for a smoother surface.
  • Landscape Fabric (Optional): Placed beneath the gravel or sand to prevent weed growth and maintain the integrity of the foundation.

Step-by-Step Guide

Preparing the ground properly is crucial for a lasting stone installation. Follow these steps to ensure a stable, precise foundation that will support your stones for years to come.

Step 1: Clear the Area

The first step in preparing the ground for stone installation is to clear the area. This involves removing any existing vegetation, rocks, debris, or old materials that might interfere with your stonework. Use a shovel, rake, or garden hoe to remove roots, weeds, and other unwanted materials.

For large areas, a sod cutter or turf remover is effective at getting rid of large patches of grass. Once you’ve cleared the space, level the ground to create an even surface. This initial step is crucial, as leaving any organic material could cause instability and encourage weed growth, disrupting your installation over time.

Step 2: Measure and Mark the Area

Measuring and marking the installation area

Once the area is cleared, the next step is to measure and mark your layout. This ensures that your stone installation will be uniform and precise. Use stakes and string to outline straight edges or curves. A tape measure helps maintain consistent measurements, while the string provides a visual guide for accurate alignment.

For curved designs, a flexible garden hose or a piece of string can help you create smooth, flowing lines. By marking the area clearly, you’ll avoid mistakes during installation, and the layout will look more polished in the end.

Step 3: Excavate the Ground

With your area marked, it’s time to excavate the ground to the correct depth. The excavation depth depends on the type of stone you are installing and its intended purpose. 

For example, a driveway may need a deeper excavation compared to a garden path. Typically, a depth of 3-4 inches is sufficient for most stone installations.

Use a shovel or mechanical digger for larger areas. Remove any debris or rocks that may disrupt the surface of your stone installation. If the ground is soft or uneven, you may need to dig deeper to create a stable foundation. Once you’ve dug the area to the desired depth, the next step is to prepare the base layer.

Step 4: Add a Base Layer

Adding a base layer for stone installation

A stable base layer is essential to the longevity of your stone installation. Crushed stone or gravel is commonly used for this layer. It provides stability, facilitates drainage, and supports the weight of the stones. Spread a 2-3 inch layer of gravel or crushed stone evenly across the excavated area.

Next, it’s crucial to compact the base layer thoroughly using a plate compactor or hand tamper. Compacting the base ensures that the stones won’t shift or settle unevenly over time. The more compact the base, the more stable your stone installation will be. After compaction, use a level to check for consistency, ensuring the surface is smooth and even.

Step 5: Install a Sand Layer (Optional)

While not always necessary, a sand layer can enhance the level of your installation. If your stones need to sit precisely, a thin layer of sand (1 inch) can help level out any remaining imperfections from the base. Spread the sand evenly across the compacted gravel, then use a rake to smooth the surface.

For maximum precision, compact the sand lightly to create a solid yet flexible base for the stones to rest on. This step is particularly useful if you’re laying paving stones, as it helps prevent gaps and ensures the stones sit securely.

Step 6: Compact and Final Adjustments

Compacting and final adjustments

Before installing the stones, make one final check of the surface. Use a plate compactor or hand tamper to go over the compacted base and sand layer to ensure everything is set in place. This final pass will ensure no gaps or loose material that could affect the stability of the stones.

Next, use a level or a long, straight board to check the surface for any uneven areas. Adjust the surface by adding or removing material as necessary to ensure a level foundation. This attention to detail now will save you time and effort later by ensuring the stones fit perfectly and stay stable.

Common Mistakes to Avoid

Proper ground preparation is crucial for a durable and stable stone installation. Avoiding these common mistakes will help ensure your project lasts longer and stays in great condition.

  • Neglecting proper site grading: Ensure the ground is levelled and slopes away from structures to promote drainage. Without this, water can accumulate and cause shifting or cracking of stones.
  • Insufficient compaction of the base material: Failing to compact each layer of base material thoroughly can lead to uneven settling, causing the stones to become loose or uneven.
  • Using the wrong type of sand or gravel: Always choose a high-quality, well-draining material for the base to avoid instability.
  • Overlooking weed barriers: Installing a fabric barrier beneath the stones helps prevent weed growth, which can destabilize the surface and create uneven areas.
  • Skipping the edge restraints: Without proper edge restraints, the stones can shift out of place over time, compromising the integrity of your installation.
  • Inconsistent stone placement: Not maintaining uniform gaps between stones or failing to stagger seams can lead to an uneven surface, affecting both the aesthetic and durability of the installation.

When to Consult a Professional

When to hire a professional for stone installation

In some cases, consulting a professional may be the best course of action. If your project involves a large area or complex design, or if you are unsure about the ground conditions, a professional installer can ensure that everything is done correctly. 

Professionals can help with things like assessing soil quality, ensuring proper drainage, and handling heavy materials that might be difficult to work with on your own.

Additionally, if you lack the time or expertise for excavation and compacting, an expert can save you from potential mistakes and ensure your installation is done efficiently and safely. When in doubt, hiring a professional guarantees a lasting result and can prevent costly errors in the long run.

Conclusion

Ground preparation is the backbone of a successful stone installation. By following these steps—from clearing the area to compacting the base—you can ensure that your stones stay stable and look great for years to come. 

Whether you’re installing a simple garden path or a more complex driveway, taking the time to properly prepare the ground will pay off in the end. Ready to get started? Gather your tools and materials, and transform your outdoor space today!

How to Choose the Best Sealants for Stacked Stone Fireplaces

Stacked stone fireplaces are stunning, but their porous nature makes them vulnerable to damage.  Without the right sealer, their natural beauty can quickly fade due to moisture, stains, and heat damage. 

Choosing the perfect sealing product might seem daunting, but it doesn’t have to be. From protecting against everyday wear to enhancing the stone’s rich textures, the right sealer makes all the difference. 

This article breaks down the top factors and products to make the perfect choice stress-free.

Why Sealing Your Stacked Stone Fireplace is Essential

Sealing stacked stone fireplace

Sealing your stacked stone fireplace is done to maintain its appearance and durability. Stacked stone, while visually appealing, is porous, which means it can absorb moisture, dirt, and stains over time. Without a protective seal, these elements can cause damage, discolouration, and degradation, especially in high-heat areas like a fireplace.

One primary reason to seal your fireplace is to protect it from moisture infiltration. Moisture can seep into the stone, leading to potential mould growth, staining, and even structural damage. 

In addition, the intense heat from the fireplace can cause the unsealed stone to crack or degrade over time, especially if exposed to frequent temperature fluctuations. Sealing helps mitigate these risks, ensuring the stone remains intact and retains its natural beauty.

Sealers also protect against dirt, oils, and other contaminants that stain or mark the stone’s surface. Regular cleaning can become much easier when your stacked stone is sealed, as debris will sit on the surface rather than being absorbed.

Key Factors to Consider When Selecting a Sealer for Stacked Stone

Selecting sealer for stacked stone

When selecting a sealer for your stacked stone fireplace, it’s essential to consider several key factors to ensure the product is compatible, durable, and practical. Here are the main points to keep in mind:

  • Compatibility with Stone Type: Not all sealers work well with every type of stone. Ensure the sealer is designed for natural stones like slate, granite, or limestone, as some may be too harsh or unsuitable for porous materials like stacked stone.
  • Durability and Longevity: Choose a sealer that offers long-lasting protection. High-quality sealers are designed to withstand the heat and moisture exposure that fireplaces experience. 
  • Penetrating vs. Surface Sealers: Penetrating sealers absorb into the stone, offering protection from within, and are ideal for preventing stains and moisture damage.
  • Heat Resistance: Since fireplaces are subjected to high temperatures, selecting a heat-resistant sealer is critical. Look for products specifically designed to withstand heat without breaking down or discolouring.
  • Ease of Application: Some sealers are easier to apply than others, requiring fewer coats or less preparation. Choose a product that suits your DIY skills, or consider professional-grade sealers for a more thorough application.
  • Finish and Aesthetic: Sealers come in various finishes, from matte to glossy. Choose one that complements the look of your stacked stone and enhances its natural texture without drastically altering its appearance.

The Different Types of Sealers for Stacked Stone Fireplaces

Types of sealers for stacked stone

Choosing the right sealer is essential for protecting and enhancing your stacked stone fireplace. Below, we explore the key types of sealers, highlighting their features, uses, and advantages to help you make an informed decision.

1. Penetrating Sealers

Penetrating sealers are an excellent choice for stacked stone fireplaces, absorbing deeply into the stone to provide long-lasting, invisible protection. They maintain the natural texture and appearance, making them ideal for an authentic look. 

These sealers repel moisture, stains, and contaminants while allowing the stone to breathe, preventing efflorescence and trapped moisture damage. Heat-resistant and durable, they are perfect for high-temperature areas like fireplaces. 

2. Enhancing Sealers

Enhancing sealers

Enhancing sealers combine protection with aesthetic improvement, enriching stacked stone fireplaces’ natural colours and textures. They are especially effective for darker or multicoloured stones, intensifying tones while retaining a matte finish. Along with visual enhancement, these sealers protect against moisture, stains, and heat. 

They simplify maintenance by preventing dirt and oils from penetrating the surface. Enhancing sealers are ideal for homeowners seeking durable protection and enhanced visual appeal, ensuring their fireplace remains vibrant and well-preserved.

3. Topical Sealers

Topical sealers form a protective layer on the surface of stacked stone fireplaces, available in glossy, semi-gloss, or matte finishes. They guard against stains water infiltration, and wear while adding a decorative sheen to enhance texture. 

Ideal for indoor fireplaces, topical sealers create a polished look but require more maintenance as the coating may wear down over time. For those seeking a refined and elegant appearance, topical sealers offer adequate protection with proper care and upkeep.

4. Water-Based Sealers

Water-based sealer

Water-based sealers are eco-friendly and perfect for stacked stone fireplaces. They provide reliable protection against water, stains, and oils while maintaining the stone’s natural appearance. Low VOC emissions, minimal odour, and quick-drying properties are ideal for indoor use and ensure good air quality. 

While they may require more frequent reapplication than solvent-based options, water-based sealers are easy to apply and versatile across stone types. They are excellent for environmentally conscious homeowners seeking safe and effective stone protection.

5. Solvent-Based Sealers

Solvent-based sealers deliver superior durability and long-lasting protection for stacked stone fireplaces. They deeply penetrate the stone, forming a strong barrier against water, oils, and stains, making them ideal for challenging environments. These sealers may slightly enhance the stone’s colour, adding richness to its appearance. 

While they emit more pungent odours during application, proper ventilation mitigates this issue. Solvent-based sealers are perfect for homeowners prioritising maximum protection and longevity, keeping their stacked stone fireplaces resilient and visually appealing for years.

Features to Look for in the Best Sealing Products

Features of best sealers

When choosing a sealer for your stacked stone fireplace, prioritise the following features to ensure the best results:

  • Deep Penetration: Opt for sealers that absorb into the stone for long-lasting, invisible protection.
  • Moisture Resistance: Effective sealers repel water and prevent mould, efflorescence, and structural damage.
  • Heat Resistance: Ensure the sealer withstands high temperatures, especially for fireplaces exposed to frequent heat fluctuations.
  • Breathability: A breathable formula allows moisture to escape while blocking new contaminants.
  • Finish Options: Choose natural, matte, or glossy finishes to match your aesthetic preferences.
  • Ease of Application: User-friendly products, such as spray or roll-on sealers, save time and effort.
  • Low VOCs: Environmentally friendly, low-odour sealers are ideal for indoor use.

Step-by-Step Guide to Applying Sealer to Your Stacked Stone Fireplace

Applying sealer to stacked stone

Properly sealing your stacked stone fireplace ensures lasting protection and a polished look. Following the correct steps will prevent moisture, stains, and damage while preserving its natural beauty. This guide breaks down the process into simple, actionable steps for a professional-quality result every time.

1. Clean the Surface

Start by thoroughly cleaning the stacked stone. Use a stone-safe cleaner to remove dust, dirt, and any stains. Allow the surface to dry completely before applying the sealer, as moisture can hinder its effectiveness.

2. Test the Sealer

Before completing the application, test the sealer on a small, inconspicuous area. This ensures compatibility and helps you confirm the final look, significantly if the product enhances colour or adds a finish.

3. Apply the Sealer

Apply the sealer to the stacked stone using a brush, roller, or sprayer. Work in sections, ensuring full coverage without over-saturating the surface. For spray sealers, maintain a consistent distance for even application.

4. Allow Penetration

Let the sealer penetrate the stone for the time recommended on the product label, typically 5-10 minutes. A second coat may be needed for highly porous stones for maximum protection.

5. Wipe Away Excess

After the sealer has had time to absorb, wipe off any excess with a clean, dry cloth. This step prevents residue or streaking on the stone’s surface.

6. Allow to Cure

Let the sealer cure fully, which can take anywhere from a few hours to 24 hours, depending on the product. Keep the area clean and avoid exposing the fireplace to heat until the curing process is complete.

Common Mistakes to Avoid When Sealing Your Fireplace

Mistakes when sealing fireplace

Sealing your stacked stone fireplace is essential for its protection and longevity, but simple errors can lead to poor results or damage. Knowing common mistakes when sealing will help you achieve a professional finish, ensuring your fireplace stays beautiful, protected, and easy to maintain for years.

  • Skipping Surface Cleaning: Applying sealer to a dirty surface traps dust and grime, reducing effectiveness.
  • Using the Wrong Sealer: Not all sealers suit natural stone—choose one designed for stacked stone fireplaces.
  • Over-Application: Applying too much sealer leaves a sticky residue or a cloudy, uneven finish.
  • Ignoring Drying Time: Rushing the process prevents proper absorption, compromising the sealer’s durability.
  • Neglecting Reapplication: Sealers wear over time; failing to reseal regularly leaves the stone unprotected.
  • Not Testing First: Skipping a test patch can result in unwanted colour changes or finishes.
  • Using Harsh Cleaners: Acidic or abrasive cleaners can damage the stone, impacting the sealer’s adhesion.

How Often Should You Reseal Your Stacked Stone Fireplace?

Re-sealing stacked stone frequency

The frequency of resealing your stacked stone fireplace depends on several factors, including the type of sealer used, the stone’s porosity, and its exposure to heat, moisture, and general wear. 

Penetrating sealers typically last 3 to 5 years, providing deep, long-lasting protection. In contrast, topical sealers, which form a surface barrier, may need reapplication every 1 to 3 years, particularly in high-heat environments like fireplaces.

Regularly using your fireplace, exposure to fluctuating temperatures, or heavy cleaning can reduce the sealer’s lifespan. To determine when resealing is needed, perform a simple water test: Place a few drops of water on the stone surface. If the water is absorbed or darkens the stone, it’s time to reseal.

Annual inspections are key to maintaining the stone’s protection and aesthetic appeal. Look for signs of moisture absorption, staining, or a dull, uneven finish. Resealing at the correct intervals prevents damage, discolouration, and deterioration, ensuring your stacked stone fireplace remains a stunning and durable focal point in your home for years.

Wrap-Up

The right sealer transforms your stacked stone fireplace, protecting it from stains, moisture, and heat damage. Choosing wisely makes all the difference whether you want invisible protection or a vibrant finish. Take control of your fireplace’s longevity—start sealing with the best products now!

How to Refresh Your Garden for the New Year with Stone Pathways and Patios

Your garden deserves better than worn paths and tired spaces. Overgrown walkways and dull patios can make even the most beautiful landscapes feel neglected.

Unsurprisingly, over 70% of homeowners plan garden updates yearly—because a refreshed outdoor space sets the tone for a new beginning! Imagine your garden as a vibrant retreat, yet it’s far from that.

In this article, I’ll guide you through Stone pathways and patios to give your garden a stunning makeover using durable and timeless stone features. This will ensure that your outdoor space is ready for the year ahead.

1. Design Stone Pathways

Elegant stone pathway weaving through a lush green garden.

Stone pathways are a versatile and timeless feature that can enhance the beauty and functionality of any garden. They guide visitors through your outdoor space, creating a sense of flow while protecting delicate plants from foot traffic.

Begin by choosing a layout that complements your garden’s style—winding paths for a natural, organic feel or straight paths for a more formal appearance. Select materials like flagstone, gravel, or cobblestone to suit the aesthetic

Prepare the ground by clearing and levelling the area, then lay a base of gravel or sand for stability. Arrange the stones carefully, leaving space for plants or ground cover if desired.

To add character, consider varying the stone shapes or incorporating decorative elements like stepping stones with mosaic designs. Stone pathways not only make your garden more accessible but also provide a charming visual element that ties your landscape together.

2. Create a Patio Space

Cozy patio space with stylish stone flooring and inviting seating.

Creating a patio space requires a careful blend of design, functionality, and site preparation to maximise usability and aesthetic appeal. 

Start by selecting an ideal location—ideally, one that enjoys enough sunlight for lounging but offers some shade for comfort. Consider proximity to your home for easy access, particularly if you plan to use the outdoor dining or entertaining space.

Once you’ve chosen the spot, define the patio’s purpose and size. A smaller area with comfortable chairs may suffice for casual seating, but if you envision hosting gatherings, ensure the deck is spacious enough for furniture and easy movement.

Next, choose suitable stone materials based on style and durability. Natural stones like limestone and slate add elegance and withstand weather well, though options like concrete pavers offer a more budget-friendly alternative while still achieving a polished look.

Plan for foundational stability by laying a solid base, typically a mix of gravel and sand, to prevent stones from shifting or sinking over time. Add finishing touches like surrounding plants, lighting, and furniture to create a warm, inviting atmosphere.

Thoughtful patio design enhances your garden and provides a versatile outdoor space for relaxation and socialising year-round.

3. Add Greenery and Accents Around the Stonework

Vibrant greenery and decorative accents enhancing stone pathways and patios.

Enhancing stone pathways and patios with greenery and accents can transform them into inviting, vibrant spaces that blend seamlessly with the garden. 

Begin by selecting plants that complement the style of your stonework and thrive in the local climate. Low-growing ground covers, such as creeping thyme or moss, fill gaps between stones. They add softness and texture while being durable enough for foot traffic.

Border your pathways or patio edges with small shrubs, ornamental grasses, or flowering plants to create a natural frame that defines the space

For a layered effect, combine plants of varying heights and textures, such as taller ornamental grasses with shorter, colourful blooms. This adds depth and visual interest while maintaining a balanced, cohesive look.

Integrate decorative accents like lanterns, garden statues, or even a small water feature near the stonework. These elements add character and make the space more inviting, especially in the evening. 

Solar-powered path lights are a practical addition to pathways. They ensure safe passage after dark and subtly highlight the beauty of your stonework.

Finally, consider placing pots with seasonal plants around your patio area. These are easy to change out, providing a fresh look throughout the year. Thoughtful use of greenery and accents will elevate the stonework, blending hard and soft elements for a harmonious outdoor space.

4. Create a Curved Stone Pathway for a Natural Flow

Graceful curved stone pathway blending seamlessly with garden landscapes.

Incorporating a curved stone pathway into your garden design can transform its atmosphere, adding charm and a sense of natural movement. Unlike straight paths, which can feel rigid, curved pathways mimic natural organic shapes, encouraging exploration and providing a softer aesthetic.

To create this feature, choose stones that complement your garden’s style—flagstone for a rustic appeal or smooth pebbles for a modern touch. Begin by mapping out the path with a garden hose or rope to ensure a gentle curve.

Prepare the ground by clearing debris and levelling the area before laying a foundation of sand or gravel. Arrange the stones thoughtfully, allowing space for grass or low-growing plants to peek through for added texture.

A curved pathway enhances the visual appeal and guides visitors through your garden, making it more spacious and inviting for the new year.

5. Install a Central Stone Patio as an Outdoor Living Area

Spacious central stone patio designed for relaxing outdoor living.

A central stone patio can become the heart of your garden, providing a functional and beautiful space for relaxation and entertaining. Strategically placed, it is a focal point while harmonising with the natural surroundings.

Choosing durable and weather-resistant stones such as slate, limestone, or granite to ensure longevity when designing your patio. Consider patterns like herringbone for a classic look or irregular flagstones for a more organic feel. 

Start by levelling the ground and adding a gravel or sand base for stability, then carefully lay the stones, ensuring they are secure and evenly spaced.

Enhance the ambience by framing the patio with lush greenery, container plants, or even a pergola for partial shade. 

Add comfortable seating and decorative elements such as fire pits or outdoor lighting to create a cosy retreat. This central patio will elevate your garden into a vibrant outdoor living area, perfect for the new year.

6. Use Gravel and Stone Mix for a Textured Walkway

Textured walkway combining gravel and stone for a rustic garden charm.

Creating a textured walkway using a mix of gravel and stones is an excellent way to refresh your garden for the new year. This combination adds a visually appealing element to your outdoor space and offers practical benefits like improved drainage and easy maintenance. 

Gravel provides a soft, rustic base, while larger stones can frame or accentuate the pathway, giving it a polished and structured look.

To start, outline your desired path and remove any grass or debris. Lay a weed barrier to prevent unwanted growth, then spread the gravel evenly. Incorporate flat stepping stones or irregularly shaped flagstones to add dimension and functionality. 

This versatile design can complement various garden styles, from modern to cottage-inspired. The interplay of textures and colours will create a dynamic and inviting pathway that enhances the natural charm of your garden.

7. Introduce a Zen Garden with Stone Paths

Peaceful Zen garden featuring minimalist stone paths and serene landscaping.

Transform your outdoor space into a peaceful retreat by incorporating a Zen garden with thoughtfully placed stone paths. Inspired by traditional Japanese designs, these gardens emphasise simplicity, natural materials, and the calming interplay of textures.

Begin by selecting a quiet garden area and laying a raked gravel or sand foundation to symbolise water. 

Integrate stone paths using stepping stones or irregular slabs that meander through the space, guiding movement and creating moments of reflection. Arrange stones intentionally, balancing their size, shape, and placement to evoke harmony.

Complement the paths with minimalist elements such as moss, bamboo, or a small stone lantern to enhance the serene atmosphere. 

The path can lead to a focal point like a bench, a water feature, or a meditation space. A Zen garden with stone paths beautifies your garden and invites mindfulness and tranquillity into your daily life.

8. Define Garden Sections with Stone Edging

Neat garden sections highlighted by elegant stone edging for clear boundaries.

Stone edging is a practical and aesthetic way to define sections of your garden, creating clear boundaries while adding a polished look to your outdoor space. Whether you’re separating flower beds, vegetable plots, or pathways, stone edging offers timeless charm and durability.

Start by selecting stones that suit your garden’s design—natural fieldstones for a rustic feel, sleek pavers for a modern touch, or cobblestones for a classic look. 

Outline the desired sections, then dig a shallow trench to anchor the stones securely. Consider levelling the rocks and filling gaps with soil or small gravel for a seamless finish.

Stone edging prevents mulch and soil from spilling over and makes maintenance more manageable by keeping grass and weeds at bay. Using this method, you can create well-defined, organised garden sections that enhance functionality and visual appeal.

9. Build a Stone Fire Pit Area within the Patio

Inviting stone fire pit area nestled within a cozy patio setting.

A stone fire pit area can elevate your patio into a cosy gathering spot, perfect for year-round enjoyment. This feature creates warmth, ambience, and a natural focal point for your outdoor space.

To start, choose a central location on your patio that allows for safe clearance from nearby structures and plants. Use durable stones such as fire-rated bricks, natural stone, or heat-resistant pavers to construct the fire pit. 

Begin by laying a stable base, then stack the stones in a circular or square shape, securing them with fireproof adhesive or mortar for added stability.

Surround the fire pit with comfortable seating like benches or outdoor chairs, and add decorative elements such as cushions or string lights to enhance the atmosphere. 

A stone fire pit makes your patio more inviting and transforms it into a versatile space for entertaining, relaxing, or roasting marshmallows under the stars.

10. Highlight Garden Features with Stone Pillars or Columns

Striking garden features enhanced by elegant stone pillars or columns.

Stone pillars or columns can add a touch of elegance and structure to your garden, serving as striking accents highlighting key features. Whether framing an entryway, supporting an arbour, or marking transitions between garden zones, these timeless elements bring sophistication and functionality to your outdoor space.

Choose materials that complement your garden’s style—stacked natural stone for a rustic appeal or polished stone for a modern look. Position the pillars to draw attention to specific areas, such as a seating nook, fountain, or pathway. Consider topping them with decorative lanterns, planters, or sculptures for added visual impact.

Building stone pillars involves stacking stones over a stable base, using mortar for durability, or opting for pre-made stone veneer over a concrete core. These features enhance your garden’s aesthetic, create focal points that guide the eye, and define the space with character and charm.

11. Add a Water Feature with a Stone Base

Tranquil water feature flowing over a beautifully crafted stone base.

A water feature with a stone base can bring tranquillity and a touch of elegance to your garden. The flowing water and natural stone create a soothing ambience while serving as a beautiful focal point.

Start by selecting a location that allows the feature to be appreciated from multiple angles, such as a central garden area or near a patio. 

Choose a style that fits your aesthetic—a cascading fountain, a bubbling rock, or a small pond. Stones like slate, granite, or river rock are used for the base to ensure stability and complement the natural surroundings.

Install a waterproof liner and a submersible pump to maintain a steady water flow. Surround the feature with plants or smaller stones to blend it seamlessly into your garden. A stone-based water feature elevates your garden’s charm and introduces the calming sound of water to your outdoor oasis.

12. Design a Raised Stone Patio for Better Views

Elevated stone patio offering stunning views of the surrounding garden.

A raised stone patio offers the perfect solution for enjoying breathtaking views and creating a functional outdoor living area. Elevating your patio can help you make the most of natural surroundings, whether overlooking a garden, a scenic landscape, or a city skyline.

Select an ideal spot that maximises the view to design a raised patio. Use sturdy materials like natural stone, brick, or pavers to build the patio’s foundation, ensuring proper drainage and structural integrity. You may need to incorporate a retaining wall or steps to elevate the area while maintaining stability.

Enhance the space with comfortable seating, a dining area, or a fire pit to encourage relaxation and entertaining. 

Surround the patio with lush plants or decorative features to frame the view. A raised stone patio transforms your garden into a scenic retreat, providing a perfect place to unwind while enjoying the beauty of your surroundings.

Conclusion

Stone pathways and patios asdd beauty and functionality to any garden. You create a cohesive, inviting space that enhances usability and charm by carefully selecting materials, planning layouts, and adding greenery. 

With quality materials and solid installation, your garden becomes a lasting retreat that evolves beautifully through the seasons.

How to Install Patio Pavers Over an Existing Concrete Slab

An old, cracked concrete slab can make any outdoor space feel tired and uninspired. Instead of tearing it out, imagine transforming it into a beautiful, functional patio with minimal effort. 

By installing pavers over the existing concrete, you can give your backyard a fresh new look without the mess or expense of starting from scratch.

Curious how it works? Keep reading – you’re just a few steps away from creating the patio of your dreams!

Tools and Materials You’ll Need

Essential tools and materials for installing patio pavers.

Having the right tools and materials before starting the installation is crucial for a smooth and successful project.

  • Tape Measure: This is used to ensure accurate measurements for paver placement.
  • Spirit Level: This is to check that the surface is perfectly even and level.
  • Broom: This is used to sweep away debris and spread sand into joints.
  • Rubber Mallet: This is used to adjust pavers into position without causing damage.
  • Plate Compactor: This is for compacting pavers and sand to create a stable base.
  • Masonry Saw or Angle Grinder: This is used for cutting pavers to fit corners and edges precisely.
  • High-Quality Pavers: These are used to create a durable and visually appealing patio surface.
  • Coarse Sand or Polymeric Sand: To build a stable base and secure paver joints.
  • Edge Restraints: These are used to prevent pavers from shifting or spreading over time.
  • Self-Levelling Compound: For smoothing out dips or uneven areas on the slab.
  • Adhesive or Bonding Agent: For securing pavers in high-traffic or sloped areas.

Step-by-Step Installation Process

Easy-to-follow steps for installing patio pavers over concrete.

Transforming your dull concrete slab into a stunning patio is easier than you think. Follow these simple steps to achieve a professional, durable finish that enhances your outdoor space.

Step 1: Assess the Existing Concrete Slab

Start by checking the slab’s structural integrity. Look for cracks, uneven surfaces, or instability, and repair any minor issues to ensure a solid base. Confirm the slab has a slight slope for proper water runoff. If drainage is poor, consider using drainage solutions like installing weep holes.

Step 2: Prepare the Concrete Surface

Using a power washer, clean the slab thoroughly to remove dirt, grease, and debris. If there are any dips or uneven spots, apply a self-levelling compound to smooth out imperfections. For added paver stability, spread a thin layer of mortar or adhesive as a bonding layer.

Step 3: Lay the Paver Base

Spread a thin, even layer of coarse sand or bonding adhesive over the cleaned concrete surface. This layer creates a stable and level foundation for the pavers. Ensure the sand or adhesive is evenly distributed to avoid future shifting or unevenness when placing the pavers.

Step 4: Place the Pavers

Start placing the pavers in your chosen pattern, such as herringbone or basket weave. Use a level to maintain even alignment and a rubber mallet to adjust each paver gently into place. Pay attention to spacing for a uniform and professional finish.

Step 5: Install Edge Restraints

How to install edge restraints for secure paver placement.

Edge restraints are essential for keeping the pavers in position over time. Place them around the perimeter of the patio to prevent shifting or spreading. Secure the restraints using adhesive or ground anchors to ensure they remain firm, especially in high-traffic areas.

Step 6: Fill the Joints

Seal the paver joint for longevity. Spread polymeric sand evenly across the paver surface, sweeping it into the joints with a broom. Remove any excess sand from the surface, then lightly mist it with water to activate the binding agent. Allow the sand to settle and harden for a strong, long-lasting bond.

Step 7: Compact the Surface

Use a plate compactor to press the pavers firmly into place, ensuring they settle evenly into the base. This step enhances stability and reduces gaps. After compacting, check for alignment and fill any remaining gaps with additional sand for a smooth, polished finish.

Step 8: Seal the Pavers

Apply a high-quality paver sealant. Sealing protects the surface from stains, weather damage, and wear. Use a roller or sprayer for even coverage, and allow the sealant to dry completely. Paver sealing ensures longevity, enhances the pavers’ colour, and keeps your patio pristine for years.

Benefits of Installing Patio Pavers Over Concrete

Key benefits of installing pavers over an existing concrete slab.

Transforming your existing concrete slab with patio pavers is a smart, cost-effective way to enhance your outdoor space. Below are the key benefits of installing patio pavers over concrete, each offering practical and aesthetic advantages for your home.

1. Ease of Installation

Installing pavers over concrete eliminates the need for slab removal, saving time, money, and labour. The process is straightforward and far less disruptive, allowing you to achieve a brand-new patio with minimal hassle while avoiding the mess of a full demolition.

2. Design Versatility

Pavers come in a wide range of materials, patterns, and colours, making it easy to match your style preferences. Whether you love the timeless appeal of natural stone or the clean finish of interlocking concrete pavers, the design options are virtually endless.

3. Durability and Longevity

High-quality pavers are designed to withstand heavy foot traffic, changing weather conditions, and wear over time. Their robust nature ensures a long-lasting, sturdy patio surface that remains beautiful and functional for years with proper care.

4. Low Maintenance

Maintaining pavers is simple and cost-effective. Regular sweeping, occasional washing, and reapplying joint sand or sealant keep the surface looking fresh and clean, without the cracks or major repairs often associated with concrete slabs.

5. Increased Property Value

A well-designed patio adds significant value to your home. Pavers not only improve curb appeal but also enhance the overall functionality of your outdoor space, making your property more attractive to potential buyers.

6. Improved Aesthetics

Pavers instantly upgrade the look of an old, worn concrete slab. Their elegant finish creates a warm, inviting outdoor area perfect for relaxing, entertaining, or showcasing a professionally designed landscape.

Common Problems and Fixes For Installing Pavers Over Concrete

Solutions to common issues when installing pavers over concrete.

While installing pavers over concrete is straightforward, a few challenges can arise if not addressed correctly. Understanding these common issues—and their fixes—will ensure your patio remains durable and visually appealing for years to come.

Poor Drainage

If water pools on the concrete, it weakens the paver base over time and causes instability. To fix this, ensure the concrete has a proper slope for runoff. For stubborn water retention, drill small weep holes into the slab to allow water to escape effectively.

Paver Movement

Pavers can shift or spread if edge restraints are overlooked during installation. Installing sturdy edge restraints and securing them with strong adhesive or ground anchors prevents unwanted movement. This step is crucial for maintaining stability in high-traffic areas.

Uneven Surface

Dips and bumps in the concrete can make the pavers unstable and uneven. Apply a self-levelling compound to fill low spots and smooth imperfections. Once levelled, add a thin layer of sand or adhesive to create a strong, even foundation for the pavers.

Joint Sand Loss

Regular sand between paver joints can wash out over time, leading to loose pavers and weed growth. Replace it with polymeric sand, which hardens when wet, locking pavers into place. This creates a solid bond while resisting erosion, weeds, and heavy rains.

Maintenance Tips for Patio Pavers

Easy maintenance tips to keep your patio pavers looking great.

With proper care, a beautifully laid patio can stay stunning for years. The good news is that maintaining patio pavers is simple and doesn’t require expensive tools or excessive effort. Follow these tips to keep your outdoor space looking polished and functional season after season.

  • Regular Cleaning: Sweep weekly to remove dirt, leaves, and debris. Use water and mild detergent to lift stains for a deeper clean, ensuring you rinse thoroughly.
  • Reapply Joint Sand: Over time, sand between the pavers can erode. Use polymeric sand to refill joints—it hardens when wet and resists weeds, insects, and washout.
  • Seal the Surface: Apply a quality paver sealant every 2–3 years to protect against stains, fading, and weather damage while enhancing the paver colour.
  • Address Weeds and Moss: Remove weeds or moss promptly and treat the joints with an appropriate weed or moss killer to prevent regrowth.
  • Check for Movement: Inspect the pavers for shifting or uneven areas. Reset the affected pavers and reapply joint sand to maintain a stable surface.
  • Prevent Staining: Avoid spills from oil, food, or chemicals. Clean stubborn stains immediately to prevent long-term discolouration or surface damage.
  • Protect Against Harsh Weather: Avoid using metal shovels or de-icing salts in colder climates, as they can scratch or degrade the paver surface. Instead, use plastic tools and gentle ice-melting alternatives.

Conclusion

Transforming your old concrete slab with patio pavers is a cost-effective and rewarding way to elevate your outdoor space. With the right tools, materials, and steps, you can create a stunning, durable patio that enhances both functionality and style.

Ready to bring your vision to life? At Splendour in Stone, we offer premium pavers and expert advice to help you achieve the perfect finish. Explore our range today and start your patio transformation with confidence!

How to Repair & Restore Damaged Limestone Walling Stones

Limestone walling stones bring timeless elegance to any space, but even the most durable surfaces can suffer damage over time. 

Whether it’s from harsh weather, accidental impact, or natural wear, restoring your limestone can seem daunting. But fear not – with the right tools and techniques, you can bring your stones back to life. 

In this guide, we’ll walk you through the essential steps to repair and restore damaged limestone walling stones, ensuring they look as beautiful and sturdy as the day they were installed. Let’s get started!

Common Causes of Damaged Limestone Walling Stones

Understanding common causes of limestone wall damage for effective repair.

Limestone walling stones are renowned for their durability, but even the most resilient stone can succumb to damage over time. Understanding the most common causes of wear and tear can help you protect your investment. Here are the most common causes:

1. Weathering and Erosion

Exposure to the elements—wind, rain, and frost—can slowly erode limestone over time. This constant wear makes the surface rougher, more porous, and vulnerable to further damage. 

The freeze-thaw cycle, where water penetrates the stone, freezes, and expands, causes cracks, worsening the deterioration.

2. Staining and Discolouration

Limestone can easily become stained or discoloured due to organic growths such as moss, algae, and lichen or by external pollutants like rust, mineral deposits, and environmental pollution. 

If left untreated, these stains can be permanent, affecting the stone’s appearance and long-term durability.

3. Cracks and Chips

Limestone is vulnerable to physical impact, whether from heavy objects, settling foundations, or shifting ground. 

Natural expansion and contraction of the stone due to temperature fluctuations can also cause cracks and chips. Over time, these minor damages can worsen, leading to significant structural issues if not addressed promptly.

4. Algae, Moss, and Lichen Growth

Algae, moss, and lichen can thrive on limestone, particularly in damp, shaded areas. 

These biological growths damage the stone’s surface by infiltrating it with their root systems. Over time, they contribute to stone erosion and accelerate the breakdown of the material.

Tools and Materials Required for Repairing Limestone Walling Stones

Essential tools and materials for limestone wall restoration.

When repairing and restoring damaged limestone walling stones, having the right tools and materials is essential for achieving a professional and durable result. Here’s what you’ll need:

  • Chisels and Hammers: For minor chips and cracks, stone chisels and a masonry hammer are essential to carefully remove damaged areas and create a clean surface for repair.
  • Angle Grinder or Handsaw: If you need to shape or cut the stone, an angle grinder with a diamond blade is often the best choice, but if you’re looking for a more accessible option, a manual handsaw or wet stone cutter can also work for small repairs.
  • Stone Repair Filler: A high-quality stone filler or epoxy resin is critical for filling cracks and chips. Choose a filler that matches the limestone’s colour and texture for seamless restoration.
  • Brushes: A soft bristle brush is useful for cleaning the stone’s surface before repairs. A wire brush may also be needed to remove stubborn dirt or old sealant.
  • Protective Gear: To ensure safety, always wear gloves, safety glasses, and a dust mask when handling tools and working with stone.
  • Stone Sealer: After repairs, a stone sealer is essential to protect the stone from future damage and stains. Opt for a high-quality, breathable sealer for optimal results.

Step-by-Step Guide to Repairing Damaged Limestone Walling Stones

Easy step-by-step guide to restore damaged limestone walls.

Restoring damaged limestone walling stones may seem daunting, but with the right approach, you can achieve stunning, long-lasting results. Follow these easy steps to bring your limestone back to life!

Step 1: Clean the Damaged Area

Start by removing dirt, debris, and any biological growth from the damaged area using a soft brush. Then, wash the surface with a mild detergent or stone-safe cleaner. Rinse thoroughly with clean water to ensure no residue remains, leaving a clean, smooth surface for repairs.

Step 2: Treat Stains and Discolouration

Identify the type of stain affecting the limestone—organic, rust, or mineral. Apply a suitable cleaner or poultice to the stained area and allow it to sit for the recommended time. Scrape off the poultice and rinse thoroughly with water. Repeat if necessary to remove stubborn stains.

Step 3: Fill Cracks and Chips

Mix a stone repair compound according to the manufacturer’s instructions. Use a putty knife or spatula to fill the cracks or chips with the compound, smoothing it out so it blends with the surrounding stone. Allow the compound to cure fully, then gently sand the repaired area to match the texture.

Step 4: Restore the Texture and Colour

Assess whether the stone needs texture restoration or colour correction. Use a grinder or sandpaper to restore the texture if necessary. For colour issues, apply a tinted stone repair compound and blend it seamlessly into the surrounding stone for a uniform look. Finish by buffing the area for a smooth, even surface.

Step 5: Seal the Limestone

Select an appropriate stone sealer (either penetrating or surface sealer) and apply it with a clean cloth or brush. Allow the sealer to absorb as per the manufacturer’s instructions. Wipe away any excess to prevent streaking or glossiness. Reapply periodically to maintain long-lasting protection and prevent further damage.

Pro Tips for Preventing Further Damage to Limestone Walling Stones

Expert tips to protect limestone walls from future damage.

Preventing further damage is key to preserving the integrity of your limestone walling. Follow these essential tips to keep your stone looking its best and lasting for years to come:

  • Regular Cleaning: Use a soft brush and a stone-safe cleaner to remove dirt, moss, and debris, preventing moisture buildup that can lead to erosion or staining. Avoid harsh chemicals that can weaken the stone.
  • Apply a High-Quality Stone Sealer: Protect your limestone by applying a breathable stone sealer. Sealing will protect the stone from moisture, stains, and pollutants while allowing trapped moisture to escape. Reapply periodically for lasting protection.
  • Ensure Good Drainage: Make sure water flows away from the limestone wall by maintaining gutter systems and downpipes. Poor drainage can cause water to pool at the base, leading to cracks and stone erosion.
  • Inspect Regularly: Conduct regular checks for minor cracks or chips. Address any issues early before they develop into more significant damage, saving time and money on repairs.
  • Avoid Direct Contact with Harsh Materials: Keep acidic substances such as vinegar, citrus, and cleaning agents away from the limestone, as these can cause etching and discolouration. Use stone-safe cleaning products instead.
  • Limit Exposure to Extreme Weather: If possible, protect your limestone walling from prolonged exposure to extreme temperature fluctuations or harsh winds, which can cause expansion and contraction, leading to cracks. Use appropriate covers or shielding for vulnerable areas.

When to Call a Professional for Limestone Restoration

Know when to seek professional help for limestone restoration.

While many limestone repairs can be tackled DIY, some issues are best left to the experts. If the damage is extensive or beyond your skills, professional restoration ensures the job is done right. Here are the key situations when calling a professional is the smartest choice.

1. Extensive Cracks or Structural Damage

Large cracks or structural damage in limestone walls require professional expertise. Experts can assess the underlying issues and use specialised tools to stabilise and repair the stone, ensuring a durable, long-lasting restoration that prevents further deterioration.

2. Severe Biological Growth

When moss, mould, or lichen has deeply penetrated the stone, professionals can safely remove it without damaging the surface. Their specialised cleaning methods eradicate root systems effectively, preventing future growth and preserving the integrity of the limestone.

3. Persistent Staining or Discolouration

Stains from rust, minerals, or organic growth that don’t respond to DIY cleaning should be treated by a professional. Experts use poultices and specialised cleaners to remove deep-set stains without compromising the stone’s natural colour or structure.

4. Complex Texture or Colour Restoration

For significant texture or colour restoration, professionals have the skills and materials to match the stone’s original appearance. This ensures repairs are seamless, maintaining the uniformity and aesthetic value of your limestone wall.

5. Large-Scale Repairs

For extensive damage, professionals bring the right tools and expertise to handle large-scale repairs efficiently, ensuring both aesthetic and structural integrity.

Conclusion

Restoring damaged limestone walling stones requires the right techniques, tools, and care. Whether you’re tackling small repairs or needing professional help for large-scale restoration, addressing damage early ensures your limestone remains strong and beautiful. 

For expert advice or high-quality limestone materials, contact Splendour in Stone today. Our team is ready to help you restore your stone’s natural beauty and durability for years to come.

Safe De-icing Solutions for Paving Stones

Winter can be tough on outdoor spaces, especially when it comes to keeping your paving stones safe from ice and snow. 

While traditional de-icers might seem like a quick fix, they often cause lasting damage—staining, erosion, and cracks. But what if there’s a way to keep your surfaces pristine without the risk? 

In this guide, we’ll explore safe and effective de-icing solutions that protect your paving stones through the harshest months. Ready to learn the secrets to winter-proofing your outdoor areas? Let’s dive in!

Why De-icing Is Necessary for Paving Stones

Snow-covered paving stones in winter highlighting the importance of de-icing for safety and longevity.

From preventing dangerous slips to maintaining the long-term integrity of your surfaces, de-icing is an essential part of winter maintenance. Here’s why it matters.

1. Enhances Safety

De-icing is essential for creating safe, slip-free surfaces during winter. It prevents ice build-up on paving stones, reducing the risk of accidents and falls. Safe de-icing solutions ensure safer walkways and driveways for family members, visitors, and vehicles.

2. Prevents Damage from Freeze-Thaw Cycles

Water that seeps into paving stones can freeze and expand during cold weather, causing cracks and surface erosion. De-icing helps prevent this freeze-thaw cycle by keeping moisture from freezing on the stone, ultimately preserving the integrity and lifespan of your paving stones.

3. Reduces Maintenance and Repair Costs

By preventing ice accumulation and minimising damage, de-icing helps extend the life of your paving stones. This reduces the need for frequent repairs or replacement, saving you money in the long run. Regular de-icing maintenance keeps your outdoor surfaces in top condition.

4. Maintains Aesthetics

Ice and snow can leave behind unsightly stains, especially when melted by traditional salts. Safe de-icing solutions are designed to protect your paving stones, preserve their appearance, and prevent long-term discolouration or damage so your outdoor spaces stay attractive all winter long.

5. Improves Functionality

De-icing ensures that paving stones remain functional throughout the winter season. It prevents dangerous ice build-up, ensuring driveways, walkways, and patios remain accessible for vehicles and pedestrians. It also maintains your outdoor areas’ usability despite harsh weather conditions.

Safe De-Icing Solutions for Paving Stones

A close-up of paving stones treated with safe de-icing solutions, ensuring a clear and protected walkway.

Winter can be tough on your paving stones, but with the right approach, you can keep them safe and pristine. Here are safe, effective de-icing solutions to protect your paving stones this winter.

1. Calcium Magnesium Acetate

Calcium Magnesium Acetate (CMA) is an environmentally friendly alternative to traditional de-icers. It is less corrosive to both concrete and vegetation, making it safe for paving stones. 

CMA works by preventing ice from bonding to surfaces, making it easier to remove. Its mild nature makes it ideal for areas sensitive to harsh chemicals.

2. Potassium Acetate

Potassium Acetate is another eco-friendly de-icing option that works well in low temperatures. It is less corrosive than rock salt and is non-toxic to plants and animals. 

This solution is often used in commercial settings, such as airports, for its fast-acting properties and minimal impact on paving stones and surrounding environments.

3. Sand

Sand doesn’t melt ice but provides traction, reducing the risk of slipping on icy surfaces. It’s safe for paving stones and doesn’t cause damage or corrosion. 

Sand is best used in areas where traction is needed immediately, but it doesn’t solve the problem of ice buildup long-term, so it’s often used in combination with other de-icers.

4. Gravel

Like sand, gravel provides additional traction on icy surfaces. It’s a natural and non-corrosive material that doesn’t damage paving stones or harm plant life. 

Gravel is ideal for areas with heavy foot traffic or where immediate traction is needed, though it may require frequent replenishment and clean up after it settles.

5. Baking Soda

Baking soda sprinkled on icy paving stones as a natural de-icing alternative.

Baking soda is a gentle yet effective de-icer. It works by lowering the freezing point of water, preventing ice from bonding to surfaces. 

It’s non-corrosive and safe for paving stones, plants, and pets. However, it is best suited for smaller areas or light snow and ice conditions, as it can be less effective in extreme cold.

6. Vinegar and Water Solution

A mixture of vinegar and water can be used as a mild de-icer for light snow or ice. Vinegar’s acidity helps break the bond between ice and surfaces, allowing for easier removal. 

This solution is eco-friendly and safe for paving stones but may require reapplication in extreme conditions or prolonged cold weather.

7. Urea

Urea is commonly used as a fertiliser but can also be an effective de-icer. Compared to traditional salts, it’s safer for plants and animals and less harmful to paving stones. 

Urea works by accelerating the melting of snow and ice, but excessive amounts can lead to soil contamination over time.

8. Beet Juice-Based Solutions

Beet juice-based de-icers are gaining popularity for their eco-friendly properties. These solutions combine beet juice with salt or other substances to enhance melting efficiency at lower temperatures. 

The natural sugars in beet juice help keep the ice from refreezing. It’s safe for paving stones, reduces corrosive effects, and is biodegradable, making it a green alternative.

Best Practices for De-icing Paving Stones

A person applying de-icing material on paving stones with care, following best practices for safety and durability.

Maintaining your paving stones during winter doesn’t have to be complicated. Follow these best practices for safe, effective de-icing, and protect your outdoor surfaces while ensuring optimal performance all season long.

1. Choose Stone-Safe De-Icers

Select non-corrosive, eco-friendly de-icers like Calcium Magnesium Acetate (CMA) or Potassium Acetate to protect your paving stones from damage while effectively melting ice and snow.

2. Apply Evenly and Sparingly

When applying de-icer, spread it evenly across the surface to avoid overuse. A thin, uniform layer is sufficient to prevent staining and erosion, ensuring optimal results without harming your paving stones.

3. Use the Right Tools

Avoid metal shovels or tools that can scratch and damage your paving stones. Opt for plastic shovels, snow blowers, or brooms to gently remove snow and ice, preserving your pavers’ surface.

4. Time Your Application

Apply a de-icer before snow accumulates too heavily, allowing it to work effectively before ice bonds to the stones. This makes removal more manageable and reduces the chances of long-term damage to the stone surface.

5. Remove Residual Product

After de-icing, always clear any leftover product from your paving stones. This helps prevent the build-up of harmful chemicals and ensures your paving stones remain in good condition throughout the winter.

How to Clean and Maintain Paving Stones After De-Icing

Cleaning off residue after de-icing to maintain their appearance and integrity.

Once winter is over, it’s time to give your paving stones some TLC. Follow these simple steps to clean and maintain them, ensuring they stay in excellent condition and last for many seasons.

  • Remove Excess De-Icer: Use a broom or plastic shovel to clear any leftover de-icer from the surface. This prevents the residue from soaking into the stone and causing long-term damage.
  • Clean with Mild Detergent: Use a gentle solution of warm water and mild detergent to clean your paving stones. Avoid harsh chemicals, as they can damage the stone’s finish over time and affect its appearance.
  • Rinse Thoroughly: After cleaning, rinse the paving stones thoroughly with clean water to remove any remaining cleaning solution or residue. This helps prevent any build-up that could stain or damage the surface.
  • Inspect and Reapply Sealant: Check the condition of the sealant on your paving stones. Apply a fresh coat if the sealant shows signs of wear or damage. Sealing creates a protective barrier that shields the stone from moisture and future de-icing chemicals.
  • Check for Cracks and Damage: After cleaning and re-sealing, inspect your paving stones for any signs of cracks or damage caused by the winter freeze-thaw cycle. If needed, repair the damaged stones promptly to prevent further deterioration and ensure long-lasting durability.

Preventing Future Damage: Proactive Care Tips

Well-maintained paving stones with no cracks, showcasing the results of proactive care to prevent future damage.

Protecting your paving stones starts long before winter arrives. Following these simple yet effective care tips, you can safeguard your stones against harsh weather and ensure they stay in top condition for years.

  • Resand the Joints Between Pavers: Reapply sand to joints to prevent weed growth and maintain stability. Use polymeric sand for added durability and to reduce erosion over time.
  • Apply Joint Stabilizers: Joint stabilisers lock sand in place, preventing erosion and enhancing the longevity of paving stones, especially in areas with heavy rainfall or freeze-thaw cycles.
  • Ensure Proper Drainage: Paving stones should be laid with a slight slope to direct water away. Proper drainage prevents water from pooling on the surface, reducing the risk of freeze-thaw damage and maintaining the structural integrity of your stones.
  • Protect with Edge Restraints: Install edge restraints around your paving stones to prevent shifting during freeze-thaw cycles. This ensures the integrity of the stone layout and keeps them securely in place.
  • Maintain Vegetation Around Pavers: Trim plants and trees near pavers to prevent root damage and reduce debris that could stain or degrade the stone over time, ensuring long-lasting, pristine surfaces.

Conclusion

At Splendour in Stone, we believe in keeping your outdoor spaces beautiful and durable through every season. You can protect your paving stones from long-term damage by choosing safe, eco-friendly de-icing solutions and following proper maintenance practices. 

Don’t wait for the damage to appear – invest in the right products today and ensure your paving stones remain pristine for years.

How to Remove Motor Oil from Pavers

Motor oil stains on pavers can be a real headache, whether it’s from an accident while changing the oil or a slip-up in the garage. 

But all is not lost—there are simple, effective methods to restore your pavers to their original beauty. Picture those stubborn stains disappearing, leaving your driveway or patio looking as good as new. 

In this guide, we’ll walk you through the best techniques to remove motor oil from pavers so your outdoor space stays clean and welcoming. Read on.

Why Motor Oil Stains on Pavers Are Problematic

Close-up of motor oil stains on pavers highlighting the damage and unsightly appearance.

Motor oil stains on pavers are not just unsightly—they can cause long-term damage. The oil seeps into porous surfaces, making them harder to clean and weakening the pavers over time. 

This can lead to slippery areas, increasing the risk of accidents. Additionally, untreated oil stains can wash into drainage systems, harming the environment by contaminating water supplies. 

Prompt removal is essential to maintain the beauty and safety of your outdoor spaces while preserving the integrity of your pavers. Act quickly to keep your surfaces looking pristine and protect the surrounding environment.

Tools and Materials Needed

Essential tools and materials neatly arranged for removing motor oil from pavers.

To effectively remove motor oil stains from pavers, having the right tools and materials on hand is essential. Gathering everything before you start will make the process smoother and more efficient. Here’s what you’ll need:

  • Absorbent Material (e.g., cat litter, baking soda or sand): This will help soak up excess oil from the surface, preventing it from spreading further.
  • Dish Soap or Degreaser: A powerful degreaser will break down the oil, making it easier to lift from the pavers. Dish soap, with its grease-cutting properties, can also be effective.
  • Broom or Scrub Brush: A stiff-bristled broom or scrub brush is essential for scrubbing away the oil and detergent solution.
  • Hot Water: Hot water helps activate cleaning agents and will make scrubbing more effective.
  • Bucket: A sturdy bucket is necessary to mix your cleaning solution and water.
  • Protective Gloves: Motor oil can irritate the skin, so gloves protect your hands during cleaning.
  • Pressure Washer (optional): A pressure washer can provide extra cleaning power, especially for large areas with tougher stains.

Step-by-Step Guide for Removing Motor Oil Stains

Hands demonstrating step-by-step techniques to remove motor oil stains from pavers.

Motor oil stains can be a nuisance, but they’re easy to remove with the proper steps. Follow this guide to learn how to effectively clean motor oil stains and restore your pavers, keeping your outdoor surfaces looking pristine.

Step 1: Blot the Stain Immediately

Act quickly to blot up the excess oil with absorbent materials like paper towels or a cloth. The faster you remove the spill, the less time the oil has to penetrate the paver surface. 

Be sure to avoid rubbing, as this can spread the stain further. The goal is to soak up as much oil as possible before it sets.

Step 2: Apply Absorbent Powder (Baking Soda or Cat Litter)

Once the excess oil is blotted, cover the stain with an absorbent material such as baking soda or cat litter. These materials help draw out any remaining oil from the paver. 

Leave it to sit for 15-30 minutes, allowing it to fully absorb the oil. Afterwards, sweep or vacuum the powder off the surface, revealing a cleaner paver.

Step 3: Scrub the Area

Prepare a mixture of warm water and a degreasing cleaner or dish soap. Use a stiff brush to scrub the oil stain, applying pressure to lift the oil from the pavers. 

Scrubbing the surface thoroughly will work the solution into the paver’s porous material, effectively breaking down and lifting the oil. Focus on areas with the most staining.

Step 4: Rinse and Repeat

Once you’ve scrubbed the stain, rinse the area with clean water to remove any leftover cleaner or residue. Assess if the stain has completely gone. 

If the oil stain remains, repeat the process. Some stains may require multiple rounds of scrubbing or additional absorbent material to remove the oil entirely.

Step 5: Use a Pressure Washer (Optional)

A pressure washer can help remove deep-set oil stains on larger or more stubborn pavers. The high-pressure water forces oil out of the paver’s surface, cleaning stubborn stains

Use the washer on a low setting to avoid damaging the pavers. Sweep the nozzle across the area for an even, thorough clean.

Additional Tips for Stubborn Stains

Expert tips and tricks for tackling stubborn motor oil stains on pavers.

For stubborn motor oil stains that won’t budge after the initial cleaning, try these additional tips to get your pavers back to their original condition.

  • Try a Commercial Degreaser: If soap and water aren’t enough, a commercial degreaser can break down tough grease and oil stains. Apply the degreaser, let it sit, and scrub with a stiff-bristled brush for deeper cleaning.
  • Use a Poultice for Deep Stains: For oil that has soaked into porous pavers, a poultice made from baking soda and water can draw out the oil. Apply a thick paste, cover with plastic, and leave it for 24-48 hours. The poultice absorbs the oil, making it easier to clean off.
  • Try an Oxygen Bleach Solution: Oxygen bleach (like sodium percarbonate) is an eco-friendly alternative for tough stains. Mix with warm water, apply to the stain, and let it sit for 15-30 minutes before scrubbing. It’s gentle on pavers but effective on deep stains.
  • Use a Scraper for Residue: If sticky residue remains, gently scrape it off with a plastic scraper. Be careful not to scratch the surface, working in small sections for the best results.
  • Apply a Commercial Concrete Cleaner: For persistent stains, use a commercial concrete cleaner designed for heavy-duty cleaning. Follow the manufacturer’s instructions, scrub, or pressure wash for a thorough clean.

When to Call a Professional

Professional assessing motor oil stains on pavers for advanced cleaning solutions.

While many motor oil stains can be tackled with DIY methods, there are situations where it’s best to call in a professional to ensure the job is done right.

1. Persistent Stains

If the oil stain remains after several cleaning attempts, it may have soaked deeply into the pavers. A professional can use industrial-grade cleaning agents and specialised equipment to tackle even the most stubborn stains without damaging the surface.

2. Large Areas or Heavy Spills

For extensive spills covering large areas or hard-to-reach spots, DIY cleaning can be overwhelming. Professionals can handle large-scale clean-ups efficiently, ensuring consistent results across the entire surface.

3. Damage to Pavers

If your cleaning attempts have caused any discolouration or surface damage, it’s time to call in an expert. Professionals can assess and restore the pavers, using the correct methods to repair damaged stones and preserve their integrity.

4. Safety Concerns

Motor oil can create a slippery surface, and using powerful cleaning equipment like pressure washers can only be safe with proper training. Professionals are equipped to handle these tasks safely, avoiding injury and damage to your property.

Conclusion

Removing motor oil from pavers doesn’t have to be a hassle. With the right techniques and tools, you can restore your outdoor surfaces to their former glory. Whether you’re dealing with a small stain or a larger spill, following the correct steps will make all the difference. 

For those stubborn stains or larger areas, professional cleaning ensures a deep, lasting clean without damaging your pavers. Ready to make your pavers look brand new again? Contact Splendour in Stone for expert advice and high-quality solutions today!

In SQM?

Please fill your details to download.


      Request Callback


        Enquiry Form


        Please fill your details to download.