Register your Information for Free Stone Samples Sent Express to You!

Search
Search
Close this search box.
Search
Close this search box.

How to Seamlessly Blend Indoor and Outdoor Spaces with Natural Stone in 2025

Picture this: you move from your cosy living room to a sunlit patio with no sharp boundaries—just one harmonious space.

As 2025 brings a fresh focus on merging indoor and outdoor living, natural stone stands out as the key to achieving that seamless look. 

But how can you capture this perfect flow? This guide covers everything from unified flooring to earthy palettes and textures inspired by nature. 

Ready to turn your home into a seamless sanctuary? Dive in to uncover every essential detail!

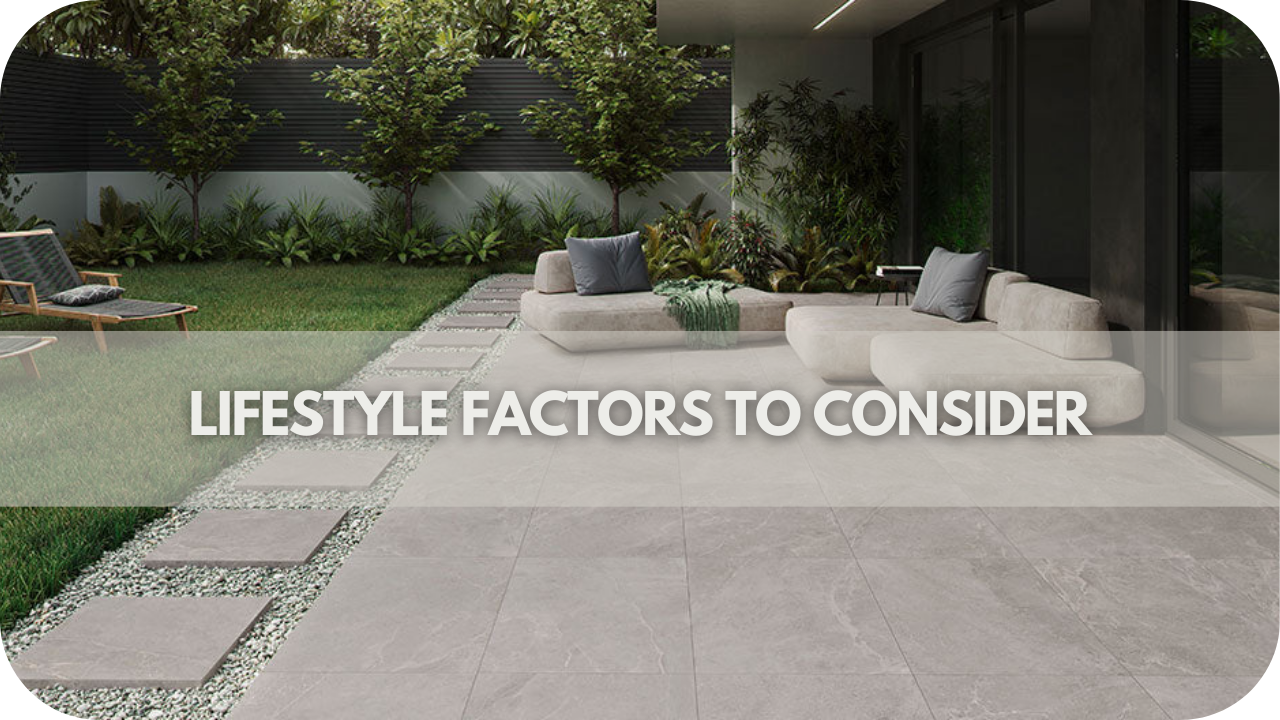
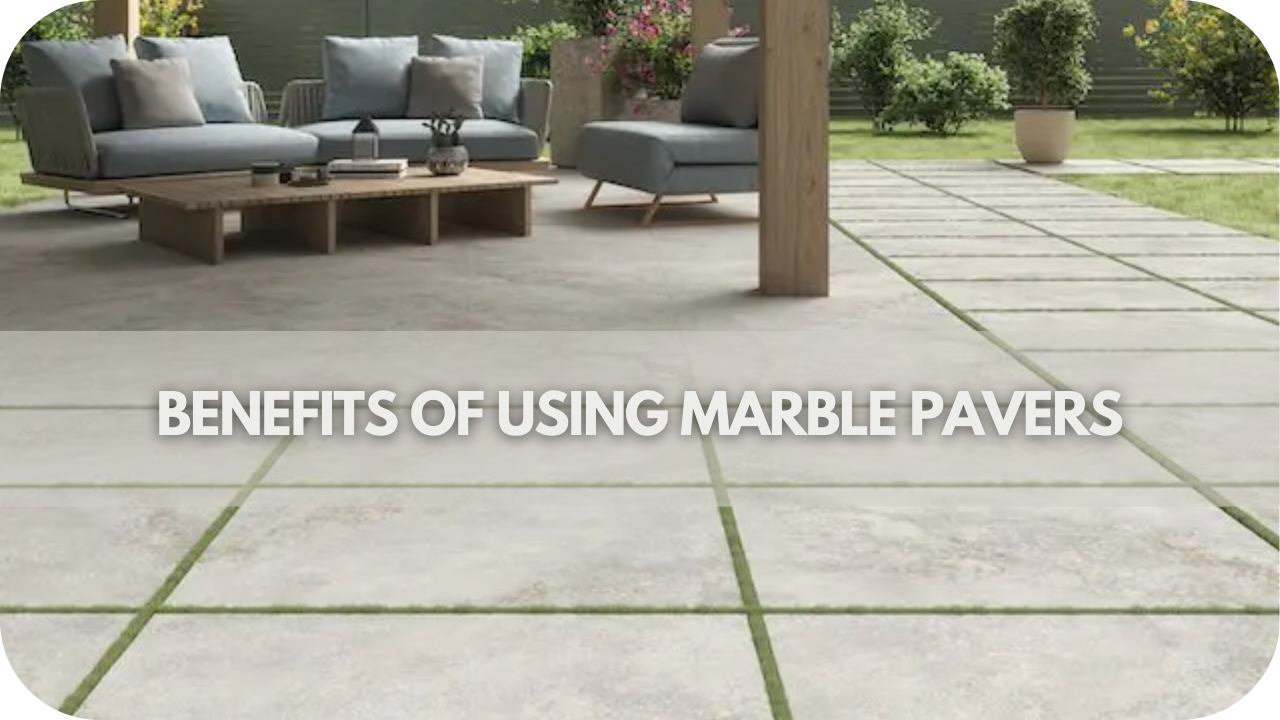
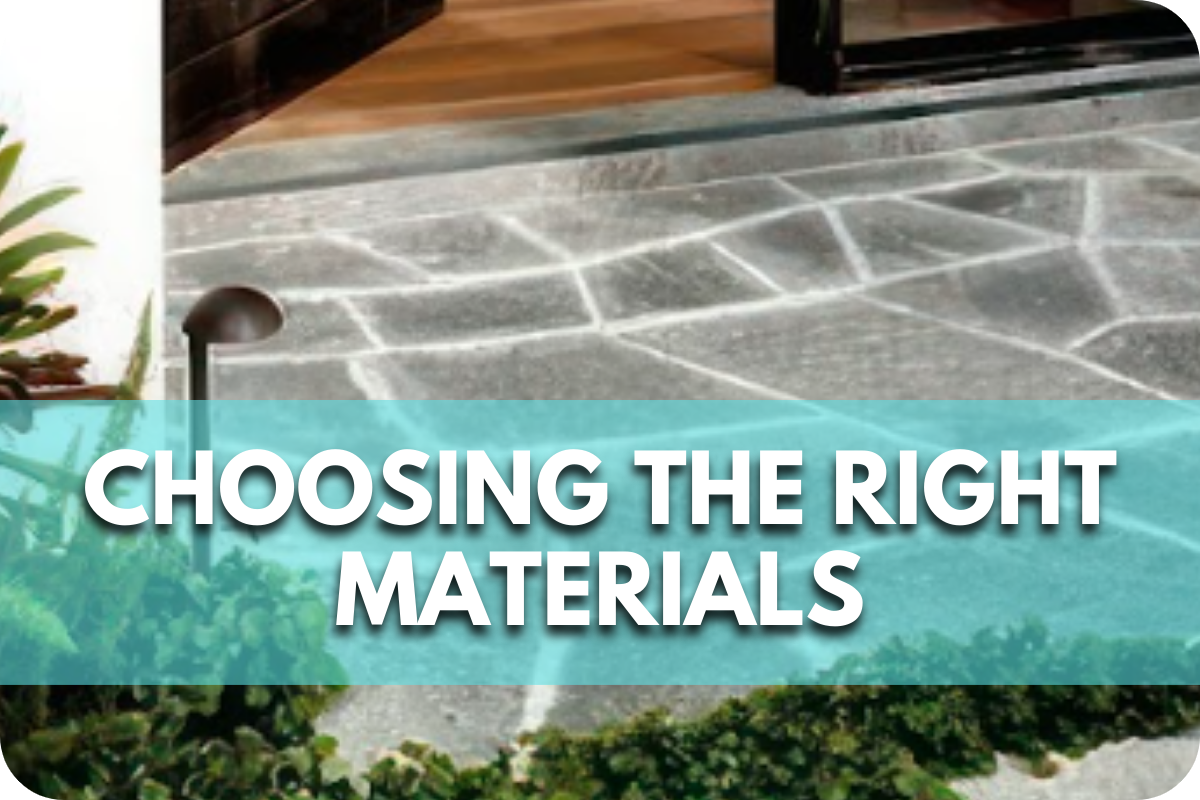
1. Ensure Unified Flooring for Indoor-Outdoor Continuity

Create a seamless flow between indoor and outdoor spaces with unified flooring, enhancing continuity and style across your home and garden.

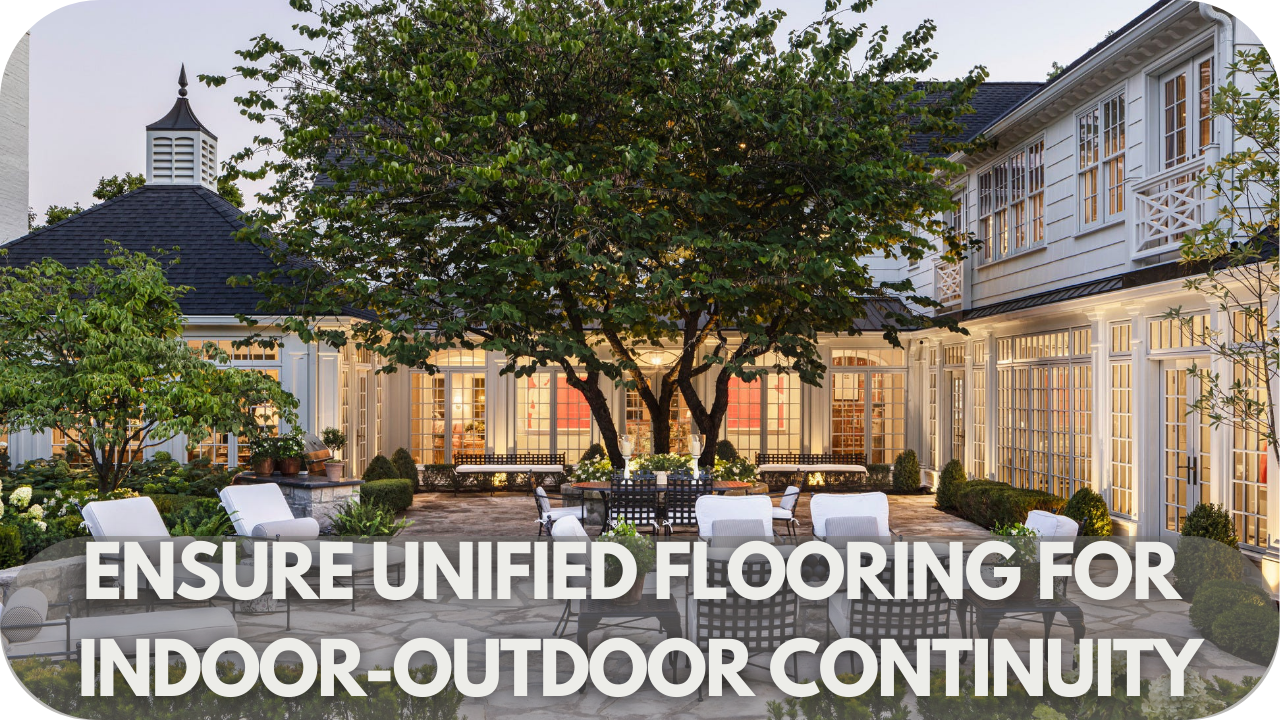
Creating a seamless flow between indoor and outdoor spaces starts with unified flooring. Using the same type of stone flooring inside and outside removes visual barriers and encourages a smooth transition. 

This approach enhances the sense of openness and brings an expansive feel to any space. Natural stones like limestone, sandstone, or travertine work exceptionally well for this purpose due to their durability and versatility. 

These stones withstand varying weather conditions outdoors while retaining elegance indoors, making them ideal for high-traffic areas. With unified flooring, your indoor and outdoor areas will feel connected, fostering a harmonious and inviting atmosphere.

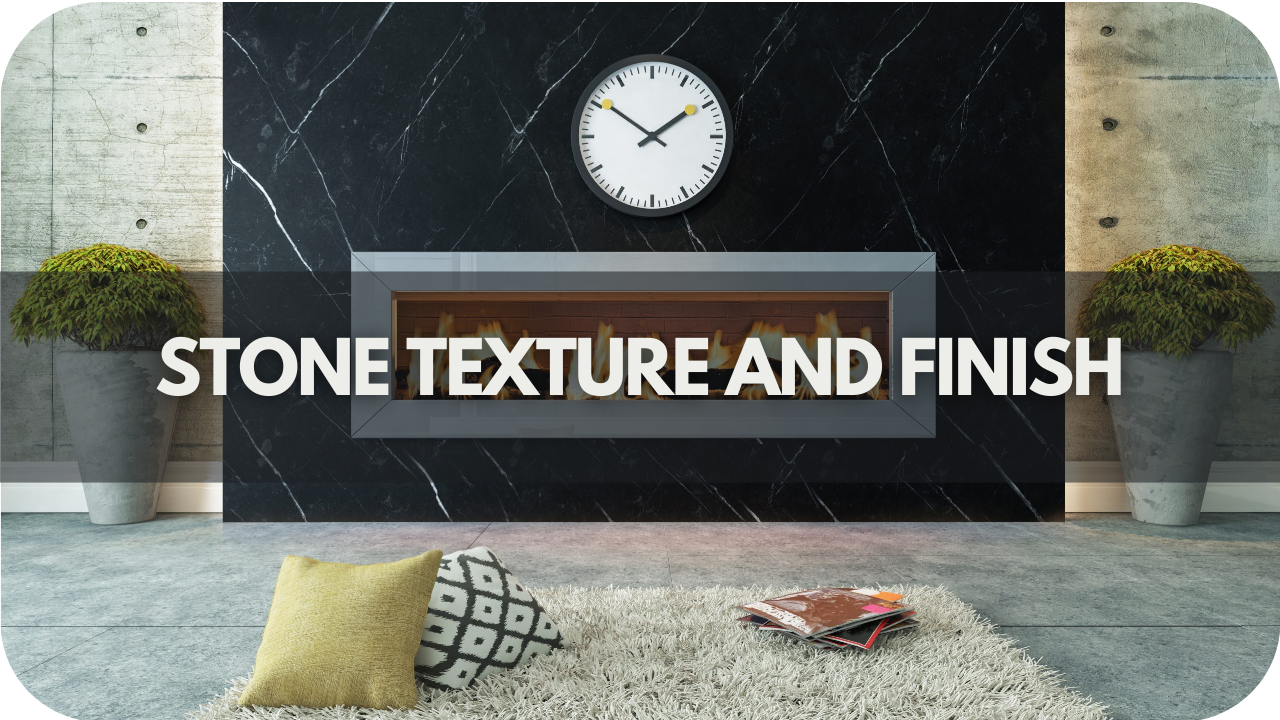
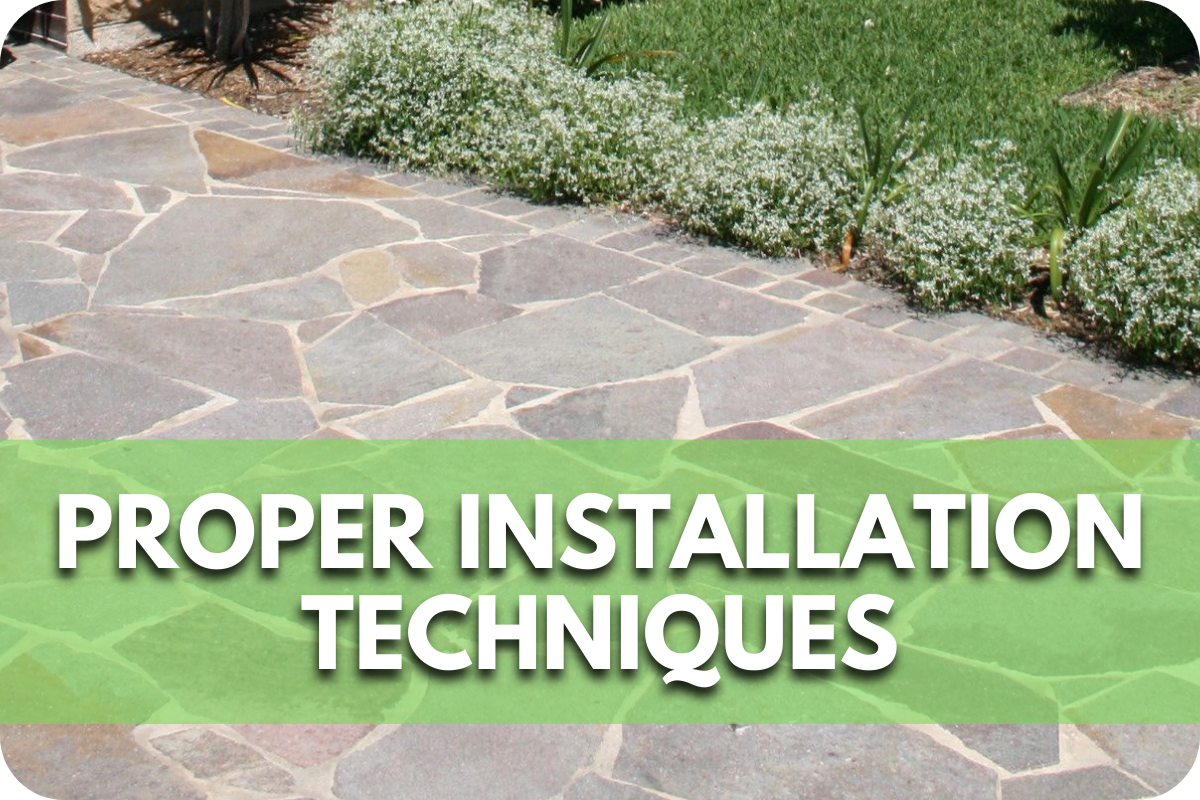
2. Use Complementary Textures and Finishes

Enhance the connection between indoor and outdoor areas by using complementary textures and finishes, adding depth and harmony to your design.

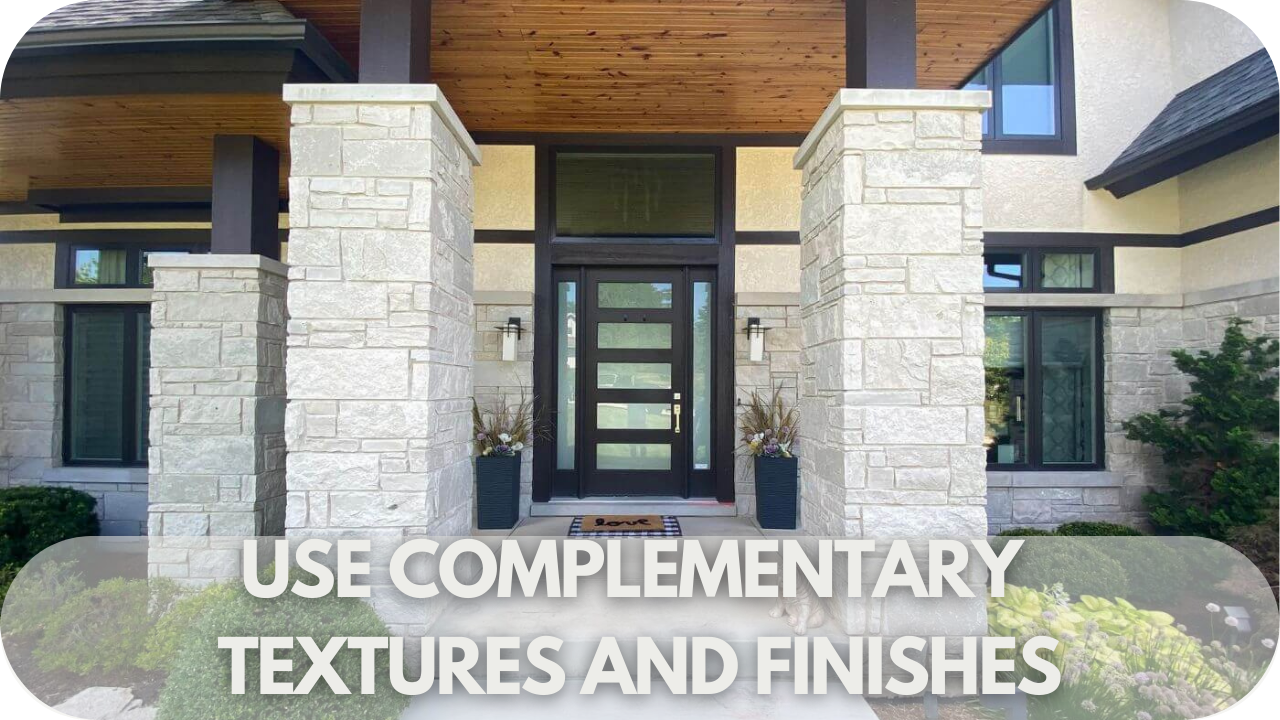
Balancing indoor elegance with outdoor functionality is essential when designing a cohesive indoor-outdoor space. To achieve this, choose polished stone finishes for indoor areas, which add sophistication and are easy to maintain. 

Outdoors, opt for honed or textured finishes that resist slipping and provide a natural, rugged appeal that blends with the landscape. 

This strategic finish contrast considers aesthetics and functionality, especially in spaces exposed to the elements. 

Honed finishes add depth and visual interest, creating a subtle yet effective transition that harmonises the indoor and outdoor experiences while ensuring safety and style.

3. Implement a Cohesive Colour Palette

Achieve visual harmony by implementing a cohesive colour palette that blends indoor and outdoor spaces, creating a unified and inviting atmosphere.

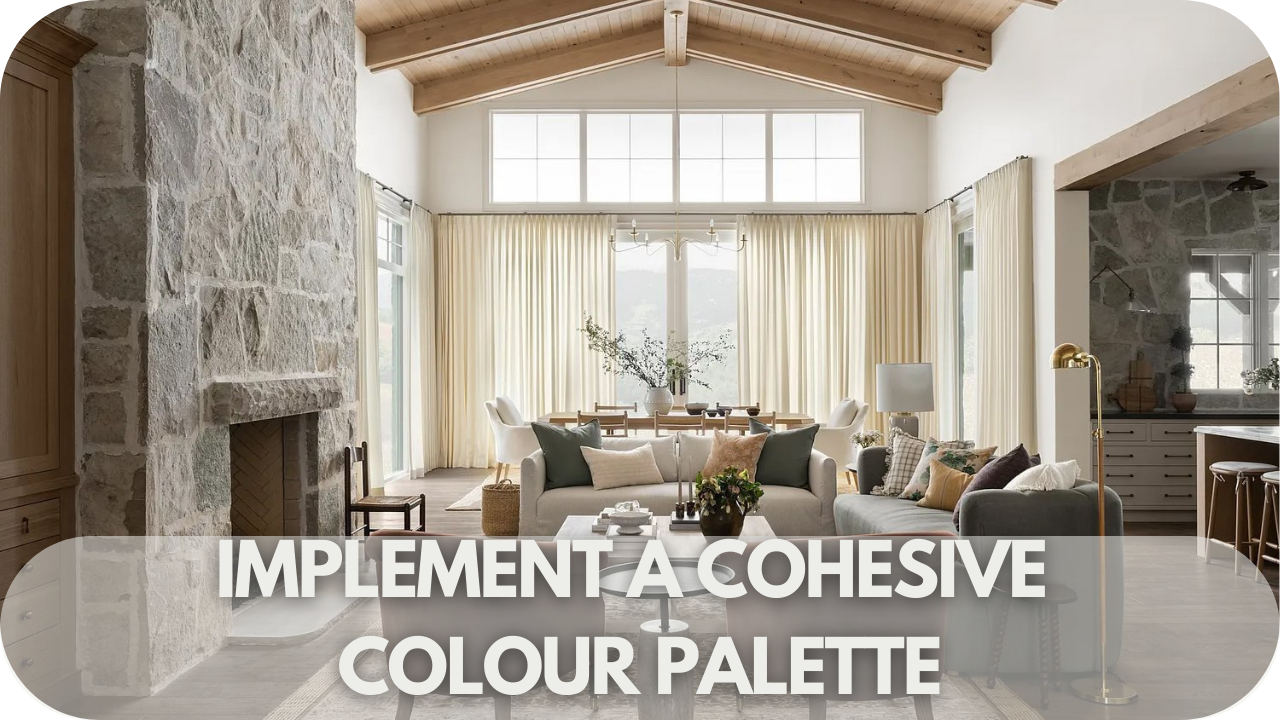
Selecting a cohesive colour palette is vital for creating harmony between indoor and outdoor spaces. 

Earthy, neutral tones—such as greys, beiges, and browns—are ideal as they work well with natural elements like plants, wood, and water features. 

These colours integrate smoothly with outdoor landscapes while also complementing interior decor, establishing a visually unified look. A natural palette ensures your spaces blend seamlessly, promoting tranquillity and balance. 

This colour scheme can be introduced through stone flooring, wall cladding, and other design elements, creating a soft transition that feels organic and enhances the flow between inside and outside.

4. Extend Stone Elements to Vertical Surfaces

Expand the beauty of natural stone by extending it to vertical surfaces, creating a seamless transition and enhancing the connection between indoor and outdoor spaces.

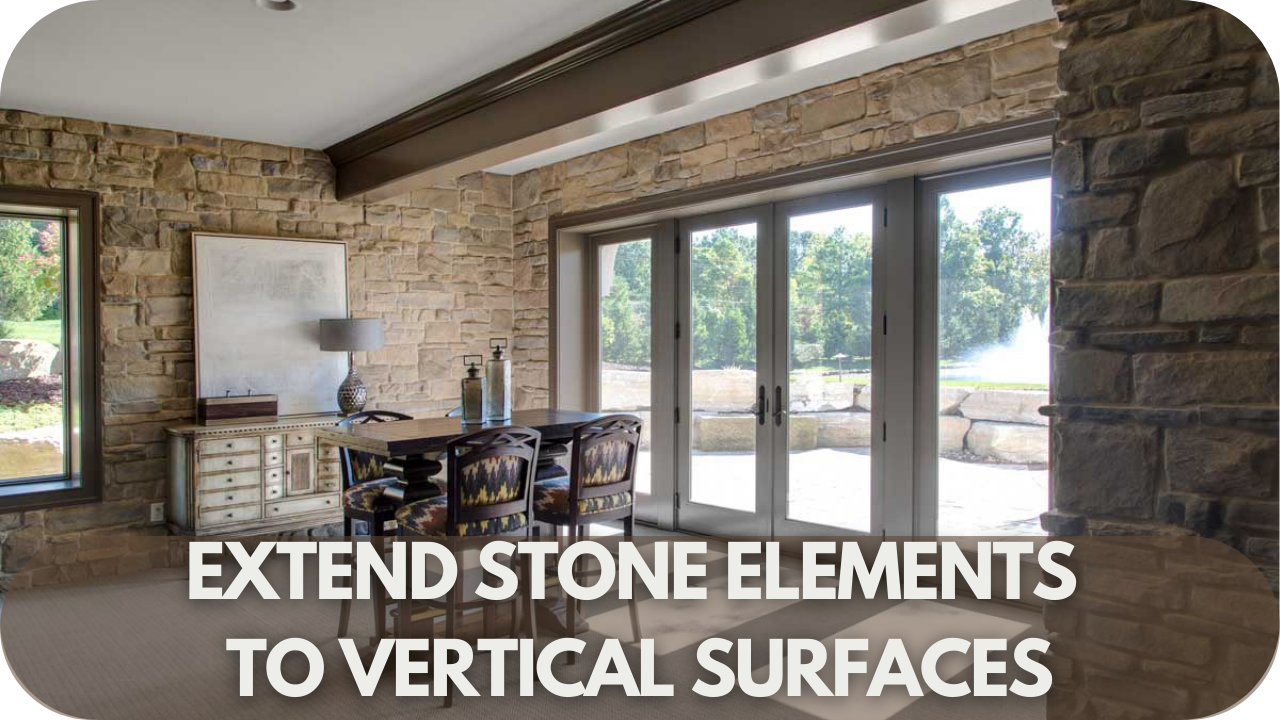
Stone elements are not limited to floors alone; they can be extended vertically to unify indoor and outdoor spaces further. 

Using stone cladding or walls both inside and outside creates a cohesive look that visually connects spaces. 

For example, a stone-clad feature wall in the living room can extend to the outdoor patio, making the transition between spaces feel seamless. 

Kitchen backsplashes or columns that carry the same stone pattern from inside to outside also create visual continuity. 

These vertical applications enhance your home’s architectural style and add depth and texture, making the spaces feel integrated and harmonious.

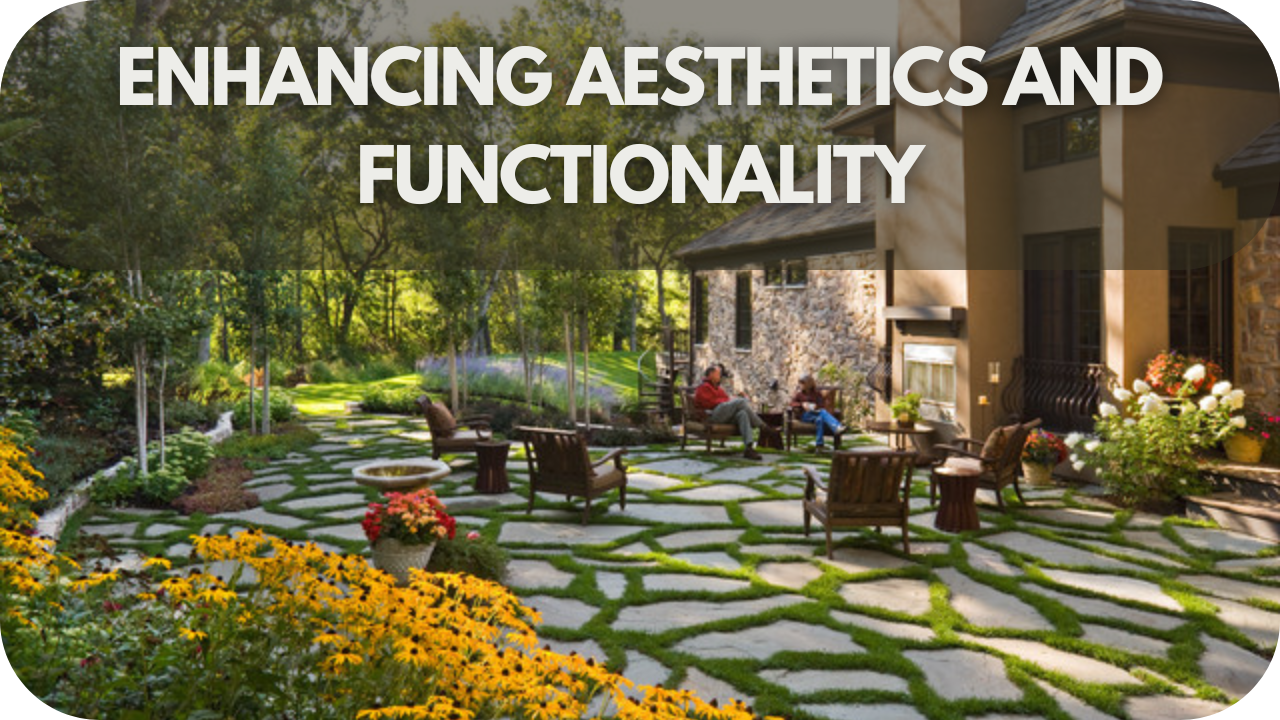
5. Open Plan Layouts with Transitional Elements

Embrace open-plan layouts with transitional elements, using natural stone to create a smooth flow between indoor and outdoor living areas, enhancing space and light.

Open-plan layouts are perfect for blending indoor and outdoor spaces, particularly when complemented with transitional elements. 

Large sliding glass doors, bi-fold doors, or open archways serve as flexible boundaries, allowing you to open up spaces or section them off as needed. 

When paired with natural stone flooring or walls that extend across these areas, the transition becomes nearly invisible, creating one continuous, versatile space. 

Transitional elements like stone thresholds or step-downs can differentiate indoor from outdoor areas without interrupting the flow. 

Open layouts, combined with stone’s organic textures, facilitate natural light, airflow, and a sense of freedom, making both indoor and outdoor areas feel like one cohesive environment.

Top Indoor-Outdoor Stone Design Trends to Look Out for in 2025

In 2025, integrating natural stone into both indoor and outdoor spaces continues to be a prominent design trend, offering timeless elegance and durability.

Step into 2025 with the latest trends in stone design that redefine indoor-outdoor spaces. From biophilic touches to bold patterns, these ideas bring sophistication, style, and seamless transitions to your home.

1. Biophilic Design with Natural Stone

Biophilic design in 2025 centres on bringing the outdoors in, using natural stone to cultivate a harmonious connection with nature. 

Adding greenery alongside stone paths, stone planters, or cladded walls creates an immersive natural environment that feels both organic and calming, enhancing the indoor-outdoor experience.

2. Minimalist Outdoor Kitchens and Lounging Areas

Minimalism meets elegance with stone countertops, sinks, and seating in outdoor kitchens and lounging areas. 

This 2025 trend favours streamlined, sophisticated designs that complement modern interiors while balancing style and functionality, perfect for hosting or relaxing in seamlessly integrated spaces.

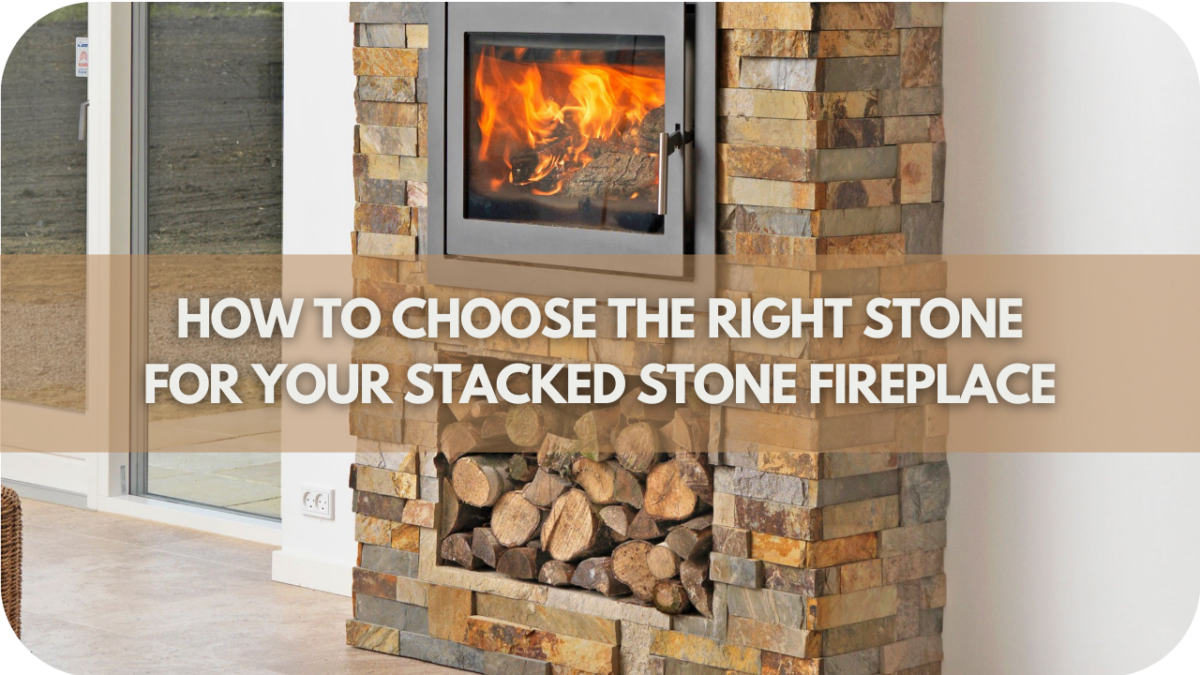
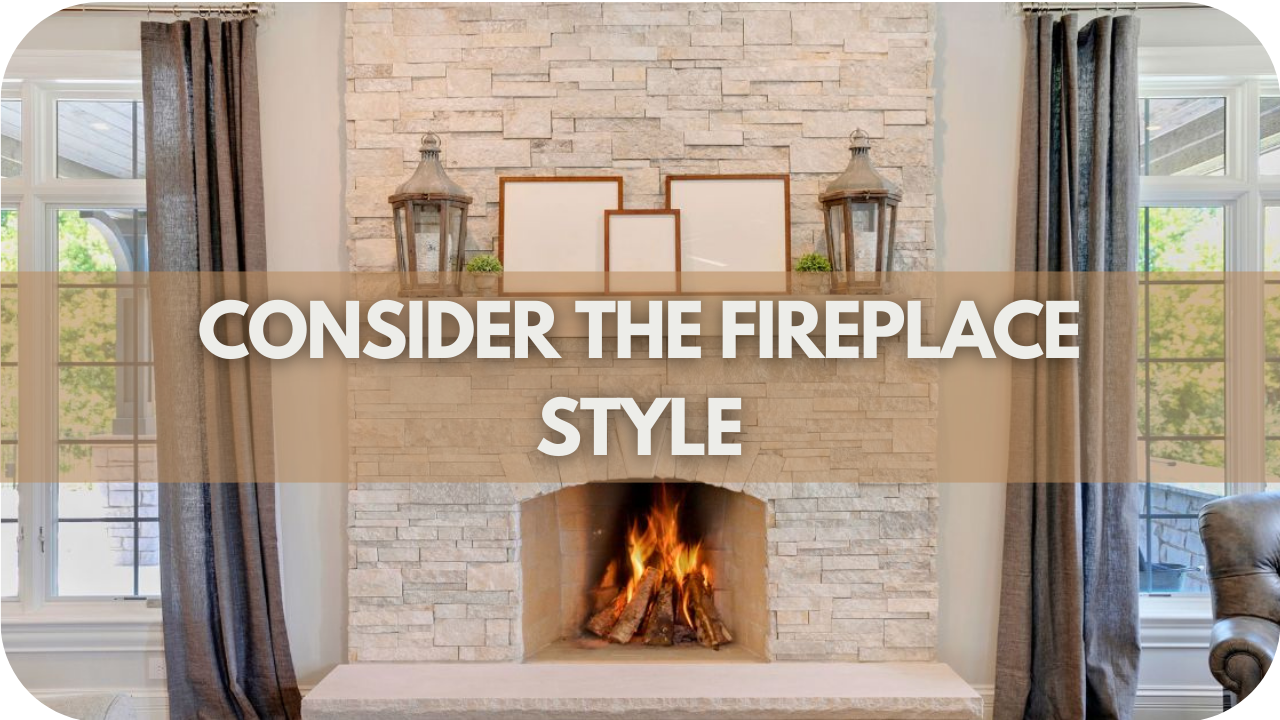
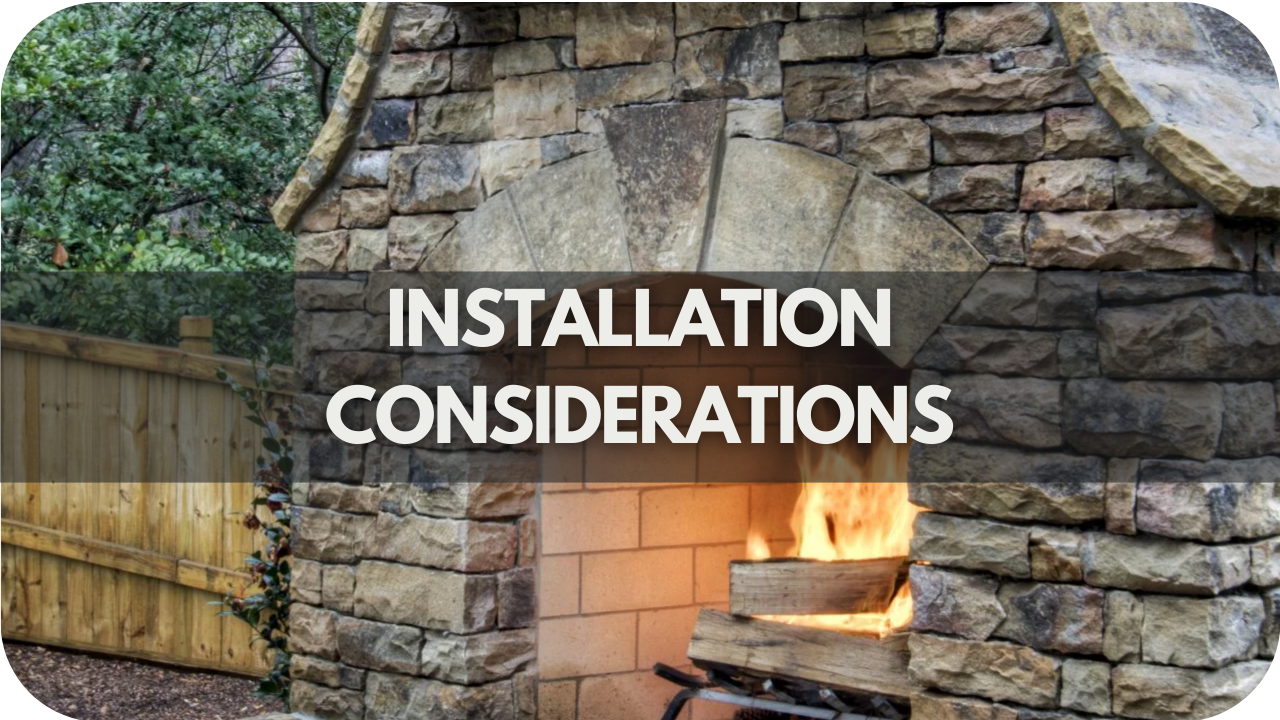
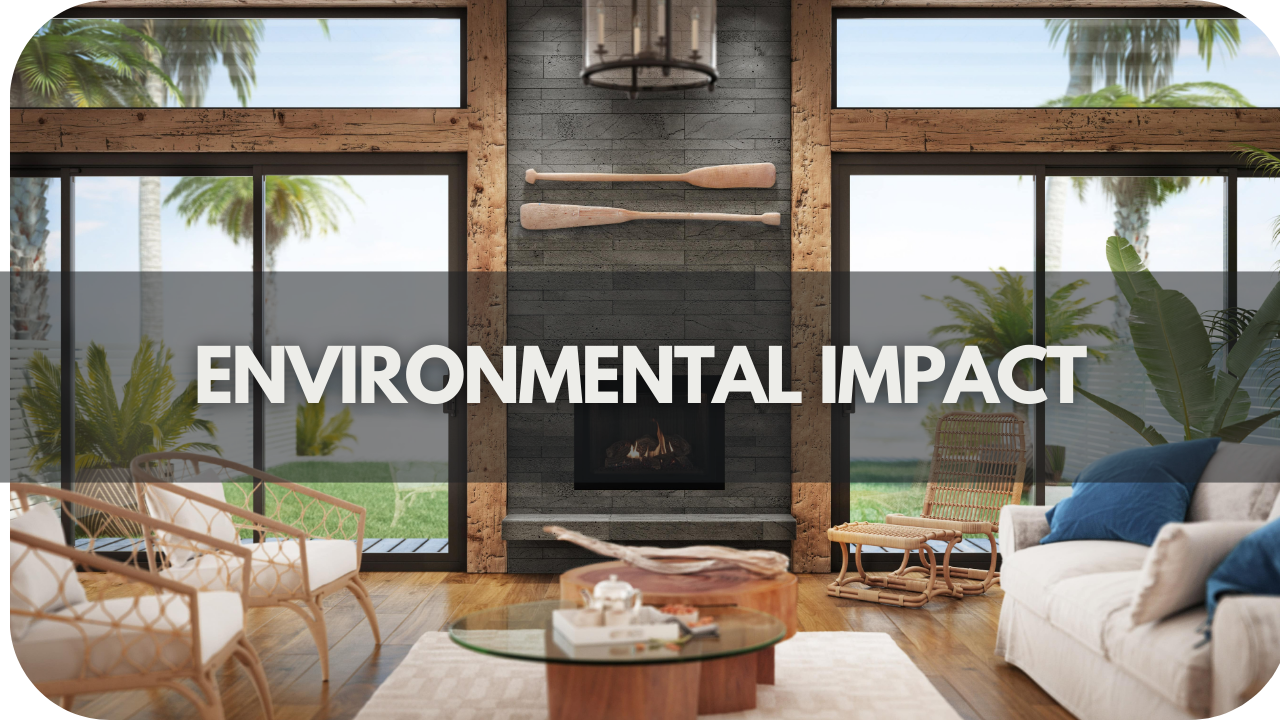
3. Statement Stone Fireplaces and Fire Pits

Statement fireplaces and fire pits, crafted from natural stone, become focal points for both indoor and outdoor areas. 

Rustic stone designs with a contemporary edge offer warmth and character. They blend effortlessly into living rooms or patios and elevate the home’s ambience with timeless charm.

4. Mixed Textures for Added Depth

Combining smooth and rough stone textures brings depth and visual interest to indoor-outdoor spaces. 

In 2025, this trend uses contrasting finishes—such as polished stone indoors paired with rough textures outdoors—to create a dynamic look that’s both cohesive and engaging, making each area feel intentionally designed yet unified.

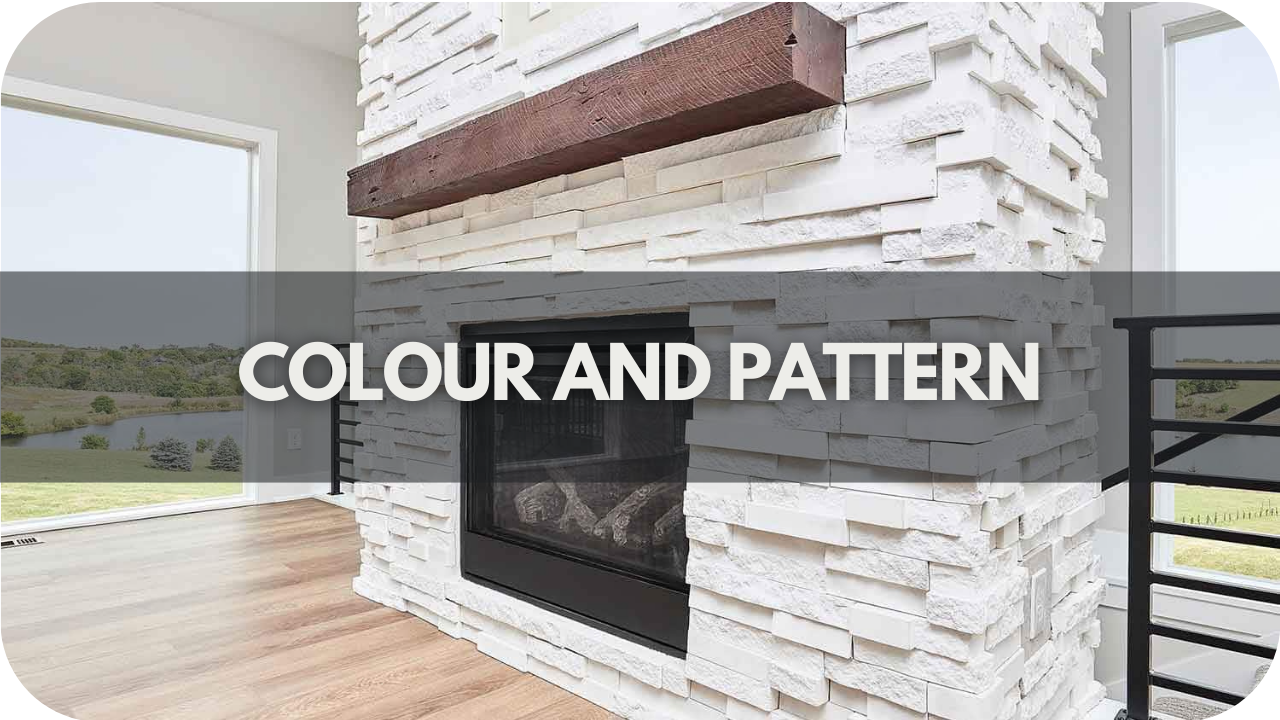
5. Geometric Patterns and Stone Inlays

Geometric patterns and stone inlays add a bold, modern twist to traditional stone use. By incorporating these elements into walls, flooring, or garden pathways, homeowners can introduce eye-catching designs that enhance the spatial flow. 

This 2025 trend plays with shapes and patterns to make each space visually striking while maintaining elegance and refinement.

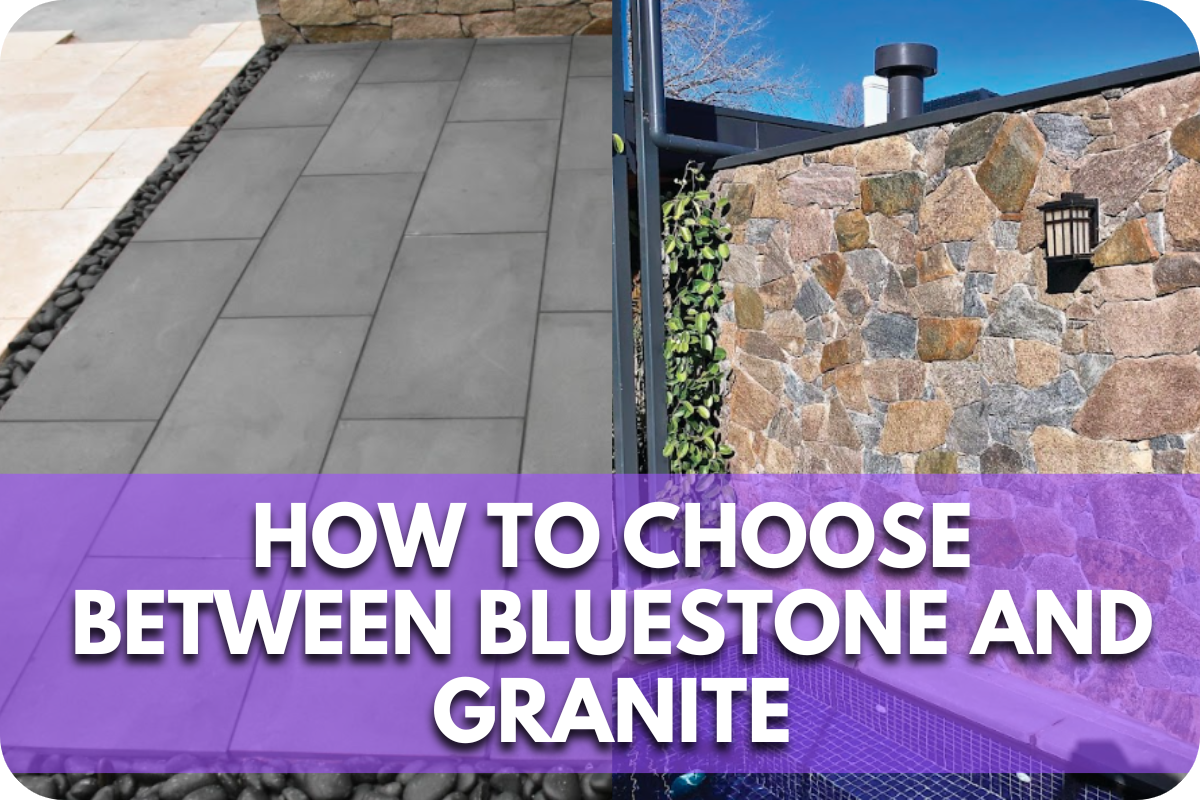
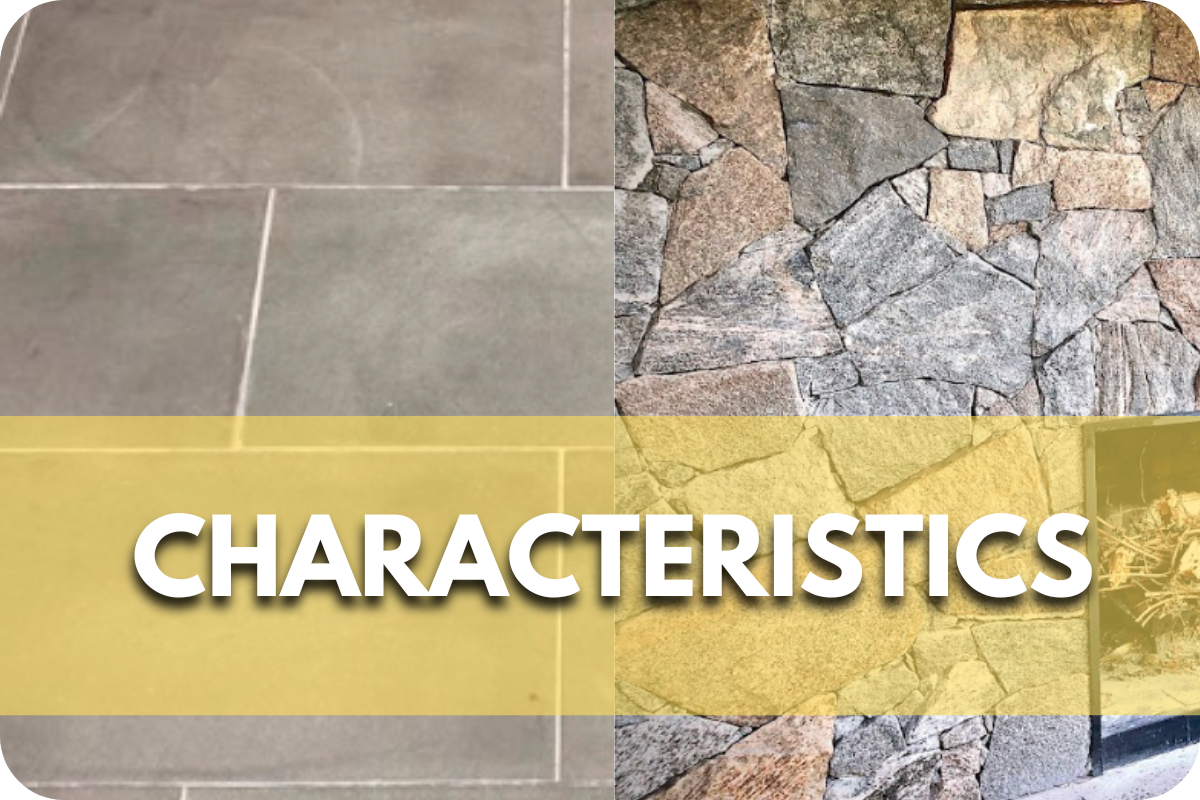
Top Stone Types for a Seamless Indoor-Outdoor Flow

Discover the top stone types that create a seamless flow between indoor and outdoor spaces, offering durability, aesthetic appeal, and timeless elegance.

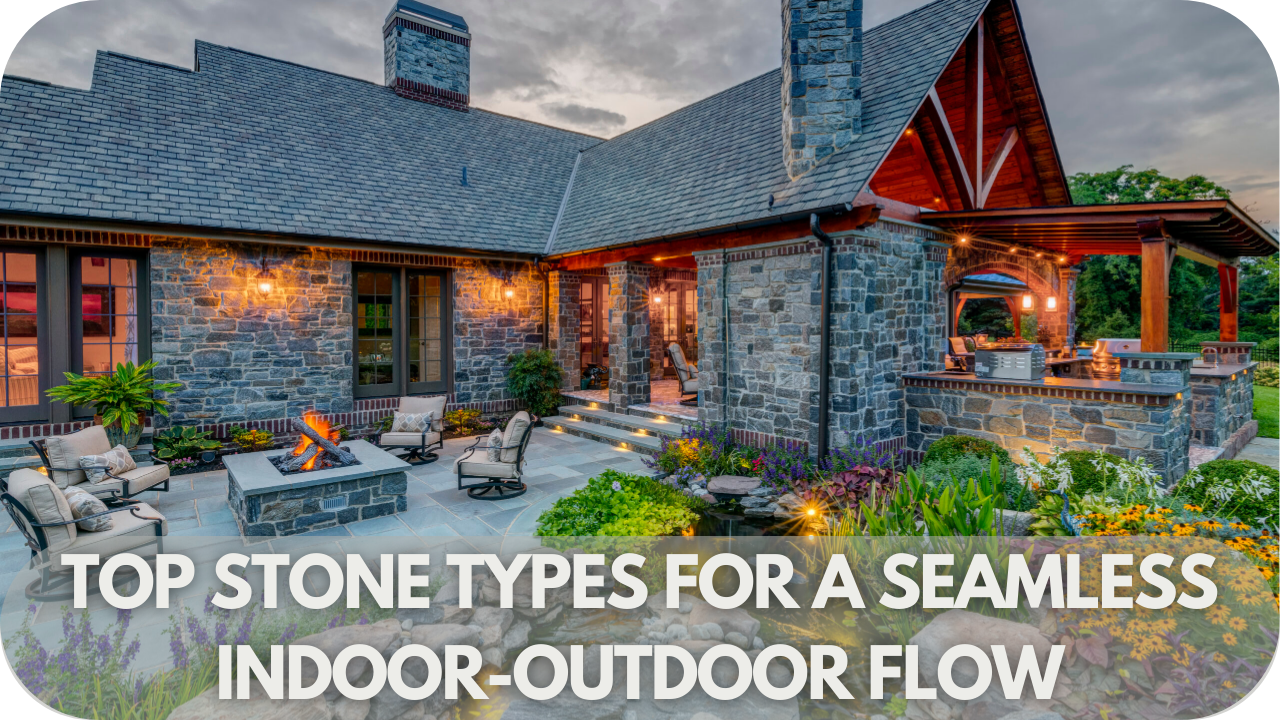
Choosing the perfect stone can make all the difference in creating a cohesive, flowing indoor-outdoor space. Here’s a list of top stones that blend beauty, durability, and functionality for a flawless transition.

1. Limestone

Due to its soft, warm tones and smooth texture, limestone is an excellent choice for creating a seamless transition between indoor and outdoor spaces. 

It’s versatile enough to be used both indoors and outdoors, offering a continuous flow. Ideal for living room flooring that extends to patios or garden paths, limestone adds a timeless, elegant touch while providing durability and ease of maintenance in high-traffic areas.

2. Travertine

Travertine’s earthy texture and natural slip resistance make it perfect for high-traffic areas like poolside spaces and bathrooms. 

Its unique appearance, with pitted surfaces and rich colours, adds a rustic charm that enhances both indoor and outdoor areas. 

Travertine is ideal for creating a cohesive design, especially in covered outdoor spaces where its durability and resistance to weather conditions make it a long-lasting choice.

3. Sandstone

Sandstone offers a rustic, durable finish that’s perfect for creating a harmonious indoor-outdoor design. 

Its excellent weather resilience suits it for outdoor applications such as patios, garden paths, and accent walls. 

With its range of earthy tones, sandstone complements natural surroundings, blending seamlessly with the environment. This stone is ideal for homeowners seeking a timeless look that can withstand the elements while adding character to outdoor living spaces.

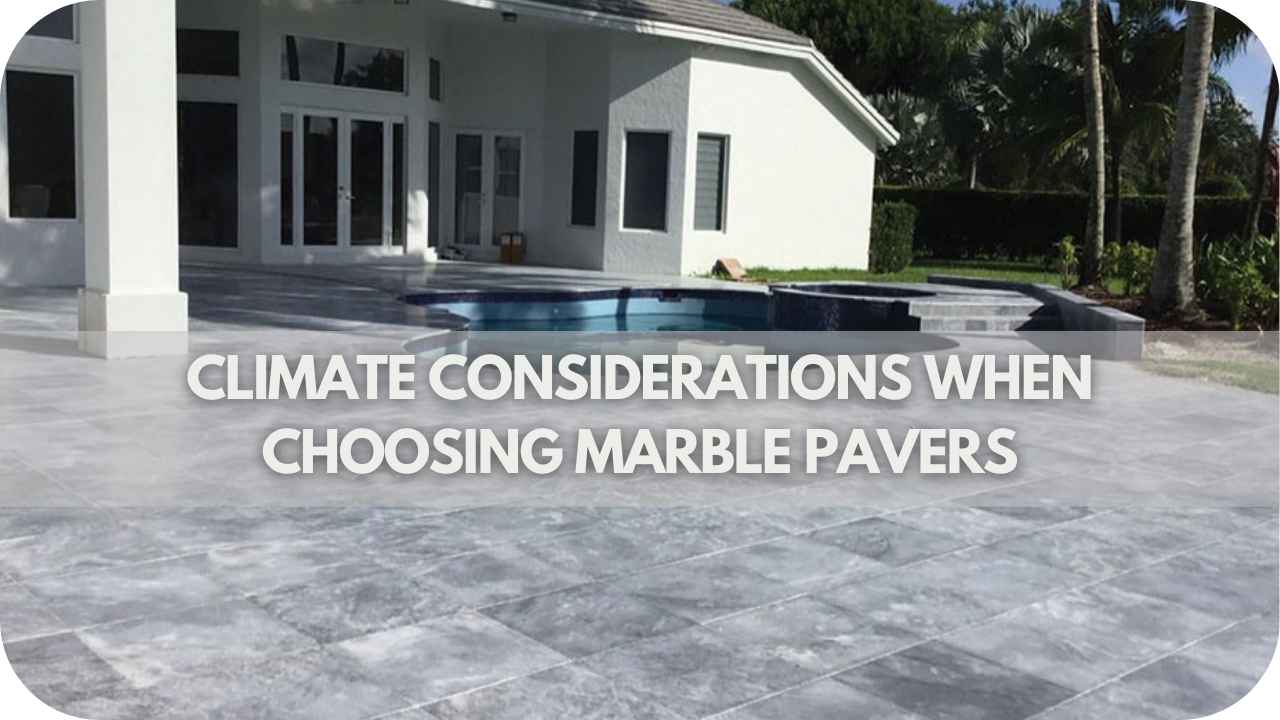
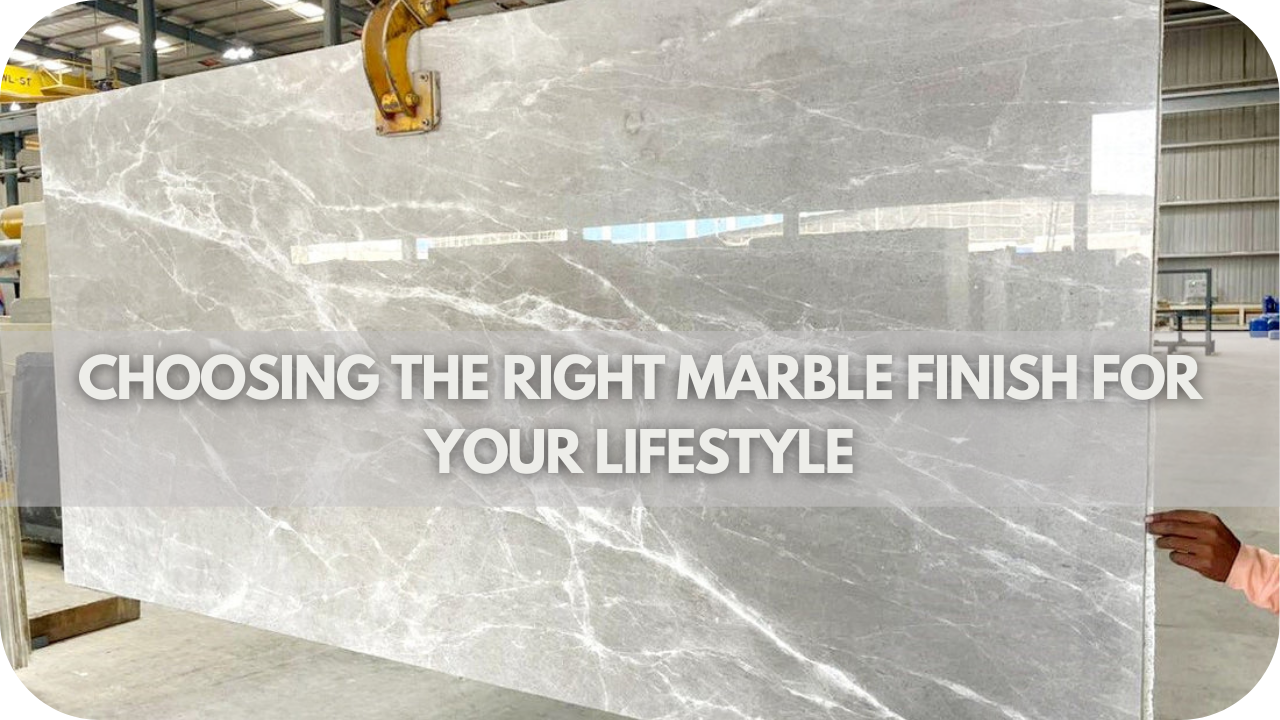
4. Marble (Use Sparingly)

Marble exudes luxury and elegance, making it an exceptional choice for indoor spaces. However, its delicate surface makes it unsuitable for heavy outdoor use. 

It works best in limited applications such as indoor feature walls, countertops, or accent areas that don’t directly connect to outdoor spaces. 

When used sparingly, marble brings an air of sophistication and refinement while ensuring that your outdoor areas maintain durability and practicality.

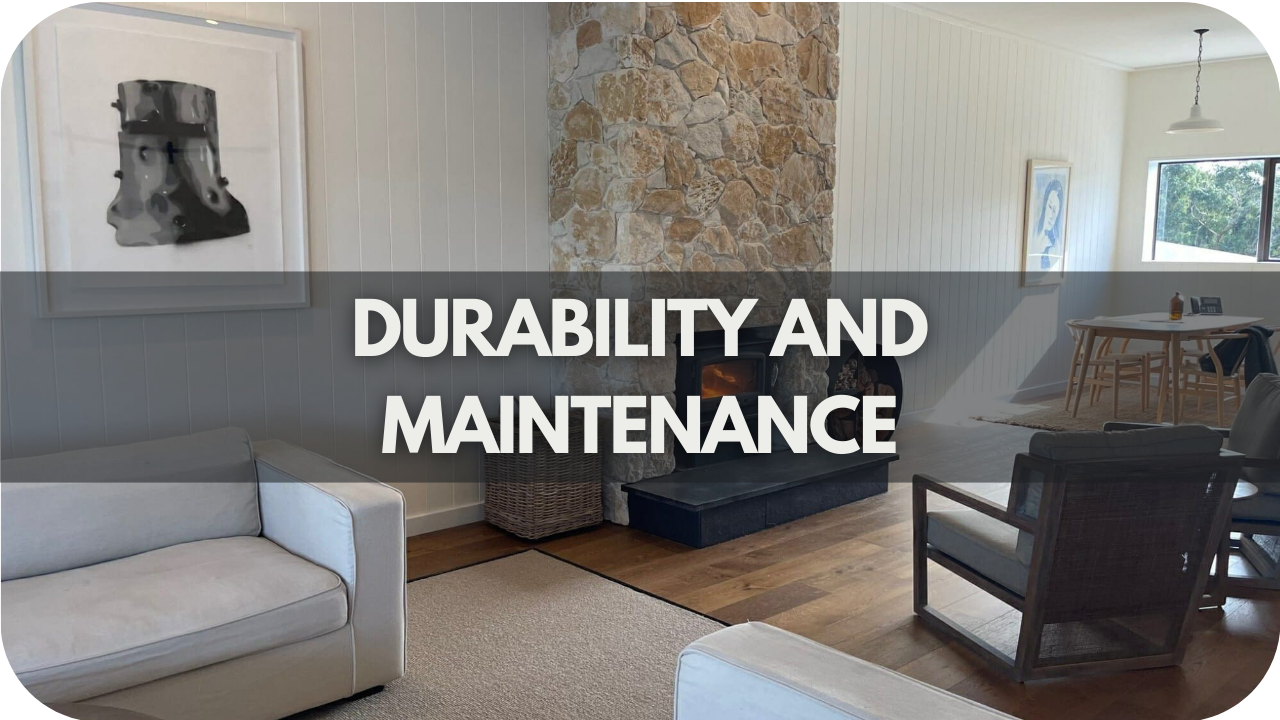
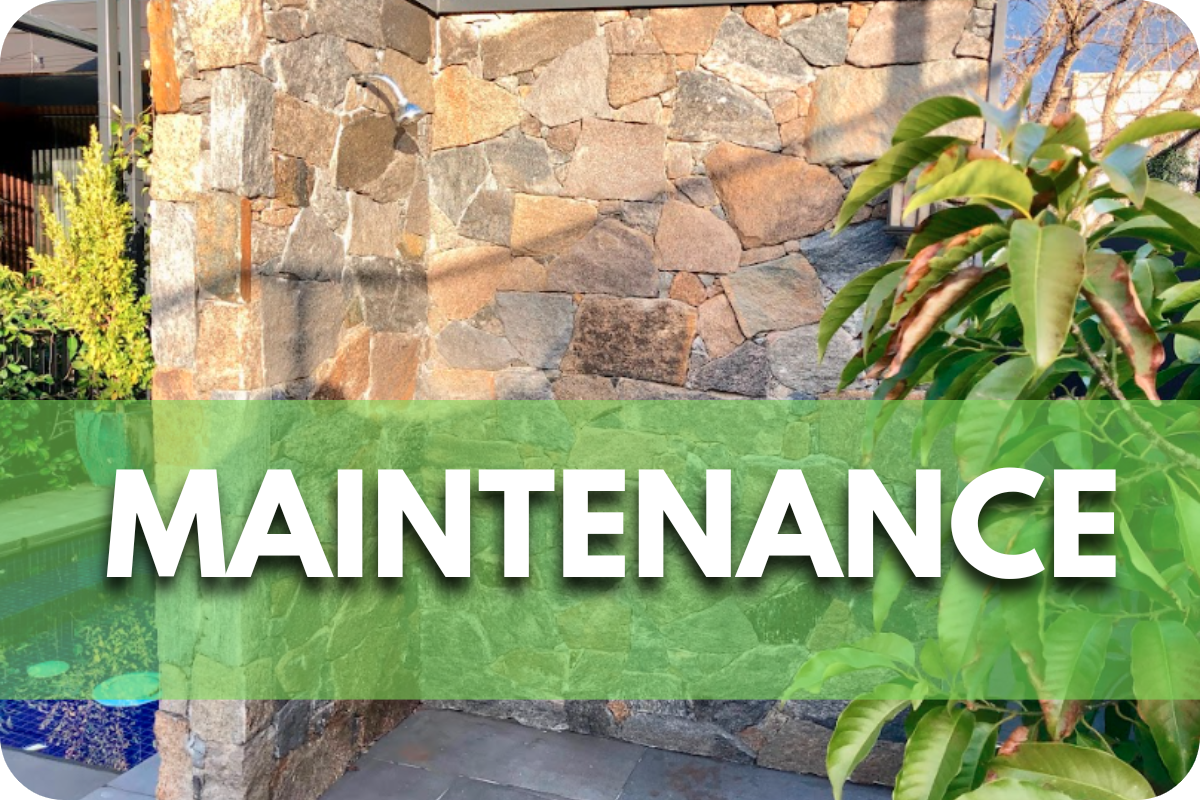
Tips for Maintaining Natural Stone Indoors and Outdoors

Follow these essential tips to maintain the beauty and durability of natural stone both indoors and outdoors, ensuring long-lasting elegance and functionality.

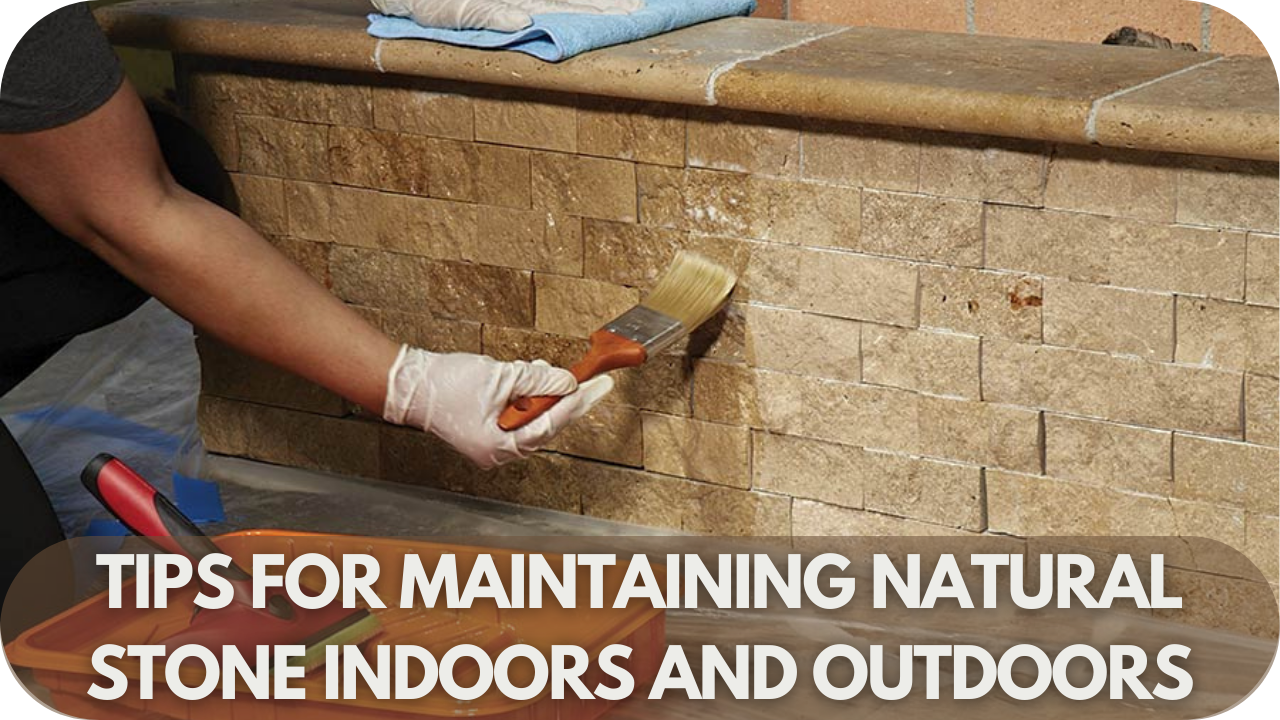
Keeping natural stone looking its best requires just a few essential maintenance steps. Follow these expert tips to preserve its beauty and durability, indoors and out!

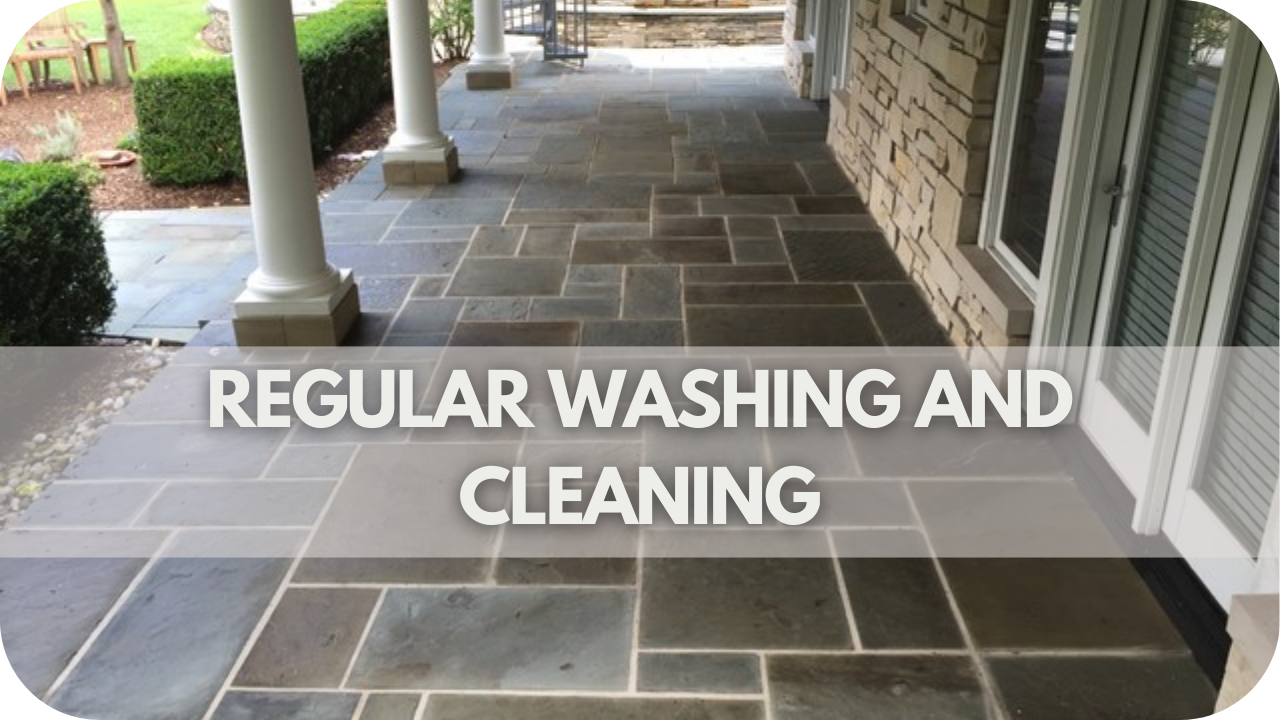
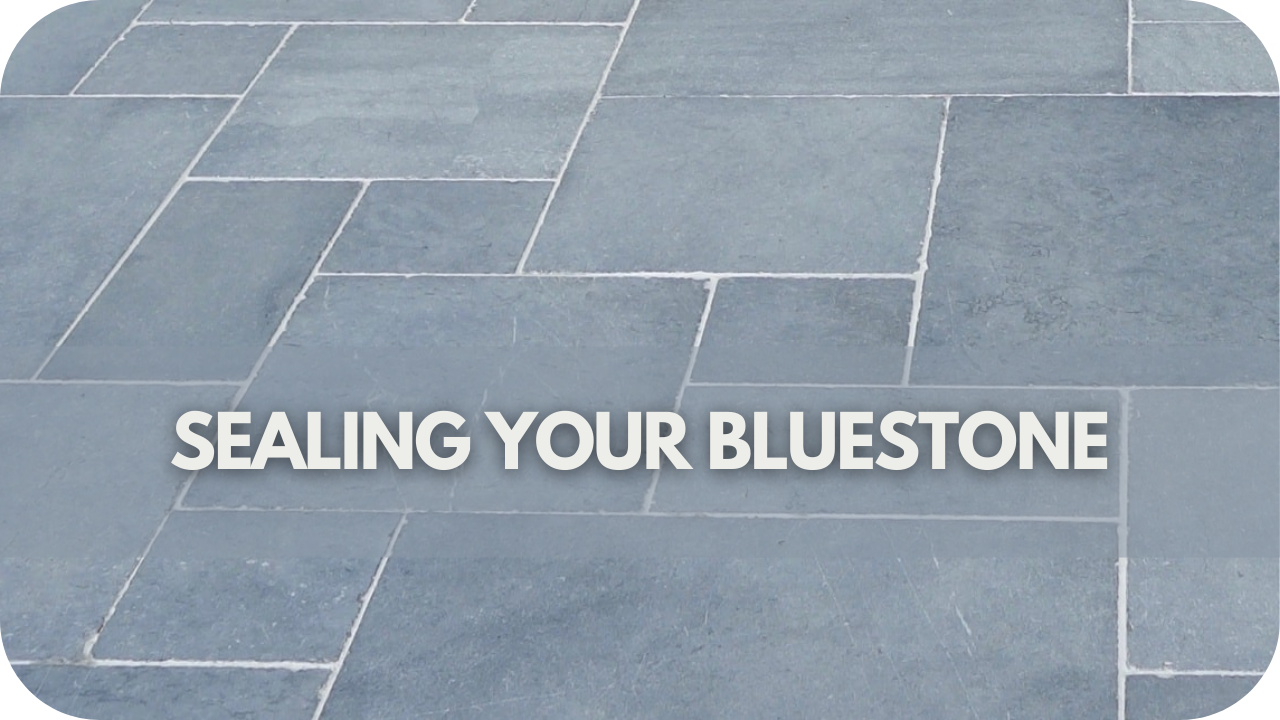
  • Regular Sealing and Cleaning: Apply a high-quality sealant to protect stone from weather and stains, ensuring long-lasting beauty and durability indoors and outdoors.
  • Choose Sustainable and Ethically Sourced Stone: Opt for responsibly sourced stones to add property value and support eco-conscious practices, aligning with 2025’s sustainable design priorities.
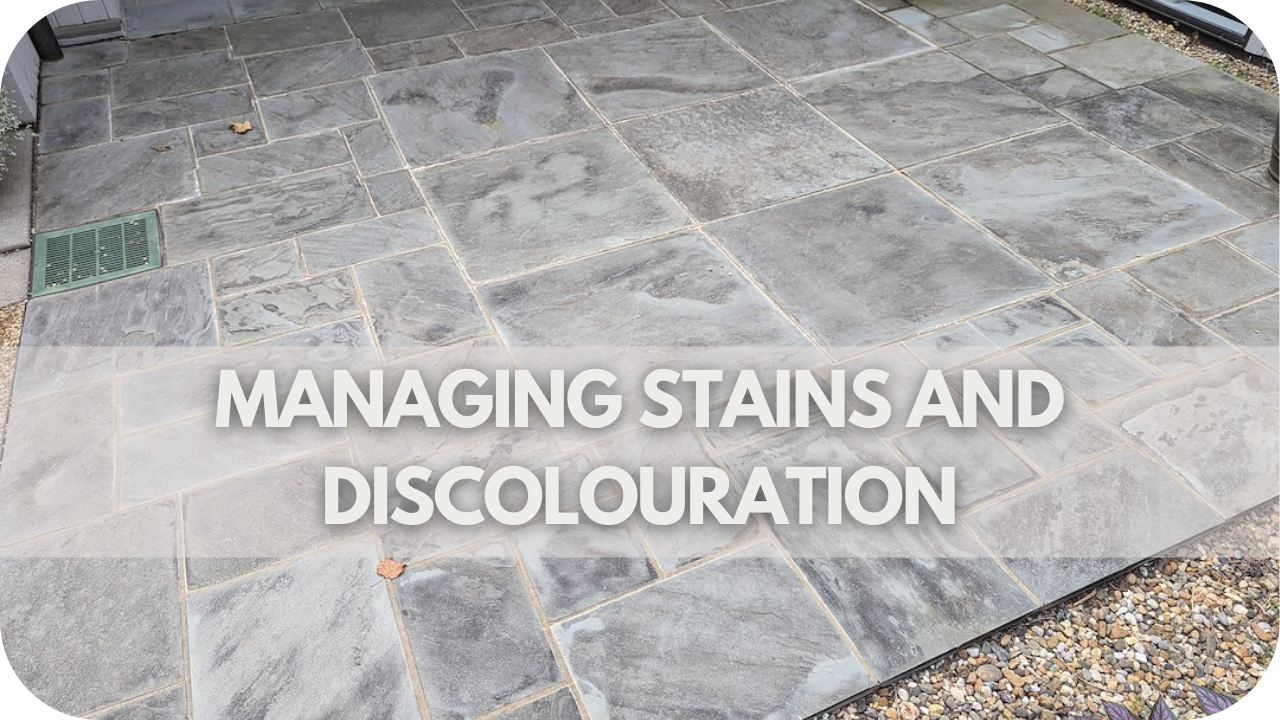
  • Use Stone-Safe Cleaning Products: Avoid harsh chemicals; use pH-neutral cleaners to prevent damage and preserve the stone’s natural finish.
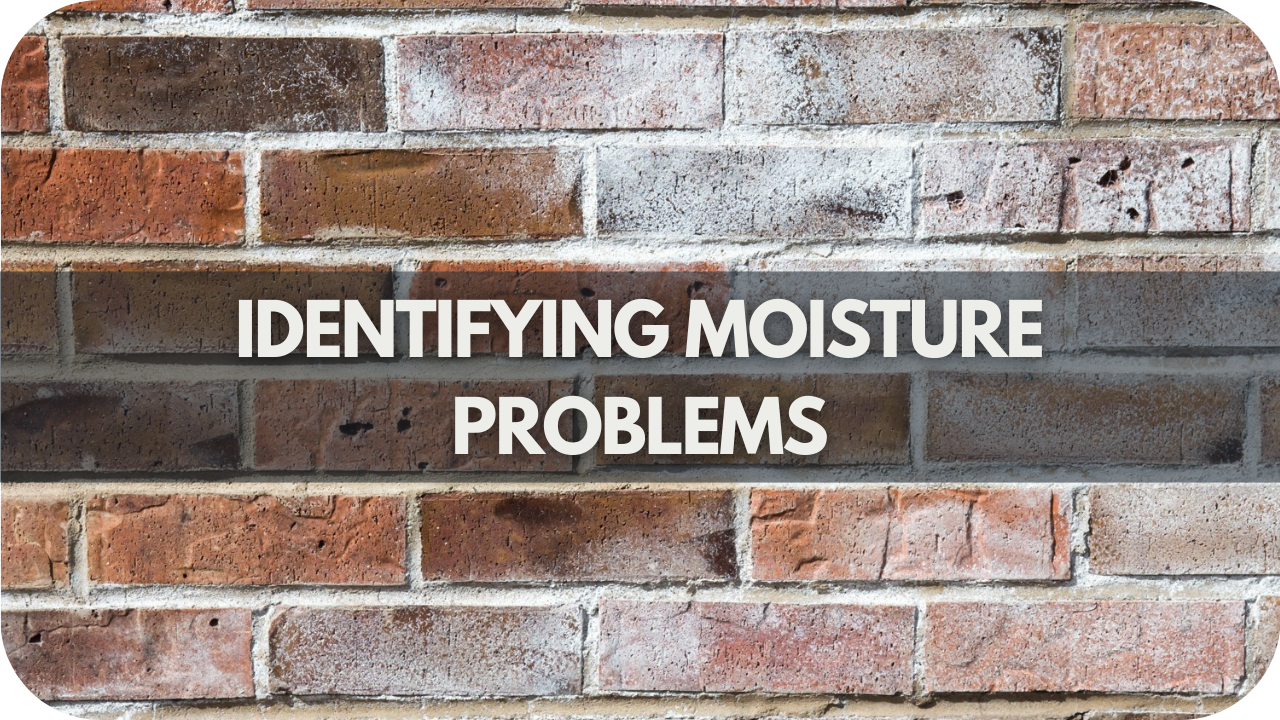
  • Address Spills Immediately: Wipe spills promptly to avoid stains, particularly on porous stones like marble and limestone, which can easily absorb liquids.
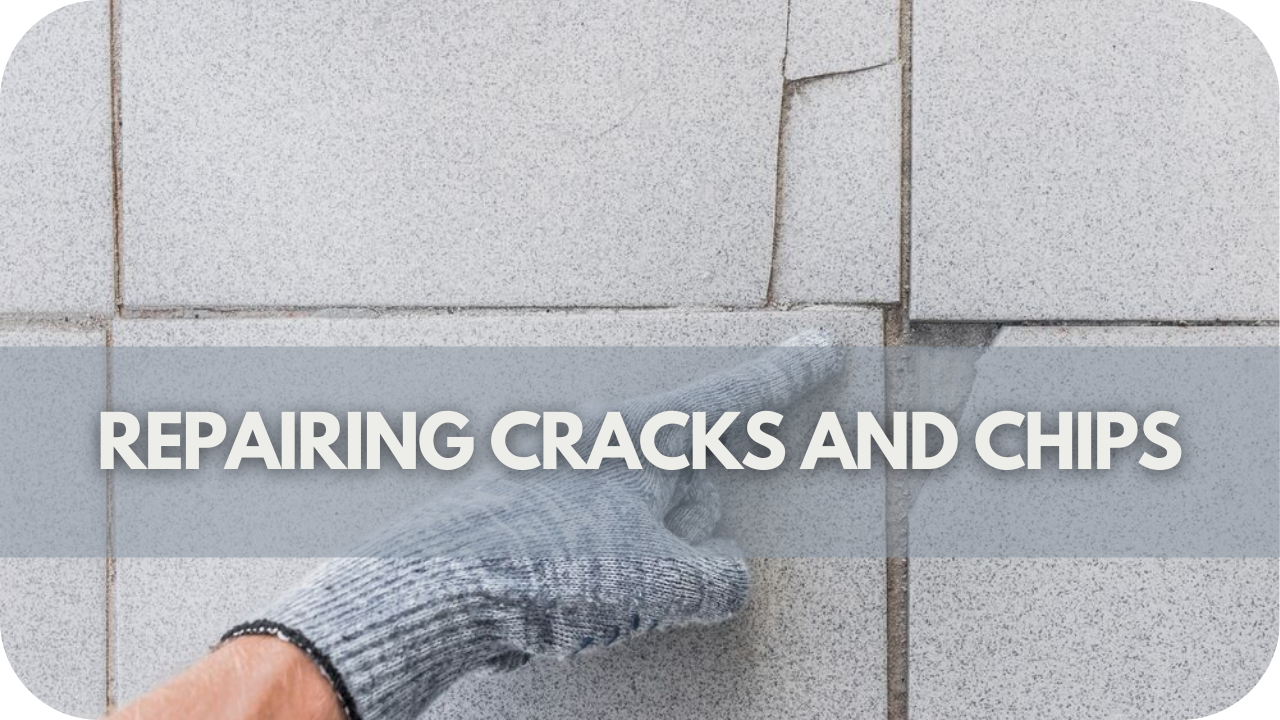
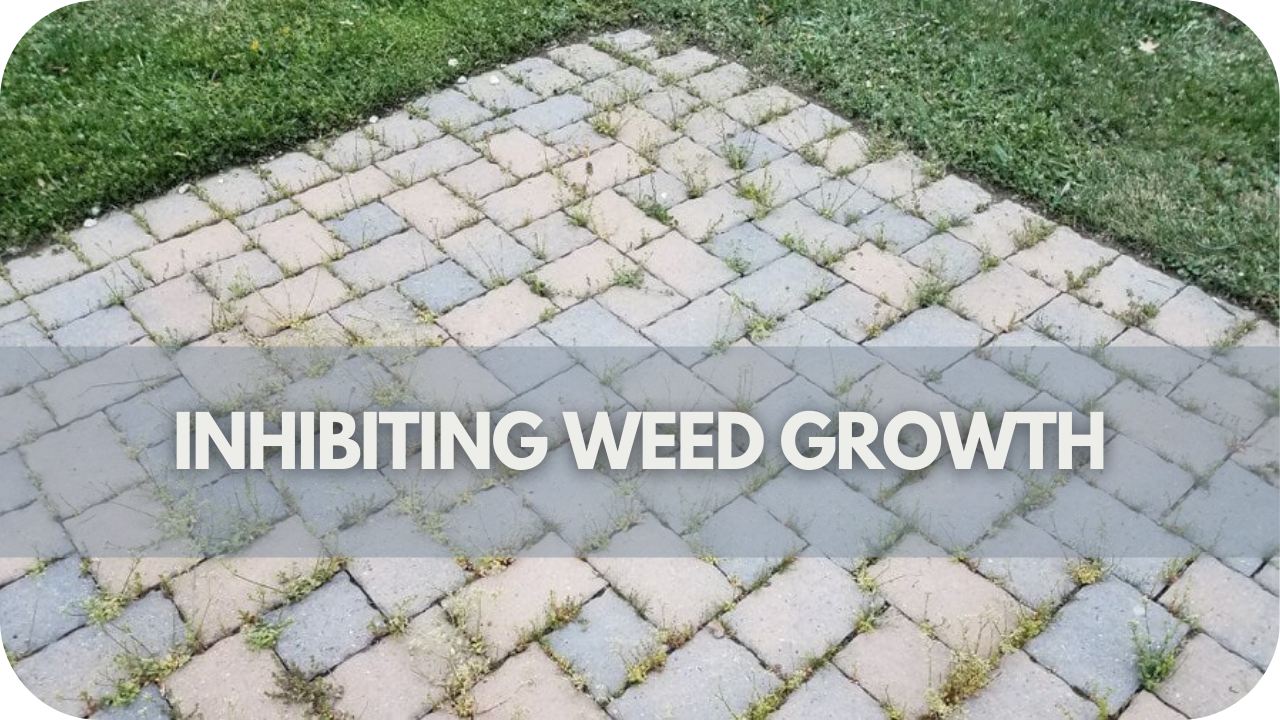
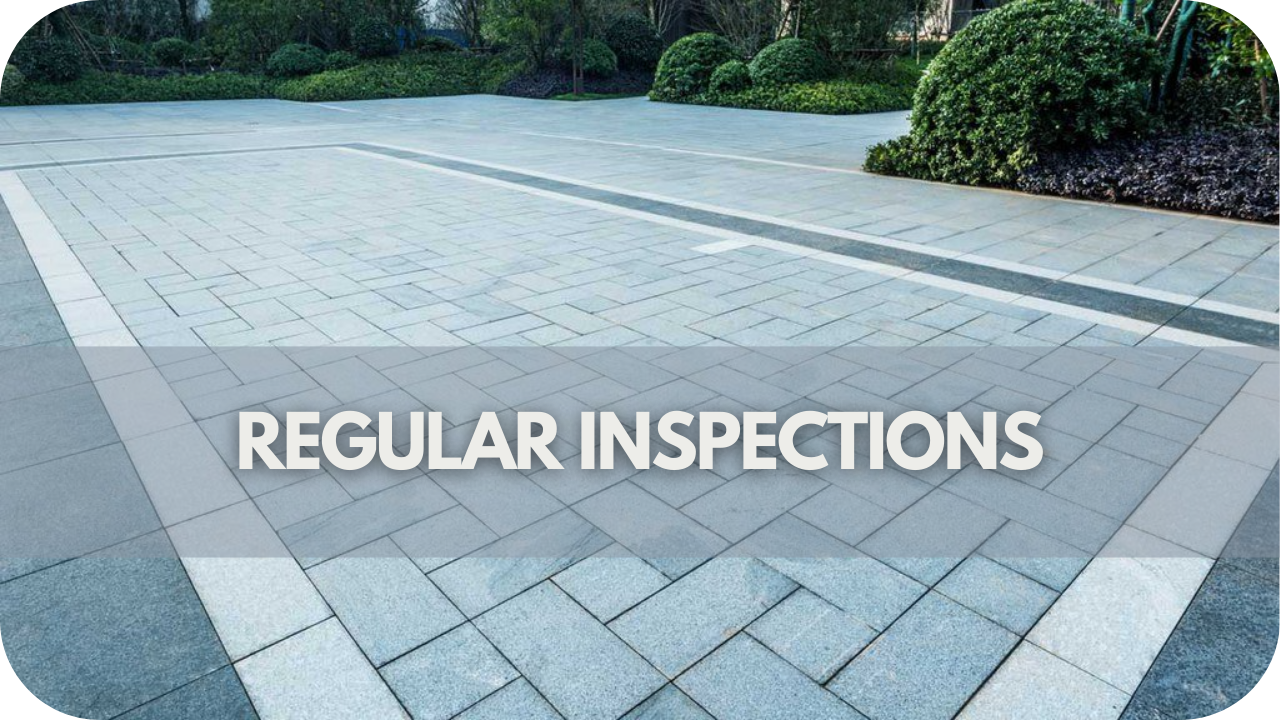
  • Inspect and Repair Regularly: Periodically check for chips or cracks in outdoor stone and repair them promptly to prevent further damage from weather elements.
  • Protect Outdoor Stone in Extreme Weather: Use covers or protective barriers for stone surfaces in harsh weather conditions to reduce wear and extend lifespan.

Conclusion

Blending indoor and outdoor spaces with natural stone creates a harmonious, stylish retreat. From unified flooring to statement walls and biophilic touches, natural stone adds durability and timeless elegance. 

With 2025’s design trends focused on seamless transitions and sustainable choices, now is the perfect time to reimagine your space with stone. 

Ready to craft a cohesive, nature-inspired home? View our expert range of natural stone options, and let Splendour in Stone help bring your vision to life!

How to Repair Sinking Patio Pavers

Are your patio pavers sinking, creating an uneven and unsightly surface?

This common issue can lead to tripping hazards, water pooling, and further damage to your outdoor space, making it less enjoyable and potentially costly to fix if left unattended.

Fortunately, repairing sinking patio pavers is a manageable task. 

In this guide, we’ll walk you through the steps to restore your patio, ensuring a safe and beautiful area for your family and friends to enjoy.

Tools and Materials Needed

How to Repair Sinking Patio Pavers: Tools and Materials Needed

The right tools and materials are essential for successfully repairing sinking patio pavers. 

Here’s what you’ll need:

Tools:

  • Shovel: To remove the affected pavers and excavate the base material.
  • Rubber Mallet: To tap the pavers back into place without damaging them.
  • Level: Ensures the pavers are set evenly and correctly aligned.
  • Plate Compactor: Compacts the base material for a stable foundation (manual tamper can be used for smaller areas).
  • Wheelbarrow: Useful for transporting materials like sand and gravel.
  • Broom: For sweeping joint sand into the paver gaps after the repair.

Materials:

  • Paver Base Material: Typically a mix of crushed stone or gravel, providing a sturdy foundation.
  • Sand: Used to create a smooth, level bedding layer for the pavers.
  • Polymeric Sand: Fills the joints between pavers, hardening to prevent weed growth and insect infestation.
  • Geotextile Fabric: Optional but recommended to prevent the base material from mixing with the soil below

Step 1: Preparation

How to Repair Sinking Patio Pavers: Preparation

Before you begin repairing sinking patio pavers, proper preparation is crucial to ensure a successful outcome.

Start by clearing the area and removing furniture, plants, or other items around the affected area. This will give you ample space to work and prevent any obstructions.

Next, carefully lift and set aside the sinking pavers using a shovel or paver lifter. Be sure to keep them intact so you can reuse them later.

Also, clean the pavers and surrounding surfaces. Once the pavers are removed, thoroughly clean them with a stiff brush and water to remove any dirt, moss, or debris. This ensures that they will fit back together neatly when reinstalled. 

Similarly, clean the surrounding surface to remove any loose sand, gravel, or organic material that may have accumulated. This step is essential for maintaining a smooth, even surface and preventing further issues.

Step 2: Repair the Sinking Pavers

Start by carefully lifting the affected pavers using a flat pry bar or a specialised paver lifter. Take care not to damage the edges. Once removed, inspect the underlying base material. If it’s uneven or degraded, address this before resetting the pavers.

Next, add base material. A stable base is crucial for preventing future sinking. Remove any loose or poor-quality base material. Add a layer of paver base material, such as crushed stone or gravel, to the excavated area. Spread it evenly and use a plate compactor or a manual tamper to compact the material firmly. The base should be about 4 to 6 inches thick, depending on the expected load and soil conditions.

Begin by leveling and compacting the base material to ensure a stable foundation. Once compacted, spread a layer of sand evenly across the surface, creating a smooth, level base for the pavers.

Use a screed board to level the sand evenly. Place the pavers back into position, ensuring they align with the surrounding area. Use a rubber mallet to tap them gently into place.

Step 3: Sealing and Finishing Touches

How to Repair Sinking Patio Pavers: Sealing and Finishing Touches

Once the pavers are securely reset, it’s time to apply jointing sand or polymeric sand between them. 

Sweep the sand over the surface, ensuring it fills all the joints. Polymeric sand is especially effective as it hardens when moistened, creating a strong bond that helps prevent weed growth and insect intrusion. 

Use a broom to thoroughly work the sand into the joints, then lightly mist the area with water to activate the polymeric sand.

Consider sealing the pavers to enhance the durability and longevity of your repair. A quality paver sealer protects against staining, weathering, and wear. Apply the sealer evenly over the entire surface using a roller or sprayer, following the manufacturer’s instructions. Allow the sealer to dry completely before using the area.

Sealing not only extends the lifespan of your patio but also enhances its appearance by adding a slight sheen and bringing out the natural colours of the pavers. With these finishing touches, your patio will be stable, level, pristine and inviting for years.

Preventive Maintenance Tips

Regularly inspecting your patio is essential to catch potential issues early, before they escalate into major problems. 

Aim to check for signs like uneven pavers, gaps, and cracks at least twice a year, paying particular attention after heavy rain or during seasonal changes when the ground is more prone to shifting. 

By detecting these issues early, you can address minor repairs promptly, saving you from more extensive and costly fixes down the line.

Maintaining proper drainage is essential for preventing future sinking and ensuring the long-term stability of your patio. Water accumulation beneath the surface is one of the main causes of paver sinking, so regularly cleaning gutters and downspouts to direct water away from the area is crucial. 

Additionally, check the slope of your patio to confirm it guides water away from the foundation. If needed, consider installing drainage solutions, like French drains or perforated pipes, to efficiently manage water runoff and prevent pooling that could destabilize the pavers.

Conclusion

This guide assessed damage, gathered the right tools, repaired sinking pavers, and implemented preventive maintenance. Don’t let your patio deteriorate further—take action now and restore its beauty and safety. 

Start your repair today and enjoy a level, stable patio for years to come.

How to Choose the Perfect Marble Pavers for Your Climate and Lifestyle

Choosing the right marble pavers can be challenging due to varying climate conditions and lifestyle needs. The wrong choice can lead to costly repairs, increased maintenance, and unsatisfactory aesthetics that don’t suit your environment or way of life.

This article will guide you through selecting the perfect marble pavers tailored to your specific climate and lifestyle, ensuring durability, beauty, and ease of maintenance. 

Check out our tips and insights to help you make an informed decision that enhances your home and garden.

Climate Considerations When Choosing Marble Pavers

Climate Considerations When Choosing Marble Pavers

Choosing marble pavers isn’t just about aesthetics—it’s about understanding how your local climate affects their durability and appearance. From blazing hot summers to freezing winters, each climate presents unique challenges impacting the type of marble and the required maintenance. 

Below are some considerations you need to look out for:

1. Hot climates

Lighter-coloured marble, such as Olympus or Glacier, should be chosen to reflect heat and prevent surface cracking. Temperature extremes can significantly impact the longevity of marble pavers. Additionally, consider applying a heat-resistant sealant to further protect the marble surface from damage due to excessive heat.

2. Cold climates

Marble in colder regions must withstand freeze-thaw cycles, making high-density marble like Provincial Marble or El Capitan essential. These pavers are less likely to crack when exposed to expanding ice during cold weather. 

In addition, proper installation with a suitable sub-base can further protect against damage caused by freezing conditions. It’s also advisable to use a penetrating sealant that prevents water absorption, reducing the risk of cracks during freezing periods.

3. Humid climates


Humidity requires marble with good water absorption rates to minimise damage. Provincial Marble and Luna Grey are good options due to their dense composition. Proper sealing is crucial to resist moisture infiltration, particularly in regions with unpredictable weather. 

In humid environments, it’s also important to ensure that water drainage is well-managed to prevent pooling, which can lead to long-term deterioration. Installing pavers with a slight slope can aid in effective water runoff, protecting the marble from prolonged exposure to moisture.

4. High UV exposure

UV resistance is crucial if your pavers will be exposed to consistent sunlight. Sealing them with a UV-resistant coating can prevent discolouration. 

Additionally, choosing marble varieties like Atlantic or Verde, known for their natural UV resistance, can help maintain their aesthetic appeal over time. A routine application of UV-protective sealant will ensure the marble retains its original colour and appearance for many years.

5. Rapid climate changes

Consider whether the climate changes drastically throughout the year. Rapid temperature fluctuations can lead to paver stress and eventual cracking. 

Choosing marble like Luna Grey, which has some inherent flexibility, or using flexible grout, can help accommodate these shifts and reduce the risk of damage. Ensuring a well-prepared sub-base with materials that can absorb some of the movement will also help to mitigate stress on the marble.

Lifestyle Factors to Consider

Lifestyle factors to Consider When Choosing Marble Pavers

Choosing marble pavers goes beyond just selecting a beautiful stone—it’s about ensuring they fit seamlessly with your everyday lifestyle. From foot traffic and pets to outdoor entertaining, each aspect of your daily activities can influence the type of marble you should choose. 

The following lifestyle factors will help you pick marble that not only looks stunning but also effectively serves your practical needs.

1. Foot traffic

Heavily trafficked areas benefit from more durable marble, which resists wear and tear. Areas such as driveways, walkways, or garden paths should be equipped with strong marble to endure frequent footfall without losing its beauty. 

The choice of Travertine ensures that the marble maintains its charm even after years of use.

2. Children or pets

If you have children or pets running around, choose marble with a honed finish to avoid slips. The honed finish provides a better grip, making it safer for little ones and pets always on the move. Accidents are less likely to occur when the surface offers sufficient traction, crucial in family-friendly spaces.

3. Outdoor dining or entertaining

Outdoor dining or entertaining spaces call for marble resistant to staining. Spills happen, so selecting marble that’s properly treated will save you trouble. 

Marbles like Olympus, when sealed effectively, can provide a classic look without compromising on functionality. Properly sealing the marble ensures that common spills like wine or sauces do not leave lasting marks, making maintenance much easier.

4. Maintenance ease

The ease of maintenance should align with your schedule; some marble types need regular resealing, while others do not. If you have a busy lifestyle, opting for low-maintenance marble such as Provincial Marble is ideal. 

Crema Marfil is aesthetically pleasing and requires less frequent upkeep, allowing you to enjoy its elegance without the added hassle of constant care.

5. Long-term considerations

Thinking about the long term? If you prefer a relaxed lifestyle without constant upkeep, go for a low-maintenance option. High-density marbles like El Capitan are durable and need less attention than softer stones. Choosing a marble that can endure the test of time with minimal maintenance is a wise investment for homeowners seeking convenience and durability.

6. Colour aesthetics

Colours should reflect your aesthetic—consider light colours for a laid-back, airy feel or darker tones for a more dramatic look. 

White marbles like Glacier create an open, fresh atmosphere, whereas darker stones like Verde add a sense of luxury and drama. The choice of colour can significantly influence the overall mood of your space, so it’s crucial to choose one that aligns with your vision.

7. Material cohesion

Will your space feature other materials? It’s important to choose a marble that complements those elements for cohesion. 

For instance, with wooden accents, marbles like Provincial Marble with warm undertones can create a harmonious look. When combining marble with metal or glass features, a cool-toned marble like Atlantic can provide an elegant contrast, creating a balanced and cohesive design.

Choosing the Right Marble Finish for Your Lifestyle

Choosing the Right Marble Finish for Your Lifestyle

Choosing the right marble finish can elevate your space’s practicality and beauty. Whether you want a glossy, high-end look or a textured, slip-resistant surface, each finish has its own benefits. 

Consider how each type aligns with your lifestyle, maintenance preferences, and intended atmosphere.

1. Polished finish

A polished finish adds that elegant, glossy look—perfect for those wanting a high-end appearance. It reflects light beautifully, making spaces appear brighter and more spacious. 

This finish is ideal for formal areas such as living rooms or grand entrances where aesthetics precede functionality. However, it requires regular cleaning to maintain its lustrous shine, which might be demanding for some homeowners.

2. Honed finish

Honed finishes are ideal for family areas where practicality meets beauty. The smooth surface provides a comfortable walking experience while maintaining a non-slip texture, making it a popular choice for kitchens, hallways, and family rooms.

Honed marble has a matte finish, which is less reflective and can help hide scratches or etching. This makes it suitable for high-traffic areas. It adds an understated elegance to any space without being overly glossy.

3. Sandblasted finish

The sandblasted finish is a popular choice for outdoor spaces that require durability and a rugged aesthetic. This finish blasts the marble surface with sand, creating a textured, matte appearance with excellent slip resistance. 

Sandblasted marble is particularly suitable for patios, pool decks, and garden pathways where safety is a priority, especially in wet conditions. The rougher surface adds traction, making it an ideal choice for moisture-prone areas. 

It also gives a unique, rustic look that beautifully complements natural outdoor settings and blends in seamlessly with other landscape features.

4. Brushed finish

Slip resistance becomes crucial in poolside areas or entryways, and a brushed finish might be the best choice. The brushed finish provides a subtly textured surface that helps improve grip, reducing the risk of slipping in wet conditions. It offers a softer, more refined look compared to sandblasted marble, making it ideal for areas where both comfort and safety are desired.

Benefits of Using Marble Pavers

Benefits of Using Marble Pavers

Transform your outdoor spaces with the timeless beauty and strength of marble pavers. Their natural elegance, durability, and heat resistance make them perfect for patios, pathways, and pool areas. Let’s explore why marble pavers are the ideal way to enhance both functionality and aesthetics in your project.

  • Aesthetic Appeal: Marble pavers offer a sophisticated look that can elevate the overall design of your outdoor space. Their natural veining and rich colours add a touch of luxury and elegance.
  • Durability: Marble is a hard, dense stone that withstands heavy foot traffic and outdoor elements. This makes marble pavers a long-lasting option for areas that experience frequent use.
  • Heat Resistance: Marble has excellent heat-resistant properties, making it a great choice for areas exposed to direct sunlight, such as pool decks and patios. It remains cool, providing a comfortable surface even in hot climates.
  • Versatility: Available in various sizes, shapes, and finishes, marble pavers can be used to create intricate designs and patterns. They can complement both traditional and contemporary architectural styles.
  • Low Maintenance: With proper sealing and care, marble pavers are relatively easy to maintain. Regular cleaning and occasional resealing keep them looking pristine and prolong their lifespan.

Types of Marble Pavers

Choosing the right marble paver depends on understanding the distinct characteristics each type offers.

1. Olympus marble

Olympus marble boasts a classic look with subtle beige undertones, making it ideal for those seeking an understated, sophisticated outdoor space. 

Its durability makes it well-suited for driveways and pathways, offering both beauty and resilience. It’s an excellent choice for climates with mild weather, as it remains cool underfoot, making outdoor areas more comfortable during warm seasons.

2. Provincial Marble

With its warm, earthy tones, provincial marble brings a touch of elegance, perfect for gardens that need a natural vibe. It blends seamlessly into rustic landscapes, creating a cohesive and welcoming outdoor environment. Its slightly textured surface also provides slip resistance, making it suitable for pool surrounds and alfresco areas. This type of marble stands up well to fluctuating temperatures, making it versatile across various climates.

3. Luna Grey

Shines with its cool, silver-grey hues that work wonders in contemporary designs, especially around pool areas. Luna Grey has a refined finish that enhances the sleekness of modern architecture, adding a sense of tranquillity to patios and courtyards. 

Its resistance to fading ensures that it retains its stunning appearance, even after long exposure to sunlight, making it an ideal option for bright, sunlit areas.

4. Verde marble

Verde marble offers stunning green tones that add an element of luxury to any setting, perfect for creating a striking focal point. It often highlights specific features, such as garden walkways or water fountains, offering a rich contrast to surrounding greenery. 

Its unique appearance makes it a fantastic choice for those who want a statement piece in their garden. Moreover, it’s quite durable and resistant to weathering, ensuring its beauty lasts for years to come.

5. Atlantic marble

Atlantic marble, known for its crisp, white appearance, helps bring patios a clean and refreshing aesthetic. Its natural brightness reflects sunlight, keeping spaces cooler, which is especially beneficial in hot climates. 

It works exceptionally well in Mediterranean-inspired outdoor areas, creating a pristine, serene atmosphere. This marble is also easy to maintain, making it a practical option for busy homeowners who want minimal upkeep.

6. Glacier marble

Glacier marble exudes an icy beauty, with sharp white and grey marbling that feels timeless. It is ideal for creating an elegant and classic look that suits traditional and modern landscapes. Its unique patterns provide visual interest, making it perfect for terraces or grand entryways. Glacier marble can also withstand colder climates, as its hardy nature resists cracking, ensuring long-term durability.

Conclusion

Choosing the perfect marble pavers can elevate your outdoor space’s look and durability. Consider your climate and lifestyle to make a choice that lasts. 

Ready to transform your space with stunning marble pavers? Contact the experts at Splendour in Stone today for personalised advice tailored to your needs.

How To Grow Moss Between Pavers

Frustrated by the barren gaps between your pavers, which lack charm and character? These empty spaces detract from the overall aesthetic appeal of your outdoor space, leaving it feeling incomplete and uninspired.

Enter the enchanting world of moss cultivation between pavers—a transformative solution. 

Delve into our comprehensive guide to discover the secrets of fostering lush, verdant moss carpets and elevating your outdoor oasis to new heights of natural beauty and tranquillity.

Step 1: Choose the Right Moss

Selecting the appropriate moss is crucial for achieving a lush, green appearance between pavers. 

A suitable moss can transform your outdoor space, adding charm and character while requiring minimal maintenance. Choosing moss varieties that thrive in your specific environment is essential to ensure success.

First, consider the climate and light conditions of your area. Mosses like Bryum argenteum (Silver Moss) and Hypnum cupressiforme (Cypress-leaved Plait Moss) are widespread, as they adapt well to various conditions. 

Silver Moss is known for its resilience in urban settings, while Cypress-leaved Plait Moss prefers shadier, moist areas and is excellent for creating a carpet-like effect.

Evaluate the moisture levels and pH of the soil between your pavers. Moss generally prefers acidic to neutral pH levels and constant moisture. Choose a drought-tolerant moss variety if your region is dry or the paver gaps lack shade.

Lastly, consider the aesthetic you wish to achieve. Mosses differ in texture and colour, from vibrant green to subtle grey-green hues. Select a moss variety that complements your landscape design to create a harmonious and visually appealing space.

Step 2: Select the Right Pavers

How To Grow Moss Between Pavers: Select the Right Pavers

Choosing the appropriate pavers is essential for successfully growing moss between them, as the paver material and design can significantly impact moss growth and overall aesthetic appeal. To create a harmonious blend of moss and pavers, consider the following factors:

Opt for porous materials like natural stone, concrete, or brick, which allow water to permeate and promote moss growth. Avoid non-porous materials, such as polished stone or ceramic, as they can hinder water absorption and create unfavourable conditions for moss.

Pavers with a rough or textured surface provide better anchorage for moss, enhancing its ability to adhere and thrive. Textured surfaces also create an organic appearance, complementing the natural look of moss.

Choose pavers in earth tones, such as grey, brown, or terracotta, which contrast beautifully with the vibrant green of moss. This contrast enhances the visual appeal of your pathway while maintaining a natural and cohesive look.

Consider using pavers with varied shapes and sizes to create interesting patterns that highlight the moss. Ensure the gaps between pavers are wide (typically 1-2 inches) to allow adequate space for moss to grow without overcrowding.

Step 3: Prepare the Site

Proper site preparation ensures moss thrives between pavers, providing a seamless and lush appearance. 

Begin by evaluating the existing paver layout and condition. Clear any debris, such as leaves, weeds, and dirt, from the gaps between the pavers, as these can inhibit moss growth and disrupt the aesthetic appeal.

Next, assess the paver alignment and ensure they are level and stable. Uneven pavers can create water drainage issues, making it difficult for moss to establish a consistent, healthy growth pattern. Adjust or re-level the paver heights if necessary to ensure a uniform surface.

The soil between the pavers should be amended to create optimal growing conditions for moss. By adding organic materials such as peat moss or compost, aim for a slightly acidic to neutral pH. These materials help maintain moisture and provide essential nutrients. 

Moisten the soil before introducing moss to ensure it has adequate water to establish itself. Moss requires consistent moisture, so consider regularly installing a drip irrigation system or hand-watering to maintain the ideal damp environment. 

These steps will create the perfect conditions for your moss to flourish and transform your outdoor space.

Step 4: Propagation Methods

How To Grow Moss Between Pavers: Propagation Methods

Several effective methods for propagating moss between pavers are suited to different needs and conditions. Understanding these techniques will help you achieve lush and even moss coverage.

Transplanting Moss Patches

One of the simplest methods is transplanting existing moss patches from other areas of your garden or a nursery. Carefully remove moss with a thin layer of soil attached and place it into the prepared gaps between pavers. 

Press down gently to ensure good contact with the substrate. This method provides immediate results and is ideal for small areas.

Moss Slurry Method

The moss slurry technique is excellent for larger areas or irregular spaces. To create a paste, blend fresh moss with water and a small amount of buttermilk or yoghurt. 

The buttermilk or yoghurt helps the moss adhere to surfaces and provides nutrients. Spread this mixture evenly in the paver gaps and ensure consistent moisture to facilitate growth.

Moss Spores

For those who prefer a more gradual approach, moss spores can be sown into the soil between pavers. Sprinkle the spores over the area and mist lightly with water. This method takes longer to establish but can result in a more natural appearance over time.

Each of these propagation methods has advantages, so choose the one that best suits your garden’s conditions and personal preferences.

Step 5: Plant Moss Between Pavers

How To Grow Moss Between Pavers: Plant Moss Between Pavers

Planting moss between pavers is a simple yet rewarding process that can enhance the beauty of your outdoor space. 

Begin by selecting healthy moss from your garden or a reputable nursery. Ensure the moss is moist and vibrant, indicating it is healthy and ready for transplantation.

To plant the moss, first prepare a moss slurry by blending the moss with water and a small amount of buttermilk or yoghurt. This mixture helps the moss adhere to the substrate and provides nutrients to encourage growth. 

Pour the slurry into the gaps between the pavers, ensuring it fills the spaces evenly. Alternatively, you can transplant moss directly by pressing small patches into the prepared soil between the pavers. Gently press the moss to ensure good contact with the soil, which is essential for root establishment.

After planting, mist the moss with water to maintain moisture levels. Moss thrives in consistently damp conditions, so it remains moist, especially during the initial establishment phase.

Until firmly rooted, avoid direct sunlight and foot traffic on the newly planted moss. With proper care, your moss will soon create a lush, green carpet between your pavers, enhancing your landscape’s natural beauty.

Step 6: Caring for Moss Between Pavers

Caring for moss between pavers is relatively straightforward but requires attention to specific maintenance tasks to ensure the moss remains healthy and vibrant over time.

  • Watering: Moss thrives in consistently moist conditions. Regularly mist the moss, especially during dry periods, to maintain adequate moisture levels. Avoid over-watering, which can lead to fungal growth or rot. A light, frequent misting is usually sufficient.
  • Light Conditions: Moss generally prefers shade or indirect light. Excessive sunlight can cause moss to dry out and become patchy. If your moss is in a sunny area, consider providing temporary shading or relocating it to a more shaded spot.
  • Weed Control: Keep the area between the pavers free from weeds and debris, which can compete with moss for nutrients and moisture. Gently remove weeds or use a hand tool to avoid disturbing the moss.
  • Cleaning: Occasionally clear away fallen leaves and debris that can smother the moss and impede its growth. Use a soft brush or broom to avoid damaging the moss.
  • Trimming: If moss begins to overgrow or encroach on surrounding areas, trim it back carefully to maintain a neat appearance and prevent it from spreading beyond desired limits.

Controlling Weeds and Competing Vegetation

Weeds and competing vegetation threaten the health and vitality of moss between pavers. Implement the following strategies to control weeds and maintain the integrity of your moss garden:

  • Manual Removal: Regularly inspect the moss for weeds and remove them by hand, ensuring minimal disturbance to the moss.
  • Mulching: Apply a layer of organic mulch, such as shredded bark or compost, between pavers to suppress weed growth and retain moisture in the soil.
  • Herbicides: Exercise caution when using herbicides near moss, as they can damage or kill the moss if not applied carefully. Opt for natural or organic herbicides that pose minimal risk to moss and other desirable plants.

Dealing with Moss Pests and Diseases

While moss is relatively resistant to pests and diseases, occasional issues may arise. Monitor closely for signs of pests or disease, such as discolouration, browning, or abnormal growth patterns. If problems occur, take the following steps:

  • Pest Management: Use environmentally friendly methods, such as handpicking or natural predators, to control pests such as slugs, snails, and aphids.
  • Disease Prevention: Maintain good airflow and drainage around the moss to prevent fungal diseases and rot. Avoid overwatering or allowing water to stagnate on the moss surface.

Step 7: Troubleshooting Common Issues

Troubleshooting Common Issues: How To Grow Moss Between Pavers

Addressing common issues with moss between pavers ensures a thriving and visually appealing garden feature. Here’s how to resolve typical problems:

Dry or Patchy Moss

Dry patches are often due to insufficient moisture. Increase the frequency of misting, especially during hot, dry weather. Ensure that the soil between the pavers remains consistently damp but not soggy. If patches persist, check for drainage issues or add a layer of organic mulch to retain moisture.

Excessive Algae Growth

Algae can outcompete moss if the area is overly moist or shaded. Reduce the amount of standing water and increase air circulation around the moss. Avoid using fertilisers, as they can promote algae growth. Regularly remove algae by gently scrubbing the affected areas with a soft brush.

Moss Discolouration

Yellowing or browning moss may indicate too much direct sunlight or poor soil conditions. Move the moss to a shadier spot and improve the soil’s acidity by adding organic matter like peat moss. Ensure that the moss receives adequate moisture and avoid excessive foot traffic.

Weeds and Debris

Weeds and debris can smother moss and impede growth. Regularly remove weeds by hand and clear debris using a soft brush to prevent it from covering the moss and reducing its health.

Step 8: Enhancing Aesthetics and Functionality

How To Grow Moss Between Pavers: Enhancing Aesthetics and Functionality

Moss creates a lush, natural look that complements various paver styles and landscape designs. Select moss varieties that blend well with your paver colours and textures for a cohesive appearance. Use moss to fill gaps irregularly for a more organic, natural feel, or create defined patterns to add visual interest. 

Beyond their practical benefits, moss between pavers adds a unique aesthetic and functional dimension to outdoor spaces. Explore creative ways to enhance the beauty and functionality of your moss garden between pavers.

Design Ideas for Incorporating Moss into Your Outdoor Space

Incorporating moss into your outdoor space adds a touch of natural beauty and tranquillity. Here are some creative design ideas to make the most of moss between pavers and other areas:

  • Moss-Covered Pathways: Allow moss to grow between pavers to create serene, enchanting pathways. This softens the appearance of traditional hardscapes and provides a lush, green contrast. Choose pavers with irregular shapes for a more natural, winding look, or opt for a geometric pattern to add visual interest.
  • Moss Gardens: Design dedicated moss gardens by planting moss between stepping stones or within garden beds. Combine different moss species to achieve varying textures and shades, creating a textured green carpet that complements other plants and flowers.
  • Moss Wall Features: Incorporate moss into vertical garden designs or as part of a moss wall feature. Mount a frame or create a vertical structure filled with moss to add a striking, living element to fences or walls. This vertical approach brings a fresh perspective to garden design.
  • Moss-Embedded Seating Areas: Transform seating areas by integrating moss between pavers or around outdoor furniture. Moss-covered seating spaces provide a soft, natural cushion and create a relaxing atmosphere, ideal for garden lounges or reading nooks.
  • Moss-Covered Steps: Add a touch of elegance and nature to stairways or garden steps by growing moss between or around the steps. This design adds a charming, rustic feel and enhances the visual appeal of stairways, making them a focal point in your garden.

Benefits of Moss Between Pavers Beyond Aesthetics

By creating a hospitable environment for moss, you support biodiversity and ecological balance in your garden.

  • Water Retention: Moss acts as a natural sponge, absorbing and retaining water in the soil between pavers. This helps to reduce water runoff and erosion, promoting a healthy and sustainable water cycle in your garden.
  • Erosion Control: The dense, fibrous root structure of moss helps to stabilise soil and prevent erosion between pavers. Planting moss on slopes or in areas prone to erosion can help mitigate the effects of runoff and soil displacement.
  • Habitat Creation: Moss provides valuable habitat and food sources for various beneficial insects, including pollinators and decomposers.

To keep moss looking its best, ensure it receives consistent moisture and is debris-free. Trim surrounding plants and maintain proper light levels to prevent moss from becoming overgrown or shaded. 

To sustain its aesthetic and functional benefits, regularly check for and address any issues, such as excess debris or dry patches.

Conclusion

Cultivating moss between pavers is a sustainable and enchanting way to enhance outdoor spaces. Apply the principles shared to embrace its beauty and ecological benefits. 

Start your moss-growing journey today and transform your landscape into a verdant oasis of natural charm.

Caring for Your Bluestone: Maintenance Tips for Lasting Beauty

Bluestone is celebrated for its enduring beauty, but neglect can lead to wear and dullness over time. With the right care, your Bluestone surfaces can maintain elegance and withstand the elements.

Imagine your patio or floors looking flawless year after year with just a few simple maintenance steps. Follow these expert maintenance tips to protect and enhance your Bluestone’s natural charm, ensuring its lasting beauty and resilience for the future.

Tip 1: Regular washing and cleaning

Regular cleaning is the simplest way to keep your Bluestone looking its best. A consistent routine of sweeping away dirt and debris prevents scratches from forming on the surface. How often should Bluestone be washed? Aim for a weekly rinse with water to remove loose particles and a more thorough clean with a pH-neutral stone cleaner once a month. 

Use a soft-bristle brush to scrub gently for tougher grime without damaging the stone’s finish. Avoid high-pressure washing, as it can degrade Bluestone over time, wearing away its smooth surface. Instead, opt for a garden hose, which provides enough water pressure to cleanse the surface without causing harm. 

Keeping your Bluestone clean enhances its natural appearance and extends its longevity, reducing the need for costly repairs.

Tip 2: Managing Stains and Discolouration

Stains and discolouration are inevitable with Bluestone, especially in outdoor spaces, but they can be managed effectively. The first step is understanding the source of the stain. For oil stains, a poultice made from baking soda and water can lift the residue, allowing the stone to breathe again. 

Organic stains, such as those from leaves, moss, or bird droppings, often respond well to mild detergents or pH-neutral cleaners. Never use acidic cleaners; they can permanently etch the surface of Bluestone, leaving unsightly marks.

Rust stains are more difficult to remove and require specialised stone cleaners. In some cases, applying the cleaner several times may be necessary to remove the rust thoroughly. Acting swiftly is crucial when dealing with any stain, as the longer it sits, the deeper it penetrates the porous stone. 

Sealing the Bluestone helps to create a protective barrier, reducing the chances of future staining. Additionally, always rinse the stone thoroughly after cleaning to remove any residue that could cause further discolouration. 

Tip 3: Sealing Your Bluestone

Sealing your Bluestone protects it from moisture, stains, and weathering. A high-quality sealant creates a barrier that keeps water and debris from penetrating the stone’s surface. How often should Bluestone be sealed? Experts recommend sealing outdoor Bluestone every one to two years, depending on weather exposure and foot traffic. 

Before applying the sealant, it’s vital to clean the surface thoroughly to avoid trapping dirt or stains. Using a roller or sprayer, evenly coat the surface, ensuring full coverage. Allow the sealant to dry completely before using the area to maximise its effectiveness. 

Resealing regularly ensures the stone maintains its natural beauty and resilience, preventing costly damage in the future. Proper sealing will protect your Bluestone against the elements while preserving its aesthetic charm for years.

Tip 4: Repairing cracks and chips

Over time, cracks and chips may appear on Bluestone, but addressing them early can prevent further deterioration. Small cracks can be repaired using an epoxy or resin filler, which bonds with the stone to create a smooth finish.

 Professional intervention is recommended for larger cracks to avoid complications or further damage. Cleaning the affected area before applying filler ensures a solid bond. 

Once the crack is filled, gently smooth the surface to match the surrounding Bluestone. A patching compound can restore the stone’s original shape for chips, especially on the edges. Prompt repair of these imperfections prevents them from spreading, safeguarding the structural integrity of your Bluestone. 

Regularly inspecting the stone for signs of damage will help catch small issues early, minimising the need for more costly repairs. This proactive approach keeps your Bluestone looking pristine and extends its lifespan, preserving its beauty and function.

Tip 5: Inhibiting weed growth

Weeds can be a persistent issue between Bluestone pavers, but proactive measures help keep them at bay. Applying a joint stabilising sealer is highly effective for inhibiting weed growth. This sealer fills the joints, preventing weeds from taking root. How can regular maintenance help? Sweeping frequently removes seeds before they have the chance to germinate. Sand can also fill in gaps between pavers, making growing weeds difficult. 

For existing weeds, a natural weed killer, such as vinegar, is a safe option that won’t harm the Bluestone. Chemical weed killers can also be used, but choose products specifically formulated for use on stone to avoid potential damage.

Promptly addressing weed growth helps maintain Bluestone’s clean, sleek look, ensuring it remains a beautiful feature of your landscape. A proactive approach keeps the surface tidy and prevents weeds from loosening the joints, possibly leading to paver displacement over time.

Tip 6: Regular inspections

Regular inspections are key to keeping Bluestone in top condition. By examining your stonework frequently, you can spot minor issues like cracks or chips before they become larger, more expensive problems. 

How often should inspections be conducted? Ideally, a visual check every few months will help catch early signs of wear. Pay special attention to high-traffic areas, where wear and tear are more likely. 

During an inspection, look for signs of staining, loose pavers, or weeds growing between joints. If any issues are identified, they should be addressed promptly to prevent further damage. Inspecting after extreme weather is especially important, as heavy rain or freezing temperatures can weaken the stone’s structure. 

Keeping an eye on your Bluestone helps maintain its beauty and prevents costly repairs in the long run. Staying proactive with regular inspections will extend the lifespan of your Bluestone surfaces, ensuring they remain functional and visually appealing.

Tip 7: Professional repair services

Conducting regular inspections is essential to ensuring the longevity of Bluestone surfaces. By checking the stonework every few months, you can catch minor problems before they become costly repairs. Start by examining high-traffic areas which are more prone to wear and tear. 

What should you look for? Cracks, chips, or loose pavers are common signs of damage. Checking for stains or moisture build-up is also crucial, especially in areas exposed to rain or humidity. Inspections are especially important after extreme weather conditions, such as heavy rains or freezing temperatures. 

Bluestone is durable, but prolonged exposure to these elements can weaken its structure. Spotting minor issues early allows for timely repairs, preventing damage from spreading and maintaining the stone’s appearance. 

Inspections protect against deterioration and help you retain the Bluestone’s aesthetic appeal, ensuring it remains a stunning feature in your landscape or home.

Conclusion

Proper care for your Bluestone ensures its timeless beauty and longevity. For years, follow simple maintenance tips—regular cleaning, sealing, managing stains, and prompt repairs—to protect your investment.

Ready to give your Bluestone the care it deserves? Apply these tips today and keep your stone surfaces pristine for the long haul.

How to Control Moisture in Masonry

Excess moisture wreaks havoc on masonry structures, leading to deterioration and costly repairs. Without proper control, dampness seeps in, causing unsightly stains, mould growth, and structural instability. 

Learn practical strategies and solutions to combat moisture infiltration, safeguarding your masonry against damage and ensuring its longevity.

1. Identifying Moisture Problems

Accurately identifying moisture problems in masonry is paramount to implementing effective solutions. Signs of moisture issues include stains, discolouration, peeling paint, or mould growth on interior or exterior surfaces. 

Efflorescence, a white powdery substance, often indicates moisture migration within the masonry.

Visual inspection should be complemented by moisture testing, using tools like moisture meters or infrared cameras to detect hidden moisture. Pay attention to damp or musty odours and warped or deteriorating materials, which indicate long-standing moisture problems.

Furthermore, monitor areas prone to moisture infiltration, such as basements, crawl spaces, and windows and doors. Address any cracks or gaps in masonry joints or seals promptly to prevent water ingress.

Regular maintenance and vigilant observation are essential for early detection and mitigation of moisture issues. 

2. Preventative Design and Construction Techniques

Preventative design and construction techniques are essential for controlling moisture in masonry structures. 

Proper site grading directs surface water away from the building, preventing moisture ingress. Vapour barriers used during construction also act as a barrier against moisture infiltration.

Effective drainage systems, including gutters and downspouts, efficiently channel rainwater away from the building’s foundation. Proper flashing installation around windows, doors, and other openings prevents water penetration.

Choose quality construction materials with low porosity to minimise moisture absorption. Proper ventilation in attics, basements, and crawl spaces helps reduce humidity levels, mitigating moisture-related issues.

Attention to detail in masonry joint construction and sealing ensures tight seals during construction, reducing the risk of water infiltration. Regular maintenance, including repointing mortar joints and repairing damaged seals, further enhances the building’s resistance to moisture ingress.

3. Waterproofing Methods

Keeping your outdoor surfaces dry and damage-free requires the right waterproofing techniques. Let’s explore the best methods to ensure your interlocking pavers stand the test of time, no matter the weather.

Method 1. Surface Coatings

Surface coatings, such as acrylic or siloxane-based sealants, are applied directly onto the masonry surface. These coatings form a protective layer that repels water, allowing the masonry to breathe.

They are particularly effective for above-grade applications where aesthetics are a concern, as they can be clear or tinted to match the desired finish.

Method 2. Penetrating Sealers

Penetrating sealers are designed to penetrate deep into the masonry substrate and react chemically to form a water-repellent barrier. Unlike surface coatings, penetrating sealers do not change the appearance of the masonry, making them suitable for preserving the natural look of materials such as brick or stone.

They are commonly used on interior and exterior surfaces to provide long-lasting protection against moisture intrusion.

Method 3. Cementitious Waterproofing 

Cementitious waterproofing is a thin membrane applied directly to the masonry surface. Made from a mixture of cement, sand, and waterproofing additives, it offers excellent adhesion to masonry substrates and forms a durable barrier against water penetration.

Cementitious waterproofing is often used on below-grade surfaces such as foundation walls and basements, where moisture intrusion is a common problem.

Method 4. Bituminous Coatings

Bituminous coatings are asphalt-based compounds that provide robust protection against water penetration. They are typically applied as a thick, viscous liquid that forms a waterproof membrane when dry.

Bituminous coatings are ideal for below-grade applications, such as foundation walls and below-grade concrete structures, and they effectively protect against groundwater infiltration.

Method 5. Sheet Membranes

Sheet membranes are flexible waterproofing materials made from rubber or bitumen. They are applied directly to the masonry surface and provide seamless waterproofing protection.

Sheet membranes are commonly used in critical areas such as basements, retaining walls, and below-grade structures. They offer superior resistance to water penetration and can withstand high hydrostatic pressure.

Method 6. Drainage Systems

Besides surface treatments and coatings, drainage systems are essential for managing water around masonry structures. French drains and weeping tile systems are commonly used to divert groundwater away from foundations and prevent moisture buildup around the perimeter of the building.

Properly designed drainage systems can significantly reduce the risk of moisture-related problems and help maintain the structural integrity of masonry structures over time.

4. Ventilation and Airflow

Proper ventilation and airflow are critical aspects of moisture control in masonry structures. Adequate ventilation helps regulate humidity levels, preventing condensation and moisture buildup.

Effective ventilation systems, such as ridge vents, soffit vents, and gable vents, facilitate airflow throughout the structure, allowing moisture-laden air to escape and fresh air to circulate. 

This circulation helps to maintain a balanced indoor environment, reducing the risk of moisture-related issues such as mould growth and decay.

In addition to natural ventilation, mechanical ventilation systems, such as exhaust fans and dehumidifiers, can supplement airflow in areas prone to high humidity, such as basements and bathrooms. 

These systems actively remove excess moisture from the air, helping to prevent moisture accumulation and associated damage.

Regular maintenance of ventilation systems is essential to ensure optimal performance. Cleaning vents and filters, inspecting for blockages, and promptly addressing mechanical issues will help maintain proper airflow and ventilation efficiency.

5. Repairing Moisture Damage

Discover effective strategies for addressing moisture damage in masonry structures. Learn how to identify the source of moisture ingress, repair interior and exterior damage, and apply preventative measures to safeguard against future issues.

The first step in repairing moisture damage is to identify the source of the moisture ingress. This could be from leaky pipes, damaged seals around windows or doors, or cracks in the masonry itself. Addressing these underlying issues is crucial to prevent further damage. 

For interior moisture damage, remove any affected materials, such as drywall or insulation, to assess the extent of the damage and ensure the area is thoroughly dried to prevent mould growth. 

Dehumidifiers and fans can help expedite drying and restore the area to a dry condition. Exterior moisture damage often manifests as cracks or spalling in the masonry. 

These areas should be repaired using appropriate materials such as mortar or masonry patching compound. Ensuring these repairs create a secure and watertight seal is essential to prevent further moisture intrusion. 

Consider applying a waterproofing treatment to the repaired areas and other vulnerable parts of the masonry for additional protection. This extra layer can help prevent future moisture damage and prolong the structure’s lifespan.

Maintenance Tips

Explore essential strategies for preserving the integrity of masonry structures through regular upkeep. From inspecting for cracks to managing vegetation, these tips empower property owners to control moisture and extend the lifespan of their buildings effectively.

  • Regular Inspections: Conduct routine exterior inspections for cracks, gaps, or deteriorating mortar joints. Promptly repair any issues to prevent water infiltration and potential moisture damage.
  • Gutter Maintenance: Clean gutters and downspouts regularly to ensure proper drainage. This prevents water from accumulating around the foundation, reducing the risk of moisture seeping into the masonry.
  • Vegetation Management: Trim vegetation away from the building to improve airflow and prevent moisture retention. Overgrown plants can create a damp environment conducive to moisture-related issues.
  • Indoor Humidity Control: Monitor indoor humidity levels and use dehumidifiers if necessary to maintain a healthy environment. This helps prevent condensation and moisture buildup inside the building.
  • Waterproofing Sealant Application: Apply a waterproofing sealant to exterior masonry surfaces every few years. This enhances moisture resistance and prolongs the structure’s lifespan by providing additional protection against water intrusion.
  • Drainage System Maintenance: Regularly inspect and maintain any drainage systems, such as French drains or weeping tile systems, to ensure they remain clear and functional. Proper drainage prevents water from pooling around the foundation, reducing the risk of moisture damage.

Conclusion

Controlling moisture in masonry is crucial for preserving the durability and appearance of your stonework. With the right techniques, you can keep your structure dry and long-lasting.

Splendour in Stone offers expert solutions to protect your masonry. Contact us today to maintain the beauty and strength of your stone surfaces.

How to Choose the Right Stone for Your Stacked Stone Fireplace

A stacked stone fireplace adds charm and sophistication, creating a stunning centrepiece for any room.

However, selecting the perfect one can be challenging, given the wide variety of stones available. Which stone will best suit your vision?

Whether you prefer a timeless, rustic appeal or a sleek, modern aesthetic, the right stone will elevate your fireplace to a new level. Keep reading to explore expert guidance on choosing the perfect stone to make your fireplace stand out in style.

1. Consider the Fireplace Style

The fireplace style is essential for creating a cohesive look when choosing the suitable stone for your stacked stone fireplace. Start by identifying your fireplace’s style—traditional, modern, rustic, or contemporary. 

Stones like granite or limestone are great for traditional fireplaces, offering timeless elegance and warmth. To understand their qualities, check out our in-depth guides on Granite and Limestone.

Granite offers durability and a classic appeal, while limestone adds a natural, inviting texture. Granite is a sleek and versatile option for modern or contemporary fireplaces that enhances minimalist designs.

Limestone or marble can elevate the rustic charm of a country-style fireplace. With its sophisticated veining, Marble creates a beautiful contrast that complements a classic look.

Matching the right stone with your fireplace style will ensure a seamless interior blend, enhancing its visual appeal and functionality.

2. Stone Texture and Finish

Choosing the right stone texture and finish is pivotal in defining the look and feel of your stacked stone fireplace. The stone’s texture can dramatically influence the fireplace’s aesthetics and functionality.

Limestone offers a rough, natural texture that provides a rustic and earthy appeal. It adds depth and character to your fireplace, ideal for creating a rugged, outdoor feel even in an indoor setting.

Conversely, if you prefer a smoother, polished finish, marble provides a sleek, refined look. Its glossy surface reflects light beautifully, making the fireplace a focal point of elegance.

Granite provides a range of finishes, from honed to polished. A honed finish offers a matte appearance that hides fingerprints and smudges, while a polished finish enhances the stone’s natural colours and patterns, adding a touch of sophistication.

Selecting the right texture and finish complements your design style and impacts maintenance. A rough texture may require more frequent cleaning to avoid trapping dust, while a polished surface is more accessible to wipe clean and maintain its shine.

3. Colour and Pattern

Choosing the right colour and pattern for your stacked stone fireplace is crucial in setting the mood and integrating the fireplace into your overall dĂ©cor. The stone’s colour can significantly impact the room’s ambience, while the pattern adds visual interest and texture.

When selecting a colour, consider your room’s existing palette. Neutral tones like beige, grey, or cream are versatile and can complement various interiors, offering a classic and timeless look. Dark shades, such as charcoal or deep brown, add a dramatic and sophisticated touch, ideal for creating a bold statement.

The pattern is equally important. Uniform patterns in stones like granite or limestone can provide a clean, modern look, while varied patterns in stones like marble or limestone offer a more rustic or eclectic feel. Natural stone often features unique patterns and veining, making each fireplace distinct.

Be mindful that lighter colours can make a space feel larger and airier, whereas darker colours can create a cosy, intimate atmosphere. Choosing a pattern that complements your room’s style ensures that your stacked stone fireplace becomes a harmonious and striking feature in your home.

4. Durability and Maintenance

Evaluating your chosen stone’s durability and maintenance requirements is essential for ensuring your stacked stone fireplace stands the test of time. Each type of stone varies in its resilience and upkeep needs.

Granite is renowned for its exceptional durability. This rugged, dense stone resists scratches, stains, and heat, making it ideal for high-traffic areas. Its maintenance is relatively straightforward—regular wiping with a damp cloth and periodic sealing to prevent staining are usually sufficient.

While elegant, marble is more porous and susceptible to scratching and staining. It requires more careful maintenance, including regular sealing to protect its surface from spills and acidic substances. Regular cleaning with pH-neutral products helps maintain its lustre.

With its softer composition, limestone can be prone to scratching and weathering. It benefits from routine sealing to guard against moisture and stains. Its maintenance includes gentle cleaning with non-abrasive solutions to preserve its surface.

3. Cost Considerations

Understanding the cost considerations is crucial when choosing the suitable stone for your stacked fireplace. The price of natural stone can vary significantly depending on the type, its rarity, and the complexity of the installation.

  • Granite, known for its durability and aesthetic appeal, typically comes at a higher cost due to its strength and long-lasting nature. However, this investment often pays off in the long term with minimal maintenance and a timeless look that adds value to your home.
  • Marble is another premium option for its luxurious appearance and unique veining. While it offers a sophisticated aesthetic, its higher price point and maintenance needs should be factored into your budget.
  • Limestone is generally more affordable than granite or marble and offers a natural, warm look at a lower cost. However, it may require more frequent maintenance, which could add to long-term expenses.

Installation costs also vary based on the complexity of the design and the labour required. Professional installation is recommended for achieving the best results, which adds to the overall cost but ensures durability and a polished finish.

Balancing your budget with the desired look, durability, and maintenance requirements will help you choose a stone that meets both your aesthetic preferences and financial considerations.

4. Installation Considerations

The installation process is crucial when choosing the stone for your stacked fireplace. The installation affects your fireplace’s overall appearance, longevity, and safety.

Professional installation is highly recommended, particularly for natural stone, as it ensures precision and quality. Experienced installers can adequately align and secure the stone, avoiding common issues such as uneven surfaces or poor adhesion, which can lead to long-term problems.

Another critical factor is the weight of the stone. Heavier stones like granite require structural solid support to ensure stability. Additional reinforcement of the fireplace structure may involve this, which could increase the complexity and cost of installation.

Lighter stones like limestone might be easier to install but require careful handling to avoid damage. Additionally, the stone’s finish—whether polished, honed, or natural—can affect the installation technique. For example, polished rocks must be handled delicately to prevent scratching, while rougher stones might require special adhesives or grouting techniques.

Finally, consider the time involved. Natural stone installation is often time-consuming, requiring precision and patience. Rushing the process can lead to mistakes that compromise the fireplace’s aesthetics and durability.

Choosing a professional installer who understands these nuances ensures that your stacked stone fireplace will look stunning and stand the test of time.

5. Environmental Impact

Considering the environmental impact of the stone you choose for your stacked stone fireplace is increasingly vital in today’s eco-conscious world. In contrast, natural stone is durable and long-lasting but has an environmental footprint due to the extraction and processing involved.

The quarrying process can significantly impact the landscape, including habitat disruption and energy consumption. Choosing stones from sustainably managed quarries can help mitigate these effects. Look for suppliers prioritising ethical practices, such as responsible land management, restoration efforts, and reduced energy use during extraction.

Transportation also contributes to the environmental impact, mainly if the stone is sourced from distant locations. Opting for locally sourced stone supports local businesses and reduces the carbon footprint associated with long-distance shipping.

Another factor to consider is the longevity of the stone. Natural stone’s durability means it doesn’t need to be replaced often, reducing the frequency of resource extraction and waste. This makes it a more sustainable option than materials requiring frequent replacement.

Finally, inquire about using eco-friendly sealants and adhesives during installation. These products minimise harmful emissions and reduce the overall environmental impact of your fireplace project.

Conclusion

Choosing the suitable stone for your stacked stone fireplace involves balancing aesthetics, durability, maintenance, and environmental impact. Considering these factors, you can create a stunning and lasting feature in your home.

For expert guidance and a wide range of stone options, contact Splendour In Stone Melbourne today to find the perfect match for your fireplace.

How to Repair a Broken Driveway Paving Stone in 3 Steps

A broken paving stone on your driveway can be both unsightly and unsafe. if left unrepaired, it can lead to further damage, increased repair costs, and even potential accidents.

Learn how to fix a broken driveway paving stone in three simple steps. Our straightforward guide will help you assess the damage, remove the broken stone, and install a new one, restoring your driveway’s appearance and safety efficiently.

Tools and Materials Needed

Before you begin the process of repairing your broken driveway paving stone it’s crucial to gather all the necessary tools and materials. Having everything prepared will ensure a smooth and efficient repair process. Here’s what you’ll need:

Tools:

  • Hammer: Essential for breaking up the damaged paving stone.
  • Chisel: Useful for chiselling out broken pieces.
  • Pry Bar or Crowbar: Helps lift out the broken pieces of the paving stone.
  • Safety Gloves: Protect your hands from sharp edges and debris.
  • Safety Goggles: Shield your eyes from dust and small particles during the removal process.
  • Broom: Necessary for cleaning the area around the damaged stone.
  • Level: Ensures the base is flat and the new stone is aligned correctly.
  • Rubber Mallet: Used to gently tap the new paving stone into place without causing damage.

Materials:

  • Replacement Paving Stone: Ensure it matches the size, shape, and material of the existing stones.
  • Mortar or Adhesive: Used to secure the new stone in place. Choose a product suitable for the type of paver and the conditions.
  • Sand: For creating a stable and level base layer.
  • Bedding Sand or Gravel (if needed): Used for additional base material if the underlying gravel is damaged or needs replenishing.
  • Jointing Compound or Polymeric Sand: Used to fill the joints between the paving stones and secure them in place.

Step 1: Removing the Broken Paving Stone

The first step in repairing a broken driveway paving stone is to carefully remove the damaged stone without disturbing the surrounding area. This process requires precision and patience to ensure that the adjacent stones and base layers remain intact.

1. Assessing the Damage

Before beginning the repair, thoroughly assess the damage to the paving stone. Check if the stone is cracked, chipped, or shattered, and decide if it can be repaired or needs replacement. 

Inspect the surrounding area for additional damage and signs of settling or shifting in adjacent pavers, which could indicate underlying issues. Evaluate the stability and cleanliness of the base; any instability must be addressed before installing a new stone.

Based on your assessment, gather the necessary tools and materials to ensure a smooth and efficient repair process. Proper preparation is crucial for achieving a successful and lasting repair.

2. Preparing the Area

Clear the Area; remove any debris, dirt, or loose materials around the damaged stone. This will provide a clean workspace and prevent any foreign objects from interfering with the repair.

Secure Surrounding Stones; ensure the stones adjacent to the broken ones are secure. You can use small pieces of wood or wedges to hold them in place during the repair.

3. Removing the Stone

Break the damaged stone using a hammer and chisel, and start breaking the damaged stone into smaller, more manageable pieces. Begin at the edges and work your way towards the centre. Be cautious and controlled to avoid damaging nearby stones.

Lift out the pieces; once the stone is broken into smaller pieces, use a pry bar to lift them out. Insert the pry bar into the gaps created by the chisel and gently lever the pieces out of the ground. Continue this process until all fragments of the broken stone are removed.

After removing the stone, use a broom to sweep away any remaining debris, sand, or small fragments from the base. This step is crucial to ensure a clean and level surface for the new paving stone.

Step 2: Preparing the Base for the New Paving Stone

Preparing the base is a crucial step to ensure the new paving stone sits correctly and remains stable over time. A well-prepared base will prevent future issues and provide a solid foundation for the replacement stone.

1. Checking the Base

After removing the broken stone, inspect the exposed base layer. Look for any signs of damage, such as erosion, unevenness, or insufficient depth. A damaged base can compromise the stability of the new stone. Assess the need for additional material; determine if you need to add more base material, such as gravel or sand, to achieve the necessary depth and stability.

2. Levelling the Base

If the base layer is too shallow or damaged, add a layer of gravel. Spread it evenly and use a compactor to compress it, ensuring a solid foundation that also aids with drainage. Once the gravel is properly laid, add a layer of sand on top.

Use a straightedge or a piece of wood to spread the sand evenly across the bas; making sure the sand layer is level and about 1-2 inches thick.

Next, compact the sand layer using a hand tamper or a mechanical compactor. This process ensures the sand is firm and level, providing a stable base for the new paving stone.

Finally, place a level across the sand layer to check for evenness. Adjust as necessary by adding or removing sand until you achieve a perfectly level surface.

3. Ensuring Proper Base Preparation

Ensure the entire base area is uniformly compacted and level. Any unevenness can cause the new stone to settle unevenly, leading to instability and potential future damage.

The depth of the base layer should match the thickness of the paving stones used in your driveway. This ensures a flush and seamless fit with the surrounding stones.

Step 3: Installing the New Paving Stone

With the base properly prepared, the next step is to install the new paving stone. This process involves careful placement and alignment to ensure a seamless and durable repair.

1. Placing the Replacement Stone

Choose a paving stone that matches the size, shape, and material of the existing stones in your driveway. This will ensure a consistent appearance and fit.

Carefully place the new paving stone into the prepared base. Ensure that it is oriented correctly to match the pattern of the surrounding stones.

Gently lower the stone into the sand base, making sure it sits evenly. Avoid dropping it forcefully, as this can disturb the base layer.

2. Ensuring Proper Alignment

Check the alignment; use a level to ensure the new paving stone is perfectly aligned with the surrounding stones. The top surface of the new stone should be flush with the adjacent stones, creating a smooth and even surface.

Adjust as necessary; if the stone is not level lift it out and adjust the sand base by adding or removing sand as needed. Reposition the stone and check the alignment again.

Once the stone is correctly positioned and aligned, use a rubber mallet to tap it gently into place. This helps to secure the stone and ensure it sits firmly in the base.

3. Filling the Joints

Apply jointing compound or polymeric sand over the entire area, making sure it fills the gaps between the paving stones. These materials help lock the stones in place and prevent movement.

Once applied, use a broom to sweep the compound into the joints, ensuring that they are filled. Check to make sure there are no gaps or voids.

After sweeping the compound, use a compactor or a rubber mallet to compact the sand further. This step stabilises the stones and prevents the jointing material from washing out.

Finally, perform a final sweep to remove any excess jointing compound from the surface of the stones, leaving the area clean and neat.

4. Ensuring a Secure Installation

When tapping the stone into place, apply consistent pressure to avoid tilting or uneven settling. This ensures that the stone is positioned correctly and remains stable.

It’s also crucial to ensure that the joints are thoroughly filled and compacted. Proper joint filling is essential for the stability and longevity of the paving stone, as it helps to prevent movement and maintain the integrity of the installation.

5. Cleaning the Area

After filling the joints, begin by cleaning the area. Use a broom to sweep away any excess sand or jointing compound from the surface of the paving stones to prevent the material from hardening on the stone.

Next, lightly rinse the repaired area with water to help settle the jointing material and remove any remaining dust or debris. Be cautious not to use too much water, as it can wash out the jointing compound before it sets.

Once the cleaning is complete, inspect the repair. Gently walk over the newly installed stone to ensure it is stable and does not wobble, verifying that it feels secure and is level with the surrounding stones. Check the alignment of the new stone with the adjacent ones, using a level to confirm that the surface is even and flush.

To maintain the integrity of your driveway, consider preventive measures. Avoid parking heavy vehicles or machinery on the driveway, as excessive weight can cause cracking or damage to the paving stones.

Ensure proper drainage to prevent water pooling; which can weaken the base and lead to stone movement or damage. In colder climates use de-icing products that are safe for paving stones to prevent ice build-up without causing damage.

Conclusion

Repairing a broken driveway paving stone in three simple steps restores your driveway’s beauty and functionality. Ensure a seamless repair with our detailed guide. Need professional help? Contact Splendour In Stone Melbourne for expert advice and quality services. Schedule a consultation today to keep your driveway in top condition.

How to Choose Between Bluestone and Granite

Choosing between bluestone and granite for your next project can be overwhelming.

Both offer unique aesthetics and durability, but their differences can make or break your design. 

This guide will break down their pros, cons, and ideal applications to help you make an informed decision.

1. Characteristics

Bluestone Characteristics:

Bluestone is a sedimentary rock known for its rich history and distinctive blue-grey hues. However, depending on the quarry’s location and mineral composition, its colour can vary, ranging from deep blues and greens to lighter greys and even browns.

Bluestone’s surface texture is typically smooth with subtle variations, often showcasing fossil impressions or mineral deposits. It is characterised by its dense composition and natural cleft finish, which give it a non-slip surface ideal for outdoor applications.

Granite Characteristics:

Granite, an igneous rock, is celebrated for its remarkable durability and wide array of colours. It’s available in a vast spectrum, from classic whites and blacks to vibrant reds, blues, and greens.

This diversity is due to the different minerals present during its formation. Granite’s texture can vary from fine-grained to coarse-grained, depending on the cooling rate of the molten rock.

The coarse-grained varieties often exhibit visible crystals, adding visual interest. Granite is known for its polished, sleek finish, making it a popular choice for countertops and interior applications.

2. Common Applications

Bluestone Application

Bluestone is commonly used for outdoor applications due to its natural slip-resistant surface and durability. Popular uses include patios, pathways, and pool surrounds, where its non-slip properties enhance safety.

Bluestone is also a favourite for outdoor stair treads and garden stepping stones. Its natural aesthetic blends seamlessly with the landscape. Its thermal properties make it ideal for areas exposed to direct sunlight, as it remains cool.

Granite Application

Granite, known for its hardness and resistance to wear, is frequently used for indoor and outdoor applications. Indoors, it is a popular choice for kitchen countertops and bathroom vanities, where its resistance to scratching and heat is highly valued.

Granite’s wide range of colours and patterns adds an element of luxury to any space. Outdoors granite is often used for paving, wall cladding, and monuments.

Its ability to withstand harsh weather conditions and high-traffic areas makes it suitable for driveways, pathways, and exterior wall facades.

3. Durability

Bluestone Durability:

Bluestone is renowned for its robust durability, making it a long-lasting choice for various applications. It exhibits excellent resistance to wear, weathering, and freeze-thaw cycles, making it suitable for outdoor use in diverse climates.

Factors such as the stone’s quality, installation method, and maintenance influence its lifespan. Properly installed and sealed bluestone can endure for generations, with some installations lasting over a century.

However, neglecting sealing can leave it susceptible to staining and potential damage over time.

Granite Durability:

Granite boasts exceptional durability and is often considered one of the most challenging natural stones. It’s highly resistant to scratches, chips, heat, and staining, making it a preferred choice for high-traffic areas.

Granite is also virtually impervious to weathering, withstanding harsh elements and temperature fluctuations. Its lifespan is incredibly long, often lasting for the lifetime of a building.

Proper sealing is still recommended to enhance its stain resistance and protect its finish. However, even with minimal maintenance, granite remains a reliable choice for long-term durability.

4. Aesthetic Qualities

Bluestone Aesthetic Qualities:

Bluestone’s visual appeal lies in its earthy elegance and timeless charm. Its natural blue-grey hues evoke a sense of tranquillity and blend seamlessly with various architectural styles, from traditional to contemporary.

The subtle variations in colour and texture create a visually exciting surface that adds depth and character to any space. Bluestone is often associated with rustic and coastal designs, complementing natural landscapes and creating a relaxed ambience.

However, it can also be incorporated into modern settings, adding a touch of warmth and sophistication.

Granite Aesthetic Qualities:

Granite’s aesthetic appeal is characterised by its luxurious appearance and versatility. Its wide range of colours and patterns offers endless design possibilities, allowing it to fit seamlessly into any style.

Whether you prefer a classic, monochromatic look or a bold, statement piece, granite can cater to your preferences. The polished finish of granite enhances its natural beauty, creating a sleek and refined surface that exudes elegance.

It’s often associated with high-end kitchens and bathrooms, but its versatility extends to various applications, including flooring, fireplaces, and outdoor features.

5. Maintenance

Bluestone Maintenance:

Bluestone requires relatively simple maintenance to retain its beauty and longevity. Regular sweeping or hosing off debris is usually sufficient for outdoor installations. For indoor use, a damp mop or cloth with mild detergent can be used for cleaning.

Sealing bluestone, especially for outdoor applications, prevents staining and moisture absorption. Depending on the sealant used and the level of wear, resealing might be necessary every few years.

Avoid acidic or abrasive cleaners, which can damage the stone’s surface. Promptly addressing spills and stains can prevent them from setting in and becoming more challenging to remove.

Granite Maintenance:

Granite is remarkably easy to maintain, requiring minimal effort to keep it looking its best. Regular dusting or wiping with a damp cloth is usually sufficient for daily cleaning.

A mild soap or stone cleaner can be used for deeper cleaning. While granite is naturally stain-resistant, sealing it enhances its resistance and makes cleaning spills easier.

Depending on the sealant’s quality and usage, resealing might be necessary every few years. Avoid harsh chemicals and abrasive cleaners, as they dull the stone’s finish. With proper care, granite has maintained its lustre and durability for decades.

6. Cost

Bluestone Cost:

Bluestone’s cost varies depending on several factors: quality, thickness, finish, and sourcing location. Generally, natural stone falls in the mid-range price range, often more affordable than granite.

Thinner cuts and irregular shapes are less expensive than thicker, uniform pieces. The specific type of bluestone also affects its price, with some varieties commanding a premium due to their unique colouration or rarity.

While bluestone might have a higher upfront cost than some manufactured materials, its durability and timeless appeal make it a valuable long-term investment.

Granite Cost:

Granite is often considered a premium natural stone, and its cost reflects its quality and desirability. The price range for granite can vary significantly depending on the colour, pattern, rarity, thickness, and finish.

Exotic or rare varieties with intricate patterns tend to be more expensive. Additionally, thicker slabs and custom edge profiles can increase the overall cost.

While granite might require a higher initial investment than other materials, its longevity, low maintenance, and high resale value make it worthwhile for those seeking a luxurious and enduring material.

7. Environmental Impact

Bluestone Environmental Impact:

Bluestone’s environmental impact varies depending on the sourcing and production practices. Quarrying natural stone inherently involves ecological disruption, but responsible practices can minimise the impact.

Some bluestone quarries prioritise sustainable extraction methods, such as using water-based cutting techniques and minimising waste. Additionally, choosing locally sourced bluestone reduces transportation emissions and supports regional economies.

Bluestone’s longevity and minimal maintenance requirements also contribute to its overall sustainability. Choosing reclaimed or recycled bluestone further reduces environmental impact by avoiding the need for new quarrying.

Granite Environmental Impact:

Granite’s environmental impact is also influenced by extraction and processing methods. Quarrying granite requires energy and water, and irresponsible practices can lead to habitat destruction and pollution.

However, many quarries adhere to strict environmental regulations and employ sustainable practices to mitigate these effects. Opting for locally sourced granite can reduce transportation-related emissions.

Granite’s durability and long lifespan contribute to its sustainability, as it reduces the need for frequent replacements. Furthermore, recycled granite is becoming increasingly available, offering an eco-friendly option for those seeking to minimise their environmental footprint.

Conclusion

Bluestone and granite, each with unique allure and practical benefits, cater to distinct preferences and project needs. Consider your budget, desired aesthetic, and maintenance commitment to make an informed decision. 

Choose bluestone for rustic charm and affordability or granite for unparalleled durability and luxurious appeal.

How to Avoid Common Mistakes While Laying Crazy Porphyry Pavers

Are you frustrated that your crazy porphyry paver installations are not turning out as expected?

Uneven surfaces, misaligned patterns, and premature wear can ruin the aesthetics and integrity of your project, leading to wasted time and resources.

Discover tips and techniques to sidestep these pitfalls and achieve flawless results in laying crazy porphyry pavers.

Preparing the Base

A solid foundation is crucial for the longevity and stability of crazy porphyry paver installations. You risk uneven surfaces, shifting pavers, and premature wear without it.

Common Mistakes

  • Inadequate Excavation: Not digging deep enough can lead to a weak base. The excavation depth should account for the base material and the paver thickness.
  • Improper Base Material: Using incorrect materials, like loose soil or inadequate gravel, can result in poor drainage and instability.

Best Practices for Base Preparation

  • Excavate Properly: Dig to a depth that accommodates the base material and pavers, typically 6-8 inches for pedestrian areas and 10-12 inches for driveways.
  • Compact the Soil: After excavation, compact the soil to create a stable sub-base. This step is crucial for preventing settling and movement.
  • Add a Gravel Layer: Spread a layer of gravel or crushed stone (typically 4-6 inches deep). Compact this layer thoroughly to ensure stability and proper drainage.
  • Top with Sand: Add a 1-2 inch layer of coarse sand on the gravel. Level and compact the sand to create a smooth, even surface for laying the pavers.

Planning the Layout

A well-thought-out design is essential for laying crazy porphyry pavers successfully. 

Without proper planning, you may encounter common issues such as a lack of coherence in the design and uneven spacing between the pavers, which can compromise the installation’s aesthetic and structural integrity.

Common Mistakes

  • Lack of Planning: Rushing into the project without a clear design can lead to a disorganised appearance and increased material waste.
  • Uneven Spacing: Inconsistent gaps between pavers look unprofessional and affect the installation’s stability and durability.

Tips for Effective Layout Planning

  • Sketch Your Design: Begin with a detailed sketch of your desired layout. Consider the shape and size of the area, and decide on any specific patterns or motifs.
  • Measure Accurately: Measure the area precisely to ensure the pavers fit perfectly. Use tools like string lines or chalk to mark the layout on the ground.
  • Mock Layout: Before setting the pavers permanently, lay them out in the desired pattern to visualise the final look and make any necessary adjustments.
  • Consider Functionality: Plan for proper drainage and accessibility. Ensure that the layout accommodates the natural flow of water and foot traffic.

Choosing the Right Materials

The success of your crazy porphyry paver project hinges on selecting high-quality materials. Using the right pavers and adhesives ensures durability, aesthetic appeal, and longevity.

Common Mistakes

  • Using Substandard Pavers: Low-quality pavers can crack, chip, or discolour quickly, leading to frequent repairs and replacements.
  • Inappropriate Adhesives: Choosing the wrong type of adhesive can result in poor bonding, causing pavers to shift or come loose.

Guidelines for Selecting Suitable Materials

  • Choose High-Grade Pavers: Opt for premium-grade porphyry pavers known for their strength, durability, and resistance to environmental factors. Inspect the pavers for uniformity in colour and texture.
  • Select the Right Adhesive: Use adhesives specifically designed for natural stone. These adhesives should offer strong bonding properties and resist moisture and temperature fluctuations.
  • Check Compatibility: Ensure that the chosen pavers and adhesives are compatible with the base materials and the overall environmental conditions of your project site.
  • Source from Reputable Suppliers: Purchase materials from trusted suppliers to guarantee quality. Reputable suppliers often provide detailed product specifications and support.

Proper Installation Techniques

Proper installation techniques are essential for a durable and visually appealing crazy porphyry paver project. 

Following the correct steps helps prevent common issues such as incorrect paver placement and insufficient joint spacing.

Common Mistakes

  • Incorrect Paver Placement: Placing pavers unevenly or without proper alignment can lead to an unsightly and unstable surface.
  • Insufficient Joint Spacing: Failing to leave adequate space between pavers can cause them to shift or crack over time.

Best Practices for Installation

  • Plan the Layout: Before laying the pavers, plan the layout carefully to ensure a coherent design and avoid making major adjustments later.
  • Use Spacers: To maintain consistent spacing between pavers, use spacers. This helps achieve a uniform look and allows for joint filling.
  • Fill Joints Properly: After laying the pavers, fill the joints with suitable material, such as polymeric sand. This helps lock the pavers in place and prevents weed growth.
  • Compact the Surface: Once all pavers are laid and joints filled, use a plate compactor to compact the entire surface. This ensures that the pavers are firmly set and stable.

Key Steps in Laying Crazy Porphyry Pavers

  • Prepare the Base: Ensure the base is well-excavated, compacted, and layered with gravel and sand.
  • Lay the Pavers: Start placing the pavers from one corner, working your way across the area. Use a rubber mallet to gently tap each paver into place, ensuring they are level.
  • Check for Alignment: Continuously check that the pavers are aligned properly, and make any necessary adjustments as you go along.
  • Maintain Joint Spacing: Ensure consistent spacing between the pavers for expansion and contraction.

Ensuring Proper Drainage

Adequate drainage is critical for maintaining the longevity and functionality of your crazy porphyry paver installation. 

Without proper drainage, water can pool and cause damage to the pavers and underlying foundation.

Common Mistakes

Poor Slope: Failing to grade the installation site correctly can result in water pooling instead of draining away. A slope of about 2% away from buildings is generally recommended.

Blocked Drainage Paths: Neglecting to keep drainage paths clear can cause water to back up and create pressure on the paver surface.

Tips for Achieving Proper Drainage

  • Plan the Slope: Before installation, plan for a gentle slope to direct water away from the paved area. A slope of 1/4 inch per foot is typically sufficient.
  • Use Permeable Base Materials: Incorporate a permeable base layer like gravel to facilitate water movement through the base and away from the pavers.
  • Install Drainage Systems: Consider installing drainage systems like French or channel drains in areas where water accumulation is likely.
  • Regular Maintenance: Keep drainage paths clear of debris and inspect them to ensure they function correctly.

Joint Filling and Sealing

Proper joint filling and sealing are crucial steps in laying crazy porphyry pavers. 

They ensure your paver installation’s stability, durability, and appearance, protecting it from environmental factors and wear.

Common Mistakes

  • Using Incorrect Materials: Choosing the wrong type of sand or filler can result in weak joints that deteriorate quickly. Polymeric sand is recommended for its binding properties and durability.
  • Insufficient Sealing: Failing to apply an adequate sealant can leave the joints vulnerable to water infiltration, leading to erosion and instability.

Best Practices for Joint Filling and Sealing

  • Select the Right Filler: Use polymeric sand or a similar high-quality joint filler specifically designed for pavers. This material hardens when wet, creating a robust and stable joint.
  • Proper Application: After placing the pavers, sweep the filler material into the joints, ensuring they are filled. Use a broom to distribute the sand evenly and a plate compactor to settle it into the joints.
  • Clean the Surface: Before sealing, ensure the paver surface is clean and free of residual filler material. This ensures that the sealant adheres properly.
  • Apply the Sealant: Choose a sealant suitable for natural stone pavers. Follow the manufacturer’s instructions to apply it evenly over the surface and joints. This step should be done in dry conditions to ensure effective curing.
  • Regular Maintenance: To maintain protection and appearance, reapply sealant as the manufacturer recommends, typically every 2-3 years.

Compaction and Finishing

Proper compaction and finishing are essential in laying crazy porphyry pavers, ensuring a stable, durable, and visually appealing surface.

Common Mistakes

  • Inadequate Compaction: Failing to compact the base material and pavers sufficiently can lead to an unstable surface, causing pavers to shift, settle, or become uneven.
  • Uneven Surface: Skipping the finishing touches can result in an irregular surface, which looks unappealing and can pose tripping hazards.

Tips for Effective Compaction and Finishing Touches

  • Compact the Base Material: Before laying the pavers, thoroughly compact the base material (gravel or sand) using a plate compactor. This creates a stable foundation.
  • Compact the Pavers: After placing the pavers, use a plate compactor to compact the surface again. To prevent damage, place a protective layer, such as plywood or a compactor pad, over the pavers.
  • Check for Level: Continuously check the level of the pavers during compaction to ensure an even surface. Adjust any pavers that are too high or too low.
  • Fill Joints Properly: Refill the joints with polymeric sand or another suitable filler material after compaction, then compact again to settle the filler.
  • Final Sweep and Clean: Sweep off any excess filler material from the surface and rinse the area lightly with water to help the filler settle and bond. Ensure the surface is clean and free of debris.

Post-Installation Care

Proper post-installation care is crucial to maintaining the beauty and durability of your crazy porphyry paver installation. 

Regular maintenance helps prevent damage and prolongs the lifespan of the pavers.

Common Mistakes

  • Neglecting Regular Cleaning: Failing to clean the pavers regularly can lead to the accumulation of dirt, debris, and stains, making the surface look unattractive and potentially causing damage.
  • Ignoring Sealing Needs: Not reapplying sealant as needed can leave the pavers unprotected from water infiltration, stains, and wear.

Guidelines for Ongoing Care and Maintenance

  • Regular Cleaning: Sweep the pavers regularly to remove debris and dirt. To scrub the surface for a deeper clean, use a mild detergent mixed with water and a stiff brush. Rinse thoroughly with water.
  • Weed Control: Watch for weeds that may sprout between the pavers. Remove them promptly, and consider using a weed-preventive solution in the joints to minimize growth.
  • Reapply Sealant: Depending on the type of sealant used, reapply it every 2-3 years to protect the pavers from stains and weathering. Make sure the pavers are clean and dry before applying the sealant.
  • Inspect for Damage: Regularly inspect the paver surface for any signs of damage, such as cracks or loose pavers. Address these issues promptly to prevent further deterioration.
  • Avoid Harsh Chemicals: Use gentle cleaning products and avoid harsh chemicals that can damage the pavers or the joint filler.

Conclusion

Preparing a solid base, planning the layout, choosing quality materials, and ensuring proper installation and maintenance can help avoid common mistakes when laying crazy porphyry pavers. 

Follow these best practices for a successful, durable, beautiful paver installation. 

For expert advice and top-quality materials, consult Splendour In Stone and ensure your project’s success.

In SQM?

Please fill your details to download.


      Request Callback


        Enquiry Form


        Please fill your details to download.