Register your Information for Free Stone Samples Sent Express to You!

Search
Search
Close this search box.
Search
Close this search box.

How To Grow Moss Between Pavers

Frustrated by the barren gaps between your pavers, which lack charm and character? These empty spaces detract from the overall aesthetic appeal of your outdoor space, leaving it feeling incomplete and uninspired.

Enter the enchanting world of moss cultivation between pavers—a transformative solution. 

Delve into our comprehensive guide to discover the secrets of fostering lush, verdant moss carpets and elevating your outdoor oasis to new heights of natural beauty and tranquillity.

Step 1: Choose the Right Moss

Selecting the appropriate moss is crucial for achieving a lush, green appearance between pavers. 

A suitable moss can transform your outdoor space, adding charm and character while requiring minimal maintenance. Choosing moss varieties that thrive in your specific environment is essential to ensure success.

First, consider the climate and light conditions of your area. Mosses like Bryum argenteum (Silver Moss) and Hypnum cupressiforme (Cypress-leaved Plait Moss) are widespread, as they adapt well to various conditions. 

Silver Moss is known for its resilience in urban settings, while Cypress-leaved Plait Moss prefers shadier, moist areas and is excellent for creating a carpet-like effect.

Evaluate the moisture levels and pH of the soil between your pavers. Moss generally prefers acidic to neutral pH levels and constant moisture. Choose a drought-tolerant moss variety if your region is dry or the paver gaps lack shade.

Lastly, consider the aesthetic you wish to achieve. Mosses differ in texture and colour, from vibrant green to subtle grey-green hues. Select a moss variety that complements your landscape design to create a harmonious and visually appealing space.

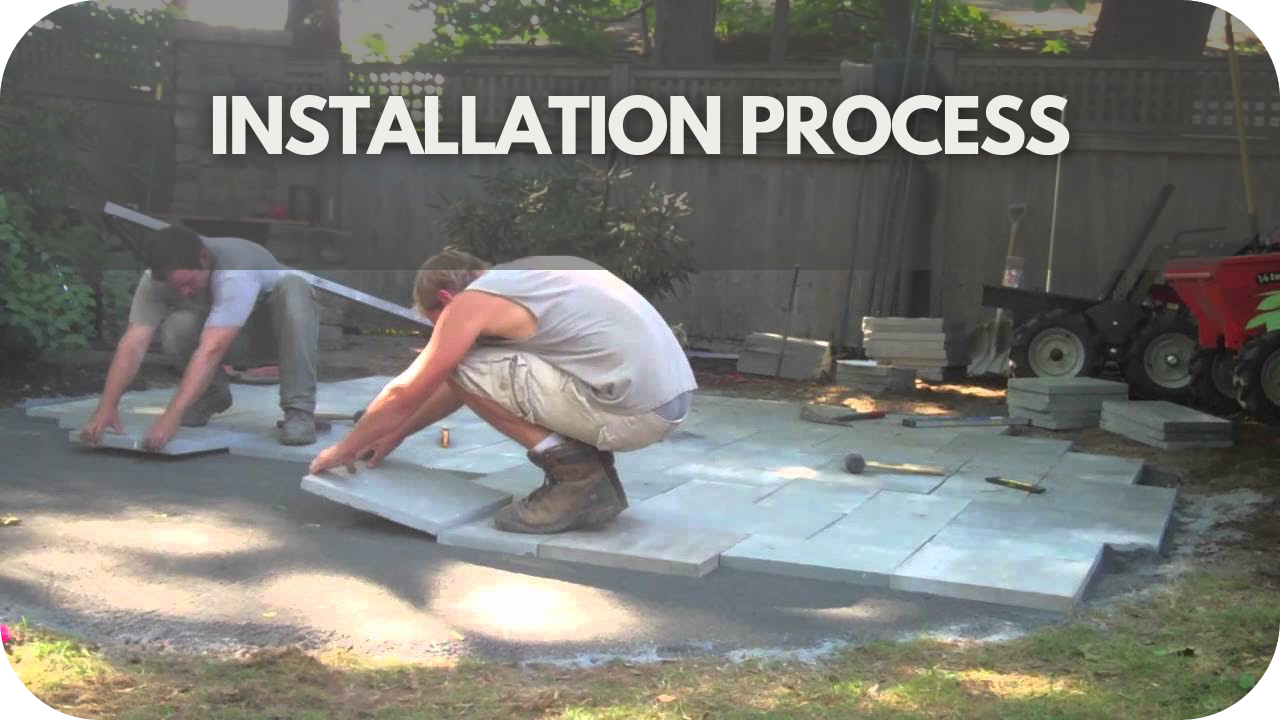
Step 2: Select the Right Pavers

How To Grow Moss Between Pavers: Select the Right Pavers

Choosing the appropriate pavers is essential for successfully growing moss between them, as the paver material and design can significantly impact moss growth and overall aesthetic appeal. To create a harmonious blend of moss and pavers, consider the following factors:

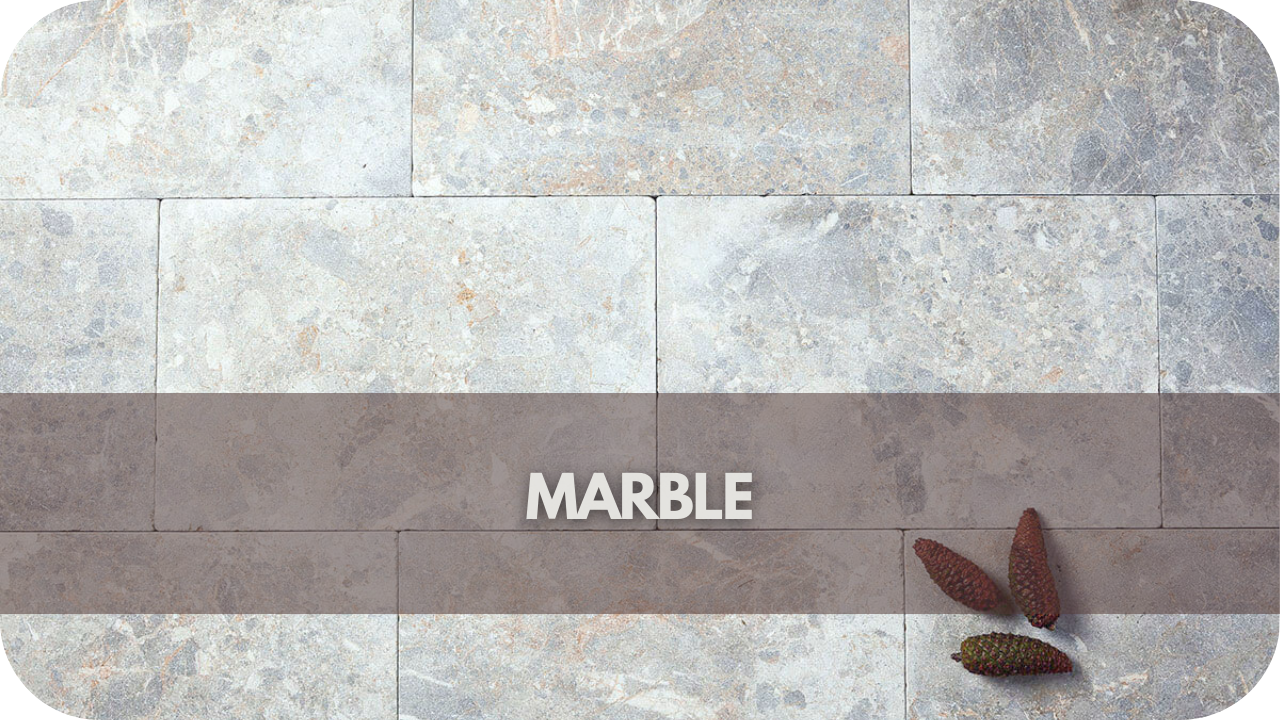
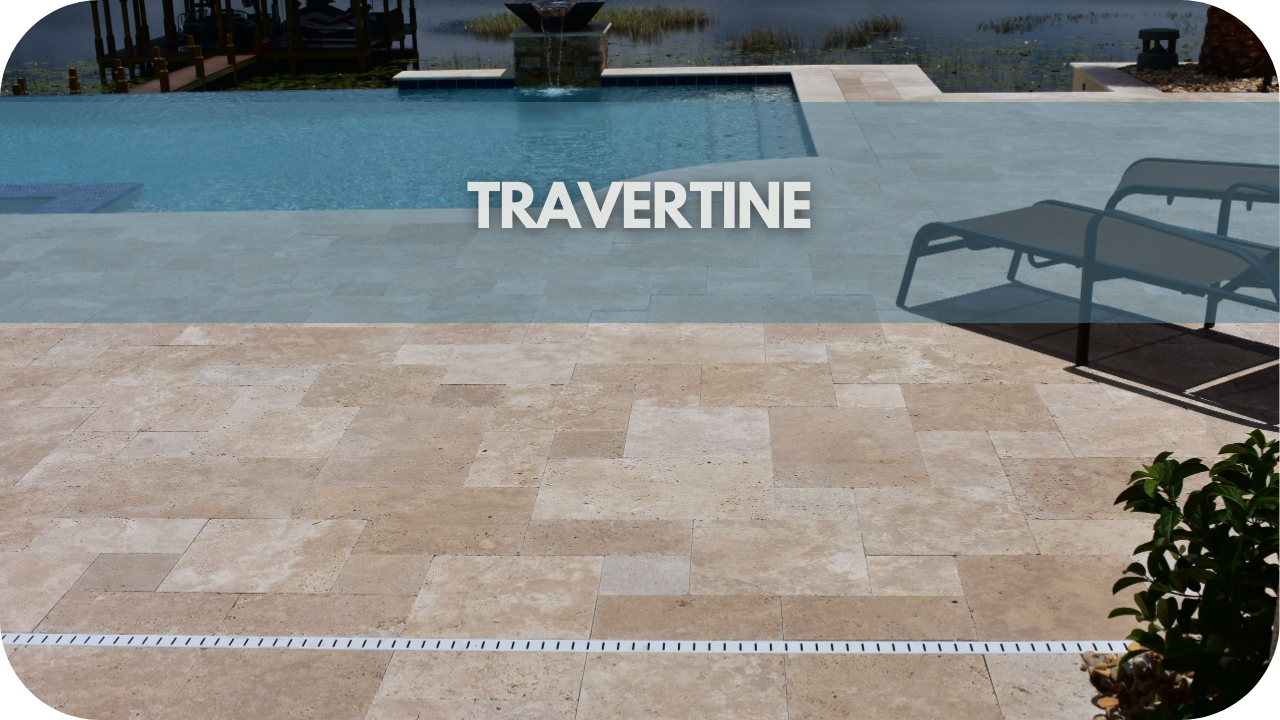
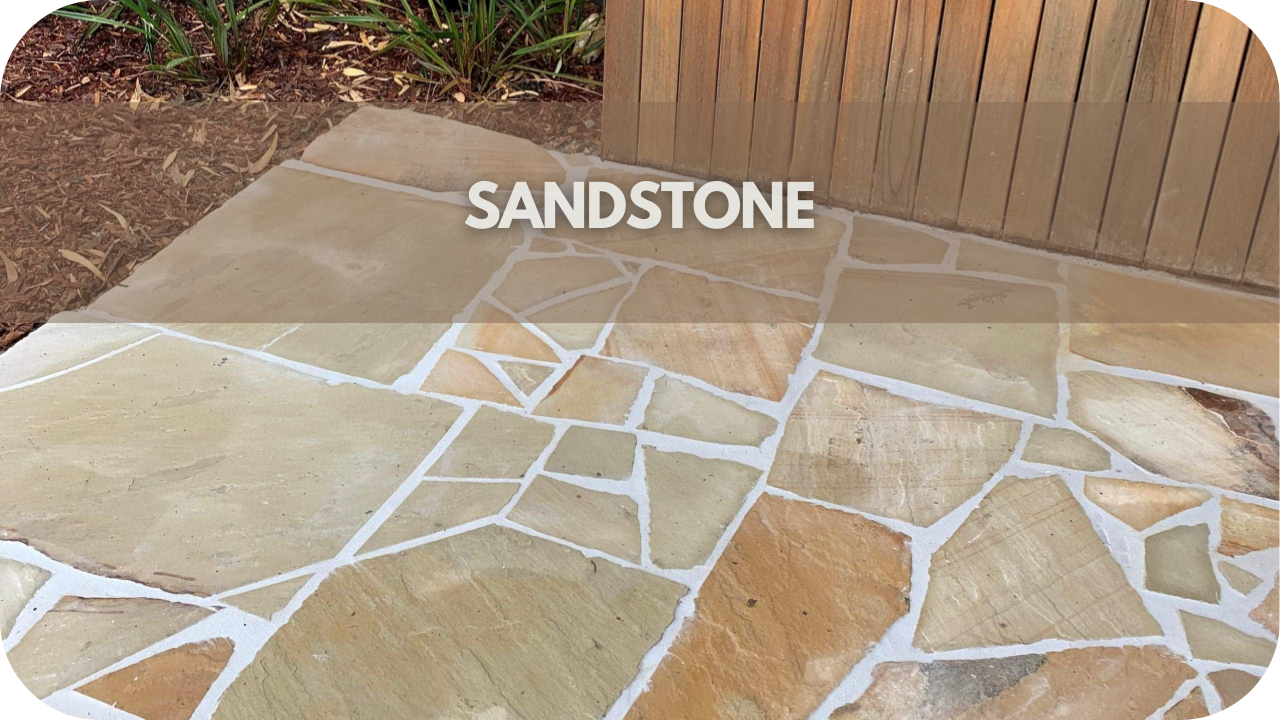
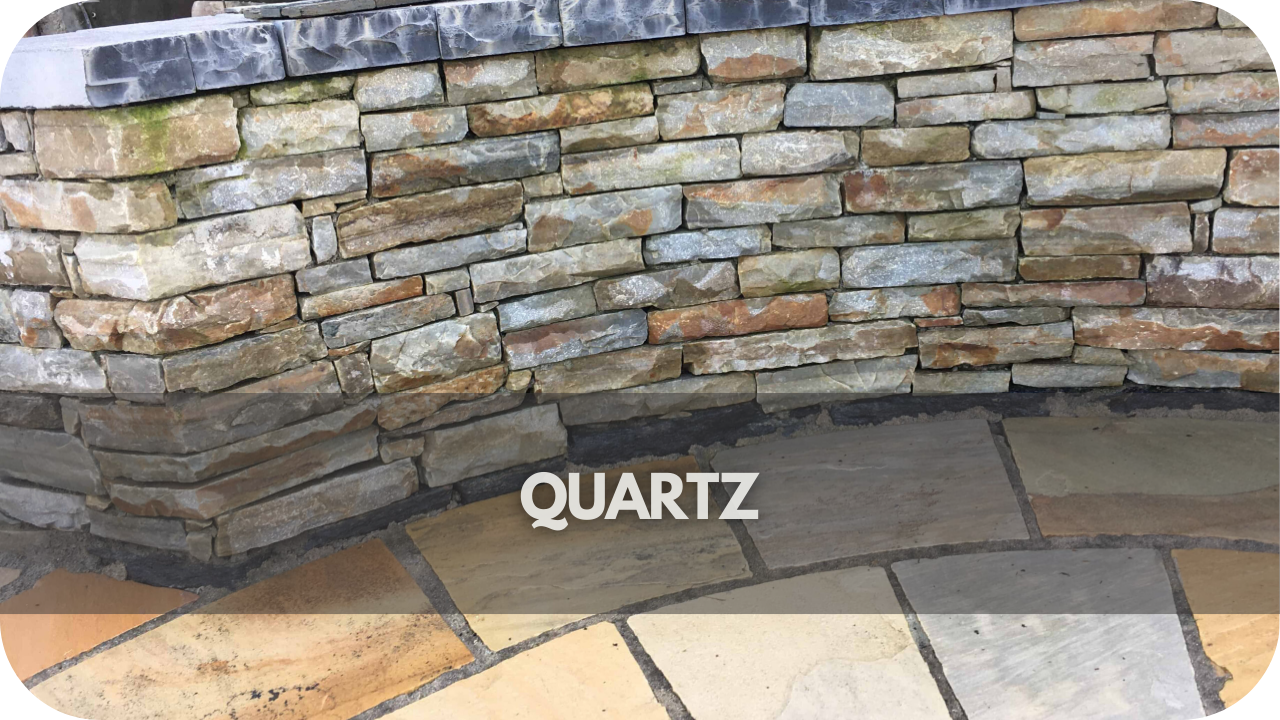
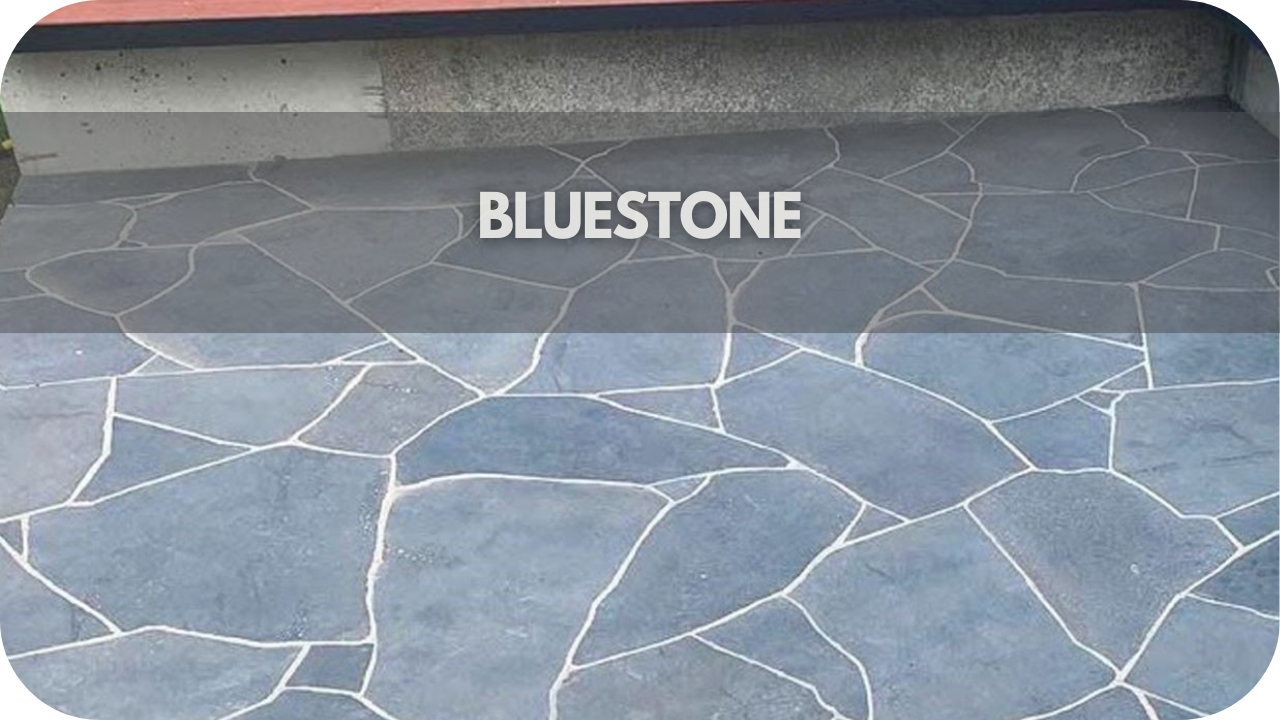
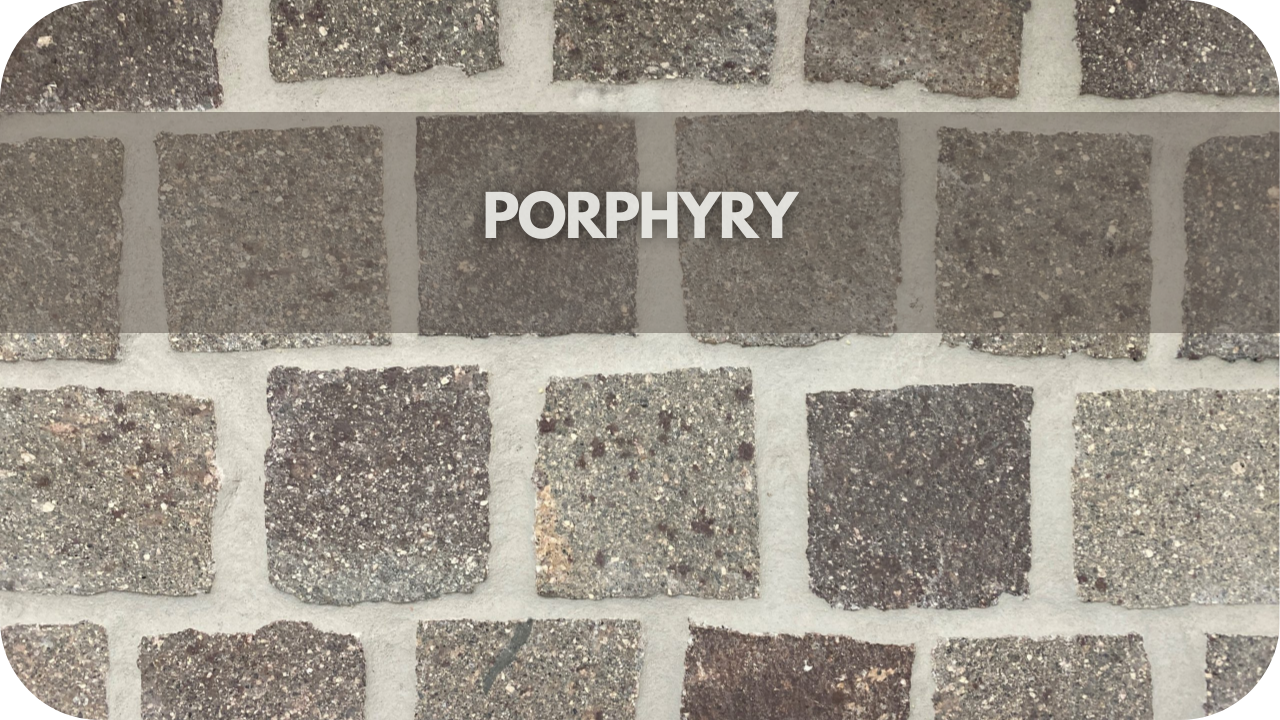
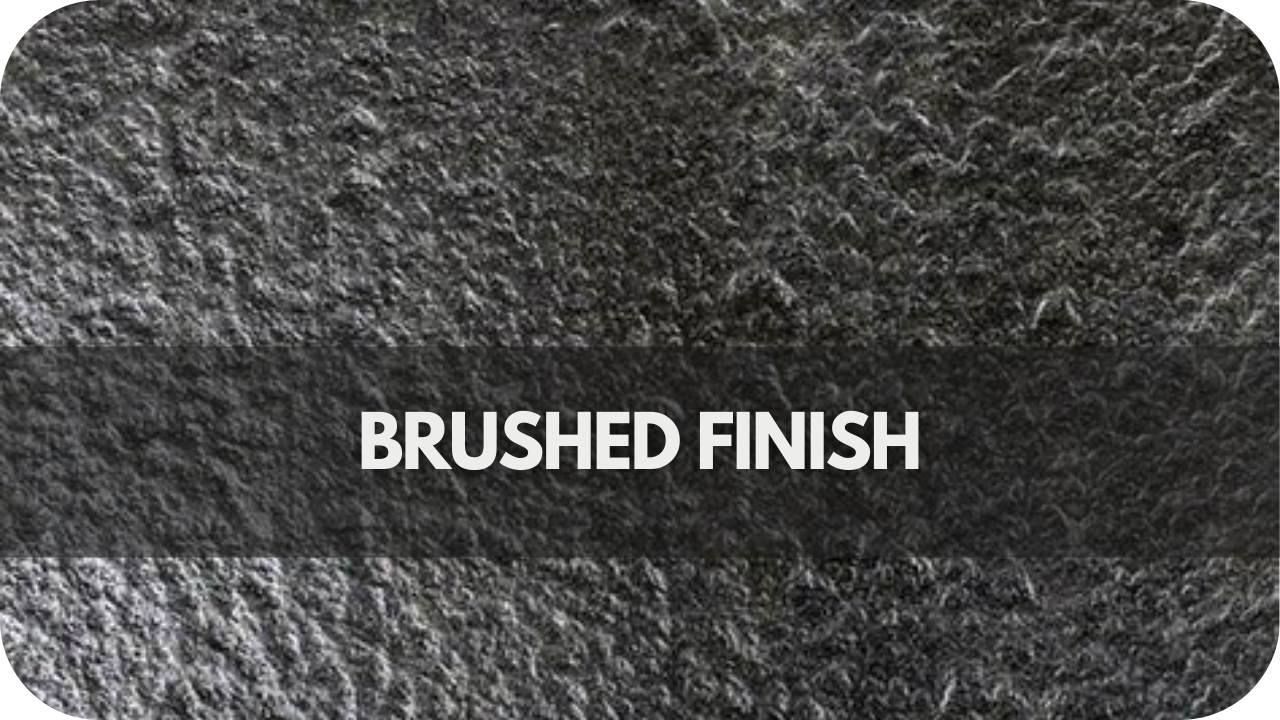
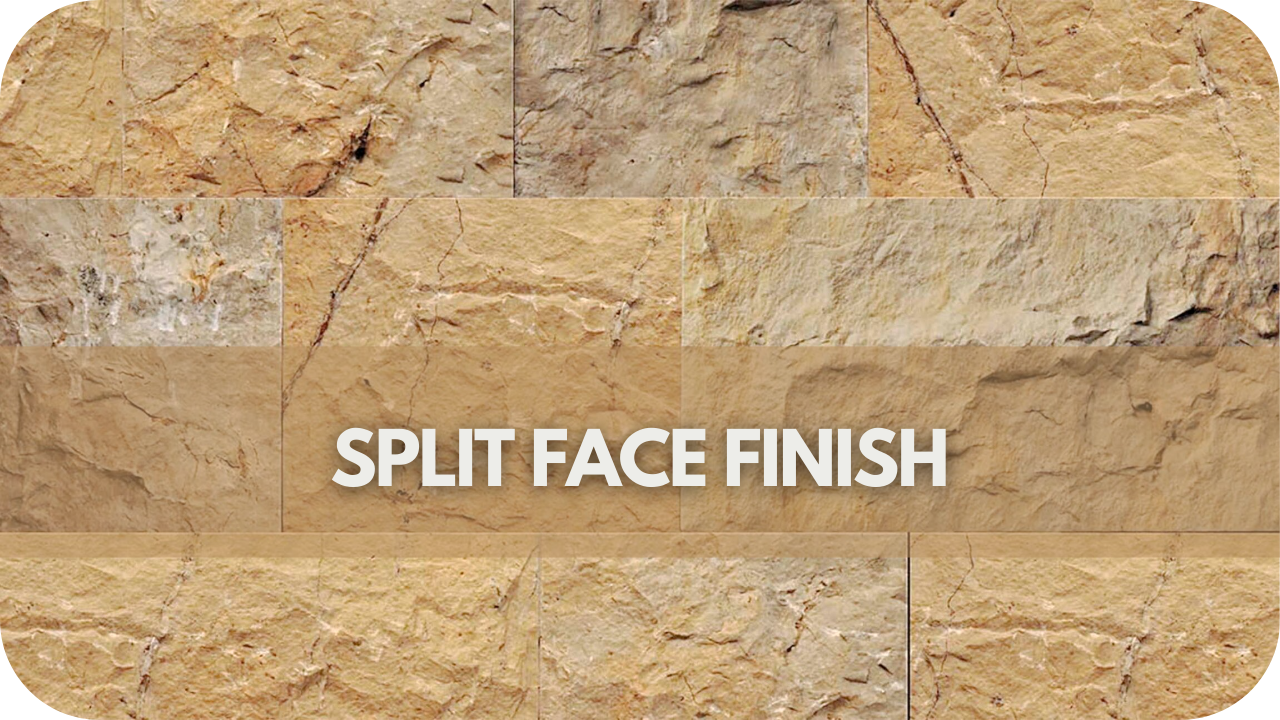
Opt for porous materials like natural stone, concrete, or brick, which allow water to permeate and promote moss growth. Avoid non-porous materials, such as polished stone or ceramic, as they can hinder water absorption and create unfavourable conditions for moss.

Pavers with a rough or textured surface provide better anchorage for moss, enhancing its ability to adhere and thrive. Textured surfaces also create an organic appearance, complementing the natural look of moss.

Choose pavers in earth tones, such as grey, brown, or terracotta, which contrast beautifully with the vibrant green of moss. This contrast enhances the visual appeal of your pathway while maintaining a natural and cohesive look.

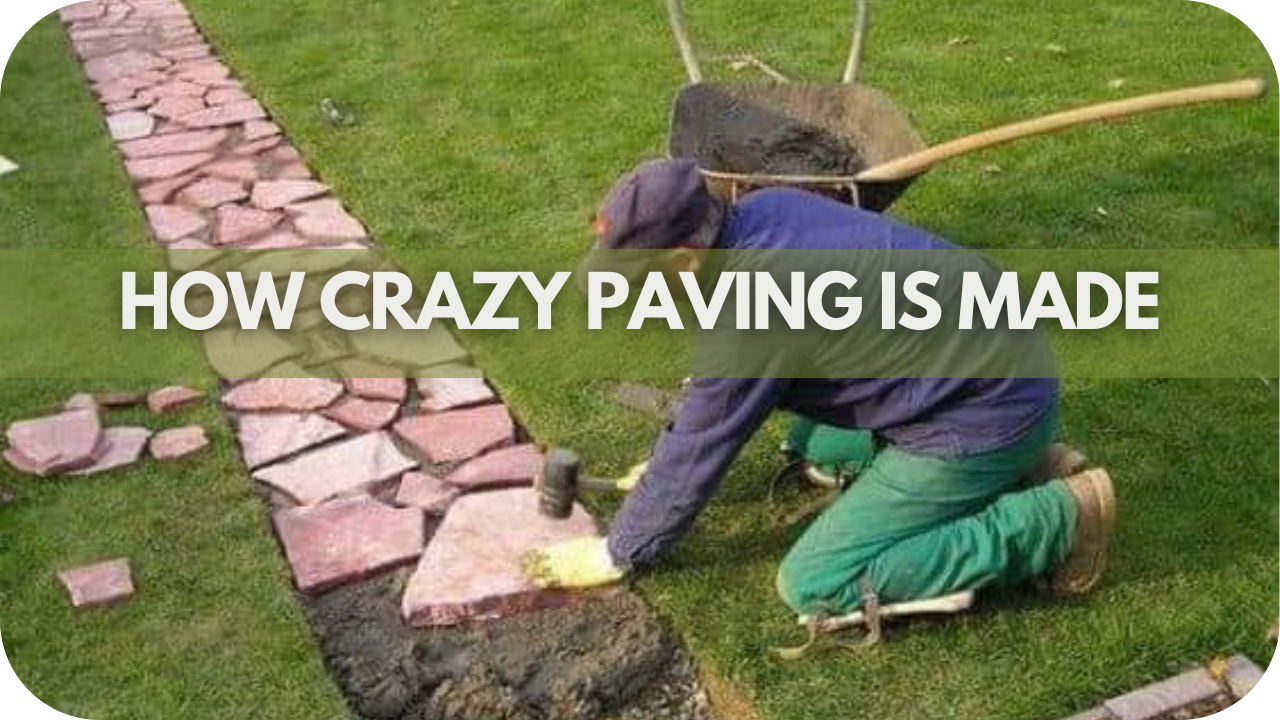
Consider using pavers with varied shapes and sizes to create interesting patterns that highlight the moss. Ensure the gaps between pavers are wide (typically 1-2 inches) to allow adequate space for moss to grow without overcrowding.

Step 3: Prepare the Site

Proper site preparation ensures moss thrives between pavers, providing a seamless and lush appearance. 

Begin by evaluating the existing paver layout and condition. Clear any debris, such as leaves, weeds, and dirt, from the gaps between the pavers, as these can inhibit moss growth and disrupt the aesthetic appeal.

Next, assess the paver alignment and ensure they are level and stable. Uneven pavers can create water drainage issues, making it difficult for moss to establish a consistent, healthy growth pattern. Adjust or re-level the paver heights if necessary to ensure a uniform surface.

The soil between the pavers should be amended to create optimal growing conditions for moss. By adding organic materials such as peat moss or compost, aim for a slightly acidic to neutral pH. These materials help maintain moisture and provide essential nutrients. 

Moisten the soil before introducing moss to ensure it has adequate water to establish itself. Moss requires consistent moisture, so consider regularly installing a drip irrigation system or hand-watering to maintain the ideal damp environment. 

These steps will create the perfect conditions for your moss to flourish and transform your outdoor space.

Step 4: Propagation Methods

How To Grow Moss Between Pavers: Propagation Methods

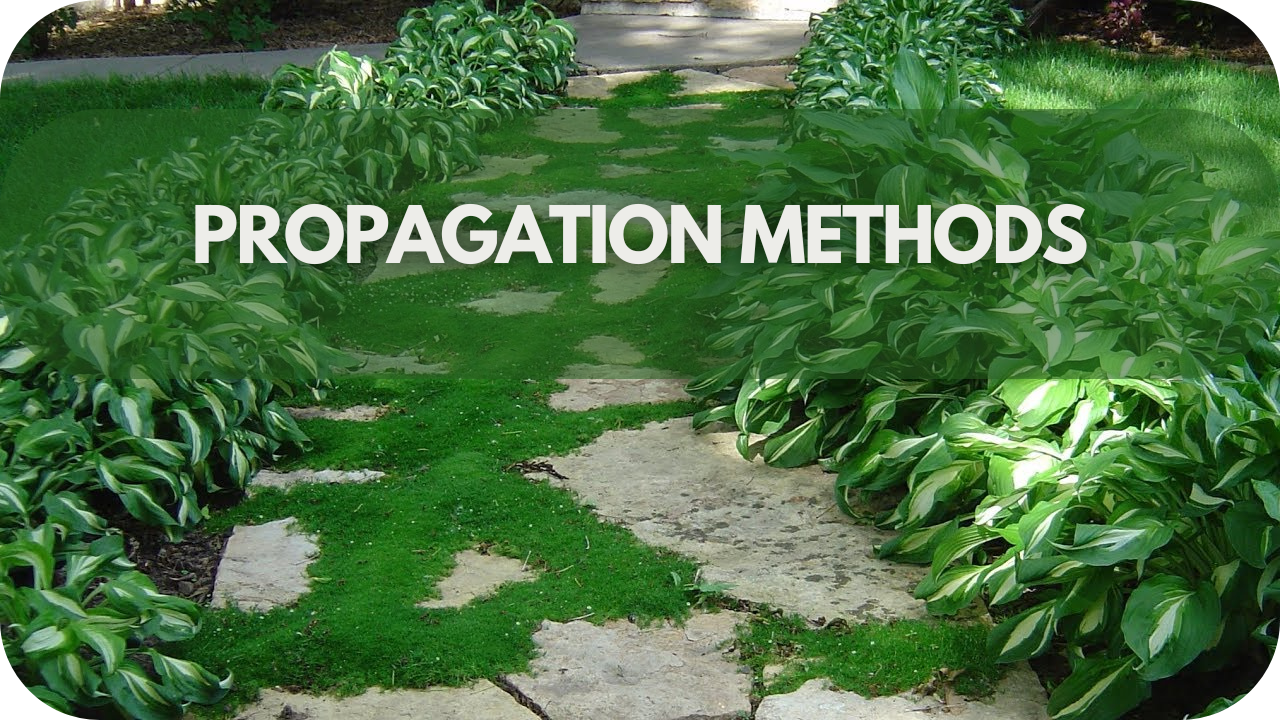
Several effective methods for propagating moss between pavers are suited to different needs and conditions. Understanding these techniques will help you achieve lush and even moss coverage.

Transplanting Moss Patches

One of the simplest methods is transplanting existing moss patches from other areas of your garden or a nursery. Carefully remove moss with a thin layer of soil attached and place it into the prepared gaps between pavers. 

Press down gently to ensure good contact with the substrate. This method provides immediate results and is ideal for small areas.

Moss Slurry Method

The moss slurry technique is excellent for larger areas or irregular spaces. To create a paste, blend fresh moss with water and a small amount of buttermilk or yoghurt. 

The buttermilk or yoghurt helps the moss adhere to surfaces and provides nutrients. Spread this mixture evenly in the paver gaps and ensure consistent moisture to facilitate growth.

Moss Spores

For those who prefer a more gradual approach, moss spores can be sown into the soil between pavers. Sprinkle the spores over the area and mist lightly with water. This method takes longer to establish but can result in a more natural appearance over time.

Each of these propagation methods has advantages, so choose the one that best suits your garden’s conditions and personal preferences.

Step 5: Plant Moss Between Pavers

How To Grow Moss Between Pavers: Plant Moss Between Pavers

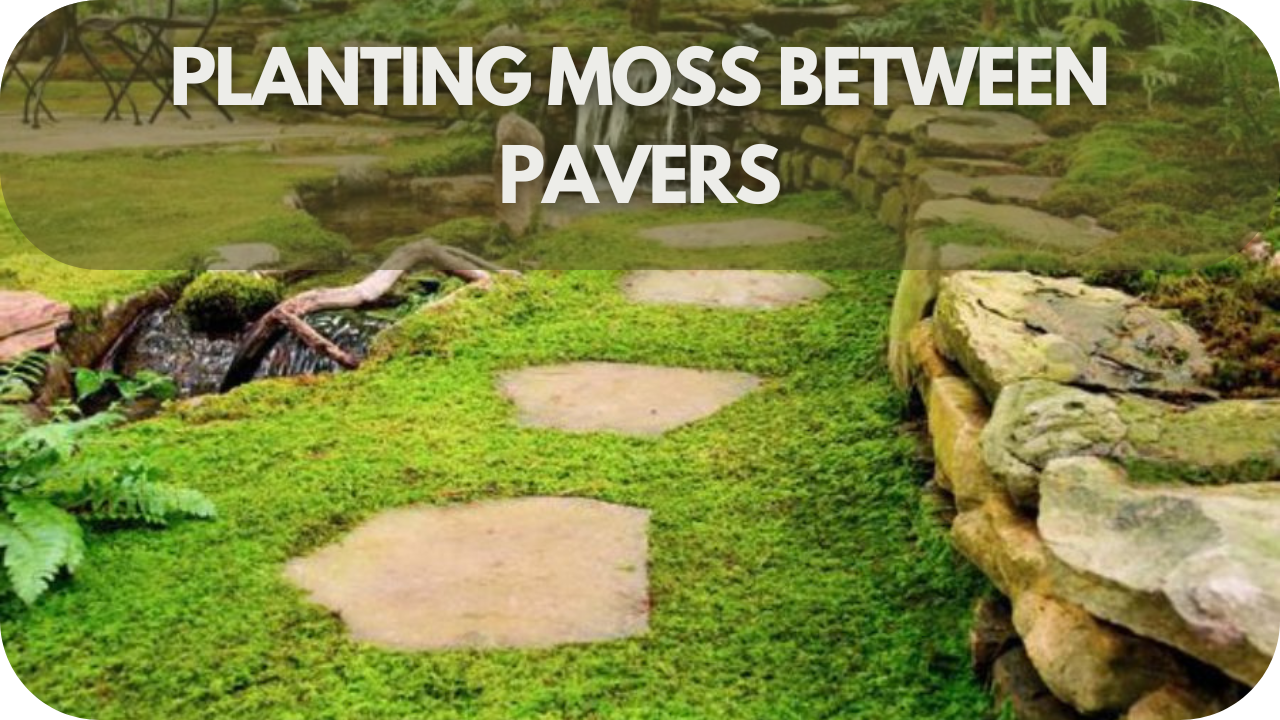
Planting moss between pavers is a simple yet rewarding process that can enhance the beauty of your outdoor space. 

Begin by selecting healthy moss from your garden or a reputable nursery. Ensure the moss is moist and vibrant, indicating it is healthy and ready for transplantation.

To plant the moss, first prepare a moss slurry by blending the moss with water and a small amount of buttermilk or yoghurt. This mixture helps the moss adhere to the substrate and provides nutrients to encourage growth. 

Pour the slurry into the gaps between the pavers, ensuring it fills the spaces evenly. Alternatively, you can transplant moss directly by pressing small patches into the prepared soil between the pavers. Gently press the moss to ensure good contact with the soil, which is essential for root establishment.

After planting, mist the moss with water to maintain moisture levels. Moss thrives in consistently damp conditions, so it remains moist, especially during the initial establishment phase.

Until firmly rooted, avoid direct sunlight and foot traffic on the newly planted moss. With proper care, your moss will soon create a lush, green carpet between your pavers, enhancing your landscape’s natural beauty.

Step 6: Caring for Moss Between Pavers

Caring for moss between pavers is relatively straightforward but requires attention to specific maintenance tasks to ensure the moss remains healthy and vibrant over time.

  • Watering: Moss thrives in consistently moist conditions. Regularly mist the moss, especially during dry periods, to maintain adequate moisture levels. Avoid over-watering, which can lead to fungal growth or rot. A light, frequent misting is usually sufficient.
  • Light Conditions: Moss generally prefers shade or indirect light. Excessive sunlight can cause moss to dry out and become patchy. If your moss is in a sunny area, consider providing temporary shading or relocating it to a more shaded spot.
  • Weed Control: Keep the area between the pavers free from weeds and debris, which can compete with moss for nutrients and moisture. Gently remove weeds or use a hand tool to avoid disturbing the moss.
  • Cleaning: Occasionally clear away fallen leaves and debris that can smother the moss and impede its growth. Use a soft brush or broom to avoid damaging the moss.
  • Trimming: If moss begins to overgrow or encroach on surrounding areas, trim it back carefully to maintain a neat appearance and prevent it from spreading beyond desired limits.

Controlling Weeds and Competing Vegetation

Weeds and competing vegetation threaten the health and vitality of moss between pavers. Implement the following strategies to control weeds and maintain the integrity of your moss garden:

  • Manual Removal: Regularly inspect the moss for weeds and remove them by hand, ensuring minimal disturbance to the moss.
  • Mulching: Apply a layer of organic mulch, such as shredded bark or compost, between pavers to suppress weed growth and retain moisture in the soil.
  • Herbicides: Exercise caution when using herbicides near moss, as they can damage or kill the moss if not applied carefully. Opt for natural or organic herbicides that pose minimal risk to moss and other desirable plants.

Dealing with Moss Pests and Diseases

While moss is relatively resistant to pests and diseases, occasional issues may arise. Monitor closely for signs of pests or disease, such as discolouration, browning, or abnormal growth patterns. If problems occur, take the following steps:

  • Pest Management: Use environmentally friendly methods, such as handpicking or natural predators, to control pests such as slugs, snails, and aphids.
  • Disease Prevention: Maintain good airflow and drainage around the moss to prevent fungal diseases and rot. Avoid overwatering or allowing water to stagnate on the moss surface.

Step 7: Troubleshooting Common Issues

Troubleshooting Common Issues: How To Grow Moss Between Pavers

Addressing common issues with moss between pavers ensures a thriving and visually appealing garden feature. Here’s how to resolve typical problems:

Dry or Patchy Moss

Dry patches are often due to insufficient moisture. Increase the frequency of misting, especially during hot, dry weather. Ensure that the soil between the pavers remains consistently damp but not soggy. If patches persist, check for drainage issues or add a layer of organic mulch to retain moisture.

Excessive Algae Growth

Algae can outcompete moss if the area is overly moist or shaded. Reduce the amount of standing water and increase air circulation around the moss. Avoid using fertilisers, as they can promote algae growth. Regularly remove algae by gently scrubbing the affected areas with a soft brush.

Moss Discolouration

Yellowing or browning moss may indicate too much direct sunlight or poor soil conditions. Move the moss to a shadier spot and improve the soil’s acidity by adding organic matter like peat moss. Ensure that the moss receives adequate moisture and avoid excessive foot traffic.

Weeds and Debris

Weeds and debris can smother moss and impede growth. Regularly remove weeds by hand and clear debris using a soft brush to prevent it from covering the moss and reducing its health.

Step 8: Enhancing Aesthetics and Functionality

How To Grow Moss Between Pavers: Enhancing Aesthetics and Functionality

Moss creates a lush, natural look that complements various paver styles and landscape designs. Select moss varieties that blend well with your paver colours and textures for a cohesive appearance. Use moss to fill gaps irregularly for a more organic, natural feel, or create defined patterns to add visual interest. 

Beyond their practical benefits, moss between pavers adds a unique aesthetic and functional dimension to outdoor spaces. Explore creative ways to enhance the beauty and functionality of your moss garden between pavers.

Design Ideas for Incorporating Moss into Your Outdoor Space

Incorporating moss into your outdoor space adds a touch of natural beauty and tranquillity. Here are some creative design ideas to make the most of moss between pavers and other areas:

  • Moss-Covered Pathways: Allow moss to grow between pavers to create serene, enchanting pathways. This softens the appearance of traditional hardscapes and provides a lush, green contrast. Choose pavers with irregular shapes for a more natural, winding look, or opt for a geometric pattern to add visual interest.
  • Moss Gardens: Design dedicated moss gardens by planting moss between stepping stones or within garden beds. Combine different moss species to achieve varying textures and shades, creating a textured green carpet that complements other plants and flowers.
  • Moss Wall Features: Incorporate moss into vertical garden designs or as part of a moss wall feature. Mount a frame or create a vertical structure filled with moss to add a striking, living element to fences or walls. This vertical approach brings a fresh perspective to garden design.
  • Moss-Embedded Seating Areas: Transform seating areas by integrating moss between pavers or around outdoor furniture. Moss-covered seating spaces provide a soft, natural cushion and create a relaxing atmosphere, ideal for garden lounges or reading nooks.
  • Moss-Covered Steps: Add a touch of elegance and nature to stairways or garden steps by growing moss between or around the steps. This design adds a charming, rustic feel and enhances the visual appeal of stairways, making them a focal point in your garden.

Benefits of Moss Between Pavers Beyond Aesthetics

By creating a hospitable environment for moss, you support biodiversity and ecological balance in your garden.

  • Water Retention: Moss acts as a natural sponge, absorbing and retaining water in the soil between pavers. This helps to reduce water runoff and erosion, promoting a healthy and sustainable water cycle in your garden.
  • Erosion Control: The dense, fibrous root structure of moss helps to stabilise soil and prevent erosion between pavers. Planting moss on slopes or in areas prone to erosion can help mitigate the effects of runoff and soil displacement.
  • Habitat Creation: Moss provides valuable habitat and food sources for various beneficial insects, including pollinators and decomposers.

To keep moss looking its best, ensure it receives consistent moisture and is debris-free. Trim surrounding plants and maintain proper light levels to prevent moss from becoming overgrown or shaded. 

To sustain its aesthetic and functional benefits, regularly check for and address any issues, such as excess debris or dry patches.

Conclusion

Cultivating moss between pavers is a sustainable and enchanting way to enhance outdoor spaces. Apply the principles shared to embrace its beauty and ecological benefits. 

Start your moss-growing journey today and transform your landscape into a verdant oasis of natural charm.

Are Marble Pavers Right for Your Pool Deck? Everything You Need to Know

Pool decks take a beating. Exposure to harsh sunlight, pool chemicals, and foot traffic can quickly turn an elegant space into an eyesore.

But what if your chosen paver enhances the look and fails to withstand the wear and tear? Uneven surfaces, slipping hazards, and a lack of comfort underfoot can frustrate relaxing poolside.

Explore whether marble pavers are the answer to your pool deck woes. This guide covers everything you need to know to make an informed choice.

Pros of Using Marble Pavers for a Pool Deck

Pros of Using Marble Pavers for a Pool Deck

Transform your pool deck into a luxurious haven with marble pavers that blend timeless beauty with these practical benefits.

1. Luxury

Marble pavers exude luxury. Their timeless appearance instantly elevates the aesthetic appeal of any poolside area, adding a classic touch. The natural veining and unique patterns give each paver an exclusive look, enhancing the sense of luxury.

2. Cool Underfoot

Known for being naturally cool underfoot, marble is a welcome relief during the hottest summer days – making it perfect for bare feet! The cooling effect ensures comfort, especially around pool areas with overwhelming heat. Choosing marble can make lounging by the pool a pleasant experience, even during peak summer.

3. Durability

Marble can withstand frequent exposure to water and UV rays without losing its stunning finish. This makes it an excellent choice for pool areas that require long-lasting materials. The stone’s inherent strength ensures it maintains its integrity even under high foot traffic, preserving its beauty for years.

4. Ease of Maintenance

Marble pavers are relatively easy to maintain. Regular sweeping and occasional cleaning keep them pristine, while their natural resistance to algae and mildew adds convenience. Proper sealing makes marble even easier to manage, as the sealer helps repel water and prevent staining from pool chemicals.

5. Heat Resistance

One of the unique qualities of marble is its ability to stay cool even under intense sunlight. This feature makes marble a comfortable option for barefoot pool-goers, particularly in hot climates. Unlike darker stones that absorb and retain heat, light-coloured marble reflects sunlight, providing a more excellent surface.

6. Function and Form

If you value function and form, marble pavers are worth serious consideration! They combine aesthetic appeal with practical features, making them versatile for pool decks. Marble’s luxurious look and its functional benefits ensure your pool area remains stylish and safe, offering the perfect blend of beauty and utility.

Cons of Using Marble Pavers for a Pool Deck

Cons of Using Marble Pavers for a Pool Deck

Before choosing marble, it’s important to weigh the potential drawbacks of its luxury appeal. Marble may look stunning but comes with cost, maintenance, and safety concerns. Understanding these factors will help you decide what is best for your pool area.

1. Cost

The cost of marble pavers tends to be higher than that of other materials, which may be off-putting if you’re on a tight budget. The initial investment includes the cost of the material and the cost of professional installation, which can add up quickly.

2. Porosity

Marble is porous, meaning sealing is required regularly to prevent staining from pool chemicals or algae build-up. Marble can absorb water and other substances without proper sealing, leading to discolouration and damage. Regular maintenance is key to preserving its look and longevity.

3. Surface Scratches

Heavy usage can lead to surface scratches, affecting the visual appeal over time. Marble is a relatively soft stone compared to other natural materials, and sharp or heavy objects can easily mar its surface. Protective mats and avoiding dragging furniture can help reduce the likelihood of scratches.

4. Installation Cost

Installing marble pavers requires skilled labour, which adds to the initial outlay. Proper installation is crucial to ensure the pavers are level and secure, especially around a pool with constant water exposure. Hiring experienced professionals will guarantee that the marble is installed correctly, but it does increase the overall project cost.

How to Choose the Right Marble Pavers for Your Pool Deck

How to Choose the Right Marble Pavers for Your Pool Deck

Selecting the ideal marble pavers for your pool deck can feel overwhelming, but with the right knowledge, you can create a stunning and functional space. Let’s explore the key factors that make your pool deck beautiful and practical.

1. Finish

Consider the finish—a honed surface will provide better slip resistance, while a polished one might look more luxurious but be riskier when wet. A honed finish has a matte texture that reduces glare and adds a layer of safety around wet areas, making it a popular choice for pool decks.

2. Outdoor Suitability

Ensure the marble type you select is suitable for outdoor use, as not all varieties can effectively handle weather extremes. Some types of marble are more porous and may not be able to withstand constant exposure to moisture, making them less ideal for outdoor installations.

3. Thickness


Another key element is the pavers’ thickness; thicker options are generally more durable. For pool decks, a thickness of at least 2 cm is recommended to handle high foot traffic and resist cracking or shifting over time. Thicker pavers can better withstand impacts and offer more stability.

4. Colour

Don’t overlook colour – lighter shades like white or beige will remain cooler underfoot. While visually striking, darker marble can absorb more heat and become uncomfortable to walk on during hot weather. Choosing a lighter colour keeps the area cool and enhances the pool deck’s brightness and spaciousness.

What is the Best Way to Clean Marble Pavers?

What is the Best Way to Clean Marble Pavers?

Maintaining marble pavers isn’t as complex as it seems! Start by sweeping the area regularly to clear away dirt and debris, as this prevents scratches. Use a gentle pH-neutral cleaner mixed with water for deeper cleaning, as acidic substances can etch the marble’s surface. 

Avoid harsh chemicals like bleach or vinegar to keep the pavers from becoming damaged. A soft-bristle brush can help remove any build-up, especially around the pool’s edges. 

Stubborn stains should be treated with a marble-specific poultice. After each cleaning, a quick rinse with clean water will ensure no residue lingers, preserving the paver’s elegance.

How Often Should Marble Pavers be Sealed?

How Often Should Marble Pavers be Sealed?

Sealing marble pavers is crucial to maintaining their beauty. Depending on usage and exposure to pool chemicals, pavers should be resealed once every one to two years. High-traffic areas might require more frequent sealing to keep the surface protected. 

Before resealing, inspect the surface; if water no longer beads on the marble, it’s time to reapply the sealer. A high-quality, penetrating sealer ensures deeper protection, keeping out moisture and reducing staining. Clean the pavers thoroughly before sealing – sealing over dirt can trap it, causing more harm than good. Regular sealing is the secret to longevity!

Can Marble Pavers Withstand Saltwater Pools?

Can Marble Pavers Withstand Saltwater Pools?

Saltwater pools demand materials that resist corrosion; marble might be ideal sometimes. Although marble has a certain resistance level, salt can cause etching or dull the finish over time without proper care. 

Sealing plays a major role here. Using a high-grade sealer specifically designed for saltwater can significantly boost marble’s durability. Regular rinsing after exposure to saltwater can also help prolong the finish. 

If a saltwater pool is your dream, choosing a robust sealing routine and consistent maintenance can make marble pavers work. But without these steps, deterioration is inevitable.

Do Marble Pavers Retain Heat in Summer?

Do Marble Pavers Retain Heat in Summer?

Heat retention is an important factor when considering marble for pool decks. Marble, being a naturally cool stone, does a fantastic job of keeping people comfortable even during summer. 

Light-coloured marble pavers, such as white or cream, reflect more sunlight than darker options, keeping them cooler underfoot. Of course, on sweltering days, they might warm slightly, but far less than other materials like concrete or dark granite. 

If staying cool by the pool is a priority, choosing light marble is your best bet. It’s a refreshing alternative that helps keep the pool area enjoyable!

Is it Necessary to Reseal Marble Pavers After Installation?

Is it Necessary to Reseal Marble Pavers After Installation?

Yes, resealing marble pavers after installation is essential to protect against moisture, stains, and wear. Initial sealing acts as a barrier, but that layer wears away over time, making resealing necessary. It’s best to wait 24-48 hours after installation before applying the first coat, ensuring the pavers have settled properly. 

For best results, a high-quality penetrating sealer should be used, providing resistance against water—and oil-based stains. Maintenance doesn’t end there—regular inspection and resealing when required will keep your marble pavers looking pristine. With consistent care, your pool deck will retain its elegant charm.

Conclusion

Marble pavers can transform your pool deck into a stunning, luxurious space if you are ready to invest in maintenance and care. 

To enjoy a beautiful, functional poolside area, choose the right marble and maintain it properly. Ready to take the plunge? 

Consult Splendour in Stone today to bring your vision to life!

Bluestone or Concrete? Unmissable Pros and Cons for Your Dream Patio!

Choosing a suitable material for your patio can be overwhelming. Bluestone and concrete are two popular yet distinct options.

Each material offers unique benefits but has challenges that could affect your budget, maintenance efforts, and the overall aesthetic of your outdoor space.

In this article, we’ll break down the pros and cons of bluestone and concrete patios, helping you make an informed decision that best suits your needs.

Material Overview

Bluestone or Concrete: Material Overview

Choosing the suitable material for your patio is crucial, affecting its aesthetic appeal, longevity, and maintenance. Bluestone and concrete are two popular options, each with distinct characteristics.

Bluestone is a natural stone renowned for its elegant appearance and rich colour variations, ranging from deep blues to earthy greys. It’s quarried primarily in the United States and Australia, making it a premium choice for those seeking a timeless, sophisticated look. 

Bluestone’s natural texture provides excellent slip resistance, and its durability ensures it can withstand harsh weather conditions and heavy foot traffic.

Conversely, concrete is an artificial material that is highly versatile and cost-effective. Its adaptability allows for a wide range of finishes, from smooth and polished surfaces to textured patterns that mimic stone or brick. 

Concrete is also available in various colours, offering flexibility in design. While it lacks the natural allure of bluestone, concrete’s affordability and low maintenance make it an attractive option for budget-conscious homeowners.

Pros and Cons Breakdown

Bluestone or Concrete: Pros and Cons Breakdown

When deciding between a bluestone or concrete patio, understanding the strengths and weaknesses of each material is essential.

Bluestone Patio

A bluestone patio offers a timeless, elegant outdoor surface with natural durability, rich colour variations, and textures that enhance any landscape.

ProsCons
Natural Beauty: Bluestone’s rich, earthy colours range from blue-grey to warm brown hues, adding a timeless aesthetic appeal that blends well with various landscapes. Its unique, natural texture and veining make each stone one of a kind, offering an upscale, sophisticated look.Higher Initial Cost: Bluestone is a premium material, which makes it more costly than concrete. The price reflects the stone and the skill required for installation, adding to the overall project expense.
Durability: Bluestone is incredibly hard and dense, making it resistant to wear and tear, even in high-traffic areas. This stone is less likely to chip or crack, and when properly maintained, it can last for decades without losing its beauty.Regular Sealing: Bluestone requires regular sealing to protect its surface from weathering, staining, and moss growth, especially in high-moisture environments. This maintenance aspect can add to the long-term costs and care needed.
Unique Textures: With finishes like natural cleft, thermal, or honed, bluestone offers multiple surface textures that enhance aesthetics and functionality, especially for creating a non-slip surface around pools or walkways.

Concrete Patio

ProsCons
Natural Beauty: Bluestone’s rich, earthy colours range from blue-grey to warm brown hues, adding a timeless aesthetic appeal that blends well with various landscapes. Its unique, natural texture and veining make each stone one of a kind, offering an upscale, sophisticated look.Higher Initial Cost: Bluestone is a premium material, which makes it more costly than concrete. The price reflects the stone and the skill required for installation, adding to the overall project expense.
Durability: Bluestone is incredibly hard and dense, making it resistant to wear and tear, even in high-traffic areas. This stone is less likely to chip or crack, and when properly maintained, it can last for decades without losing its beauty.Regular Sealing: Bluestone requires regular sealing to protect its surface from weathering, staining, and moss growth, especially in high-moisture environments. This maintenance aspect can add to the long-term costs and care needed.
Unique Textures: With finishes like natural cleft, thermal, or honed, bluestone offers multiple surface textures that enhance both aesthetics and functionality, especially for creating a non-slip surface around pools or walkways.

Installation Process

Bluestone or Concrete: Installation Process

The installation process is critical when choosing between a bluestone and a concrete patio. Each material has unique requirements that can influence the overall cost, time, and expertise needed.

Installing a Bluestone Patio

Installing a bluestone patio requires careful planning and professional expertise. While the results are beautiful, achieving a stable, long-lasting patio with bluestone can only be challenging with the right skills and tools.

  • Preparation: Clear and level the area and lay a solid base of compacted gravel to support the heavy bluestone slabs and prevent shifting or settling.
  • Laying the Bluestone: Carefully position and level each slab in the desired pattern, filling gaps with sand or mortar. Due to the precision required, professional installation is highly recommended.
  • Sealing and Maintenance: Seal the bluestone to protect it from stains and weathering, and perform regular maintenance, including resealing, to preserve its beauty and durability.

Installing a Concrete Patio

Installing a concrete patio is a flexible process tailored to various design preferences. While it’s possible to DIY, professional installation is recommended to ensure durability and a flawless finish.

  • Preparation: Start by clearing and levelling the area where the patio will be installed. Set up formwork to define the patio’s shape and ensure a solid foundation. Proper preparation is crucial to prevent future issues like cracking.
  • Pouring and Finishing: Pour the concrete into the prepared formwork, then level and smooth it using specialised tools. This step allows for customisation, such as adding textures, colours, or patterns. Professional expertise ensures an even finish and helps avoid common mistakes.
  • Curing and Maintenance: To achieve maximum strength, allow the concrete to cure correctly, which can take several days. Regular maintenance, including resealing and cleaning, will help preserve the patio’s appearance and prevent damage over time.

Long-Term Value and Investment

Bluestone or Concrete: Which one is a Long Term Investment?

When investing in a patio, it’s essential to consider the initial costs, long-term value, and return on investment each material can offer.

Bluestone is often considered a premium choice due to its natural beauty and durability. While the upfront costs for a bluestone patio are higher, this investment can pay off in the long run. 

Bluestone’s timeless appeal and robust nature can significantly enhance property value, making it a desirable feature for potential buyers. With proper maintenance, including regular sealing, a bluestone patio can last for decades, retaining its beauty and functionality over time.

Conversely, concrete is a more cost-effective option, offering a good balance between affordability and longevity. Although concrete may not have the same natural allure as bluestone, its versatility and low maintenance make it a practical choice. 

Concrete patios can be customised to mimic more expensive materials, adding value without the associated costs. However, the risk of cracking over time can affect its long-term appearance and value, though this can be mitigated with proper installation and care.

Conclusion

Both bluestone and concrete have unique advantages and challenges. Your choice should reflect your budget, aesthetic goals, and maintenance preferences. 

Bluestone is ideal if you seek timeless elegance and long-term value, while concrete is a solid choice for versatility and affordability.

What Is the Meaning of Crazy Paving? Everything You Need to Know

I recall strolling through a friend’s garden, immediately captivated by the unusual stone pathway underfoot. 

Unlike the usual straight-edged pavers, this design featured an organic blend of irregular shapes that felt both creative and natural. That was my first introduction to crazy paving, a style that effortlessly adds character and charm to outdoor spaces. 

If you’re curious about what makes crazy paving unique and how it can enhance your landscape, this guide will provide all the details you need to know.

What Is Crazy Paving?

Crazy paving refers to a style of paving where irregularly shaped stones or slabs are arranged in a random, puzzle-like pattern. This unique design creates a natural, rustic look and is often used for pathways, patios, and driveways. The uneven shapes add character to outdoor spaces, making them both visually appealing and functional.

How Crazy Paving Is Made

How Crazy Paving Is Made

Crazy paving is made from irregularly shaped stones, typically sourced from natural stone quarries. These stones are either broken into random pieces or left in their natural form, creating a distinct, organic pattern. The variety in shapes and sizes adds character to each paving design, ensuring no two projects look the same.

The process begins with preparing the ground by levelling and compacting the surface. A layer of mortar or sand is then spread as the base, and the stones are carefully arranged to fit together naturally. Gaps between the stones are adjusted to create an appealing and balanced design.

Mortar is often applied between the stones to secure them, providing strength and stability. Alternatively, sand or gravel may be used for a more flexible finish. The end result is a durable, visually striking paving style that enhances outdoor spaces with a rustic, unique look.

Popular Types of Stones for Crazy Paving

Popular Types of Stones for Crazy Paving

The choice of stone for crazy paving greatly influences both its appearance and durability. Whether you’re after a sleek, modern look or a more rustic feel, here are the most popular stones used in crazy paving:

1. Bluestone

Bluestone is a versatile and durable stone, highly favoured for its rich blue-grey tones that add a sleek, modern appeal to any space. Its dense structure makes it perfect for high-traffic areas such as patios, pathways, and driveways, offering excellent resistance to wear and weather. 

Bluestone’s adaptability to contemporary and traditional designs allows it to blend seamlessly into various architectural styles. Its slightly rough texture provides a slip-resistant surface, making it a practical choice for outdoor areas. Additionally, its ability to age gracefully ensures it remains a long-lasting and attractive feature.

2. Granite

Granite is among the toughest and most durable stones available, making it a perfect choice for high-traffic areas like driveways, walkways, and outdoor steps. Its wide range of colours, from light greys to deep reds, along with its intricate speckled patterns, adds a luxurious and refined aesthetic to outdoor spaces. 

Granite is highly resistant to scratches, stains, and weathering, ensuring a long-lasting and virtually maintenance-free surface. Its polished or flamed finish can also enhance the stone’s natural beauty, making it both a functional and visually appealing option.

3. Limestone

Limestone is a softer, more subtle stone. It offers a light, clean aesthetic that works beautifully in both traditional and contemporary outdoor designs. Its smooth texture and soft shades, which range from cream to light grey, create an elegant and inviting feel, perfect for courtyards, garden paths, and terraces. 

Although softer than other stones, limestone is still highly durable, especially when properly sealed. Its workability allows for intricate paving patterns and custom designs, making it a versatile option for various outdoor projects. Limestone also remains cool underfoot, making it ideal for sunny areas.

4. Travertine

Travertine is a classic stone known for its distinctive veining and natural warm tones, including creams, golds, and browns. Due to its non-slip surface, even when wet, it’s highly prized for pool surrounds and outdoor entertainment areas. 

The porous nature of travertine allows water to drain easily, reducing the risk of puddles and slippery surfaces. Its weather-resistant properties ensure it holds up well in extreme climates, while its timeless appearance adds elegance to outdoor spaces. Travertine can be left with a natural finish or polished for a more refined look, offering versatility in design.

5. Quartzite

Quartzite is a highly durable and hard-wearing stone, making it an ideal choice for outdoor paving in areas exposed to extreme weather or heavy foot traffic. Known for its distinctive crystalline structure and glossy finish, quartzite is resistant to fading, scratches, and stains. 

It comes in various colours, including silver, white, and grey, with unique veining that gives it a sophisticated appearance. This stone is ideal for modern designs, adding a touch of luxury while maintaining practicality. Its non-slip surface makes it suitable for walkways and poolside areas.

6. Porphyry

Porphyry is a natural stone recognised for its deep, rich colours, including shades of red, purple, and brown, which create a striking visual impact. Known for its exceptional durability, porphyry is highly resistant to wear, making it an excellent option for high-traffic areas such as driveways, walkways, and courtyards. 

Its textured surface offers excellent slip resistance, even in wet conditions, making it safe and practical. The unique blend of colours and the natural cleft finish make porphyry a popular choice for those seeking a bold, distinctive paving option that withstands the elements.

Key Considerations for Choosing Crazy Paving

Key Considerations for Choosing Crazy Paving

Before deciding on crazy paving, assessing whether it fits your space and meets your practical needs is essential. Here are the key factors to consider:

1. Aesthetic Appeal

Crazy paving adds a distinctive, natural charm that complements both traditional and modern settings. Its irregular patterns create a visually striking effect, making it perfect for homeowners who want to add character to their outdoor spaces. 

Whether you’re looking for a rustic, casual look or a more contemporary design, crazy paving’s unique layout allows it to blend seamlessly with various architectural styles and garden landscapes.

2. Durability and Functionality

Crazy paving is known for its durability, making it ideal for high-traffic areas such as driveways, patios, and walkways. The irregular stone arrangement provides a sturdy surface that can withstand heavy use while maintaining its appeal. 

Additionally, the design allows for better drainage, reducing water buildup in outdoor spaces. If longevity and functionality are priorities, crazy paving is a solid choice for your project.

3. Maintenance Requirements

One of the advantages of crazy paving is its relatively low maintenance. Regular cleaning and occasional resealing will help keep the stones looking fresh and ensure their durability over time. 

If the mortar between the stones is used, some minor upkeep may be necessary, but overall, crazy paving requires less maintenance than other paving options, making it a convenient choice for many homeowners.

4. Suitability for Your Space

Crazy paving works best in outdoor spaces like garden paths, patios, and courtyards. The flexible design can be adapted to small or large areas, and its natural flow complements garden features like ponds or flower beds. For uneven or sloping areas, crazy paving can easily follow the landscape, making it a practical solution for various spaces.

Where to Use Crazy Paving

Where to Use Crazy Paving

Crazy Paving’s versatility makes it a fantastic choice for various outdoor spaces, offering functionality and aesthetic appeal. Here are the best places to use crazy paving:

  • Garden Pathways: Crazy paving adds an organic, natural flow to garden paths, seamlessly blending with greenery and landscaping.
  • Patios: Ideal for outdoor entertaining areas, crazy paving provides texture and character while offering a durable and stylish surface for patios.
  • Driveways: With excellent weight distribution, crazy paving is strong enough for driveways and adds a unique aesthetic to high-traffic areas.
  • Courtyards: Crazy paving enhances courtyards’ visual appeal, bringing functionality and a rustic charm to outdoor living spaces.
  • Pool Surrounds: Crazy paving’s non-slip properties make it a practical and stylish choice for poolside areas, improving safety while adding to the overall design.

Benefits of Crazy Paving

Benefits of Crazy Paving

Crazy paving enhances the beauty of outdoor spaces and offers a range of practical advantages. Here are the key benefits that make crazy paving a standout choice for homeowners:

  • Unique Aesthetic: Crazy paving features an irregular design that creates a visually striking look, adding character and charm to outdoor spaces. Each installation is distinct, ensuring a one-of-a-kind appearance.
  • Durability: Made from robust natural stones like bluestone, granite, or sandstone, crazy paving is built to withstand heavy foot traffic, making it ideal for high-use areas such as driveways and patios.
  • Versatility: Crazy paving can quickly adapt to uneven or sloped surfaces, making it a practical option for various landscapes and outdoor applications.
  • Low Maintenance: Crazy paving requires minimal upkeep, only periodic cleaning and occasional resealing to maintain its appearance, making it convenient for homeowners.
  • Excellent Drainage: The gaps between stones allow for efficient drainage, helping to prevent water pooling and flooding in outdoor areas, ensuring a safer and more functional space.

Installation Tips for Crazy Paving

Installation Tips for Crazy Paving

Successfully installing crazy paving requires careful preparation and attention to detail. To achieve a stunning and durable finish, follow these essential tips for a smooth installation process:

  • Prepare the Area: Clear debris, grass, or existing materials from the installation site. This ensures a stable base for the crazy paving.
  • Level the Ground: Properly level the ground to ensure the stones fit together snugly and facilitate effective water drainage.
  • Create a Stable Foundation: Spread a layer of sand or gravel as a foundation. This provides stability and aids in drainage, preventing shifting over time.
  • Arrange the Stones: Lay the stones in a random pattern, ensuring even gaps between them to achieve the characteristic look of crazy paving.
  • Secure the Stones: Use a rubber mallet to gently tap each stone into place, ensuring they are well-secured and level.
  • Fill Gaps: Depending on your preference, apply mortar between the stones for added stability or brush sand into the gaps for a flexible finish.
  • Seal the Surface: Consider sealing the paving to protect against stains and wear, enhance durability, and maintain its appearance over time.

Maintenance and Care for Crazy Paving

Maintenance and Care for Crazy Paving

Maintaining crazy paving is essential to ensure its longevity and aesthetic appeal. Regular cleaning should be the first step in your maintenance routine. 

Sweeping away leaves, dirt, and debris will prevent grime from building up in the gaps between stones. A pressure washer can be used for deeper cleaning, but care must be taken to avoid damaging the mortar or the stones.

It is essential to inspect the paving periodically. Look for any shifting stones or cracks that may need attention. Addressing these issues promptly can prevent further damage and maintain the integrity of your paving.

In addition to cleaning, sealing the surface is recommended every few years. A quality sealant can help protect the stones from stains, moisture, and weathering, keeping them looking fresh and vibrant.

If weeds begin to grow in the gaps, they should be removed as soon as possible to prevent root damage. Overall, with a little effort and attention, your crazy paving can remain a stunning feature of your outdoor space for years to come.

Conclusion

Incorporating crazy paving into your outdoor space adds character and charm while also providing durability and functionality. Its unique designs and materials make it a versatile choice for any garden or patio. If you’re looking to elevate your landscape, reach out today for expert guidance and premium crazy paving options that perfectly suit your vision.

The Ultimate Guide to Choosing the Perfect Paver Colour (Tip #8 Will Surprise You!)

Choosing the right paver colour can significantly impact your outdoor space’s aesthetics and functionality. A poor choice can clash with your home’s architecture, disrupt the natural harmony, and fail to meet practical needs, leaving you dissatisfied with the result.

Here are 8 essential tips to help you select the ideal paver colour for your project, ensuring a perfect blend of beauty and functionality. 

1. Match with the environment

Have you ever thought about how your paver colour connects with the surroundings? It’s not just about picking a shade you like – it’s about how it works with everything around it. For a garden, earthy tones like browns, greens, or soft greys can create harmony with the plants and natural features.

Look closely at your home’s exterior. Does it have brick, stone, or wood elements? The right paver colour should complement these existing materials, not compete with them. If you have a more modern space, sleek, neutral tones like grey or charcoal can provide a clean, stylish look.

For coastal settings, sandy or pale colours complement the beachy vibe. It’s also important to consider how sunlight affects the colour; some tones will look lighter or darker depending on the time of day. 

Take a walk around your outdoor space—what colours do you see? Let those natural surroundings guide your choice for a more seamless finish.

2. Climate considerations

The local climate plays a significant role in choosing the right paver colour. In hotter regions, lighter shades like beige or light grey can help reflect heat, making outdoor spaces more comfortable. 

Conversely, darker pavers absorb heat, which might be ideal for cooler climates but less practical in areas with intense sun exposure. Selecting the right shade could also prevent fading caused by UV rays, particularly in sunny locations.

If you experience frequent rain or damp conditions, earth-toned or darker pavers may hide dirt and water stains better than lighter options. Additionally, frost-prone areas may benefit from mid-toned pavers that disguise salt damage or seasonal wear. 

Consider neutral or warm hues for coastal regions that blend naturally with the sandy environment. Climate-specific needs should guide your decision to ensure both aesthetic appeal and durability in your outdoor space. Choosing wisely will save you time on maintenance and increase the longevity of your pavers.

3. Design aesthetics

When selecting paver colours, it is crucial to create a cohesive design. Your choice should complement the architectural style of your home, whether it’s modern, traditional, or rustic. Blending pavers with existing landscaping features, such as stone walls or garden elements, ensures a harmonious look. Bold, contrasting colours can create a striking visual impact, especially in contemporary designs.

Neutral tones like grey, beige, or taupe blend well with most surroundings, offering a timeless appeal. For those wanting a bolder statement, darker shades or mixed-tone pavers can add depth and character. 

Consider the overall palette of your outdoor space. Warm colours like terracotta or sandy beige evoke a Mediterranean vibe, while cool greys and blues lend a sleek, modern feel. Matching or complementing the colour of outdoor furniture or other dĂ©cor can tie the entire area together beautifully. 

4. Maintenance and wear

Maintenance is key when choosing paver colours, especially for high-traffic areas. Darker pavers tend to hide stains and dirt more effectively and wear more effectively than lighter ones, making them a practical choice for spaces like driveways or patios. Regular exposure to the elements can cause fading, particularly in sunny climates, so selecting UV-resistant pavers can reduce long-term maintenance.

If you prefer a low-maintenance option, opt for pavers that naturally conceal wear, such as earth tones or textured finishes. Lighter colours, while aesthetically pleasing, may require more frequent cleaning to keep them looking fresh. Sealing your pavers can also help protect them from weather-related damage, staining, and discolouration, making upkeep easier.

Regular inspections of your outdoor spaces ensure early detection of any wear and tear, prolonging the lifespan of your pavers.

5. Lighting conditions

Maintenance is key when choosing paver colours, especially for high-traffic areas. Darker pavers tend to hide stains and dirt more effectively and wear more effectively than lighter ones, making them a practical choice for spaces like driveways or patios. Regular exposure to the elements can cause fading, particularly in sunny climates, so selecting UV-resistant pavers can reduce long-term maintenance.

If you prefer a low-maintenance option, opt for pavers that naturally conceal wear, such as earth tones or textured finishes. Lighter colours, while aesthetically pleasing, may require more frequent cleaning to keep them looking fresh. Sealing your pavers can also help protect them from weather-related damage, staining, and discolouration, making upkeep easier.

Regular inspections of your outdoor spaces ensure early detection of any wear and tear, prolonging the lifespan of your pavers.

6. Stain resistance

Stain resistance is Key when selecting paver colours, especially for outdoor areas prone to spills or heavy use. Darker pavers are generally more forgiving, as they better mask stains from dirt, food, or oils than lighter tones. Earthy hues like browns or greys can effectively hide common stains, reducing the frequency of cleaning and maintenance.

In areas where food and drink are often served, such as patios or outdoor kitchens, selecting pavers with a natural resistance to staining can be practical. Sealed pavers offer an added protection layer, helping prevent stains from penetrating the surface. Applying a high-quality sealant is one of the best ways to boost the stain resistance of any paver colour you choose.

Lighter paver colours, though visually appealing, may show stains more readily, so it’s essential to weigh aesthetics against practical maintenance needs. Frequent cleaning can help keep them looking their best, but opting for stain-resistant materials will save you time in the long term.

7. Trends

Are you considering a modern look for your outdoor space? Neutral tones like grey, charcoal, and taupe lead the way in contemporary paver design. These colours offer a clean, minimalist feel that works beautifully in urban and suburban settings.

Earthy tones such as terracotta, sandy beige, and soft browns are also popular for a more natural vibe. These shades add warmth and blend seamlessly with outdoor landscapes. Darker pavers, on the other hand, are gaining traction among those wanting a bolder, more striking appearance.

Mixing two complementary colours is another growing trend, providing depth and a more dynamic visual effect. Are you bold enough to embrace this new approach? You can create unique patterns with contrasting colours that bring personality to your space.

Whether you prefer sleek, modern tones or rich, earthy hues, staying aware of current paver trends ensures your outdoor area feels stylish and up-to-date.

8. Requesting Samples and Comparing Colours

Requesting samples is a crucial step in choosing the right paver colour. Seeing a colour online or in a brochure can vastly differ from how it appears in real life. Samples allow viewing the paver under different lighting conditions, ensuring it complements your outdoor space. Comparing multiple options side by side gives a clearer idea of which tones work best with your home’s design.

Place the samples in the intended area and observe them as natural light changes throughout the day. Darker pavers may appear even darker in shaded areas, while lighter pavers can reflect more light in bright spaces. Examining pavers in varying weather conditions can also help determine which colours better hide dirt or stains.

Comparing colours against existing features such as walls, furniture, or landscaping will ensure a harmonious look. Don’t hesitate to request different textures or finishes, as these can affect the colour’s appearance. Taking the time to review samples thoroughly helps you make an informed choice that will last for years.

Conclusion

Choosing the right paver colour is crucial for creating the perfect look for your outdoor space. Considering these tips, you’ll make a well-informed decision that complements your surroundings. 

Ready to transform your space? Request samples today and start planning your dream design with confidence. The right colour is just a decision away!

Want to Increase Your Property’s Value Fast? Here’s How Pavers Can Help!

Homeowners often need help finding effective ways to boost their property value.With the right upgrades, properties can remain undervalued, making it easier to sell or refinance at a desirable price.

Learn how installing pavers can significantly enhance your property’s curb appeal and market value. This guide explores the benefits and impact of pavers on your home’s worth and provides practical tips for maximising your investment.

1. Aesthetic Appeal

Natural stone pavers like granite, travertine, and bluestone provide unparalleled aesthetic beauty, transforming ordinary outdoor areas into stunning visual statements. 

The inherent elegance of natural stone, combined with its unique textures, rich tones, and subtle veining patterns, creates a sense of sophistication that other materials cannot match. These pavers exude luxury and timelessness, whether used in a patio, driveway, or garden pathway. 

Granite pavers offer a sleek, polished finish, perfect for contemporary designs, while travertine pavers bring warmth and rustic charm with their earthy hues and natural imperfections. Bluestone pavers deliver a bold, dramatic look, with deep blues and greys that make outdoor spaces stand out. 

The diversity of styles allows homeowners to choose a design that aligns with their vision—whether modern, classic, or rustic—and enhances the property’s overall curb appeal and aesthetic coherence.

2. Durability

One of the primary reasons natural stone pavers are favoured for outdoor projects is their remarkable durability. Granite, travertine, and bluestone pavers are incredibly resilient and can withstand the harshest weather conditions without showing signs of wear. 

Granite pavers are known for their extreme hardness, making them resistant to cracking, chipping, and other damage caused by foot traffic or heavy loads. 

While slightly softer, travertine pavers offer excellent resistance to temperature fluctuations and freeze-thaw cycles, preventing damage that affects other paving materials.

With their high density, Bluestone pavers can easily handle the rigours of outdoor use, making them ideal for high-traffic areas such as walkways, driveways, and patios. 

Their long-lasting nature ensures homeowners do not have to worry about frequent replacements, providing a cost-effective and sustainable outdoor solution.

3. Low Maintenance

Another key advantage of natural stone pavers is their low maintenance requirements. Unlike other materials that require regular upkeep or special treatments, granite, travertine, and bluestone pavers are highly resistant to stains, dirt, and general wear. 

A simple routine of occasional sweeping and hosing down is often needed to keep them pristine. Their dense composition makes them less prone to absorbing liquids, reducing the risk of staining from oils, food, or outdoor elements. 

Travertine pavers, for example, naturally resist heat and moisture, making them perfect for pool areas where splashes and spills occur every day. 

Bluestone pavers maintain their deep, rich colours without fading, even after years of exposure to sunlight. This minimal upkeep makes them a practical choice for homeowners looking for hassle-free, long-lasting outdoor paving solutions.

4. Enhanced Outdoor Living

Natural stone pavers significantly enhance the functionality and beauty of outdoor living spaces, creating inviting and stylish environments. A well-placed patio made from travertine, granite, or bluestone offers the perfect setting for entertaining guests, dining al fresco, or simply relaxing with family. 

These materials naturally blend into the surrounding landscape, seamlessly transitioning between indoor and outdoor spaces. Natural stone’s inherent beauty helps to create a sense of luxury and relaxation, while its durability ensures that the space remains functional and attractive for years. 

Buyers increasingly value outdoor living areas that can be used year-round, and natural stone pavers help to achieve this, making properties more desirable and increasing their market appeal.

5. Curb Appeal

Curb appeal is critical in creating a strong first impression, and natural stone pavers elevate a property’s exterior to a new level of sophistication. Whether it’s a grand driveway paved in granite, a welcoming walkway in travertine, or a bold front garden featuring bluestone, these materials deliver an unmatched aesthetic impact. 

The natural variations in colour and texture give each stone its unique character, providing a depth and interest that draws the eye. As potential buyers or guests approach the property, using natural stone pavers immediately communicates quality and attention to detail. 

This enhanced curb appeal can significantly increase a property’s value, making it more attractive to those seeking an elegant, well-maintained home.

6. Increased Property Functionality

In addition to improving aesthetics, natural stone pavers offer practical benefits by enhancing the functionality of outdoor areas. Whether creating well-defined walkways, patios, or seating areas, these pavers help organise and optimise space, making outdoor environments more usable. 

Travertine and bluestone pavers, for example, provide a stable, slip-resistant surface ideal for high-traffic areas or poolside installations. Determining and designing spaces using durable, beautiful materials allows homeowners to make the most of their outdoor areas, turning unused corners into functional zones. 

This added functionality particularly appeals to buyers who value form and function in their outdoor living spaces.

7. Versatility and Customisation

Natural stone pavers offer incredible versatility in design and customisation. Homeowners can personalise their outdoor spaces with various colours, textures, and finishes to reflect their style and preferences. 

Granite comes in shades, from light greys to deep blacks, while travertine is available in warm, earthy tones that evoke a Mediterranean feel. Bluestone, known for its deep blues and greys, can be cut into various shapes and sizes, allowing for creative patterns and layouts. 

Whether homeowners want to match the existing architecture of their property or create a striking contrast, natural stone pavers provide the flexibility to achieve their vision. This customisation also ensures a cohesive look that enhances the overall aesthetic harmony of the property.

Conclusion

Pavers significantly enhance property value by improving aesthetics, functionality, and sustainability. For residential or commercial properties, pavers offer a high return on investment. 

Ready to boost your property’s appeal and value? Contact us today for expert advice and premium pavers to transform your outdoor spaces.

Limestone 101: What It Is and How It’s Used in Everyday Life

Understanding the unique characteristics and benefits of building materials can be challenging. With so many options available, choosing the suitable material for your construction projects often feels overwhelming and confusing, leading to costly mistakes and dissatisfaction.

This article will delve into what limestone is, highlighting its properties, uses, and advantages, helping you make an informed decision for your next project.

What is Limestone?

Limestone is a sedimentary rock primarily composed of calcium carbonate, typically formed from marine organisms’ skeletal fragments. It’s widely used in construction for its durability and versatility, and it is ideal for flooring, wall cladding, and architectural features. Limestone’s natural beauty and various colours make it a popular choice for interior and exterior applications.

Composition and Formation

Limestone’s composition is predominantly calcium carbonate (CaCO3), usually calcite or aragonite minerals. This rock also contains varying amounts of silica, clay, silt, and sand. These additional minerals can influence the colour and texture of the limestone, leading to a wide range of aesthetic possibilities.

Limestone formation is an intricate process that primarily occurs in marine environments. Over millions of years, the accumulation of shells, coral, algae, and other marine debris on the ocean floor forms thick layers of sediment. 

These layers are compacted and cemented through lithification, transforming into solid rock. This sedimentary rock can also form through the precipitation of calcium carbonate from water, particularly in caves, resulting in speleothems like stalactites and stalagmites.

Understanding limestone’s composition and formation reveals why it is such a durable and versatile material. Its unique blend of minerals and formation process gives it properties that make it ideal for various construction and design applications, from robust building blocks to elegant decorative features.

Physical Properties

Ever wonder why limestone has endured in architecture and design? Its unique blend of durability, aesthetic appeal, and versatility makes it an exceptional choice for countless applications. 

Dive into limestone’s fascinating physical properties and discover why it remains a favourite material for everything from ancient structures to modern masterpieces.

1. Durability and Hardness

Limestone’s physical properties make it a prized material in construction and design. One of its key characteristics is its durability. 

With a hardness rating of 3 to 4 on the Mohs scale, limestone is tough enough to withstand significant wear and tear while remaining relatively easy to cut and shape. This balance of strength and workability makes it suitable for various applications, from structural elements to intricate carvings.

2. Porosity and Insulation

Another notable property is its porosity. Limestone’s permeability allows it to absorb water, which can be both an advantage and a consideration in construction. Proper sealing can enhance its longevity and resistance to weathering. 

Its porosity also makes it a good insulator, contributing to energy efficiency in buildings by regulating indoor temperatures and reducing heating and cooling costs.

3. Colour and Aesthetic Versatility

Limestone’s various colours vary depending on the impurities present during its formation, from pure white to shades of grey, beige, and even blue. This range of colours, combined with its natural texture, provides aesthetic versatility, making it famous for interior and exterior design. 

The natural variation in appearance ensures that each limestone installation is unique, adding character and charm to any project.

4. Lightweight and Compressive Strength

Additionally, limestone is relatively lightweight compared to other natural stones, which can simplify transportation and installation. Despite its lightness, it retains a high degree of compressive strength, making it suitable for both load-bearing and decorative purposes.

Uses of Limestone

Limestone’s versatility makes it a staple in both ancient and modern architecture.

  • Construction Industry: Limestone is essential as a building material for its durability and ease of shaping. It serves as building blocks, aggregate in concrete, and foundational material for roads and buildings.
  • Interior and Exterior Design: Highly valued for its aesthetic appeal, limestone is widely used in flooring, wall cladding, and decorative facades. Its diverse range of colours and textures makes it suitable for both traditional and contemporary architectural styles.
  • Cement and Lime Production: Limestone is critical in cement and mortar production, which is pivotal in construction. It is also integral to lime production, which supports industrial processes such as steel manufacturing, water purification, and environmental protection through flue gas desulphurisation.
  • Art and Landscaping: Beyond industrial use, limestone’s unique properties make it an ideal medium for sculptures, monuments, and landscaping features. Its enduring beauty and historical significance contribute to its popularity in diverse projects, ranging from monumental public buildings to private garden paths.

Types of Limestone

Each variety of limestone has its unique charm and characteristics, offering endless possibilities for your design vision. At Splendour In Stone, we offer many limestone options, each perfect for elevating your paving projects. But which type best suits your needs?

1. Tuscan Limestone

Tuscan Limestone captures the essence of Mediterranean charm. With its soft beige tones and subtle veining, it complements both modern and classic designs. Known for its durability, this limestone withstands the test of time in outdoor and indoor applications. 

Its natural texture adds depth and warmth to any surface. Sourced from quality quarries, Tuscan Limestone offers a refined finish for sophisticated spaces. It is perfect for creating timeless paving that blends seamlessly with its surroundings.

2. Himalayan Limestone

Himalayan Limestone offers a striking blend of dark tones and earthy textures, making it perfect for adding character to any space. Crafted from high-quality stone, this limestone is both durable and visually captivating. 

Its natural finish enhances outdoor areas, while its strength ensures long-lasting performance. Available in various finishes, Himalayan Limestone brings a touch of rugged elegance to pathways, patios, and more. It is perfect for creating bold, timeless designs.

3. Sienna Limestone

Sienna Limestone exudes warmth with its rich golden hues and soft textures, creating a welcoming atmosphere in any setting. Its natural tones blend effortlessly with various design styles, from contemporary to traditional. Crafted from high-quality stone, Sienna Limestone ensures durability and strength for indoor and outdoor use. 

This limestone adds elegance and charm, perfect for transforming patios and walkways. Every stone tells a story of timeless beauty.

4. Selene Limestone

Selene Limestone boasts a sleek, understated look with its cool grey tones and fine texture. It is perfect for minimalist and contemporary designs, and its natural finish adds an air of sophistication to both interiors and exteriors. 

Sourced from premium quarries, Selene Limestone offers excellent durability and weather resistance. Ideal for those seeking a refined yet modern touch, this limestone transforms outdoor spaces into stylish, long-lasting environments.

Benefits of Limestone

Limestone offers numerous benefits, making it a preferred choice in construction and design.

1. Durability

Limestone is resistant to weathering and wear, making structures built from it last centuries. This durability makes limestone a cost-effective investment for long-term projects.

2. Aesthetic Versatility

Various limestone colours, textures, and finishes can be tailored to traditional and contemporary design schemes, allowing architects and designers to achieve specific looks.

3. Environmentally Friendly

As a natural material, limestone requires minimal processing, resulting in a lower carbon footprint. Its thermal properties also contribute to building energy efficiency by helping regulate indoor temperatures and reducing heating and cooling costs.

4. Workability

Limestone’s softness allows for precise cutting and shaping, enabling intricate designs and detailed architectural elements. This ease of working with limestone and its natural beauty and strength ensures it remains a timeless and practical choice for various applications.

Maintenance and Care

Proper maintenance and care are crucial to preserving the beauty and longevity of limestone surfaces.

Regular cleaning is essential to prevent the build-up of dirt and grime. Use a pH-neutral cleaner to avoid damaging the stone, as acidic or abrasive cleaners can cause etching and discolouration.

Sealing your limestone is an essential step in its care routine. A high-quality sealant will protect the stone from stains and moisture penetration, which can lead to deterioration over time. Depending on the usage and exposure, it is advisable to reseal the limestone every one to two years to maintain its protective barrier.

Addressing environmental factors is essential for outdoor limestone. Regularly removing debris, such as leaves and dirt, will prevent staining and mildew growth. Additionally, using breathable covers during harsh weather can protect outdoor limestone features from the elements.

Address spills immediately to avoid staining. Blot the spill with a soft cloth and clean the area with a mild soap solution. A poultice can be used for stubborn stains to draw out the impurities without harming the stone.

Limestone in Australia

Australia is home to abundant limestone deposits, particularly in regions such as South Australia, Western Australia, and Victoria. These deposits testify to the country’s geological history and provide a rich industry resource.

Australian limestone is widely used in residential and commercial construction. Its durability and aesthetic appeal make it a popular choice for building facades, flooring, and wall cladding. Notable structures, such as the iconic Parliament House in Canberra, showcase the elegance and versatility of Australian limestone.

In addition to construction, Australian limestone is crucial in agriculture. It is commonly used to produce agricultural lime, which helps to neutralise acidic soils, promoting healthier crop growth and improved yields. The mining and processing of limestone also contribute significantly to the Australian economy, providing jobs and supporting local communities.

Moreover, Australia’s limestone caves, such as the Naracoorte Caves in South Australia, are of great scientific and tourist interest. These natural formations offer insights into the country’s prehistoric environment and attract visitors worldwide, highlighting the multifaceted importance of limestone in Australia.

Conclusion

Limestone’s durability, versatility, and aesthetic appeal make it indispensable in construction and design. Whether for building, agriculture, or landscaping, limestone offers unparalleled benefits. 

Explore limestone’s potential in your next project and experience its timeless elegance and practical advantages. Contact us today to learn more about our high-quality limestone products.

New Year’s Day Sale: Top Natural Stone Products for Your Home Makeover

As the New Year approaches, it’s the perfect time to start thinking about refreshing your home for the year ahead. Imagine stepping into a space transformed by the natural beauty of stone, from elegant marble countertops to rustic sandstone patios. 

At Splendour In Stone, our New Year’s Day Sale offers you the chance to elevate your home with top-quality natural stone products at unbeatable prices. Whether updating your interiors or giving your outdoor spaces a fresh look, now is the time to start your home makeover journey.

1. Marble

Are you looking to add a touch of luxury to your outdoor space? Marble paving offers an unmatched combination of durability and style. For its natural beauty, marble has been a go-to material for centuries

Marble paving’s smooth, polished finish brings sophistication to any garden, patio, or walkway. It can withstand harsh weather while maintaining its refined look.

What makes marble ideal for outdoor use? Its strength and resistance to cracking under pressure make it a top choice for high-traffic areas. Available in various colours and patterns, marble paving can seamlessly blend with any landscape design. From sleek, modern spaces to classic, rustic settings, it enhances the visual appeal of any outdoor environment.

Can you imagine your outdoor area transformed with the timeless elegance of marble? With its light reflection, marble paving can brighten outdoor areas and give them an expansive, airy feel. Installing marble in your home is more than just a style choice—it’s an investment in long-lasting quality.

2. Granite

Are you Seeking a material that combines strength and beauty? Granite is the perfect choice for paving and walling, offering unrivalled durability for outdoor projects. Granite can handle the most challenging conditions without losing appeal. Its dense composition makes it resistant to cracks, chips, and wear, making it an ideal option for high-traffic areas.

What sets granite apart from other materials is its natural resistance to weathering, which ensures it remains a long-lasting investment for any home. Whether you’re paving a driveway, creating a garden pathway, or building a retaining wall, granite’s versatility shines through. 

You can personalise your space in various colours and finishes with modern and traditional designs.

Imagine a patio or driveway made from sleek granite slabs, seamlessly blending with granite walls to create a cohesive, high-end look. Granite’s natural textures and patterns add character and depth to any outdoor environment.

3. Travertine

Travertine is the perfect choice for paving and walling if you are looking for a material that brings elegance and warmth to your outdoor space. It offers a timeless aesthetic that complements a variety of designs. 

Renowned for its unique texture and earthy tones, travertine adds a natural charm to any environment. Its soft, porous surface creates a warm, inviting look that is ideal for patios, pathways, and garden walls.

Travertine is unique because it is naturally slip-resistant stone, making it a safe and stylish option for outdoor areas like pool decks and walkways. Available in various shades, from soft beige to rich walnut, it effortlessly blends with surrounding landscapes. 

Travertine’s durability also stands to the test of time, weathering beautifully and maintaining its appeal.

Can you imagine a sunlit patio paved with travertine or a garden wall that adds depth and character to your outdoor living space? With its understated elegance, travertine brings a timeless appeal to any project.

4. Sandstone

Sandstone offers a versatile and visually striking option for walling, blending seamlessly with various landscapes. 

Known for its warm, earthy tones, sandstone creates a rustic yet refined aesthetic. Whether used for garden walls, retaining walls, or exterior façades, sandstone brings a timeless elegance to any outdoor space.

Sandstone stands out because of its durability and resistance to weathering. It ensures that your walls remain strong and visually appealing for years. 

Sandstone is a natural stone in various colours and textures, allowing you to customise your design to suit your home’s style. From golden yellows to soft greys, sandstone complements modern and traditional settings.

Imagine the impact of a sandstone wall, adding character and depth to your garden or patio area. Each sandstone block’s unique grain and texture tell a story, creating a one-of-a-kind feature for your home.

5. Limestone

Limestone is a fantastic choice for both paving and walling. Its classic look enhances any outdoor space, and its smooth, matte finish brings refined sophistication to gardens, patios, and pathways. 

Whether used for walling or paving, limestone’s versatility makes it a popular option for homeowners seeking timeless beauty.

This natural stone combines elegance with durability, making it perfect for outdoor projects. Its natural composition allows it to withstand heavy foot traffic and harsh weather conditions, making it an ideal choice for long-lasting outdoor use. 

Limestone, available in soft, neutral tones like cream, beige, and light grey, complements various design styles, from contemporary to traditional.

Imagine a beautifully paved walkway or a feature wall made from limestone that transforms your outdoor areas into luxury spaces. This stone’s subtle textures and colours provide a serene, understated elegance that will elevate your home’s exterior.

6. Quartz

Quartz offers a sophisticated and durable solution for walling, perfect for adding a touch of modern elegance to your outdoor spaces. Quartz ensures that your walls maintain their beauty over time

Whether used for gardens or feature walls, this material provides aesthetic appeal and long-lasting performance.

One of quartz’s key advantages is its low-maintenance nature, making it an ideal choice for homeowners who want a stunning look without the upkeep. Quartz is available in various colours and patterns, from crisp whites to deep greys, allowing you to create a cohesive design that complements your home’s exterior.

Quartz delivers a sleek and contemporary finish, while its natural sheen adds a subtle, polished look to your surroundings. The non-porous surface makes it resistant to stains and moisture, ensuring that your walls remain in top condition, even in harsh weather.

7. Bluestone

Bluestone offers a unique combination of durability and style, making it an ideal choice for outdoor paving. This versatile natural stone is renowned for its strength, allowing it to withstand heavy foot traffic and the elements. Whether you’re updating a driveway, patio, or walkway, bluestone provides a solid foundation that will stand the test of time.

This stone’s rich, deep blue-grey tones bring a modern yet timeless look to any outdoor space. Bluestone’s slip-resistant surface is well-suited for moist areas like pool surrounds or garden paths. Its natural texture ensures safety and elegance, offering the perfect balance for functional yet stylish paving.

In addition to its practical benefits, bluestone requires minimal maintenance, making it a hassle-free option for homeowners. Its ability to resist cracking and fading ensures it remains pristine for years, even in harsh weather conditions.

8. Porphyry

Porphyry offers a unique and visually striking option for paving, bringing strength and character to your outdoor spaces. Renowned for its durability, porphyry is a natural stone that can withstand even the heaviest foot traffic and harsh weather conditions

Its toughness makes it an excellent choice for driveways, patios, and pathways that must stand the test of time.

One of the porphyry’s key features is its rich variety of colours, ranging from deep reds to earthy browns and greys. This natural variation adds depth and visual interest to your paving projects, creating a dynamic look that enhances any landscape design. 

The stone’s textured surface also provides a natural slip-resistant quality, making it ideal for wet areas around pools or garden paths.

Porphyry’s resilience is complemented by its low-maintenance nature, ensuring that your paved areas remain beautiful with minimal effort. Its natural resistance to wear and fading keeps it looking fresh and vibrant for years.

Conclusion

Take advantage of our New Year’s Day Sale to transform your home with premium natural stone products. Whether updating your outdoor paving or enhancing your walls, now is the perfect time to invest in timeless beauty. 

Visit Splendour In Stone today, explore the exclusive offers, and elevate your home makeover with lasting elegance.

10 Types of Natural Stone Finishes

Choosing the right finish for natural stone can be overwhelming, especially with many options.  A wrong decision can result in a surface that doesn’t suit your style, requires too much maintenance, or wears out quickly. 

The impact of this choice extends beyond aesthetics—it affects the durability and functionality of your stone.  This guide will simplify the process by breaking down the 10 most popular natural stone finishes, helping you select the perfect one for your project.

1. Polished Finish

Polished Finish

A polished finish creates a sleek, glossy surface that beautifully reflects light. Crafted through grinding and buffing, this finish enhances the stone’s natural colour and pattern. 

Have you ever wondered why marble floors look so luxurious? It’s often because of the polished finish that gives them a mirror-like sheen. With its smooth texture, this type of finish is ideal for areas where an elegant and sophisticated appearance is desired, such as countertops and walls. 

On the downside, polished stone can be slippery when wet, making it less suitable for outdoor applications or high-traffic areas like bathrooms. It also tends to show scratches more easily. However, regular maintenance and sealing can help preserve its lustrous appearance over time. 

A polished finish might be your best bet if you’re looking for a timeless, high-end look. Why not elevate your space with the stunning reflective quality only polished stone can provide?

2. Honed Finish

Honed Finish

A honed finish delivers a smooth, matte surface, offering a more muted and understated appearance than the glossy sheen of polished stone. By grinding the stone to create a flat, non-reflective surface, this finish brings out the stone’s natural beauty without the shine. 

The result is a soft, velvety texture, making it particularly appealing for modern and traditional interior designs. Have you ever noticed how honed finishes are favoured in high-traffic areas? Their matte quality provides better slip resistance, making them ideal for kitchens, bathrooms, and hallway flooring.

Additionally, honed finishes are excellent for concealing scratches, dents, and general wear, offering a more durable option for busy spaces. While this finish may not have the glossy appeal of polished stone, it showcases the natural veining and patterns of the material in a more subdued and sophisticated way. 

Honed stone is also suitable for outdoor use, as it doesn’t become as slippery when exposed to moisture. However, due to its porous nature, it may require regular sealing to prevent staining.

3. Brushed Finish

Brushed Finish

A brushed finish offers a textured, weathered appearance that enhances the natural beauty of stone while giving it a rustic charm. Using wire brushes to wear down the stone’s surface gently, this finish results in a rough yet soft texture that feels aged and lived-in. 

Why is a brushed finish popular in outdoor and high-traffic areas? Its slip-resistant texture makes it ideal for patios, walkways, and even pool surrounds, where safety is essential.

Visually, the brushed finish brings out the stone’s natural colours and patterns with a soft, muted effect. Unlike polished or honed finishes, the surface retains a slightly rough quality, giving it a tactile appeal that works beautifully in more casual settings. 

The process also subtly highlights the stone’s unique veining, adding character without overwhelming the overall design. Though it has a rugged appearance, the finish is durable and relatively easy to maintain. 

Occasional sealing can help preserve its look and protect the surface from stains. The brushed finish is versatile and stylish for homeowners seeking a finish that balances natural beauty with practical durability.

4. Tumbled Finish

Tumbled Finish

A tumbled finish creates a soft, aged appearance, offering a timeless aesthetic that evokes the look of weathered stone. Achieved by placing the stone in a tumbler with abrasives, this process gently rounds the edges and softens the surface, giving it a worn and rustic feel. 

Have you ever wondered how to add instant character to a space? The tumbled finish brings a natural, vintage look that suits traditional and contemporary designs.

The slightly uneven texture provides slip resistance, making it an excellent choice for flooring in bathrooms, kitchens, and outdoor areas like patios and courtyards. 

Unlike polished finishes, tumbled stone doesn’t reflect light, allowing its natural tones and patterns to stand out more subtly. The muted, earthy colours add warmth to any space, making this finish a favourite for those seeking a cosy, lived-in look.

Though it has an old-world appeal, a tumbled finish is remarkably durable. It can withstand wear and tear while requiring minimal maintenance. Occasional sealing can further protect the surface, ensuring it remains beautiful for years. Tumbled stone is an ideal choice if you’re after a finish that offers both character and practicality.

5. Sandblasted Finish

Sandblasted Finish

A sandblasted finish offers a distinctive rough texture created by blasting the stone’s surface with high-pressure sand. This process results in a matte, slightly coarse surface, ideal for creating a non-slip environment. 

Why is a sandblasted finish often chosen for outdoor spaces? Its excellent traction makes it perfect for areas like pool decks, walkways, and garden paths, where safety is a priority.

The finish also softens the stone’s natural colour, giving it a more muted, weathered look. Unlike polished finishes, which highlight the stone’s vibrancy, sandblasted surfaces provide a more natural and understated appearance. 

With its textured feel, this finish adds a tactile element to the stone and enhances durability, making it resilient to the elements and daily wear.

A sandblasted finish is an excellent choice for those looking to combine aesthetic appeal with practicality, especially for areas exposed to moisture or high foot traffic. 

Occasional sealing can help maintain the surface’s appearance and prevent staining, ensuring its rugged beauty lasts for years. If you’re after a finish that provides both style and function, the sandblasted option is a versatile and long-lasting solution.

6. Flamed Finish

Flamed Finish

A flamed finish is created by exposing the stone to intense heat, followed by rapid cooling. This process causes the surface to burst and crack, leaving a rough, textured appearance behind. 

Why is this finish favoured for outdoor applications? It offers excellent slip resistance, making it ideal for areas like patios, driveways, and pool surrounds, where safety is crucial.

The high-temperature process also gives the stone a natural, weathered look, often enhancing its earthy tones. Flamed finishes add a bold, rugged aesthetic that creates a rustic or industrial feel in residential and commercial spaces. Despite its rough texture, the surface remains durable and withstand heavy foot traffic and exposure to the elements.

Flamed stone typically works best with granite and other hard materials, as softer stones might not withstand the extreme heat involved in the process. Occasional sealing may be necessary to protect the surface from stains and preserve its rich, natural colours. 

The flamed finish is a standout option for exterior designs that aim to blend natural beauty with functional durability.

7. Leathered Finish

Leathered Finish

A leathered finish offers a soft, textured surface that balances polished and honed finishes. This finish is achieved by running diamond-tipped brushes over the stone, resulting in a slightly rough, matte surface with a unique, tactile feel. 

Have you ever wondered why this finish has gained popularity in modern interiors? It provides a sophisticated look while also being easy to maintain. The texture of a leathered finish adds depth and character to the stone, bringing out its natural grain and colour without the high shine of a polished surface. 

One of the key advantages of a leathered finish is its resistance to fingerprints and watermarks, making it an excellent choice for countertops and high-traffic areas. It also feels warm and inviting, perfect for creating a cosy yet elegant atmosphere in living spaces.

Leathered finishes are most commonly applied to granite, although other stones like marble and quartzite can also be treated this way. The finish is durable and easy to clean, requiring minimal upkeep to preserve its beauty. If you’re seeking a blend of texture, style, and practicality, a leathered finish is perfect for aesthetic and functional appeal.

8. Bush Hammered Finish

Bush Hammered Finish

A bush-hammered finish creates a rugged, heavily textured surface that stands out for its bold and natural appearance. Achieved by repeatedly striking the stone with a specialised hammer with multiple points, this finish leaves behind a pitted, rough texture that resembles the weathered look of stone. 

Have you ever considered why a bush-hammered finish is often chosen for outdoor spaces? The bumpy texture provides excellent slip resistance, making it ideal for driveways, patios, and pool surrounds.

This finish dramatically enhances the stone’s natural strength and durability, allowing it to withstand heavy traffic and extreme weather conditions. With its coarse appearance, the bush-hammered finish is perfect for creating a rustic or industrial aesthetic. 

The process also subtly lightens the stone’s colour, giving it a unique, weathered charm that works beautifully in residential and commercial spaces. Although it may appear rough, bush-hammered stone is incredibly sturdy and low-maintenance. Occasional cleaning and sealing can help preserve its natural beauty. 

The bush-hammered option offers striking aesthetics and functional benefits for those seeking a finish combining rugged texture and practicality.

9. Sawn Finish

Sawn Finish

A sawn finish gives the natural stone a raw, unpolished appearance, highlighting its authentic beauty. Created by cutting the stone with a diamond-tipped saw, this finish leaves behind a flat, slightly rough surface with visible saw marks. Why is the sawn finish popular in modern architecture? Its clean, minimalist look makes it ideal for contemporary designs where simplicity is key.

The texture of a sawn finish provides a subtle grip, making it suitable for indoor and outdoor applications, particularly in spaces like pathways, patios, or feature walls. The finish emphasises the stone’s natural colours and patterns without the added shine or smoothness of polished finishes, allowing for a more organic feel in design projects.

While the surface may seem unfinished, it is highly durable and can withstand heavy use, especially in high-traffic areas. Occasionally, sealing the stone can help protect it from moisture and staining, prolonging its longevity. For those seeking a natural yet refined look, a sawn finish balances raw beauty and functional durability, making it an excellent choice for residential and commercial spaces.

10. Split Face Finish

Split Face Finish

A split-face finish provides a rugged, uneven surface that reveals the stone’s raw, natural appeal. Created by manually or mechanically splitting the stone, this finish produces a rough texture that adds depth and dimension to any space.

Why is the split-face finish so popular in feature walls and facades? Its dramatic, textured look creates a bold, eye-catching effect, perfect for adding architectural interest.

Unlike smooth finishes, the split face option highlights the stone’s natural layers and colour variations, making it an ideal choice for projects seeking an organic, earthy aesthetic. This finish is well-suited for indoor and outdoor applications, adding character and texture while maintaining a rustic charm.

Its uneven surface provides a striking contrast when paired with smoother materials like glass or metal, offering a unique design element. While the rough texture is visually appealing, it’s important to note that the surface can be more challenging to clean.

If you want to enhance a space with texture and natural beauty, the split face finish offers a dynamic solution that leaves a lasting impression.

Choosing the Right Finish for Your Project

Choosing the Right Finish for Your Project

Selecting the ideal natural stone finish is crucial for the success of your project. Factors to consider include location, usage, and aesthetics.

  • Location: Determine whether the stone will be used indoors or outdoors. Outdoor stones require finishes that can withstand weather conditions, such as a flamed or textured finish for better grip. Indoor stones can benefit from polished or honed finishes for a sleek look.
  • Usage: Consider the space’s function. High-traffic areas like floors or pathways need durable, slip-resistant finishes like bush-hammered or sandblasted. Smoother finishes, polished or honed, are suitable for decorative walls or low-traffic areas.
  • Aesthetics: Think about the overall design and style you wish to achieve. Polished finishes offer a luxurious and reflective look, while textured finishes provide a rustic and natural appearance. Match the finish with your design vision to enhance the space’s visual appeal.
  • Expert Tips: Consult with a professional to understand the maintenance requirements of different finishes. Some finishes may require more upkeep than others. Additionally, request samples to see how the finish looks in your specific environment and lighting conditions.

Conclusion

Natural stone finishes are crucial in enhancing your spaces’ aesthetics and functionality. Consult professionals for tailored advice on selecting the perfect finish for your project. Contact us for expert guidance and personalised solutions.

Importance of Paver Filling: The Hidden Secret to Long-Lasting, Flawless Outdoor Spaces

Are your pavers shifting or sinking, creating an unsightly, uneven surface?

Over time, weather and daily wear can erode the material between your pavers, leading to loose stones and water damage. Neglecting this issue can turn your outdoor area into a safety hazard and ruin its appeal.

By using the right paver-filling material, you can lock your pavers in place, prevent future damage, and keep your outdoor space looking flawless. Here’s why paver filling is essential for lasting stability. Read on.

What Is Paver Filling and Why Does It Matter?

Paver filling is the process of applying materials, such as sand or polymeric sand, between the joints of pavers to stabilise them. It prevents movement, weed growth, and water erosion, ensuring the surface remains level and durable. Proper paver filling enhances the lifespan and appearance of outdoor spaces by maintaining structural integrity.

Benefits of Paver Filling

Proper paver filling is more than just a finishing touch – it’s a key factor in maintaining the integrity of your entire installation. Here’s a look at the benefits that make paver filling essential.

1. Prevents Shifting and Movement

A well-filled surface ensures your pavers remain stable and evenly aligned over time. Pavers can loosen and shift without proper filling, leading to uneven surfaces that detract from the appearance and pose safety hazards. 

Proper filling locks the pavers in place, preventing movement and maintaining the integrity of the entire structure. 

2. Blocks Weed Growth and Insects

Filling the joints between pavers helps stop the growth of unwanted weeds, which often sprout in gaps and become a maintenance headache. 

The barrier created by filling material blocks sunlight and soil access, reducing the chances of weed growth. Additionally, insects are less likely to nest in well-filled joints, keeping pests at bay and reducing the need for regular upkeep.

3. Controls Water Erosion

Water can cause significant erosion, gradually weakening the foundation beneath the pavers. Proper paver filling directs water away from the base, minimising erosion and preventing the ground from shifting over time. 

This is particularly important in areas with heavy rainfall. By managing water flow, filling ensures that your pavers stay firmly in place, reducing the need for costly repairs and helping to avoid unsightly pooling on the surface.

4. Enhances Durability and Appearance

Filling the gaps between pavers improves the stability and appearance of your installation. A well-filled surface provides a seamless, polished finish that enhances the overall look of your outdoor area. 

Beyond aesthetics, filling boosts durability by reducing movement and wear over time. This ensures that your pavers remain functional and visually appealing for years, offering structural and aesthetic benefits.

5. Increases Safety

Loose or uneven pavers can create tripping hazards, particularly in areas with heavy foot traffic or where children play. Proper filling eliminates these gaps, ensuring the surface stays even and safe. It reduces the chances of accidents, making your outdoor space more secure for everyone. 

Whether it’s a patio, driveway, or walkway, the added safety of well-filled pavers cannot be overlooked, especially when considering long-term use.

6. Minimises Maintenance Costs

Filling pavers is an effective way to reduce future maintenance expenses. Without proper filling, pavers are more prone to shifting, cracking, and erosion, all of which require repairs or replacements over time. Addressing these potential issues early with a suitable filling material minimises the need for costly fixes. 

7. Prevents Staining and Discolouration

Filling gaps between pavers also helps in preventing staining and discolouration. When paver joints are left unfilled, debris, dirt, and moisture can settle in the gaps, causing unsightly stains that are difficult to remove. 

With the right filling material, these elements are kept out, helping to maintain the pavers’ clean and uniform look. Over time, this reduces the need for intensive cleaning and keeps your outdoor area looking fresh.

8. Strengthens Overall Structure

Proper paver filling contributes to the overall structural integrity of your paved surface. The joints help distribute pressure evenly, preventing individual pavers from bearing too much weight and cracking. 

This is especially important for areas like driveways that experience heavy loads. Using the correct filling material creates a more resilient surface that withstands both daily wear and harsh environmental conditions, ensuring long-lasting durability.

Common Issues from Improper or Missing Paver Filling

Improper or missing paver filling can lead to significant problems over time. Here are some common issues you may encounter:

  • Shifting and Uneven Surfaces: Without proper filling, pavers can shift and create an uneven surface, which is unsightly and poses a safety hazard.
  • Water Erosion: Water can seep into the gaps, eroding the base beneath the pavers, leading to sinking and cracking over time.
  • Weed and Moss Growth: Unfilled joints provide an ideal environment for growing weeds and moss, further destabilising the surface.
  • Pest and Insect Infestations: Gaps in the pavers can become nesting spots for pests and insects, causing additional issues.
  • Frequent Repairs: In high-traffic areas, the movement of unfilled pavers can lead to more frequent repairs, ultimately reducing the lifespan of your paved surface.
  • Reduced Durability: Over time, missing or improper filling compromises the structural integrity, leading to costly reinstallation.

How to Choose the Right Paver Filling Material

Choosing the suitable paver-filling material can make all the difference in ensuring the stability and longevity of your outdoor space. The correct choice depends on several important factors, from the type of pavers to their environment. Here’s how to make the best decision for your project:

1. Understand Your Paver Type

The type of pavers you’re working with will determine the most suitable filling material. For example, some pavers work well with traditional sand, while others require stronger materials like polymeric sand to hold up over time. Ensuring that the filling material complements your pavers is crucial for both durability and appearance, helping you achieve a smooth, long-lasting surface.

2. Consider the Climate

The local climate plays a significant role in determining the best filling material. In areas with heavy rainfall or freezing conditions, a material that resists water absorption and frost damage is essential. 

Polymeric sand, which hardens when exposed to water, is ideal for such environments. Choosing a climate-appropriate filling material helps protect your pavers from weather-related issues like erosion or frost heave.

3. Think About Maintenance Requirements

Some materials, such as regular sand, may require more frequent maintenance due to their tendency to shift over time. Polymeric sand, however, hardens and stays in place, reducing the need for reapplication. When selecting the right filling material, consider how much time and effort you will invest in maintaining your pavers.

4. Evaluate Traffic and Use

Opt for a more durable filling material if your pavers are installed in high-traffic areas like driveways or patios. Polymeric sand is a great option, as it resists shifting and compacts well under pressure. For less frequently used areas, traditional sand may be sufficient. 

5. Aesthetic Considerations

Beyond functionality, the filling material should also complement the look of your pavers. Different filling materials come in various colours and textures, allowing you to match the aesthetic of your outdoor space. 

Step-by-Step Guide to Proper Paver Filling

Filling paver joints correctly ensures stability, durability, and a clean finish. You can achieve a beautiful, long-lasting paved surface by following the right steps. Here’s a step-by-step guide to help you fill your pavers effectively:

Step 1. Clean the Paver Area

Begin by thoroughly cleaning the paver surface, removing all dirt and debris between the joints. This ensures that the filling material properly settles and bonds with the pavers. Using a broom or blower helps clear out loose particles, creating a clean foundation for the filler. Proper preparation is crucial for long-lasting results.

Step 2. Spread the Filling Material

Once the surface is clean, spread the filling material evenly over the pavers. Use a stiff brush to sweep the sand or polymeric sand into the joints, thoroughly filling all gaps. Taking time to distribute the material properly prevents future movement and maintains the stability of the paver surface.

Step 3. Compact the Pavers

Compaction is crucial in locking the filling material in place. Use a plate compactor or a hand tamper to compact the pavers, settling the filler into the joints. This step helps prevent shifting over time and contributes to the overall durability of the installation.

Step 4. Reapply and Fill Gaps

After compacting, add more filler to ensure all gaps are fully filled. Spread additional sand as needed and sweep it into any remaining open joints. Reapplying filler after compaction helps achieve a solid, secure paver installation with no loose areas.

Step 5. Lightly Mist the Area

Use a garden hose to lightly mist the entire paver area lightly, especially when using polymeric sand. Water activates the binding agents in polymeric sand, helping it harden and lock in place. Avoid oversaturating, as too much water can cause erosion or wash out the filler.

Step 6. Allow Proper Drying Time

Finally, allow the area to dry completely. This is particularly important when using polymeric sand, as proper drying ensures the joints harden effectively. Leaving sufficient time for drying helps secure the pavers and prevent shifting, giving you a stable and durable paved surface.

Maintaining Paver Filling for Long-term Success

Regular maintenance is essential to ensure your paver filling stands the test of time. Here are some essential tips for maintaining your paver filling for long-term success:

  • Inspect Joints Regularly: Periodically check the paver joints for signs of wear, such as gaps or erosion. Early detection of issues allows for quick repair, maintaining the stability of your paved surface.
  • Refill Joints as Needed: If gaps or erosion are found, promptly refill the joints. Adding more filling material ensures your pavers remain stable and secure.
  • Remove Weeds Promptly: Weeds can grow between the pavers and destabilise the filling material. Remove any weeds as soon as they appear to prevent further damage.
  • Sweep in More Filling Material: Occasionally sweep more sand into the joints to fill areas that may have settled or washed out. This simple step keeps the filling material even and effective.
  • Reapply Filling Material After Heavy Rain: Rain and weathering can displace filling material, making reapplication necessary. Top up the filling after heavy rains to maintain its integrity.
  • Use a Sealant for Added Protection: A sealant can protect the filling material from water damage, keeping it in place longer. This helps prevent erosion and increases the durability of your paver surface.

Conclusion

Proper paver filling is crucial to maintaining stability, preventing damage, and enhancing the overall appearance of your paved surfaces. 

This critical step is necessary to avoid costly issues down the road. Invest in quality paver filling today to ensure your outdoor space stays beautiful and durable. Contact us for expert advice or professional installation services.

In SQM?

Please fill your details to download.


      Request Callback


        Enquiry Form


        Please fill your details to download.