Register your Information for Free Stone Samples Sent Express to You!

Search
Search
Close this search box.
Search
Close this search box.

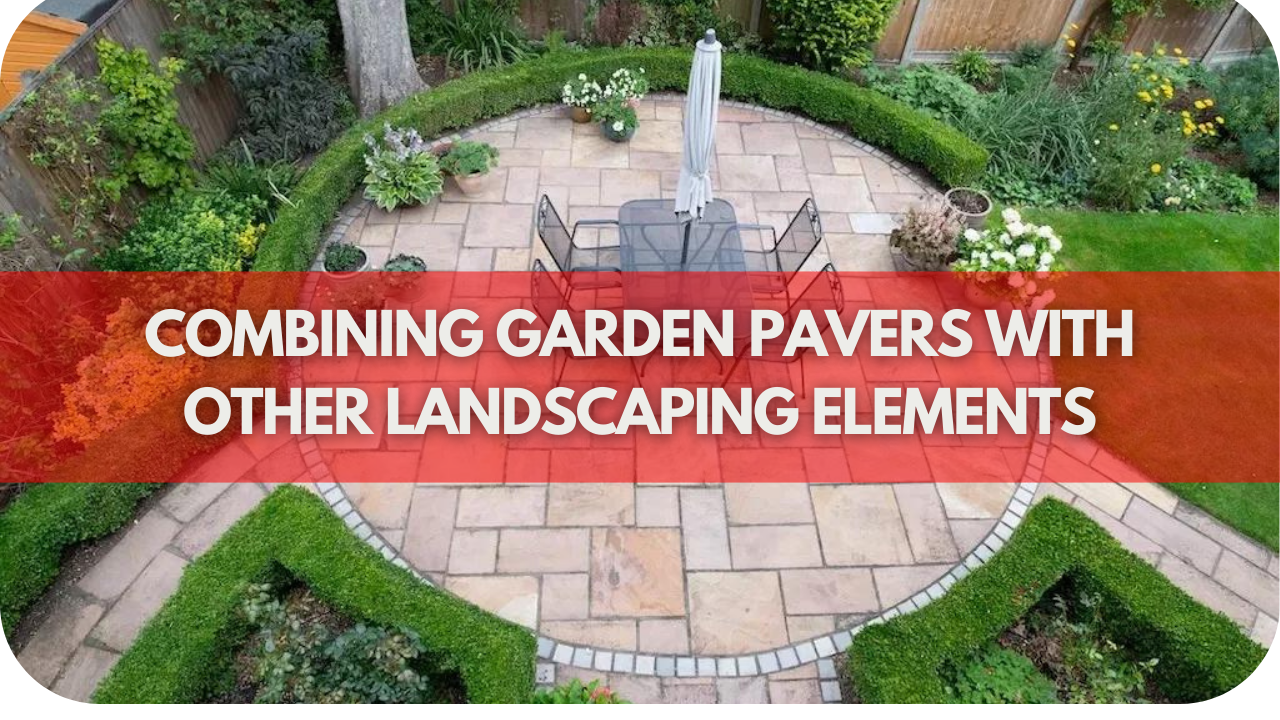
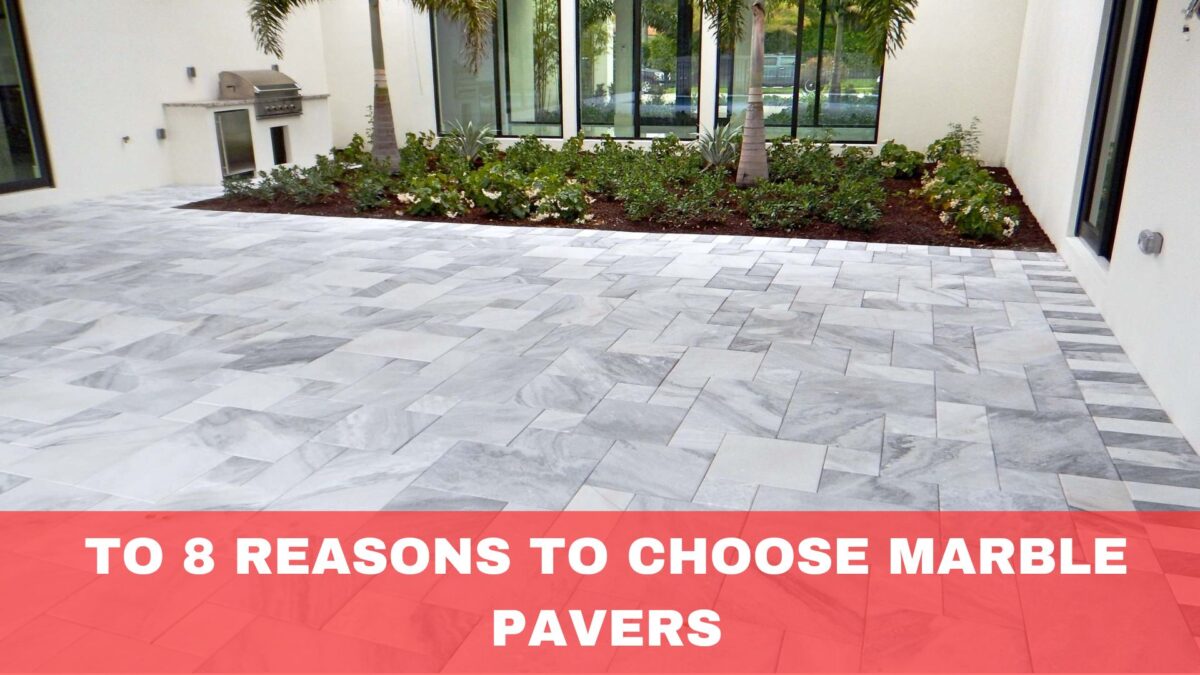
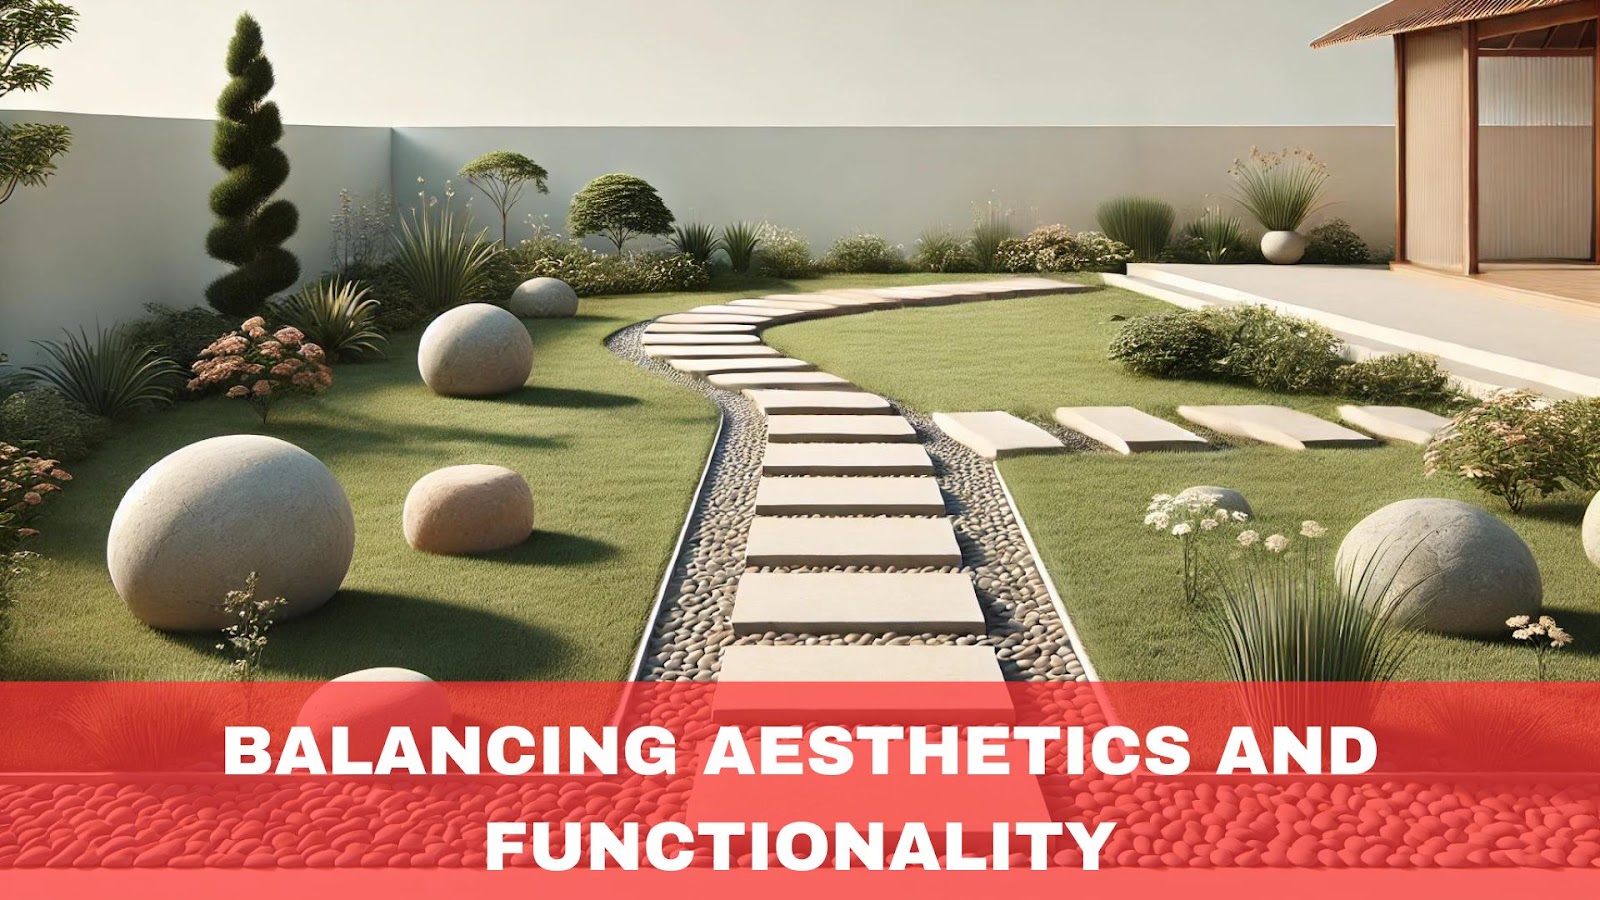
6 Reasons Marble Pavers are Ideal for Pools, Patios & Driveways

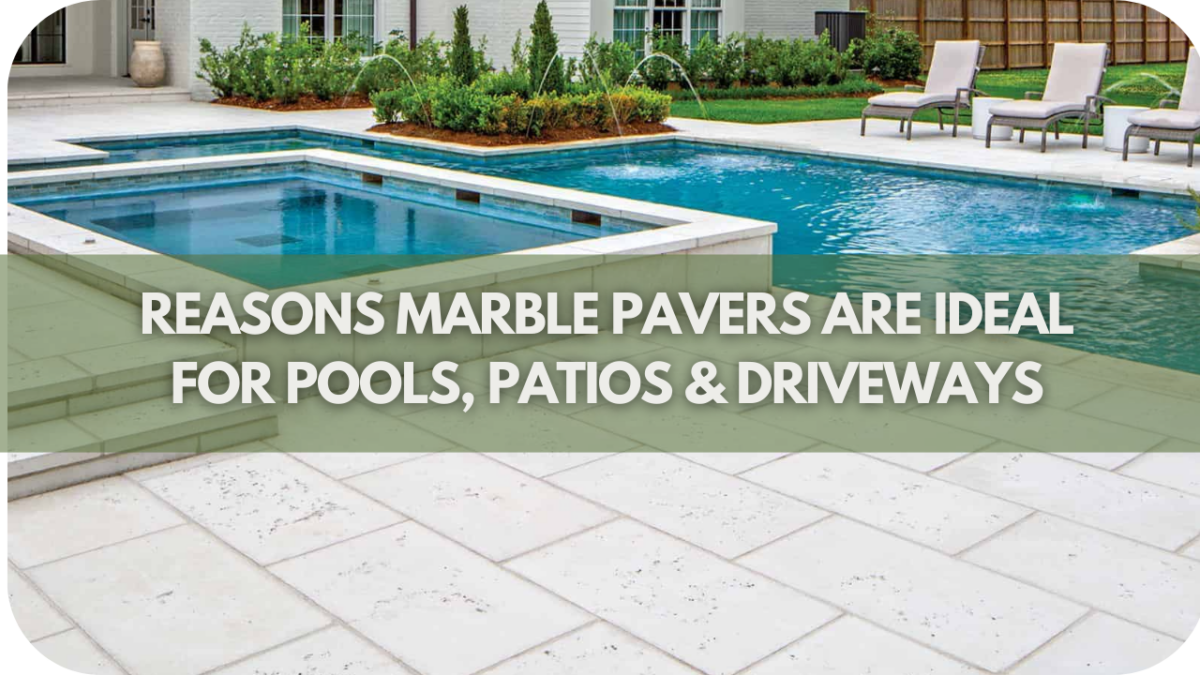
Are you tired of dull, cracked surfaces that mar the beauty of your outdoor spaces? Whether it’s the weathered look of your patio or the lacklustre driveway, the struggle to maintain aesthetics is real.

Marble pavers offer a luxurious solution. Discover how these elegant stones enhance the charm of your poolside and bring durability and sophistication to your patios and driveways. Say goodbye to mundane surfaces and welcome the timeless allure of marble.
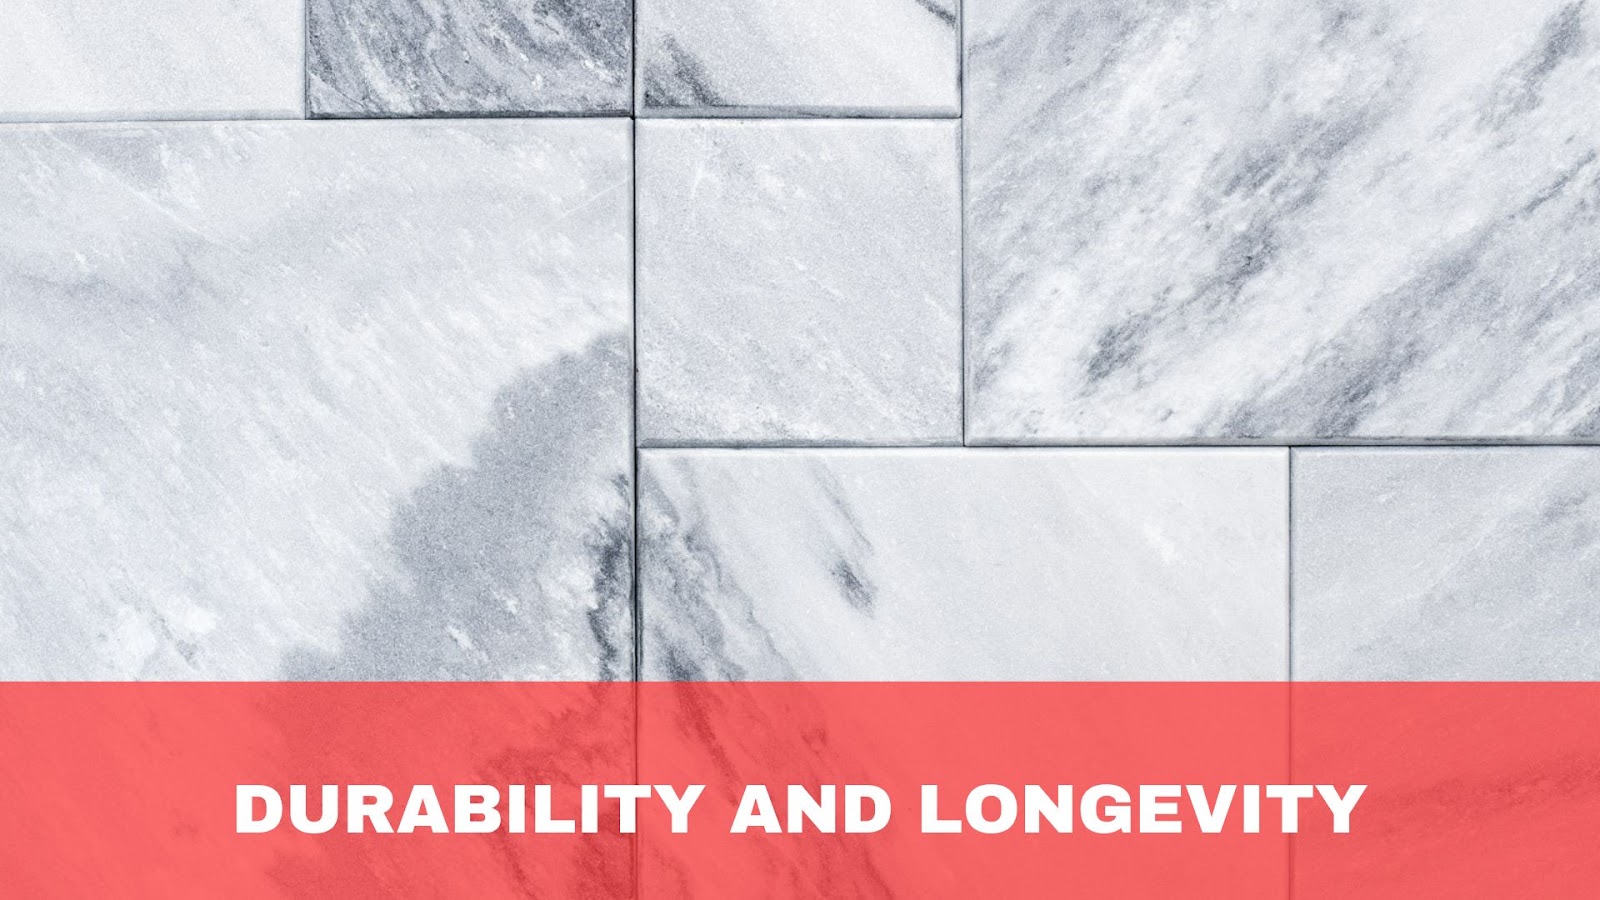
1. Durability

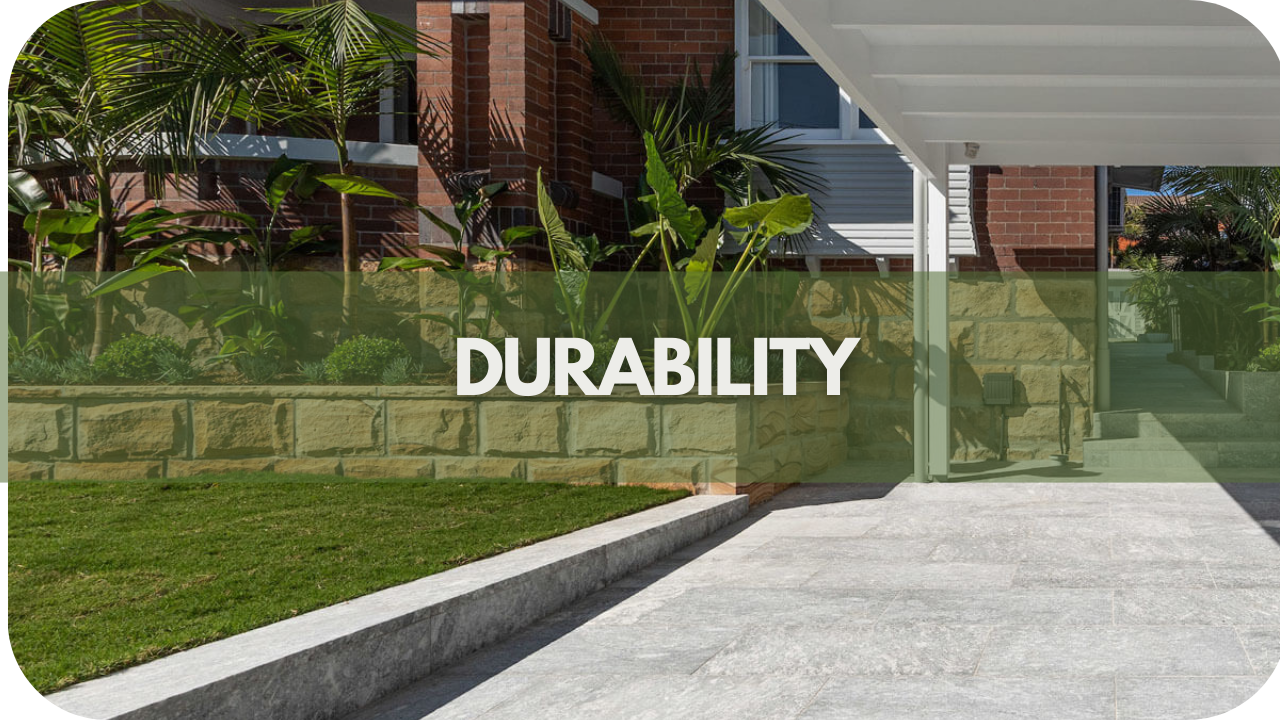
Marble, forged under immense pressure, boasts an inherent durability that makes it an exceptional choice for high-traffic areas like pools, patios, and driveways.

Its dense composition resists scratches, chips, and cracks, ensuring your surfaces remain pristine even with daily wear and tear.

Unlike other materials that may fade or deteriorate over time, marble’s colours remain vibrant, maintaining its luxurious appeal for years.

Whether it’s the weight of vehicles on your driveway or the constant footfall around your pool, marble pavers can withstand the heaviest loads without compromising on style. This resilience guarantees longevity and saves you the hassle and expense of frequent repairs or replacements.

Investing in marble pavers is a testament to quality. They provide a lasting foundation for outdoor spaces that can be enjoyed by generations to come.
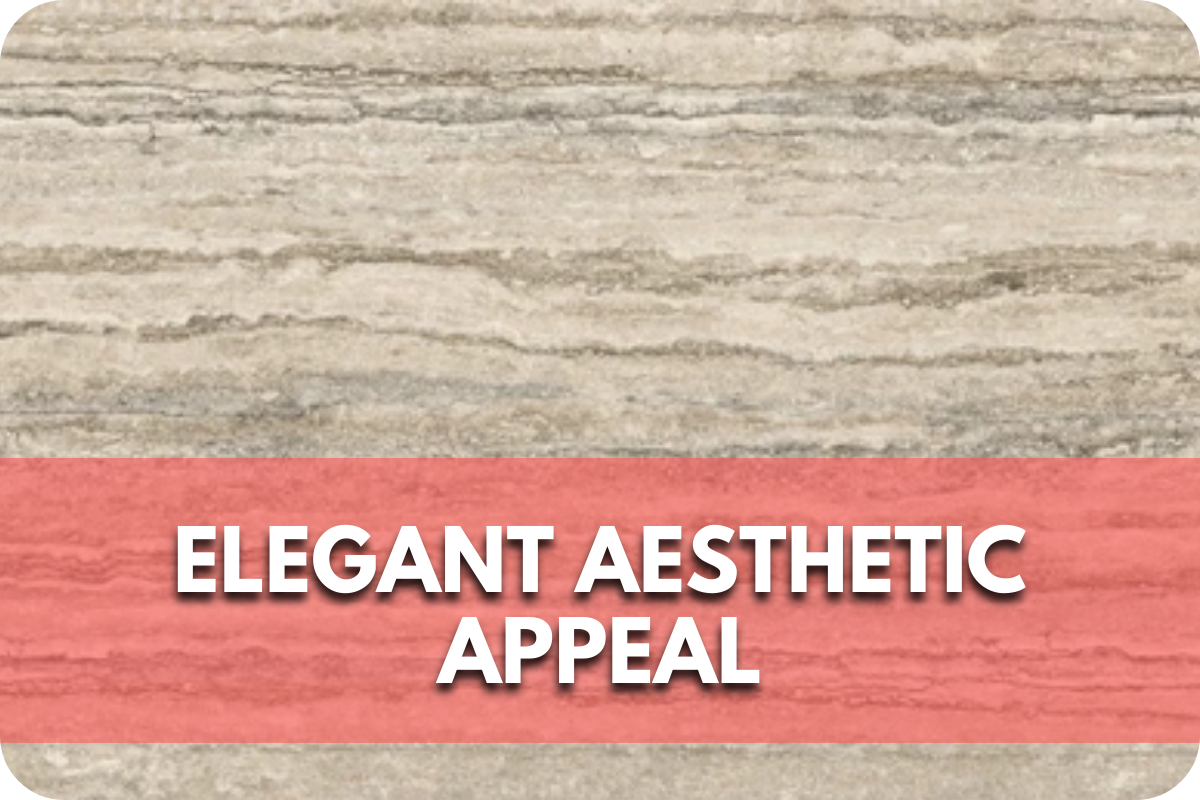
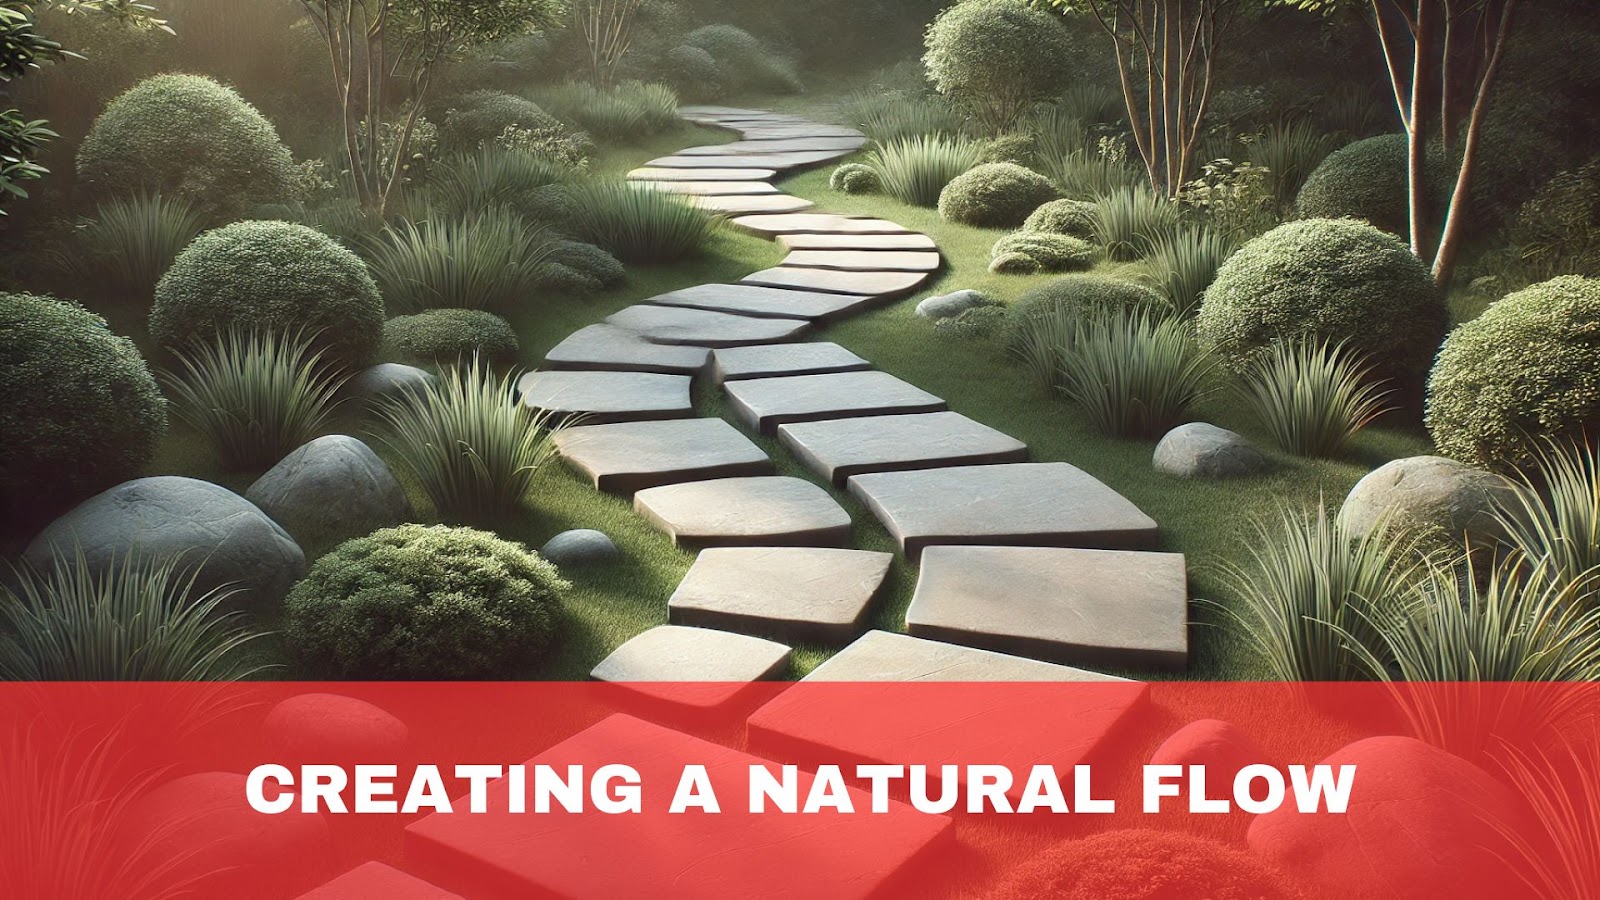
2. Aesthetic Appeal

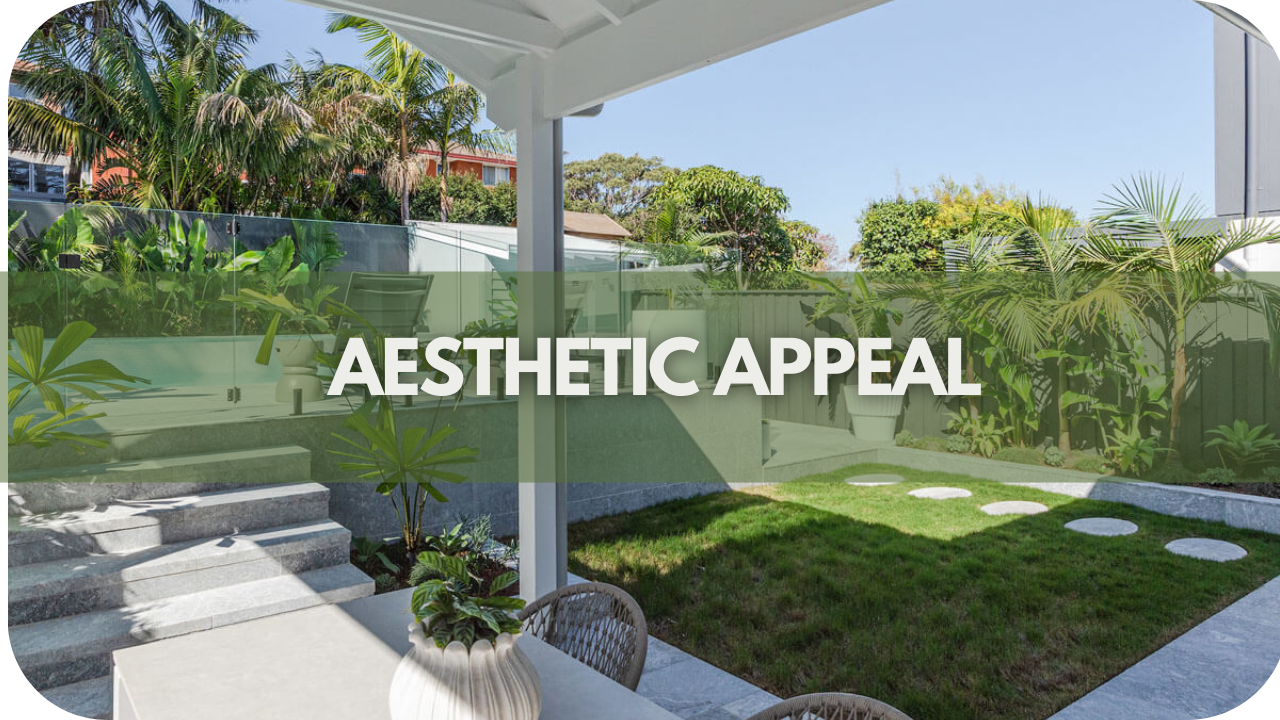
Marble pavers are renowned for their timeless aesthetic appeal, making them an exceptional choice for enhancing the visual allure of pools, patios, and driveways. The natural elegance of marble lies in its unique veining and colour variations, which create a luxurious and sophisticated appearance.

Each marble paver is distinct, with patterns that range from subtle to striking, offering endless possibilities for customisation. This natural variation means no two marble installations are identical, adding a unique character to your outdoor spaces.

The way marble interacts with light further enhances its aesthetic value. Its reflective surface can create a luminous effect, adding depth and dimension to your outdoor areas.

This quality is particularly effective around pools, where the water and marble work together to create a shimmering, tranquil environment. Moreover, marble pavers are available in various finishes, from polished to honed, allowing you to tailor the look to match your design vision.

Marble’s versatility extends across different architectural styles, seamlessly integrating modern and traditional designs. Whether your home features sleek, contemporary lines or classic, ornate details, marble pavers can enhance and complement the overall aesthetic. 

Their natural beauty is also enduring, ensuring that your outdoor spaces remain elegant and attractive for years. Choosing marble pavers is not just about selecting a building material; it’s about investing in a timeless beauty that will elevate your property’s appeal and value.
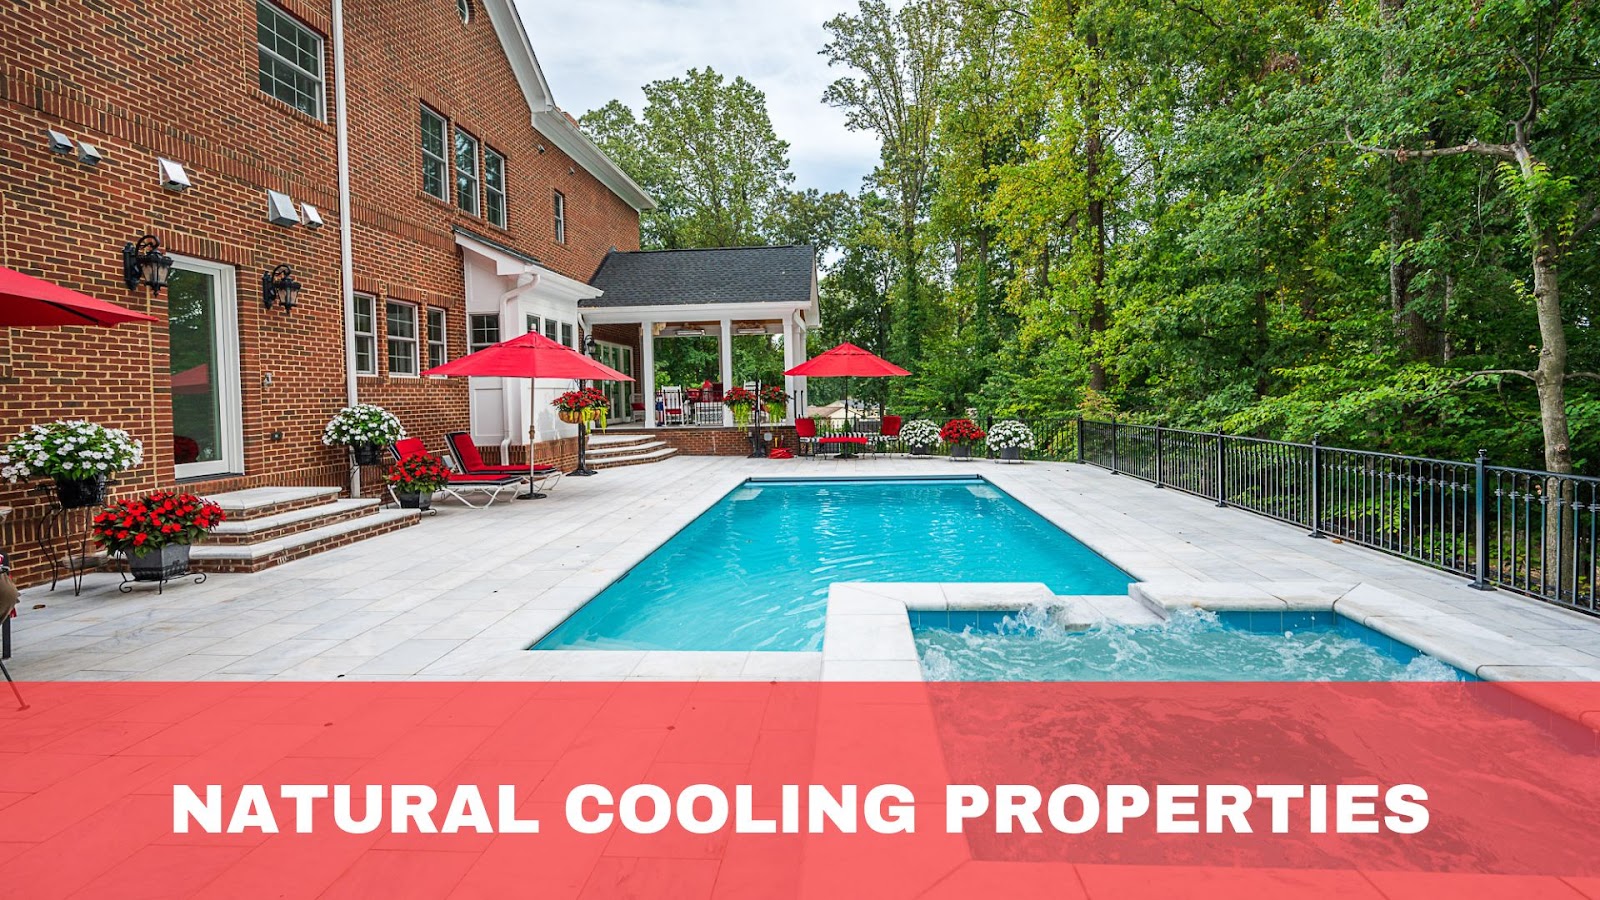
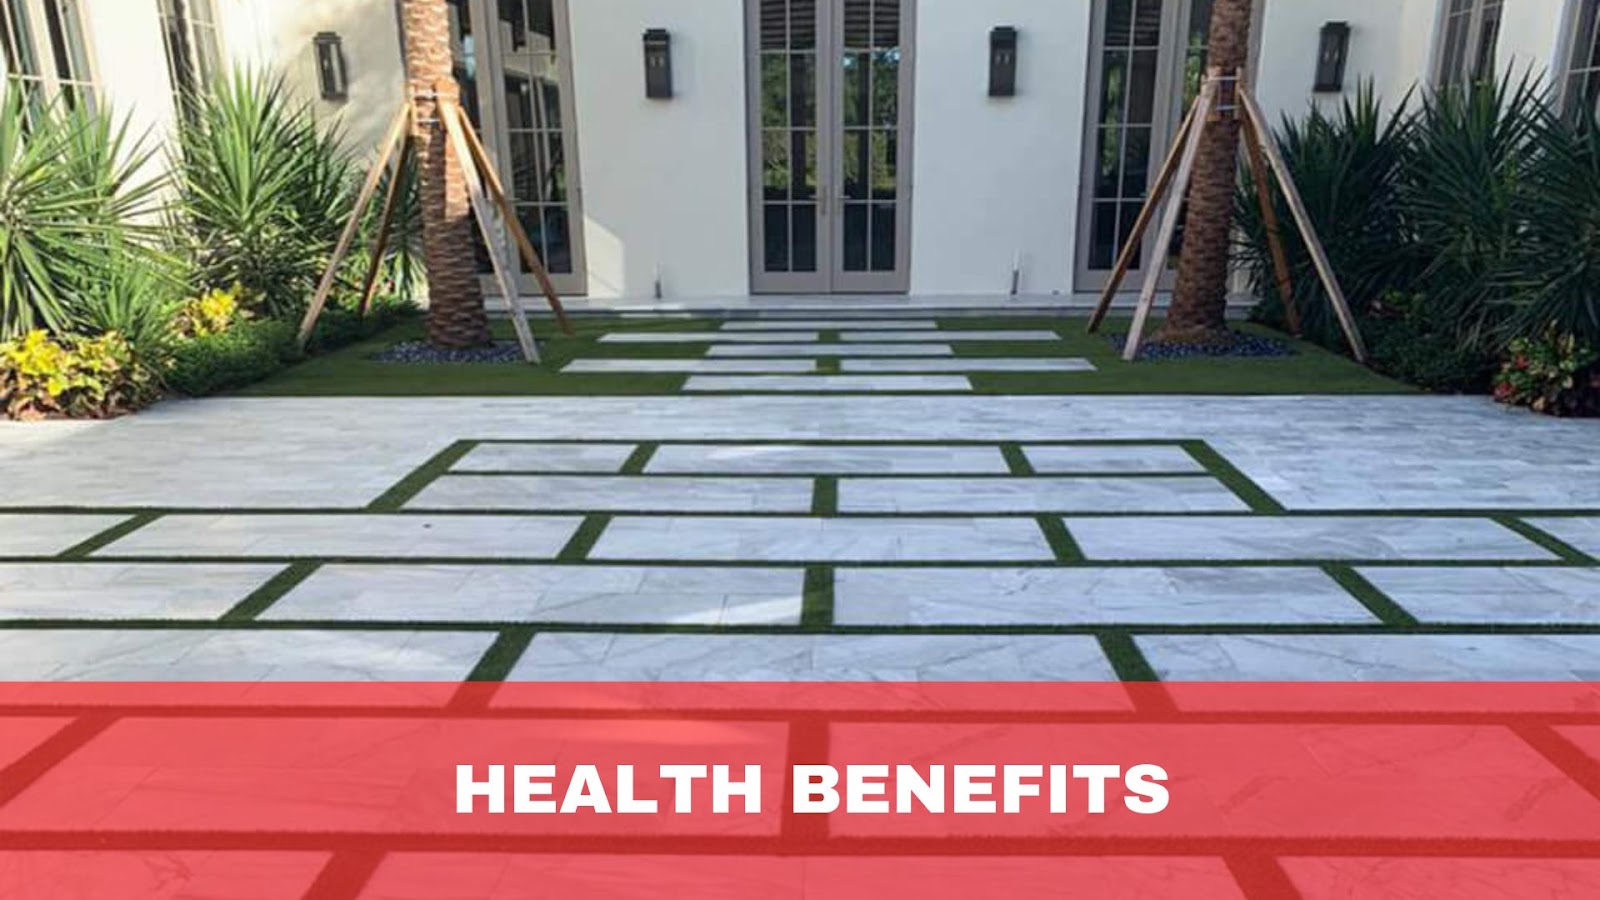
3. Heat Resistance

One of the standout features of marble pavers is their excellent heat resistance, making them an ideal choice for outdoor areas like pools, patios, and driveways. Unlike many other natural stones, marble remains cool to the touch, even under the intense heat of the summer sun.

This natural ability to stay cool provides a comfortable barefoot surface around pool areas, reducing the risk of burns or discomfort, especially in high-temperature climates.

Marble’s heat resistance is due to its low thermal conductivity, which absorbs and retains less heat than other materials. This characteristic makes marble pavers more comfortable to walk on and helps keep the surrounding environment cooler, contributing to a more pleasant outdoor living experience.

Whether lounging by the pool, hosting a summer barbecue on your patio, or parking your car on the driveway, marble pavers ensure the surface remains cool and comfortable.

In addition to comfort, marble’s heat resistance also enhances its durability. By not retaining excessive heat, marble pavers are less likely to crack or suffer from heat-related damage, ensuring they remain in pristine condition for years to come. This makes marble pavers a smart investment for anyone who combines beauty with practicality in their outdoor spaces.
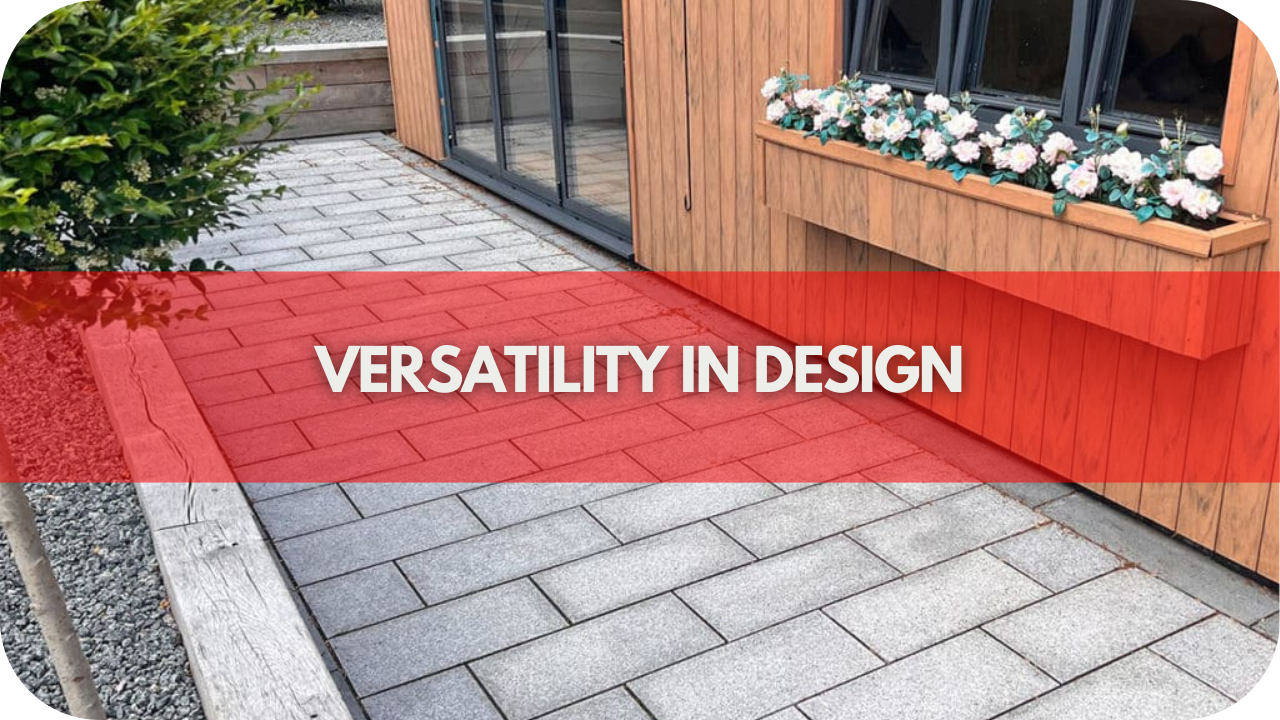
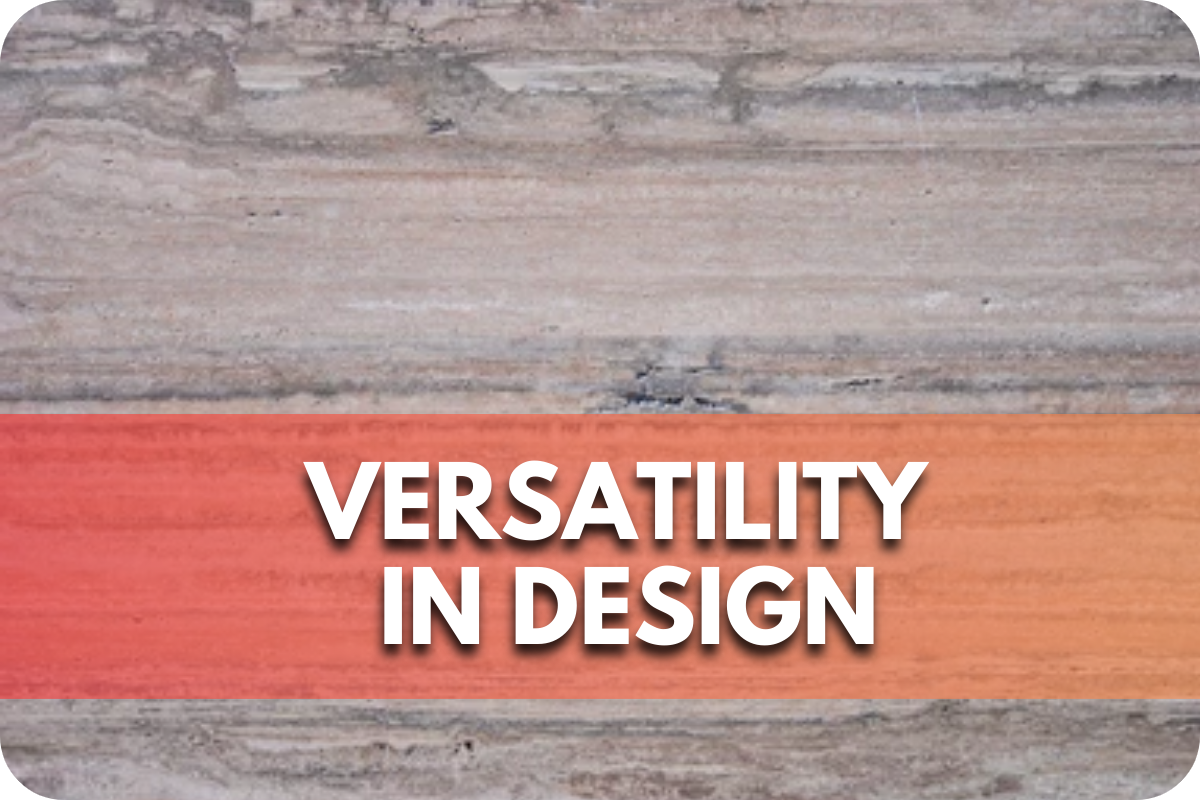
4. Versatility

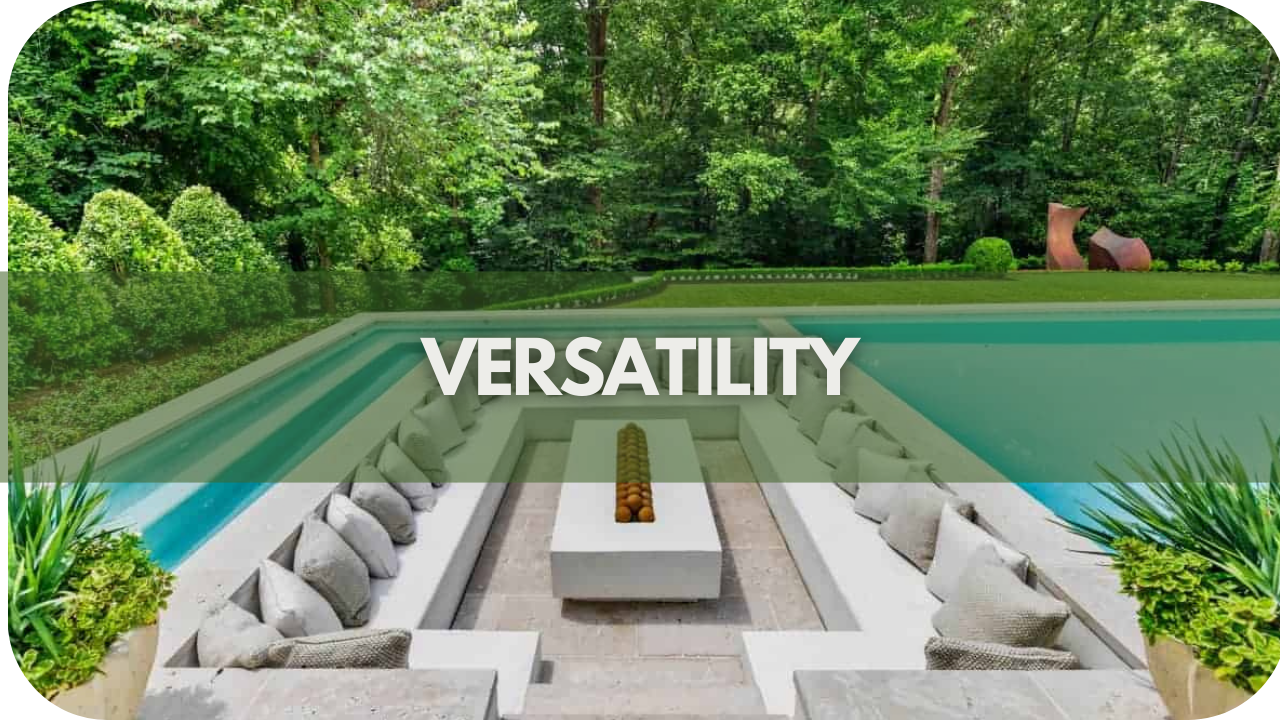
Marble pavers are renowned for their versatility, ideal for pools, patios, and driveways. Their natural beauty and wide range of colours and patterns allow seamless integration into various design styles, from classic to contemporary.

This adaptability means you can create a cohesive look throughout your outdoor spaces, enhancing the overall aesthetic appeal.

Marble’s inherent strength and durability make it suitable for high-traffic areas like driveways, where it can withstand significant wear and tear. They also remain cool underfoot, providing comfort even on the hottest days.

Additionally, marble’s ability to be cut into various shapes and sizes means it can be customised to fit any layout or design vision. Whether you want intricate mosaic patterns or simple, clean lines, marble pavers can be tailored to meet your requirements.
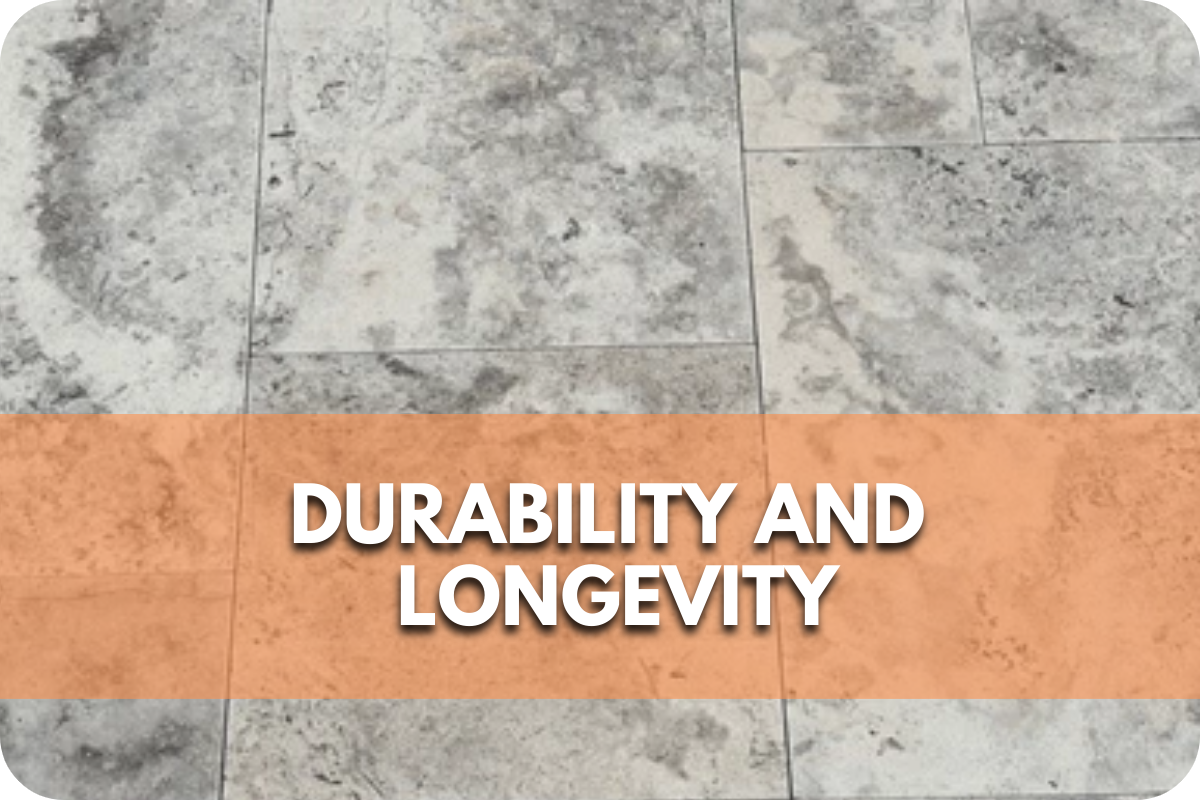
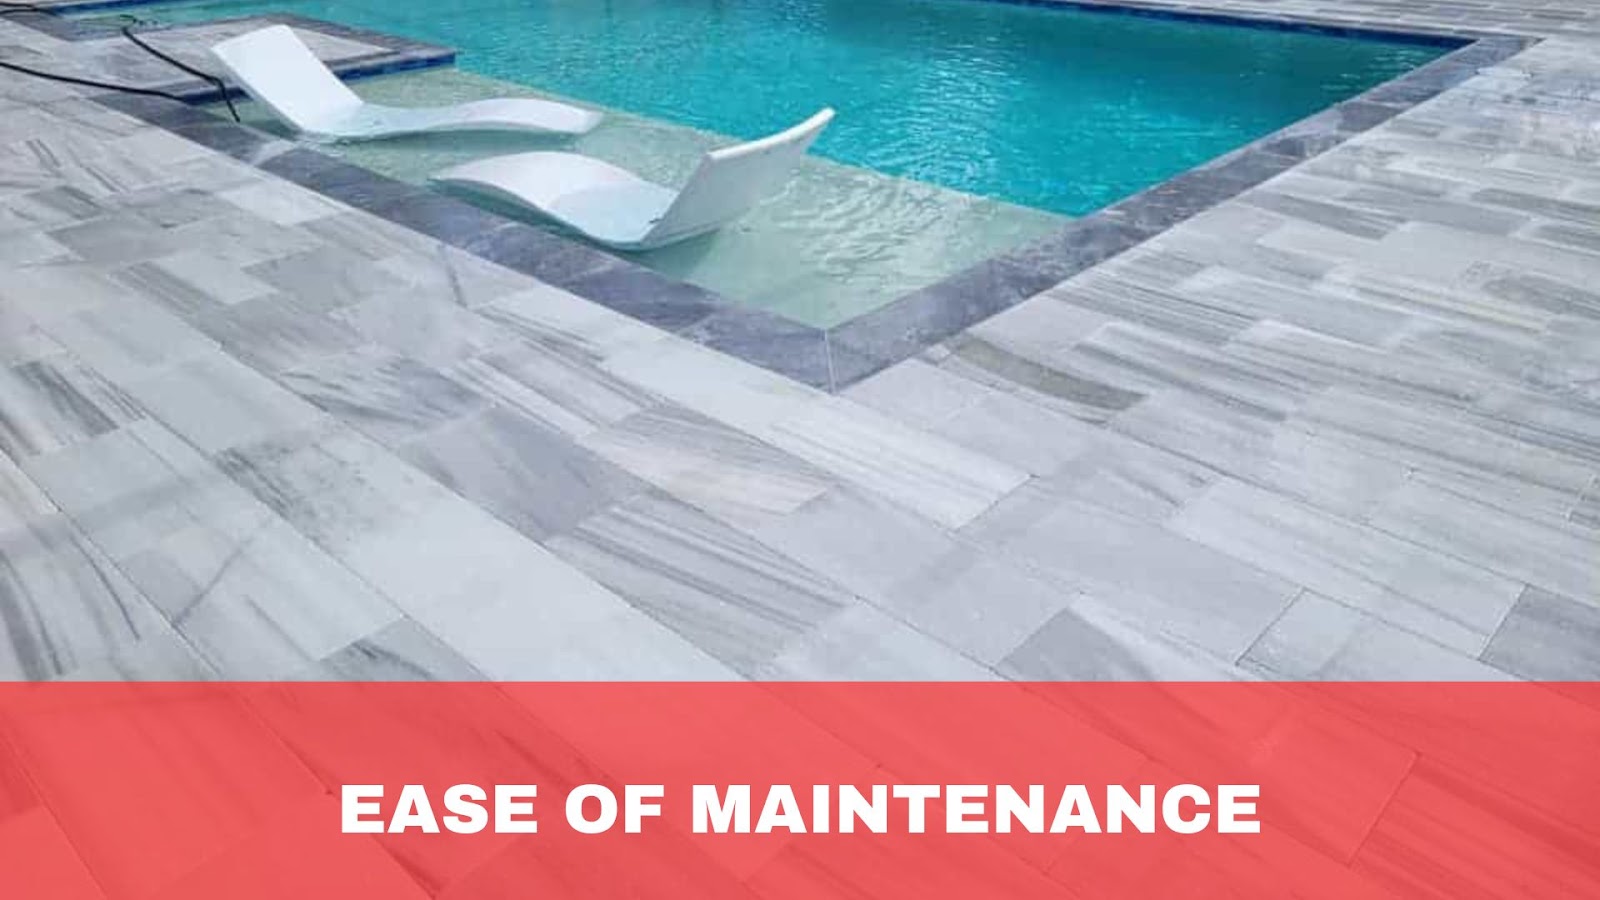
5. Longevity

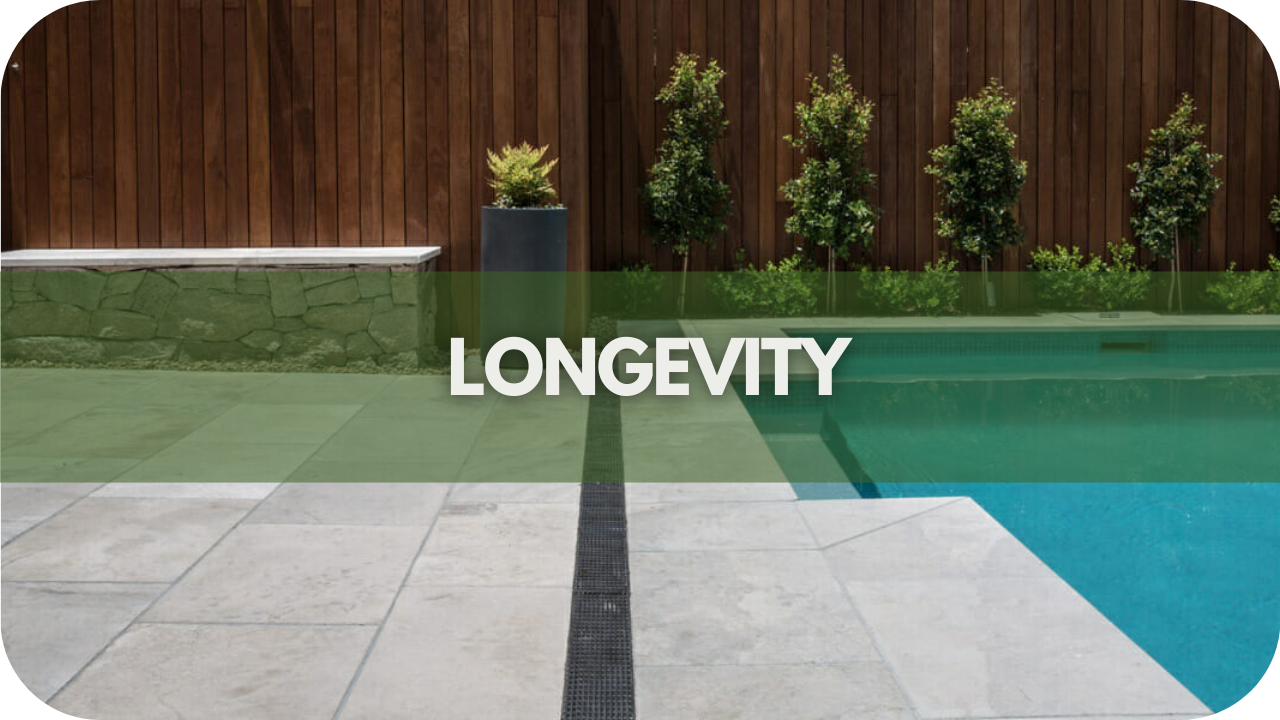
Marble pavers are an excellent choice for outdoor spaces due to their exceptional longevity. Known for their durability, marble pavers can withstand the elements, from intense sun and rain to frost and snow, without losing their structural integrity or aesthetic appeal.

This resilience makes them particularly suitable for high-traffic areas like driveways, where they can endure constant use and heavy loads without cracking or deteriorating.

One of the key attributes contributing to the longevity of marble pavers is their density and hardness. This natural stone is less porous than many other paving materials, reducing the likelihood of water infiltration and the associated risks of damage from freeze-thaw cycles. Additionally, marble’s resistance to abrasion maintains its smooth, elegant surface even after years of use.

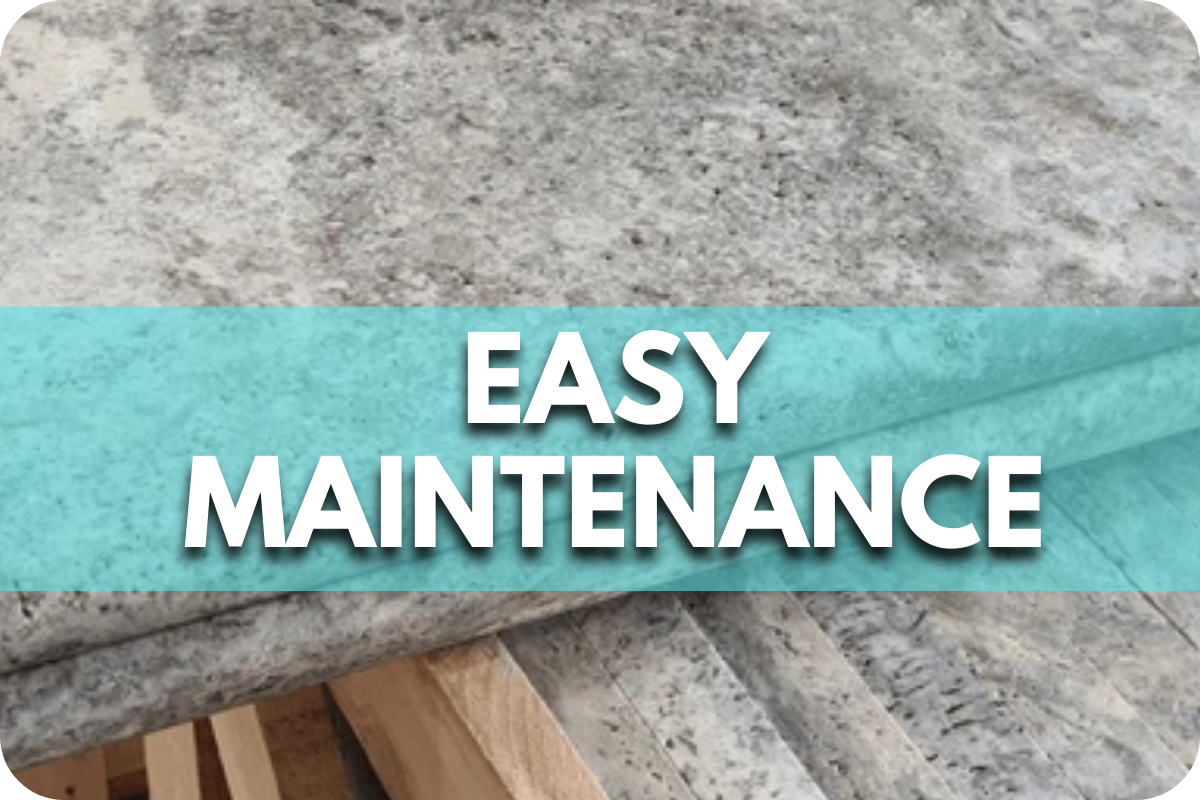
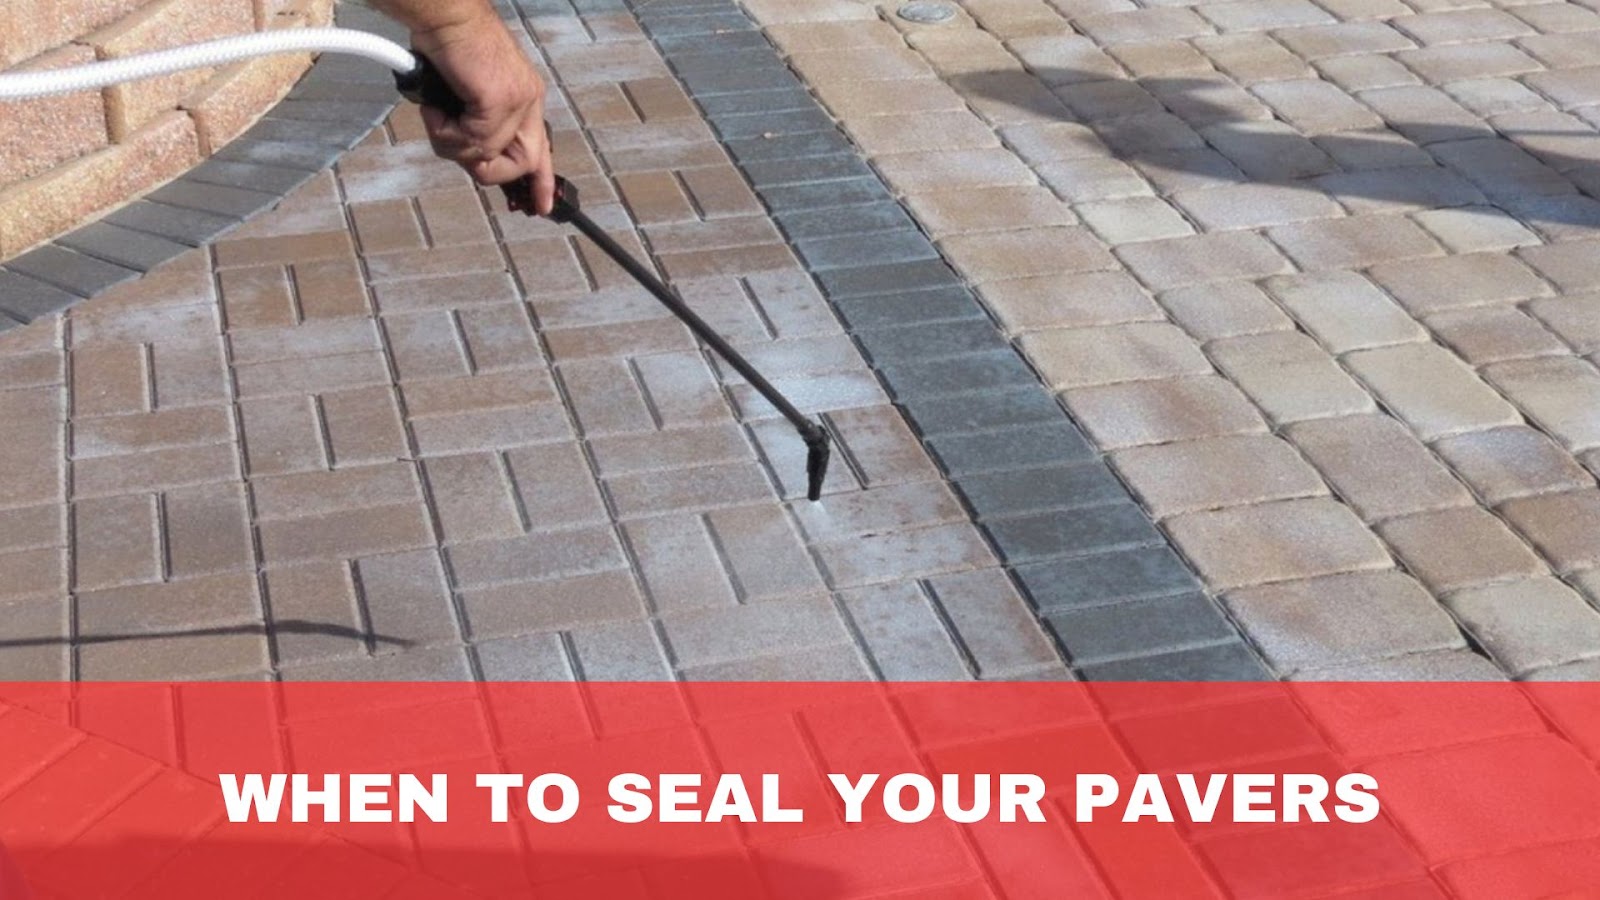
Proper maintenance further enhances the lifespan of marble pavers. Regular sealing can protect the stone from staining and weathering, ensuring it retains its pristine appearance.

When properly cared for, marble pavers can last for decades, making them a cost-effective investment for homeowners seeking long-term solutions for their pools, patios, and driveways.
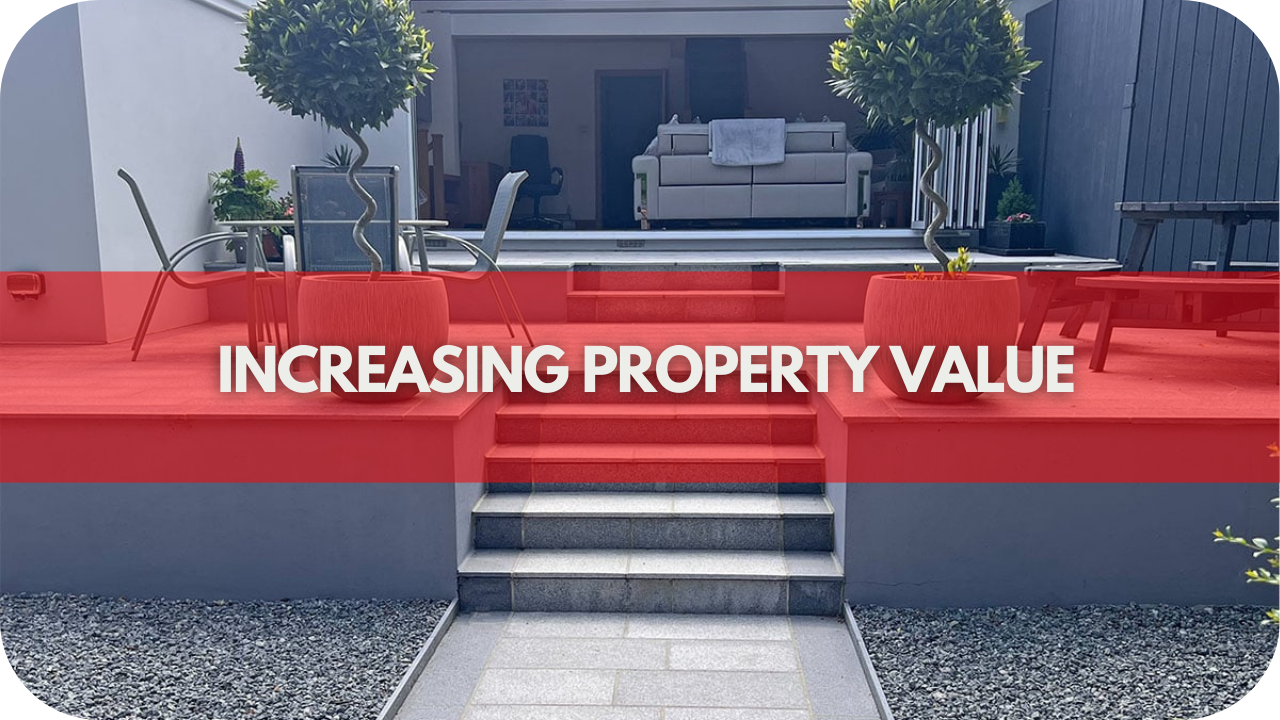
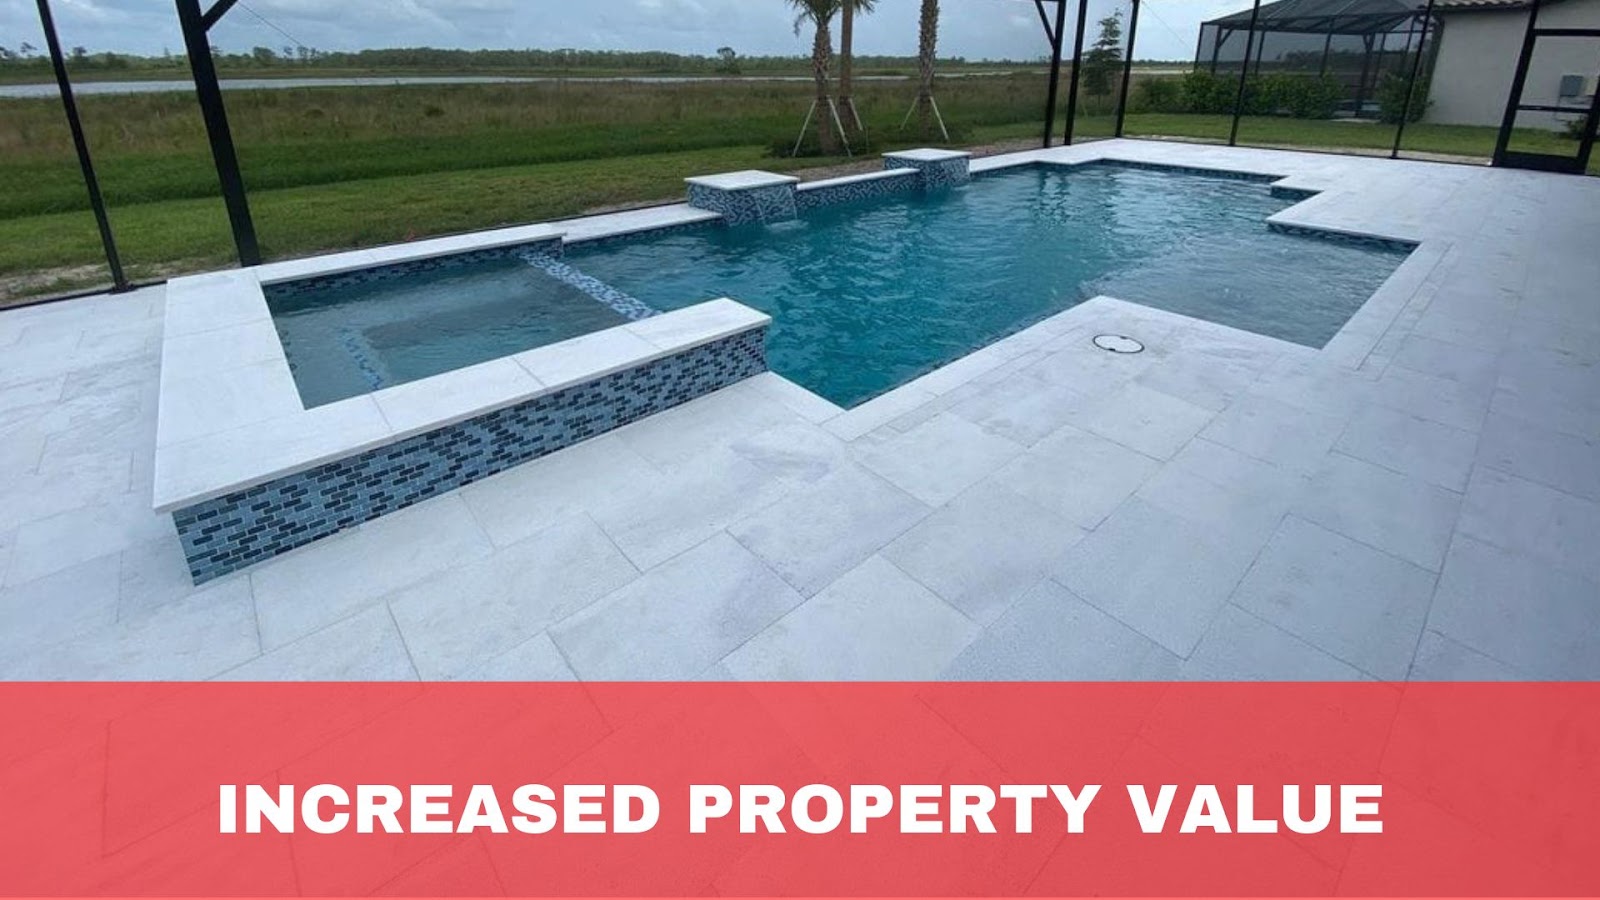
6. Investment Value

Marble pavers offer significant investment value, making them a smart choice for enhancing pools, patios, and driveways. One of the primary reasons for this is their timeless appeal and luxurious aesthetic. Marble’s natural beauty and elegance can elevate the look of any outdoor space, potentially increasing the property’s market value and curb appeal.

In addition to their aesthetic benefits, marble pavers are known for their durability and longevity. This means they require less frequent replacement than other materials, resulting in long-term cost savings.

While marble pavers may cost more initially, their extended lifespan and minimal maintenance make them a cost-effective investment.

Marble’s versatility also contributes to its investment value. Its ability to complement various architectural styles ensures it remains desirable, regardless of changing trends. This adaptability can make your property more attractive to potential buyers should you sell.

Moreover, well-maintained marble pavers can retain their pristine appearance for decades, preserving the value of your investment.

Conclusion

Marble pavers offer unmatched elegance, durability, and comfort, making them the perfect choice for outdoor spaces. Whether you’re designing a poolside haven, a stylish patio, or a grand driveway, marble delivers both beauty and functionality. Ready to elevate your outdoor living? Contact Splendour In Stone today to explore our exquisite marble paver collection.

How to Repair a Broken Driveway Paving Stone in 3 Steps

A broken paving stone on your driveway can be both unsightly and unsafe. if left unrepaired, it can lead to further damage, increased repair costs, and even potential accidents.

Learn how to fix a broken driveway paving stone in three simple steps. Our straightforward guide will help you assess the damage, remove the broken stone, and install a new one, restoring your driveway’s appearance and safety efficiently.

Tools and Materials Needed

Before you begin the process of repairing your broken driveway paving stone it’s crucial to gather all the necessary tools and materials. Having everything prepared will ensure a smooth and efficient repair process. Here’s what you’ll need:

Tools:

  • Hammer: Essential for breaking up the damaged paving stone.
  • Chisel: Useful for chiselling out broken pieces.
  • Pry Bar or Crowbar: Helps lift out the broken pieces of the paving stone.
  • Safety Gloves: Protect your hands from sharp edges and debris.
  • Safety Goggles: Shield your eyes from dust and small particles during the removal process.
  • Broom: Necessary for cleaning the area around the damaged stone.
  • Level: Ensures the base is flat and the new stone is aligned correctly.
  • Rubber Mallet: Used to gently tap the new paving stone into place without causing damage.

Materials:

  • Replacement Paving Stone: Ensure it matches the size, shape, and material of the existing stones.
  • Mortar or Adhesive: Used to secure the new stone in place. Choose a product suitable for the type of paver and the conditions.
  • Sand: For creating a stable and level base layer.
  • Bedding Sand or Gravel (if needed): Used for additional base material if the underlying gravel is damaged or needs replenishing.
  • Jointing Compound or Polymeric Sand: Used to fill the joints between the paving stones and secure them in place.

Step 1: Removing the Broken Paving Stone

The first step in repairing a broken driveway paving stone is to carefully remove the damaged stone without disturbing the surrounding area. This process requires precision and patience to ensure that the adjacent stones and base layers remain intact.

1. Assessing the Damage

Before beginning the repair, thoroughly assess the damage to the paving stone. Check if the stone is cracked, chipped, or shattered, and decide if it can be repaired or needs replacement. 

Inspect the surrounding area for additional damage and signs of settling or shifting in adjacent pavers, which could indicate underlying issues. Evaluate the stability and cleanliness of the base; any instability must be addressed before installing a new stone.

Based on your assessment, gather the necessary tools and materials to ensure a smooth and efficient repair process. Proper preparation is crucial for achieving a successful and lasting repair.

2. Preparing the Area

Clear the Area; remove any debris, dirt, or loose materials around the damaged stone. This will provide a clean workspace and prevent any foreign objects from interfering with the repair.

Secure Surrounding Stones; ensure the stones adjacent to the broken ones are secure. You can use small pieces of wood or wedges to hold them in place during the repair.

3. Removing the Stone

Break the damaged stone using a hammer and chisel, and start breaking the damaged stone into smaller, more manageable pieces. Begin at the edges and work your way towards the centre. Be cautious and controlled to avoid damaging nearby stones.

Lift out the pieces; once the stone is broken into smaller pieces, use a pry bar to lift them out. Insert the pry bar into the gaps created by the chisel and gently lever the pieces out of the ground. Continue this process until all fragments of the broken stone are removed.

After removing the stone, use a broom to sweep away any remaining debris, sand, or small fragments from the base. This step is crucial to ensure a clean and level surface for the new paving stone.

Step 2: Preparing the Base for the New Paving Stone

Preparing the base is a crucial step to ensure the new paving stone sits correctly and remains stable over time. A well-prepared base will prevent future issues and provide a solid foundation for the replacement stone.

1. Checking the Base

After removing the broken stone, inspect the exposed base layer. Look for any signs of damage, such as erosion, unevenness, or insufficient depth. A damaged base can compromise the stability of the new stone. Assess the need for additional material; determine if you need to add more base material, such as gravel or sand, to achieve the necessary depth and stability.

2. Levelling the Base

If the base layer is too shallow or damaged, add a layer of gravel. Spread it evenly and use a compactor to compress it, ensuring a solid foundation that also aids with drainage. Once the gravel is properly laid, add a layer of sand on top.

Use a straightedge or a piece of wood to spread the sand evenly across the bas; making sure the sand layer is level and about 1-2 inches thick.

Next, compact the sand layer using a hand tamper or a mechanical compactor. This process ensures the sand is firm and level, providing a stable base for the new paving stone.

Finally, place a level across the sand layer to check for evenness. Adjust as necessary by adding or removing sand until you achieve a perfectly level surface.

3. Ensuring Proper Base Preparation

Ensure the entire base area is uniformly compacted and level. Any unevenness can cause the new stone to settle unevenly, leading to instability and potential future damage.

The depth of the base layer should match the thickness of the paving stones used in your driveway. This ensures a flush and seamless fit with the surrounding stones.

Step 3: Installing the New Paving Stone

With the base properly prepared, the next step is to install the new paving stone. This process involves careful placement and alignment to ensure a seamless and durable repair.

1. Placing the Replacement Stone

Choose a paving stone that matches the size, shape, and material of the existing stones in your driveway. This will ensure a consistent appearance and fit.

Carefully place the new paving stone into the prepared base. Ensure that it is oriented correctly to match the pattern of the surrounding stones.

Gently lower the stone into the sand base, making sure it sits evenly. Avoid dropping it forcefully, as this can disturb the base layer.

2. Ensuring Proper Alignment

Check the alignment; use a level to ensure the new paving stone is perfectly aligned with the surrounding stones. The top surface of the new stone should be flush with the adjacent stones, creating a smooth and even surface.

Adjust as necessary; if the stone is not level lift it out and adjust the sand base by adding or removing sand as needed. Reposition the stone and check the alignment again.

Once the stone is correctly positioned and aligned, use a rubber mallet to tap it gently into place. This helps to secure the stone and ensure it sits firmly in the base.

3. Filling the Joints

Apply jointing compound or polymeric sand over the entire area, making sure it fills the gaps between the paving stones. These materials help lock the stones in place and prevent movement.

Once applied, use a broom to sweep the compound into the joints, ensuring that they are filled. Check to make sure there are no gaps or voids.

After sweeping the compound, use a compactor or a rubber mallet to compact the sand further. This step stabilises the stones and prevents the jointing material from washing out.

Finally, perform a final sweep to remove any excess jointing compound from the surface of the stones, leaving the area clean and neat.

4. Ensuring a Secure Installation

When tapping the stone into place, apply consistent pressure to avoid tilting or uneven settling. This ensures that the stone is positioned correctly and remains stable.

It’s also crucial to ensure that the joints are thoroughly filled and compacted. Proper joint filling is essential for the stability and longevity of the paving stone, as it helps to prevent movement and maintain the integrity of the installation.

5. Cleaning the Area

After filling the joints, begin by cleaning the area. Use a broom to sweep away any excess sand or jointing compound from the surface of the paving stones to prevent the material from hardening on the stone.

Next, lightly rinse the repaired area with water to help settle the jointing material and remove any remaining dust or debris. Be cautious not to use too much water, as it can wash out the jointing compound before it sets.

Once the cleaning is complete, inspect the repair. Gently walk over the newly installed stone to ensure it is stable and does not wobble, verifying that it feels secure and is level with the surrounding stones. Check the alignment of the new stone with the adjacent ones, using a level to confirm that the surface is even and flush.

To maintain the integrity of your driveway, consider preventive measures. Avoid parking heavy vehicles or machinery on the driveway, as excessive weight can cause cracking or damage to the paving stones.

Ensure proper drainage to prevent water pooling; which can weaken the base and lead to stone movement or damage. In colder climates use de-icing products that are safe for paving stones to prevent ice build-up without causing damage.

Conclusion

Repairing a broken driveway paving stone in three simple steps restores your driveway’s beauty and functionality. Ensure a seamless repair with our detailed guide. Need professional help? Contact Splendour In Stone Melbourne for expert advice and quality services. Schedule a consultation today to keep your driveway in top condition.

7 Reasons Why Grey Granite Pavers Enhance Patios

Is your patio looking dull and uninviting?  A lacklustre outdoor space can dampen your home’s curb appeal and prevent you from fully enjoying your outdoor living area. 

Elevate your patio’s style and functionality with grey granite pavers. This article explores 7 compelling reasons why these elegant and durable pavers are the perfect choice to enhance your patio.

1. The Timeless Appeal of Grey Granite Pavers

Grey granite pavers offer a timeless elegance that instantly elevates any patio space. Their subtle, neutral tones blend effortlessly with various design styles, from modern minimalism to classic elegance, making them a versatile choice for homeowners and designers alike. 

The natural speckled pattern of grey granite adds depth and interest to outdoor areas without overwhelming the overall aesthetic. In addition to their visual appeal, grey granite pavers are known for their durability and resistance to weathering, ensuring that your patio remains stunning for years to come. 

This resilience makes them a practical investment, as they can withstand heavy foot traffic and harsh outdoor conditions without losing their lustre. The cool, muted tones of grey granite also create a calming, sophisticated atmosphere, perfect for transforming your patio into a serene outdoor retreat. 

Whether you’re aiming for a sleek, contemporary look or a more traditional design, grey granite pavers provide a solid foundation that enhances the beauty and functionality of your patio.

2. Durability and Longevity

Grey granite pavers are renowned for their exceptional durability, making them an ideal choice for patios that must withstand the test of time. One of the standout features of granite is its inherent hardness, which allows it to resist chipping, cracking, and wear even under heavy foot traffic. 

This robustness is particularly advantageous in outdoor settings, where pavers are exposed to the elements. Granite’s natural composition makes it highly resistant to weathering, whether it’s the scorching summer sun, freezing winter temperatures, or heavy rainfall. 

Unlike other materials that may fade, warp, or deteriorate over time, grey granite has maintained its structural integrity and appearance for decades.

In addition to its physical strength, granite’s low porosity ensures that it doesn’t easily absorb moisture, reducing the risk of stains and moss growth. This makes maintenance straightforward and less frequent, saving homeowners both time and effort. 

When properly installed and sealed, grey granite pavers can last a lifetime, offering a long-term solution for creating beautiful and resilient outdoor spaces. 

3. Low Maintenance Requirements

One of the most appealing aspects of grey granite pavers is their low maintenance requirements, making them an excellent choice for homeowners seeking both beauty and practicality. 

Grey granite is naturally resistant to stains, scratches, and weather-related damage, meaning you won’t have to spend excessive time or money on upkeep. Unlike other materials that may require frequent cleaning or sealing, granite’s dense composition prevents moisture absorption, which reduces the likelihood of staining, moss, or algae growth.

Routine maintenance is simple. A regular sweep to remove debris and an occasional wash with mild soap and water are generally all that’s needed to keep your patio looking pristine. 

Additionally, grey granite’s natural resistance to fading ensures that it retains its original colour and appeal even after years of exposure to the elements. For those seeking a hassle-free outdoor space, the combination of durability and minimal upkeep makes grey granite pavers an ideal solution. 

4. Versatility in DesigEnhancing Aesthetic Appeal

Grey granite pavers offer unmatched versatility in design, making them a top choice for enhancing the aesthetic appeal of any patio. Their neutral grey tones provide a sophisticated backdrop that complements a wide range of architectural styles, from contemporary to traditional. This adaptability allows homeowners and designers to create various looks, whether aiming for a sleek, modern space or a more rustic, natural feel.

The subtle variations in texture and pattern within grey granite pavers add visual interest without overwhelming the overall design. They can be arranged in numerous patterns, such as herringbone, basketweave, or classic running bond, to suit individual tastes and project requirements.

Additionally, grey granite pairs beautifully with other materials like wood, metal, or greenery, enabling seamless integration into existing landscapes and outdoor furniture.

This versatility also extends to different outdoor settings—whether used around a pool, as a walkway, or for a full patio, grey granite pavers deliver both form and function. 

5. Eco-Friendly Choice

Choosing grey granite pavers for your patio is not only an aesthetic decision but also an environmentally responsible one. Grey granite is a natural stone that requires minimal processing, reducing the carbon footprint associated with its production. 

Unlike synthetic materials, granite is quarried from the earth, meaning it doesn’t involve harmful chemicals or energy-intensive manufacturing processes. This makes it a more sustainable option for eco-conscious homeowners.

Additionally, grey granite’s longevity contributes to its eco-friendliness. Because it’s incredibly durable, the need for replacement is rare, resulting in less waste over time. When properly maintained, granite pavers can last for decades, if not longer, making them a long-term solution that doesn’t require frequent replacement or disposal.

Furthermore, granite is fully recyclable. Should you decide to remodel or repurpose your outdoor space, the pavers can be reused in new projects or returned to the earth without leaving a negative environmental impact. 

7. Increasing Property Value

Installing grey granite pavers on your patio is not just a design choice but also a strategic investment that can significantly increase your property’s value. 

Grey granite is widely recognised for its timeless elegance and durability, making it an attractive feature for potential buyers. Its ability to maintain its appearance and integrity over the years ensures that your outdoor space will continue to look pristine, adding lasting appeal to your home.

Moreover, the versatility of grey granite allows it to complement various architectural styles, enhancing the overall aesthetic of your property. A well-designed patio with high-quality granite pavers creates a luxurious outdoor living space, which is a highly sought-after feature in today’s real estate market.

This can lead to a higher resale value and make your home more appealing to buyers looking for a move-in-ready property with premium finishes.

In addition to its visual appeal, the low maintenance requirements and longevity of grey granite pavers make them a cost-effective choice in the long run, further contributing to the property’s overall value. 

Conclusion

Grey granite pavers offer unmatched aesthetics, durability, and eco-friendliness, making them a superior choice for enhancing patios. Their timeless elegance, low maintenance, and long-term value elevate any outdoor space. Transform your patio with grey granite pavers and experience the perfect blend of beauty and practicality. 

7 Benefits of Silver Travertine Walling You Must Know

Choosing the right walling material for your home can be daunting, with countless options on the market. 

You want something that looks beautiful, stands the test of time, is easy to maintain, and adds value to your property. 

Silver travertine walling is a natural stone that offers a perfect blend of aesthetics and functionality, making it an ideal choice for homeowners seeking a timeless and practical solution.

1. Elegant Aesthetic Appeal

Silver travertine walling offers an effortlessly sophisticated look, making it a prime choice for those seeking to elevate their space. The subtle yet striking silver hues complement various interior and exterior design styles, from modern minimalism to rustic charm. 

Silver travertine’s natural veining and patterns create a unique visual texture that adds depth and character to any wall, ensuring no two installations are alike. Its elegance also lies in its timeless appeal; it doesn’t succumb to fleeting trends, making it a lasting investment in your property’s aesthetic. 

This stone’s versatility allows it to blend seamlessly with various colour palettes and materials, offering endless possibilities for creating a cohesive and stylish environment. Whether used for feature walls, fireplaces, or exterior facades, silver travertine’s natural beauty instantly enhances the look and feel of any space, making it a favourite among designers and homeowners alike.

2. Durability and Longevity

Silver travertine’s durability and longevity make it a practical and lasting investment for your walls. Formed over centuries through the deposition of minerals, this natural stone is inherently robust and resistant to wear and tear. 

Silver travertine’s dense composition allows it to withstand the elements, making it suitable for indoor and outdoor applications. Silver travertine maintains its structural integrity over time, unlike softer materials that may chip or crack easily. 

Its natural resistance to scratches and stains ensures that your walls retain their pristine appearance for years. Its ability to withstand moisture makes it an excellent choice for areas prone to humidity, such as bathrooms and kitchens. 

With proper care and maintenance, silver travertine walls can last for generations, offering timeless beauty and enduring value to your property.

3. Versatility in Design

Silver travertine walling is a highly versatile material that adapts beautifully to various design concepts. This stone can effortlessly blend into your vision, whether you aim for a sleek, contemporary look or a more traditional, rustic charm. 

Its neutral silver tones provide a perfect backdrop for bold and subtle design elements, allowing it to harmonise with various colour schemes and textures. Silver travertine can be used in multiple applications, from interior feature walls to exterior facades, making it an ideal choice for residential and commercial spaces. 

Silver travertine’s ability to be cut into various shapes and sizes further enhances its adaptability, allowing you to create custom designs that suit your needs. It delivers unmatched flexibility whether you want to add a touch of luxury to your bathroom, a sophisticated accent to your living room, or a durable finish to your outdoor spaces. 

This versatility makes it a favourite among architects and designers seeking a material that offers aesthetic appeal and practical functionality.

4. Easy Maintenance

One of the standout benefits of silver travertine walling is its ease of maintenance. This natural stone is remarkably durable, resisting the wear and tear of daily life, making it a practical choice for indoor and outdoor applications. 

Unlike other materials that require frequent upkeep, silver travertine’s dense composition means it is less prone to staining, scratching, or chipping. Routine maintenance involves little more than regular cleaning with a mild soap and water solution, ensuring your walls remain as stunning as the day they were installed.

Additionally, silver travertine benefits from periodic sealing, which enhances its natural resistance to moisture and spills, making it even easier to care for. This simple process protects the stone and preserves its beautiful finish for years. 

Silver travertine walling’s low-maintenance nature ensures you can enjoy its aesthetic and practical benefits without the burden of time-consuming or costly upkeep, making it an ideal choice for busy homeowners and commercial properties.

5. Eco-Friendly Material

Silver travertine walling is aesthetically pleasing and an environmentally responsible choice. As a natural stone, travertine is sourced directly from the earth, reducing the need for energy-intensive manufacturing processes familiar with synthetic materials. 

This makes it a more sustainable option for those looking to minimise their environmental impact. The extraction process is often less harmful to the environment than the production of other building materials, as it involves minimal processing and fewer chemical treatments.

Moreover, silver travertine is a long-lasting material, reducing the need for frequent replacements and minimising waste. Its durability means that it can be repurposed or recycled at the end of its life cycle, further contributing to its eco-friendly credentials. 

Additionally, travertine’s natural thermal properties can help regulate indoor temperatures, reducing the reliance on artificial heating and cooling systems and lowering energy consumption. Silver travertine walling is a commitment to beauty and durability and a conscious decision to support a more sustainable and eco-friendly environment.

6. Added Property Value

Investing in silver travertine walling enhances your home’s aesthetic appeal and significantly boosts its market value. This natural stone is highly regarded for its timeless beauty and durability, qualities that are attractive to potential buyers. 

High-quality materials like silver travertine in your home’s interior or exterior design are often seen as a mark of luxury and sophistication, making your property stand out in the competitive real estate market.

Furthermore, silver travertine’s versatility and low-maintenance nature add to its appeal, as prospective buyers are drawn to properties that offer elegance and practicality. 

The stone’s long-lasting nature ensures that the investment will pay off over time, as it maintains its charm and structural integrity for years. 

By incorporating silver travertine walling into your home, you’re creating a beautiful living space and making a wise financial decision that can yield a higher return on investment when it comes time to sell.

7. Cost-Effective Investment

Silver travertine walling is a smart financial decision, offering long-term value for your money. While the initial cost of this natural stone might be higher than some synthetic alternatives, its durability and low maintenance requirements make it a cost-effective investment over time. 

Silver travertine’s resilience to wear and tear means fewer repairs and replacements, reducing overall maintenance costs. Additionally, its timeless appeal ensures that it remains a desirable feature in your home, potentially increasing your property’s resale value.

The longevity of silver travertine also means you won’t need to worry about frequent upgrades or renovations, further saving on expenses. 

Unlike cheaper materials that may need to be replaced after a few years, silver travertine can last for decades with minimal upkeep, offering exceptional value for every penny spent. 

Moreover, its natural insulating properties can contribute to energy savings by helping to regulate indoor temperatures and reducing energy bills. Investing in silver travertine walling enhances your living space and provides long-term financial benefits, making it a wise choice for budget-conscious homeowners.

Conclusion

Silver travertine walling offers a harmonious blend of elegance, durability, versatility, and sustainability, making it an investment that enhances both aesthetics and property value. 

Silver travertine’s easy maintenance and cost-effectiveness further solidify its appeal. Consider its timeless beauty and enduring benefits if you want to elevate your next project.

6 Popular Paver Edging Ideas for Your Yard or Garden

Tired of your yard or garden needing that finishing touch?

Uneven edges, unruly grass encroachment, and a lack of defined borders can leave your outdoor space looking unfinished and untidy.

Fortunately, we’ve curated 6 popular paver edging ideas to transform your landscape, providing aesthetic appeal and practical functionality. Whether aiming for a sleek modern look or a rustic charm, these solutions will help you create a polished, well-defined outdoor space you’ll love showing off.

1. Classic Brick Edging

Regarding traditional charm and enduring appeal, classic brick edging stands the test of time. This timeless choice adds a touch of elegance to any yard or garden, seamlessly blending with modern and traditional landscapes.

Brick edging offers durability and versatility, with various patterns and arrangements available to suit your aesthetic preferences. Installation is relatively straightforward, requiring minimal tools and expertise.

One key advantage of brick edging is its ability to withstand weathering and erosion, ensuring long-term stability for your garden borders. Additionally, bricks provide a sturdy barrier against encroaching grass or weeds, maintaining a clean and tidy appearance.

Maintenance is simple, requiring occasional inspection and adjustment to ensure proper alignment. With appropriate care, classic brick edging can retain its beauty for years, making it a cost-effective investment in your outdoor space’s overall aesthetics and functionality.

2. Natural Stone Border

Elevate your yard or garden with the rustic allure of a natural stone border. This popular paver edging option brings a touch of nature to your outdoor space, creating a visually striking boundary that enhances the overall aesthetic.

Natural stone borders offer unparalleled durability. They can withstand the elements and maintain their beauty for years to come. With various shapes, sizes, and textures available, you can tailor the look of your border to complement your landscape design.

Installation may require more effort than other edging options, as each stone must be carefully placed and secured. However, the result is well worth the investment, as natural stone borders provide a timeless elegance that enhances the charm of any garden or yard.

Once installed, maintenance is minimal, with occasional cleaning and repositioning to ensure proper alignment. Whether you prefer a neatly defined edge or a more organic, irregular look, a natural stone border adds character and distinction to your outdoor environment.

3. Concrete Paver Banding

Consider concrete paver banding as your edging solution for a sleek and contemporary look. This option offers a clean and minimalist aesthetic, perfect for enhancing the visual appeal of your yard or garden.

Concrete paver banding provides excellent durability, resisting weathering and erosion to maintain its pristine appearance. You can customise the banding in various shapes, sizes, and colours to complement your outdoor space’s style and colour scheme.

Installation is relatively straightforward, requiring minimal tools and expertise. With interlocking pavers, you can create a seamless and sturdy border containing gravel, mulch, or soil, preventing them from spilling onto surrounding areas.

Maintenance is hassle-free, typically involving occasional cleaning to remove dirt or debris. Concrete paver banding offers versatility, allowing you to adjust or expand your border to accommodate changes in your landscaping design.

4. Timber Log Edging

Enhance the rustic charm of your yard or garden with timber log edging, a popular choice for those seeking a natural and organic border solution.

Timber log edging adds a touch of warmth and character to outdoor spaces, creating a visual distinction between different areas while seamlessly blending with the surrounding environment. Timber logs are available in various sizes and shapes and offer versatility to suit your landscaping needs and preferences.

Installation is relatively simple and requires essential tools and skills. By arranging timber logs along the desired perimeter and securing them, you can create a sturdy and durable border containing soil, mulch, or gravel.

One critical advantage of timber log edging is its natural resistance to rot and decay, especially when treated or sourced from durable wood species. This ensures long-lasting performance and minimal maintenance, making it an attractive option for homeowners looking for aesthetic appeal and practical functionality in their outdoor spaces.

5. Metal Landscape Edging.

Consider metal landscape edging for a sleek, modern approach to defining your outdoor space. This popular choice offers clean lines and a contemporary aesthetic, perfect for adding definition and structure to your yard or garden.

Metal landscape edging is available in various materials, including steel, aluminium, and iron. Each offers unique benefits in terms of durability and appearance. Whether you prefer a subtle, understated border or a bold statement piece, a metal edging option suits your style.

Installation is straightforward. The metal strips are typically secured into the ground along the desired perimeter. Once in place, metal landscape edging provides a durable barrier against grass encroachment and ensures tidy borders for flower beds, pathways, or lawn edges.

Maintenance is minimal, with occasional cleaning to remove dirt or debris. Additionally, metal landscape edging offers flexibility, allowing you to easily adjust or expand your borders to accommodate changes in your landscaping design.

With its sleek design and practical functionality, metal landscape edging is a popular choice among homeowners seeking to elevate the aesthetic appeal of their outdoor spaces while maintaining clean and defined borders.

6. Recycled Rubber Edging

Looking for an environmentally conscious edging solution? Recycled rubber edging offers both sustainability and versatility, making it a popular choice for eco-conscious gardeners.

Made from recycled tyres and other rubber products, this edging option reduces waste and provides excellent durability and flexibility. Its rubber construction allows easy shaping and bending, making it ideal for curved or irregular garden borders.

Installation is hassle-free. The rubber strips are typically secured into the ground with stakes or pegs. Once in place, recycled rubber edging creates a sturdy barrier against grass and weeds, helping to maintain neat garden beds.

Maintenance is minimal, with occasional cleaning to remove dirt or debris. Additionally, recycled rubber edging is resistant to weathering and UV damage, ensuring long-lasting performance in outdoor environments.

With its eco-friendly credentials and practical benefits, recycled rubber edging is a smart choice for those looking to enhance their yard or garden while reducing their environmental footprint.

Conclusion

Elevate your outdoor space with one of these popular paver edging ideas. From classic brick to eco-friendly rubber, there’s a solution for every style and preference. Choose the perfect edging to define your garden or yard borders and transform your outdoor oasis today!

Garden Pavers Ideas: 2024 Edition

Is your garden tired and uninspired? Dull, outdated pavers can detract from the beauty of your outdoor space, making it less inviting and functional.

Explore our 2024 edition of garden paver ideas for the latest trends, materials, and designs to revitalise your garden and create a stunning, welcoming environment.

Trending Materials for Garden Pavers in 2024

In 2024, garden pavers continue to evolve, focusing on sustainability, durability, and aesthetic appeal. Here are the trending materials shaping outdoor spaces:

1. Natural Stone Pavers

Natural stone pavers, renowned for their timeless beauty and durability, remain a top choice. Granite offers unparalleled strength, while limestone exudes elegance. Sandstone, with its warm hues and natural textures, adds a touch of rustic charm to garden pathways and patios.

2. Concrete Pavers

Concrete pavers have reentered the market, and technological advancements have allowed various design options. From sleek and modern to rustic and textured, concrete pavers offer versatility and affordability. Innovative finishes and colour choices enable homeowners to create custom looks that suit their style.

3. Porcelain Pavers

Porcelain pavers are gaining popularity for their exceptional durability and aesthetic appeal. Resistant to stains, scratches, and fading, porcelain pavers maintain their beauty even in harsh outdoor conditions. With various colours, patterns, and textures available, homeowners can achieve the look of natural stone or wood without maintenance.

4. Eco-Friendly Pavers

As sustainability becomes increasingly essential, eco-friendly pavers are in high demand. Materials such as recycled glass, reclaimed wood, and permeable concrete help reduce environmental impact while enhancing the beauty of outdoor spaces. 

Permeable pavers allow rainwater to infiltrate the ground, reducing runoff and replenishing groundwater supplies.

Popular Garden Paver Designs and Patterns

In 2024, garden paver designs and patterns offer endless possibilities to enhance outdoor spaces. Here are some popular options:

1. Herringbone Pattern

The herringbone pattern, characterised by its distinctive V-shaped arrangement, adds visual interest and a sense of movement to garden pathways and patios. This pattern is achieved by laying pavers at a 45-degree angle, creating a timeless, sophisticated look that complements traditional and contemporary landscapes.

2. Basket Weave Pattern

The basket weave pattern mimics the interwoven appearance of a basket and adds texture and depth to garden surfaces. To achieve this look, alternating sets of pavers are laid horizontally and vertically, creating a visually striking pattern that enhances the aesthetic appeal of outdoor areas.

3. Running Bond Pattern

The running bond pattern is a classic and versatile option for garden pavers. Pavers are laid in a staggered, brick-like formation, with each row offset from the previous one. This simple yet effective pattern creates a sense of continuity and flow, making it ideal for pathways, driveways, and patio areas.

4. Circular Pattern

Circular patterns are ideal for creating focal points and defining gathering areas in the garden. Pavers are arranged in concentric circles or radiating arcs, drawing the eye towards central features such as fire pits, seating areas, or garden sculptures. This pattern adds visual interest and creates a sense of symmetry and balance in outdoor spaces.

Creative Ideas for Using Garden Pavers

Garden pavers are more than just practical pathways—they’re a canvas for creativity. Whether you’re looking to craft a charming garden nook, define outdoor spaces with style, or add a touch of artistry to your landscape, pavers offer endless possibilities. 

Dive into these innovative ideas to transform your garden from ordinary to extraordinary with the versatile elegance of garden pavers.

1. Pathways and Walkways

Garden pavers are ideal for creating well-defined pathways and walkways, enhancing navigation and adding structure to your garden. 

Various patterns, such as herringbone or running bond, can create visual interest while guiding visitors through your landscape. 

Choosing natural stone or eco-friendly pavers can blend seamlessly with your garden’s aesthetic, creating a cohesive look.

2. Patio and Seating Areas

Transform your outdoor space into a cosy retreat using garden pavers to create inviting patios and seating areas. Pavers provide a durable and attractive surface for outdoor furniture, fire pits, and lounge areas. 

Consider using different paver colours and textures to define separate zones within your patio, enhancing functionality and visual appeal.

3. Borders and Edging

Garden pavers are perfect for defining garden beds, lawns, and pathways. Using pavers as borders and edging helps maintain clean lines and prevents soil erosion. 

They also create a polished look, enhancing the overall design of your garden. For a harmonious appearance, choose pavers that complement the colours and materials used in other areas of your garden.

4. Steps and Staircases

Add elevation and interest to your garden with steps and staircases made from garden pavers. Pavers provide a stable and attractive solution for navigating sloped areas, creating a sense of depth and dimension in your landscape. 

Using pavers with a textured surface can improve traction and safety, especially in wet conditions.

5. Pool Decks

Garden pavers are an excellent choice for pool decks, offering safety, style, and practicality. Non-slip surfaces and heat-resistant materials make pavers ideal for poolside areas, providing a comfortable and secure environment. 

Selecting pavers in complementary colours can enhance the aesthetic appeal of your pool area, creating a cohesive look that ties in with the rest of your garden.

6. Outdoor Kitchens & Dining Areas

Elevate your outdoor entertainment space by using garden pavers to create stylish and functional outdoor kitchens and dining areas. 

Pavers provide a durable foundation for grills, countertops, and dining tables, ensuring your outdoor kitchen remains beautiful and practical. Consider using large-format pavers for a modern, seamless look that enhances the overall ambience.

Choosing the Right Pavers for Your Melbourne Garden

Choosing the right pavers for your Melbourne garden involves several key considerations to ensure durability, aesthetic appeal, and cost-effectiveness.

1. Climate Considerations

Melbourne’s weather can vary, with hot summers and wet winters. Select pavers that can withstand these conditions. 

Natural stone pavers, like granite and sandstone, are highly durable and weather-resistant, making them ideal for Melbourne’s climate. 

Porcelain pavers are also a great choice due to their low water absorption and resistance to cracking in extreme temperatures.

2. Maintenance & Longevity

Different materials require varying levels of maintenance. Natural stone pavers are generally low-maintenance, needing occasional sealing to maintain their appearance.

Concrete pavers are durable but may require periodic cleaning to prevent staining. Porcelain pavers, due to their non-porous nature, are almost maintenance-free. When choosing your pavers, consider how much time and effort you will invest in upkeep.

3. Budget-Friendly Options

Creating a beautiful garden doesn’t have to be expensive. Concrete pavers offer an affordable option without sacrificing style and are available in numerous designs and finishes. 

Eco-friendly pavers, made from recycled materials, are another cost-effective choice that benefits the environment. 

When planning your garden, consider a mix of premium and budget-friendly pavers to achieve a stunning look without overspending.

Combining Garden Pavers with Other Landscaping Elements

Combining garden pavers with other landscaping elements can transform your outdoor space into a cohesive and visually appealing environment. 

Here are some key ways to integrate pavers with greenery, water features, lighting, and garden furniture:

1. Greenery and Plants

Garden pavers provide a beautiful contrast to the lushness of plants and greenery. When selecting plants, consider their colour, texture, and height to create a harmonious balance with the pavers. 

Low-growing ground covers can soften the edges of pathways, while taller shrubs and flowers can create focal points along the borders. 

Using pavers to create raised beds or planter boxes adds structure and variety to your garden design, making the greenery stand out.

2. Water Features

Integrating water features such as fountains, ponds, or small streams can enhance your garden’s tranquillity and aesthetic appeal. 

Pavers can be used to create pathways leading to these water features or as edging around ponds to define the space. 

The flowing water and solid pavers create a pleasing contrast that adds visual and auditory interest to your landscape.

3. Lighting

Outdoor lighting is essential for highlighting garden pavers and ensuring safety during evening hours. Consider installing low-voltage landscape lighting along pathways, seating areas, and near water features. 

Solar-powered lights are an eco-friendly option that can be easily installed. Uplighting can accentuate the texture and colour of the pavers, while downlighting can illuminate walking paths and create a welcoming atmosphere.

4. Garden Furniture

Coordinating garden pavers with outdoor furniture enhances the functionality and comfort of your outdoor spaces. Choose furniture that complements the style and colour of your pavers. 

For example, wrought iron furniture pairs well with classic stone pavers, while modern metal or wooden furniture can match contemporary porcelain or concrete pavers. 

Arranging furniture on a paved patio creates defined dining, lounging, and socialising areas, making your garden versatile and inviting.

Conclusion

In 2024, garden pavers offer endless possibilities for enhancing your outdoor space. From versatile designs to eco-friendly options, there’s something for every garden. 

Explore and experiment with these ideas, and visit Splendour In Stone for more inspiration and high-quality products. Transform your garden into a stunning retreat today!

5 Ways to Fill Paver Joints

Are you struggling with loose or uneven paver joints? Unfilled paver joints can lead to weed growth, shifting pavers, and less appealing outdoor space.

Check out the top 5 effective methods to fill paver joints, ensuring a durable, weed-free, and visually pleasing paver installation.

The Importance of Paver Filling

A solid foundation for your pavers is only as good as the material that holds them together. Learn why filling those joints isn’t just a finishing touch—it’s the key to long-lasting beauty and durability

1. Stability and Prevention of Damage

Correctly filled paver joints are crucial in stabilising the pavers, preventing them from shifting underfoot or during adverse weather conditions. This stability is essential for maintaining the structural integrity of your paving, helping to avoid the formation of cracks that can lead to costly repairs and unsightly damage over time.

2. Weed Control and Aesthetic Maintenance

A well-filled joint deters weed growth, which can mar the appearance of your paving and weaken the structure by forcing the pavers apart. By preventing weed intrusion, you maintain both the aesthetic appeal and durability of your paved surfaces, reducing the need for frequent maintenance and upkeep.

3. Protection Against Water Damage

Filling the joints creates a barrier that reduces water penetration, protecting the subbase from erosion and preventing water from seeping into areas that can cause damage. This protection is crucial for ensuring the longevity of your paving, particularly in climates prone to heavy rainfall or freeze-thaw cycles.

4. Prevention of Insect Infestations

Proper joint filling also serves as a deterrent to insect infestations. Open joints can become a breeding ground for pests, such as ants, which can undermine the stability of your pavers and create unsightly mounds on your surface. By filling the joints, you create a barrier that helps keep these pests at bay, ensuring a clean and stable paved area.

5. Enhanced Load Distribution

Finally, filled joints contribute to better load distribution across the paved surface. When the joints are correctly filled, the pressure from foot traffic, vehicles, or heavy objects is more evenly distributed across the pavers. This reduces the risk of individual pavers sinking or becoming dislodged, which is critical for maintaining a smooth and level surface over time.

Effective Methods to Fill Paver Joints

Choosing the right method to fill your paver joints can make all the difference between a patio that endures and one that quickly falls apart. Explore these proven techniques to ensure a flawless, durable finish that stands the test of time.

Method 1. Polymeric Sand

Polymeric sand is an excellent choice for filling paver joints. It offers a durable, long-lasting solution that resists weed growth, insect infestation, and erosion. This advanced material combines fine sand and special additives that bind when water activates, creating a solid yet flexible joint that locks pavers in place. 

Unlike regular sand, polymeric sand hardens to form a stable surface, preventing pavers from shifting over time while allowing for slight movement due to weather changes. Its binding properties also minimise the risk of joint washout during heavy rain or pressure washing, making it ideal for outdoor spaces exposed to the elements. 

Application is straightforward: after spreading the sand over the paver surface, you sweep it into the joints and gently water it to activate the polymers. The result is a clean, seamless finish that enhances the aesthetic appeal of your paved area and significantly reduces maintenance efforts.

Method 2. Traditional Sand

Traditional sand is one of the most commonly used materials for filling paver joints, offering an affordable and straightforward solution that has stood the test of time. This basic method involves sweeping fine, dry sand over the pavers and into the joints until they are completely filled. 

Once in place, the sand helps to stabilise the pavers by locking them together, reducing movement and providing a solid, even surface. While traditional sand does not harden like polymeric sand, it allows for some flexibility, benefiting areas with frequent freeze-thaw cycles.

However, it’s important to note that this flexibility also means that traditional sand is more susceptible to erosion from rain, wind, and regular maintenance, such as sweeping or pressure washing. 

Over time, this may lead to the need for reapplication. Despite these considerations, traditional sand remains a popular choice for those looking for a simple, cost-effective way to keep their pavers in place while achieving a classic, natural appearance.

Method 4. Cement-Based Joint Fillers

Cement-based joint fillers offer a robust and durable solution, particularly suited for high-traffic areas where strength and longevity are paramount. These fillers consist of a mixture of cement and fine aggregates, which, when combined with water, create a solid, mortar-like substance. 

Once applied, cement-based fillers harden to form a rigid, impermeable surface that effectively locks pavers in place, preventing movement and providing excellent resistance to wear and tear. This joint filler is particularly beneficial in areas exposed to heavy loads, such as driveways, commercial spaces, or pathways with frequent foot traffic. 

However, the rigidity of cement-based fillers means they lack the flexibility of other options, making them more prone to cracking in regions with significant temperature fluctuations. The application requires careful work, as the mixture must be properly compacted and allowed to cure to ensure maximum performance. 

While more labour-intensive than other methods, cement-based fillers deliver unmatched durability, making them a go-to choice for long-lasting paver installations.

Method 5. Sealants and Joint Compounds

Sealants and joint compounds offer a versatile and effective solution for filling paver joints, providing enhanced protection against water infiltration, weed growth, and erosion. These materials are typically applied after the pavers are laid, either as a liquid or paste seeping into the joints, forming a flexible but durable barrier. 

Sealants are particularly useful for areas exposed to moisture, as they create a water-resistant seal that prevents damage from freeze-thaw cycles and reduces the risk of paver displacement. Joint compounds, on the other hand, can be used to repair existing joints or as a primary filler. They offer a blend of flexibility and strength, accommodating slight movements in the pavers without cracking. 

Both options require precise application to ensure even coverage and effective sealing. While sealants and joint compounds can be more expensive and labour-intensive than traditional methods, they significantly reduce long-term maintenance and enhance your paved area’s overall lifespan and appearance.

Conclusion

Choosing the right method to fill paver joints can enhance the durability and appearance of your paving project. Explore these 5 effective options to find the best fit for your needs. 

Ready to upgrade your paver joints? Contact Splendour In Stone Melbourne for expert advice and top-quality materials.

Top 8 Reasons to Choose Marble Pavers

Are you struggling to find the perfect material for your outdoor spaces that combines beauty and functionality?

Many paving options require more durability or enhance the aesthetic appeal, leaving your outdoor area uninspired and high maintenance.

Marble pavers are the ultimate solution, offering unmatched elegance, resilience, and ease of maintenance. Discover the top 8 reasons why marble pavers are ideal for transforming your outdoor space.

1. Elegance and Aesthetics

Marble pavers offer unparalleled elegance and aesthetic appeal to any outdoor environment. Their natural veining and unique patterns bring a timeless charm that enhances the visual appeal of any space, from patios to pool surrounds.

The luxurious appearance of marble effortlessly elevates the ambience of outdoor settings, creating a sophisticated atmosphere that exudes opulence. Whether used in traditional or contemporary designs, marble pavers add a touch of class and refinement, making them a popular choice for high-end residential and commercial projects.

Moreover, marble’s versatility allows for a wide range of design possibilities. Available in various shapes, sizes, and finishes, it offers endless opportunities for creativity and customization. Whether you prefer a sleek, modern look or a more rustic, antique feel, a marble option suits every style and preference.

Furthermore, marble’s natural beauty improves with age, as weathering adds character and depth to the stone’s surface. Its durability ensures that your outdoor space will maintain its elegance and charm for years, making marble pavers a timeless investment in aesthetics and functionality.

2. Durability and Longevity

Marble pavers are renowned for their exceptional durability and longevity, making them a wise choice for outdoor paving projects.

Marble is a naturally resilient stone, capable of withstanding the elements and heavy foot traffic without losing its integrity. Its dense composition ensures resistance to cracking, chipping, and erosion over time.

Unlike other paving materials, marble is non-porous, which means it is resistant to stains and water damage. This characteristic makes it particularly suitable for outdoor use, as it can withstand exposure to rain, sunlight, and temperature fluctuations without deteriorating.

With proper maintenance and sealing, marble pavers can retain their beauty and structural integrity for decades, making them a cost-effective and low-maintenance option for outdoor spaces.

3. Ease of Maintenance

One compelling reason to choose marble pavers is their simplicity of maintenance. Unlike other materials, marble requires minimal upkeep to retain its beauty and functionality.

Regular sweeping or gentle washing with water and mild detergent is usually sufficient to keep marble pavers clean and debris-free. Additionally, sealing the pavers annually helps to enhance their resistance to stains and water damage, prolonging their lifespan and maintaining their appearance.

Marble’s non-porous nature means it is less prone to absorbing liquids, reducing the risk of staining and making it easier to clean up spills.

Unlike wood or concrete, marble pavers do not require regular sealing, saving time and money in maintenance costs.

With its straightforward care routine, marble pavers offer beauty and convenience, ensuring that your outdoor space remains pristine with minimal effort.

4. Versatility in Design

Marble pavers offer unparalleled versatility in design, making them an ideal choice for a wide range of outdoor projects.

Marble has various shapes, sizes, and finishes, allowing endless creativity and customization. Whether you’re aiming for a modern, traditional, or eclectic look, there’s a marble option to suit your aesthetic preferences.

Marble’s natural veining and patterns add a touch of sophistication and elegance to any outdoor space. Marble can achieve the desired effect if you prefer a subtle, uniform appearance or a bold, statement-making design.

Furthermore, marble pairs effortlessly with other materials, such as wood, brick, or concrete, allowing seamless integration into existing outdoor designs.

Whether you’re renovating a patio, pool area, or pathway, marble pavers offer the flexibility and versatility needed to bring your vision to life, ensuring a stunning and cohesive outdoor environment.

5. Natural Cooling Properties

Unlike materials such as concrete or asphalt, marble has a high albedo, meaning it reflects a significant portion of sunlight rather than absorbing it. This inherent quality helps to keep marble pavers cooler to the touch even on scorching summer days, providing a more comfortable surface for bare feet.

Marble’s lower thermal conductivity than other paving materials further contributes to its ability to remain calm. This characteristic makes marble pavers ideal for areas where temperature control is essential, such as around swimming pools or outdoor seating areas.

6. Increased Property Value

Choosing marble pavers for your outdoor spaces can significantly increase the value of your property. Marble’s timeless elegance and durability appeal to potential buyers, making it a desirable feature in any home.

Properties with marble paving often command higher prices in the real estate market due to the perceived luxury and quality associated with this material. Prospective buyers will pay a premium for homes adorned with marble features, including pavers.

Additionally, marble’s longevity and low maintenance requirements add to its appeal, as buyers are attracted to materials that offer aesthetic value and practicality. The durability of marble ensures that the paved areas will remain in excellent condition for years to come, further enhancing the property’s overall value.

7. Eco-Friendly and Sustainable Choice

Marble pavers are aesthetically pleasing and an environmentally conscious choice for outdoor paving projects.

Unlike synthetic materials, marble is a natural stone sourced from quarries worldwide. While extraction does have environmental implications, responsible quarrying practices can minimise these impacts.

Marble is also a durable material, meaning that once installed, it requires minimal replacement or maintenance, reducing the need for further extraction and manufacturing of new materials.

Furthermore, marble’s thermal properties contribute to energy efficiency. Its light colour reflects heat, helping to reduce the urban heat island effect and potentially lowering cooling costs in urban areas.

Regarding disposal, marble is recyclable and can be repurposed for various applications, reducing waste and the demand for new materials.

8. Health Benefits

Beyond its aesthetic appeal and durability, marble pavers offer health benefits, making them a superior choice for outdoor paving projects.

One notable advantage is marble’s hypoallergenic properties. Unlike synthetic materials, marble does not harbour allergens like dust mites, pollen, or pet dander, making it an excellent option for individuals with allergies or respiratory sensitivities.

Additionally, marble’s smooth surface discourages the accumulation of dirt and bacteria, promoting a cleaner and healthier outdoor environment. This feature is particularly advantageous for areas such as patios and pool surrounds, where hygiene is essential.

Moreover, marble’s cooling properties can have a positive impact on well-being. By maintaining lower surface temperatures, marble pavers provide a comfortable and refreshing space for relaxation and recreation, especially during hot weather.

Conclusion

Marble pavers combine elegance, durability, ease of maintenance, design versatility, cooling properties, property value enhancement, sustainability, and health benefits. Transform your outdoor space with marble pavers. Contact us to explore our premium selection and elevate your home’s aesthetic and functional appeal. 

Importance of Paver Sealing

Are your outdoor pavers losing their appeal and durability over time? Exposure to weather, stains, and regular wear can cause pavers to fade, crack, and deteriorate, diminishing the beauty and lifespan of your outdoor areas.

Paver sealing is the key to preserving and enhancing the look and durability of your pavers. This article explores the importance of sealing pavers and how they can protect your investment, ensuring your outdoor spaces remain attractive and resilient for years.

Benefits of Paver Sealing

Sealing your pavers offers numerous advantages that enhance their durability and visual appeal. Here are the key benefits:

1. Protection Against the Elements

Paver sealing provides a robust shield against the damaging effects of UV rays, rain, and freeze-thaw cycles. This protection prevents the pavers from fading, staining, and cracking, which can occur over time due to exposure to the elements. By sealing your pavers, you ensure they maintain their structural integrity and appearance for years.

2. Enhanced Resistance to Stains and Spills

One of the most practical benefits of paver sealing is its ability to repel oil, grease, and other everyday spills. The sealant forms a protective layer on the surface, making it much easier to clean up spills before they cause permanent stains. This keeps your pavers looking fresh and reduces the time and effort required for maintenance.

3. Colour and Texture Enhancement

Sealing your pavers enhances their natural colours and textures, giving them a vibrant and polished appearance. This aesthetic boost can significantly elevate the overall look of your outdoor space, making it more inviting and visually appealing.

4. Weed and Insect Inhibition

A sealed surface resists the growth of weeds and the spread of ants and other insects. This is because the sealant fills the gaps between pavers, creating a barrier that prevents weed seeds from taking root and insects from nesting. This leads to a cleaner, more pristine outdoor area with less need for regular maintenance.

5. Increased Durability and Longevity

Overall, paver sealing significantly increases the durability and lifespan of your pavers. By protecting against environmental damage, stains, and the invasion of weeds and insects, sealing helps preserve your outdoor space’s value and beauty, making it a wise investment for any homeowner.

6. Easier Cleaning and Maintenance

Sealed pavers are much easier to clean compared to unsealed ones. The sealant prevents dirt, grime, and other debris from penetrating the surface, allowing you to rinse or sweep away the mess simply. This reduces the need for frequent deep cleaning or harsh chemicals, saving you time and effort in maintaining your outdoor areas.

7. Prevention of Erosion and Shifting

Paver sealing helps to bind the sand between the pavers, reducing the chances of erosion and shifting. This is particularly important in areas that experience heavy foot traffic or are subject to water runoff. By keeping the pavers in place, sealing helps maintain the integrity of your walkways and patios, preventing the need for costly repairs down the line.

8. Resistance to Mold and Mildew

Unsealed pavers can become a breeding ground for mould, mildew, and algae in damp or shaded areas. Sealing creates a water-resistant barrier that prevents moisture from seeping into the pavers, reducing the risk of mould and mildew growth. This keeps your pavers looking clean and fresh and helps prevent slippery surfaces that could pose a safety hazard.

8. Enhanced Curb Appeal

Finally, sealing your pavers adds to the overall curb appeal of your property. The enhanced colours, cleaner appearance, and well-maintained structure create a polished and inviting look that can significantly boost the aesthetic value of your home. This is especially beneficial if you’re looking to sell your property, as a well-sealed outdoor area can be a major selling point for potential buyers.

Types of Paver Sealers

Choosing the right paver sealer is crucial for achieving the desired protection and finish for your outdoor areas. Here are the main types of paver sealers and their benefits:

  • Penetrating Sealers: These sealers soak into the pavers, protecting them within. They are excellent for repelling water, oils, and other contaminants without altering the paver’s natural appearance. Penetrating sealers are ideal for those who want to maintain the original look of their pavers while ensuring robust protection against stains and weathering.
  • Film-Forming Sealers: Unlike penetrating sealers, film-forming sealers create a protective layer on the surface of the pavers. This layer enhances the colour and provides a glossy or matte finish, depending on the product used. Film-forming sealers offer excellent protection against UV rays, which can prevent fading and maintain the vibrancy of the pavers. However, they may require more frequent reapplication, especially in high-traffic areas.

When to Seal Your Pavers

Timing is crucial when sealing your pavers to ensure optimal protection and longevity. Here’s what you need to know about the best time to seal your pavers:

  • New Installations: For newly installed pavers, it’s recommended to wait at least 1-3 months before applying a sealer. This waiting period allows the pavers to settle and ensures any efflorescence (a white, powdery residue that can appear on the surface) has been completely removed. Sealing too soon can trap moisture and lead to issues down the line.
  • Existing Pavers: For existing pavers, the ideal time to seal is during dry weather, ensuring the pavers are completely dry before application. Typically, late spring or early autumn are the best seasons for sealing, as the weather is more predictable and temperatures are moderate.
  • Re-Sealing: Pavers should be resealed every 2-3 years to maintain their protective layer and appearance. However, high-traffic areas or regions with extreme weather conditions may require more frequent reapplication. Always follow the manufacturer’s recommendations for re-sealing intervals.
  • Before Winter: Sealing before the onset of winter is particularly beneficial. The sealer will protect your pavers from freeze-thaw cycles, which can cause cracking and damage due to moisture expansion.

Steps for Sealing Pavers

Sealing pavers effectively involves several crucial steps to ensure a lasting and attractive finish. Here’s a detailed guide to the process:

  1. Cleaning the Pavers: Begin by thoroughly cleaning the pavers to remove dirt, stains, and debris. Use a pressure washer for a deep clean, ensuring all contaminants are washed away. Allow the pavers to dry completely before proceeding, as moisture can interfere with the sealer’s effectiveness.
  2. Choosing the Right Sealer: Select a sealer suitable for your specific type of pavers and the desired finish (glossy, matte, or natural). Consider factors such as UV protection, stain resistance, and slip resistance when choosing.
  3. Application Process: Apply the sealer evenly using a roller, sprayer, or brush. Start at one end and work systematically to avoid missing any areas. Ensure even coverage without over-application, as pooling sealer can create an uneven finish. Follow the manufacturer’s instructions for the best results.
  4. Curing Time and Maintenance: After application, allow the sealer to cure as per the manufacturer’s guidelines, typically 24-48 hours. During this period, keep the area free from traffic, water, and debris. Once cured, the sealed pavers will be ready for use and should be maintained by regular cleaning and periodic reapplication of the sealer.

Common Mistakes to Avoid

Proper paver sealing is essential for maintaining the durability and attractiveness of your outdoor areas. However, several common mistakes can undermine the effectiveness of this process. Here are the key pitfalls to avoid:

  • Sealing Too Soon: Applying sealer to newly installed pavers before settling can trap moisture and efflorescence, leading to discolouration and damage. Always wait 1-3 months after installation to ensure the pavers are ready.
  • Inadequate Cleaning: Please thoroughly clean pavers before sealing to avoid dirt and stains being sealed in, compromising the appearance and effectiveness of the sealer. Use a pressure washer and ensure the pavers are completely dry before applying the sealer.
  • Over-Application: Applying too much sealer can cause pooling and an uneven finish. Follow the manufacturer’s instructions for the correct amount and method of application to ensure an even, thin layer.
  • Ignoring Weather Conditions: Sealing during wet or excessively hot conditions can prevent the sealer from curing properly. Choose a period of dry, moderate weather for the best results, and ensure no rain is forecast for at least 24 hours after application.
  • Neglecting Maintenance: Sealing is not a one-time task. Regular maintenance, including cleaning and re-sealing every 2-3 years, is necessary to keep the pavers protected and looking their best.

Conclusion

Paver sealing is crucial for maintaining durable and attractive outdoor areas. It enhances longevity, appearance, and ease of maintenance. 

Ready to protect your investment? Contact Splendour In Stone Melbourne today for professional paver sealing services and ensure your outdoor spaces look their best for years.

6 Ways to Space Out Stepping Stones to Fit Your Stride

Struggling to space your stepping stones correctly can lead to an awkward, uncomfortable pathway. This disrupts the visual harmony of your garden and poses a tripping hazard, making every step a potential misstep.

Discover 6 simple and effective ways to space out stepping stones to perfectly fit your stride, ensuring a safe and aesthetically pleasing pathway for your outdoor space.

1. Understanding Stride Length

Correctly spacing stepping stones begins with understanding stride length, a critical factor that ensures comfort and safety on your pathway. Stride length is the distance between successive steps, measured from heel to heel. This distance varies among individuals due to height, leg length, and walking style.

To determine your stride length, walk naturally over a measured distance and count your steps. Divide the total distance by the steps to find your average stride length. For example, if you cover 10 metres in 12 steps, your stride length is approximately 0.83 metres.

Understanding this measurement helps in positioning the stepping stones at appropriate intervals. Too close together, the path becomes cramped and uncomfortable; too far apart can cause tripping or awkward strides. Stepping stones should be placed to match the average stride length of the path’s primary users.

Additionally, consider the terrain and purpose of the pathway. A garden path may have a more casual, varied stride, while a functional walkway requires uniform spacing. By understanding and applying the correct stride length, you can create a pathway that is both visually appealing and comfortable to walk on.

2. Measure Twice, Step Once

Accurate measurements are the cornerstone of correctly spaced stepping stones. Before laying any rocks, it’s essential to measure twice to ensure precision and avoid costly mistakes. As discussed earlier, start by determining the average stride length of the primary users. Once you have this measurement, mark the intended path with stakes and string, ensuring it follows the desired route and accounts for any curves or slopes.

Next, measure the distance between each stake, ensuring it matches the stride length. Use a tape measure for accuracy and mark the positions where each stepping stone will be placed. It’s crucial to double-check these measurements to ensure consistency and prevent any misalignment that could disrupt the walking flow.

If the path is irregular or features changes in elevation, consider adjusting the spacing slightly to accommodate natural walking patterns. Always prioritise comfort and safety, ensuring each step feels natural and secure.

By taking the time to measure twice and step once, you ensure a seamless, well-spaced pathway that enhances both the functionality and aesthetic appeal of your garden or outdoor space. This careful planning and precise measurement process will save you time and effort in the long run.

3. Balancing Aesthetics and Functionality

Creating a stepping-stone pathway that is both beautiful and practical requires a delicate balance between aesthetics and functionality. While the pathway’s visual appeal is important, it must also provide a comfortable and safe walking experience.

Start by considering the overall design and layout of your garden or outdoor space. Choose stepping stones that complement the existing landscape and match the style of your garden. Whether you prefer a natural, rustic look or a more formal, structured design, the stones should enhance the visual harmony of the area.

Next, focus on functionality. The spacing between stepping stones should align with the users’ average stride length, ensuring a natural and comfortable walk. Avoid placing the stones too close together, which can make the path feel cramped or too far apart, which can cause tripping hazards.

Additionally, consider the terrain and intended use of the pathway. For instance, a garden path may have a more relaxed spacing, allowing for a stroll, while a frequently used walkway might require more uniform spacing for efficiency and safety.

4. Creating a Natural Flow

Achieving a natural flow in your stepping stone pathway is essential for aesthetics and ease of use. A path with a natural flow guides the walker effortlessly, making each step feel intuitive and comfortable.

Start by laying out the pathway according to the landscape’s natural contours. Avoid rigid, straight lines unless the design specifically calls for them. Instead, opt for gentle curves and meanders that mimic natural paths. This approach enhances the visual appeal and creates a more relaxed and inviting walk.

When spacing the stones, consider the natural stride length of the primary users. Each stone should be placed at a comfortable distance to allow for a smooth transition from one to the next. For varied terrain, adjust the spacing to accommodate elevation or ground conditions changes, ensuring each step feels stable and secure.

Additionally, consider the surrounding environment. Integrate the stepping stones with existing features such as trees, shrubs, and flower beds, allowing the pathway to blend seamlessly with the landscape. This integration helps maintain a cohesive look and feel.

5. Safety First: Avoiding Tripping Hazards

Safety is paramount when designing a stepping-stone pathway. Poorly spaced or unevenly laid stones can create tripping hazards, posing a risk to anyone using the path. Ensuring safety involves careful planning and precise execution.

Start by ensuring each stepping stone is level with the surrounding ground. Uneven stones can cause trips and falls, especially in areas with heavy foot traffic. Use a spirit level to check that each stone is flat and stable.

Next, pay attention to the spacing. The distance between stones should match the average stride length of the primary users, allowing for a natural, comfortable walk. Stones placed too far apart can cause overreaching, while those too close together can create a cramped, awkward stride.

Additionally, consider the type of stone used. Choose stones with a non-slip surface to provide better traction, especially in wet or icy conditions. Textured stones or those with a rough finish are ideal for reducing the risk of slipping.

Finally, if the pathway is used at night, ensure it is well-lit. Adequate lighting helps to highlight each stepping stone, reducing the risk of accidents. Solar-powered path lights are excellent for illuminating your pathway without extensive wiring.

6. Experimenting with Patterns and Layouts

Experimenting with different patterns and layouts can transform a simple stepping-stone pathway into a captivating feature of your garden. Creative arrangements enhance visual appeal and provide opportunities to accommodate various stride lengths and walking preferences.

Begin by exploring traditional layouts such as linear, staggered, or random patterns. A linear layout offers a straightforward, formal look, ideal for more structured garden designs.

Staggered patterns, where stones are offset from each other, create a dynamic, engaging pathway that guides the walker smoothly around curves and bends. Random layouts provide a more natural, whimsical feel, perfect for informal garden settings.

Consider incorporating geometric shapes, such as circles, diamonds, or spirals, to add an element of surprise and interest. These patterns can break the monotony and draw attention to specific areas of your garden.

Mix and match different stone sizes and shapes to create a unique texture and visual rhythm. Larger stones can serve as focal points or resting spots, while smaller stones can fill gaps and maintain continuity.

When experimenting with layouts, always prioritise functionality. Ensure that the stones are spaced to fit the average stride length comfortably and that the path remains safe and easy to navigate.

Conclusion

Perfectly spaced stepping stones enhance both the beauty and functionality of your pathway. You can create an inviting and secure path by understanding stride length, measuring accurately, and balancing aesthetics with safety. Ready to transform your garden? Start planning your stepping stone layout today and enjoy a seamless, stylish walkway.

In SQM?

Please fill your details to download.


      Request Callback


        Enquiry Form


        Please fill your details to download.