Register your Information for Free Stone Samples Sent Express to You!

Search
Search
Close this search box.
Search
Close this search box.

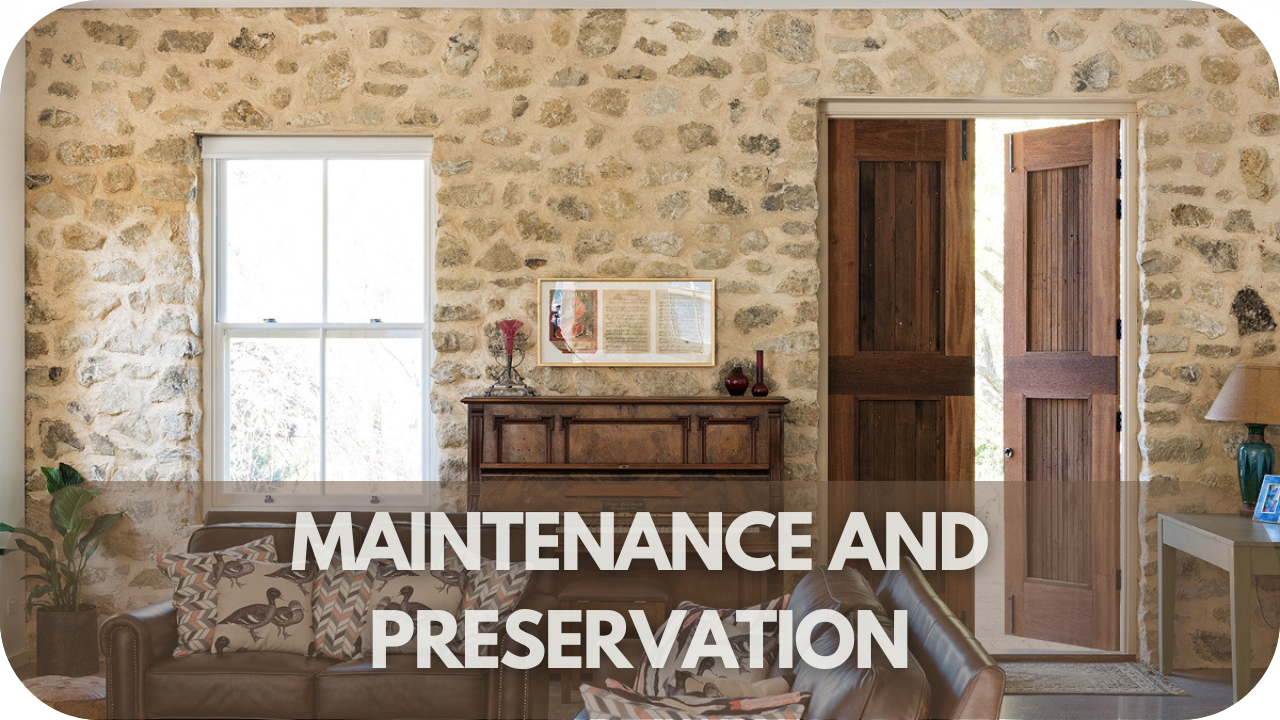
How Do You Maintain an Outdoor Natural Stone Fireplace?

Maintaining an outdoor natural stone fireplace is more than just a task—it’s a way to preserve a focal point that transforms your outdoor space into a warm, inviting haven. 

As someone who’s seen how proper care can extend the life and beauty of these stone masterpieces, I can tell you that a little effort goes a long way. 

From regular cleaning to protecting against the elements, these maintenance steps will ensure your fireplace stays stunning and functional for years, providing countless cosy nights under the stars.

Importance of Maintaining Outdoor Natural Stone Fireplaces

Your outdoor natural stone fireplace is more than just a feature—it’s a focal point that enhances the beauty and value of your outdoor space. Moisture, temperature fluctuations, and UV rays are stone’s natural enemies, leading to discolouration, erosion, and cracks.

Regular maintenance is crucial to preserving the integrity and appearance of your fireplace. Keeping the stone clean and sealed prevents dirt, mould, and pollutants from penetrating the surface, which can cause permanent stains and structural damage.

Moreover, a well-maintained fireplace looks better and functions more safely, reducing the risk of fire hazards caused by accumulated debris or weakened stone. In short, consistent upkeep is essential to ensuring your outdoor fireplace remains a stunning and durable centrepiece in your garden for years to come.

Below are the ways of maintaining your outdoor stone fireplace.

1. Regular Cleaning Routine

How Do You Maintain an Outdoor Natural Stone Fireplace: Regular Cleaning Routine

Maintaining an outdoor natural stone fireplace starts with a regular cleaning routine, ensuring it stays functional and visually appealing. 

Begin by removing ash and burnt debris after each use. Using a soft brush or an outdoor wet-dry vacuum, sweep out soot, ash, and any leaves that may have settled in the firebox. This step is crucial as leftover ash can attract moisture, which may seep into the stone, causing potential damage over time.

For a deeper clean, mix warm water with a gentle, pH-neutral soap—specifically formulated for natural stone surfaces—to avoid stripping the stone of its natural oils. Apply this solution using a soft-bristled brush to scrub the stone surface, focusing on areas with soot or smoke residue. 

Work in small sections, rinsing thoroughly with clean water to prevent soap residue from leaving streaks or discolouration. Avoid pressure washers, as the high pressure can damage the stone’s surface or mortar joints.

After washing, allow the fireplace to air dry completely before using it again, as moisture trapped in the stone can weaken its structure over time. A routine like this helps to prevent stubborn stains, preserves the stone’s natural finish.

2. Deep Cleaning: Annual Maintenance

How Do You Maintain an Outdoor Natural Stone Fireplace: Deep Cleaning: Annual Maintenance

While regular cleaning keeps your outdoor natural stone fireplace looking great, a deep clean once a year is essential for maintaining its longevity and appearance. Start by thoroughly sweeping out any ash, soot, and debris. 

Next, inspect the fireplace for stubborn soot stains or discolouration, especially around the firebox and chimney. To avoid damaging the surface, use a specialised stone cleaner that is pH-neutral and designed for natural stone. Apply the cleaner with a soft-bristled brush, scrubbing gently in circular motions to lift embedded dirt and stains.

Use a smaller brush or a toothbrush for precision for hard-to-reach areas, such as gaps between stones or mortar lines. Rinse the stone thoroughly with clean water, ensuring no cleaning residue is left behind, as this can dull the stone’s finish. Avoid using pressure washers, which can erode the stone or damage mortar joints. 

Allow the fireplace to air dry completely, which helps prevent moisture from being trapped within the stone, leading to potential cracking or structural issues. 

3. Sealing the Stone for Protection

Sealing the Stone for Protection

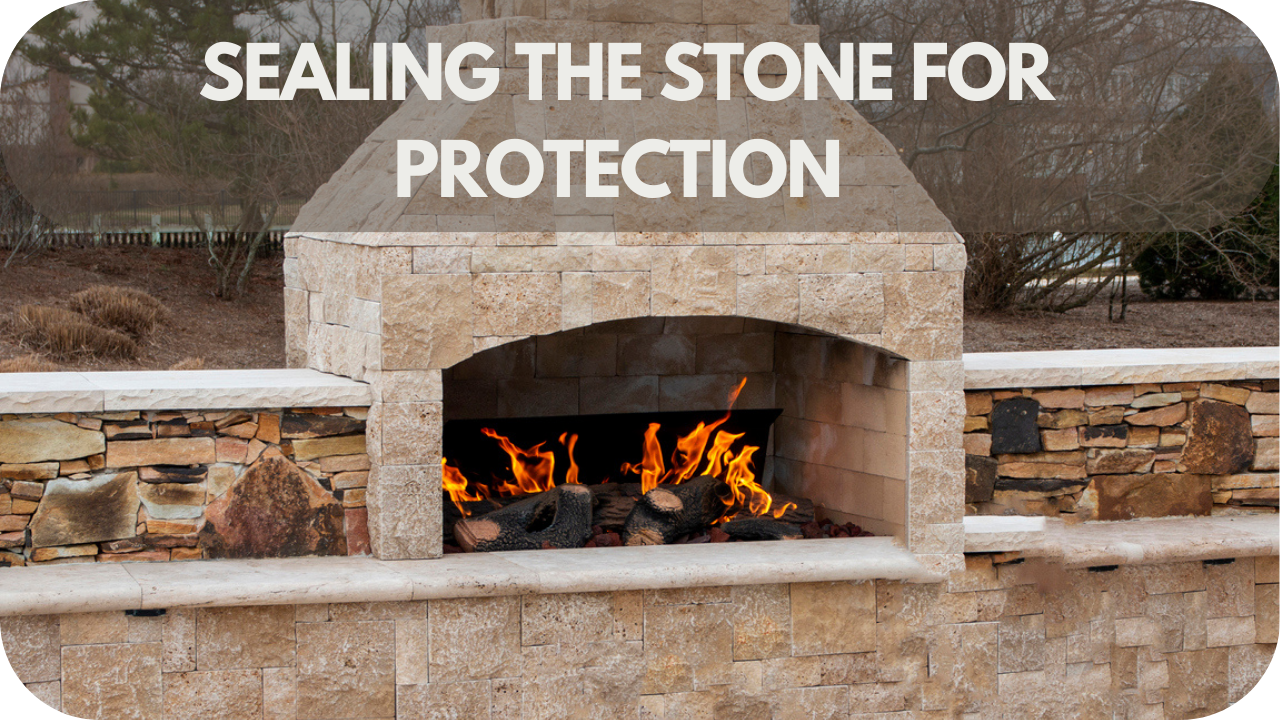
Applying a sealant to your outdoor natural stone fireplace is crucial for protecting it from the elements and preserving its appearance. 

Sealing creates a protective barrier that prevents water, dirt, and stains from penetrating the stone. This is especially important in outdoor settings exposed to rain and fluctuating temperatures. 

Choose a high-quality, breathable stone sealant specifically formulated for natural stone. This ensures the stone can release any trapped moisture, preventing mould or freeze-thaw damage. Here’s an article I did on Common Mistakes to Avoid When Sealing a Stacked Stone Fireplace that might be handy.

Before applying the sealant, ensure the stone is clean and completely dry—moisture trapped beneath the sealant can lead to discolouration or damage. Use a paintbrush, roller, or sprayer to apply the sealant evenly, working in manageable sections. 

Follow the manufacturer’s instructions regarding the number of coats and drying times. Depending on the climate and level of use, it’s recommended to reapply the sealant every 1-2 years. 

4. Addressing Weather Damage

How Do You Maintain an Outdoor Natural Stone Fireplace: Addressing Weather Damage

Outdoor natural stone fireplaces are constantly exposed to the elements, making them vulnerable to weather-related damage over time. 

Regularly inspecting your fireplace for signs of weathering is crucial in preventing more serious issues. Look for cracks, chips, or spalling (flaking) caused by the freeze-thaw cycle, where water seeps into small gaps, freezes, and then expands, widening the cracks. If you spot any damage, address it promptly using appropriate stone repair products like epoxy or mortar.

To minimise water damage, ensure that the fireplace is properly sealed. Sealants help repel moisture and prevent absorption into the stone. Additionally, directing water away from the fireplace using proper drainage solutions, such as grading the ground or adding a small roof overhang, can reduce moisture buildup. 

For areas with heavy rainfall or snow, consider covering the fireplace during off-seasons with a breathable cover, which protects the stone while allowing it to release moisture. Addressing weather damage quickly and proactively ensures that your fireplace remains a beautiful, long-lasting feature of your outdoor space.

5. Managing Surrounding Foliage

Managing Surrounding Foliage

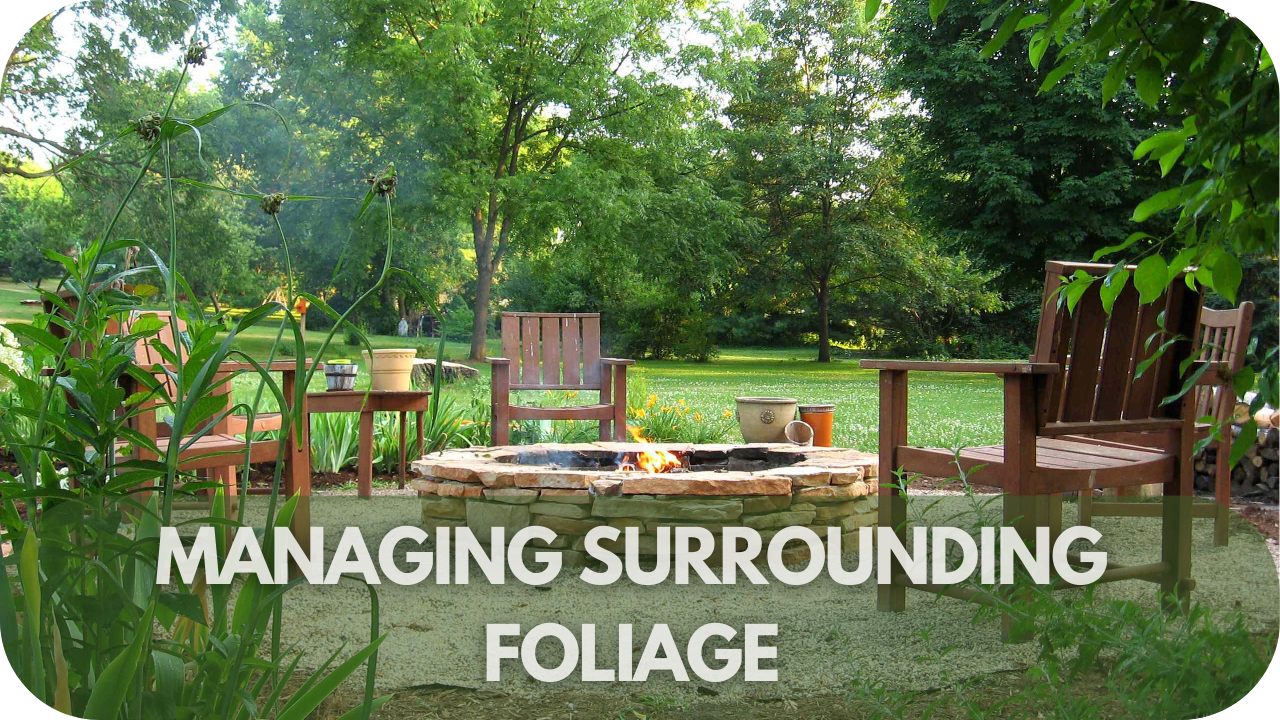
Managing the plants and trees around your outdoor natural stone fireplace is essential for maintaining both its safety and longevity. 

Overgrown foliage can trap moisture against the stone, leading to staining, mildew, and even structural damage as roots or vines penetrate small cracks. To prevent this, regularly trim trees, bushes, and creeping vines that grow close to the fireplace. 

Maintaining a clear area of at least three feet around the fireplace ensures better airflow, reduces moisture buildup, and helps the stone dry more quickly after rain.

It’s also essential to prevent leaves, twigs, and other debris from accumulating near the base or on top of the fireplace. These can trap moisture and contribute to the growth of moss or mould, which can stain the stone and cause further damage over time. 

Use a rake or leaf blower to clear debris away regularly, especially in autumn. 

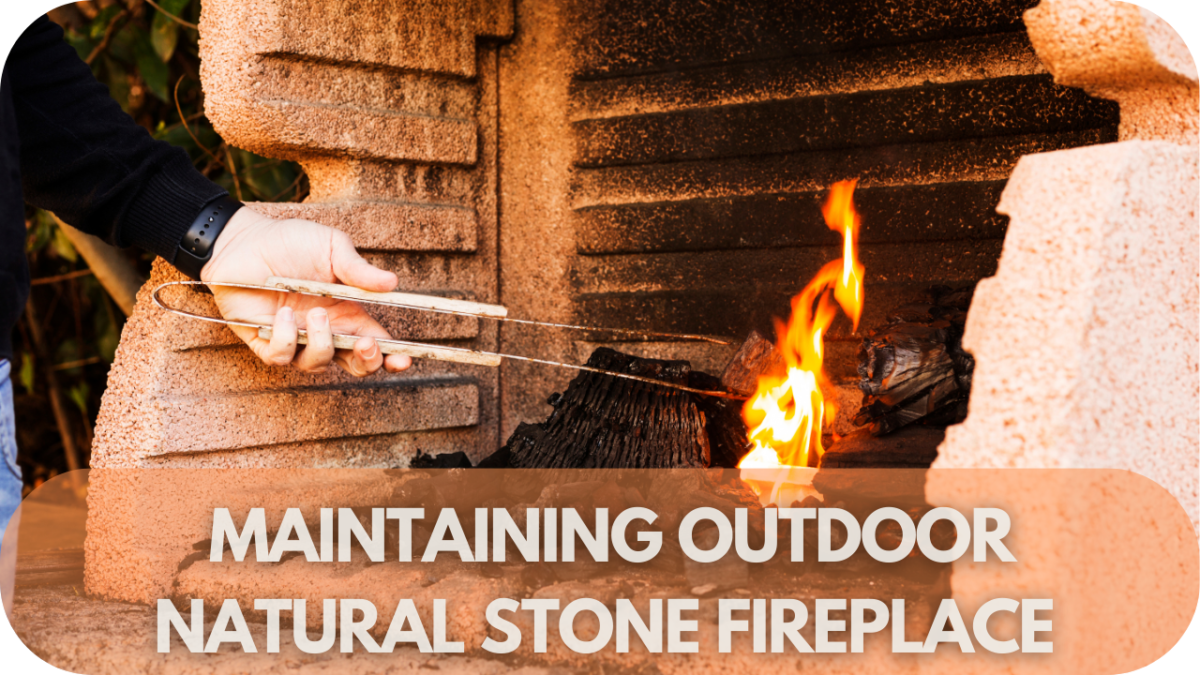
6. Safety Checks and Firebox Maintenance

Safety Checks and Firebox Maintenance

Regular safety checks and proper firebox maintenance are essential for keeping your outdoor natural stone fireplace safe and efficient. 

Start by inspecting the firebox where the fire burns for any signs of damage, such as cracks, worn areas, or loose mortar joints. Over time, the intense heat can cause these materials to degrade, potentially leading to safety hazards if not addressed promptly. Use a flashlight to examine hard-to-reach corners and ensure all components remain intact.

Clean the firebox regularly, removing leftover ash, unburned logs, and soot build-up. Excess ash can block airflow, reducing the fire’s efficiency and increasing the risk of sparks escaping. For wood-burning fireplaces, inspect the chimney or flue for creosote build-up—a highly flammable by-product of burning wood. Creosote should be professionally cleaned at least once a year to prevent chimney fires.

Additionally, ensure a fire extinguisher is kept nearby and the fireplace has proper clearance from flammable materials. 

Troubleshooting Common Problems

How Do You Maintain an Outdoor Natural Stone Fireplace: Troubleshooting Common Problems

Even with regular maintenance, outdoor natural stone fireplaces can encounter common problems. Identifying and addressing these issues early can save you time and prevent costly repairs. 

One common issue is the appearance of hairline cracks in the stone or mortar due to the freeze-thaw cycle. These can often be repaired using a high-quality masonry filler or sealant to prevent further moisture infiltration.

Another frequent problem is poor drainage around the fireplace, which can lead to water pooling at the base. This moisture can seep into the stone, causing staining or structural damage over time. Installing proper drainage or grading the ground away from the fireplace can resolve this issue.

Soot and smoke stains are also common, especially for wood-burning fireplaces. These stains can be removed using a stone-safe cleaner and a soft brush. If you notice excessive smoke, it may indicate a blockage in the chimney or a drafting issue—make sure to inspect the chimney for obstructions like leaves or nests.

Consulting a professional is recommended for persistent issues such as deep cracks or significant smoke leakage. Addressing these problems promptly ensures that your fireplace remains safe and visually appealing for years to come.

Conclusion

Your outdoor natural stone fireplace is more than just a feature—it’s a gathering place. By taking the time to care for it, you ensure it remains a warm, inviting spot for friends and family to enjoy. Need more advice or professional help? We’re here to make your fireplace maintenance a breeze.

Reach out for personalised maintenance tips or to book a professional consultation.

How To Fix Chips and Cracks in Kimberley Sandstone—What Experts Won’t Tell You

Staring at a chip or crack in your beautiful Kimberley sandstone can feel like finding a scratch on a new car—painful, right? But don’t worry, you don’t need to be a stonemason to tackle this! 

With tools, suitable materials, and a little patience, you can restore your sandstone to its former glory. In this guide, I’ll walk you through the steps, share some insider tips, and even point out common pitfalls to avoid. 

Let’s turn that chipped surface into a seamless finish!

Assessing the Extent of Damage

Before making repairs, assessing the severity of chips or cracks in your Kimberley sandstone is crucial. 

Start by examining the size and depth of the damage. Minor chips or surface-level cracks are often cosmetic and can be repaired with filler or epoxy. However, deeper cracks may indicate underlying structural issues, requiring more robust solutions. 

Use a flashlight to inspect the crack closely—if it extends through the stone or affects multiple areas, a professional assessment may be necessary. Also, check for signs of moisture infiltration around the damage, as this could worsen the problem over time. 

Understanding the extent of damage helps you choose the suitable repair method, ensuring a lasting fix and preventing future issues.

Materials and Tools Needed for Repairs

How To Fix Chips and Cracks in Kimberley Sandstone: Materials and Tools Needed for Repairs

Having suitable materials and tools is non-negotiable when repairing chips or cracks in sandstone walls. Without them, even a simple fix can become a time-consuming task. Here’s what you need to ensure your repair is durable, seamless, and matches the surrounding stone:

  • Epoxy or Acrylic-Based Filler: A high-quality filler is the backbone of any repair. These materials are designed to bond with sandstone, providing a strong, durable solution for both small chips and deeper cracks. Look for fillers that match your stone’s colour for a more natural finish.
  • Putty Knife or Trowel: These are indispensable for applying filler or mortar. A putty knife is ideal for precision work on small chips, while a trowel is better for filling wider cracks. They help you spread the material evenly and press it firmly into the damaged areas.
  • Sandpaper: Once the repair material is fully cured, fine-grit sandpaper smooths out any uneven edges, blending the repaired area seamlessly with the rest of the sandstone.
  • Cleaning Brush and Mild Detergent: Thoroughly clean the area before starting any repair. Dirt or loose particles can prevent the filler from adhering properly. A gentle detergent and soft brush can remove contaminants without damaging the stone.
  • Sealant: Applying a high-quality sealant after the repair ensures long-term protection against moisture and weathering, preserving the integrity and appearance of your sandstone. Opt for a sealant that complements the natural look of your stone.

Step-by-Step Guide to Repairing Chips in Kimberley Sandstone

Step-by-Step Guide to Repairing Chips in Kimberley Sandstone

Repairing chips in Kimberley sandstone requires careful attention to detail to ensure a seamless, durable fix. Here’s a detailed breakdown of each step to help you achieve professional results:

Step 1: Clean the Area

Begin by thoroughly cleaning the chipped area to ensure proper filler adhesion. Use a soft brush or a non-abrasive cloth to remove loose particles, dirt, or debris around the chip. 

Next, mix a mild detergent with water and gently scrub the area, removing any remaining dirt or contaminants. Rinse thoroughly with clean water to remove soap residue, as leftover detergent can interfere with the filler’s bonding. 

Allow the sandstone to dry completely before proceeding—this is essential because moisture trapped in the stone can weaken the bond of the repair material.

Step 2: Apply the Filler

Select a high-quality epoxy or acrylic-based filler designed for sandstone repairs. Ideally, the filler should match the natural colour of the Kimberley sandstone to maintain a uniform look. 

Mix the filler according to the manufacturer’s instructions, ensuring it is lumps-free. Using a putty knife, apply the filler directly into the chipped area, starting from the deepest point and gradually working outward. Press the filler firmly into the chip to fill all voids and prevent the formation of air bubbles. 

Step 3: Smooth the Surface

Use a damp cloth or your finger to smooth out the surface with the pliable filler. Focus on blending the edges of the filler into the surrounding sandstone, maintaining an even transition between the repaired area and the rest of the stone. 

If the sandstone’s surface texture is rough, gently mimic this pattern while smoothing to ensure the repair blends seamlessly. Keep a small bowl of water handy to keep your finger or tool moist during this process, which helps prevent sticking and allows for smoother application.

Step 4: Allow to Cure

Curing is a critical part of the repair process. Follow the curing time specified by the filler manufacturer, which is typically 24 to 48 hours, depending on the product. 

Curing allows the filler to harden entirely and bond securely with the sandstone, making the repair more durable. During this period, avoid touching or applying any pressure to the 

Step 5: Sand and Finish

Once the filler has fully cured, use fine-grit sandpaper (around 220 to 320 grit) to smooth the repaired area. 

Sand in gentle, circular motions, blending the filler’s edges with the sandstone’s natural surface. This step helps to eliminate any visible ridges or bumps, creating a uniform texture across the repaired area. If the surrounding sandstone has a polished or honed finish, continue sanding until you match the existing sheen. 

After sanding, wipe the area with a clean, damp cloth to remove dust. To complete the process, apply a sandstone sealant to the repaired area, which protects it from moisture, weathering, and future damage. 

Choose a breathable sealant designed for natural stone. This will maintain the stone’s ability to release trapped moisture while protecting the surface.

Step-by-Step Guide to Repairing Cracks in Kimberley Sandstone

Step-by-Step Guide to Repairing Cracks in Kimberley Sandstone

Cracks in Kimberley sandstone can worsen over time, but with the right approach, you can restore the stone’s appearance and integrity. Follow these detailed steps for a professional-grade repair:

Step 1: Clean and Prepare the Crack

Start by cleaning the crack thoroughly to ensure a solid base for the repair. Use a stiff-bristled brush to remove loose particles, dust, and debris inside the crack. For more minor or narrow cracks, compressed air can effectively blow out hidden dust and fine particles. 

Cleaning ensures that the repair compound bonds properly with the sandstone surface. If moisture is present, let the area dry completely before proceeding, as water can weaken the bond between the sandstone and the repair material.

Step 2: Fill the Crack

Once the area is clean and dry, select a high-quality repair compound or mortar compatible with sandstone. Press the compound firmly into the crack using a trowel, ensuring it reaches all depths and corners of the gap. It’s best to apply the compound in multiple layers for deep cracks, allowing each to settle for a few minutes before adding the next. 

This approach helps to prevent air bubbles from forming, which could compromise the repair’s strength. Ensure the compound slightly overfills the crack to allow for more effortless blending during the next step.

Step 3: Smooth and Blend

While the compound is still workable, use a damp finger, sponge, or a small tool to smooth the surface of the repair. Aim to blend the newly filled area with the surrounding sandstone, mirroring the natural texture of the stone. This step is critical for achieving a uniform appearance, especially for cracks in visible places. 

Keep a small bowl of water nearby to keep your finger or tool wet, which helps prevent sticking and allows for a smoother finish. Take time to ensure the repair is level with the rest of the stone for a seamless look.

Step 4: Curing Process

Allow the repair compound to cure fully, following the manufacturer’s instructions—typically, this process takes 24 to 48 hours. Curing allows the compound to harden and bond with the sandstone, providing a durable finish. 

During this time, avoid touching or applying any pressure to the repaired area, as this can disrupt the bonding process and result in a weaker repair. 

If the sandstone is outdoors, consider covering it with a protective cloth or tarp to shield it from rain or direct sunlight. Sudden temperature changes can affect the curing process.

Step 5: Sanding and Sealing

Once the repair compound is wholly cured, lightly sand the surface with fine-grit sandpaper (220 to 320 grit). Focus on smoothing rough edges or uneven spots, ensuring the repaired area blends seamlessly with the surrounding stone. 

After sanding, use a clean, damp cloth to remove any dust left behind. Finish by applying a high-quality sandstone sealant to the repaired area. A sealant will protect the sandstone from moisture, temperature changes, and UV exposure, helping to prevent future damage and extend the life of your repair. 

Choose a breathable sealant to allow the natural stone to release trapped moisture, avoiding further cracking or damage.

Common Mistakes to Avoid

How To Fix Chips and Cracks in Kimberley Sandstone: Common Mistakes to Avoid

When repairing chips or cracks in Kimberley sandstone, certain mistakes can undermine your efforts:

  • Using Incorrect Repair Materials: Avoid cement or non-specialized fillers that may fail to bond appropriately with sandstone.
  • Skipping the Cleaning Step: Debris or dust can prevent the filler from adhering securely.
  • Rushing the Curing Process: Allow ample time for the filler to harden for a durable repair.
  • Poor Blending: Ensure the filler blends seamlessly with the surrounding stone to avoid a visible patch.
  • Neglecting Sealant Application: Without a sealant, the repaired area remains vulnerable to moisture and weathering.

When to Consult a Professional

How To Fix Chips and Cracks in Kimberley Sandstone: When to Consult a Professional

While minor chips and surface cracks in Kimberley sandstone can often be repaired at home, it is ideal to hire a professional stonemason. 

If you encounter deep cracks that extend through the stone or affect large areas, it’s best to call a specialist. These types of damage may indicate underlying structural issues that could compromise the stone’s stability if not addressed correctly. 

Additionally, suppose your sandstone has significant moisture infiltration, such as water seeping through cracks or signs of mould. In that case, a professional can adequately assess and address the root cause to prevent future damage. Complex repair scenarios, like restoring heritage stonework or matching specific textures and colours, also benefit from a skilled hand. 

Professionals have the tools and knowledge to blend repairs seamlessly with the surrounding stone, ensuring a durable, aesthetic result. Suppose you’re unsure about the extent of damage or the suitable materials to use.

Conclusion

Fixing chips and cracks in Kimberley sandstone doesn’t have to be daunting. With these practical tips, you can keep your stone pristine without breaking the bank. 

Ready to restore your sandstone to its original beauty? Contact us today for a hassle-free consultation and ensure a flawless finish!

Retail Store Design Tips: How Natural Stone Can Triple Your Customer Visits

The moment I walked into a beautifully designed retail store, I felt the cool touch of marble underfoot and noticed how the stone-clad walls instantly exuded luxury. It wasn’t just about the products anymore; the atmosphere was inviting. 

Natural stone created a seamless blend of elegance and durability, making every corner memorable. That experience taught me how vital these design elements are in attracting customers. 

If you want to elevate your retail space, using natural stone might be the game-changer to draw people in and keep them coming back.

Why Natural Stone is Perfect for Retail Design

Why Natural Stone is Perfect for Retail Design

Natural stone offers various benefits, making it an exceptional choice for retail spaces that enhance aesthetics and functionality. Here are some of the reasons why it stands out:

  • Durability and Longevity: Natural stone can endure heavy foot traffic without losing appeal, making it a wise investment for high-traffic retail areas. Its resilience means fewer replacements and repairs over time.
  • Timeless Aesthetic Appeal: Stones like marble and granite create a sense of luxury that appeals to customers, elevating the store’s overall atmosphere. This classic look always stays in style.
  • Sustainability: Natural stone is often sourced responsibly and has a lower environmental impact than synthetic materials. Its thermal mass can also help regulate indoor temperatures, reducing energy costs.
  • Versatility in Design: With various colours, textures, and finishes, natural stone can be tailored to match any retail theme, from modern minimalism to rustic charm, adding a unique character to your space.
  • Enhanced Brand Perception: Using natural stone can signal quality and care, aligning a brand with a sense of refinement and permanence. It helps create a memorable shopping experience that can encourage customer loyalty.
  • Low Maintenance Requirements: Natural stone surfaces are easy to clean and maintain, requiring minimal upkeep to retain their beauty. This simplicity makes them ideal for busy retail environments.
  • Improved Acoustics: Certain stones, like travertine, have sound-absorbing properties. These properties help create a more pleasant shopping environment by reducing noise levels, which can be particularly beneficial in bustling stores.

Popular Types of Natural Stone for Retail Interiors

Natural stone can elevate the atmosphere of retail spaces, providing a blend of durability, elegance, and unique aesthetics. Here are detailed insights into the most popular types of natural stone for retail interiors:

1. Marble

Popular Types of Natural Stone for Retail Interiors: Marble

Marble is synonymous with luxury and timeless elegance. Its characteristic veining and smooth, polished surface make it an ideal choice for high-end retail spaces. Available in various colours and patterns, marble can suit different brand aesthetics, from classic to modern. 

Feature walls, countertops, and flooring in retail settings commonly use polished marble to create an immediate visual impact. The reflective nature of polished marble enhances ambient light, adding a sense of spaciousness and brightness to the store. However, regular sealing is required to maintain its pristine look and prevent stains.

2. Granite

Granite is celebrated for its robustness and variety. Known for its resistance to scratches and stains, it’s a practical choice for retail spaces with heavy foot traffic, such as entrances, display areas, and countertops. 

Granite’s dense structure makes it less prone to wear and tear, ensuring the store maintains its elegant appearance for longer. It offers a broad spectrum of colours and intricate patterns, making it a versatile choice for many surfaces that complement modern and traditional retail designs. 

Its durability and ease of maintenance make it a preferred option for surfaces that need to endure frequent interaction.

3. Limestone

Popular Types of Natural Stone for Retail Interiors: Limestone

Limestone’s soft, natural look brings warmth and comfort to retail interiors. Its muted tones, ranging from beiges to subtle greys, create a serene and inviting atmosphere, perfect for stores that aim to make customers feel at ease.

Limestone’s smooth yet textured surface adds a touch of organic charm to floors and wall claddings. Its versatility extends to interior and exterior applications, making it suitable for creating a cohesive design from the storefront to the interior. 

Regular sealing is recommended to maintain its appearance, as limestone is more porous than other stones.

4. Travertine

Travertine is distinguished by its unique, porous surface and naturally occurring pits, giving it a distinctive texture that adds depth to any space. This stone is often used for flooring, feature walls, and accent pieces in retail spaces that combine rustic charm with modern design. 

Its colour palette ranges from creamy whites to rich browns, allowing for various design styles, whether warm and earthy or sleek and contemporary. The natural variations in each piece of travertine ensure that no two installations look alike, adding a bespoke element to retail interiors. However, it requires filling and sealing for use in high-traffic areas.

5. Slate

Popular Types of Natural Stone for Retail Interiors: Slate

Slate offers a rugged, natural look that fits perfectly in retail spaces, aiming for an industrial or contemporary aesthetic. Its layered texture and darker tones, including shades of black, grey, and deep reds, create a dramatic and earthy feel. 

Slate is often used for flooring or as an accent material for walls, bringing a sense of solidity and natural beauty. Its non-slip surface makes it an excellent choice for entrances and areas where safety is a concern. With proper care, slate can maintain its stunning appearance for years, although it benefits from periodic sealing to prevent moisture absorption.

6. Quartzite

Quartzite combines the visual appeal of marble with the durability of granite, making it a prime choice for retailers seeking style and strength. Its hardness makes it resistant to scratches and heat, making it suitable for display counters, flooring, and even exterior applications like storefront cladding. 

Quartzite’s natural patterns and the light-reflective surface can mimic the look of luxurious marble while offering a more robust option. This stone is precious in areas where maintaining a sleek appearance with minimal maintenance is essential. It requires sealing to prevent staining but offers long-lasting beauty with minimal upkeep.

7. Onyx

Popular Types of Natural Stone for Retail Interiors: Onyx

Onyx is the go-to option for retailers looking to create a striking visual statement. Known for its translucent quality, onyx can be backlit to create captivating feature walls, bar fronts, or countertops that become focal points within a store. 

Its vibrant colours and swirling patterns give each piece a unique look, making it perfect for luxury retail settings that aim to impress. Due to its softer nature, onyx is best suited for low-traffic areas or decorative elements that won’t be subjected to heavy use. Proper sealing and care are essential to maintaining its stunning appearance over time.

Design Applications of Natural Stone in Retail Stores

Design Applications of Natural Stone in Retail Stores

Natural stone can transform retail spaces in various creative ways. Here are some critical applications that blend functionality and aesthetics:

  • Flooring: Natural stone floors offer durability and elegance, perfect for high-traffic areas. Marble, granite, and slate bring unique textures, while polished surfaces enhance lighting, creating a brighter environment. Honed finishes add a sophisticated, understated touch, ideal for modern and classic retail designs.
  • Feature Walls and Cladding: Stone feature walls create eye-catching focal points. Materials like travertine or marble add depth and texture, elevating display areas. Backlit onyx can draw attention to special collections, while stone cladding ensures durability and easy maintenance, maintaining a sleek appearance over time.
  • Display Units: Granite or quartzite for countertops offers scratch-resistant surfaces that remain beautiful and can be used heavily. Marble adds a luxurious touch to display tables or cash wrap areas. Stone countertops blend seamlessly into retail interiors, enhancing the overall customer experience with a tactile, elegant feel.
  • Staircases and Steps: Stone staircases make a bold visual impact in multi-level stores. Marble or limestone steps create an elegant look, while durability ensures long-lasting appeal. Adding glass or metal accents can modernise the design, combining safety with aesthetic charm for a cohesive store environment.
  • Exterior Facades and Storefronts: Cladding facades with granite or limestone creates a high-end appearance that attracts customers before they even step inside. Natural stone facades provide texture and character, setting a store apart in urban areas and reinforcing brand identity through a striking, enduring exterior.
  • Accent Pieces and Custom Art Installations: Stone can be used creatively in accents like sculptures, planters, or custom installations. These pieces add natural charm without overwhelming the space, offering an organic backdrop for products. Stone accents enhance window displays and create a memorable visual appeal in stores.
  • Water Features: Adding a stone water feature can elevate luxury retail spaces. Travertine or slate fountains create a serene atmosphere, enhancing the shopping experience. This unique element offers a sense of calm, helping customers feel more at ease while browsing the store’s offerings.

Biophilic Design: Bringing the Outdoors In

Biophilic design focuses on incorporating elements of nature into indoor spaces, creating a connection with the natural world that enhances well-being. This approach can be efficient in retail stores, transforming the shopping experience into something more calming and inviting. 

Natural stone plays a significant role in biophilic design by introducing textures, patterns, and colours that evoke nature’s raw beauty. For instance, stone walls, floors, or accent pieces bring the feeling of rugged landscapes into a store, making the space more organic and grounded.

The presence of natural materials like stone can also foster a sense of tranquillity, reducing stress levels and encouraging customers to spend more time in the store. This not only enhances their experience but can also lead to increased sales. 

Additionally, natural stone’s ability to blend seamlessly with plants, water features, and other organic elements creates visually appealing spaces that feel fresh and invigorating. These design elements create a multi-sensory experience, making the retail environment aesthetically pleasing and comfortable.

By incorporating biophilic design with natural stone, retail stores can create a unique, engaging atmosphere that appeals to customers’ innate desire to connect with nature. This approach sets a store apart and aligns with growing trends towards sustainability and wellness in commercial design.

Practical Considerations for Using Natural Stone in Retail

When using natural stone in retail design, several practical considerations are essential for a successful implementation:

  • Budget: Natural stone can be a significant investment due to its material cost and installation requirements. Prices vary based on the type of stone and its sourcing, making it crucial to balance quality with the available budget. While more expensive initially, the stone’s durability can reduce long-term maintenance costs.
  • Maintenance Needs: Different stones have unique care requirements. For instance, marble and limestone may require regular sealing to prevent stains, while granite and quartzite offer more resilience. Understanding these needs ensures the store maintains its aesthetic appeal.
  • Professional Installation: Due to the weight and complexity of stone installations, hiring experienced professionals is vital. Proper installation ensures durability and prevents issues like uneven flooring or improperly secured cladding.
  • Weight and Structural Considerations: The weight of stone materials can affect the load-bearing capacity of flooring, especially for upper levels. Consulting with structural engineers ensures safety and longevity.
  • Local Sourcing and Sustainability: Opting for locally sourced stone can reduce transportation costs and support sustainability efforts. It aligns with eco-conscious values and may contribute to certifications like LEED.

Conclusion

Ready to transform your retail space into a customer magnet with the timeless appeal of natural stone? The correct stone elements can create an inviting atmosphere that draws customers in and keeps them returning. 

Let Splendour in Stone help you select the perfect materials to elevate your store’s design—reach out today to make your vision a reality.

How Long Can I Expect Stirling Sandstone to Last?

Stirling Sandstone is a favoured option for exterior cladding and masonry, but questions often arise about its durability.

This natural stone can be vulnerable to weathering, erosion, and other environmental challenges, which may lead to expensive repairs or even replacement over time. 

However, with a deeper understanding of what affects its longevity and by adopting effective maintenance practices, homeowners and builders can extend the life of Stirling Sandstone, preserving its stunning, timeless appeal for many years.

How Long Can I Expect Stirling Sandstone to Last?

Stirling Sandstone is renowned for its durability. With proper care, it typically lasts over 50 years. Its robust nature withstands weathering and erosion, making it ideal for indoor and outdoor applications. Regular maintenance, such as cleaning and sealing, can significantly extend its lifespan, ensuring it remains timeless in any setting.

Factors Influencing Longevity

How Long Can I Expect Stirling Sandstone to Last: Factors Influencing Longevity

Several factors influence Stirling Sandstone’s longevity, ensuring it remains a durable and aesthetically pleasing material for various applications.

  • Quality of Stone: The initial quality of the sandstone significantly affects its lifespan. High-grade Stirling Sandstone, sourced from reputable quarries, tends to have fewer impurities and a more consistent composition, leading to more excellent durability.
  • Installation Techniques: Proper installation is crucial for maximising the lifespan of Stirling Sandstone. Using appropriate adhesives, ensuring correct alignment, and applying proper sealing techniques can prevent early degradation and structural issues.
  • Environmental Exposure: The environment in which the sandstone is used plays a vital role. Areas with extreme weather conditions, such as heavy rainfall, freeze-thaw cycles, or high humidity, can accelerate wear and tear. Selecting the right type of sandstone for the specific environmental conditions is essential.
  • Maintenance Practices: Regular maintenance, including cleaning and resealing, helps protect Stirling Sandstone from the elements. Removing dirt, debris, and biological growth like moss or algae prevents surface damage, while periodic sealing can enhance its resistance to moisture and stains.
  • Usage Patterns: The frequency and type of use also impact longevity. High-traffic areas may experience more wear, requiring frequent maintenance, while less-trafficked areas may last longer with minimal upkeep.

Expected Lifespan in Various Conditions

How Long Can I Expect Stirling Sandstone to Last: Expected Lifespan in Various Conditions

The expected lifespan of Stirling Sandstone varies depending on the environmental conditions in which it is used.

1. Urban Settings

With proper care, Stirling Sandstone can last for over 50 years in urban environments. However, the presence of pollution, vehicle emissions, and increased human activity can impact its lifespan.

Urban grime and pollutants can accumulate on the surface, potentially compromising its natural beauty and structure over time. To maintain its durability, regular cleaning is crucial to remove pollutants that can lead to surface staining and deterioration. 

Periodic sealing is recommended to create a protective barrier against moisture and grime, helping the sandstone withstand the challenges of a bustling cityscape.

2. Coastal Environments

Coastal areas present unique challenges for Stirling Sandstone due to constant exposure to salt, high humidity, and abrasive wind-blown sand. These environmental conditions can accelerate the weathering process, leading to increased erosion and a reduced lifespan of about 30-40 years. 

Salt can penetrate the stone’s pores, causing salt crystallisation, resulting in surface flaking and structural weakening over time. More frequent maintenance, including regular sealing and surface treatments designed to repel moisture and prevent salt intrusion, is essential to combat these effects. 

Using breathable sealers can also help the stone expel trapped moisture, reducing the risk of damage from internal pressure.

3. Rural and Natural Landscapes

In rural or natural settings, Stirling Sandstone typically enjoys a longer lifespan of up to 70 years, thanks to fewer pollutants and less intensive human activity. The stone is exposed to a cleaner environment, which reduces the risk of surface staining and chemical damage. 

However, exposure to natural elements like rain, freeze-thaw cycles, and biological growth, such as moss or lichen, can still affect the stone’s integrity. Freeze-thaw cycles, in particular, can cause expansion within the stone’s pores, leading to cracking over time. 

Routine maintenance, such as cleaning and removing biological growth, is essential to maintain its appearance and structural integrity. Applying moss and lichen inhibitors can also help prevent the buildup of organic matter that can trap moisture.

4. Extreme Climates

In regions with extreme climates, Stirling Sandstone typically has a reduced lifespan of around 40-50 years. The frequent temperature changes, particularly in areas with severe winters or scorching summers, can cause thermal shock, leading to surface cracks over time. 

These micro-cracks can accumulate, weakening the stone’s structure. Proper maintenance, such as the use of thermal-resistant sealers and regular inspections, can help extend its lifespan by minimising damage from temperature fluctuations. 

Additionally, using thicker sandstone slabs can offer better resistance against such conditions, ensuring a longer service life.

5. Industrial Zones

In industrial zones, where Stirling Sandstone is exposed to chemical pollutants, acidic rain, and industrial runoff, its lifespan can be shortened to about 30-40 years. These harsh conditions can accelerate the erosion of the stone, making it more vulnerable to surface wear and structural damage. 

Regular washing to neutralise acidic residues and applying sealants designed to resist chemical exposure are essential measures to protect the stone. Protective coatings can also help minimise the impact of airborne industrial particles that might settle on the sandstone, ensuring that its natural texture and appearance are preserved for as long as possible. 

With diligent maintenance, the sandstone’s durability can be enhanced, allowing it to endure the challenges of industrial environments.

Typical Applications of Stirling Sandstone

Typical Applications of Stirling Sandstone

Stirling Sandstone is a versatile material with a wide range of applications. It is known for its durability and aesthetic appeal.

  • Wall Cladding: Stirling Sandstone is commonly used for wall cladding in residential and commercial buildings. Its natural texture and variety of colours add an elegant and timeless look to facades, feature walls, and internal partitions.
  • Paving: This sandstone is an excellent choice for paving in gardens, patios, and pathways. Its robustness ensures it can withstand foot traffic and weather conditions, making it ideal for outdoor spaces. Proper sealing and maintenance enhance its longevity and appearance.
  • Landscaping: Stirling Sandstone creates retaining walls, garden borders, and decorative elements. Its natural beauty complements various landscape designs, from contemporary to rustic, providing a cohesive and attractive outdoor environment.
  • Flooring: Stirling Sandstone is suitable for flooring in both indoor and outdoor settings. Its durability makes it perfect for high-traffic areas such as hallways, foyers, and outdoor courtyards. Regular maintenance helps preserve its finish and extend its lifespan.
  • Steps and Stairs: The strength and slip-resistant properties of Stirling Sandstone make it an ideal material for steps and staircases. Its aesthetic appeal adds a touch of elegance to entryways and garden paths.

Maintenance and Preservation

Maintenance and Preservation

Proper maintenance and preservation are crucial for maximising Stirling Sandstone’s lifespan. Regular upkeep ensures the stone remains in excellent condition, retaining its aesthetic appeal and structural integrity.

  • Cleaning: Regular cleaning removes dirt, debris, and biological growth such as moss and algae. Use a mild detergent and water, and avoid harsh chemicals that can damage the stone. A soft brush can help scrub away surface grime without causing abrasion.
  • Sealing: Applying a high-quality sealant every few years protects Stirling Sandstone from moisture penetration, staining, and weathering. Sealing is critical in high-traffic areas and harsh environmental conditions, such as coastal regions. Ensure the surface is thoroughly cleaned and dry before applying the sealant.
  • Inspection: Periodic inspection of the sandstone surfaces helps identify any early signs of damage, such as cracks, chips, or erosion. Promptly addressing these issues prevents further deterioration. Minor repairs can be managed with suitable fillers and adhesives for natural stone.
  • Protection: Preventing physical damage is crucial for preservation. Avoid using harsh metal tools or abrasive materials that can scratch or chip the surface. Place protective pads under heavy furniture and equipment to prevent direct impact on the stone.
  • Environmental Considerations: In areas with freeze-thaw cycles, ensure that water does not accumulate on the stone surface, as freezing can cause cracks. Good drainage and proper installation can mitigate these risks.

Real-World Examples

Real-World Examples of Sandstone Stirling Usage

Real-world examples of Stirling Sandstone showcase its impressive durability and timeless beauty in various applications.

  • Historic Buildings: Many historic buildings across the UK feature Stirling Sandstone, demonstrating its longevity. For instance, The Stirling Castle , constructed in the late 15th century, has utilised this sandstone extensively. Despite centuries of exposure to the elements, the stone has maintained its structural integrity and aesthetic appeal, illustrating its resilience and durability.
  • Urban Landmarks: Stirling Sandstone is used in prominent landmarks in modern urban settings. The Glasgow City Chambers, built in the 1880s, is a prime example. With its intricate sandstone facade, this iconic building continues to stand strong, weathering pollution and urban wear while maintaining its grandeur.
  • Residential Projects: Stirling sandstone is also used in contemporary residential projects. Luxury homes in the Cotswolds often feature this stone for exterior cladding, paving, and landscaping. These homes, built in the past few decades, demonstrate the stone’s ability to combine modern design with long-lasting performance.
  • Public Spaces: Stirling Sandstone is commonly used in public spaces such as parks and plazas. The Princes Street Gardens in Edinburgh, featuring sandstone pathways and retaining walls, is a testament to the stone’s ability to endure high foot traffic and diverse weather conditions while enhancing the beauty of public areas.

Conclusion

Stirling Sandstone, renowned for its durability and timeless appeal, can last decades with proper care. Consider factors like installation, maintenance, and environmental exposure to maximise its lifespan. 

Choose Stirling Sandstone for your next project and enjoy a beautiful, enduring finish. Contact us today to explore your options.

Best Cleaning and Maintenance Techniques for Stirling Sandstone

Maintaining Stirling sandstone’s timeless elegance can be challenging despite environmental wear and tear. Stubborn stains, weathering, and moss growth often mar its beauty, leaving homeowners frustrated.

Our comprehensive guide unveils the best cleaning and maintenance techniques explicitly tailored for Stirling sandstone, ensuring its longevity and pristine appearance for years.

Tip 1: Gather Your Supplies

Best Cleaning and Maintenance Techniques for Stirling Sandstone: Supplies

Preparation is the key to success! Before diving into cleaning your Stirling sandstone, make sure to have all the essential supplies at hand:

  • Soft-bristle brush or broom – Ideal for removing loose dirt without scratching the surface.
  • Bucket.
  • Mild pH-neutral cleaner.
  • Soft cloth or mop.
  • Garden hose (for outdoor cleaning).
  • Proper gloves – Protect your skin, especially if scrubbing for an extended period.

Everything in reach means no interruptions, making the entire process much smoother! Take the time to assemble these tools first, and you’ll save yourself the hassle later. Let’s set it up right, and it’ll make a difference.

Tip 2: Routine Cleaning Technique

Best Cleaning and Maintenance Techniques for Stirling Sandstone: Routine Cleaning Technique

Routine care is all about consistency! Sweeping or dusting your Stirling sandstone surfaces once a week keeps dirt from accumulating and becoming hard to remove. A damp mop works wonders for indoor areas. Gently hosing outdoor surfaces down can help maintain their fresh appearance. 

Always use a pH-neutral cleaner—strong chemicals can degrade the stone over time. Watch for dirt settling into the grout lines, as these areas can become breeding grounds for mould if neglected. Regularly cleaning these spots keeps your sandstone beautiful and safe from damage. 

Dry off the surface with a soft towel or let it air dry; standing water can lead to discolouration. Stay consistent, and you’ll enjoy spotless sandstone for years.

Tip 3: Deep Cleaning Method

Sometimes routine cleaning isn’t enough, and that’s when deep cleaning steps in! Begin by sweeping the entire surface to remove any loose debris. Mix a pH-neutral cleaner with warm water to create an effective cleaning solution. 

Apply this mixture generously over the sandstone and allow it to sit for about 10 minutes—this gives the solution time to break down any tough grime. Next, grab a soft-bristle brush and scrub gently in circular motions, focusing on mainly stained or soiled areas. 

Rinse thoroughly with clean water to remove any leftover cleaner residue. If working indoors, ensure the space is well-ventilated to help with faster drying. Repeat the process for any stubborn stains. Taking the time for a thorough clean every few months will help restore the stone’s natural beauty.

Tip 4: Stain Removal 

Best Cleaning and Maintenance Techniques for Stirling Sandstone: Stain Removal 

Stains can be tricky, but they mustn’t be a nightmare! Identify the type of stain first—oil, organic, or rust—as each requires a slightly different approach. Mix baking soda and water to create a paste for oil stains, then apply it to the stain and let it sit for 24 hours

Organic stains, such as those from leaves or plants, can be removed using a diluted hydrogen peroxide solution. Rust stains may need a commercial rust remover specifically designed for stone. 

Avoid vigorous scrubbing; let your cleaning agents do the heavy lifting. Test any solution on a small, inconspicuous area first to ensure it won’t discolour your sandstone. Patience is key here—effective stain removal often takes more than one attempt.

Seasonal Maintenance Tips

Seasons change, and so should your maintenance habits! Each season brings unique challenges and opportunities for maintaining your Stirling sandstone. By adapting your maintenance approach throughout the year, you can keep your stone pristine no matter the weather.

1. Spring

As the weather warms up, it’s the ideal time to focus on giving your sandstone a thorough wash to remove any residue left by winter weather. This helps to prepare the stone for the coming months and ensures it remains vibrant and free from lingering grime. Pay extra attention to corners and crevices where winter debris may have accumulated.

2. Summer 

This is the perfect time to reseal your stone, as dry conditions help the sealer adhere effectively. Applying a fresh coat of sealant during the summer protects the sandstone from intense sunlight and enhances its natural colour. Remember to schedule this task for a day when there is no rain forecast to ensure the sealant cures properly.

3. Autumn

An influx of fallen leaves and debris comes with autumn, so increasing sweeping frequency to prevent organic stains is crucial. These organic materials can leave permanent marks on your sandstone if left unchecked. Additionally, consider trimming back nearby trees and bushes to minimise the amount of debris falling onto your stone surfaces.

4. Winter

The colder months require special care for your sandstone. Avoid using salt or harsh de-icers directly on sandstone, as these can damage its surface. Instead, sand should be used for traction on walkways to maintain safety without compromising the integrity of the stone. Be proactive in brushing off snow or ice buildup, as moisture can seep into the pores and lead to cracking when temperatures drop.

Preventive Maintenance Techniques

Protecting your Stirling sandstone is more than just upkeep—it’s about preserving this timeless material’s natural beauty and strength. With a few simple preventive maintenance techniques, you can shield your sandstone from stains, scratches, and wear, ensuring it stays pristine for years. Ready to keep your stone looking its best? Here’s how you can make that happen.

1. Sealing

Applying a high-quality sealant to Stirling sandstone can significantly reduce the chances of staining or water damage. Choose a breathable sealant that allows moisture to escape while providing a protective barrier. 

Seal your stone every 1 to 2 years to maintain this protective layer, ensuring the sealant is evenly applied to avoid streaks or patchy areas. Consider consulting a professional to seal large areas or intricate designs for optimal protection.

2. Spill Management

Make it a habit to immediately wipe away spills, particularly of acidic substances like wine or citrus juice, which can etch into the surface. Use a pH-neutral cleaner when wiping to avoid further damage to the stone. 

Apply a stone-specific stain remover and follow the manufacturer’s instructions for stubborn stains. Regularly inspect your sandstone surfaces for unnoticed spills; even small spots can lead to long-term discolouration.

3. Protection Against Wear

Position mats or rugs in high-traffic areas to protect against scratches and wear. Opt for non-slip, rubber-backed rugs to prevent shifting, which could scratch the stone. Rotate these rugs periodically to distribute wear evenly. 

To minimise abrasion, furniture resting on the sandstone should have felt pads or protective covers on the legs, especially with heavy pieces that might dig into the surface over time.

4. Landscaping

Strategic landscaping will benefit outdoor sandstone. Trimming bushes and keeping gutters clean prevents organic debris from accumulating. Water should drain away from sandstone surfaces, avoiding pooling that could lead to moisture build-up and mildew growth. 

Incorporate gravel or ground covers around the base of bushes to minimise splashing and dirt buildup on the stone. Regularly sweep away leaves and debris that could trap moisture against the stone’s surface.

5. Pet Care

Keep pets’ claws trimmed if they regularly walk across your sandstone, as this prevents scratches. Use pet-friendly rugs near entryways to encourage pets to wipe their paws before stepping onto the stone. 

If your pets frequently play or run across the area, consider designating a specific zone to prevent excessive wear on the stone. Additionally, promptly clean up any pet accidents with a neutral cleaner to avoid etching or staining.

6. Regular Cleaning

Dust and sweep the sandstone surface weekly to remove dirt and grit that could scratch the stone. Use a soft-bristle broom or a vacuum with a brush attachment to avoid abrasions. For a deeper clean, mop with a pH-neutral stone cleaner and warm water, ensuring the mop is damp rather than wet to prevent water absorption. Avoid harsh or acidic cleaning products, which can erode the stone over time.

7. Consistent Actions

Small, consistent actions now will save you considerable repair effort later on. Regularly inspecting your sandstone surfaces for signs of damage or wear ensures that issues can be addressed before they worsen. 

For larger areas, consider a professional inspection every few years to catch problems that might take time to be visible. A proactive maintenance approach can extend your sandstone’s life, preserving its beauty for years.

Conclusion

Maintaining Stirling sandstone ensures its beauty and longevity for years to come. By applying these specific cleaning and maintenance methods, you can keep your sandstone pristine. 

Ready to give your sandstone the care it deserves? Reach out to Splendour in Stone for expert guidance or products tailored for Stirling sandstone maintenance today.

Retaining Wall Design Ideas

Retaining walls often get overlooked as merely functional structures, but leaving them as plain, dull barriers can save valuable design potential.

Without a thoughtful design, these walls can become eyesores, detracting from the overall beauty of your landscape. Worse yet, they may need to optimise space or fully enhance your garden’s flow.

By exploring creative retaining wall design ideas, you can transform these structures into stunning landscape features that are both practical and visually appealing, adding depth, character, and functionality to your outdoor space.

Basics of Retaining Walls

Retaining walls are structural elements that hold back soil and create level areas in sloped landscapes. They are essential for preventing soil erosion and offering support where the ground needs stabilisation. These walls are commonly used in gardens, around patios, or to create tiered landscaping features.

There are different types of retaining walls, each suited to specific needs. Gravity walls rely on their weight to resist the pressure from the earth, making them ideal for small-scale projects. 

Cantilevered walls use a reinforced base, extending more deeply into the ground for added strength, perfect for taller walls. Anchored walls employ cables or anchors embedded into the surrounding soil, offering additional stability for more significant load-bearing needs.

Proper drainage is a crucial aspect of retaining wall design. It prevents water buildup behind the structure, which could damage it over time. 

Choosing the suitable material—natural stone, concrete, or timber—depends on your landscape style and the wall’s intended function. Understanding these basics ensures that your retaining wall remains sturdy, functional, and a long-lasting feature in your garden.

1. Tiered Retaining Walls

Retaining Wall Design Ideas: Tiered Retaining Walls

Tiered retaining walls offer a practical and visually striking solution for sloped properties. By creating multiple levels, these walls add depth and dimension to your outdoor space, transforming steep inclines into functional, attractive features. 

Each tier is a separate level for planting different vegetation types, such as flowers, shrubs, or ground cover, creating a lush and layered look.

This design enhances the aesthetic appeal and improves drainage by directing water away from the wall, reducing erosion risk. Each tier can be constructed using different materials, such as natural stone, timber, or concrete, allowing for flexibility in design to match your garden’s style. 

Additionally, tiered walls create small, flat surfaces that can be used as seating areas, walkways, or for placing garden ornaments.

The benefits extend beyond beauty—tiered retaining walls also maximise usable space on sloped terrain, turning otherwise unmanageable areas into accessible, garden-friendly zones. 

With proper planning, they can seamlessly blend with the natural contours of your landscape, making them a smart choice for both functionality and visual impact.

2. Curved Retaining Walls

Retaining Wall Design Ideas: Curved Retaining Walls

Curved retaining walls bring a soft, organic flow to your garden, offering a visually appealing alternative to straight lines. By following the natural contours of your landscape, curved walls create a more harmonious integration with the environment, enhancing the overall design. This design approach is efficient in larger outdoor spaces, where straight walls may appear too rigid or stark.

Curved walls can also guide movement through your garden, directing visitors along paths and highlighting critical areas like seating nooks, water features, or flower beds. 

This gentle curve draws the eye, making the space more welcoming and dynamic. The versatile design allows various materials, such as natural stone, brick, or textured concrete, to complement your landscape style.

Building curved retaining walls requires careful planning and precision, as the alignment must be just correct to ensure stability. 

Proper drainage behind the wall is crucial to prevent water buildup and maintain structural integrity. With the right design and execution, curved retaining walls can transform your garden, offering a seamless blend of beauty and function that feels natural at home.

3. Retaining Walls with Built-In Seating

Retaining Wall Design Ideas: Retaining Walls with Built-In Seating

Retaining walls with built-in seating offer a clever way to enhance outdoor spaces’ functionality and appeal. By incorporating seating directly into the design, you can create a practical gathering spot without taking up additional room in your garden or patio area. This approach is especially beneficial in compact spaces, where maximising every square metre is crucial.

Built-in seating can be seamlessly integrated with the wall’s structure, using the same materials for a cohesive look or contrasting finishes for added visual interest. Materials like natural stone, brick, or timber can be shaped into benches that follow the curve of the retaining wall, offering comfortable seating that blends into the landscape.

This design is perfect for creating intimate outdoor seating areas around a fire pit, along a garden path, or beside a patio. It also provides practical solutions for spaces where furniture might need to be more convenient or challenging to place. 

Additionally, the solid structure of retaining walls means the seating is sturdy and low-maintenance, offering a durable option that can withstand the elements. Combining seating with retaining walls makes your outdoor area more inviting and user-friendly, enhancing form and function.

4. Retaining Walls with Built-In Planters

Retaining walls with built-in planters offer a unique way to blend structure with nature, creating a dynamic landscape feature that serves both functional and decorative purposes. 

By integrating planters directly into the wall, you can add layers of greenery without needing separate garden beds, saving space while enhancing the visual appeal of your outdoor area.

Built-in planters are ideal for growing various plants, such as flowers, herbs, or small shrubs, turning your retaining wall into a living wall. This adds colour and texture and provides an opportunity to introduce seasonal blooms or aromatic herbs that enrich the environment. The strategic placement of planters along the wall allows for easy access, making gardening simpler and more convenient.

Incorporating planters can also improve the wall’s drainage by directing water away from the structure, helping to prevent water buildup that could compromise the wall’s integrity. 

Materials like natural stone, brick, or concrete can match your garden’s style when designing retaining walls with planters. This approach creates a seamless blend of hardscape and softscape, making your retaining wall a vibrant and engaging feature in the landscape.

Decorative Finishes to Elevate Your Retaining Walls

Decorative Finishes to Elevate Your Retaining Walls

Decorative finishes can transform a standard retaining wall into a stunning focal point in your landscape. Adding textures, colours, and unique patterns can elevate the look of a retaining wall, making it a feature that enhances the overall aesthetic of your outdoor space. 

Textured finishes, such as rough-cut stone or stamped concrete, can add depth and interest to the wall’s surface, creating a more natural and visually appealing appearance.

Coloured stains or paints offer a way to customise the wall, allowing you to match or contrast the surrounding elements in your garden. For a bold look, consider using rich, earthy tones or more vibrant colours to create a striking visual impact. Alternatively, subtle shades can complement traditional garden designs’ classic, timeless feel.

Patterned brickwork or stonework is another way to add character to retaining walls. Incorporating intricate designs or geometric patterns can give the wall a more refined look, turning it into an artistic feature. 

Decorative caps or ledges can be added to the top of the wall for a polished finish, providing a neat and complete look. With thoughtful design choices, your retaining wall can become a true highlight of your garden.

Choosing the Right Materials for Your Retaining Wall

Selecting a suitable material is key to building a retaining wall that is both durable and visually appealing. Here’s what you need to consider:

  • Natural Stone: Offers a classic, timeless look that blends seamlessly with outdoor landscapes. It’s highly durable but can be costly and requires skilled installation.
  • Concrete Blocks: A versatile and budget-friendly option. Available in various colours and textures, they’re ideal for creating customised designs and are suitable for taller walls due to their strength.
  • Timber: Brings a warm, rustic charm to modern or traditional gardens. It’s affordable but needs regular maintenance to protect against moisture and decay, especially in damp environments.
  • Brick: Provides a clean, uniform appearance perfect for formal gardens. It’s solid and weather-resistant, making it a reliable choice for long-lasting walls.
  • Gabion Walls: Constructed using wire cages filled with stones, gabion walls offer a rugged, industrial aesthetic. They are ideal for areas with significant water flow and allow for natural drainage.
  • Precast Concrete Panels: Quickly installed and available in various textures and patterns, precast concrete panels are solid and well-suited for large-scale projects where time and uniformity are essential.
  • Boulder Walls: Use large natural stones for a raw, natural look that’s especially effective in rustic settings. These are best for lower walls and can be arranged to fit the land’s natural contours.

Benefits of Retaining Walls

Retaining walls are more than just barriers; they bring multiple advantages to your outdoor space:

  • Prevents Soil Erosion: Retaining walls support sloped landscapes, helping to hold back soil and reduce erosion, especially during heavy rain.
  • Maximises Usable Space: They turn sloped or uneven ground into level areas, creating space for gardens, patios, or other functional outdoor zones.
  • Enhances Aesthetic Appeal: With tiered designs, curves, and decorative finishes, retaining walls can become a stunning focal point in your landscape.
  • Increases Property Stability: Retaining walls protect the structural integrity of your property, particularly in hilly areas, by preventing landslides and soil movement.
  • Improves Drainage: Well-designed retaining walls can direct water away from vulnerable areas, reducing the risk of water damage and pooling around your home.
  • Adds Value to Your Property: Increased space, stability, and visual appeal can boost your property’s market value, making retaining walls an intelligent investment.

Conclusion

Transforming your outdoor space with creative retaining wall designs adds beauty and functionality to your landscape. Whether you choose tiered walls, built-in seating, or decorative finishes, each option offers unique benefits. 

Ready to elevate your garden’s appeal? Consult with a professional today to explore the perfect retaining wall design that matches your vision and needs.

Modernise Your Office Space: Top Natural Stone You Can’t Ignore

Stale office environments can drain creativity and productivity, leaving employees uninspired.

Bland walls, uninspiring floors, and generic decor often create a lacklustre atmosphere, making it difficult to foster motivation and innovation. This can negatively impact mood and performance, holding back your team’s potential.

Transform your workspace with natural stone features that bring elegance, warmth, and sophistication. Explore the top options that can revitalise your office, turning it into a space that inspires every day.

Top Natural Stones for Modern Office Design

These natural stones offer a unique blend of aesthetics and practicality, making them valuable choices for modern office transformations. Their natural beauty enhances the atmosphere while providing the durability needed in professional spaces.

Here are some of the top natural stones ideal for modern office design that enhance the atmosphere while providing the durability needed in professional spaces.

1. Marble

Marble

Marble is synonymous with luxury and sophistication, making it an excellent choice for modern office spaces. Its natural veining patterns create a visually stunning surface, adding depth and character to reception desks, lobbies, and boardrooms. 

This stone comes in various colours, from classic white Carrara to rich, dark hues, allowing customisation to match any design theme. However, it is essential to note that marble requires regular sealing and maintenance to protect it from staining, particularly in areas exposed to spills or moisture.

2. Granite

Granite is celebrated for its strength and resilience, making it ideal for high-traffic office areas. It is resistant to scratches, heat, and stains, making it a practical choice for countertops, break rooms, and shared workspaces. 

Granite’s availability in numerous shades and patterns—from speckled black and grey to earthy tones—allows it to integrate seamlessly into various modern or traditional office aesthetics. It is a go-to material for spaces requiring a refined, durable surface.

3. Travertine

Travertine

With its earthy tones and characteristic porous surface, travertine tile offers a warm, natural look. This stone adds a welcoming, organic feel to office spaces, making it particularly suitable for accent walls, flooring, or even feature areas around fireplaces. 

Travertine tiles bring a unique character to interiors because it blend well with greenery and natural lighting to enhance a biophilic design. When appropriately sealed, travertine tile can withstand the demands of a busy office environment while maintaining its timeless charm.

4. Quartzite

Quartzite is a versatile stone that combines marble’s aesthetic appeal with granite’s durability. It is highly resistant to scratching and heat, making it suitable for worktops and feature walls in areas that experience heavy use. 

The stone’s natural crystalline sparkle adds a touch of elegance, while its durability ensures that it remains a long-lasting investment. Quartzite is available in various colours and patterns, often resembling marble, but it is easier to maintain, making it a popular choice in modern workplaces.

5. Bluestone

Bluestone

Bluestone, characterised by its blue-grey hues, provides a modern yet rustic appeal, making it perfect for indoor and outdoor office spaces. It is often used for flooring, wall cladding, and outdoor patios, creating a cohesive flow between the office interior and exterior. 

Its rough texture makes it ideal for high-traffic areas, offering slip resistance while maintaining a sophisticated look. Bluestone’s adaptability allows it to complement various design styles, from industrial to contemporary.

6. Onyx

Onyx is known for its dramatic flair, offering a unique and luxurious aesthetic that sets it apart from other stones. Its translucent properties allow for stunning backlit applications, making it a popular choice for feature walls, reception desks, and art installations within the office. 

Onyx can create a breathtaking focal point that elevates a space’s overall design. However, due to its softness, it is best suited for areas with lighter foot traffic or decorative features, as it requires careful handling and maintenance.

Benefits of Natural Stone in Office Spaces

Benefits of Natural Stone in Office Spaces

These benefits make natural stone a valuable addition to modern office spaces, offering a blend of style, durability, and a connection to nature. Natural stone offers several key benefits when used in office spaces, contributing to aesthetics, functionality, and well-being:

  • Aesthetic Versatility: Natural stones such as marble, granite, and travertine have unique visual appeal with varied patterns and colours. Each piece is distinct, adding a touch of luxury and sophistication to lobbies, boardrooms, and common areas.
  • Durability and Low Maintenance: Stone materials are incredibly durable and capable of withstanding high foot traffic without losing their charm. Granite, for instance, is resistant to scratches and stains, making it ideal for busy work environments. Additionally, natural stone requires minimal maintenance, only occasional sealing and regular cleaning to maintain its look.
  • Biophilic Design Benefits: Incorporating natural elements like stone can enhance employee well-being by fostering a connection with nature. This biophilic approach reduces stress and improves focus, creating a calmer, more productive workspace.
  • Branding and Professionalism: Natural stone conveys a sense of quality and longevity, aligning with a brand that values premium aesthetics and lasting investment. It helps create a strong first impression for clients and visitors.
  • Sustainability: Stone is a natural, eco-friendly material that can contribute to sustainable design, mainly when locally sourced. Its thermal mass properties can also aid in passive heating and cooling, improving the energy efficiency of office spaces.
  • Health Benefits: Natural stones do not emit harmful volatile organic compounds (VOCs), contributing to better indoor air quality. This promotes a healthier workspace, reducing potential health risks for employees.
  • Energy Efficiency: Natural stones have excellent thermal mass properties, helping regulate indoor temperatures. This reduces the reliance on artificial heating and cooling systems, leading to energy savings and improved comfort.

Applications of Natural Stone in Office Spaces

Applications of Natural Stone in Office Spaces

Selecting the correct type of stone and applying it thoughtfully can help businesses transform their office spaces into places that leave a lasting impression. Here are some of the applications that leverage the natural beauty and functional benefits of stone to create inspiring and durable office environments:

  • Reception Areas and Lobbies: Natural stone feature walls and floors in reception areas create a solid first impression. Materials like marble and granite add elegance while durable enough for high-traffic areas. Stone countertops at reception desks enhance both style and functionality.
  • Boardrooms and Meeting Spaces: Stone surfaces like quartzite and marble bring sophistication to boardroom tables and countertops. These materials withstand daily use while adding a professional touch. Backlit onyx panels can create a captivating atmosphere, adding a touch of luxury to meeting spaces.
  • Breakout Zones and Common Areas: Travertine or bluestone floors in common areas add a natural, welcoming feel. Stone-topped coffee tables or benches provide durability, making them ideal for collaborative spaces. The earthy tones of these stones complement plants and other biophilic elements.
  • Private Offices and Executive Suites: Executive offices benefit from stone surfaces, with granite or quartzite offering a refined look for desks and feature walls. These materials add an element of prestige, creating an elegant and authoritative atmosphere that is perfect for high-level business settings.
  • Outdoor Spaces and Patios: Stones like bluestone, granite, or sandstone for patios and walkways create a seamless indoor-outdoor flow. These materials are slip-resistant and weather-resistant, ideal for outdoor office areas that serve as relaxation zones or informal meeting spots.
  • Accent Walls and Feature Installations: Stone accent walls, crafted with marble or travertine, can become striking focal points in lobbies or corridors. Backlit onyx installations create dynamic visual effects, adding elegance to any part of the office.
  • Kitchens and Restrooms: Granite and quartzite are excellent for kitchen counters and restroom vanities due to their resistance to heat and stains. These stone surfaces maintain a sleek, modern look while ensuring durability, making them ideal for high-use areas like communal kitchens.

Combining Stone with Other Materials for a Modern Look

Combining Stone with Other Materials for a Modern Look

Combining natural stone with other materials is a popular approach to achieving a balanced, modern aesthetic in office spaces. Here’s how different materials can complement stone for a contemporary look:

Pairing natural stone with wood creates a warm and inviting atmosphere, balancing the relaxed, sleek nature of stone with the organic warmth of wood. This combination is ideal for reception areas, boardrooms, or lounge spaces, where wooden furniture or panelling can soften the robust feel of stone walls or countertops. Together, they create a harmonious contrast that feels both grounded and luxurious.

Glass is a perfect partner for stone in creating a modern, open feel. Large glass windows or partitions paired with stone feature walls allow natural light to highlight the stone’s textures and colours, making spaces feel more expansive. Glass desks or dividers can enhance transparency and flow, contrasting beautifully with stone’s solidity and timeless appeal.

Metal elements such as steel frames, brass fittings, or aluminium trims add an industrial edge to stone surfaces. This pairing is particularly effective in modern, minimalist designs, where sleek metal details accentuate the clean lines of stone installations like countertops or cladding. 

Introducing soft furnishings like upholstered chairs, area rugs, or fabric partitions can soften the appearance of stone surfaces. This combination provides comfort and elegance in lounge areas or private offices. The tactile nature of fabrics adds warmth and depth to the cool, polished look of stone, making spaces feel more inviting and balanced.

Blending concrete with natural stone can enhance an office space’s modern, industrial appeal. Concrete’s raw, unfinished look contrasts nicely with the refined texture of polished stone, such as marble or quartzite. This pairing is especially effective in creative workspaces, where a bold, minimalist aesthetic is desired.

Maintenance Tips for Natural Stone in Offices

Maintenance Tips for Natural Stone in Offices

Proper maintenance is crucial to preserving the beauty and durability of natural stone in office spaces. Regular cleaning with pH-neutral cleaners is recommended to avoid damaging the stone’s surface, as acidic or abrasive products can cause etching. 

Gentle dusting and mopping help maintain its natural shine. Sealing is essential for porous stones like marble and limestone, providing a protective barrier against stains. High-quality sealants should be applied every 6 to 12 months, especially in high-traffic areas. 

Prompt repairs prevent further damage to chips or cracks. Minor fixes are handled using repair kits; more significant issues require professional restoration. Regular inspections can catch problems early, ensuring the stone’s longevity and pristine appearance.

Conclusion

Imagine a store that draws customers in with just one glance—could yours be next? Natural stone’s allure can turn ordinary spaces into unforgettable shopping experiences. 

Ready to make your vision a reality? Let Splendour in Stonecraft have a design that stops shoppers in their tracks. Contact us today and start transforming your retail space!

You can also check out our article about top natural stones for commercial spaces.

How Durable is Charlotte Sandstone? What You Need to Know Before Buying

Choosing the right stone for outdoor use is challenging. Durability and long-term performance often top the list of concerns, especially when harsh weather can quickly wear out lesser materials, resulting in costly repairs. 

Imagine a stone that not only withstands nature’s toughest tests but maintains its beauty year after year. Charlotte Sandstone, known for its remarkable strength and resilience, is that stone.

This versatile stone remains pristine through the most challenging conditions, making it a top choice for lasting outdoor projects. Are you curious about how it holds up over time? Let’s dive into the details.

How Durable is Charlotte Sandstone?

Charlotte Sandstone is highly durable and known for its excellent resistance to weathering and erosion. Its robust nature makes it suitable for outdoor applications, ensuring long-lasting performance. With proper maintenance, Charlotte Sandstone can withstand time, providing aesthetic appeal and structural integrity for years.

Factors Affecting Charlotte Sandstone’s Durability

How Durable is Charlotte Sandstone: Factors Affecting Charlotte Sandstone's Durability

Several factors affect the durability of Charlotte Sandstone, ensuring its long-lasting performance in various applications.

  • Composition: Charlotte Sandstone’s mineral composition plays a crucial role. A higher quartz content generally indicates better durability, as quartz is a complex and weather-resistant mineral.
  • Density and Porosity: The stone’s density and porosity significantly impact its resilience. Lower porosity means less water absorption, reducing the risk of freeze-thaw cycles and weathering. Denser stones are typically more robust and less prone to erosion.
  • Weather Conditions: Charlotte Sandstone’s exposure to weather conditions such as rain, wind, and temperature fluctuations can influence its durability. Regions with severe weather patterns may require additional maintenance to preserve the stone’s integrity.
  • Installation Quality: Proper installation techniques are vital. Poor installation can lead to structural weaknesses, reducing the stone’s lifespan. Ensuring correct sealing and jointing methods will enhance its durability.
  • Maintenance: Regular maintenance, including cleaning and sealing, is essential to protect Charlotte Sandstone from environmental damage. Proper care can significantly extend the stone’s life and maintain its appearance.

Performance in Different Environments

How Durable is Charlotte Sandstone: Performance in Different Environments

Charlotte Sandstone performs exceptionally well in various environments, making it a versatile choice for indoor and outdoor applications:

1. Outdoor Use

In exterior settings, Charlotte Sandstone demonstrates excellent resistance to weathering. Its low porosity minimises water absorption, significantly reducing the risk of freeze-thaw damage in colder climates. 

This feature ensures the stone remains structurally sound, even after years of exposure to moisture and freezing temperatures. Charlotte Sandstone’s robust nature makes it ideal for patios, pathways, and garden features, where it can withstand heavy foot traffic and varying weather conditions.

Its hard-wearing qualities also make it an excellent option for driveways and outdoor seating areas, providing durability without compromising natural beauty.

2. Coastal Areas

Charlotte Sandstone’s resilience to saltwater and wind erosion is particularly notable in seaside environments. Despite exposure to harsh coastal elements, its ability to maintain structural integrity and aesthetic appeal makes it a preferred choice for seaside constructions such as retaining walls, pier facades, and outdoor terraces. 

The stone’s low porosity means it absorbs less saltwater, reducing the risk of salt crystallisation, which can otherwise cause surface damage over time. 

This durability ensures that Charlotte Sandstone maintains its natural finish and texture, even in locations prone to constant sea spray and high winds.

3. Urban Settings

Charlotte Sandstone stands out in urban areas for its durability against pollution and acid rain, which can deteriorate other natural stones over time. Its resistance to chemical weathering ensures it remains in good condition even in heavily industrialised areas.

 As a result, it is often chosen for building facades, public monuments, and city squares where aesthetic longevity and low maintenance are essential.

Charlotte Sandstone’s natural appearance complements modern and historical architecture, making it a versatile option for urban landscaping, including benches, fountains, and walkways.

4. Indoor Applications

Indoors, Charlotte Sandstone retains its durability even when environmental factors are less of a concern. Its resistance to wear and tear makes it a suitable choice for flooring, wall cladding, and decorative features like fireplace surrounds and feature walls. 

The stone’s fine grain and elegant finish add a touch of sophistication to interior spaces, while its robust structure ensures it can handle the demands of high-traffic areas like hallways and living rooms.

Charlotte Sandstone requires minimal maintenance to maintain its natural beauty, making it a long-lasting and attractive choice for residential and commercial interiors.

Common Uses of Charlotte Sandstone

Common Uses of Charlotte Sandstone

Charlotte Sandstone is widely valued for its durability and versatility, making it an excellent choice for various applications in construction and design, particularly in wall cladding and paving.

  • Wall Cladding: Charlotte Sandstone has many wall cladding benefits thanks to its aesthetic appeal and resilience. It enhances the buildings’ exterior and interior walls, providing a natural and timeless look while offering excellent protection against weather elements.
  • Paving: Charlotte Sandstone’s robustness and resistance to wear and tear make it ideal for paving applications. It is commonly used for pathways, patios, and driveways, where it can withstand heavy foot traffic and vehicular loads, maintaining its integrity and appearance over time.
  • Landscaping: Charlotte Sandstone is used for various landscaping features beyond paving, including garden walls, steps, and edging. Its natural texture and durability make it suitable for visually appealing and long-lasting outdoor spaces.
  • Retaining Walls: Charlotte Sandstone’s strength and stability are advantageous for retaining walls. These walls serve a functional purpose in managing soil, preventing erosion, and adding an element of natural beauty to the landscape.
  • Interior Design: Indoors, Charlotte Sandstone is used for flooring, feature walls, and decorative accents. Its ability to withstand daily wear and tear while maintaining its beauty makes it a preferred material for high-traffic areas such as hallways, living rooms, and kitchens.
  • Monuments and Sculptures: Charlotte Sandstone’s workability and aesthetic qualities make it a preferred material for monuments and sculptures. Artists and architects value its ability to hold intricate details and its enduring charm.

Comparison with Other Sandstones

How Durable is Charlotte Sandstone: Comparison with Other Sandstones

When comparing Charlotte Sandstone to other sandstones, several factors highlight its superior durability and performance in various applications.

FeatureCharlotte SandstoneRoman, Stirling, Australiana, and Kimberley Sandstones
Composition and DensityHigher quartz content, lower porosity, enhanced strength, and resistance to weathering. Ideal for outdoor use.Higher porosity is more prone to water absorption, leading to quicker degradation through freeze-thaw cycles.
Weather ResistanceResilient against harsh weather, including rain, wind, and temperature fluctuations. Suitable for severe climates.It may require more frequent maintenance or replacement in harsh climates.
Aesthetic LongevityMaintains aesthetic appeal over time, resists staining and erosion, and is suitable for high-traffic or exposed areas.More prone to discolouration and erosion, which can detract from initial appearance over time.
VersatilitySuitable for various applications, including wall cladding, paving, sculptures, and monuments.Often limited to specific uses due to lower durability.
MaintenanceLower maintenance requirements due to environmental resistance reduce long-term upkeep costs.Requires more frequent cleaning and sealing, leading to higher maintenance efforts.

Maintenance and Care

How Durable is Charlotte Sandstone: Maintenance and Care

Proper maintenance and care are essential to maximise the durability and longevity of Charlotte Sandstone. Here are the key steps to ensure its optimal condition:

  • Regular Cleaning: Regular cleaning prevents dirt, moss, and algae build-up. Use a soft brush and mild detergent to clean the surface, avoiding harsh chemicals that can damage the stone. A pressure washer can be used for outdoor applications, but with caution to prevent surface erosion.
  • Sealing: A high-quality sealant can significantly enhance Charlotte Sandstone’s resistance to moisture and staining. Sealing the stone helps reduce porosity, prevent water absorption, and protect against freeze-thaw cycles. Re-seal the stone every few years or as recommended by the manufacturer.
  • Inspecting for Damage: Regularly inspect the stone for any signs of damage, such as cracks or chips. Early detection allows for timely repairs, preventing further deterioration. Use appropriate fillers or patching compounds to repair minor damages and maintain the stone’s integrity.
  • Preventing Stains: To prevent staining, promptly clean any spills, especially from acidic substances like vinegar or citrus juices, which can etch the stone. Mats or coasters can also help protect the stone from stains and scratches.
  • Avoiding Harsh Chemicals: Avoid using harsh chemicals, acidic cleaners, or abrasive tools on Charlotte Sandstone. These can cause surface damage and reduce the stone’s lifespan. Opt for pH-neutral cleaners specifically designed for natural stone.

Conclusion

Charlotte Sandstone stands out for its exceptional durability, low porosity, and resistance to weathering. Its versatility makes it ideal for various applications, from wall cladding to paving. 

Choose Charlotte Sandstone for your next project to enjoy long-lasting beauty and resilience. Contact us today to learn more about its benefits and to get started on your project.

Architects Swear By These 10 Natural Stones for Jaw-Dropping Facades

When I set out to design an exterior facade, finding a material that combined durability with natural beauty was key. 

Natural stone quickly became the top choice, offering timeless appeal and the resilience I needed. Each stone, from the ruggedness of slate to the elegance of marble, had something unique to add.

In this guide, I’ll share my top 10 natural stones for facades, each bringing lasting strength and a refined touch to any architectural style.

Let’s dive in!

1. Limestone

Natural Stones for Exterior Facades: Limestone

Limestone is most preferred and has long been favoured for exterior facades as it offers a combination of strength and elegance that withstands the test of time. Known for its natural warmth and soft, muted tones, limestone adds a classic touch to traditional and modern architecture. 

The stone’s durability allows it to endure weathering, making it highly suitable for various climates. With a surface that can be finished in multiple textures, from smooth honed to rugged split face, limestone provides versatility in design. 

Additionally, it requires minimal maintenance, naturally resisting decay and erosion over decades. Over time, limestone can develop a patina that enhances character and blends seamlessly into natural surroundings. 

Limestone is an eco-friendly option that’s often locally sourced, reducing the environmental impact associated with transportation. It offers an elegant yet practical solution for facades, creating a sophisticated look that remains beautiful year after year.

Check out this Limestone 101 masterpiece I published to learn more about this natural stone, its use, and why limestone is the top choice for walling stone.

2. Porphyry

Natural Stones for Exterior Facades: Porphyry

Porphyry is a striking choice for exterior facades, prized for its durability and unique appearance. 

Known for its rich, earthy tones, which range from deep reds to subtle greys, porphyry adds a natural warmth to building exteriors. Each stone piece features distinct patterns and textures, which lend character and visual interest to facade designs. 

This natural stone is highly resistant to weathering. It performs well under harsh environmental conditions, maintaining its integrity and colour over time. 

Often used in high-traffic areas, this stone handles wear effortlessly, further showcasing its resilience. The naturally textured surface also provides an anti-slip quality, making it ideal for facade areas near entrances or pathways. 

With minimal maintenance, porphyry retains its appearance and structural soundness with little upkeep. 

3. Granite

Natural Stones for Exterior Facades: Granite

Granite has earned its place as a top choice for exterior facades. It is known for its unmatched strength and resilience. As one of the hardest natural stones, it easily withstands harsh weather, heavy impact, and daily wear. 

Its bold, speckled appearance, available in various colours from classic grey to striking black, adds a distinctive touch to any building exterior. Granite is highly resistant to fading and scratching and maintains its polished look over time, even in challenging environments. 

This stone’s density ensures it resists moisture, reducing the risk of erosion or damage. With options for both polished and textured finishes, granite allows for flexibility in facade design, adapting to both contemporary and traditional styles. Though granite requires a higher initial investment, its low maintenance needs and longevity provide great value. 

4. Bluestone

Natural Stones for Exterior Facades: Blustone

Bluestone brings a sleek, contemporary look to exterior facades. It is valued for its durability and unique aesthetic. Its cool, blue-grey tones offer a modern edge, complementing various architectural styles, from minimalist to industrial. 

Bluestone is highly weather resistant and holds up well under fluctuating temperatures, rain, and wind, making it ideal for outdoor use. The stone’s dense composition also provides excellent resilience against chipping or cracking, ensuring a long-lasting facade. 

Bluestone’s naturally slip-resistant surface makes it a practical choice for facades near entryways or high-traffic areas. Available in honed, sawn, or natural finishes, it allows for customisation, enhancing its visual appeal and functionality. 

5. Travertine

Natural Stones for Exterior Facades: Travertine

Travertine stands out for its classic beauty and natural warmth, making it a popular choice for exterior facades. 

With soft, earthy tones ranging from beige to rich brown, travertine brings a welcoming, timeless appeal to any building design. Known for its distinctive, porous surface, this stone provides a textured look that adds character and depth. 

Wondering why Travertine is the right choice for the kind of exterior projects?

Well, its durability makes it suitable for exterior use. 

It handles weather changes and wear with minimal maintenance. When properly sealed, travertine resists moisture, preserving its appearance and structural integrity. 

Available in finishes from polished to tumbled, this stone offers a range of customisation options to suit different architectural styles. Its natural composition and earthy appeal allow travertine to blend seamlessly with outdoor landscapes, enhancing the connection between the building and its surroundings. 

6. Marble

Natural Stones for Exterior Facades: Marble

Marble offers luxury and refinement, making it a distinguished choice for exterior facades. 

Renowned for its rich veining and wide range of colours, marble brings sophistication to any architectural style. Its polished surface creates a smooth, elegant finish that enhances the building’s aesthetic. 

Though often associated with interiors, marble’s durability allows it to perform well on facades. When properly maintained, this stone stands up to weather and time. This stone naturally resists extreme temperatures, which helps preserve its structural integrity in varying climates. 

Available in hues from crisp whites to deep blacks, marble provides options that complement both modern and traditional designs. With occasional sealing, it retains its polished look and resists moisture effectively, reducing maintenance needs. 

7. Quartzite

Natural Stones for Exterior Facades: Quartzite

Quartzite is celebrated for its extraordinary strength, making it an ideal choice for exterior facades that require resilience. 

Known for its hardness and durability, quartzite withstands harsh weather conditions and resists scratching, chipping, and fading over time. This natural stone offers a subtle yet elegant appearance, with soft hues ranging from white and grey to more earthy tones, often laced with delicate veining. 

Quartzite is highly resistant to moisture absorption and maintains its structural integrity, even in humid or rainy climates. Available in various finishes, from polished to honed, quartzite adapts easily to different architectural styles, bringing a refined touch to modern and traditional designs. 

With minimal maintenance required, this stone retains its beauty with ease, reducing the need for ongoing treatments. 

8. Sandstone

Natural Stones for Exterior Facades: Sandstone

Sandstone brings an earthy warmth to exterior facades, making it a popular choice for adding character and charm. Known for its natural, rustic texture, sandstone lends a timeless appeal to modern and traditional architecture. 

Its warm tones, from soft beige to rich terracotta, create a welcoming look that complements outdoor landscapes. Sandstone’s durability ensures it holds up well in various weather conditions, though regular sealing can enhance its resistance to moisture. 

The stone’s relatively light weight makes it easy to work with, allowing for creative applications in facade designs. Available in finishes from smooth to rough-hewn, sandstone provides flexibility for achieving different aesthetic effects. Over time, this stone develops a natural patina, blending even more harmoniously with its surroundings. 

9. Cobblestone

Natural Stones for Exterior Facades: Cobblestone

Cobblestone brings a rustic charm to exterior facades, offering a timeless look that evokes classic architecture. Known for its rounded, weathered appearance, cobblestone adds texture and depth to building exteriors, creating a distinctive, old-world appeal. 

Its natural durability makes it resistant to wear, ensuring that facades retain their strength and look over time. Made from hard-wearing stones like granite or basalt, cobblestone withstands various weather conditions, from intense sun to heavy rain. 

Each stone, unique in shape and size, contributes to a facade rich with visual interest and character. Cobblestone requires minimal maintenance, making it a practical choice for busy homeowners or commercial properties. It is often used in historic restorations and suits contemporary projects aiming to blend tradition and modernity. 

Find out Why Contractors Choose Cobblestone for Outdoor Projects

10. Quartz

Natural Stones for Exterior Facades: Quartz

Quartz offers a refined, contemporary look for exterior facades, ideal for designs that call for a sleek, uniform appearance. 

Engineered from natural quartz crystals combined with resins, quartz surfaces deliver exceptional durability and a polished finish that holds up well over time. Known for its wide range of colour options, quartz can be tailored to suit various architectural styles, from minimalist to industrial. 

Its non-porous nature helps it resist moisture, reducing water damage or staining concerns in exposed areas. Although not as UV-resistant as natural stones, quartz can still perform well in shaded or semi-protected facades, maintaining its smooth surface with minimal maintenance. 

The ease of cleaning (check out the top 6 tips for cleaning and maintaining Quartz stones) and overall durability make it a practical choice for those seeking low upkeep without sacrificing style. 

With quartz, building facades gain a sophisticated, modern aesthetic that remains appealing and resilient in the right conditions.

Conclusion

Selecting the ideal natural stone can bring both beauty and strength to any exterior facade. 

Each stone in our top 10 list offers distinct advantages to suit different architectural visions. Interested in finding the perfect fit for your project? 

Contact us today to explore options that blend style, durability, and timeless appeal.

Is Stone Retaining Wall Better Than Concrete?

A few years ago, I faced a dilemma while planning my garden: should I choose a stone or concrete retaining wall? I knew both options had their merits, but I was still determining which would stand the test of time, offer the best value, and blend seamlessly with the landscape. 

After weighing durability, cost, and aesthetics, the decision was more complex than it seemed. If you’re in the same position, this guide will help you determine whether stone or concrete is better for your project.

Pros and Cons of Stone Retaining Wall

When I first considered a stone retaining wall, I was captivated by its natural beauty, but I needed to weigh the pros and cons carefully. There’s more to stone than just its visual appeal. In this section, I’ll share the advantages and potential drawbacks that helped shape my decision so you can make an informed choice too.

Pros of Stone Retaining Wall

Stone retaining walls offer more than just strength—they bring a host of advantages that make them a top choice for many. There are also different types of retaining walls. From aesthetics to sustainability, the benefits are undeniable.

1. Natural Aesthetic Appeal

Stone retaining walls provide a timeless, natural beauty that complements any landscape. Various textures, shapes, and colours allow homeowners to create a unique design that blends seamlessly with outdoor spaces. 

Whether you want a rustic or modern look, stone offers flexibility in achieving the desired aesthetic. Unlike other materials, stone improves with age, enhancing the overall appeal of your property while adding a premium feel that increases its value over time.

2. Exceptional Durability

Stone, such as Hotham Granite, is known for its incredible durability and strength, making it an ideal choice for retaining walls. It can withstand harsh weather conditions, including extreme heat, cold, and moisture, without losing its structural integrity. 

Stone walls maintain their form and function with minimal wear over time. This makes them a long-lasting option, requiring very little maintenance than other materials like concrete, which may crack or deteriorate over time.

3. Eco-Friendly Material

Stone has a low environmental impact as a natural resource, especially when sourced locally. It requires minimal processing and does not emit harmful chemicals into the environment, making it an eco-friendly choice. 

Additionally, stone can be reused or repurposed, reducing waste and promoting sustainability. A stone retaining wall is an excellent option for making environmentally conscious decisions.

4. Versatility in Design

Stone’s adaptability makes it versatile for various landscaping needs. Whether you’re creating a curved, straight, or terraced wall, stone such as Marrakesh Limestone can easily be shaped to fit your desired design. Its flexibility allows for the creation of complex architectural features that wouldn’t be possible with other materials. 

Additionally, the range of stone types and sizes ensures an option to match your project’s aesthetic, making it an excellent choice for both traditional and contemporary landscapes.

5. Low Maintenance

Once installed, stone retaining walls require very little maintenance. They don’t need frequent repairs, painting, or sealing like concrete or other materials might. Natural stone is resistant to weathering, meaning it can endure the elements without significant wear. 

This long-term resilience reduces the need for costly upkeep, making the stone a cost-effective solution in the long run. Its ability to naturally age and weather beautifully is another added benefit.

Cons of Stone Retaining Wall

While stone retaining walls offer a timeless, natural appeal, they are not without their challenges. Understanding the potential drawbacks is crucial before making a decision.

1. Labour-Intensive Installation

Building a stone retaining wall requires significant time and effort due to the precise placement of individual stones. Skilled labour ensures the wall’s stability, making the installation process lengthy and costly. 

Unlike concrete, which can be poured into place, stone walls demand more manual work, particularly with irregular or natural stones. This increased labour often leads to higher project costs in terms of time and money.

2. High Material and Labour Costs

The cost of constructing a stone retaining wall tends to be higher than that of concrete alternatives. Quality natural stone can be expensive, and its availability may vary depending on location. 

In addition, hiring skilled workers to lay the stones properly adds to the overall expenditure. The combination of material costs and labour fees can make stone retaining walls an expensive choice for many homeowners.

3. Susceptibility to Weathering

Natural stones are prone to wear and tear due to exposure to the elements. Over time, moisture and temperature changes can cause certain types of stone to crack, chip, or erode. 

This weathering can affect the wall’s structural integrity and its aesthetic appeal. Regular maintenance or stone replacement may be necessary to prevent further damage from harsh weather conditions.

4. Increased Maintenance Requirements

Stone retaining walls require more frequent maintenance than concrete walls. Shifting soil or settling behind the wall can cause stones to loosen or become misaligned, compromising the wall’s stability. 

Regular inspections and repairs are often necessary to maintain the wall’s structural soundness, particularly in areas prone to soil movement or extreme weather conditions.

5. Limited Load-Bearing Capacity

Unlike concrete walls, which provide uniform strength, stone retaining walls may struggle to support large loads or steep slopes. 

The individual stones are less uniformly strong than a poured concrete structure, making them unsuitable for retaining walls in areas requiring significant structural support. This limitation could make the stone less ideal for specific projects where durability under pressure is crucial.

6. Variability in Stone Availability

The availability of suitable stone can vary greatly depending on your location, which can add to the cost and limit your design choices. In some areas, sourcing the right type of stone may require importing it from other regions, increasing material and transportation expenses. This variability can make stone walls a less practical option for some homeowners.

Pros and Cons of Concrete

When weighing the choice between stone and concrete, I found it essential to consider both the advantages and drawbacks of concrete retaining walls. Concrete offers impressive strength and durability but may lack the natural appeal of stone. Here’s what you need to know before deciding whether concrete is the right choice for your project.

Pros of Concrete

Concrete retaining walls offer a reliable and versatile solution for various landscaping needs. Here’s why they might be the better option for your project.

1. Exceptional Durability

Concrete retaining walls are highly durable and can withstand harsh weather conditions and heavy loads without significant wear. Unlike stone, which may shift or crack over time, concrete maintains its structural integrity for decades. 

This durability makes it ideal for supporting large amounts of soil, especially in areas prone to erosion or heavy rainfall. With concrete, you can count on long-term stability and a wall that stands the test of time with minimal wear and tear.

2. Faster Installation

Concrete offers a quicker installation process compared to stone. Pre-cast panels or poured-in-place methods reduce labour time, making it more cost-effective for both time and money. 

Unlike stone walls, which require precise placement of individual stones, concrete can be installed more efficiently. This streamlined process is ideal for large projects or those on a tight schedule, allowing for faster completion without compromising on strength.

3. Lower Cost

Concrete’s affordability is a significant advantage over natural stone. High-quality stone can be expensive, whereas concrete generally offers a more budget-friendly solution without sacrificing durability or strength. 

Concrete provides excellent value for homeowners and contractors looking to keep costs down, particularly for large-scale projects where material costs can quickly add up. Its cost-effectiveness makes it a popular choice for both residential and commercial applications.

4. Minimal Maintenance

Concrete retaining walls require far less maintenance than stone walls. Once installed, they need minimal attention, as they are resistant to weathering, erosion, and pests. 

Unlike stone walls, which may require regular inspections for loose stones or settling, concrete structures remain stable over time. This low-maintenance quality makes concrete an attractive option for those looking for a long-lasting solution with little upkeep.

5. Greater Design Flexibility

Another key benefit of concrete is its versatility in design. It can be moulded into various shapes and sizes, allowing custom designs to match any aesthetic. Concrete offers options to suit your style, whether you prefer a smooth, modern finish or a textured, natural appearance. 

Additionally, its ability to be coloured or stamped provides further customisation possibilities, giving you the flexibility to create a unique look for your retaining wall.

6. Structural Versatility

Concrete’s strength allows for greater wall height and length flexibility, making it suitable for large projects. It can be engineered to support taller or more extensive retaining walls, providing the necessary stability for significant loads. 

This makes concrete ideal for large-scale soil retention applications, such as commercial developments or steep slopes. Its structural integrity ensures it can handle small and large project demands.

Cons of Concrete

While concrete walls are known for their strength, some notable disadvantages can impact their long-term appeal and functionality.

1. Lack of Aesthetic Appeal

Concrete retaining walls often lack the natural charm and beauty of stone. While concrete can be customised with textures or colours, it typically doesn’t match the organic look of natural stone. 

Concrete may not deliver the desired aesthetic for homeowners seeking a more rustic or traditional appearance. This can make it a less appealing choice for projects where visual impact is a crucial consideration.

2. Prone to Cracking

Over time, concrete can crack, especially in areas that experience extreme temperature fluctuations. The expansion and contraction caused by hot and cold weather can create visible cracks, which not only affect the appearance of the wall but may also compromise its structural integrity. 

Repairing these cracks can be costly; in some cases, ongoing maintenance may be required to prevent further damage.

3. Environmental Concerns

Concrete production is energy-intensive and contributes significantly to CO2 emissions. The environmental footprint of manufacturing and transporting concrete makes it a less sustainable option compared to natural materials like stone. 

Additionally, concrete is challenging to recycle, and demolition waste from concrete walls often ends up in landfills, further impacting the environment.

4. Difficult to Modify or Remove

Once a concrete wall is in place, alterations or removal can be challenging and expensive. Unlike stone, which can often be reused or repurposed, concrete removal typically results in significant waste. 

The demolition process can be labour-intensive, and the cost of disposing of concrete waste can add to the overall expense, making future changes more difficult to manage.

5. Weathering Over Time

Although concrete is durable, it can still suffer from weathering when exposed to harsh conditions. Heavy moisture, freeze-thaw cycles, and prolonged exposure to the elements can cause surface erosion or deterioration. 

This weathering can make the wall appear worn and may eventually lead to the need for costly repairs or refinishing to maintain its integrity and appearance.

Conclusion

Ultimately, whether stone or concrete is better for your retaining wall depends on your project’s needs. Stone offers timeless beauty, while concrete provides strength and affordability. Consider your priorities and budget before deciding. Need expert advice? Contact us today to discuss which option suits your landscape best!

In SQM?

Please fill your details to download.


      Request Callback


        Enquiry Form


        Please fill your details to download.