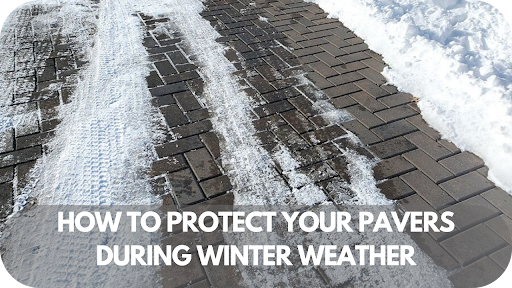
Winter weather can damage your pavers, leading to cracks, shifting, or discolouration. Preventative measures are essential to protect your investment.
From cleaning and sealing to maintaining proper drainage, there are several steps you can take to safeguard your pavers against frost, snow, and ice.
This guide will share the best practices to ensure your pavers stay intact and look great during harsh winter.
1. Clean Your Pavers Before Winter
As winter approaches, cleaning your pavers is an essential first step in protecting them from damage. Over time, dirt, leaves, and organic debris can accumulate on the surface and joints, trapping moisture. This moisture can lead to staining, algae growth, and even paver deterioration.
Use a pressure washer to clean your pavers. This is the most effective way to remove dirt, leaves, and grime from the surface.
Be sure to use a wide-angle nozzle to prevent any damage to the pavers. To remove stubborn debris and stains, a stiff brush can help loosen dirt and algae, especially between joints.
Additionally, check and remove moss or lichen growing on the pavers before winter. If left untreated, these can trap moisture and exacerbate potential damage. Regular cleaning is key to maintaining the appearance and integrity of your pavers during the colder months.
2. Seal Your Pavers for Extra Protection
Sealing your pavers before winter is crucial in safeguarding them against harsh weather. A high-quality paver sealer forms a protective barrier that helps prevent moisture from penetrating the surface, significantly when temperatures fluctuate between freezing and thawing.
The freeze-thaw cycle can lead to cracks, shifting, and general wear and tear on the pavers. Sealing pavers helps prevent moisture damage by reducing the risk of cracks caused by freezing and thawing, protects against stains from dirt, leaves, and snow-melting chemicals, and enhances durability by making the pavers more resistant to environmental damage.
Sealing can significantly extend the life of your pavers, ensuring they stay looking their best and perform well through the colder months.
3. Use a Protective Covering for Snow and Ice
When a snowstorm or ice storm is on the horizon, covering your pavers effectively prevents damage from harsh weather. Protective covers like tarps, plastic sheeting, or specialised covers are ideal for shielding your pavers from snow and ice.
Select the proper covering, such as tarps or breathable covers designed for outdoor use, to protect your pavers. Ensure the cover is tightly secured to prevent it from being blown away by strong winds, and consider weighing it down with bricks or securing it with ropes.
After the storm, it’s important to remove the covering promptly to avoid trapping moisture underneath, which could cause damage to the pavers. By taking these precautions, you can help preserve the integrity of your pavers throughout winter.
4. Avoid De-Icing Salt or Chemicals
While de-icing salt is commonly used to melt ice, it can harm your pavers over time. Salt and other chemical de-icers can seep into the pores of your pavers, leading to deterioration, discolouration, and surface damage. The effects are especially noticeable during freeze-thaw cycles, which can cause cracks and shifting in the pavers.
Safer Alternatives: Use sand for traction or Calcium Magnesium Acetate (CMA) instead of salt for safer ice control. Both are gentle on your pavers and effective in winter conditions.
If Using De-Icers, always check the label to ensure they’re safe for your paver material. Avoid over-applying chemicals to prevent potential damage and preserve the integrity of your pavers.
5. Repair Cracks and Damage Before Winter
Before the cold weather sets in, addressing any existing cracks or damage in your pavers is crucial. While small cracks may seem harmless, they can worsen during the freeze-thaw cycle as water seeps in and freezes, causing them to expand.
Left untreated, it can lead to more significant damage and costly repairs. To prevent this, thoroughly inspect your pavers for any visible cracks, chips, or gaps between the joints. For minor cracks, use a paver repair compound to fill them in.
These products bond with the surface, providing long-lasting repairs. However, for larger cracks or severely damaged pavers, replacement may be necessary to maintain the integrity of the surface. Taking these steps before winter arrives will help protect your pavers from further damage and extend their lifespan.
6. Maintain Proper Drainage
Ensuring proper drainage is essential to protect your pavers during winter. Water pooling on the surface or between the pavers can freeze in cold temperatures, causing expansion and contraction that may damage the paver structure. Your pavers should be installed with an adequate drainage system to prevent this.
Before winter, check that water flows freely from the paver area, as pooled water can lead to freezing and cracking. If necessary, add jointing sand between the pavers to fill gaps and improve drainage, allowing water to pass through more easily.
For more severe drainage issues, consider installing a drainage system beneath the pavers, such as a French drain or surface drainage system, to direct water away and prevent ice formation. Proper drainage can significantly reduce the risk of damage to your pavers throughout winter.
7. Use a Paver Joint Stabiliser
Using a paver joint stabiliser is crucial to protecting your pavers during winter. The stabiliser locks the sand between the joints, preventing it from washing away during heavy rain or snowmelt. The sand can erode without this protection, causing gaps that may lead to shifting or misaligning the pavers over time.
Applying a paver joint stabiliser helps maintain the integrity of your paved surface by reducing shifting, enhancing durability, and ensuring the pavers remain firmly in place.
To apply, clean your pavers and their joints thoroughly to remove any debris. Next, apply the stabiliser according to the manufacturer’s instructions, ensuring it is evenly distributed.
Finally, seal the pavers to ensure the stabiliser bonds effectively with the sand, providing long-lasting protection. By following these steps, your pavers will be better equipped to withstand the harsh winter conditions and maintain their appearance and stability.
8. Protect Your Pavers from Heavy Loads
To protect your pavers from heavy loads during winter weather, it’s essential to consider both the weight and the conditions that could cause damage.
Heavy snow, ice, and the stress from vehicles or equipment can crack or shift pavers if not properly supported. Start by applying a protective layer, such as sand or a specialised paver stabiliser, to help distribute weight evenly across the surface.
When using heavy machinery, avoid direct contact with the pavers by using plywood or mats to distribute the load. If snow and ice accumulation is a concern, use a shovel or broom to remove the bulk of snow to prevent it from compacting into the surface.
Avoid using harsh chemicals like rock salt that can erode the surface over time. Regular inspection during the colder months will also help identify any signs of stress or damage, allowing you to address them before they worsen.
9. Regular Snow Removal Tips
Proper snow removal is crucial for protecting your pavers during the winter months. Early snow removal helps prevent ice formation, which can damage the surface of your pavers. Here’s how to remove snow without compromising the integrity of your paved surfaces:
- Start Early: Begin clearing snow as soon as it starts accumulating. This helps prevent the snow from compacting into ice, which is harder to remove.
- Use the Right Equipment: Invest in quality snow removal tools like a snow blower, a sturdy shovel, or a snow plough (for larger areas). Make sure the equipment is in good working condition before winter starts.
- Shovel in Layers: Don’t try to remove all the snow at once. Shovel in layers to avoid straining yourself and to make the task more manageable.
- Push, Don’t Lift: If you’re using a shovel, push the snow to one side rather than lifting it. This reduces strain on your back.
- Clear Around Obstacles: Remove snow from around obstacles like trees, posts, and curbs. This improves visibility and prevents ice buildup in those areas.
- Use Ice Melt Wisely: Once you’ve cleared the snow, apply a thin layer of ice melt or salt to prevent refreezing. Be mindful of the environment—consider pet-safe and eco-friendly options.
- Create a Snow Pile: Designate a snow pile area away from walkways and driveways. Avoid piling snow in places where it could block traffic or pedestrian access.
- Take Breaks: Snow removal can be physically demanding. Take regular breaks to prevent overexertion, primarily if you work long periods.
- Clear the Roof: If there’s heavy snowfall, clear your roof or gutters to prevent ice dams or roof damage. Use a roof rake or hire a professional for higher areas.
- Stay Safe: Be aware of slippery surfaces. Wear non-slip footwear, and be careful not to rush. If you have health concerns, consider hiring a professional service.
Conclusion
Taking the time to protect your pavers during winter can save you from costly repairs. You can keep your pavers in excellent condition by cleaning, sealing, maintaining drainage, and using the proper snow removal techniques.
Act now to preserve the beauty and durability of your outdoor surfaces — start with these simple winter care steps today!
More To Explore

How to Choose the Right Adhesive for Installing Stone Cladding
Choosing the wrong adhesive for stone cladding can lead to cracking, detachment, or even structural failure. All that hard work could fall apart in months

Stone Options for Modern Home Designs
Modern homes demand high-quality materials that combine style with strength. But with so many options available, choosing the right stone can feel overwhelming. Many people


