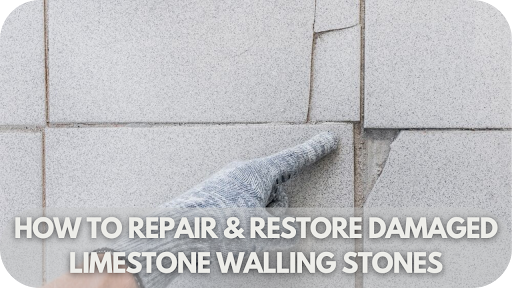
Limestone walling stones bring timeless elegance to any space, but even the most durable surfaces can suffer damage over time.
Whether it’s from harsh weather, accidental impact, or natural wear, restoring your limestone can seem daunting. But fear not – with the right tools and techniques, you can bring your stones back to life.
In this guide, we’ll walk you through the essential steps to repair and restore damaged limestone walling stones, ensuring they look as beautiful and sturdy as the day they were installed. Let’s get started!
Common Causes of Damaged Limestone Walling Stones
Limestone walling stones are renowned for their durability, but even the most resilient stone can succumb to damage over time. Understanding the most common causes of wear and tear can help you protect your investment. Here are the most common causes:
1. Weathering and Erosion
Exposure to the elements—wind, rain, and frost—can slowly erode limestone over time. This constant wear makes the surface rougher, more porous, and vulnerable to further damage.
The freeze-thaw cycle, where water penetrates the stone, freezes, and expands, causes cracks, worsening the deterioration.
2. Staining and Discolouration
Limestone can easily become stained or discoloured due to organic growths such as moss, algae, and lichen or by external pollutants like rust, mineral deposits, and environmental pollution.
If left untreated, these stains can be permanent, affecting the stone’s appearance and long-term durability.
3. Cracks and Chips
Limestone is vulnerable to physical impact, whether from heavy objects, settling foundations, or shifting ground.
Natural expansion and contraction of the stone due to temperature fluctuations can also cause cracks and chips. Over time, these minor damages can worsen, leading to significant structural issues if not addressed promptly.
4. Algae, Moss, and Lichen Growth
Algae, moss, and lichen can thrive on limestone, particularly in damp, shaded areas.
These biological growths damage the stone’s surface by infiltrating it with their root systems. Over time, they contribute to stone erosion and accelerate the breakdown of the material.
Tools and Materials Required for Repairing Limestone Walling Stones
When repairing and restoring damaged limestone walling stones, having the right tools and materials is essential for achieving a professional and durable result. Here’s what you’ll need:
- Chisels and Hammers: For minor chips and cracks, stone chisels and a masonry hammer are essential to carefully remove damaged areas and create a clean surface for repair.
- Angle Grinder or Handsaw: If you need to shape or cut the stone, an angle grinder with a diamond blade is often the best choice, but if you’re looking for a more accessible option, a manual handsaw or wet stone cutter can also work for small repairs.
- Stone Repair Filler: A high-quality stone filler or epoxy resin is critical for filling cracks and chips. Choose a filler that matches the limestone’s colour and texture for seamless restoration.
- Brushes: A soft bristle brush is useful for cleaning the stone’s surface before repairs. A wire brush may also be needed to remove stubborn dirt or old sealant.
- Protective Gear: To ensure safety, always wear gloves, safety glasses, and a dust mask when handling tools and working with stone.
- Stone Sealer: After repairs, a stone sealer is essential to protect the stone from future damage and stains. Opt for a high-quality, breathable sealer for optimal results.
Step-by-Step Guide to Repairing Damaged Limestone Walling Stones
Restoring damaged limestone walling stones may seem daunting, but with the right approach, you can achieve stunning, long-lasting results. Follow these easy steps to bring your limestone back to life!
Step 1: Clean the Damaged Area
Start by removing dirt, debris, and any biological growth from the damaged area using a soft brush. Then, wash the surface with a mild detergent or stone-safe cleaner. Rinse thoroughly with clean water to ensure no residue remains, leaving a clean, smooth surface for repairs.
Step 2: Treat Stains and Discolouration
Identify the type of stain affecting the limestone—organic, rust, or mineral. Apply a suitable cleaner or poultice to the stained area and allow it to sit for the recommended time. Scrape off the poultice and rinse thoroughly with water. Repeat if necessary to remove stubborn stains.
Step 3: Fill Cracks and Chips
Mix a stone repair compound according to the manufacturer’s instructions. Use a putty knife or spatula to fill the cracks or chips with the compound, smoothing it out so it blends with the surrounding stone. Allow the compound to cure fully, then gently sand the repaired area to match the texture.
Step 4: Restore the Texture and Colour
Assess whether the stone needs texture restoration or colour correction. Use a grinder or sandpaper to restore the texture if necessary. For colour issues, apply a tinted stone repair compound and blend it seamlessly into the surrounding stone for a uniform look. Finish by buffing the area for a smooth, even surface.
Step 5: Seal the Limestone
Select an appropriate stone sealer (either penetrating or surface sealer) and apply it with a clean cloth or brush. Allow the sealer to absorb as per the manufacturer’s instructions. Wipe away any excess to prevent streaking or glossiness. Reapply periodically to maintain long-lasting protection and prevent further damage.
Pro Tips for Preventing Further Damage to Limestone Walling Stones
Preventing further damage is key to preserving the integrity of your limestone walling. Follow these essential tips to keep your stone looking its best and lasting for years to come:
- Regular Cleaning: Use a soft brush and a stone-safe cleaner to remove dirt, moss, and debris, preventing moisture buildup that can lead to erosion or staining. Avoid harsh chemicals that can weaken the stone.
- Apply a High-Quality Stone Sealer: Protect your limestone by applying a breathable stone sealer. Sealing will protect the stone from moisture, stains, and pollutants while allowing trapped moisture to escape. Reapply periodically for lasting protection.
- Ensure Good Drainage: Make sure water flows away from the limestone wall by maintaining gutter systems and downpipes. Poor drainage can cause water to pool at the base, leading to cracks and stone erosion.
- Inspect Regularly: Conduct regular checks for minor cracks or chips. Address any issues early before they develop into more significant damage, saving time and money on repairs.
- Avoid Direct Contact with Harsh Materials: Keep acidic substances such as vinegar, citrus, and cleaning agents away from the limestone, as these can cause etching and discolouration. Use stone-safe cleaning products instead.
- Limit Exposure to Extreme Weather: If possible, protect your limestone walling from prolonged exposure to extreme temperature fluctuations or harsh winds, which can cause expansion and contraction, leading to cracks. Use appropriate covers or shielding for vulnerable areas.
When to Call a Professional for Limestone Restoration
While many limestone repairs can be tackled DIY, some issues are best left to the experts. If the damage is extensive or beyond your skills, professional restoration ensures the job is done right. Here are the key situations when calling a professional is the smartest choice.
1. Extensive Cracks or Structural Damage
Large cracks or structural damage in limestone walls require professional expertise. Experts can assess the underlying issues and use specialised tools to stabilise and repair the stone, ensuring a durable, long-lasting restoration that prevents further deterioration.
2. Severe Biological Growth
When moss, mould, or lichen has deeply penetrated the stone, professionals can safely remove it without damaging the surface. Their specialised cleaning methods eradicate root systems effectively, preventing future growth and preserving the integrity of the limestone.
3. Persistent Staining or Discolouration
Stains from rust, minerals, or organic growth that don’t respond to DIY cleaning should be treated by a professional. Experts use poultices and specialised cleaners to remove deep-set stains without compromising the stone’s natural colour or structure.
4. Complex Texture or Colour Restoration
For significant texture or colour restoration, professionals have the skills and materials to match the stone’s original appearance. This ensures repairs are seamless, maintaining the uniformity and aesthetic value of your limestone wall.
5. Large-Scale Repairs
For extensive damage, professionals bring the right tools and expertise to handle large-scale repairs efficiently, ensuring both aesthetic and structural integrity.
Conclusion
Restoring damaged limestone walling stones requires the right techniques, tools, and care. Whether you’re tackling small repairs or needing professional help for large-scale restoration, addressing damage early ensures your limestone remains strong and beautiful.
For expert advice or high-quality limestone materials, contact Splendour in Stone today. Our team is ready to help you restore your stone’s natural beauty and durability for years to come.
More To Explore

Natural Stone Features That Will Transform Your Living Room
Natural stone elevates any living room with elegance, texture, and timeless appeal. Its versatility allows it to enhance both modern and traditional spaces. From stone

How to Mix Natural Stone with Minimalist Design
Combining natural stone with minimalist design creates a timeless and sophisticated look. The sleek, clean lines of minimalism paired with the elegance and texture of


