

Sandstone garden edging creates a natural border between lawns, paths, gravel and planted areas. It can be formed with solid sandstone blocks, stone pavers or a constructed garden border finished with sandstone cladding.
The right system depends on what the edge needs to do. Low decorative edging may only need to separate grass from mulch, while a raised garden border must withstand soil pressure, moisture and ground movement. These applications should not be designed or installed in the same way.
Sandstone is particularly suited to Australian landscapes because its cream, beige, gold, brown and grey tones work comfortably with native planting, timber, brick, gravel and rendered architecture. Its natural variation also allows the border to become part of the landscape rather than appearing as a manufactured line around it.
Sandstone garden edging at a glance
There are three main ways to create sandstone garden edging.
| Edging system | How it works | Best suited to |
| Solid sandstone units | Blocks, logs or setts are laid directly along the garden edge | Lawns, paths, mulch beds and low decorative borders |
| Sandstone pavers or cobblestones | Smaller paving units are laid flat or slightly raised as a mowing strip or border | Lawn edges, paths, gravel areas and curved garden beds |
| Sandstone-clad garden border | A stable concrete or masonry structure is built first and finished with sandstone cladding | Raised beds, formal borders, terraces and coordinated garden walls |
Solid units and cobblestones can form the edge themselves when they are suitable for ground contact and installed on the correct base. Products such as Porphyry Cobble may also provide an alternative natural stone border where smaller units are better suited to curves, mowing strips or detailed garden layouts.
Stone cladding works differently. It is a facing material applied to a suitable structure. It should not be placed unsupported in the ground and expected to perform like a solid edging block.
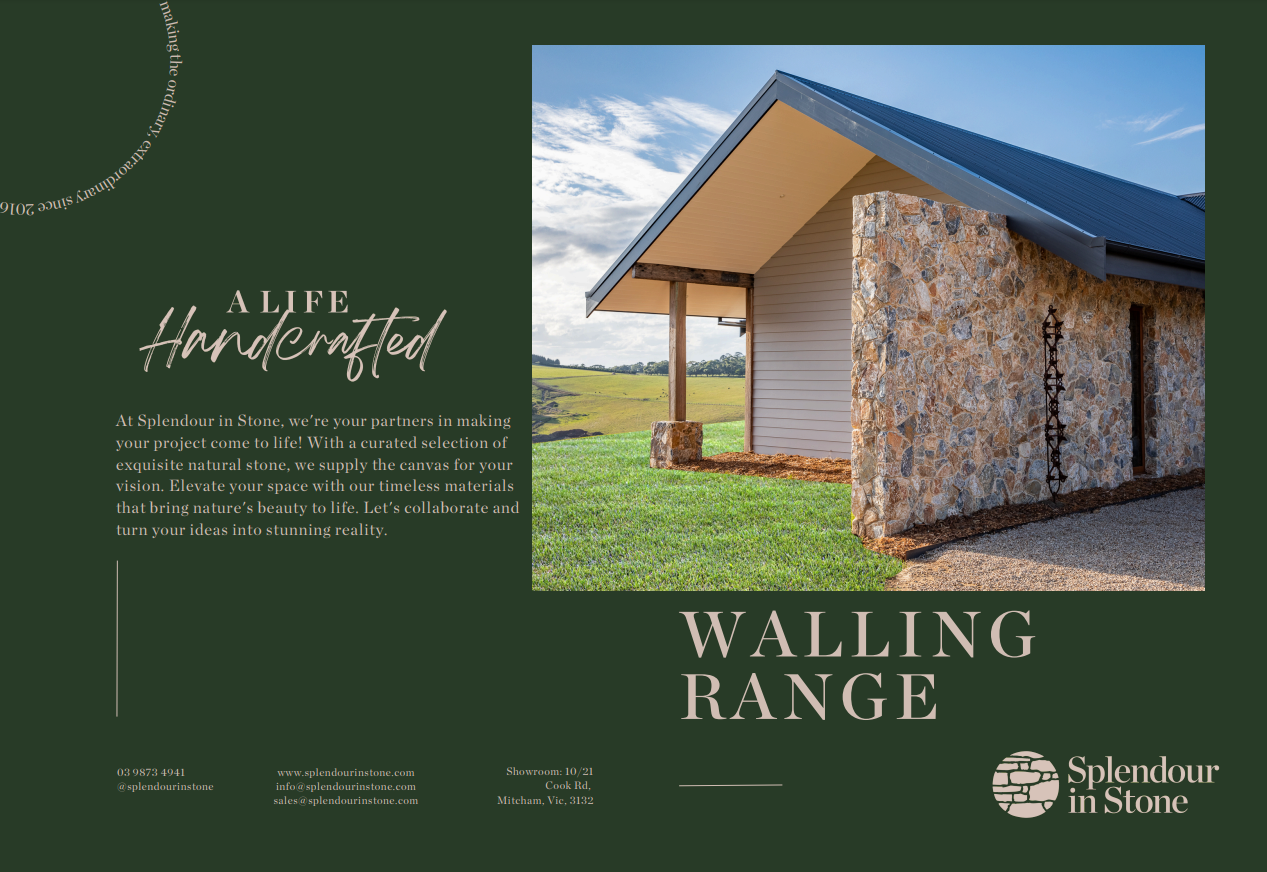
For raised borders and constructed garden walls, the Splendour In Stone sandstone range includes options such as Charlotte Sandstone, Roman Sandstone, Australiana Sandstone andStirling Sandstone. These products can help create a natural stone finish across garden walls, raised beds and other built landscape features.
Is sandstone suitable for garden edging?
Sandstone is a strong design choice when the garden needs a warm, natural border that coordinates with surrounding paving, planting or architecture.
It works particularly well in:
- Native Australian gardens
- Cottage and country gardens
- Heritage-style landscapes
- Warm contemporary courtyards
- Gravel and stepping-stone paths
- Raised garden beds
- Landscapes with brick, timber or rendered walls
The stone’s visible grain and colour variation help soften the transition between built surfaces and planting. A rougher natural finish creates a relaxed garden edge, while a sawn or evenly coursed finish produces a more controlled architectural line.
The same principles used when selecting stone for garden walls also apply to raised edging. The material needs to suit the architecture, planting style, exposure conditions and structural purpose of the border.
Before ordering, confirm:
- Whether the stone is intended for paving, walling or cladding
- Whether it is suitable for exterior exposure
- Whether it can be used in contact with soil
- The required base or structural backing
- The expected moisture conditions
- Whether sealing is recommended
- Whether the edge is decorative or retaining soil
These checks are more important than choosing by colour alone.
Seven sandstone garden edging ideas
The best sandstone edging design responds to the shape of the garden, surrounding materials and the amount of height the border needs to manage.
1. Low sandstone edging between lawn and mulch
A low stone border creates a clear separation between turf and a mulched garden bed. The edge helps contain loose mulch while giving the lawn a defined finishing line.
For a subtle result, install solid stone units close to the finished lawn level. A slightly raised edge provides more visual definition but may make mowing and trimming more involved.
This idea works well with:
- Native grasses
- Informal planting
- Cottage beds
- Warm brick homes
- Gravel garden paths
Small regular units create a neat line. Irregular stone produces a softer edge that follows the planting more naturally.
2. A sandstone mowing strip
A mowing strip is a broad, low edge laid almost flush with the lawn. It gives mower wheels a firm surface to travel over and reduces the amount of hand trimming required around the garden bed.
Suitable sandstone pavers, setts or cobblestones can be used when their thickness, finish and installation system are appropriate. The same material-selection principles covered in this garden pavers and pathways guide can help when coordinating an edging strip with a nearby walkway or stepping-stone route.
The strip should be wide enough for the mower wheel and installed with stable edge restraint. Its finished level must also allow water to drain away rather than collecting beside the lawn.
3. Curved edging around native planting
Sandstone’s irregular shapes and earthy colours suit curved native garden beds.
Curves are easier to form with:
- Small blocks
- Cobblestones
- Setts
- Carefully selected irregular pieces
Lay out the proposed curve with a garden hose before excavation. This makes it easier to view the shape from different parts of the garden and correct any awkward bends.
Tighter curves generally require smaller pieces, more joints and additional cutting or stone selection. The border should follow the planting naturally without creating unnecessary tight turns that are difficult to cut, install or maintain.
4. Sandstone edging beside a gravel path
A stone border helps stop gravel from spreading into lawn or planting areas. It also gives the path a more finished appearance.
For a relaxed garden, use irregular stone with varied joints. For a formal entry or courtyard path, use evenly sized units and a consistent joint line.
The colour of the gravel matters. Pale sandstone works well with warm cream gravel, while brown, grey or mixed sandstone can create contrast against lighter aggregates.
For paths that form a major part of the landscape, review broader walkway and hardscaping ideas before finalising the stone format, border width and connection points.
5. A sandstone-clad raised garden bed
A raised border is different from ordinary garden edging because it must hold back soil.
For this application, construct a suitable concrete, block or masonry structure first. Sandstone cladding can then be fixed to the visible face to create a natural stone finish.
This system works well when the raised bed needs to coordinate with:
- A sandstone feature wall
- A home façade
- Entry pillars
- An outdoor fireplace
- Retaining walls
- Stone-clad steps
Charlotte Sandstone can introduce warm natural variation, while Roman Sandstone can support a more structured walling design. The right option depends on the colour palette, joint style and surrounding architecture.
Homeowners considering this approach should also review the practical differences between products and fixing systems in the natural stone cladding guide.
6. Sandstone edging coordinated with paving
A garden edge feels more integrated when its tone or texture relates to a nearby path, patio or courtyard.
The materials do not have to match exactly. A lighter sandstone border can complement warm paving, while a textured stone edge can add contrast beside a smoother surface.
Compare samples outdoors against:
- Existing paving
- Brickwork
- Render
- Decking
- Gravel
- Mulch
- Plant foliage
Natural stone can look noticeably different in shade, full sun and wet conditions. Assessing several pieces together provides a more accurate impression than viewing one sample indoors.
The guide to choosing the right stone paving provides further guidance on matching colour, texture, performance and landscape style.
7. Sandstone borders for sloping gardens
A sloping bed may need more than a simple decorative edge.
Where the stone only marks the border, solid units may be installed along the slope with careful attention to levels and support. Where the border holds back a meaningful depth of soil, it should be treated as a garden wall or retaining structure.
A properly planned stone retaining wall needs to account for soil pressure, drainage, foundations and changes in level. Decorative edging should not be expected to perform the same structural role.
Low, non-structural edging may be suitable for experienced DIY installation. Raised borders and retaining features are better assessed by a qualified landscaper, builder or engineer.
Solid sandstone edging versus sandstone cladding
Solid stone and stone cladding can create a similar finished appearance, but they perform different jobs.
| Factor | Solid sandstone units | Sandstone cladding |
| Structural role | The stone unit can form the border itself | The backing structure provides support |
| Typical application | Low edging, mowing strips and decorative borders | Raised beds, garden walls and built landscape features |
| Installation | Laid on a prepared base, with or without mortar | Mechanically or adhesively fixed to a suitable substrate |
| Ground contact | Product must be approved for the application | Must follow the cladding system and substrate specification |
| Design flexibility | Best for simple low borders | Better for raised and architecturally detailed features |
| Main risk | Movement caused by poor base preparation | Failure caused by unsuitable backing, fixing or drainage |
Do not use thin walling or cladding pieces as unsupported upright garden edging unless the product supplier and installer confirm that the system is suitable.
For constructed borders, the stone cladding adhesive guide explains why the substrate, adhesive and installation environment must be considered together.
Sandstone compared with other garden edging materials
Sandstone is not automatically the best material for every garden. The right choice depends on appearance, budget, curves, available space and installation requirements.
| Material | Appearance | Curved beds | Maintenance | Installation | Best use |
| Sandstone | Natural, warm and substantial | Good with smaller units | Cleaning and possible sealing | Moderate to complex | Visible premium garden borders |
| Steel | Thin and discreet | Excellent | Finish and corrosion checks | Relatively quick | Tight curves and minimalist gardens |
| Timber | Informal and natural | Limited | May require treatment or replacement | Usually simple | Budget beds and temporary borders |
| Concrete | Consistent and manufactured | Moderate | Generally low | Moderate | Long, regular garden edges |
| Plastic or composite | Lightweight and subtle | Good | Occasional resetting | Simple | Basic lawn and mulch separation |
| Brick | Traditional and structured | Moderate | Joint and movement checks | Moderate | Heritage homes and formal beds |
Choose sandstone when the border should be visually prominent and form part of the overall landscape design.
Choose steel when the edge should almost disappear.
Choose timber or composite products when budget and installation speed matter more than long-term visual integration.
Benefits of sandstone garden edging
Natural colour variation
Sandstone includes cream, beige, caramel, gold, ochre, brown and grey tones. These colours sit comfortably beside planting and weathered outdoor materials.
For a warmer Australian landscape, Australiana Sandstone can connect the garden border with earthy planting, timber and brick. Stirling Sandstone offers another natural walling option for built garden features.
A strong visual transition
A stone edge creates a deliberate transition between soft landscaping and built surfaces. It can connect a garden bed to nearby paving, walling or architectural stone.
Flexible design options
Sandstone can produce informal, rustic or formal results depending on the format and finish. Irregular stone suits relaxed gardens, while evenly coursed cladding or sawn units suit contemporary landscapes.
Compatibility with garden walls
A sandstone-clad garden border can continue the same material used on a retaining wall, façade, fireplace or entry feature. This creates a more coordinated landscape.
The Stirling Sandstone walling ideas show how sandstone can be carried across outdoor walls and architectural features without making every surface identical.
Long-term design value
Unlike a lightweight border intended to remain visually hidden, sandstone can become a permanent landscape feature. Its variation and texture often become more settled within the garden as surrounding planting matures.
How to install low sandstone garden edging

The following method applies to low, non-structural edging made from suitable solid units, pavers or cobblestones. It does not replace an engineered specification for a retaining wall or raised structural border.
1. Confirm the stone format
Before excavation, confirm the dimensions, weight and intended application of the stone.
Check whether it will be:
- Laid flat
- Installed as a small block
- Set slightly above the lawn
- Used as a mowing strip
- Dry-laid
- Bedded in mortar
The stone dimensions determine the trench width, excavation depth and base preparation.
2. Mark the edging line
Use a string line for straight borders and a garden hose for curves.
View the proposed line from the main entry, patio, windows and paths. Adjusting the shape before excavation is easier than changing it after the base is installed.
3. Excavate the trench
Dig a trench wide enough for the stone and any required lateral support.
The necessary depth depends on:
- Stone thickness
- Soil conditions
- Finished height
- Base material
- Expected mower or foot contact
- Whether mortar is being used
Avoid relying on one universal trench depth. The system should be designed around the actual stone.
4. Prepare a stable base
Remove soft soil, roots and loose organic material from the bottom of the trench.
Add and compact the specified base material so the edging does not settle unevenly. The correct choice will depend on the stone and installation method, as explained in the natural stone bedding materials guide.
Drainage must also be considered, particularly where water could collect beneath porous stone or beside a garden bed. Good ground preparation for stone installation helps reduce settlement, rocking and uneven finished levels.
5. Set and level the stone
Place the stones along the prepared line and check:
- Finished height
- Side-to-side level
- Alignment
- Joint width
- Support beneath each unit
Use a rubber mallet rather than a metal hammer to make small adjustments.
Mix pieces from different pallets or sections of the delivery as work progresses. This distributes the stone’s natural colour variation across the complete border.
6. Add restraint where required
A purely decorative dry-laid edge may rely on embedment, compacted material and support from the adjoining ground.
An edge exposed to regular mower contact, foot traffic or loose paving material may require stronger restraint, mortar bedding or haunching.
The appropriate detail depends on the stone, location and intended use.
7. Backfill and finish
Firm the garden soil against the bed side without covering too much of the visible stone face.
Restore turf, gravel or paving on the opposite side and check that the finished levels direct water away from the edge.
Remove mortar, soil and installation residue before it dries on the sandstone.
Where the installation involves raised walls, extensive cutting or difficult access, professional help can protect the stone and reduce costly corrections. The guide to professional stone installation explains where specialist experience becomes valuable.
How to create a sandstone-clad garden border

For a raised garden bed or substantial border, the backing structure should be designed before selecting the cladding.
A typical process involves:
- Determining the height and purpose of the border
- Assessing soil pressure and drainage
- Constructing a suitable concrete or masonry substrate
- Waterproofing or preparing the substrate where required
- Selecting an exterior-grade fixing system
- Installing the sandstone cladding
- Finishing corners, caps and joints
- Sealing the stone where recommended
The installer must consider moisture from both the garden-bed side and the exposed face.
Capping is also important. The top of a raised border should direct water away from the wall rather than allowing it to enter the structure or remain behind the cladding.
Depending on the intended palette, Charlotte Sandstone can create a warm, relaxed appearance, whileRoman Sandstone can support more structured garden walls. Australiana Sandstone andStirling Sandstone provide additional natural tones and textures to compare against the surrounding home and landscape.
Where the border retains soil or forms part of a structural landscape feature, use a qualified landscaper, builder or engineer as appropriate.
What affects the cost of sandstone garden edging?
There is no reliable universal price for sandstone garden edging because products and installation systems vary considerably.
A simple line of small solid units is not priced in the same way as a raised masonry border finished with sandstone cladding.
The main cost factors include:
Stone type and format
Solid blocks, pavers, cobblestones, walling stone and cladding are sold using different units of measurement. The material may be priced per piece, square metre, lineal metre or pallet.
Total length and height
A longer edge requires more stone, excavation and installation time. Raised borders also require more structural material and visible stone coverage.
Curves and corners
Curves require more layout work and may increase cutting or stone selection. Corners, steps, returns and changes in level also add installation time.
Base preparation
Existing concrete, tree roots, unstable soil and drainage problems can make preparation more involved.
Installation method
A dry-laid decorative border is generally less complex than mortared edging. A constructed and clad border requires a backing structure, fixing materials, corner treatment and skilled installation.
Access and delivery
Natural stone is heavy. Narrow access, steep sites and limited unloading space can increase handling costs.
Waste allowance
Allow for cutting, breakage, selection and blending. The required allowance depends on the stone format and layout.
For an accurate quote, provide:
- The total measured length
- The proposed height
- Photographs of the site
- Straight and curved sections
- Access details
- Nearby paving or walling materials
- The preferred sandstone colour
- Whether the border will retain soil
Caring for sandstone garden edging
Sandstone is porous, so care should focus on moisture management, routine cleaning and preventing organic matter from building up against the exposed face.
Remove loose debris
Sweep away soil, leaves, grass clippings and mulch before they remain damp against the stone.
Use stone-compatible cleaners
For deeper cleaning, use clean water and a pH-neutral cleaner intended for natural stone. Avoid harsh acids and unsuitable household chemicals.
The recommended approach can vary with the sandstone. For example, the guide to cleaning and maintaining Stirling Sandstone covers care considerations for that specific material.
Manage nearby soil and mulch
Keep wet soil and mulch below the main exposed face where practical. Persistent contact can lead to marking, moisture retention and organic growth.
Check for movement
Inspect solid edging occasionally for rocking, settlement or widening joints. Correcting a small movement early can prevent a longer section from becoming uneven.
Consider sealing
A penetrating sealer suitable for the selected sandstone can reduce water and stain absorption. It does not make the stone waterproof or maintenance-free.
Follow the sealer manufacturer’s preparation, application and reapplication instructions rather than relying on a universal schedule. The broader hardscape care guide provides additional advice for maintaining stone within gardens, paths and other exposed outdoor areas.
How to choose the right sandstone edging system
Use the following checklist before requesting samples or quotes.
Define the purpose
Decide whether the border will:
- Separate lawn from mulch
- Contain gravel
- Act as a mowing strip
- Define a path
- Raise a planting bed
- Retain soil
- Coordinate with an existing wall or façade
Choose the correct product type
Confirm whether you need:
- Solid edging blocks
- Cobblestones or setts
- Suitable paving pieces
- A constructed border with sandstone cladding
Do not treat these products as interchangeable.
Consider the garden style
Use rougher textures and varied joints for native, cottage and informal gardens.
Use straighter courses, controlled joints and lighter finishes for contemporary and formal landscapes.
Compare samples outside
View several pieces together under natural light. Compare them with surrounding paving, walls, plants, timber and gravel.
The advice in the outdoor stone colour guide can help narrow the palette before samples are compared on site.
Confirm installation responsibility
A low decorative border may be manageable as a DIY project.
A raised edge, wall or soil-retaining feature should be assessed by a professional, particularly where failure could create movement, drainage issues or a safety risk.
Confirm supply before finalising the design
Natural stone formats and availability can vary. Confirm the current product, quantity, lead time, delivery method and suitable installation system before excavation begins.
Create a sandstone edge that suits the whole landscape
Successful sandstone garden edging starts with choosing the right system.
Solid sandstone units, pavers and cobblestones can define low lawns, paths and garden beds when they are suitable for the application and installed on a stable base. Raised beds and substantial garden borders require a constructed system, which can then be finished with sandstone cladding for a warm, natural appearance.
Before ordering, measure the full border, photograph the site and identify any curves, corners, drainage points or level changes. Confirm whether the selected product is intended for paving, solid edging or wall cladding.
Compare Charlotte Sandstone, Roman Sandstone, Australiana Sandstone and Stirling Sandstone to find a walling finish that suits the surrounding paving, planting and architecture. Viewing samples outdoors will provide the clearest indication of how the colour, texture and natural variation will appear in the completed garden.
Frequently asked questions
1. How do you lay sandstone garden edging?
Lay suitable sandstone edging by marking the border, excavating a trench, preparing and compacting the base, setting each stone to the correct level, adding restraint where required and backfilling both sides.
The exact excavation depth and base detail should suit the stone dimensions, soil and expected traffic.
2. Does sandstone edging need concrete?
Not always.
A low decorative edge may be dry-laid on a stable compacted base. An edge exposed to mower contact, foot traffic or loose paving material may require mortar bedding or additional restraint.
A raised garden border that holds back soil needs a properly designed structure rather than a simple decorative edging method.
3. Can sandstone cladding be used for garden edging?
Sandstone cladding can finish the visible face of a constructed garden border, wall or raised bed.
It should not normally be installed as an unsupported upright edging unit. The backing structure, fixing system, moisture management and capping detail provide the necessary performance.
4. What sandstone colour works best in Australian gardens?
Cream, beige, caramel and gold sandstone work well with warm brick, timber, gravel and native planting.
Grey or muted sandstone suits contemporary architecture, steel and cooler paving palettes.
The best choice depends on the house, surrounding hardscape and amount of natural colour variation desired. Compare options such as Charlotte Sandstone, Roman Sandstone, Australiana Sandstone andStirling Sandstone outdoors before making a final decision.
5. Does sandstone garden edging need sealing?
Sealing is not always compulsory, but it is often worth considering because sandstone is porous.
A suitable penetrating sealer can reduce water and stain absorption. The correct sealer and maintenance schedule should be confirmed for the selected stone and exposure conditions.
6. Can sandstone edging follow a curved garden bed?
Yes. Curves can be formed with small blocks, setts, cobblestones or selected irregular pieces.
Smaller units are easier to arrange around tight curves. Lay out the border with a garden hose before excavation to check the shape.
7. Is sandstone better than steel garden edging?
Sandstone is usually better when the border should be visible, natural and coordinated with other landscape materials.
Steel is better when the design requires a thin, discreet edge or tight curves. Sandstone usually requires more space and installation preparation.
8. Can sandstone edging retain a raised garden bed?
A low sandstone border may contain a small amount of loose material, but edging should not automatically be treated as a retaining wall.
Where the feature holds back soil pressure or a meaningful change in level, construct a suitable wall or substrate and obtain professional advice.